
Okay, so you know how sometimes you walk into Dollar Tree just “to look” and end up with a cart full of stuff you totally need? That’s exactly how these Whimsical Speckled Easter Egg Topiaries came to life! My littlest one saw some fancy ones online and begged me to make a budget-friendly version for our Easter table, and honestly, I think we totally nailed it.
See also: Diy Dollar Tree Easter Wreath Simple And Budget Friendly
Theme: Easter
Materials Needed
- Assorted Speckled Foam Easter Eggs
- Styrofoam Ball (various sizes)
- Wooden Dowel
- Craft Pots or Containers
- Hot Glue Gun & Glue Sticks
- Decorative Craft Moss
- Satin or Grosgrain Ribbon
- Assorted Easter Miniatures (bunnies, chicks, butterflies)
- Craft Paint & Brush (optional, for pots)
📋 Love staying organized while crafting? Check out our printable planners & craft designs at CraftersDT on Etsy — use code CRAFT20 for 20% off your entire order!
Step-by-Step Instructions for Whimsical Speckled Easter Egg Topiaries
Get ready for some serious fun because these Whimsical Speckled Easter Egg Topiaries are seriously addictive to make! This is one of those Holiday & Seasonal crafts that looks super impressive but is actually so quick and easy, you’ll wonder why you didn’t try it sooner. It’s perfect for beginners, and even the kids can help out with some of the steps. You’ll have these adorable Easter decorations ready in no time!
Step 1
Prepare and Decorate Your Pot Base: If your craft pot isn’t already decorated, paint it a cheerful Easter color. Using a contrasting color or slightly lighter shade, carefully paint a scalloped or ‘cracked egg’ edge around the rim of the pot. Ensure the paint is completely dry before proceeding. Create a hole in the center of the pot’s base, large enough to snugly fit your wooden dowel.
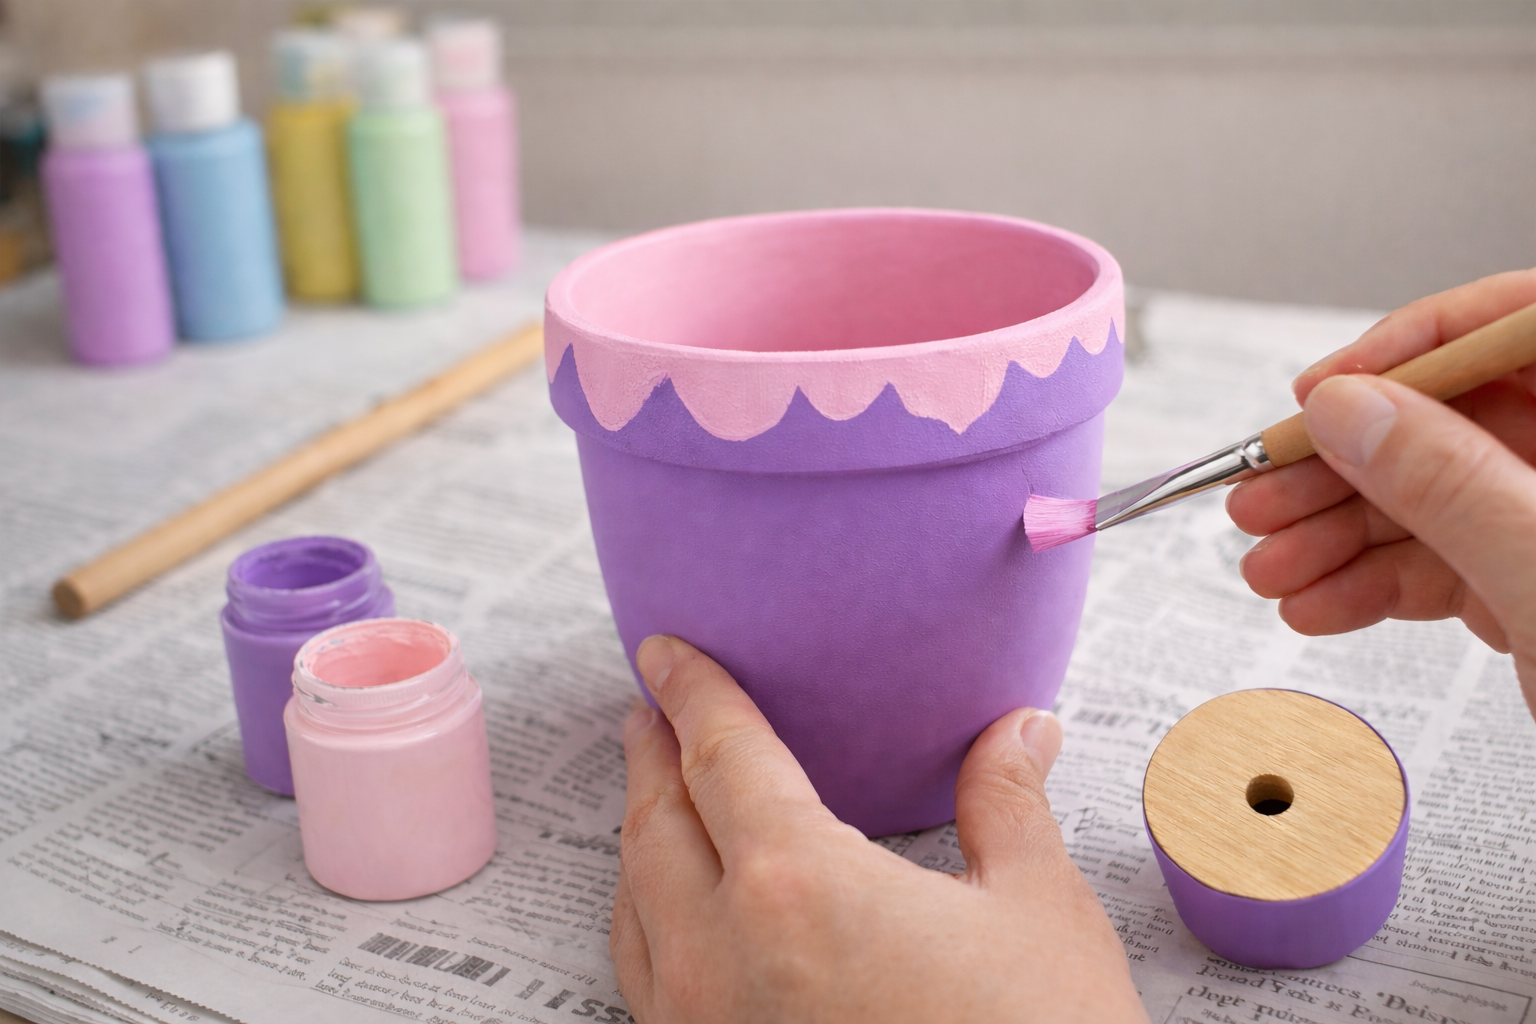
💡 Pro Tip: To achieve a truly realistic ‘cracked egg’ look, apply a lighter, textured paint around the rim in an irregular, jagged pattern, letting some of the base color show through. For added stability, you can fill the bottom of the pot with plaster of Paris or floral foam before inserting the dowel.
Step 2
Assemble the Topiary Form: Securely insert the wooden dowel into the prepared hole in your craft pot. Use hot glue around the base of the dowel inside the pot to hold it firmly in place. Once the dowel is stable, carefully push the styrofoam ball onto the top end of the dowel, ensuring it’s centered and fully secure. Add a dot of hot glue to keep the ball from spinning.
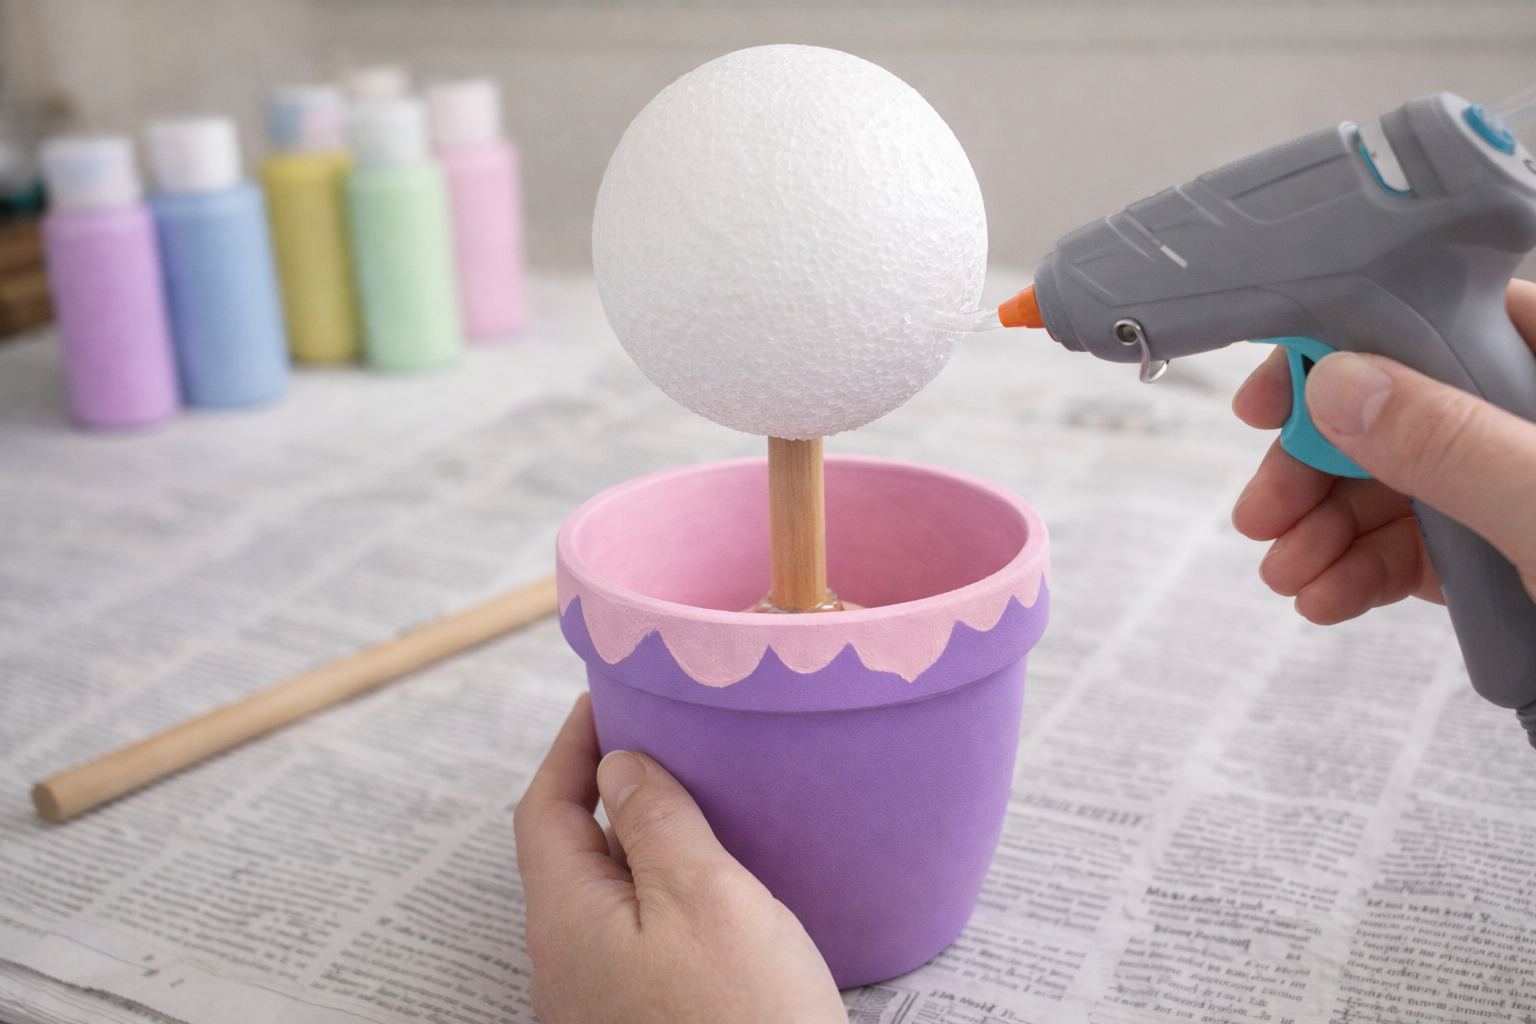
💡 Pro Tip: Choose a dowel length appropriate for your desired topiary height; trim if necessary. If the styrofoam ball feels loose on the dowel, add a ring of hot glue inside the ball’s opening before pushing it onto the dowel, or wrap a bit of floral tape around the dowel end for a tighter fit.
Step 3
Attach the Speckled Eggs: Begin hot gluing your assorted speckled foam eggs onto the styrofoam ball. Start from the bottom and work your way up, or in neat concentric circles, varying the colors and sizes (if applicable) for a visually appealing look. Apply a small dot of hot glue to the wider end of each egg and press it firmly onto the styrofoam ball, holding for a few seconds until set. Continue until the entire ball is covered, leaving no gaps.
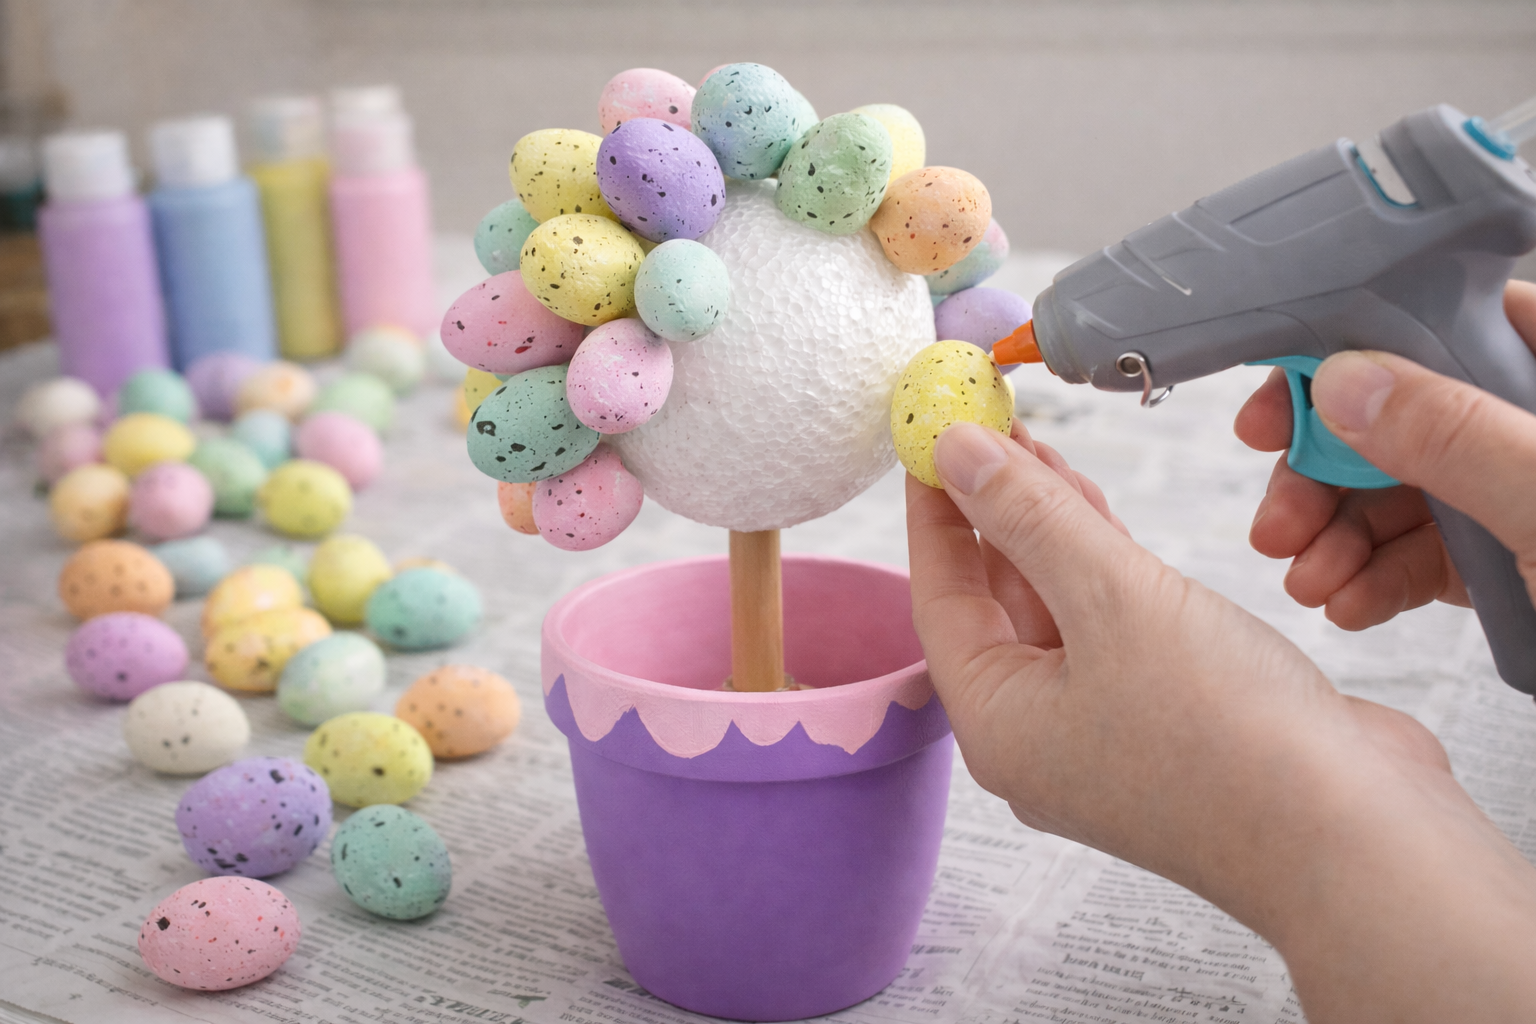
💡 Pro Tip: Work in small sections to prevent the hot glue from drying before you can place the eggs. For the best coverage and a full look, slightly overlap the edges of the eggs. Don’t be afraid to mix colors randomly for a truly whimsical effect, or plan a color gradient if you prefer a more structured design.
Step 4
Add the Finishing Touches: Tie a cheerful satin or grosgrain ribbon in a neat bow around the wooden dowel, just below the egg sphere. Fluff and arrange decorative craft moss at the base of the topiary, inside the pot, to cover any exposed glue or dowel. Finally, place your chosen Easter miniatures – bunnies, chicks, or butterflies – creatively within the moss-filled pot, securing them with tiny dots of hot glue if needed.
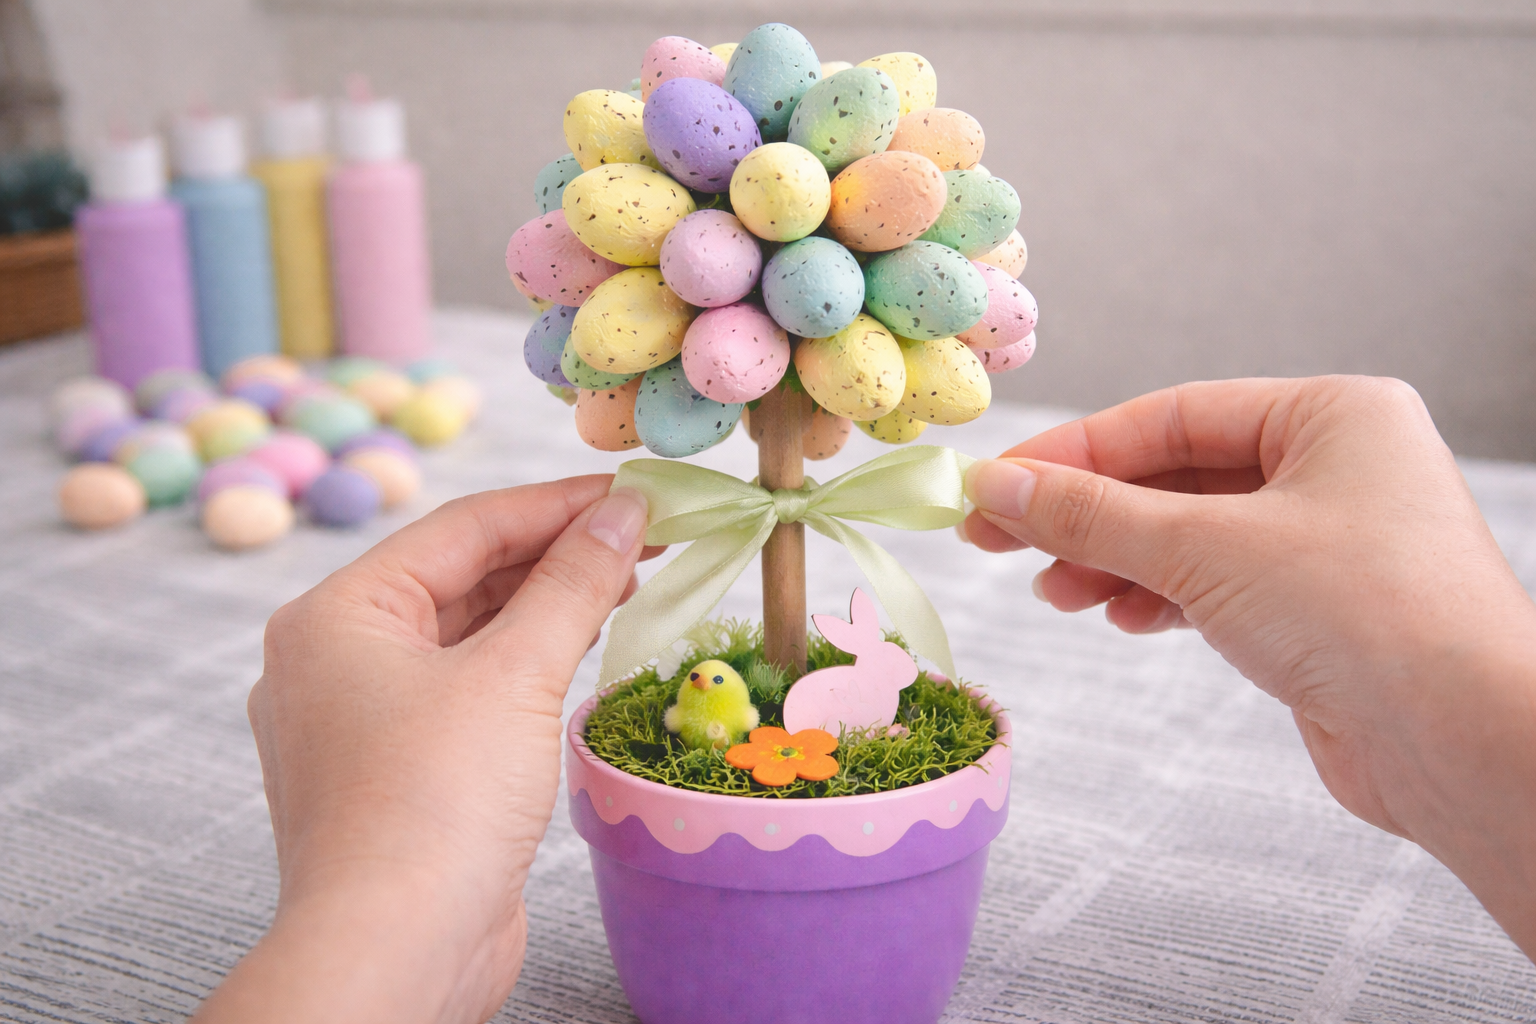
💡 Pro Tip: Consider using wired ribbon for bows that hold their shape better. For a layered look, use different shades of green moss or incorporate a few small faux flowers. To make the miniatures stand out, place them slightly off-center or create a small ‘nest’ in the moss for them.
Final Thoughts
Aren’t these just the cutest little Easter decorations? I just love how our Whimsical Speckled Easter Egg Topiaries add that perfect touch of springtime cheer, perfect for your mantel, centerpiece, or even a sweet gift! If you make your own, be sure to share a pic — I’d love to see your take!
📱 Free to Download
Craftino — The #1 Craft App
✓ Save crafts & browse fully offline
✓ Download printable PDF guides for every project
✓ Step-by-step photo tutorials — nothing left out
✓ 1,000+ craft projects with new ones added every week
Frequently Asked Questions
How long does it take to make Whimsical Speckled Easter Egg Topiaries?
You can whip up one of these adorable Easter topiaries in about 30-45 minutes, depending on how many eggs you’re speckling!
Can kids help make these Easter egg topiaries?
Absolutely! Older kids can help with gluing, and even little ones can assist with painting the speckled details on the eggs, making it a fun Holiday & Seasonal craft for the whole family.
What if I can’t find speckled eggs for my Whimsical Speckled Easter Egg Topiaries?
No worries at all! Just grab plain plastic or foam eggs and a little brown craft paint, then use an old toothbrush to easily create your own speckles.
Where can I display my finished Easter egg topiaries?
These Whimsical Speckled Easter Egg Topiaries look super cute as a centerpiece, on a mantel, on a tiered tray, or even on an entryway table to welcome guests!
Explore more home decor & floral craft essentials at Dollar Tree.
Leave a Reply