
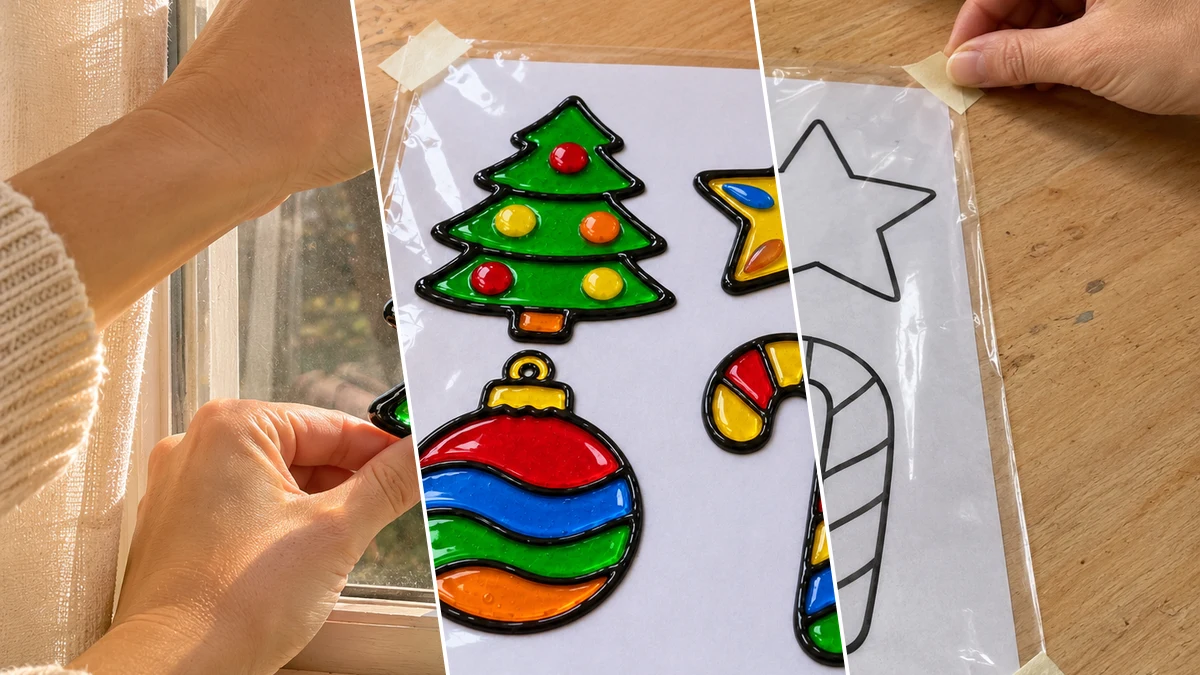
Bring a festive glow to your home with these easy puffy paint stained glass Christmas window clings. This family-friendly craft transforms simple holiday shapes into colorful window decorations that capture sunlight. The finished clings adhere to windows, creating a beautiful seasonal display.
Project at a Glance
- Difficulty: Easy
- Estimated active time: 35 minutes to 70 minutes (drying and curing waits not included)
- Estimated component cost: $2 to $5 (reusable tools and general supplies excluded)
- Main material: Plastic
- Suggested placement: Window
About These Puffy Paint Christmas Window Clings
These colorful window clings offer a simple way to add festive cheer to any window, designed to resemble traditional stained glass. Crafted using puffy paint and glossy colors, they are an ideal project for families looking for a creative activity during the Christmas season. The bright holiday shapes, such as trees, stars, and candy canes, come to life when sunlight passes through them, casting vibrant reflections.
The materials needed for this project are readily available, including black puffy fabric paint, assorted glossy craft paints, clear plastic sheets, holiday shape templates, and masking tape. Many of these items are easy to find at Dollar Tree. The process involves outlining shapes with puffy paint and then filling the sections with color, making it an accessible craft for various skill levels.
Materials for Easy Puffy Paint Stained Glass Christmas Window Clings for Kids
- Black Puffy Fabric Paint
- Assorted Glossy Craft Paints (or Liquid Glue + Food Coloring)
- Clear Plastic Sheets (Page Protectors or Laminating Pouches)
- Holiday Shape Templates
- Masking Tape
Need another material? Browse current craft supplies and deals.
How to Make Puffy Paint Christmas Window Clings
Follow these steps to create your own vibrant puffy paint stained glass Christmas window clings. This project is designed as an easy kids' craft, and adult supervision is recommended for younger participants, especially during the outlining and drying phases. The estimated active time for this project is between 35 and 70 minutes, not including unattended drying.
Step 1: Prepare Your Workspace and Template
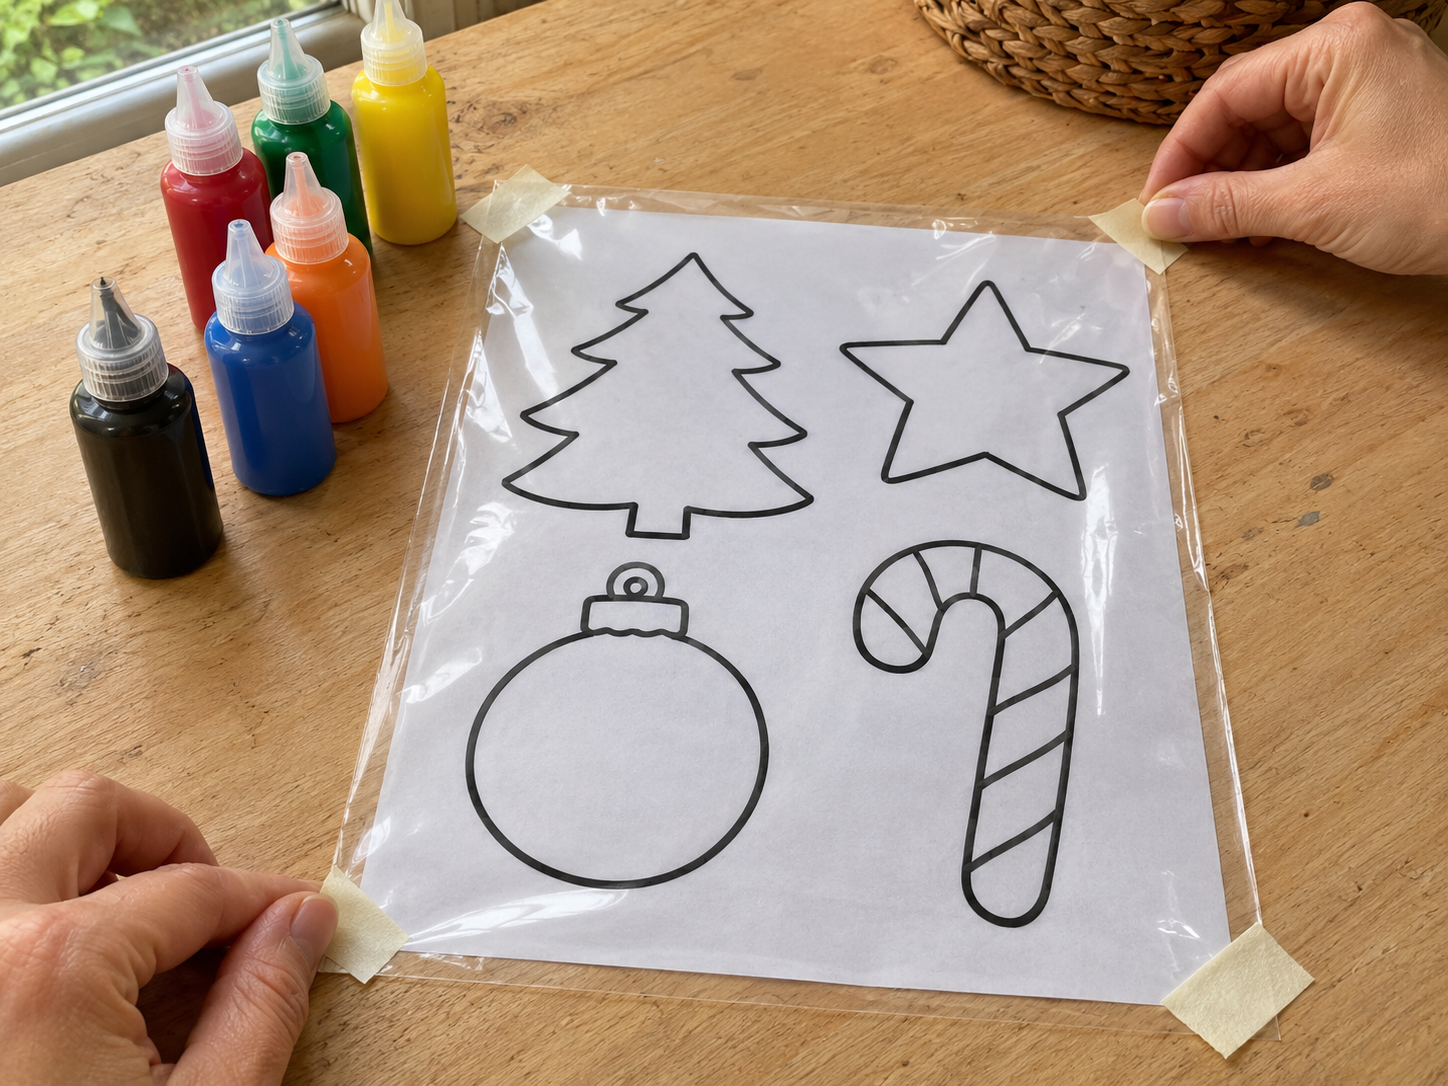
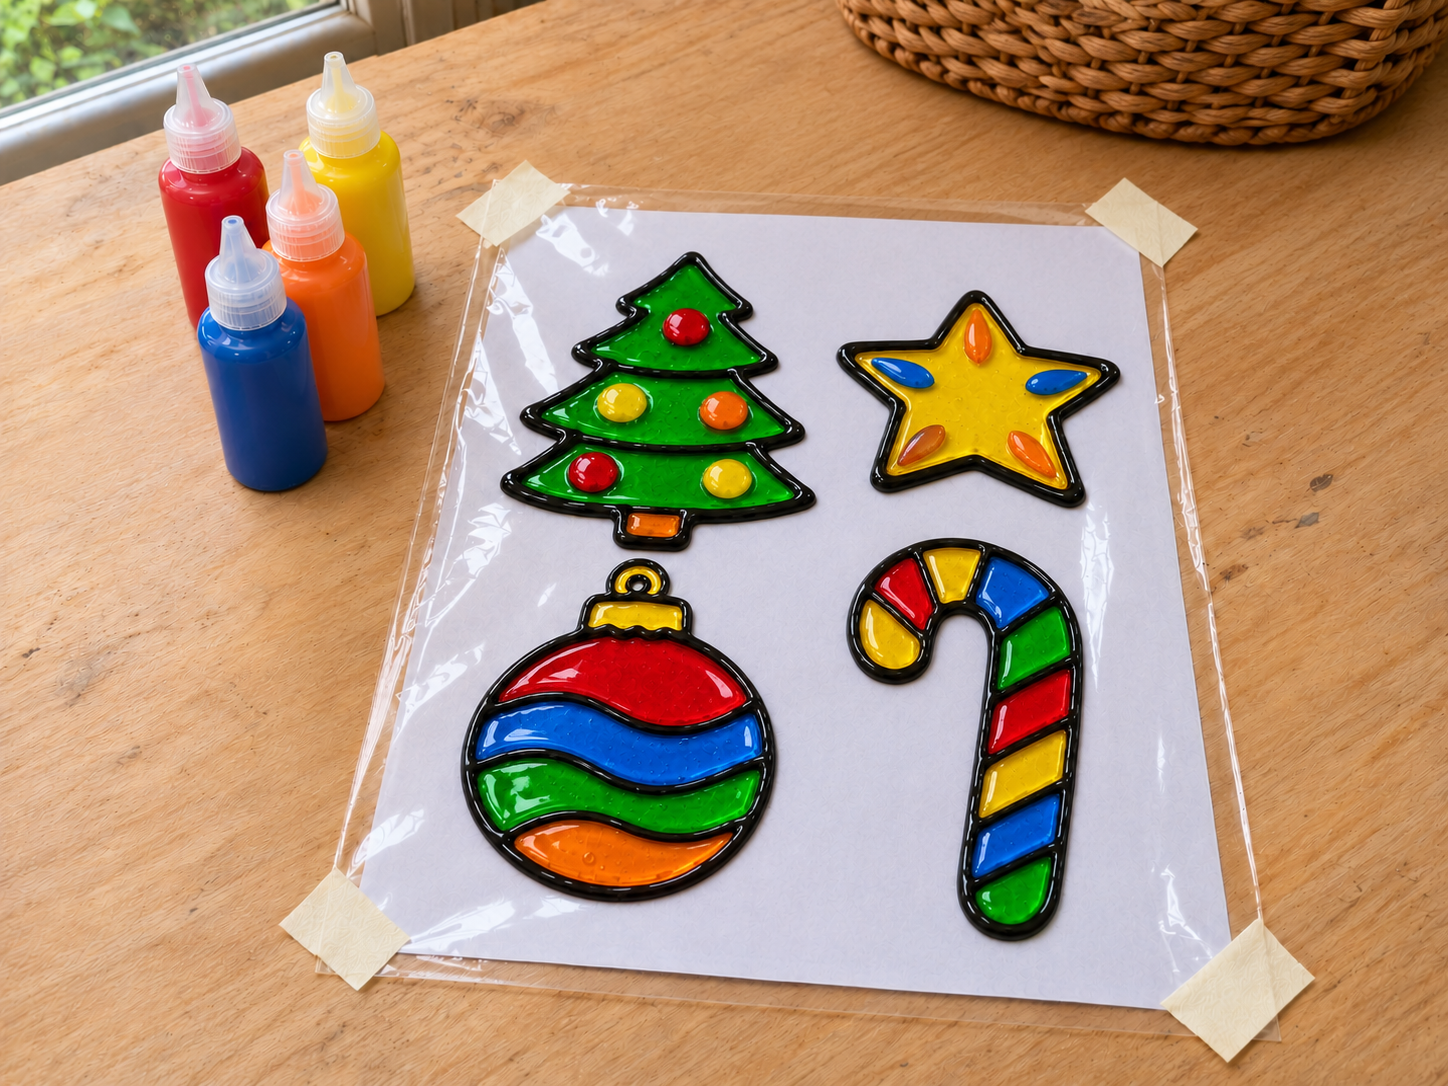
Begin by selecting simple Christmas-themed shape templates like a tree, star, ornament, or candy cane. Place one template under a clear plastic page protector or laminating pouch, ensuring it's centered. Secure the template and plastic sheet to your work surface using masking tape, preventing any movement while you work.
Step 2: Outline Shapes with Puffy Paint
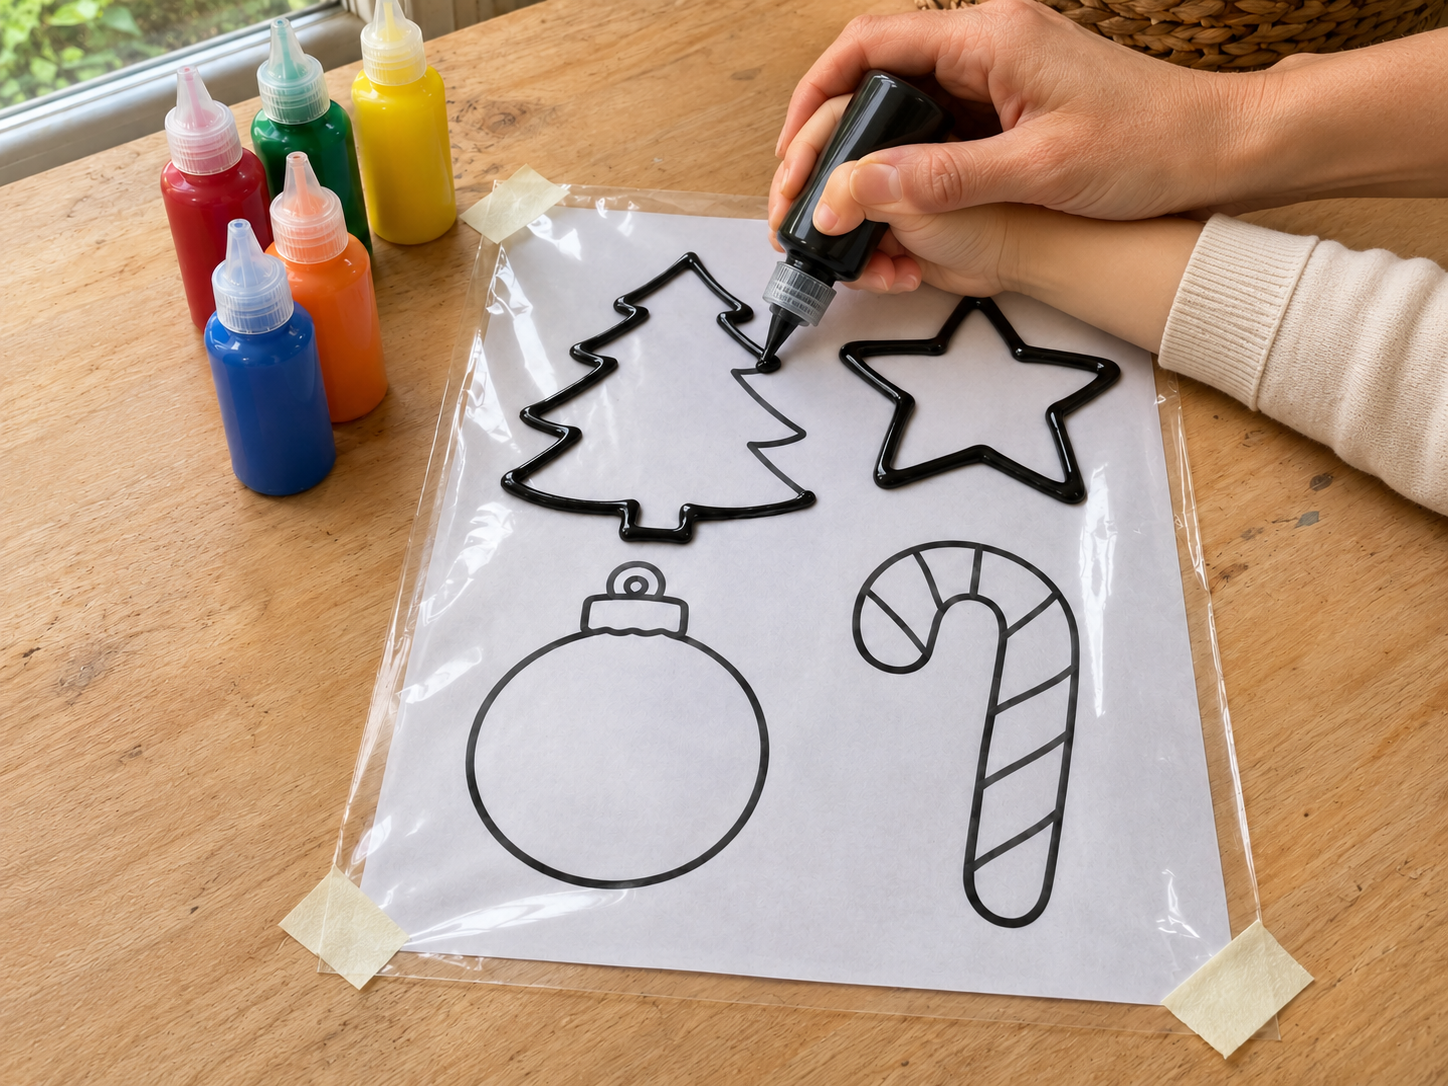
Holding the black puffy fabric paint bottle like a pen, apply steady, even pressure to create a continuous outline over the template lines. Aim for a consistent thickness. If working with children, an adult should guide their hands to ensure clean lines. Allow these black outlines to dry for at least one hour, or until they are firm to the touch. This creates barriers for the colored paint.
Step 3: Fill Outlined Sections with Color
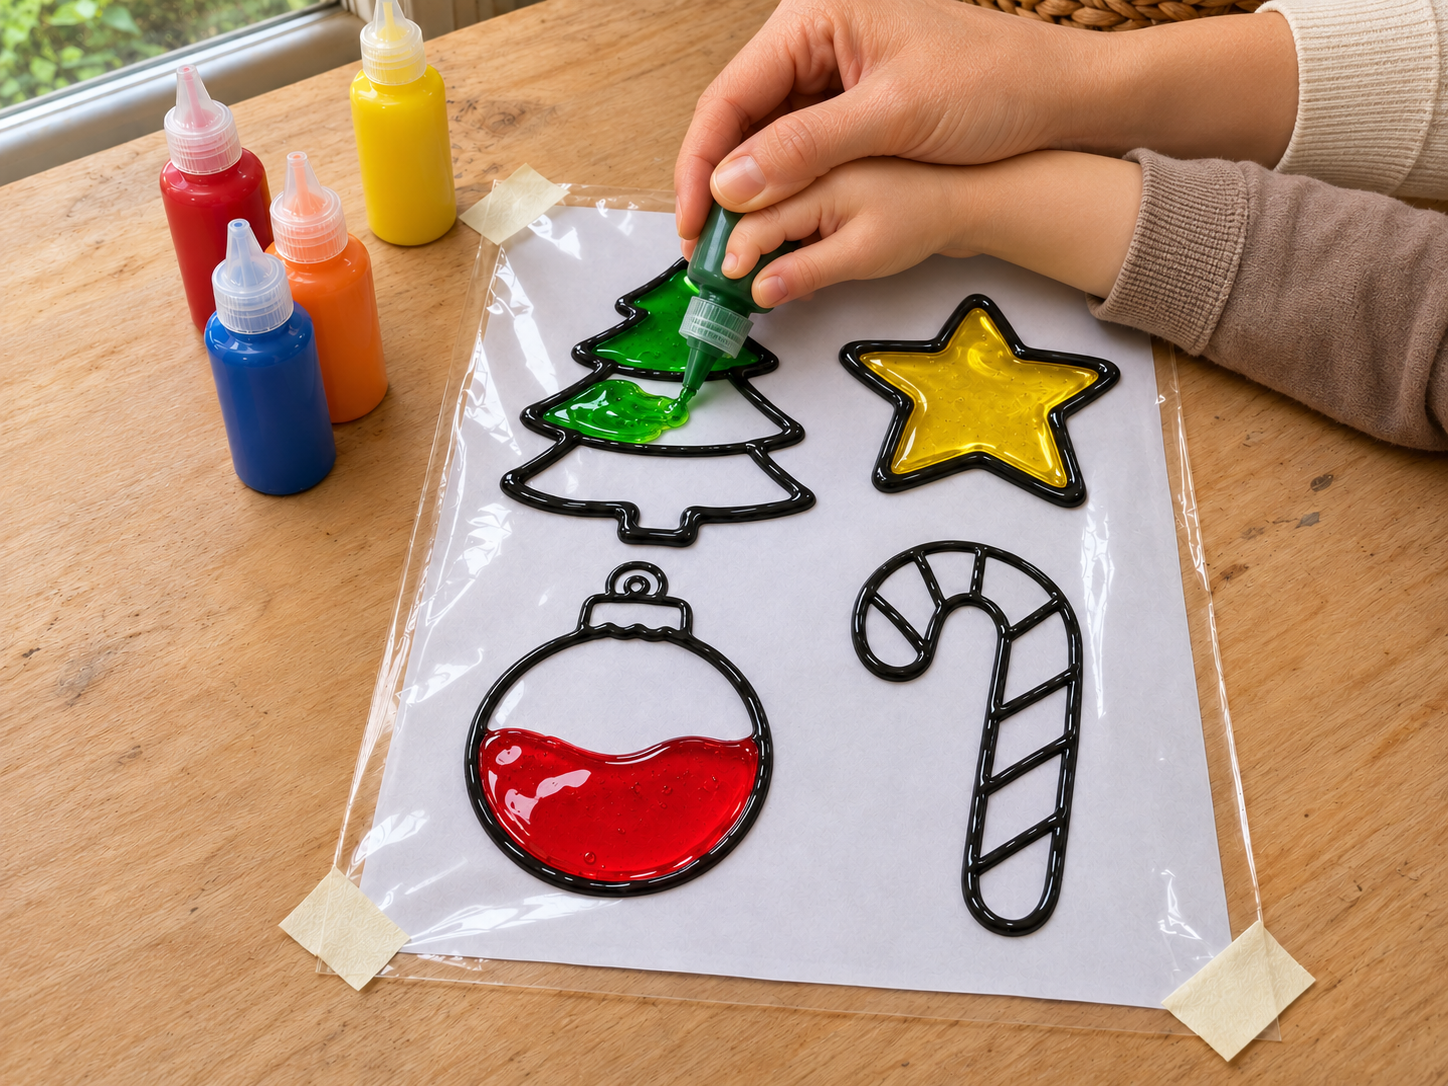
Once the black outlines are fully dry, it's time to add color. Carefully squeeze or dab glossy colored paints into each section created by the black lines. Work slowly, allowing the paint to spread to the edges without overflowing the outlines. For an authentic stained-glass look, you can slightly overfill sections to create a domed, glossy effect. To make your own colors, mix a few drops of food coloring into liquid glue.


Step 4: Allow Clings to Dry Thoroughly
Once all sections of your clings are filled with color, carefully move the plastic sheet to a flat, undisturbed surface. Ensure it is in an area where it won't be bumped or touched. Allow the clings to dry completely overnight, or follow the specific drying instructions on your paint bottles. Full drying is crucial for the clings to peel cleanly and maintain their shape.
Step 5: Peel and Display Your Clings
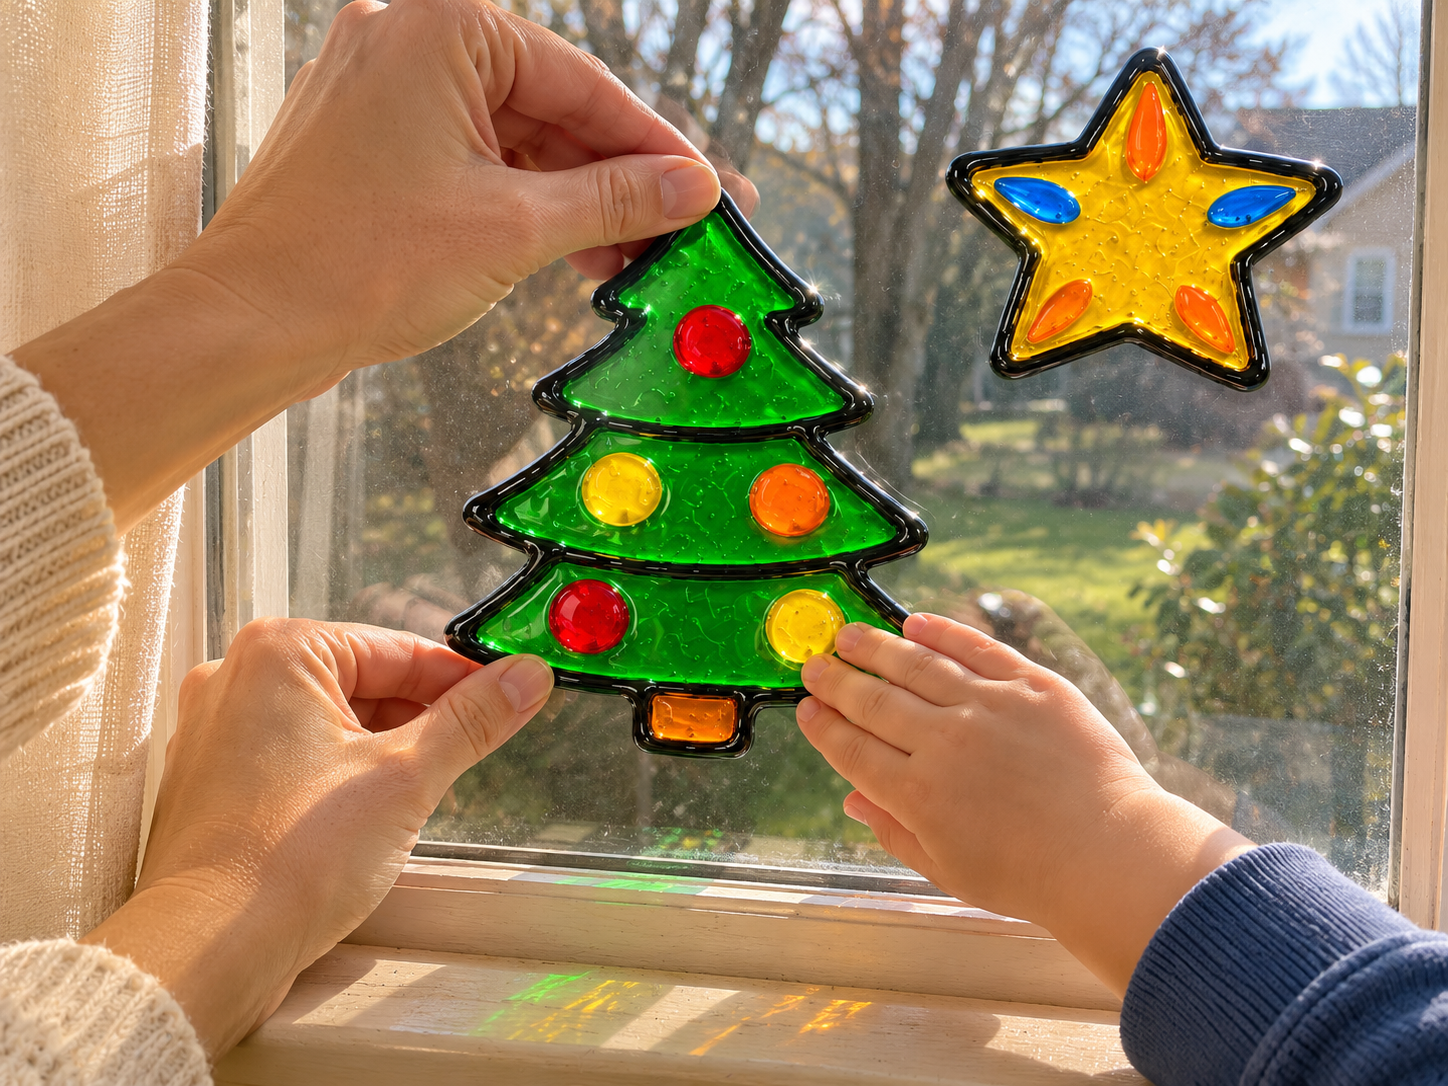
After your window clings have completely dried (this might take 12-24 hours depending on paint thickness and humidity), carefully peel them off the plastic sheet. Start at one corner or edge and gently lift, taking care not to stretch or tear the cling. Once peeled, press the smooth side of the cling onto a clean, sunny window. The cling will adhere using static electricity, transforming your window into a festive, colorful display.
Enjoy Your Puffy Paint Christmas Window Clings
Once your puffy paint Christmas window clings are fully dry, gently peel them from the plastic sheets and press them onto any clean, sunny window. These festive decorations use static electricity to adhere, making them easy to place and reposition. Watch as they catch the light, bringing a cheerful, stained-glass effect to your home throughout the holiday season.
Related project collection: DIY Christmas Tabletop Tree in a Glass Vase with Faux Evergreens & Lights
Practical Questions About This Project
What type of paint is best for these window clings?
Black puffy fabric paint is used for outlining, and glossy colored craft paints are used for filling. Alternatively, liquid glue mixed with food coloring can create the glossy colored sections.
How long do the puffy paint window clings take to dry?
The black outlines need to dry for at least one hour. After coloring, the finished clings should dry completely overnight, which can take 12-24 hours depending on paint thickness and humidity, to ensure they peel cleanly.
How do the finished clings adhere to windows?
The dried clings adhere to clean, sunny windows using static electricity. This allows for easy placement and repositioning without adhesives.
What kind of templates can be used for this craft?
Simple Christmas-themed shape templates, such as a tree, star, ornament, or candy cane, are ideal. The templates should be printed without text to avoid confusion when outlining.
Is this craft suitable for children?
Yes, this project is designed as an easy kids' craft. Adult supervision is recommended, especially for guiding hands during the outlining phase and ensuring proper drying.
Search Dollar Tree for plastic supplies.

Leave a Reply