

")
As soon as fall rolls in, I get the urge to cozy up my space with warm colors, soft textures, and little handmade touches. There’s something so comforting about turning on a candle, hearing the leaves crunch outside, and getting crafty at the kitchen table. That’s why I always turn to Dollar Tree fall crafts. They’re budget-friendly, simple to make, and add so much charm to my home without spending a fortune.
Whether it’s a rustic pumpkin made from twine or a leafy wreath for the front door, DIY fall decor has become one of my favorite seasonal traditions. It’s a fun way to slow down, get creative, and make my home feel extra special. In this post, I’ve gathered 25 easy and beautiful Dollar Tree craft ideas that are perfect for autumn lovers like me. And maybe you too.
NOTE: I will share with you the instructions and materials for the first 10 Fall Crafts, the other 15 will only consist of pictures, you can quickly scroll to see only the Fall Crafts idea pictures.
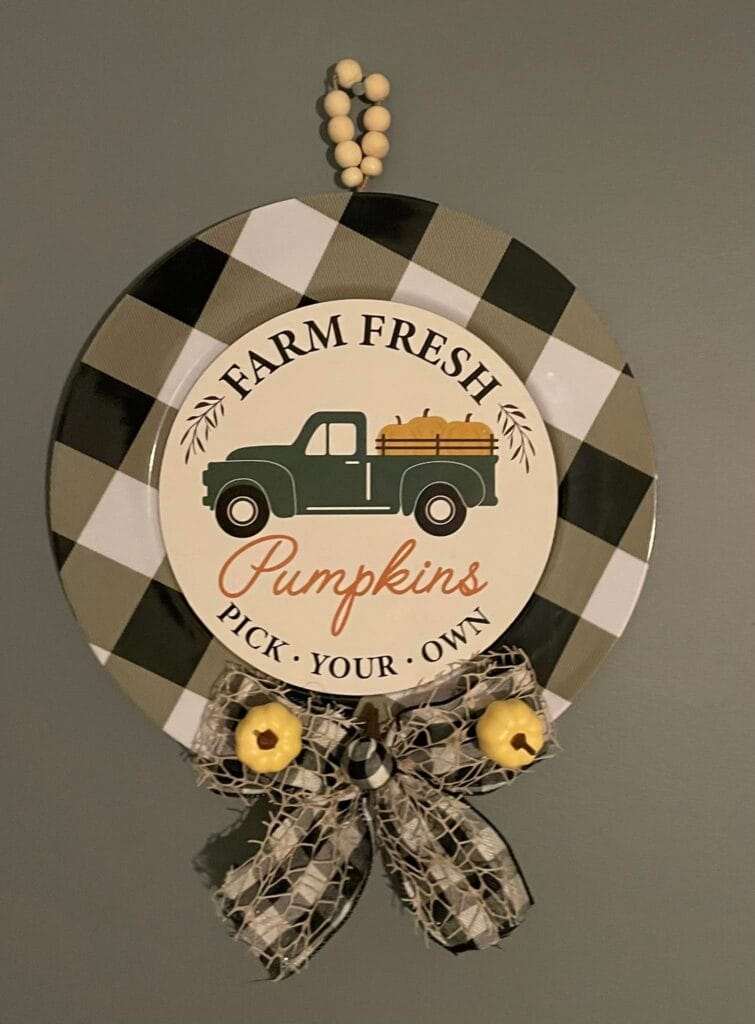
Farm Fresh Pumpkin Plate Wreath
Bring a rustic, farmhouse vibe to your home this autumn with this DIY fall wreath made entirely from Dollar Tree finds. It’s simple, stylish, and perfect for hanging on your front door or inside your kitchen for that cozy fall feeling.
Materials:
- 1 buffalo check plastic charger plate
- 1 round “Farm Fresh Pumpkins” sign (Dollar Tree seasonal aisle)
- 1 set of decorative wooden beads
- 2 mini faux pumpkins or bell-shaped accents
- Black and white mesh ribbon
- Hot glue gun and glue sticks
- Twine or jute rope (for hanging)
How to Make It:
- Attach the sign: Use hot glue to secure the round pumpkin sign in the center of the charger plate. Press firmly and let it set for a minute.
- Create the hanger: String wooden beads onto a piece of twine, then glue the ends to the back of the charger plate to make a loop for hanging.
- Make the bow: Form a bow using the mesh ribbon and glue it to the bottom edge of the plate.
- Add the pumpkins: Attach two mini pumpkins (or decorative bells) on each side of the bow for a pop of fall charm.
- Hang and enjoy: Once everything is dry, hang your wreath on the wall or door and enjoy the cozy fall vibes.
Rustic Cutting Board Pumpkins
Turn plain Dollar Tree cutting boards into a beautiful centerpiece with this charming rustic fall decor idea. The distressed paint look and wooden stems give it a farmhouse vibe that’s perfect for any fall setup.

Materials:
- 3 Dollar Tree plastic cutting boards
- Chalk paint or acrylic paint (white, cream, sage green)
- Sandpaper or sanding block
- 3 small sticks or twigs (for stems)
- Hot glue gun and glue sticks
- Raffia ribbon or jute twine
- Spanish moss
- White tray or base for display (optional)
How to Make It:
- Paint the boards: Start by painting each cutting board with a different fall-toned color. Let them dry completely.
- Create a distressed look: Lightly sand the surface to give it a weathered, rustic finish. Focus on the edges and random patches.
- Add stems: Hot glue a small stick to the top center of each board to act as a pumpkin stem.
- Decorate with ribbon: Tie raffia or jute around the base of each stem for a cute farmhouse touch.
- Assemble the display: Arrange the boards side by side on a tray or directly on a table, layering in some Spanish moss around the base.
- Style it up: Place it on your entry table, fireplace mantel, or dining centerpiece for instant fall charm.
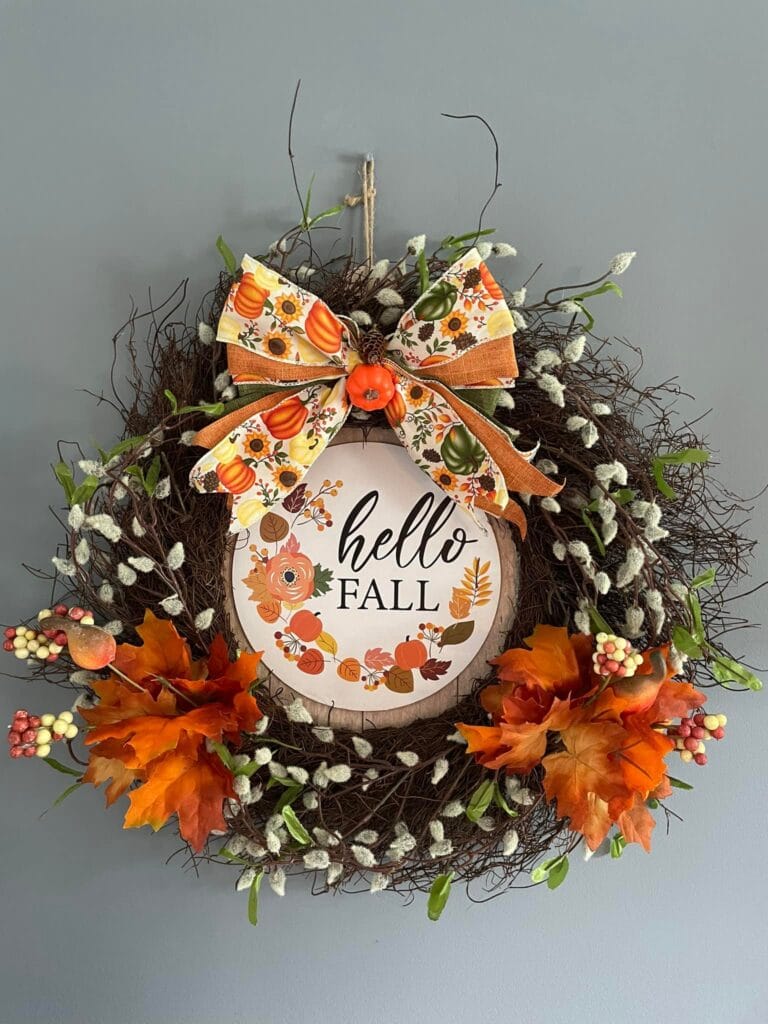
Hello Fall Door Wreath
Greet the season in style with this vibrant fall door wreath featuring a warm mix of colors, textures, and a festive message. Perfect for your front door, hallway, or even as a cozy wall piece, this wreath is a great way to say “hello” to autumn.
Materials:
- Grapevine wreath form (Dollar Tree or Walmart)
- “Hello Fall” round wood sign
- Fall-themed ribbon (pumpkin or floral pattern)
- Faux maple leaves
- Faux berries and cotton stems
- Mini pumpkin or acorn for center accent
- Hot glue gun and glue sticks
- Twine or jute rope (for hanging)
How to Make It:
- Add the center sign: Use hot glue to attach the “Hello Fall” sign to the center of your grapevine wreath. Make sure it’s secure and centered.
- Attach the ribbon: Create a large fall-themed bow and glue it to the top center. Add a mini pumpkin or acorn in the middle of the bow for an extra seasonal touch.
- Decorate the sides: Glue faux leaves and berries around the lower half of the wreath, layering them for a full, natural look.
- Add texture: Use cotton stems or similar accents to fill in gaps and give the wreath a soft, cozy vibe.
- Hang it up: Use twine or jute rope to create a loop at the top, then hang it on your front door to instantly boost your fall curb appeal.
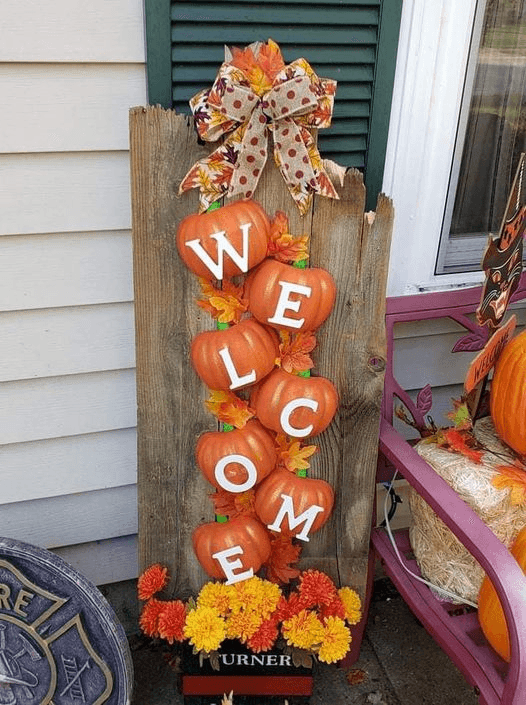
Pumpkin Welcome Sign for Fall Porch Decor
Make your front porch warm and inviting with this charming DIY fall porch sign. Featuring bright pumpkins, autumn leaves, and a cheerful “WELCOME” message, it’s the perfect seasonal greeting for guests.
Materials:
- Old wooden board or pallet piece
- 6 plastic pumpkins (Dollar Tree or similar)
- White craft letters (to spell “WELCOME”)
- Faux autumn leaves and flowers
- Large fall-themed bow
- Hot glue gun and glue sticks
- Wire cutters or scissors
How to Make It:
- Prepare the board: Start with a clean, dry piece of reclaimed wood or pallet board as your base.
- Attach the pumpkins: Hot glue or screw each plastic pumpkin vertically down the board, leaving space for the letters.
- Add the letters: Glue a white craft letter onto each pumpkin to spell out “WELCOME.”
- Decorate with leaves: Fill in the spaces between pumpkins with faux autumn leaves for a fuller look.
- Attach the bow: Glue a large fall-themed bow to the top of the board for an eye-catching finish.
- Add flowers at the bottom: Arrange faux flowers along the base to add a pop of color.
- Display: Place your sign by the front door or porch to greet guests with festive charm.
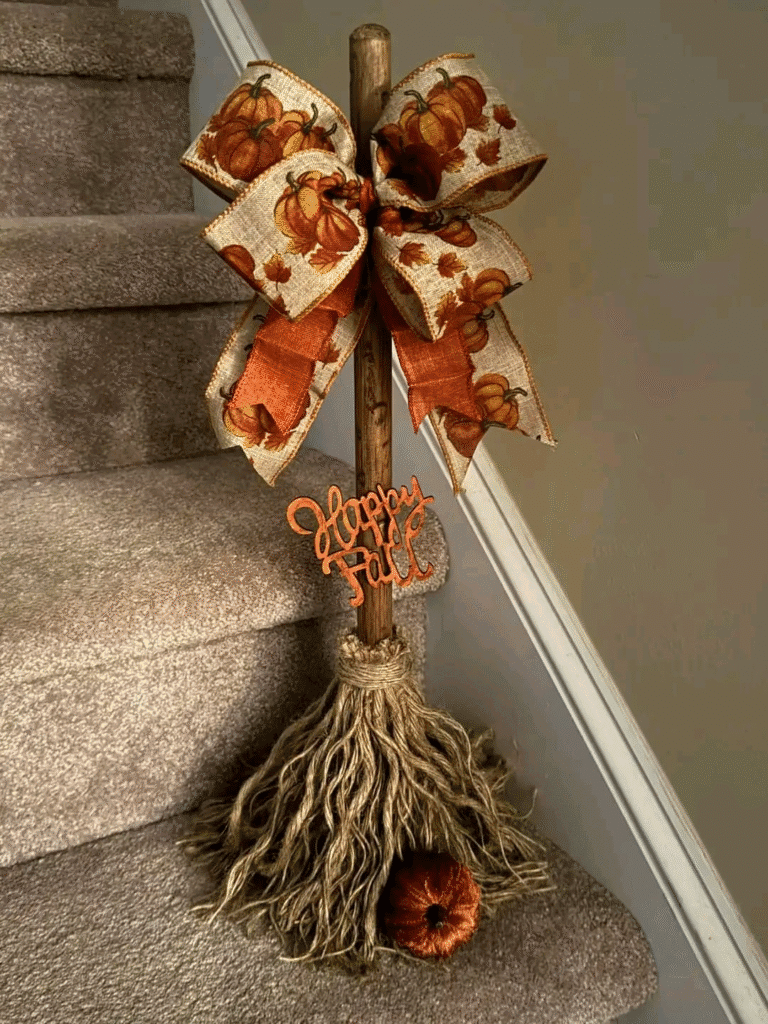
Happy Fall Mop Head Broom
This DIY fall broom is a fun and creative way to add farmhouse charm to your seasonal decor. Using a Dollar Tree mop head, some ribbon, and a festive sign, you can make this adorable piece in under 20 minutes.
Materials:
- Wooden dowel or broom handle
- Dollar Tree mop head
- Fall-themed ribbon (pumpkin print)
- Small “Happy Fall” sign
- Small faux pumpkin
- Hot glue gun and glue sticks
- Twine or jute rope
How to Make It:
- Prepare the broom base: Attach the mop head securely to the wooden dowel using hot glue and twine.
- Add the ribbon: Tie a large bow with your fall-themed ribbon and glue it to the top of the mop head for decoration.
- Attach the sign: Glue the “Happy Fall” sign to the broom handle just below the bow.
- Add the pumpkin: Place a small faux pumpkin at the base of the broom for an extra festive touch.
- Display: Stand the broom in your entryway, on a staircase landing, or by the front door to welcome fall in style.
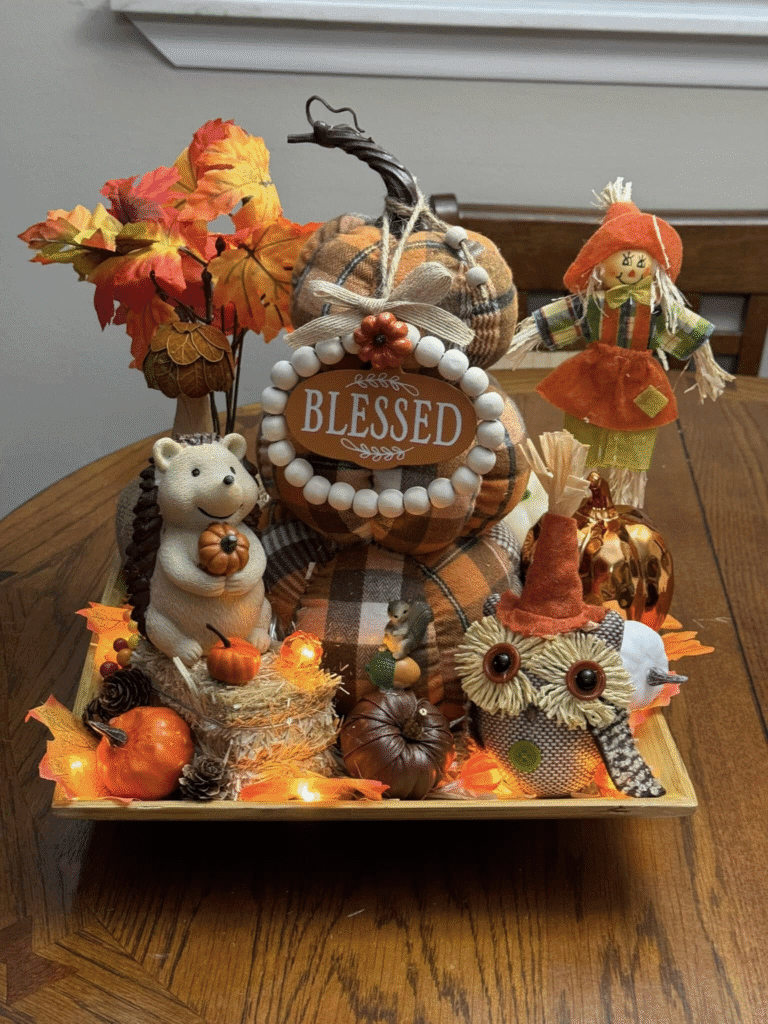
Blessed Fall Table Centerpiece
Create a warm and inviting fall table centerpiece with cozy fabric pumpkins, woodland animals, and soft autumn lighting. This display is perfect for dining tables, entryway consoles, or coffee tables.
Materials:
- Fabric pumpkins (plaid or fall-themed)
- Small “Blessed” sign with beaded frame
- Faux autumn leaves and mini hay bales
- Small woodland figurines (hedgehog, owl, squirrel)
- String lights or LED fairy lights
- Wooden or bamboo tray
- Hot glue gun and glue sticks
How to Make It:
- Prepare the base: Place the wooden tray in your chosen display area.
- Arrange the pumpkins: Position the largest pumpkin in the center, then layer smaller pumpkins around it.
- Add the sign: Attach or lean the “Blessed” sign against the main pumpkin.
- Place figurines: Add woodland animals for a charming, whimsical touch.
- Decorate with leaves and hay: Fill in empty spaces with faux leaves, mini hay bales, and pinecones.
- Add lighting: Weave LED lights around the arrangement for a cozy evening glow.
- Style and enjoy: Adjust the placement until the display looks balanced and full.
Before starting, I like to write down my supplies in a planner so I don’t miss anything. This Printable Craft Planner is super handy for that, and right now there’s a 20% discount with the code CRAFT20.”
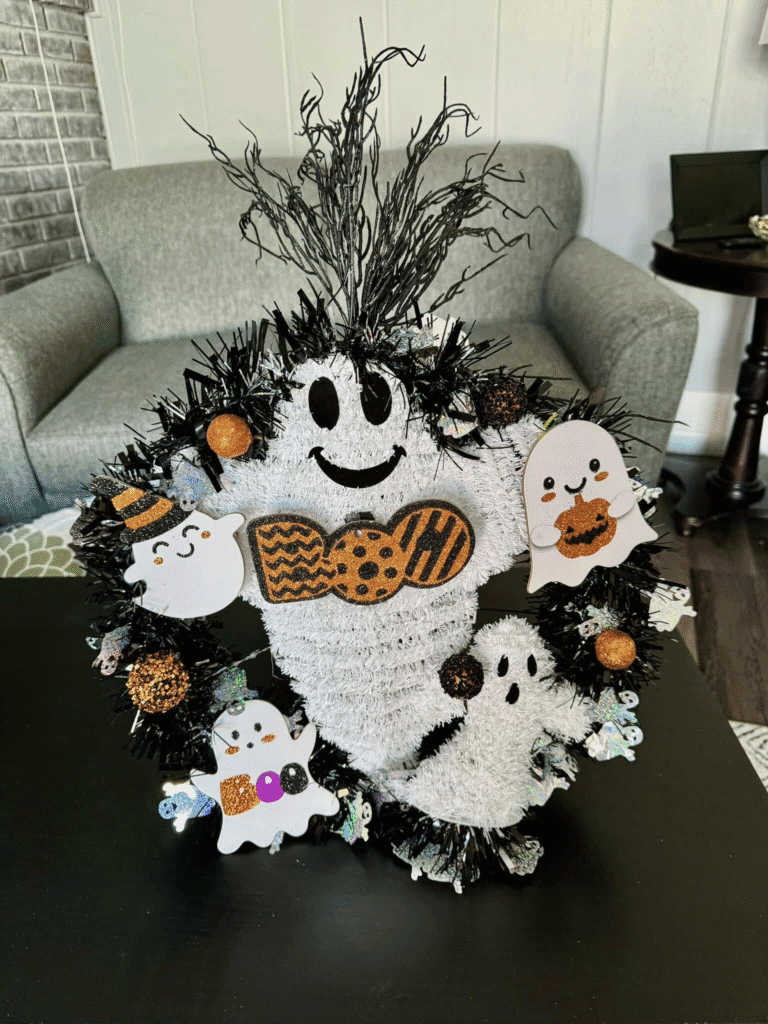
Cute Ghost Halloween Wreath
Add a playful twist to your spooky season with this DIY Halloween wreath featuring adorable ghosts, glittery accents, and festive black-and-white tinsel. Perfect for hanging on your front door or as a fun indoor decoration.
Materials:
- Black and white tinsel wreath form
- Large central ghost decoration
- Small foam or felt ghost cutouts
- Glittery mini ornaments (orange, black, gold)
- Halloween-themed embellishments (bows, candy shapes)
- Hot glue gun and glue sticks
- Black decorative picks or shredded paper for the top
How to Make It:
- Prepare the wreath base: Start with a tinsel wreath form in black and white.
- Attach the main ghost: Place the large ghost figure in the center and glue it securely.
- Add smaller ghosts: Arrange the mini ghost cutouts evenly around the wreath.
- Decorate with accents: Glue on glittery ornaments and themed embellishments for pops of color.
- Top it off: Insert black decorative picks or shredded paper at the top for a whimsical flair.
- Hang and enjoy: Display on your front door, wall, or even above a mantel for a cheerful Halloween vibe.
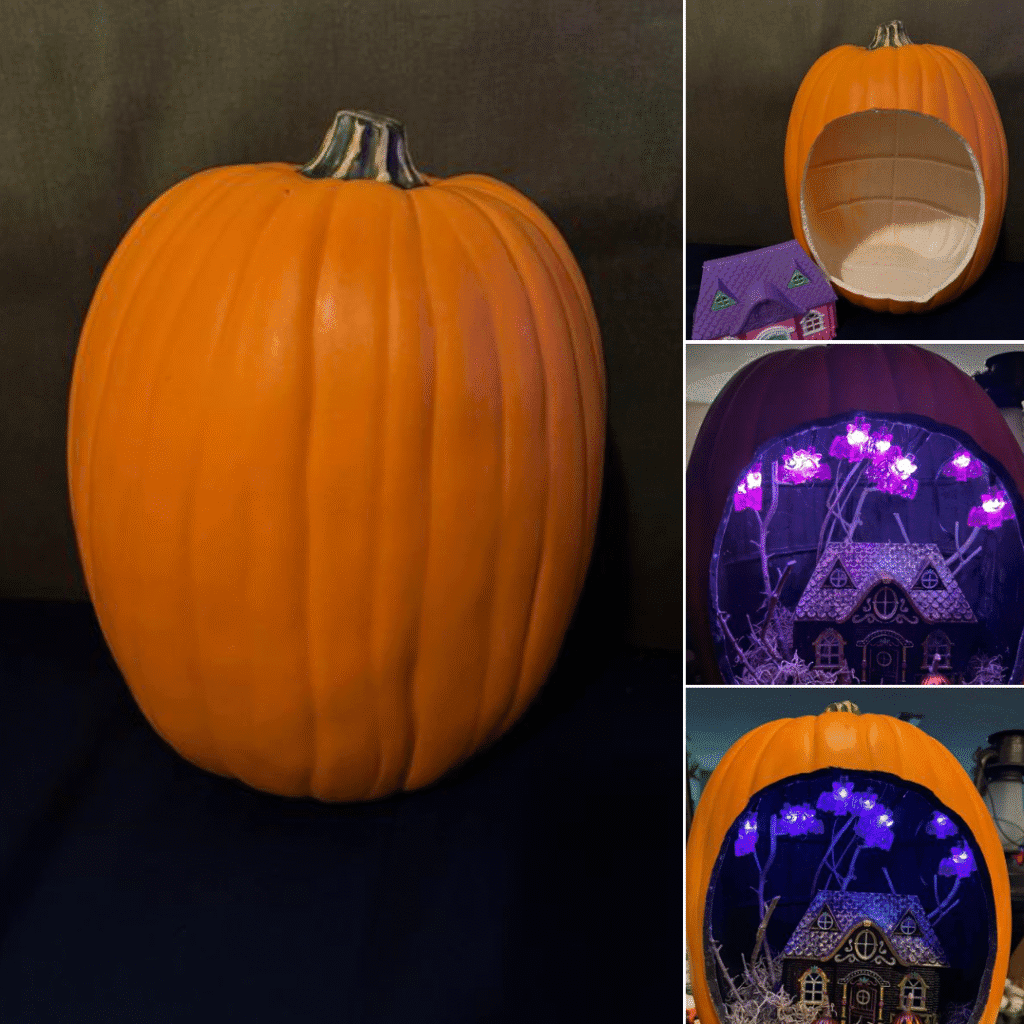
Light-Up Haunted Pumpkin House
Turn a plain foam pumpkin into a spooky Halloween pumpkin diorama with glowing lights, a haunted house, and eerie decorations. This eye-catching piece is perfect for your entryway table, mantel, or as part of a Halloween party setup.
Materials:
- Large hollow foam pumpkin
- Small haunted house figurine
- Purple LED string lights or mini fairy lights
- Faux moss or Spanish moss
- Small faux pumpkins
- Craft knife
- Hot glue gun and glue sticks
- Black or dark purple acrylic paint
How to Make It:
- Cut the opening: Using a craft knife, cut a large oval opening in the front of the foam pumpkin. Smooth the edges if needed.
- Paint the interior: Apply black or dark purple paint to the inside to create a spooky backdrop.
- Add moss: Glue Spanish moss to the bottom of the pumpkin to form the ground layer.
- Place the haunted house: Secure the haunted house figurine in the center.
- Add lighting: Wrap the purple LED lights around small branches or place them along the top inside edge for a glowing effect.
- Add pumpkins and details: Place small faux pumpkins in front of the house for extra charm.
- Display: Set your light-up haunted pumpkin in a dimly lit area for the full glowing, spooky effect.
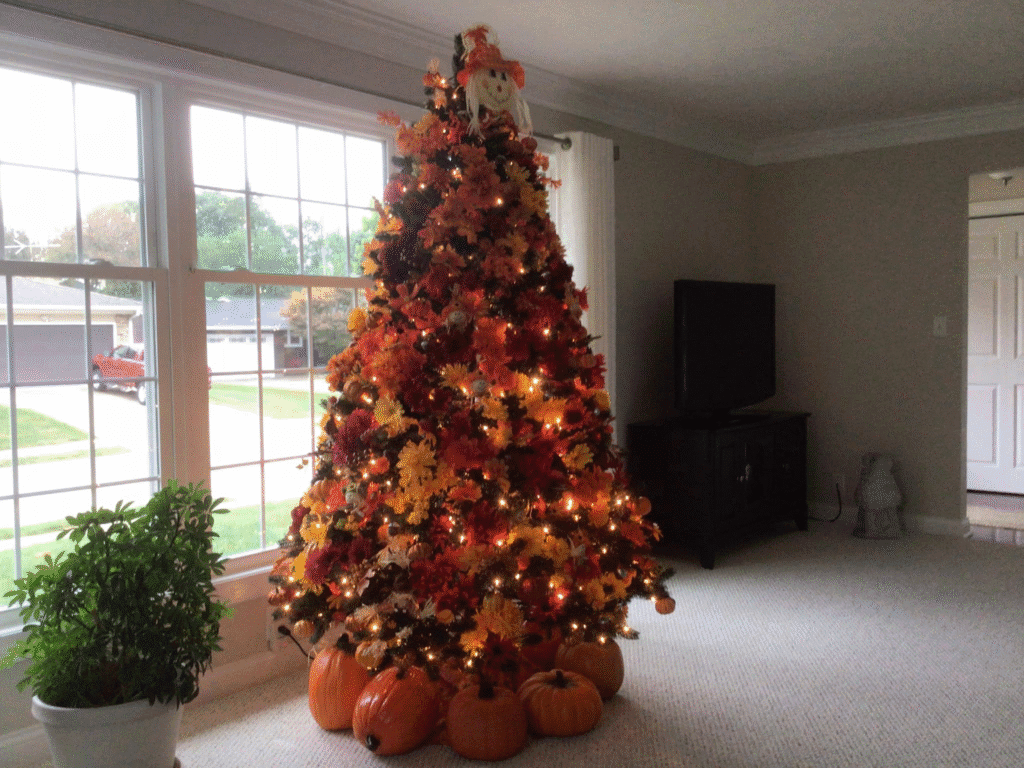
Fall-Themed Christmas Tree
Give your home a festive seasonal twist with a fall-themed Christmas tree decorated in warm autumn colors. This creative idea blends the cozy charm of fall with the sparkle of holiday lights, making it a perfect statement piece for your living room.
Materials:
- Artificial Christmas tree
- Faux autumn leaves and garlands (orange, red, yellow tones)
- String lights (warm white or amber)
- Mini pumpkins and gourds (plastic or foam)
- Fall-themed tree topper (scarecrow, sunflower, or ribbon bow)
- Ornament hooks or floral wire
How to Make It:
- Set up the tree: Assemble your artificial Christmas tree and fluff the branches for a full look.
- Add lights: Wrap the tree with warm-toned string lights to create a cozy glow.
- Layer in leaves: Drape faux autumn leaf garlands from top to bottom, weaving them through the branches.
- Add pumpkins and ornaments: Secure small pumpkins and fall ornaments throughout the tree.
- Top it off: Add a fall-themed topper, like a scarecrow or sunflower, for the finishing touch.
- Style the base: Arrange larger pumpkins around the bottom of the tree to complete the look.
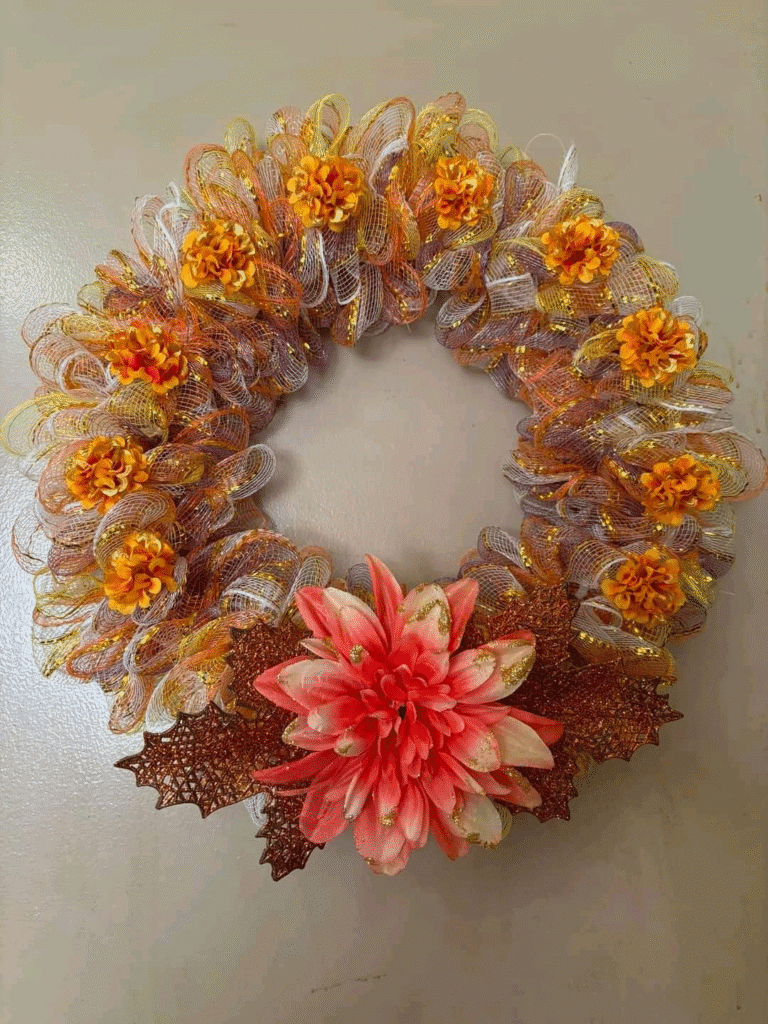
Mesh Ribbon Fall Wreath
Brighten up your front door with this DIY mesh ribbon fall wreath featuring warm autumn colors, vibrant flowers, and sparkling leaves. It’s an easy and affordable way to add seasonal charm to your home.
Materials:
- Wire wreath frame
- Fall-colored mesh ribbon (orange, gold, white)
- Faux flowers (marigolds, dahlias, or similar)
- Glittered faux leaves
- Pipe cleaners or floral wire
- Hot glue gun and glue sticks
How to Make It:
- Prepare the base: Attach one end of the mesh ribbon to the wire wreath frame using pipe cleaners.
- Create ribbon loops: Work your way around the frame, making puffed loops and securing them with pipe cleaners at each section.
- Add flowers: Evenly space faux flowers around the wreath and glue them in place.
- Highlight with a focal point: Add a larger flower at the bottom center to act as the main focal point.
- Include leaves: Insert glittered faux leaves near the focal flower for extra detail.
- Fluff and adjust: Arrange the loops and flowers until the wreath looks full and balanced.
Do you have the planner you need before starting a project?
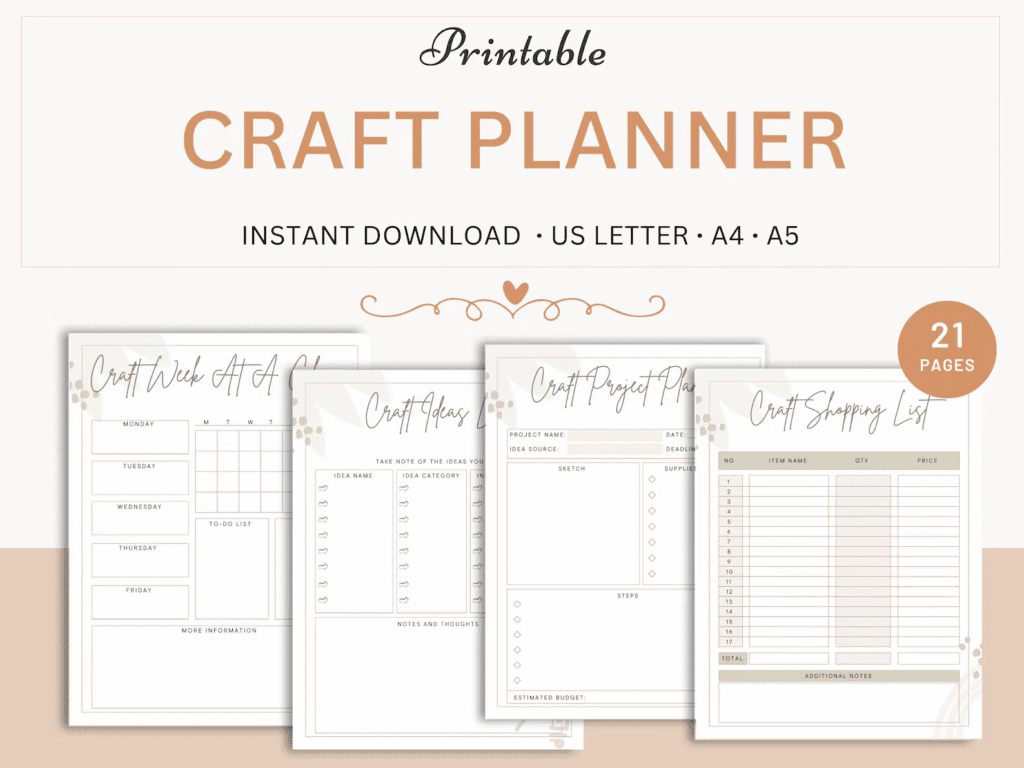
Get it Now
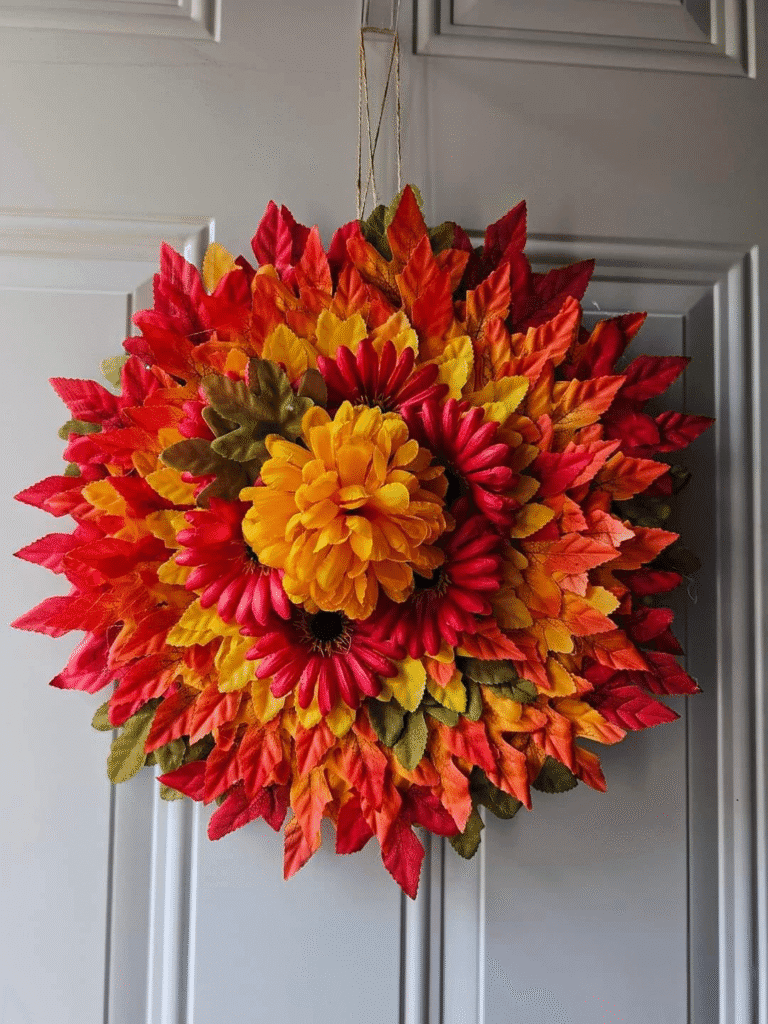
Fall Leaf and Flower Charger Wreath
Transform a simple Dollar Tree charger into a vibrant fall leaf wreath bursting with warm seasonal colors. This project is an easy and affordable way to make your front door pop for autumn.
Boo Halloween Mesh Wreath
Make a bold statement on your front door with this DIY Halloween mesh wreath featuring a glittery “BOO” sign, creepy hands, and spooky mesh ribbon. It’s the perfect mix of festive and frightful for October.

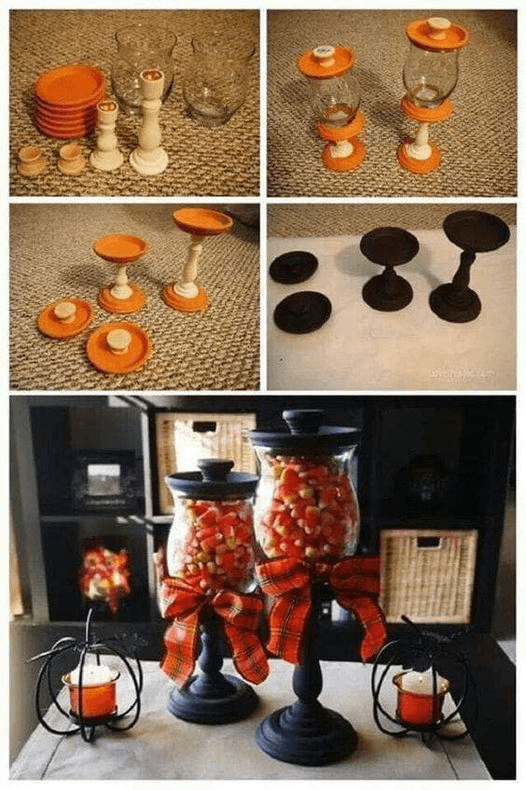
Candy Corn Fall Candy Holders
Repurpose simple Dollar Tree items into elegant fall candy holders that double as festive decor. Perfect for candy corn, wrapped treats, or small cookies during the autumn season.
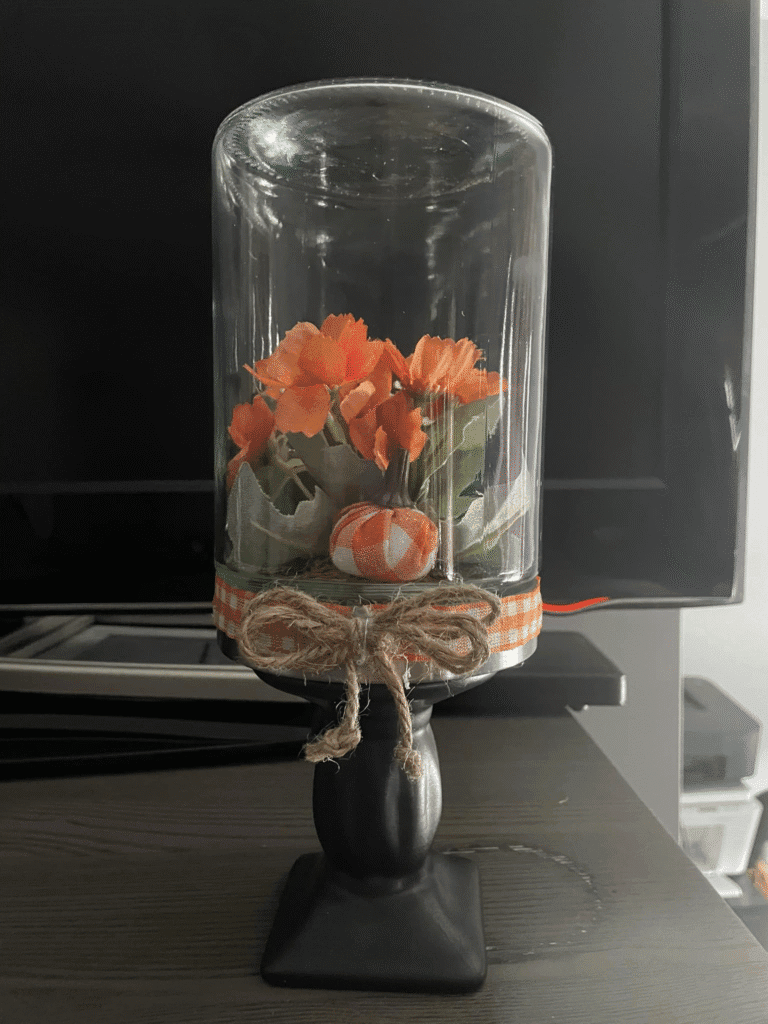
Upside-Down Glass Cloche Fall Display
Create a charming fall cloche display using Dollar Tree items, perfect for showcasing mini pumpkins, flowers, or seasonal trinkets. The upside-down design adds a creative twist to traditional decor.
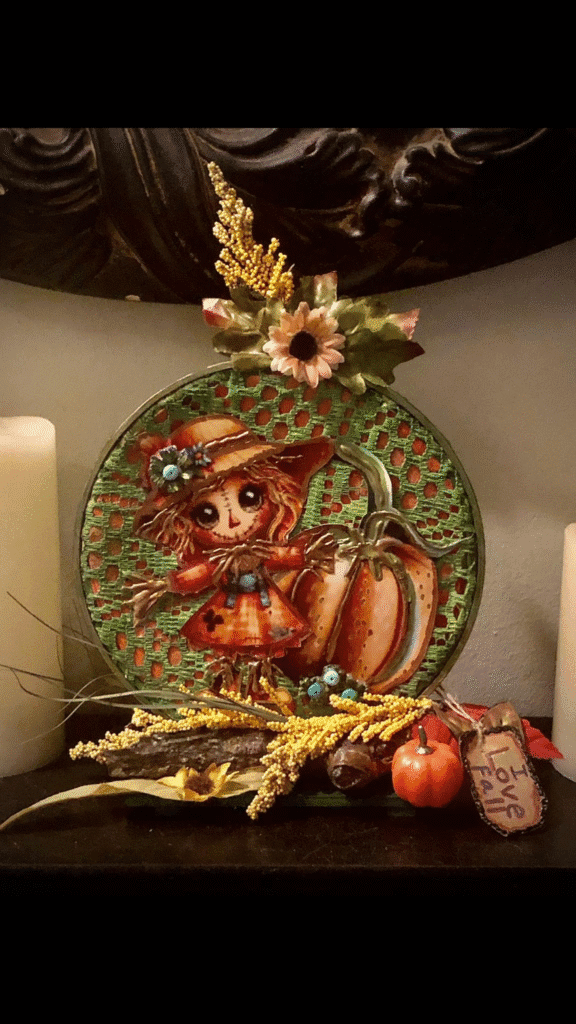
Scarecrow Fall Plate Decor
This DIY scarecrow fall plate decor is a sweet and rustic way to celebrate the autumn season. Using a Dollar Tree plate, lace, and seasonal embellishments, you can create a charming piece for your mantel, entryway, or kitchen.
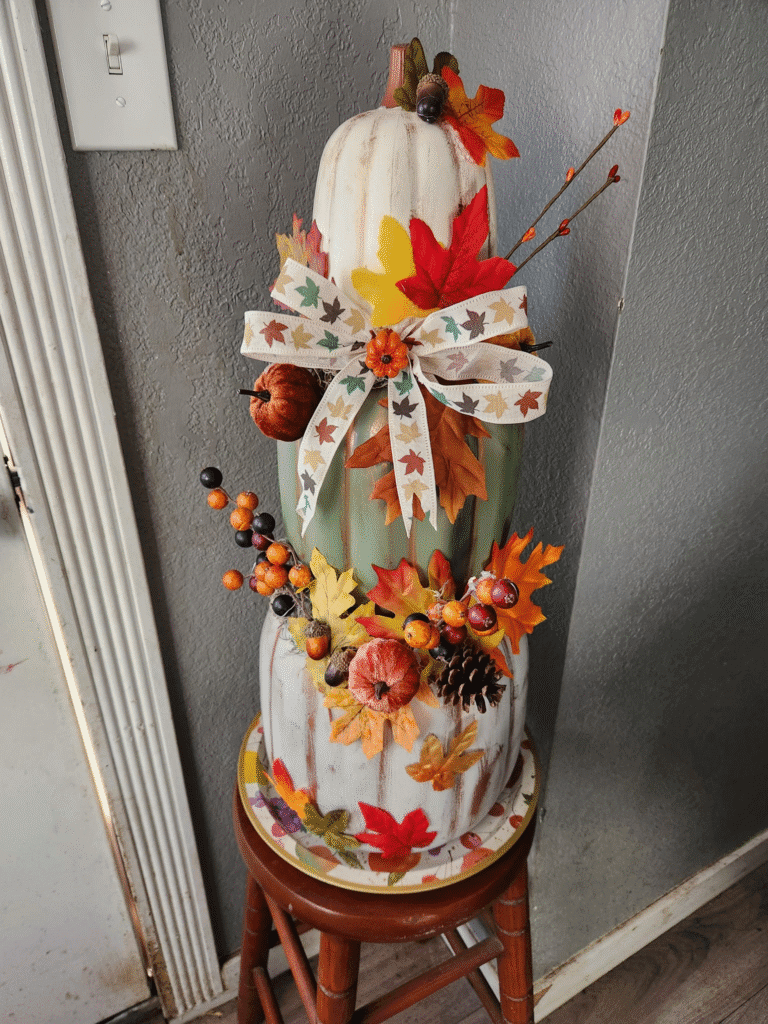
Stacked Pumpkin Fall Decor
This stacked pumpkin fall display is an eye-catching way to decorate your entryway, porch, or living room for autumn. Using faux pumpkins, seasonal florals, and a festive bow, you can create a tall, elegant arrangement perfect for the season.
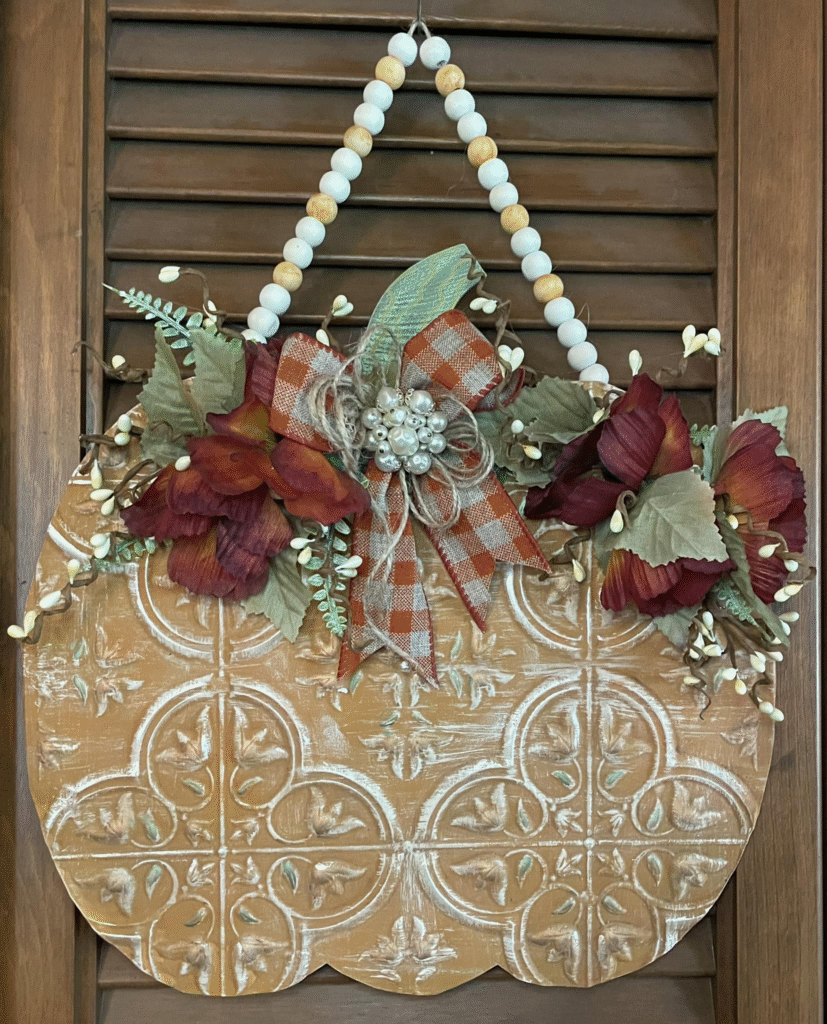
Pumpkin-Shaped Fall Door Hanger
This pumpkin-shaped fall door hanger is a rustic and elegant way to welcome the season. With embossed patterns, warm colors, and floral accents, it adds a cozy charm to your front door or entryway.
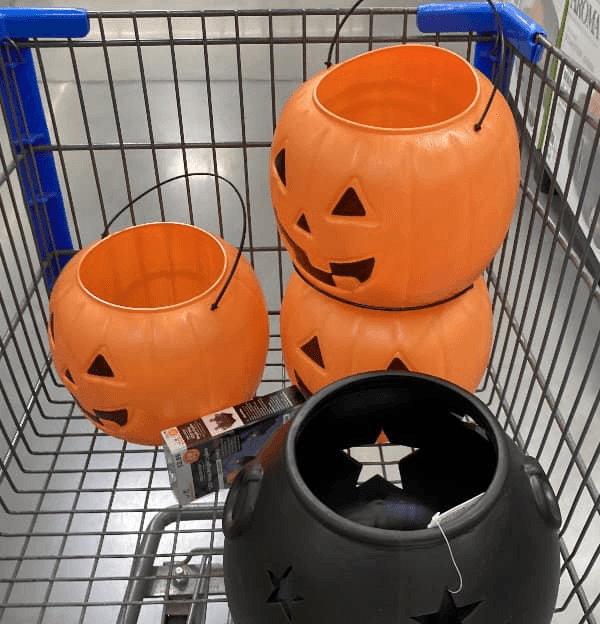
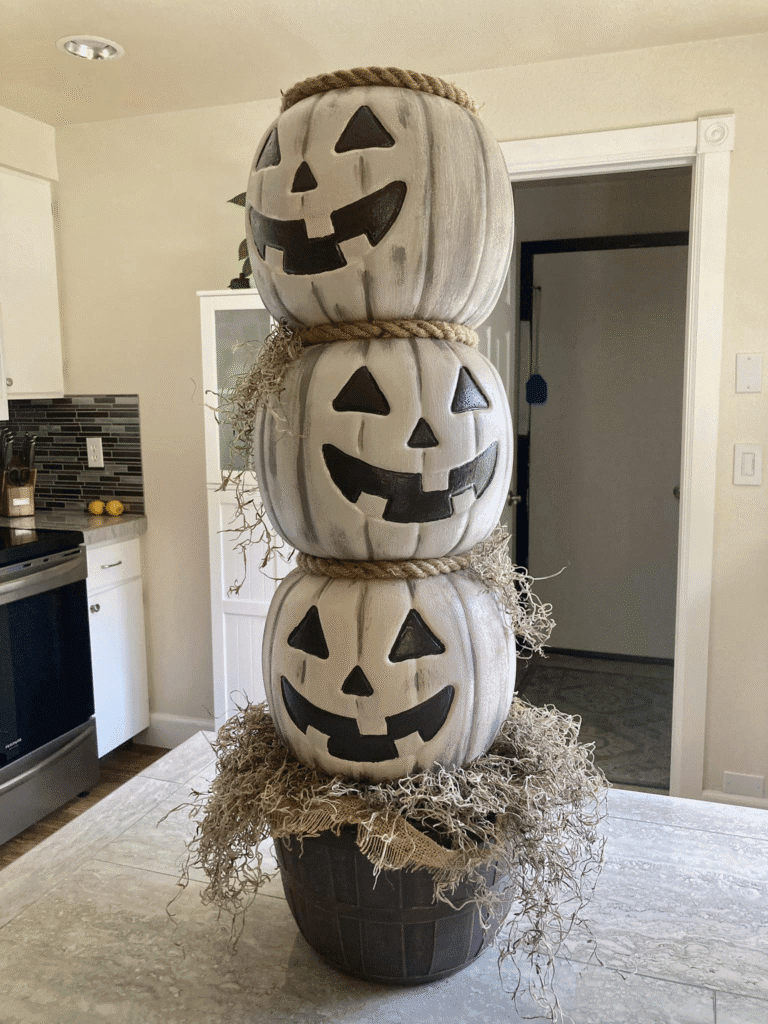
Stacked Jack-O’-Lantern Halloween Display
Create a striking stacked jack-o’-lantern display for your porch, entryway, or living room this Halloween. With painted pumpkins, rustic rope, and moss details, this decoration is spooky yet stylish.
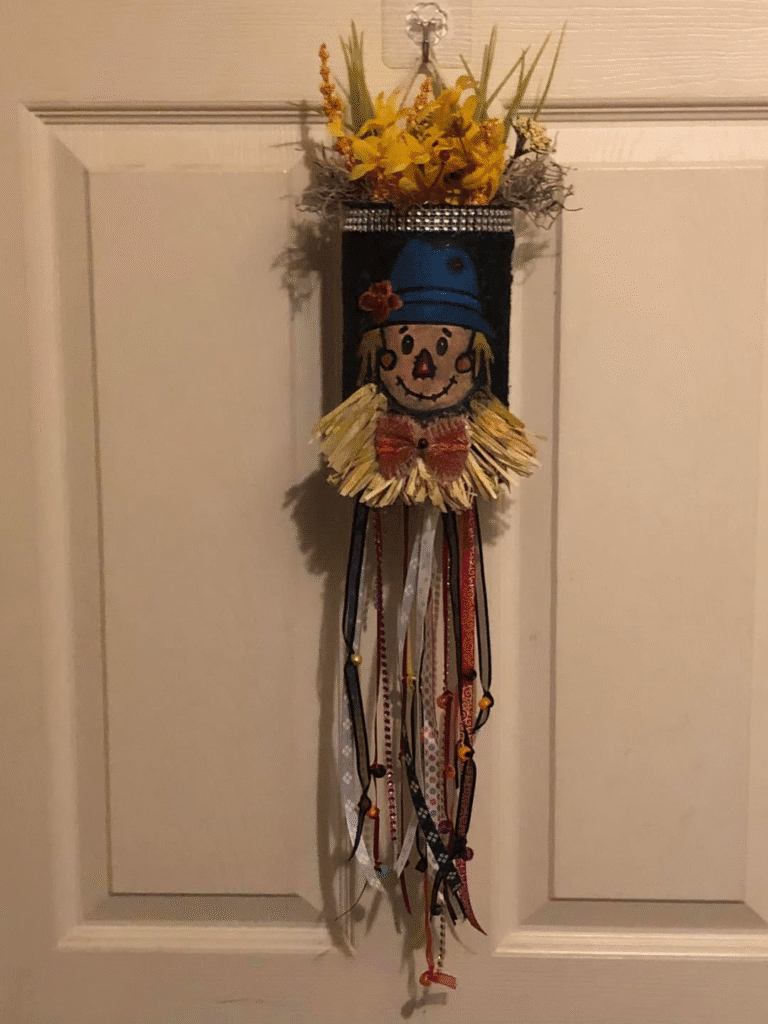
Scarecrow Ribbon Fall Door Hanger
This scarecrow ribbon door hanger is a fun and cheerful way to decorate for fall. With bright florals, rustic textures, and flowing ribbons, it’s perfect for adding seasonal charm to your front door.
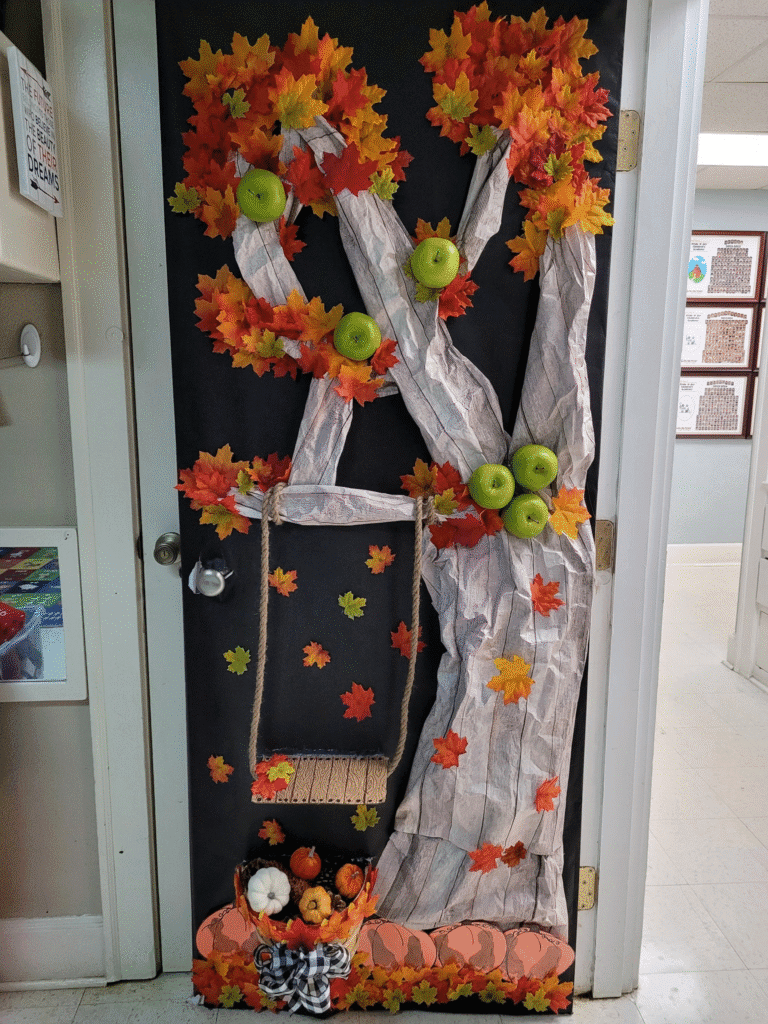
Scarecrow Fall Door Decoration
Add a playful touch to your home or classroom with this DIY scarecrow fall door decor. With cheerful ribbons, bright florals, and a rustic scarecrow face, it’s a simple way to bring seasonal joy to any doorway.
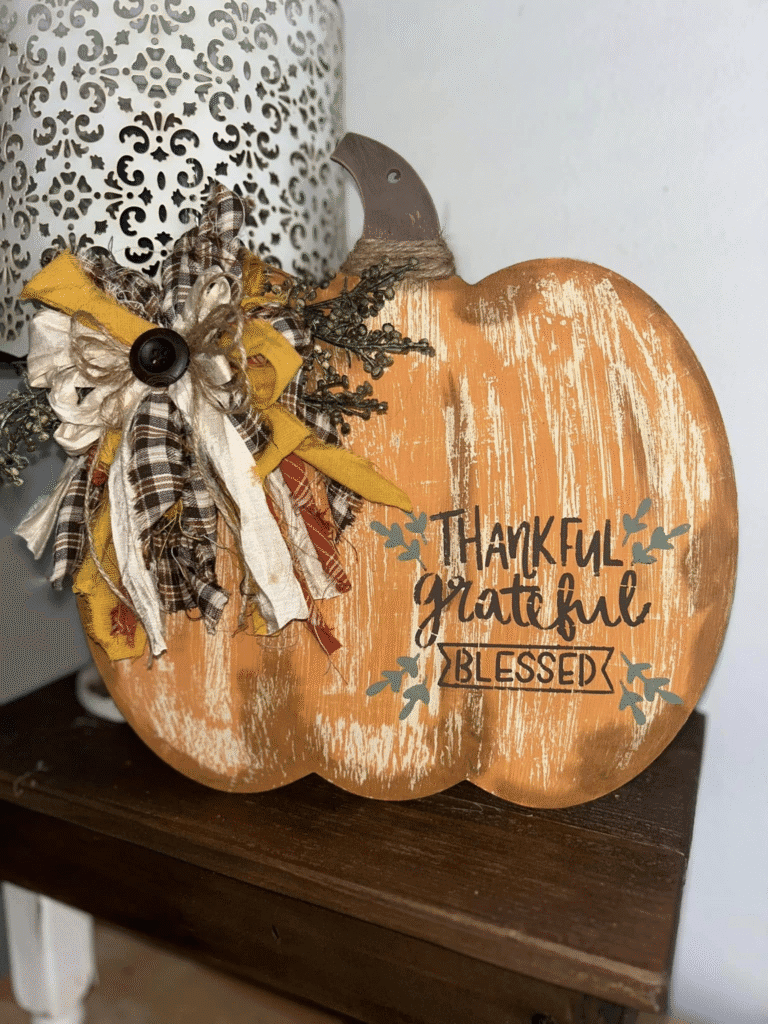
Thankful Grateful Blessed Pumpkin Sign
Bring warmth and gratitude into your home with this DIY pumpkin sign. With a rustic distressed finish, farmhouse bow, and a sweet seasonal message, it’s perfect for entryways, mantels, or as a cozy tabletop accent.
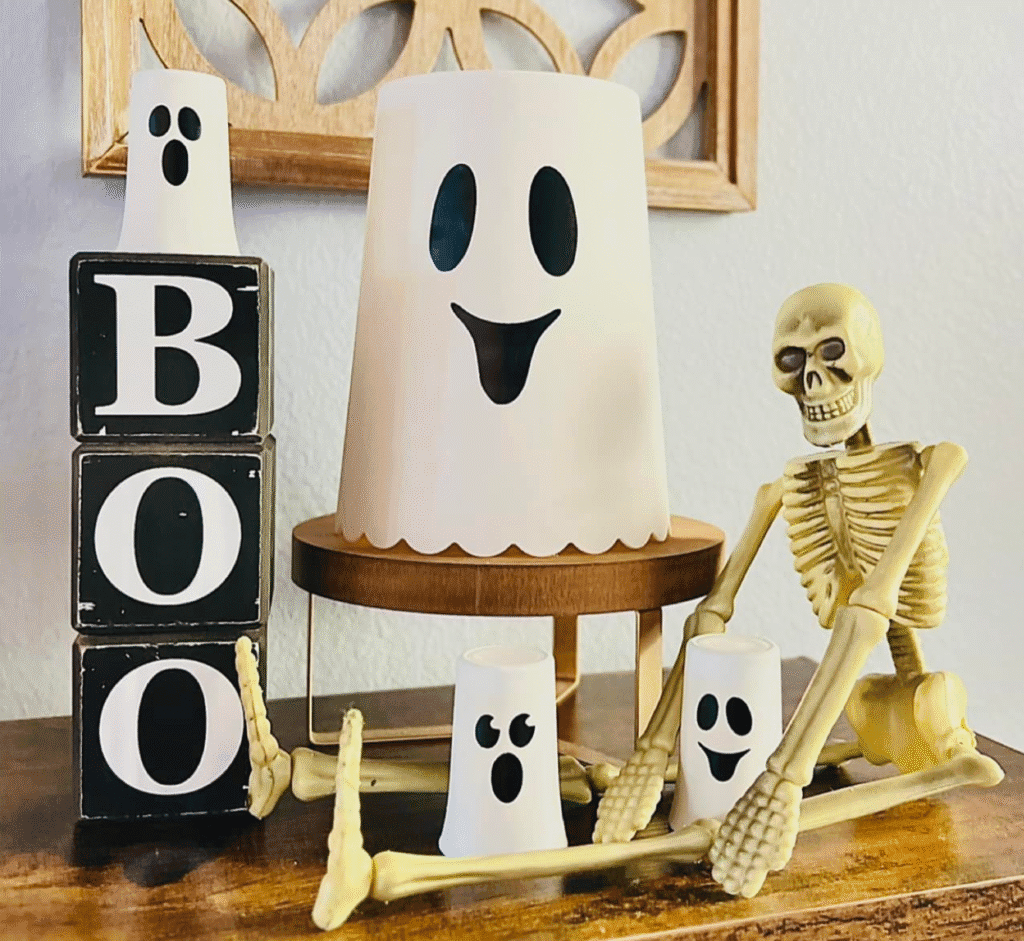
DIY Ghost Shot Glass and Canister Decor
This Dollar Tree Halloween ghost craft is a budget-friendly way to add spooky charm to your home. Using simple glassware, white paint, and vinyl faces, you can create a set of adorable ghost decorations paired with a skeleton and BOO sign.
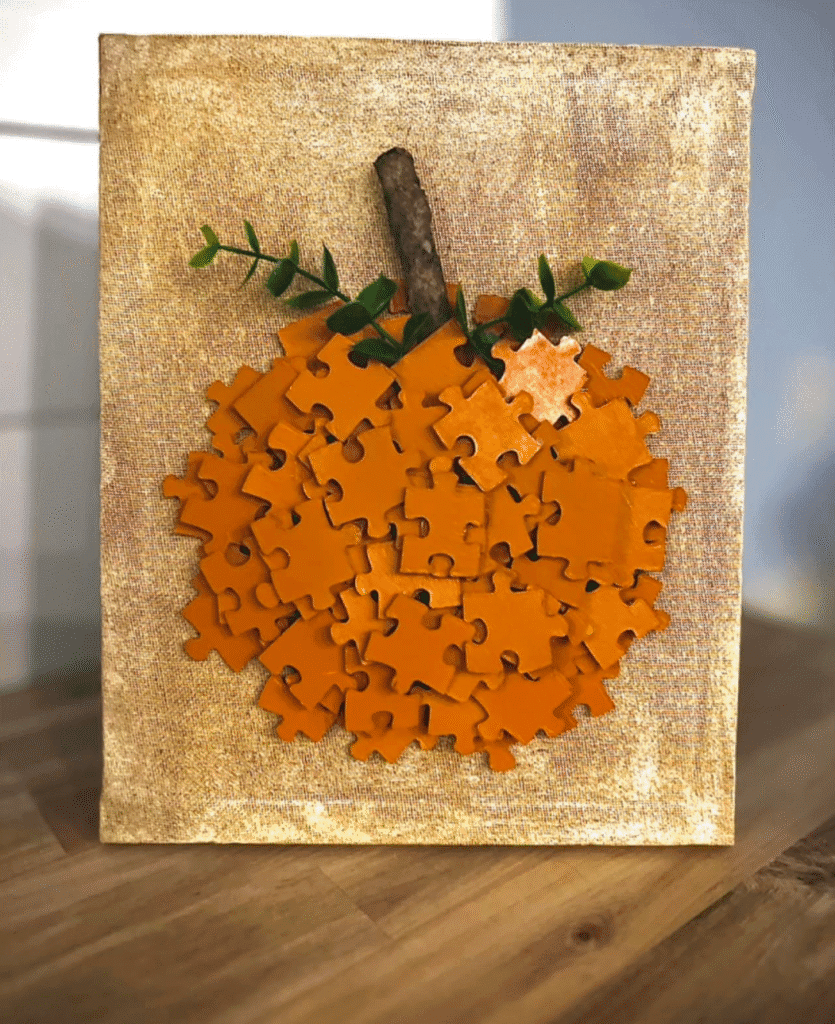
Puzzle Piece Pumpkin Canvas
Turn old puzzle pieces into a creative fall decoration with this DIY pumpkin canvas. It’s a budget-friendly project using Dollar Tree supplies and a little imagination—perfect for adding rustic charm to your seasonal decor.
Rustic Fall Wood Block Decor
This rustic wood block fall decor adds a farmhouse touch to your seasonal decorations. Featuring a distressed wood finish, layered fabric bow, and sunflower detail, it’s the perfect accent for shelves, mantels, or entryway tables.

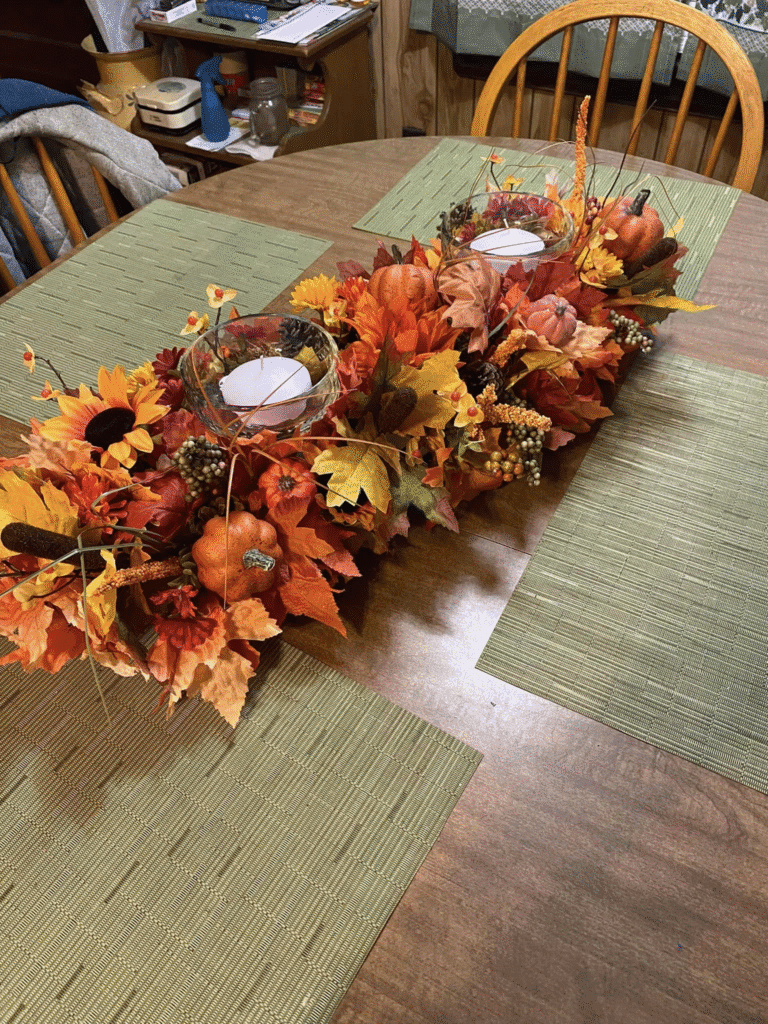
Fall Centerpiece with Candles and Pumpkins
Bring your dining table to life with this DIY fall centerpiece. Using faux pumpkins, autumn leaves, and simple glass candle holders, you can create a warm and inviting display for Thanksgiving, family dinners, or cozy gatherings.
Fall crafts are even more fun when you stay organized. If you’d like a simple way to plan your projects, check out this Craft Planner. Use code CRAFT20 for 20% off.