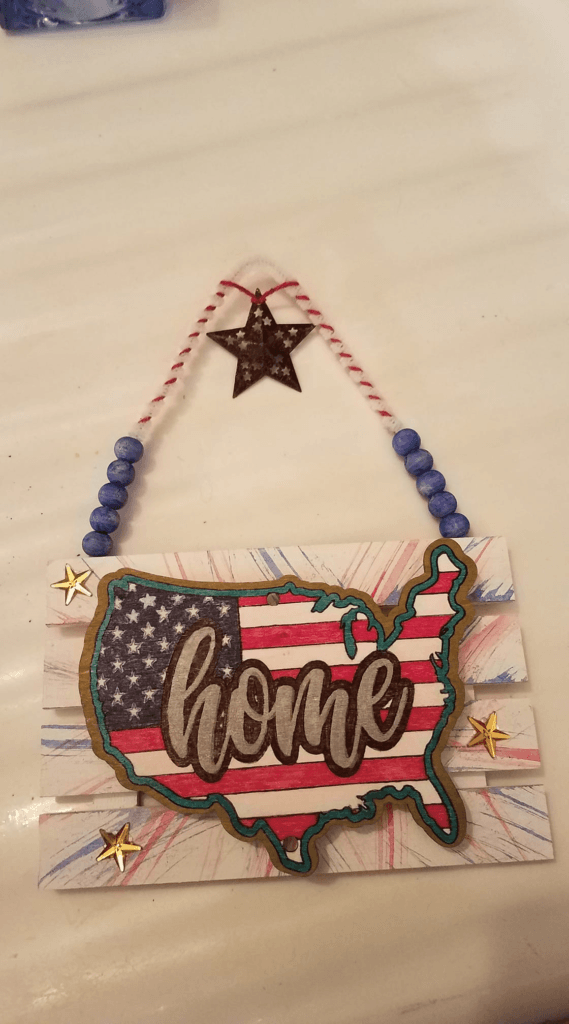
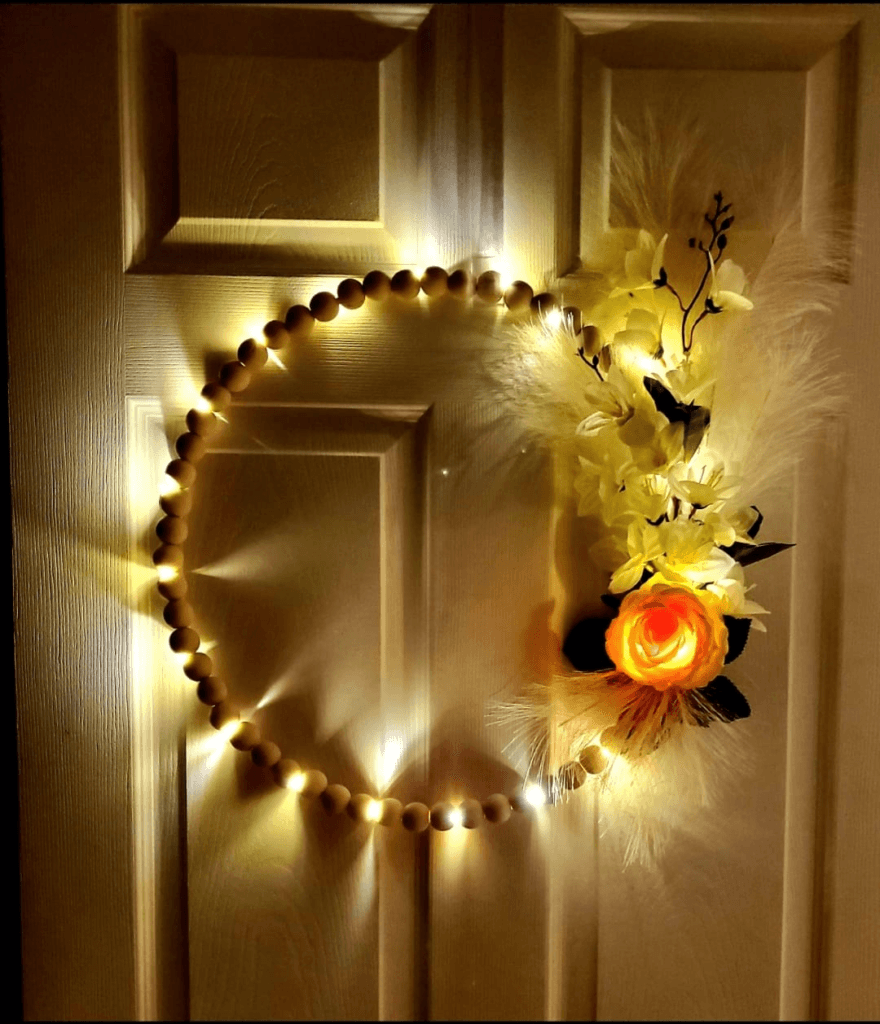
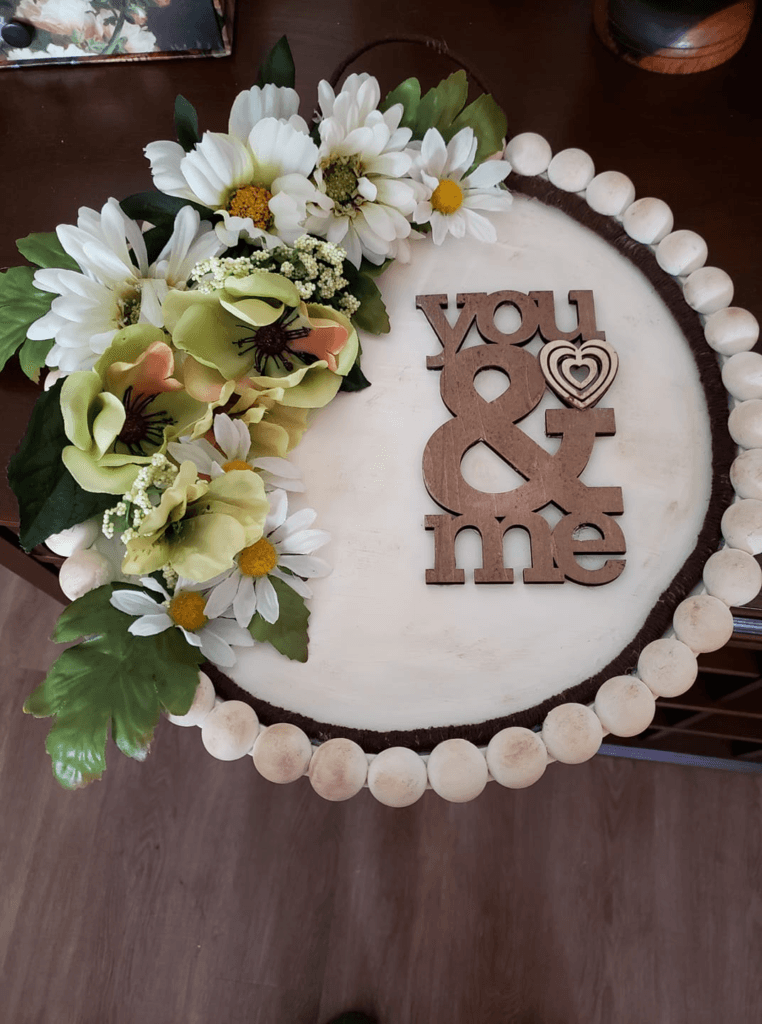
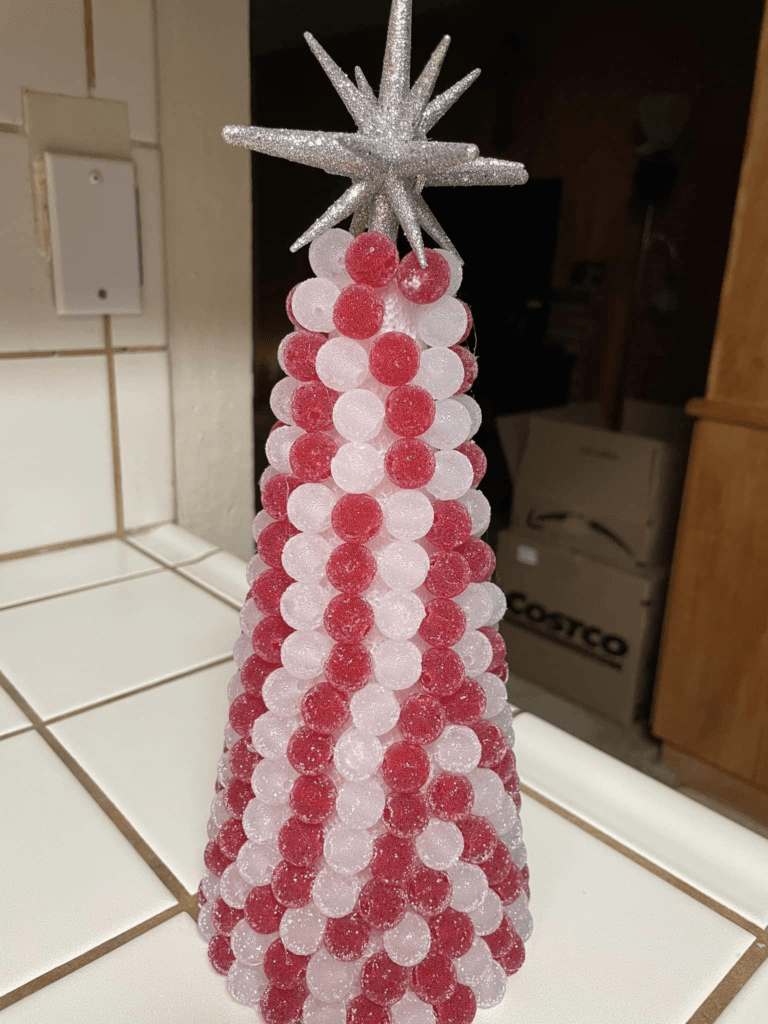
You know, whenever I need a little break from the everyday hustle, I find myself reaching for my craft beads. There’s something about making a pretty piece of decor with my own hands that just makes me smile. I’ve spent countless weekends sitting at my kitchen table, turning simple beads into fun projects for around the house. Whether you’ve been crafting for years or you’re just dipping your toes into it, working with craft beads is such a fun way to add a bit of your own style to your space. Let me share some of my favorite types of beads and how I’ve used them to brighten up my home.
Types of Craft Beads and How to Use Them in Home Decor
Wooden Craft Beads
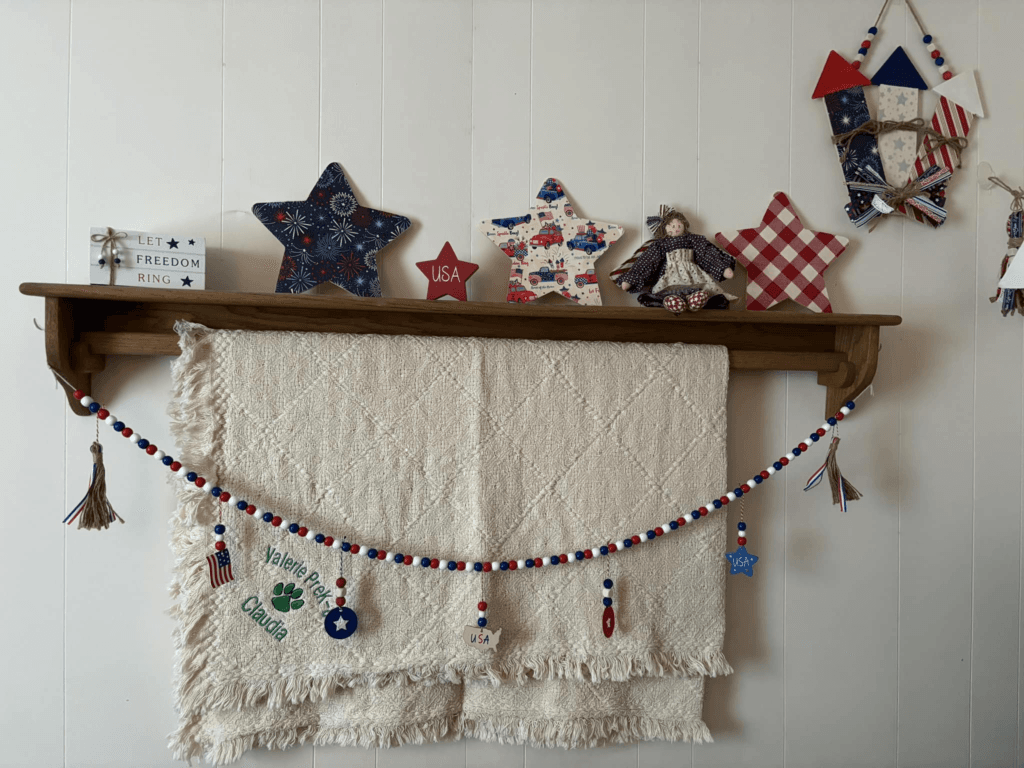
Wooden craft beads are incredibly versatile and have a natural, earthy vibe that can fit into almost any decor style. I love using them to make garlands or wall hangings for the living room. They’re also perfect for creating curtain tiebacks or even decorative tassels that add a cozy, handmade touch to a space.

Iron Beads (Perler Beads)
Iron beads, or Perler beads as they’re often called, are great for more playful, colorful projects. They’re a hit with kids, but I’ve found they can be used for some pretty chic adult decor too. You can fuse them together to make coasters, plant pot holders, or even small wall art. The best part? They’re durable and easy to clean, making them perfect for kitchen or bathroom decor.
I will present you many bead craft projects in the following parts of the article, but I would like to add one to this section.
DIY Beaded Wreath with Handmade Flowers and Bee
Adding a touch of whimsy to your home decor has never been easier. With some Dollar Tree beads, a little creativity, and a few handmade elements, you can craft this adorable beaded wreath that’s perfect for any room.
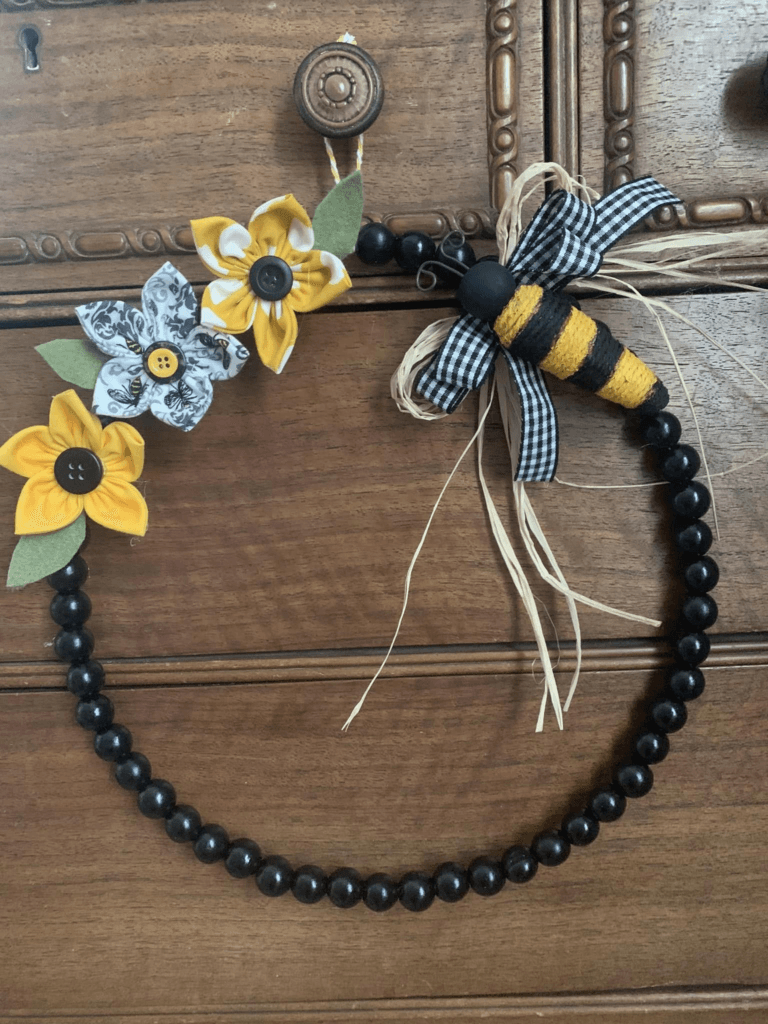
Materials Needed:
- Black craft beads (Dollar Tree)
- Wire or wreath frame (Dollar Tree)
- Fabric for flowers (your choice of colors)
- Buttons (for flower centers)
- Dollar Tree carrot (for the bee body)
- Black and yellow yarn (for the bee)
- Raffia or twine (for additional decoration)
- Hot glue gun and glue sticks
How to Make It:
- Prepare the Wreath Base: If you’re using a wire wreath frame, start by threading the black craft beads onto the wire to create the base of your wreath. Secure the ends to keep the beads in place.
- Create the Flowers: Cut the fabric into flower shapes and layer them to create a fuller look. Use buttons for the centers and secure everything with hot glue. Attach the finished flowers to the wreath.
- Make the Bee: Take a Dollar Tree carrot and wrap it with black and yellow yarn to create the bee’s body. Add small pieces of fabric or felt for wings and antennae. Attach the bee to the wreath with hot glue.
- Add Finishing Touches: Use raffia or twine to tie a bow at the top of the wreath. You can also add additional decorative elements like leaves or small flowers.
- Hang and Enjoy: Once everything is secure and the glue is dry, your beaded wreath is ready to hang. Place it on a door, wall, or even a piece of furniture to add a charming touch to your home.
Pony Beads
Pony beads bring a pop of color and are super fun to work with. They’re ideal for making things like sun catchers or beaded curtains. If you’re into outdoor decor, pony beads can be strung together to create wind chimes or garden ornaments. They’re also fantastic for adding some flair to your patio or backyard.

Popular Projects You Can Make with Craft Beads
Craft beads come in all shapes and sizes, making them perfect for a wide variety of projects. Whether you’re looking to create jewelry, decorate your home, or make something fun with the kids, there’s a craft bead project for everyone. Let’s take a look at some popular beadwork ideas you can try at home. I will share some beautiful ideas that I have made myself, and I will share more projects below in the article. If you want you can check other bead craft ideas article!
DIY Decorative Wall Hanging with Wooden Craft Beads
Add a touch of boho-chic charm to your home with this decorative wall hanging. Made with wooden craft beads and natural twine, this project is perfect for creating a warm and inviting atmosphere in any room. Customize it with tassels or small charms to suit your style.
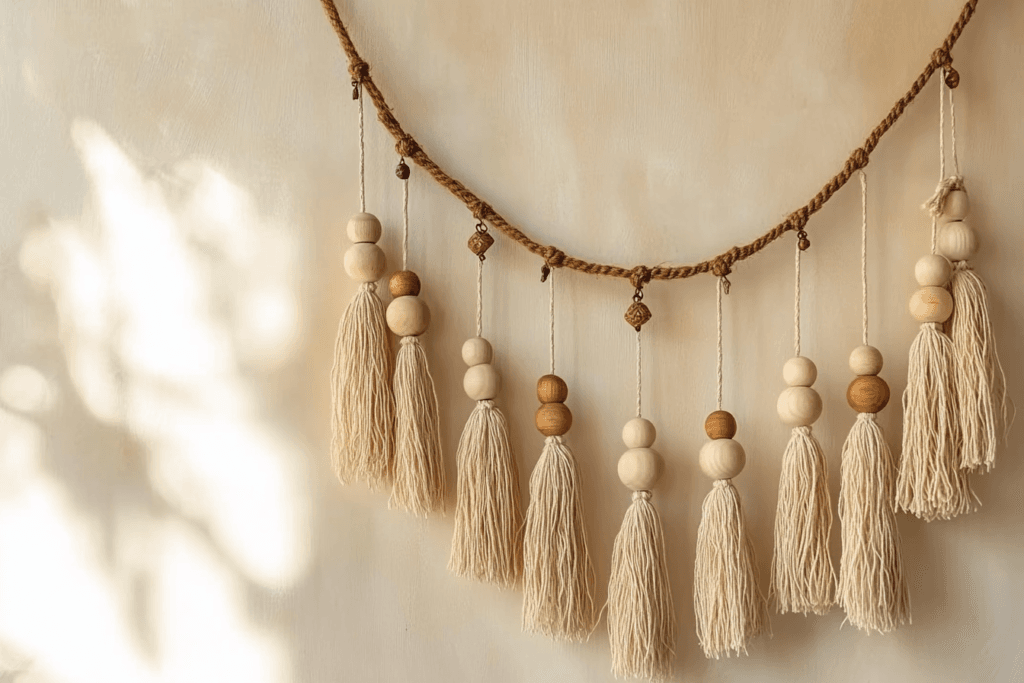
Materials Needed:
- Wooden craft beads
- Natural twine or rope
- Scissors
- Tassels or small charms (optional)
- Hot glue gun and glue sticks (optional)
How to Make It:
- Prepare the Twine: Cut a length of twine to the desired width of your wall hanging. Leave extra length at the ends for hanging.
- String the Beads: Thread the wooden beads onto the twine in your chosen pattern. You can alternate bead sizes or keep it uniform.
- Add Tassels or Charms: Attach tassels or small charms to the bottom of the twine using hot glue or by tying them on.
- Secure and Hang: Tie the ends of the twine to create a loop for hanging. Adjust the beads to ensure they are evenly spaced.
- Display Your Creation: Hang your decorative wall hanging in your living room, bedroom, or any space that needs a bit of boho flair.
DIY Beaded Bracelets Using Craft Beads
Brighten up your accessory collection with these stylish beaded bracelets. Using a mix of colorful craft beads and stretchy elastic cord, you can create personalized bracelets that match your style perfectly. This project is easy and fun, making it great for both beginners and experienced crafters.

Materials Needed:
- Craft beads in various colors and sizes
- Stretchy elastic cord
- Scissors
- Beading needle (optional)
How to Make It:
- Prepare the Cord: Cut a length of elastic cord to fit around your wrist, leaving extra length for tying knots.
- String the Beads: Use the beading needle to string the beads onto the elastic cord in your desired pattern. If you don’t have a needle, you can thread the beads directly onto the cord.
- Secure the Bracelet: Once you’ve added enough beads, tie a secure knot at the ends of the elastic cord. Double knot for extra security.
- Trim the Excess: Cut off any excess cord, leaving a small amount to ensure the knot doesn’t come undone.
- Wear and Enjoy: Slip the bracelet onto your wrist and admire your handmade creation!
DIY Iron Bead Coasters
Bring some color and creativity to your dining table with these iron bead coasters. Perfect for protecting your surfaces from hot drinks, these coasters are not only functional but also fun to make. Customize them with your favorite colors and patterns to match your decor.
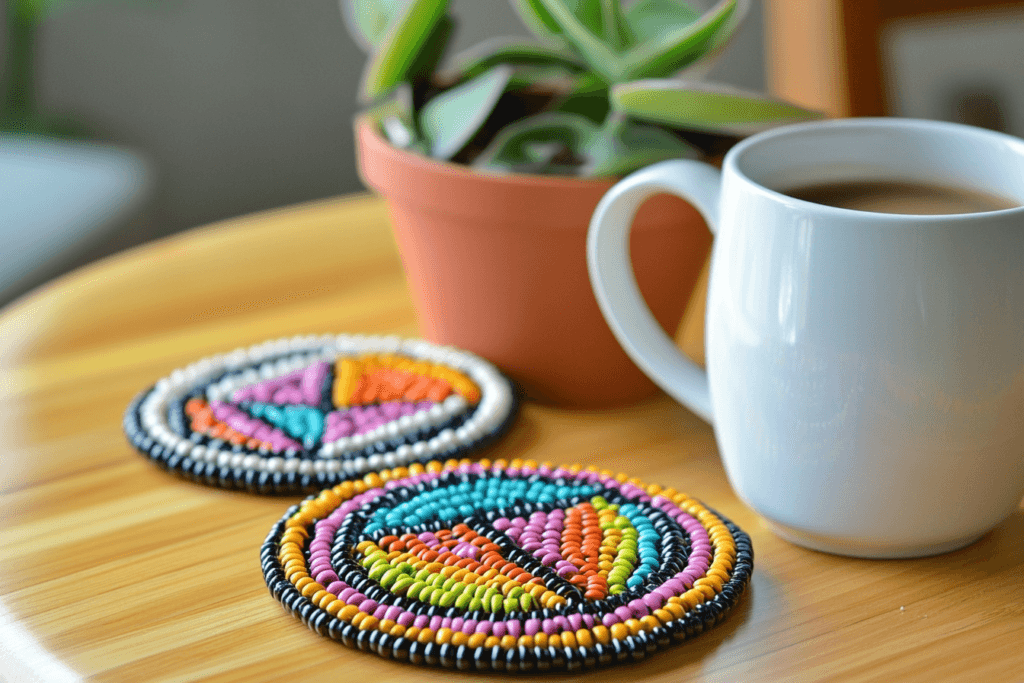
Materials Needed:
- Iron beads (Perler beads)
- Pegboard (for arranging the beads)
- Ironing paper
- Iron
- Coaster mold (optional)
How to Make It:
- Arrange the Beads: Place the iron beads on the pegboard to create your desired design or pattern. Get creative with colors and shapes!
- Prepare to Iron: Once your design is complete, cover the beads with ironing paper to protect them during the ironing process.
- Iron the Beads: Gently press the iron onto the paper-covered beads, moving in circular motions. Iron until the beads start to fuse together.
- Let It Cool: Allow the beads to cool completely before removing them from the pegboard.
- Finish and Use: Your coaster is now ready to use! Place it on your table to protect surfaces from hot or cold drinks.
Bead Crafts: Essential Supplies and Tips
When it comes to bead crafting, having the right supplies on hand can make all the difference. Over the years, I’ve learned that a few basic materials and some handy tips can really help bring those creative ideas to life. Let me share what I always keep in my craft stash and a few tricks I’ve picked up along the way.
Essential Supplies for Bead Crafts
Most of the time I use dollar tree products to craft in different ways. But I believe that a crafter should have all kinds of materials (at least that’s how I am) So I will suggest you some materials that you can buy outside the dollar tree that we will use to craft beads. (This content may contain sponsored ads. Advertisers may compensate us to promote their offers/products in the group)
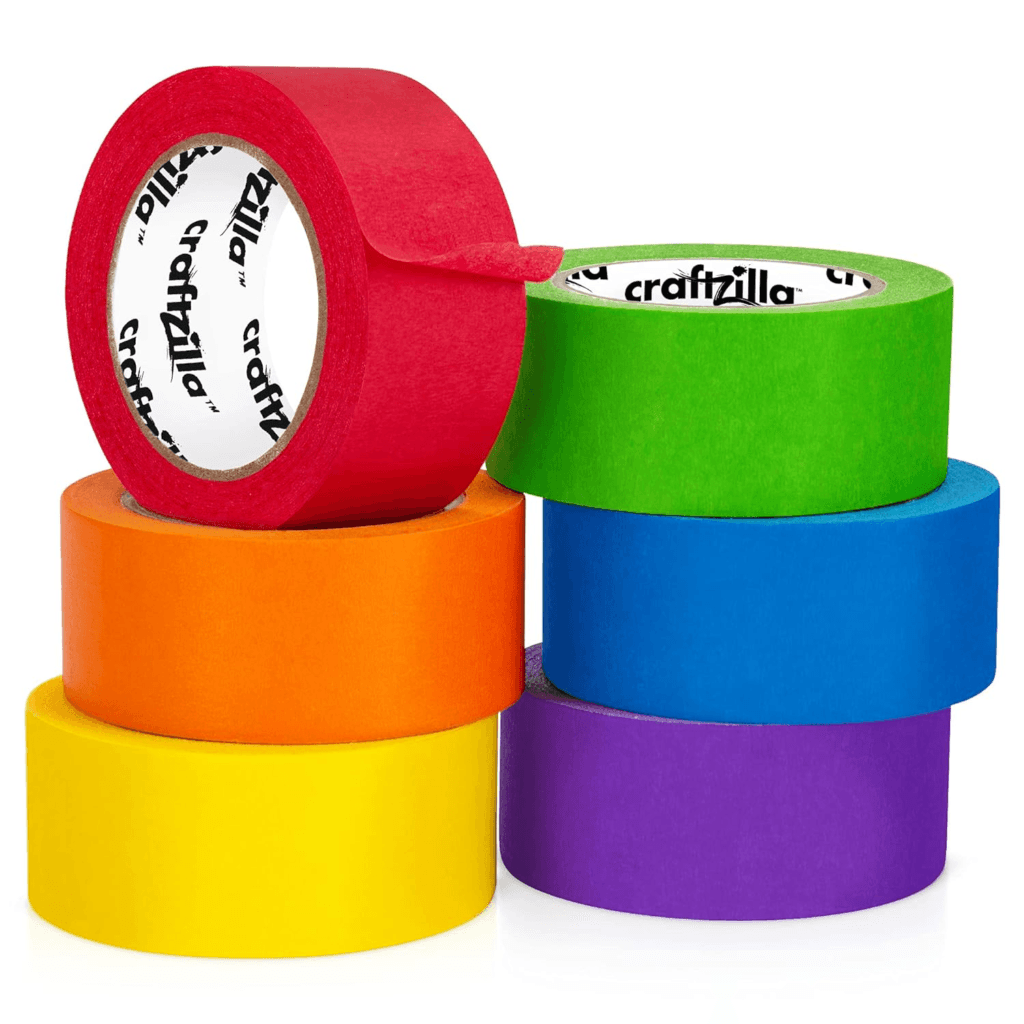
1- Colored Masking Tape
One of my go-to supplies for bead crafts is this vibrant colored masking tape. It’s not just for painting—when working with beads, I use it to keep my work in place while I’m threading or designing. For example, if you’re creating a pattern with small beads, you can use the tape to hold your design steady on a flat surface before stringing them. It’s also great for marking where to start or stop a design, especially when you’re trying to keep things symmetrical. Plus, the bright colors add a fun touch to any project!
2- 1000PCS Polymer Clay Beads Bracelet Making kit
I’ve used this polymer clay beads kit a lot lately, and it’s fantastic. With 1,000 beads in various fun shapes like fruits and flowers, it’s perfect for creating unique bracelets and necklaces. Everything you need is included, so you can start crafting right away. It’s a solid choice if you want to add some personality to your bead crafts.

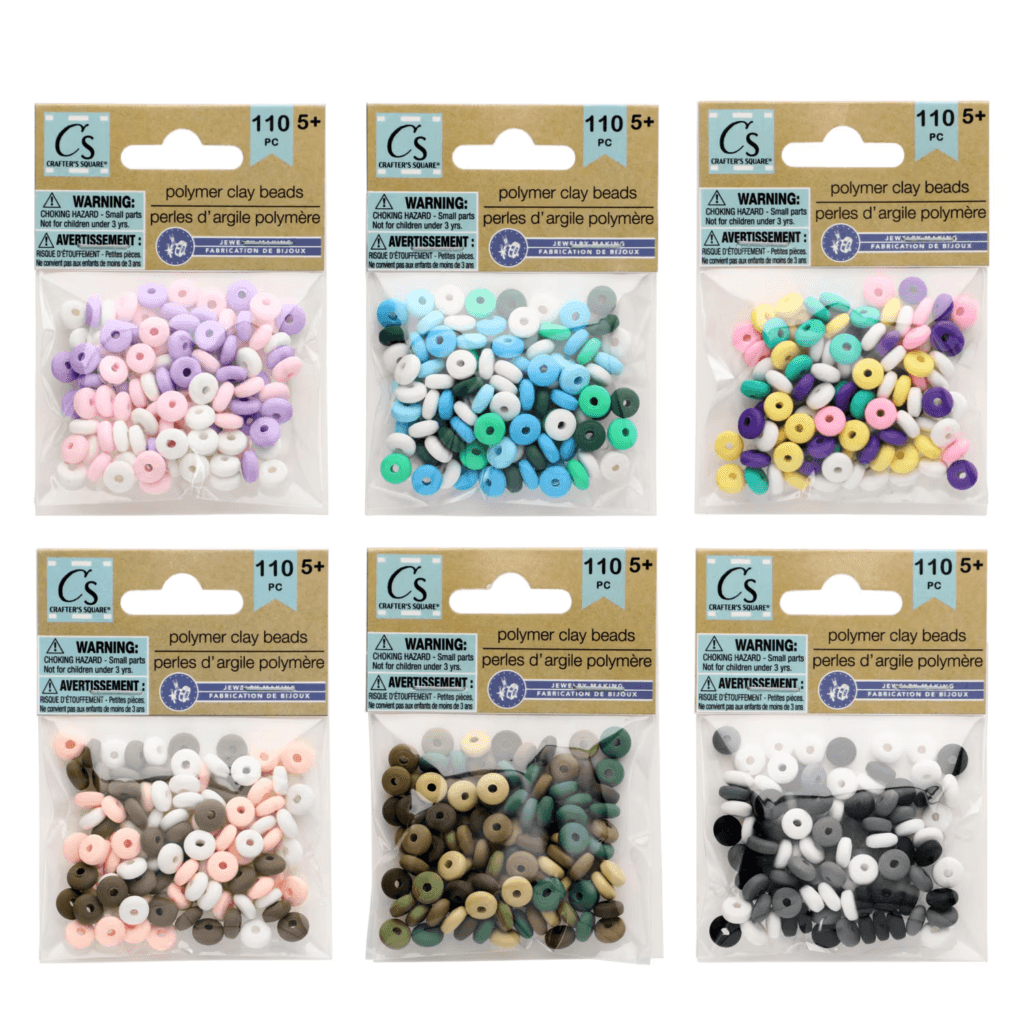
3- Polymer Clay Beads, 110-pc. Packs
These polymer clay beads are great if you’re looking to add some color to your projects without breaking the bank. With 110 beads per pack, they’re perfect for making bracelets, necklaces, or even keychains. Plus, they come in a variety of colors, so you can mix and match to suit your style.
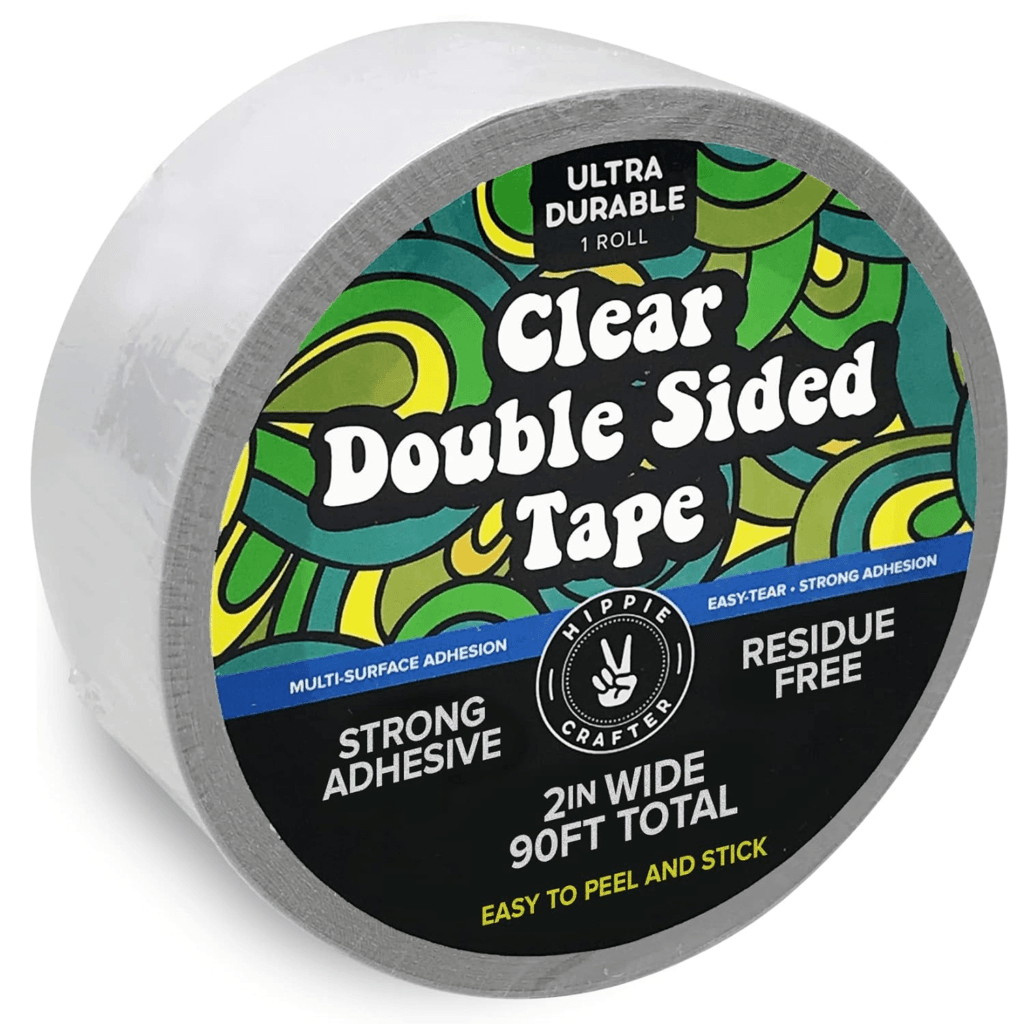
4- Clear Double Sided Tape for Crafts
I’ve found this clear double-sided tape to be incredibly useful in bead craft projects. It’s perfect for keeping beads in place while you’re working on detailed designs, especially with those tiny beads that love to roll around. I often use it to temporarily hold beads on a flat surface while I arrange patterns before threading. What’s great about this tape is that it has a strong hold, but it won’t leave any residue behind, so your materials stay clean and undamaged. It’s become one of those tools I reach for not just in bead crafts, but in other projects as well. If you’re serious about your crafting, this tape is definitely a staple you’ll want to have in your kit.
5- 500pcs Craft Beads
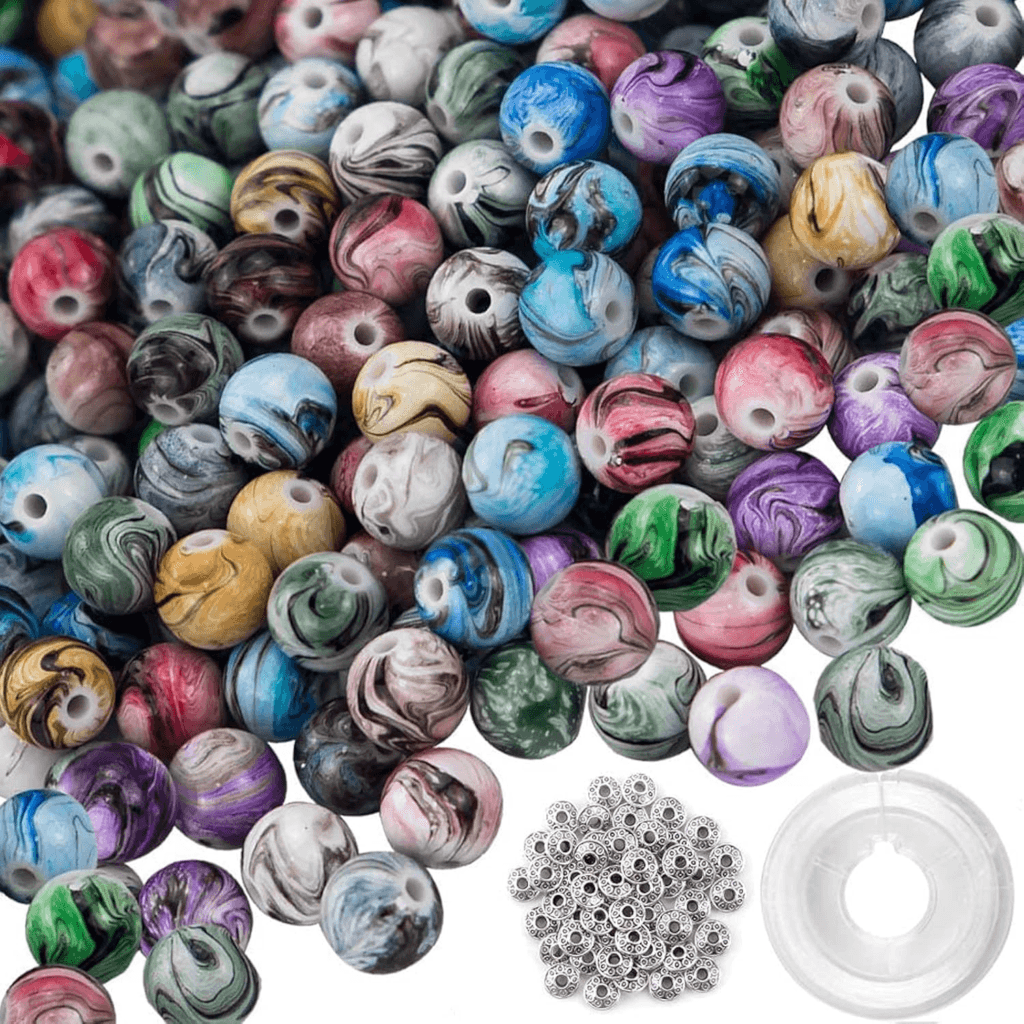
These acrylic beads with their vibrant colors and unique patterns are perfect for adding flair to any bead craft. The set includes 500 beads, 50 spacers, and crystal string—everything you need to start crafting right away.
Plus, they’re great for the home decor crafts I’ll be sharing now. I use them in many of my projects, often alongside the double-sided tape mentioned earlier—they’re a perfect pair!
Unique Craft Beads Projects to Try at Home
Now I want to share craft projects about bead crafts. I want to share how it is done and the materials used and I want you to try it at home with beads. Let’s get started.
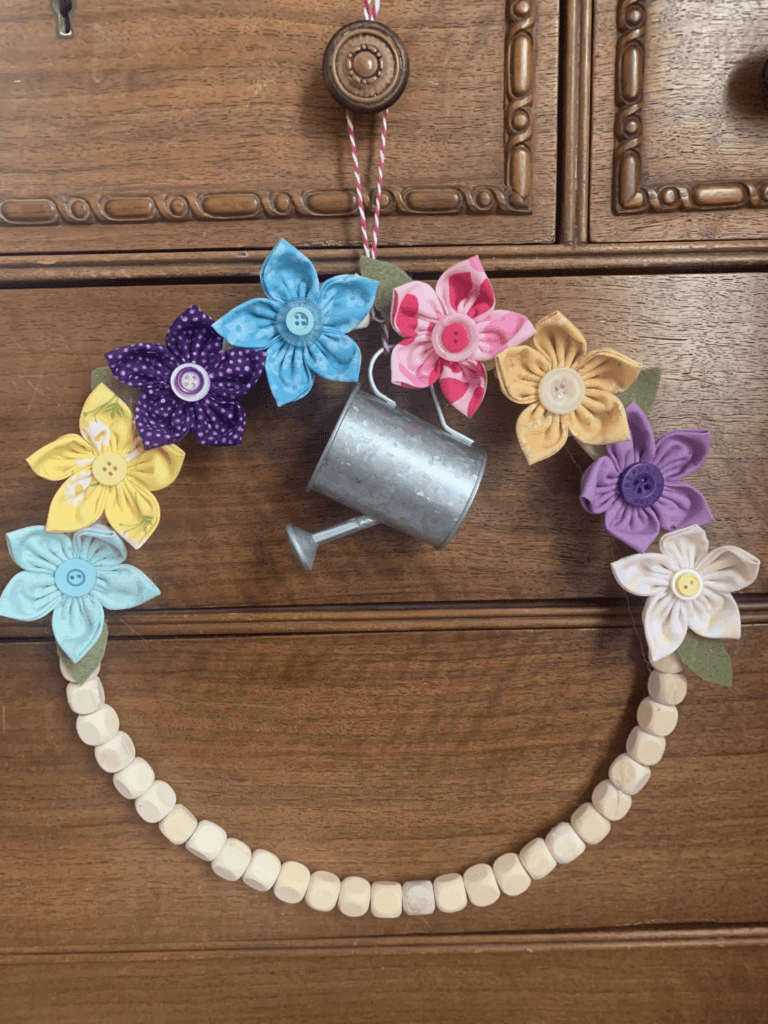
DIY Floral Bead Wreath with Watering Can Decor
Add a touch of spring to your home with this charming floral bead wreath. This project combines the softness of fabric flowers with the rustic charm of a mini watering can, all brought together by a simple beaded base. It’s a delightful addition to any room or entryway and is perfect for adding a bit of color and personality to your space.
Materials Needed:
- Wooden craft beads
- Wire or wreath frame (Dollar Tree or any craft store)
- Fabric flowers (DIY or pre-made)
- Mini watering can decoration
- String or twine for hanging
- Hot glue gun and glue sticks
- Scissors
How to Make It:
- Prepare the Wreath Base: Start by threading the wooden beads onto the wire or wreath frame, creating the base for your wreath. Secure the ends of the wire to keep the beads in place.
- Attach the Flowers: Arrange the fabric flowers around the top half of the wreath. Use a hot glue gun to secure them in place. Make sure the flowers are evenly spaced for a balanced look.
- Add the Watering Can: Attach the mini watering can decoration to the center or slightly off-center of the wreath. You can hang it with string or glue it directly onto the wreath.
- Final Touches: Once all the elements are in place, tie a piece of string or twine to the top of the wreath for hanging. Adjust any elements as needed to ensure everything is secure.
- Hang and Enjoy: Your floral bead wreath is now ready to be hung on your door, wall, or any place in your home that needs a cheerful touch.
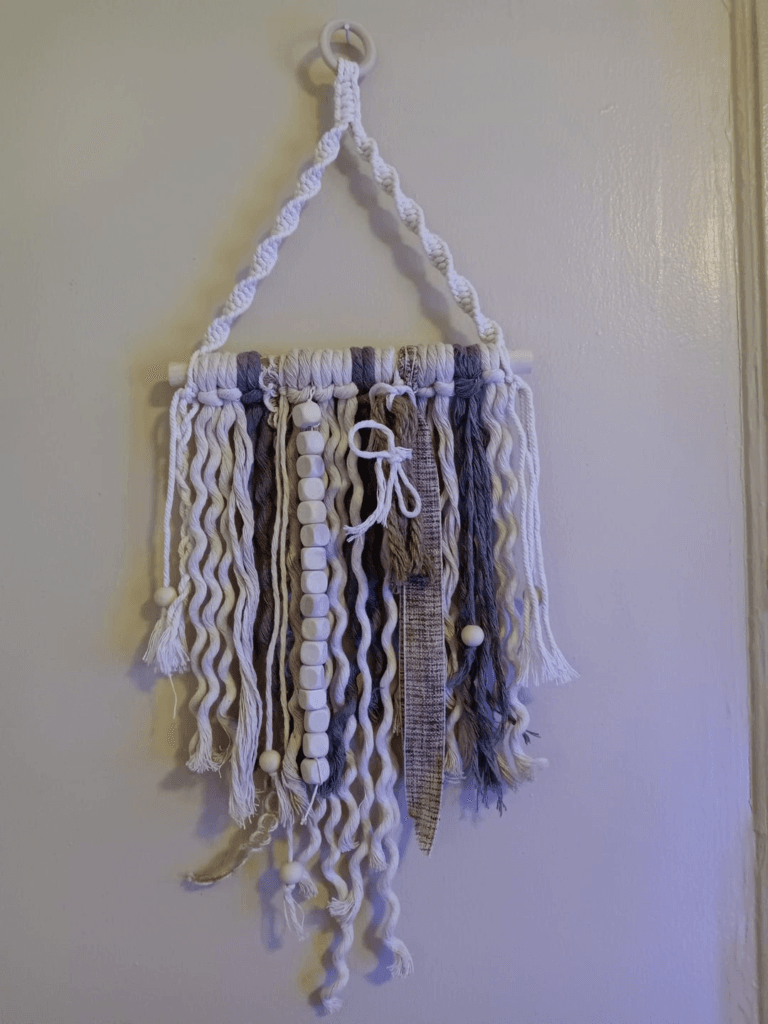
DIY Beaded Wall Hanging Using Dollar Tree Supplies
This beautiful beaded wall hanging adds a touch of boho charm to any room. Made with affordable supplies from Dollar Tree, this project is not only budget-friendly but also a fun way to get creative with textures and materials. The combination of beads, various ropes, and ribbons creates a piece that’s both stylish and personal.
Materials Needed:
- Towel holder (Dollar Tree)
- Wooden craft beads
- Various ropes (in different colors and textures)
- Ribbons (of your choice)
- Scissors
- Hot glue gun and glue sticks (optional)
How to Make It:
- Prepare the Base: Start by cutting your ropes and ribbons to the desired length. You’ll want a variety of lengths to create a layered effect.
- Attach to Towel Holder: Take your towel holder and start attaching the ropes and ribbons by looping them over the holder and pulling the ends through the loop. Arrange them evenly across the holder for a balanced look.
- Add the Beads: Thread the wooden beads onto some of the ropes. You can create patterns or keep it random—whatever suits your style. Secure the beads in place with knots or a small dab of hot glue if needed.
- Final Adjustments: Once everything is attached, make any final adjustments to ensure the hanging looks just right. You can trim any excess rope or ribbon for a neat finish.
- Hang and Display: Your beaded wall hanging is now ready to be displayed. Hang it in your living room, bedroom, or any space that could use a little texture and warmth.
DIY Boho Mirror with Beaded Accent
This boho-inspired mirror is a chic and affordable way to add a touch of style to any room. Made with a Dollar Tree mirror, a string mop, and some beautiful beads, this project is perfect for those who love combining rustic elements with a modern flair. The natural textures and earthy tones make this mirror a versatile piece that can complement any decor.

Materials Needed:
- Round mirror (Dollar Tree)
- String mop (Dollar Tree)
- Wooden craft beads (purchased from Amazon or any craft store)
- Hot glue gun and glue sticks
- Scissors
How to Make It:
- Prepare the Mop Strings: Start by cutting the mop strings to the desired length. You’ll want enough to create a full fringe around the mirror. Lay them out evenly.
- Attach the Strings: Using a hot glue gun, attach the mop strings around the edge of the mirror, creating a fringe that frames the mirror. Make sure the strings are securely glued and evenly spaced.
- Add the Beads: Once the fringe is in place, begin gluing the wooden beads in a circle directly onto the mirror, just inside the fringe. You can alternate bead colors or sizes for added visual interest.
- Final Touches: After the beads are securely in place, give the fringe a trim if necessary to ensure it’s even all around. Let everything dry completely before hanging.
- Display Your Mirror: Your boho mirror is now ready to hang! It adds a cozy, handmade touch to any room, whether it’s your bedroom, living room, or entryway.
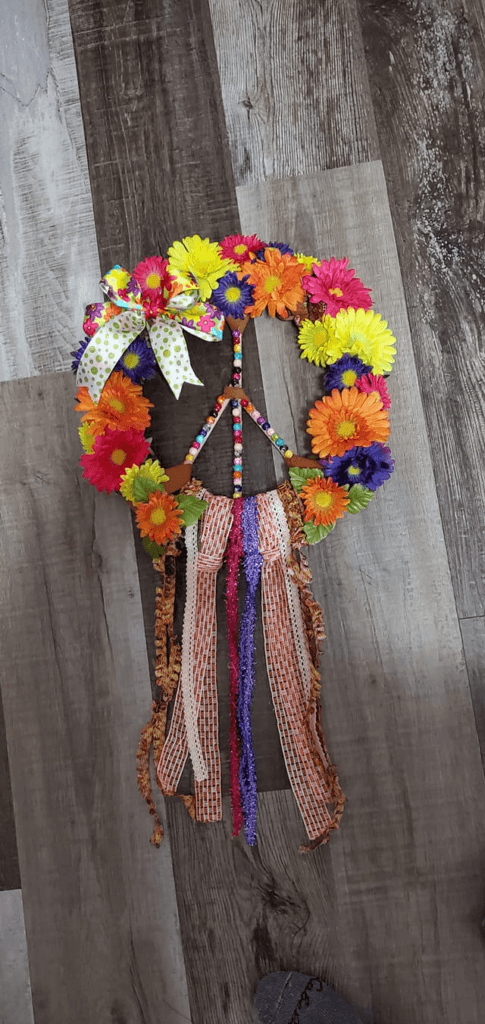
DIY Peace Sign Floral Wreath
Bring a touch of vibrant, boho spirit to your home with this DIY Peace Sign Floral Wreath. Combining colorful faux flowers, beads, and ribbons, this wreath is not only a symbol of peace but also a lively decor piece that can brighten up any space. Perfect for front doors, bedrooms, or as a statement wall hanging, this craft project is a fun way to express your creativity.
Materials Needed:
- Peace sign wreath form (can be found at craft stores or online)
- Faux flowers in bright colors
- Colorful beads
- Various ribbons and trims
- Hot glue gun and glue sticks
- Scissors
- Bow (optional, for added decoration)
How to Make It:
- Prepare the Peace Sign Frame: Start by arranging your faux flowers around the peace sign wreath form. Once you’re happy with the placement, use a hot glue gun to secure the flowers in place.
- Add the Beads: String the colorful beads onto some of the wreath form’s sections. You can create patterns or keep it random, depending on the look you want to achieve. Use hot glue to secure the beads if needed.
- Attach the Ribbons: Cut ribbons and trims to your desired length and attach them to the bottom of the peace sign wreath form. Let the ribbons hang down freely to create a cascading effect. You can layer different colors and textures for added dimension.
- Final Touches: Add a decorative bow to the top or side of the wreath for an extra pop of color. Make sure everything is securely attached, and trim any excess ribbons for a neat finish.
- Display Your Wreath: Your Peace Sign Floral Wreath is now ready to be hung! It’s a vibrant and unique addition to any space, spreading peace and positivity.
DIY Beaded Curtain for a Colorful Window Decor
Transform your windows into a vibrant display with this DIY beaded curtain. Perfect for adding a touch of color and personality to any room, this project is both decorative and functional. The colorful beads catch the light beautifully, creating a playful and artistic effect that’s sure to brighten up your space.
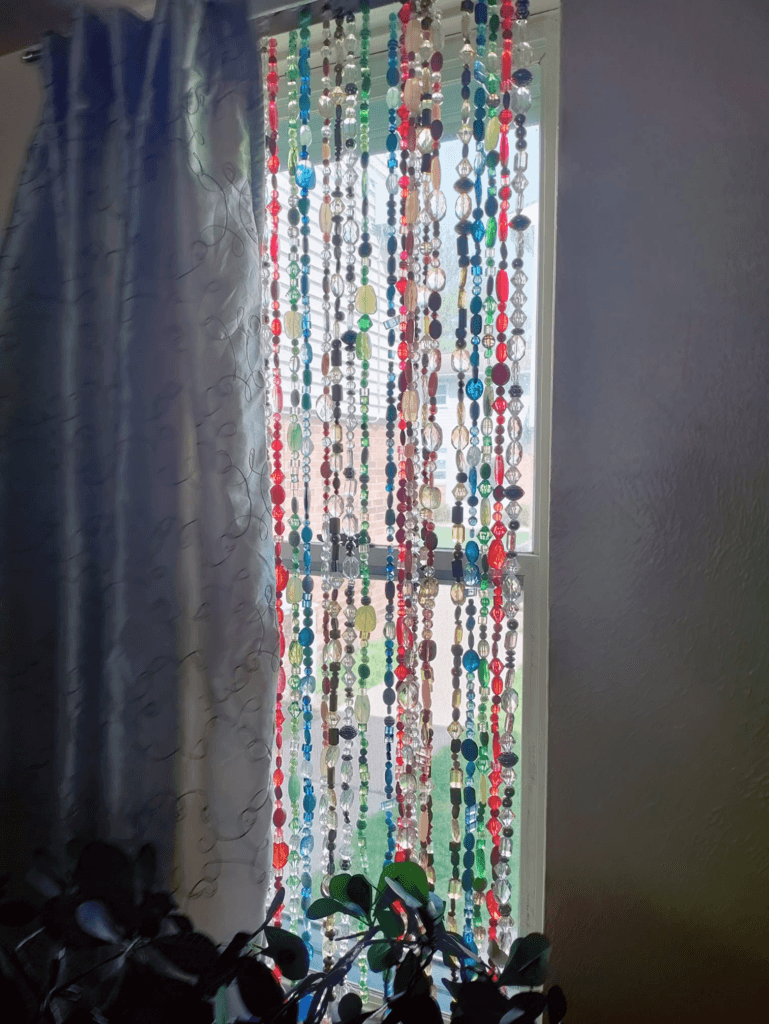
Materials Needed:
- Assorted craft beads (variety of colors, shapes, and sizes)
- Strong thread or fishing line
- Curtain rod or tension rod
- Scissors
- Needle (for threading beads)
How to Make It:
- Prepare the Beads: Start by selecting a variety of beads in different colors, shapes, and sizes. Lay them out in the order you’d like to string them, creating a pattern or random design.
- Thread the Beads: Cut the thread or fishing line to the desired length for each strand of your curtain. Using a needle, begin threading the beads onto the line. Leave some space between beads if you prefer a more airy look, or pack them tightly for a denser design. Knot the end of the line to keep the beads in place.
- Attach the Strands: Once all the strands are beaded, tie or secure each strand to the curtain rod. Make sure the strands are evenly spaced across the rod for a balanced appearance.
- Hang the Curtain: Place the curtain rod with the beaded strands in your window. Adjust the strands as needed to ensure they hang straight and don’t tangle.
- Enjoy the Light: Your beaded curtain is now ready to enjoy! Watch as the sunlight filters through the beads, creating a colorful and playful atmosphere in your room.
DIY Mermaid Wall Decor with Seashells and Beads
Bring a touch of ocean magic into your home with this enchanting DIY Mermaid Wall Decor. Perfect for a beach-themed room or any space that could use a bit of seaside charm, this project combines seashells, beads, and a wooden mermaid cutout to create a stunning piece of wall art. It’s a fun and creative way to personalize your decor, especially if you love the sea.

Materials Needed:
- Wooden mermaid cutout
- Assorted seashells (variety of sizes)
- Blue and white beads (different shapes and sizes)
- Small starfish decoration
- Hot glue gun and glue sticks
- Twine (for hanging)
How to Make It:
- Prepare the Mermaid Cutout: Start by laying out your wooden mermaid cutout on a flat surface. Plan where you want to place the seashells and beads to create a balanced and attractive design.
- Attach the Seashells: Begin gluing the seashells onto the mermaid’s tail and body using a hot glue gun. You can mix and match different sizes and types of shells to add texture and dimension.
- Add the Beads: Fill in the gaps between the seashells with beads, adding a sparkle to the mermaid’s design. Glue beads around the tail, body, and anywhere else you’d like to add some shine.
- Decorate the Details: Use smaller shells and beads to create details, such as the mermaid’s bra and accessories. You can also glue the starfish onto the mermaid’s hand as a finishing touch.
- Attach the Twine: Finally, glue a piece of twine to the back of the mermaid cutout for easy hanging. Let everything dry completely before displaying your beautiful mermaid wall decor.
- Display Your Mermaid: Hang your mermaid decor in a bathroom, bedroom, or any space that could use a little ocean-inspired beauty.
Personalized Beaded Christmas Bulb Gift Jars
Create a thoughtful and festive gift with these Personalized Beaded Christmas Bulb Gift Jars. These adorable jars are perfect for giving to loved ones, and they add a personal touch with custom names on the base. Using a clay pot, a clear Christmas bulb, and colorful beads, you can craft a unique and meaningful present that’s sure to be cherished.

Materials Needed:
- Small clay pots (Dollar Tree)
- Clear plastic Christmas bulbs (Dollar Tree)
- Assorted colorful beads (Dollar Tree)
- Small decorative charms (optional)
- Hot glue gun and glue sticks
- Paint and paintbrush (for decorating the clay pots)
- Permanent marker (for personalizing with names)
- Ribbon or twine (optional, for additional decoration)
How to Make It:
- Decorate the Clay Pots: Start by painting your clay pots in your desired colors. One pot can be painted in festive colors like red and black for a Minnie Mouse theme, while the other can use neutral tones like gray. Let the paint dry completely.
- Add Personalized Names: Once the paint is dry, use a permanent marker to write the names of the gift recipients on the base of each pot. This adds a personal and thoughtful touch to the gift.
- Prepare the Christmas Bulbs: Carefully remove the top of each clear Christmas bulb and begin filling them with the colorful beads. You can mix and match the beads for a festive look or create a specific color pattern that matches the theme of the jar. Add small decorative charms for extra flair.
- Attach the Bulbs to the Pots: Once the bulbs are filled, secure the tops back on. Then, using a hot glue gun, attach the bottom of each bulb to the top of the painted clay pots. Make sure they are centered and stable.
- Add Final Decorations: If desired, you can glue additional beads, ribbons, or charms to the pots for extra decoration. The gold and silver beads at the top of the Minnie Mouse-themed jar add a cute finishing touch.
- Present Your Gifts: Your Personalized Beaded Christmas Bulb Gift Jars are now ready to be gifted. They make a perfect holiday present that’s both handmade and heartfelt.
DIY Wooden Cube & Beads Candle Holder
This stylish candle holder is perfect for adding a cozy, rustic touch to your home. Made with simple materials from Dollar Tree, it’s an easy project that looks amazing on a coffee table or as a centerpiece.
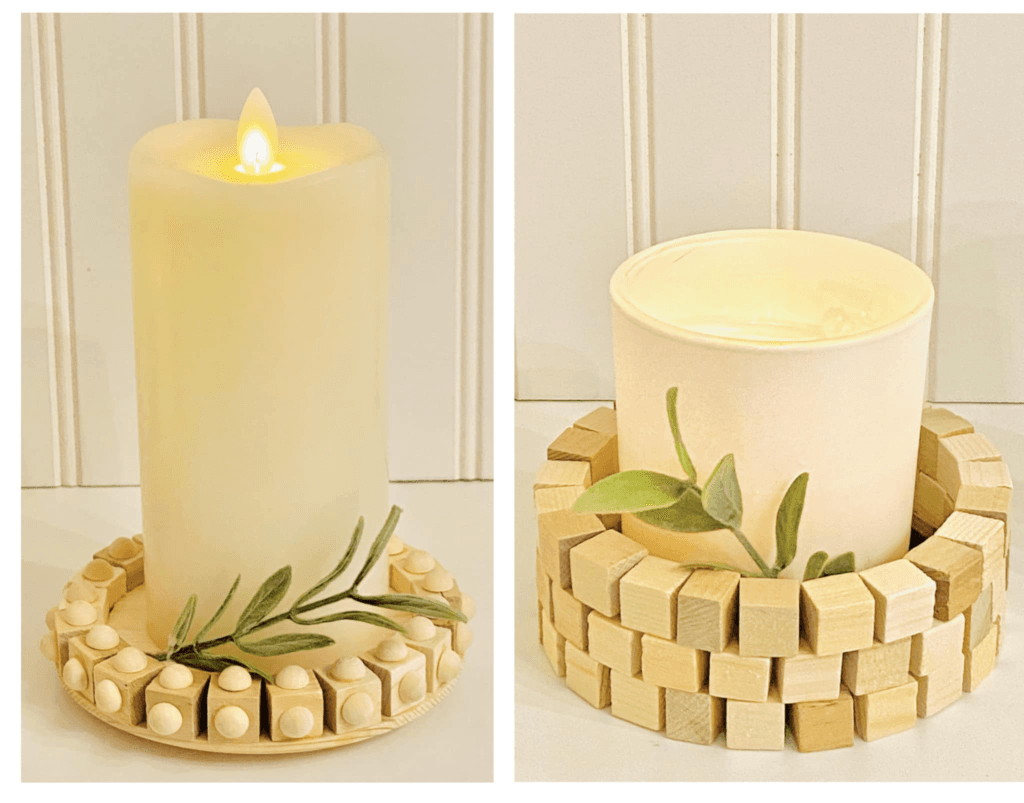
Materials Needed:
- 21 Dollar Tree wood craft cubes
- Dollar Tree Super Glue Wood Glue
- 42 half beads (found on Amazon)
- 4″ round base
For the Round Base: I repurposed a wooden box lid that I had on hand. But, you can use Dollar Tree foam board to cut circles, or their 3.75″ mirrors. Practically any round flat item found at Dollar Tree can be used, in any size you prefer. If your base is metal or glass, use Dollar Tree Super Glue Gel to attach wood cubes to the base.
How to Make It:
- Attach the Wooden Cubes: Start by gluing the wooden cubes around the edge of the round base, ensuring they’re evenly spaced.
- Stack the Second Layer: Once the first layer is dry, start adding a second row of wooden cubes on top of the first, staggering them for a brick-like pattern.
- Secure the Half Beads: For added detail, glue half beads onto the spaces between the cubes, creating a textured design.
- Let It Dry: Allow the glue to dry completely before using the candle holder. This ensures everything is securely in place.
- Add the Candle: Once dried, place your candle in the center of the holder.
This DIY Wooden Cube Candle Holder adds a handmade touch to your decor, and it’s so simple to make. Whether for a cozy evening at home or as a gift, it’s sure to impress!
DIY Love Heart Wall Hanging
This sweet and simple “Love” wall hanging is a perfect way to add a touch of warmth to your home. It’s easy to make and brings a lovely handmade vibe to any room.
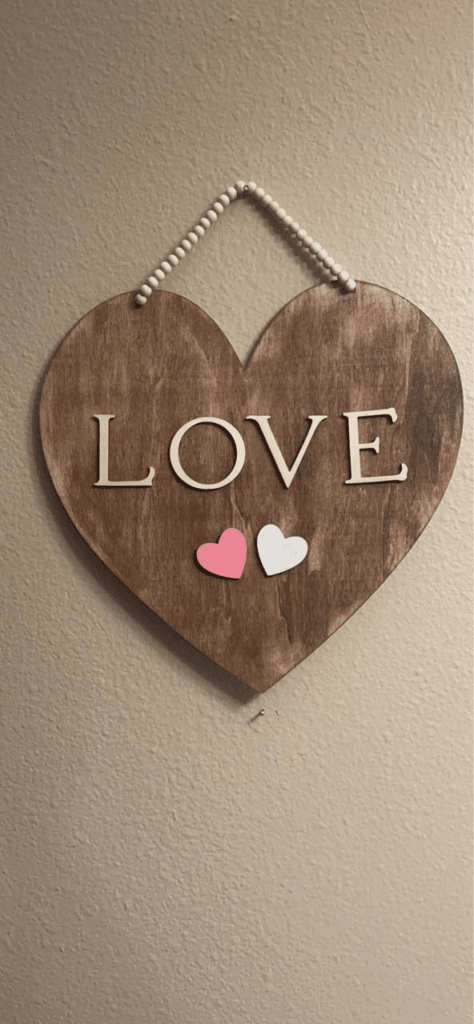
Materials Needed:
- Wooden heart cutout (Dollar Tree)
- Wooden “LOVE” letters (Dollar Tree)
- Small wooden beads (Dollar Tree)
- Stain or paint of your choice
- Craft glue or hot glue gun
- Twine or string for hanging
- Small heart embellishments (optional)
How to Make It:
- Prepare the Wooden Heart: Start by staining or painting the wooden heart cutout. Choose a color that matches your decor. Let it dry completely.
- Attach the “LOVE” Letters: Once the heart is dry, arrange the wooden “LOVE” letters in the center. Secure them with craft glue or a hot glue gun.
- Add the Beaded Hanger: String small wooden beads onto a piece of twine or string, then attach the ends to the back of the heart to create a hanger.
- Embellish with Hearts: If you have small heart embellishments, glue them onto the heart for a cute finishing touch.
- Hang and Enjoy: Your beautiful “Love” wall hanging is ready to be displayed!
Rustic Sunburst Mirror with Beads
Transform a plain mirror into a stunning piece of wall art with this rustic sunburst design. Using natural elements like wood and rope, along with decorative beads, this project adds a warm, cozy feel to any space.

Materials Needed:
- Round mirror (Dollar Tree or any craft store)
- Wooden craft sticks or small wood pieces (Dollar Tree)
- Twine or jute rope (Dollar Tree)
- Small wooden beads (Dollar Tree)
- Hot glue gun and glue sticks
- Faux greenery or flowers for decoration
- Stain or paint for the wooden pieces (optional)
How to Make It:
- Prepare the Wooden Pieces: If you prefer, stain or paint the wooden sticks or small wood pieces to give them a rustic look. Let them dry completely.
- Create the Sunburst Design: Arrange the wooden pieces around the mirror in a sunburst pattern. Secure each piece with hot glue, ensuring they are evenly spaced.
- Add the Rope: Glue the jute rope around the outer edge of the mirror to hide the ends of the wooden pieces and create a neat border. You can also add another layer of rope around the inner edge of the mirror for added texture.
- Attach the Beads: Glue the small wooden beads along the inner edge of the mirror, or create a beaded hanger for the mirror using twine and beads.
- Decorate with Greenery: Add faux greenery or flowers to the top or bottom of the mirror as a finishing touch.
- Hang Your Mirror: Your rustic sunburst mirror is ready to hang and add a charming, handcrafted touch to your home!
Vintage Heart Door Hanger with Beads and Flowers
This charming heart-shaped door hanger is a beautiful blend of rustic and vintage styles. Crafted with wooden pieces, scrapbook paper, and wooden beads, it’s perfect for adding a touch of warmth to your home decor.
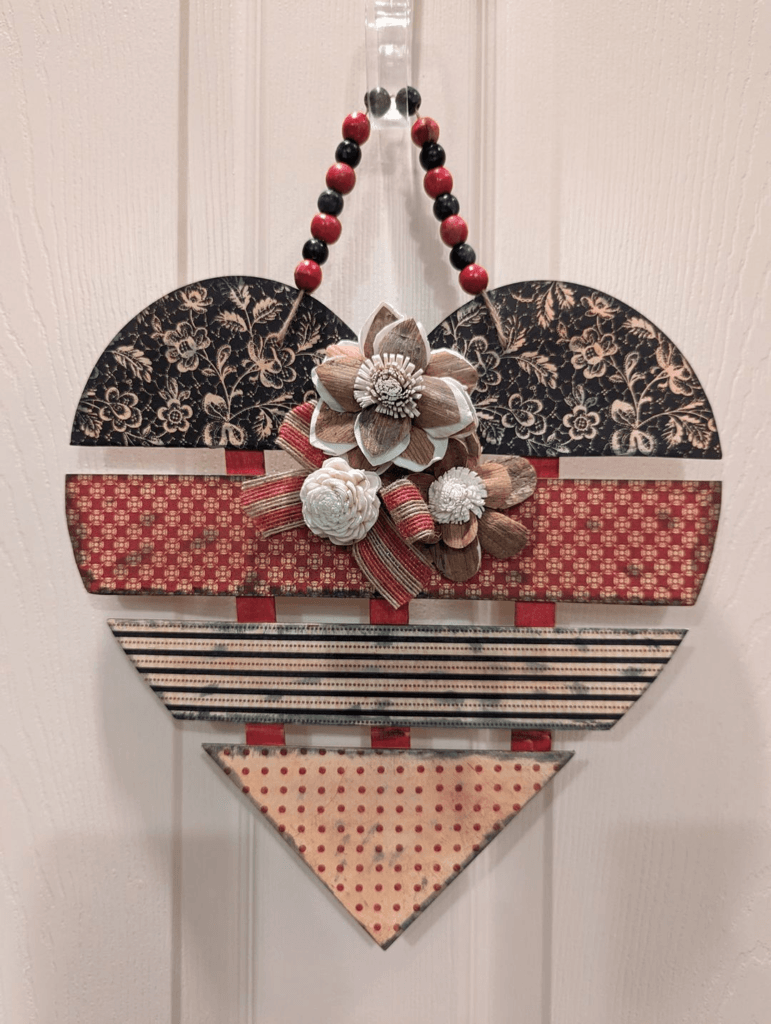
Materials Needed:
- Wooden heart shape (Dollar Tree or any craft store)
- Scrapbook paper in vintage patterns (from your stash or craft store)
- Wooden beads (Dollar Tree or craft store)
- Wooden flowers (Dollar Tree or craft store)
- Ribbon or fabric strips for decoration
- Mod Podge or Glue (Must have in my craft inventory)
- Hot glue gun and glue sticks
How to Make It:
- Cover the Heart: Start by cutting the scrapbook paper to fit the wooden heart shape. Use Mod Podge or craft glue to adhere the paper to the heart, smoothing out any bubbles. Let it dry completely.
- Attach the Beads: Thread the wooden beads onto a piece of string or wire to create a hanger for your door hanger. Secure the ends to the top of the heart with hot glue.
- Add the Flowers: Arrange the wooden flowers on the heart and attach them with hot glue. You can place them in the center or to the side, depending on your design preference.
- Decorate with Ribbon: Use ribbon or fabric strips to add some extra flair around the flowers or along the edges of the heart.
- Finish and Hang: Once everything is secure, your vintage heart door hanger is ready to display on your door or wall.
Valentine’s Day Mini Wreath on a Picket Fence Decor
I crafted this adorable Valentine’s Day decoration using Dollar Tree signs to create a charming little white picket fence. I love the idea of swapping out the wreath and sign for each holiday, making it a versatile piece that will stay fresh and festive year-round. I’m planning to display it on top of my fridge to add a bit of love to my kitchen!

Materials Needed:
- Dollar Tree wood picket fence signs (2-3 signs depending on the size)
- Dollar Tree wood plaque for the “XOXO” sign
- Wooden letters spelling “XOXO”
- Small wooden beads (red)
- Ribbon and heart embellishment for the bow
- Greenery wreath (Target)
- Hot glue gun and glue sticks
- Paint (optional for letters and plaque)
How to Make It:
- Create the Fence: Start by gluing the Dollar Tree wood signs together to form a small picket fence. You can paint the fence white for a classic look or leave it as is.
- Make the Mini Sign: Paint the wood plaque and wooden letters in your desired colors. Once dry, glue the letters onto the plaque, then glue the small red wooden beads around the edges to frame the sign.
- Assemble the Wreath: Attach the wreath to the top center of the picket fence using hot glue. Then, attach the mini sign to the center of the wreath.
- Add the Bow: Create a bow using ribbon and embellish it with a heart-shaped decoration. Glue the bow to the top of the wreath for a finishing touch.
- Display: Your Valentine’s Day mini wreath on a picket fence decor is ready to display! Place it on your fridge or any spot in your kitchen that needs a little extra love.
Spring Tier Tray Decor with Bee
Brighten up your home with this charming spring-themed tiered tray display. The tray features a cute bee house with the phrase “Home is where my Honey Bee,” along with a “Hello Spring” sign and a mini beehive adorned with yellow flowers. Most of the items were sourced from Dollar Tree, except for the wooden beads, cardstock, and tag. This setup is perfect for adding a touch of spring to any room.
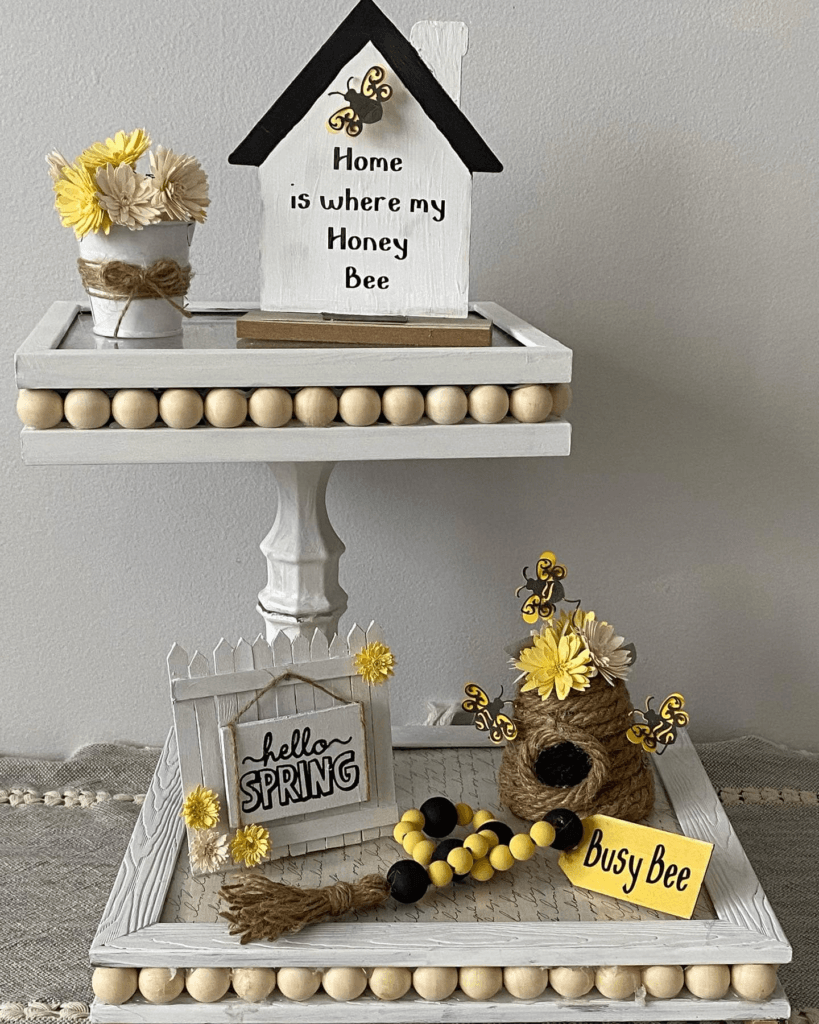
Materials Needed:
- Wooden tiered tray (Dollar Tree)
- Small wooden house decor (Dollar Tree)
- Wooden beads (natural and painted yellow/black)
- Cardstock for signs (yellow and white)
- Mini bee decorations (Dollar Tree or handmade)
- Twine and jute rope (for wrapping)
- Small flowers and greenery (Dollar Tree)
How to Make It:
- Prepare the Tray: Assemble and paint your wooden tiered tray in a color of your choice. I went with a whitewash to give it a fresh, clean look.
- Create the Signs: Paint and decorate the small wooden house with a bee theme. I added “Home is where my Honey Bee” using stencils and black paint. For the mini “hello SPRING” sign, I used cardstock and tiny wooden flowers.
- Add the Decorations: Use jute rope to wrap the small bee hive, then glue on the mini bees. String the wooden beads together to create a garland, adding tassels on the ends for a finished look.
- Assemble the Tray: Arrange all the decor pieces on the tray, placing the house on the top level and the “hello SPRING” sign, bee hive, and bead garland on the bottom level.
Other Craft Beads Ideas without Guide
I share a lot of projects on the same page for this blog and it affects me negatively in terms of diversity, but I choose this way because it is easier for you readers. Above I shared 17 how-to craft breads decor/ideas. 17 different projects! Now I will share content consisting only of pictures. Please let me know in the comments if there is a project you are curious about how it is done.
