
")
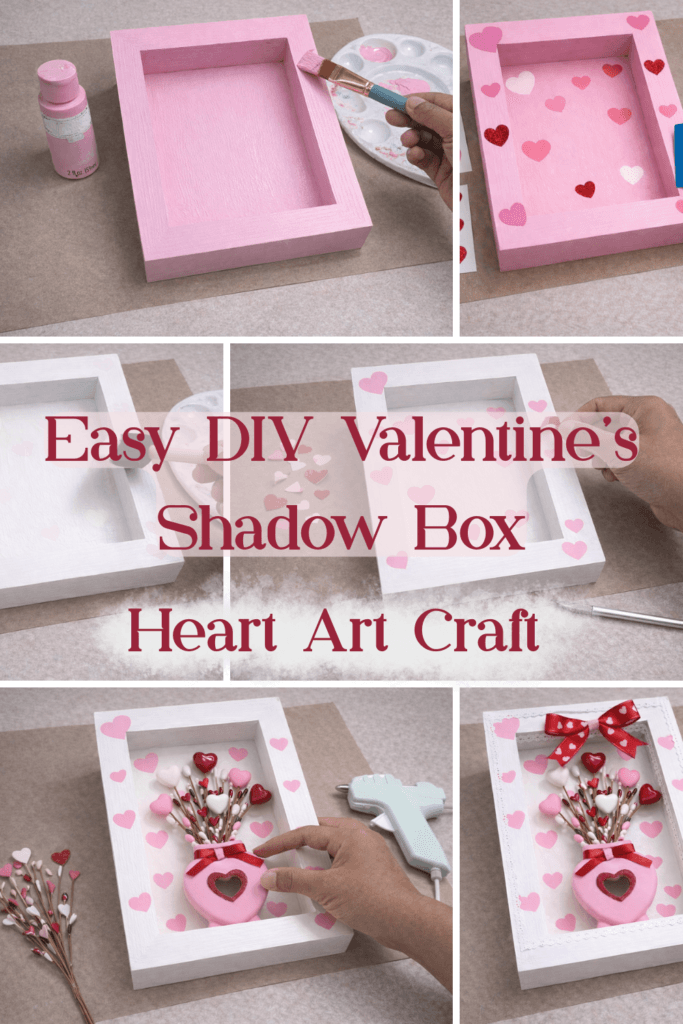
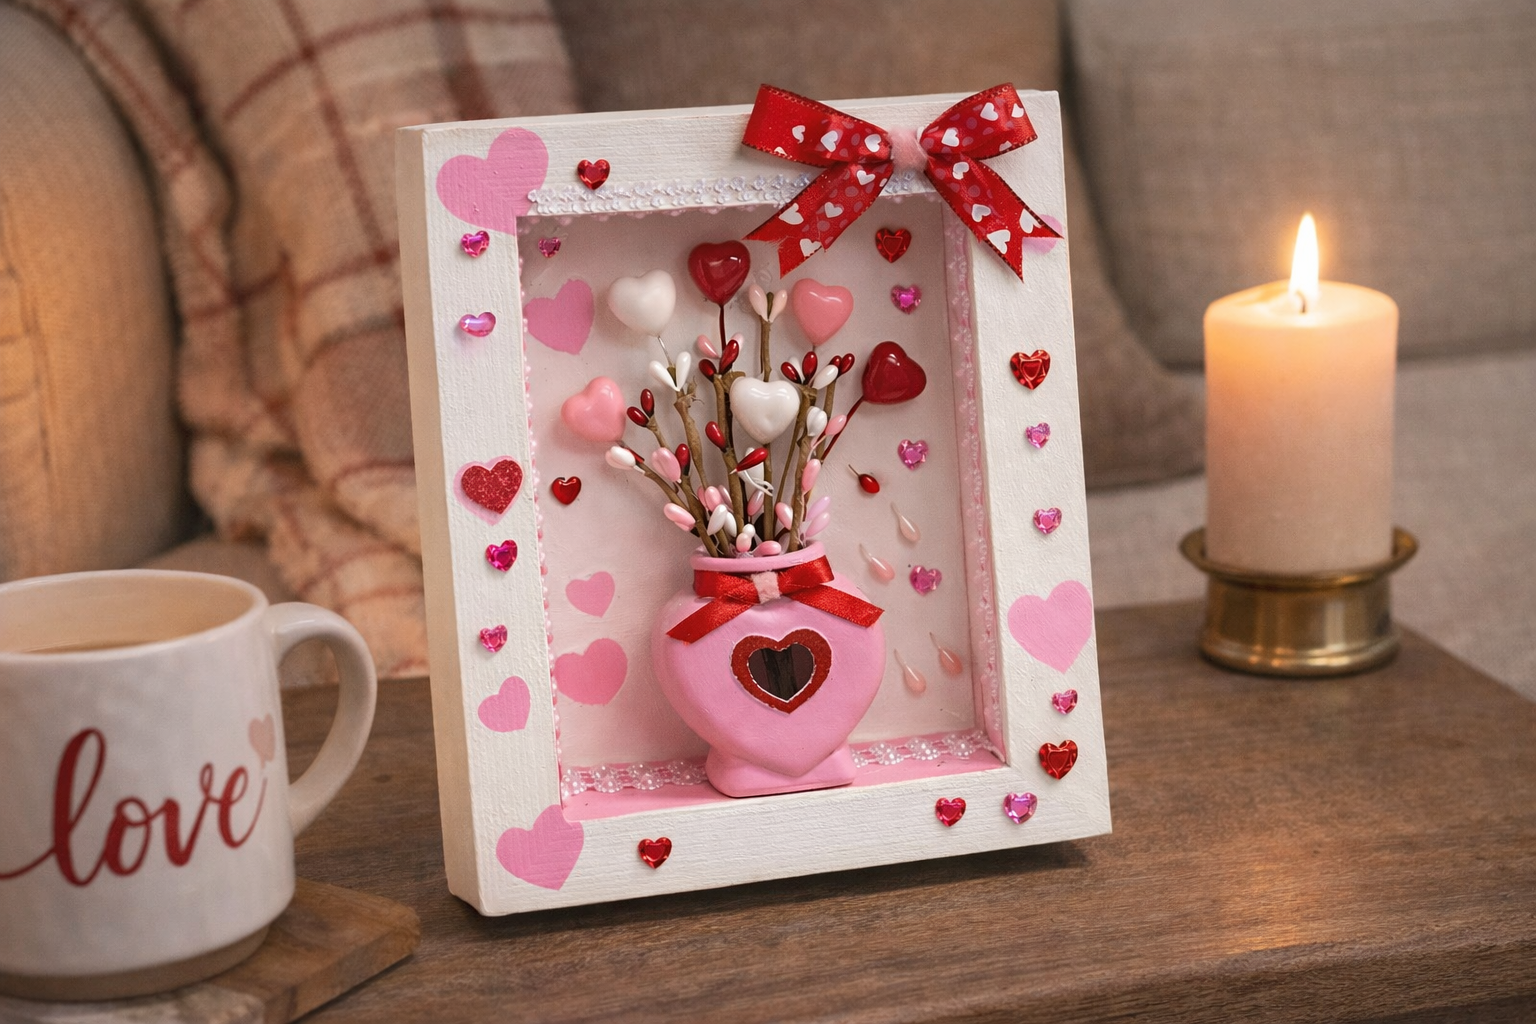
Create your own DIY Valentine’s Heart Shadow Box Craft with this easy step-by-step tutorial. This charming painted heart reveal design is perfect for adding a romantic touch to your Valentine’s Day home decor and seasonal decorations.
See also: Easy Diy Valentines Day Heart Flower Centerpiece
Theme: Valentine’s Day
Materials Needed
- Wooden Shadow Box
- Small Heart-shaped Vase
- Pink Acrylic Craft Paint
- Light Neutral/White Acrylic Craft Paint (e.g., Waverly Plaster)
- Assorted Heart-shaped Vinyl Stickers (for masking)
- Valentine’s Day Ribbons (patterned and solid red)
- White Decorative Lace Sticker Trim
- Assorted Heart Embellishments (glitter hearts, small gem hearts, heart-tipped floral picks)
- Craft Adhesive (e.g., hot glue sticks, liquid craft glue)
Step-by-Step Instructions For Valentine’s Craft
Step 1: Prepare & Base Paint Shadow Box
Begin by applying a coat of pink acrylic craft paint to the entire wooden shadow box. This includes the outer frame and the interior back panel. Ensure even coverage without heavy pooling. Let the paint dry completely before proceeding.
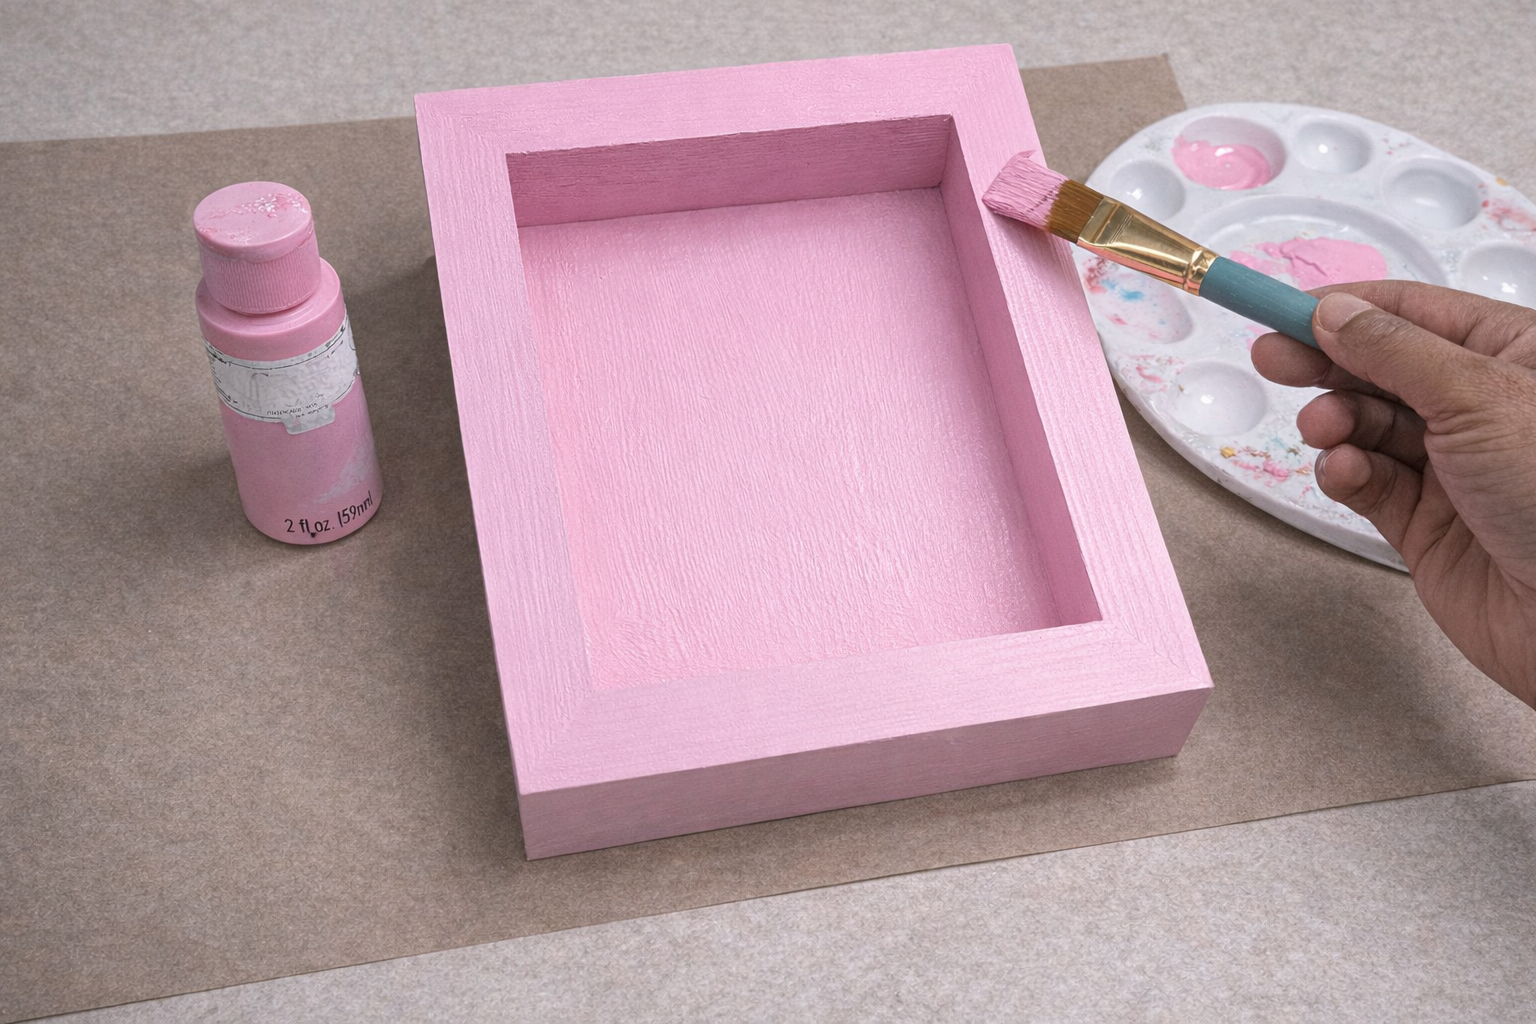
💡 Pro Tip: For a smooth, professional finish, apply two thin coats of paint instead of one thick coat. Allow at least 30 minutes of drying time between coats and a minimum of 2-4 hours for the final base coat to fully cure, depending on your paint and humidity.
Step 2: Apply Sticker Resist Design
Once the pink base coat is thoroughly dry, carefully place assorted heart-shaped vinyl stickers onto the shadow box. Position them strategically on the outer frame and the inner back panel where you want the pink color to show through the top coat. Press firmly to ensure good adhesion and prevent paint from seeping underneath.
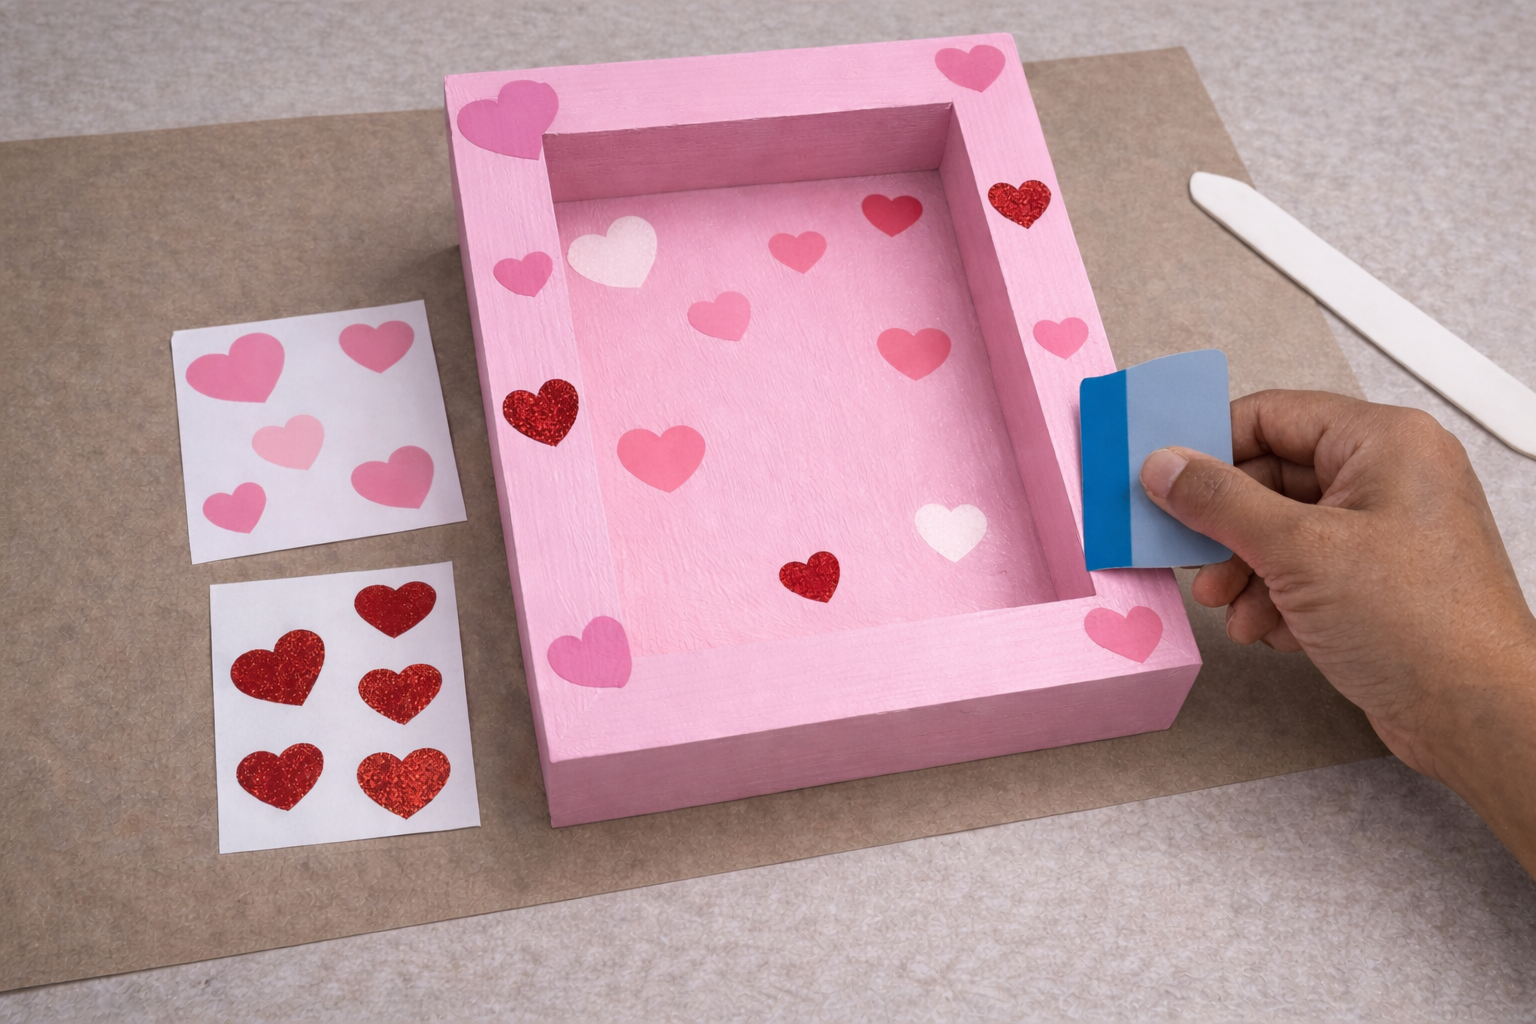
💡 Pro Tip: Use a credit card or a bone folder to firmly burnish the edges of the stickers, especially on any textured surfaces, to create a sharp, clean resist line. This prevents fuzzy edges when peeling.
Step 3: Apply Neutral Top Coat
Now, paint over the entire shadow box, including the applied heart stickers, with your chosen light neutral or white acrylic craft paint (like Waverly Plaster). Apply thin, even coats to achieve opaque coverage over the pink base and the stickers. Let this top coat dry completely.
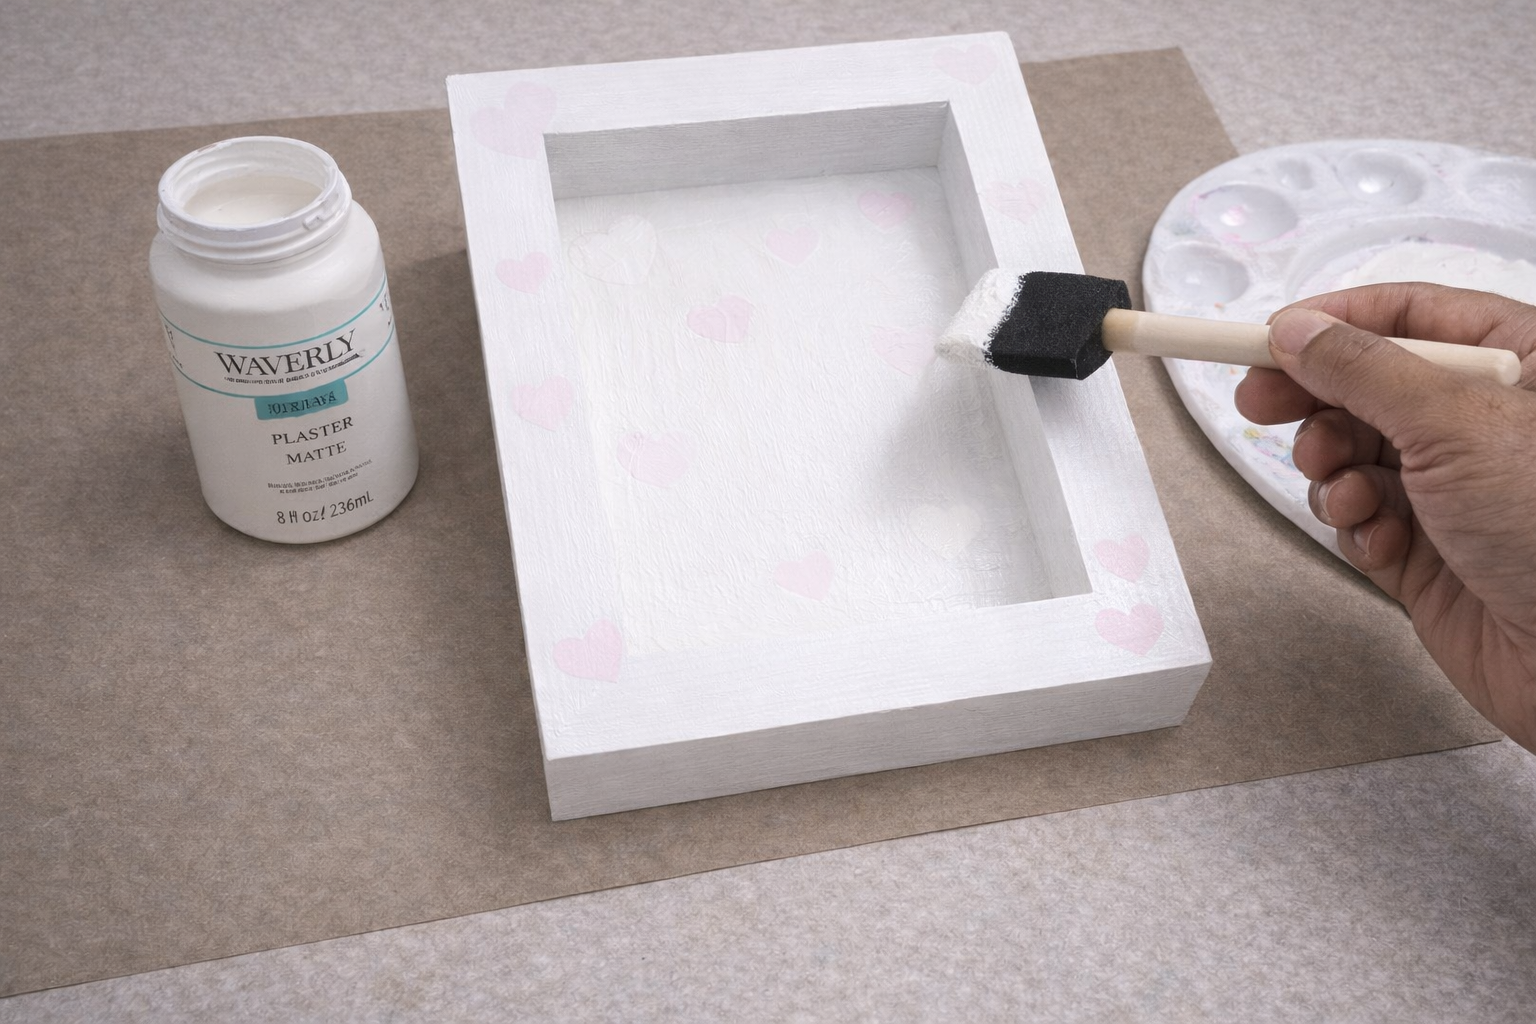
💡 Pro Tip: When painting over stickers, use a dabbing motion with a sponge brush or very light strokes with a flat brush to avoid lifting the sticker edges or forcing paint underneath. Two thin coats are better than one thick coat for optimal coverage and crisp lines. Allow ample drying time between coats (at least 1 hour).
Step 4: Peel Stickers & Reveal Design
Once the neutral top coat is fully dry to the touch, carefully and slowly peel away all the heart-shaped vinyl stickers. This will reveal the crisp pink heart designs underneath, creating a charming two-tone effect. If any paint has bled slightly, you can gently scrape it away with a craft knife or touch up with a fine brush.
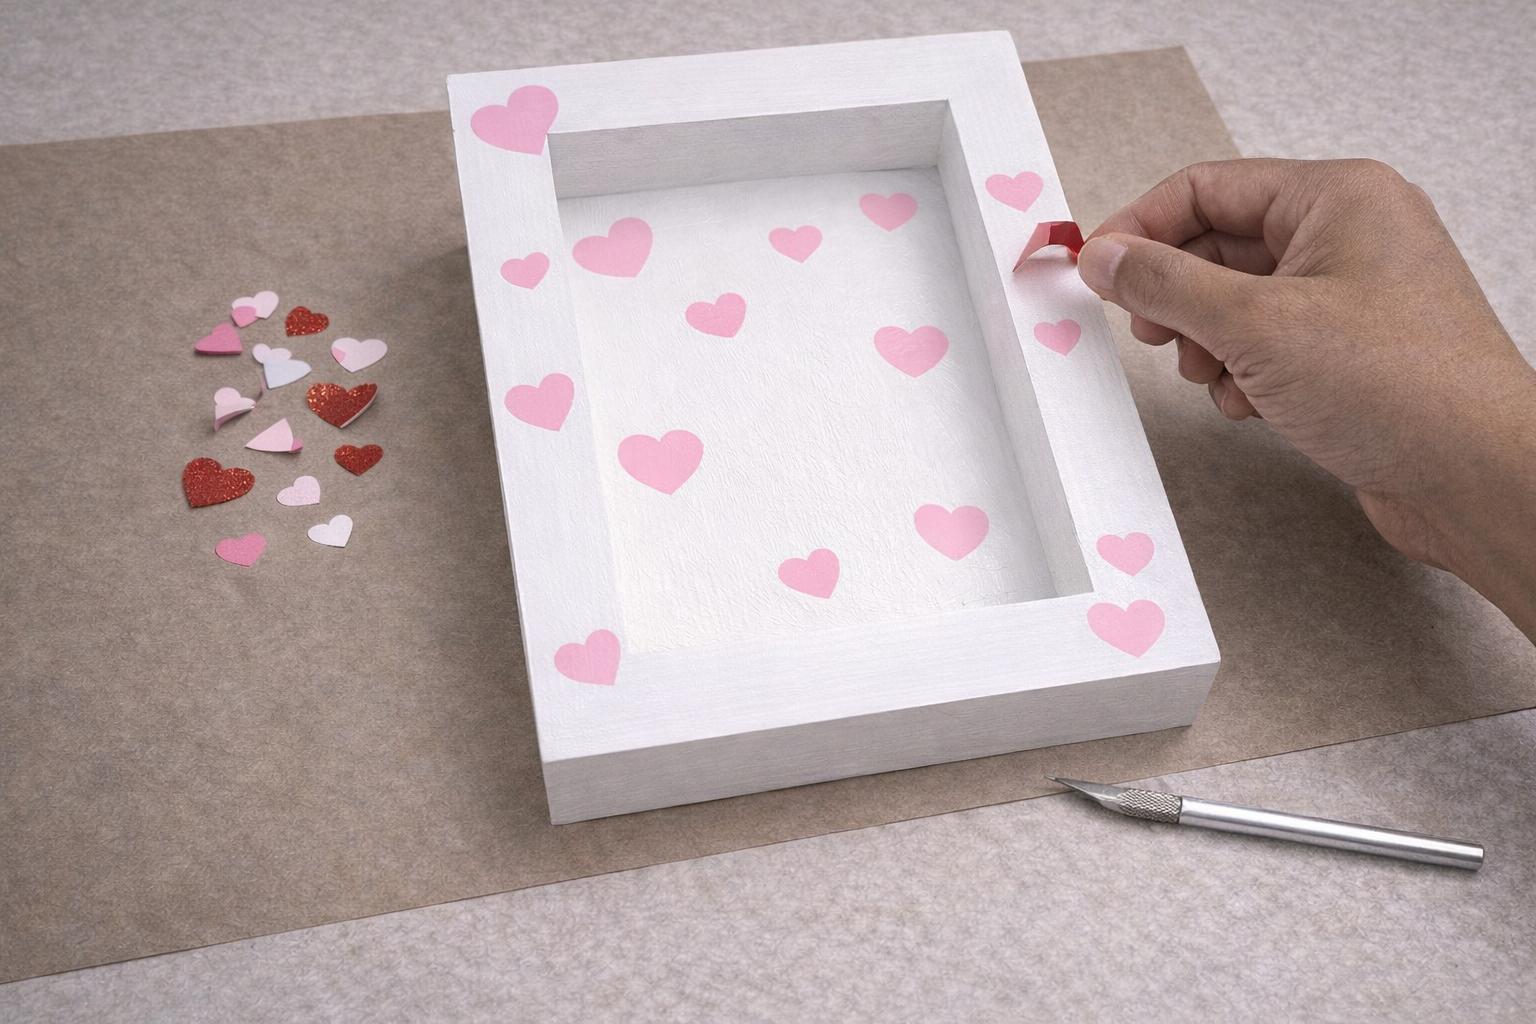
💡 Pro Tip: For the cleanest lines, peel the stickers back at a 45-degree angle while the paint is dry but not fully cured (usually within 24 hours of the final coat). If peeling after a longer period, sometimes warming the sticker with a hairdryer on low can help release it cleanly.
Step 5: Assemble Vase & Decor
If your heart-shaped vase isn’t already pink, paint it with the pink acrylic craft paint and let it dry. Arrange the assortment of heart-tipped floral picks or sprays inside the vase to create a lovely bouquet. Secure the vase firmly inside the shadow box using a strong craft adhesive like hot glue.
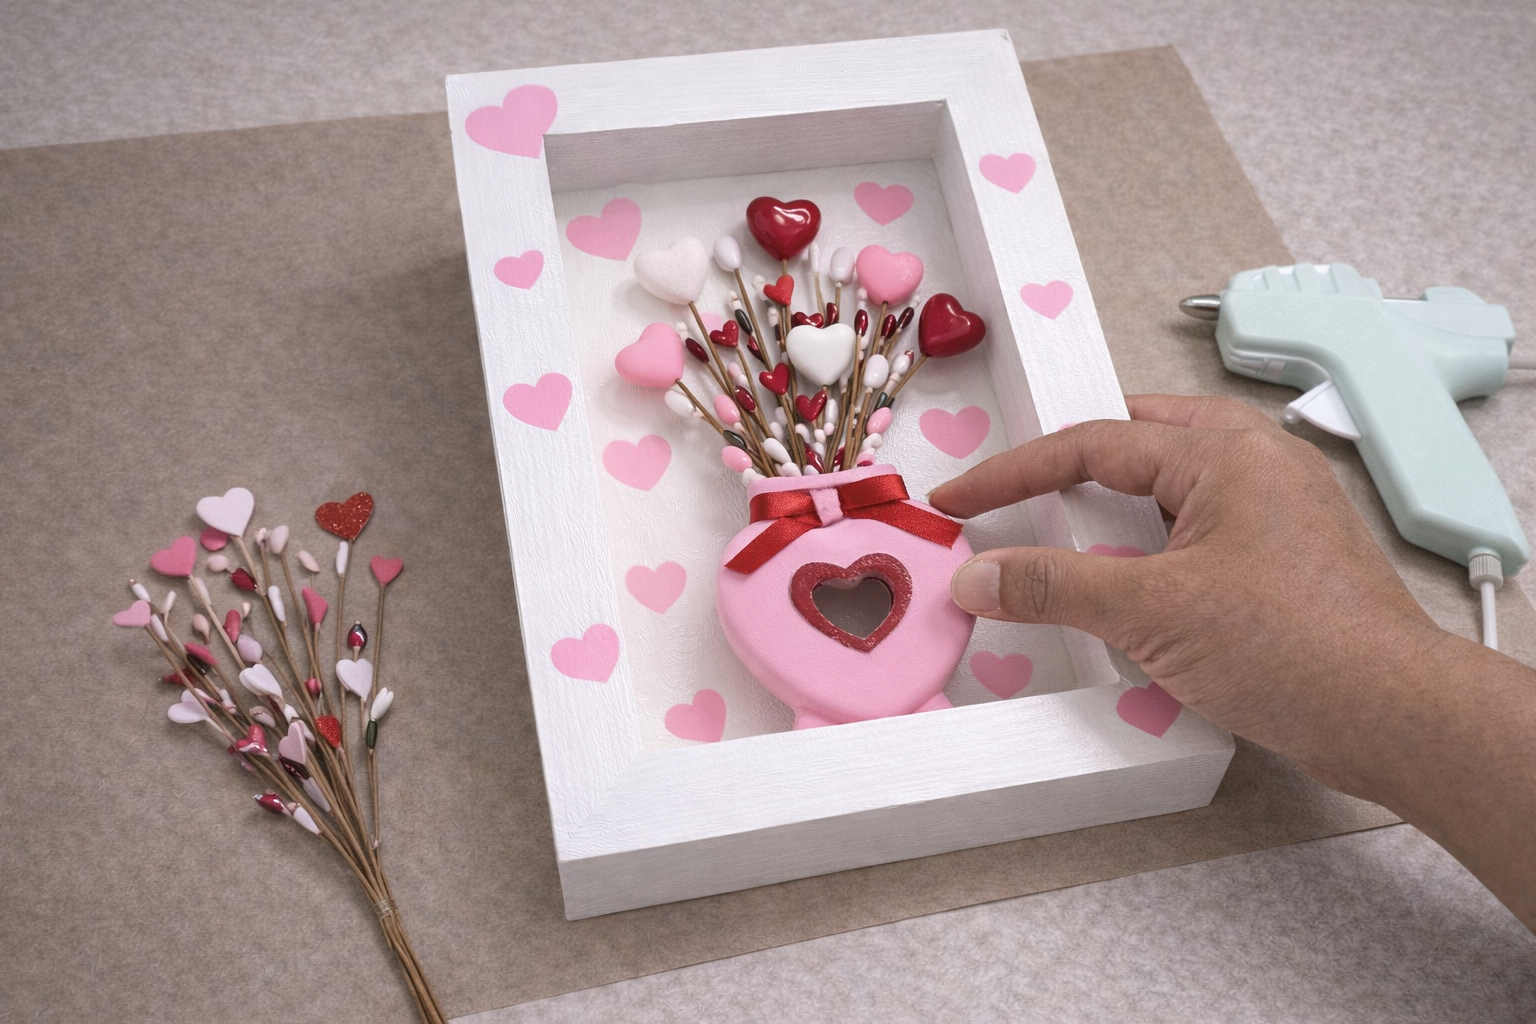
💡 Pro Tip: To keep the floral picks upright and secure in the vase, you can place a small piece of floral foam or a few dabs of hot glue inside the vase before inserting the picks. When gluing the vase into the shadow box, apply hot glue to the bottom of the vase and press down firmly for a stable hold.
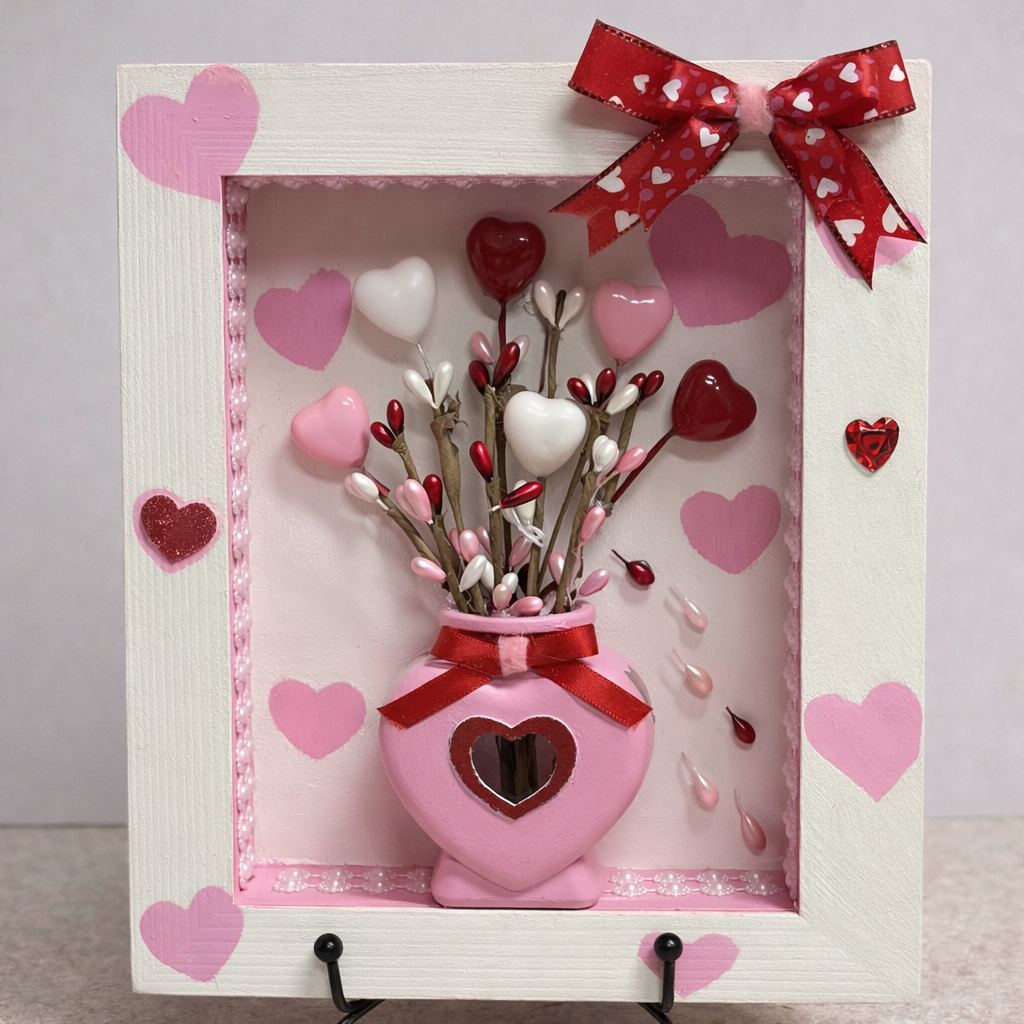
Step 6: Frame Trim & Ribbon Bow
Apply the white decorative lace sticker trim along the inner edge of the shadow box frame, creating a delicate border. Next, create a festive bow using the Valentine’s Day ribbon (e.g., red with white hearts) and attach it to the top center of the shadow box frame using craft adhesive.

💡 Pro Tip: When applying sticker trim, start from an inconspicuous corner or seam to make the overlap less noticeable. For tying a perfect bow, you can tie it separately and then hot glue it in place, or use floral wire to secure the bow and then glue the wire ends to the back of the frame.
Step 7: Apply Final Heart Accents
Complete your Valentine’s masterpiece by adding final heart embellishments. Strategically place glitter hearts and small gem hearts onto the frame and within the shadow box to add sparkle and depth. Secure all embellishments with craft adhesive.
💡 Pro Tip: Before permanently adhering, lay out all your final embellishments to visualize the placement. Use a small dab of clear-drying craft glue for gems and glitter pieces to avoid visible glue marks. Consider varying sizes and textures for visual interest.
Get inspired with daily seasonal ideas on the Dollar Tree Craft Blog.
Inspiration / Credit: Jessica Espinosa