
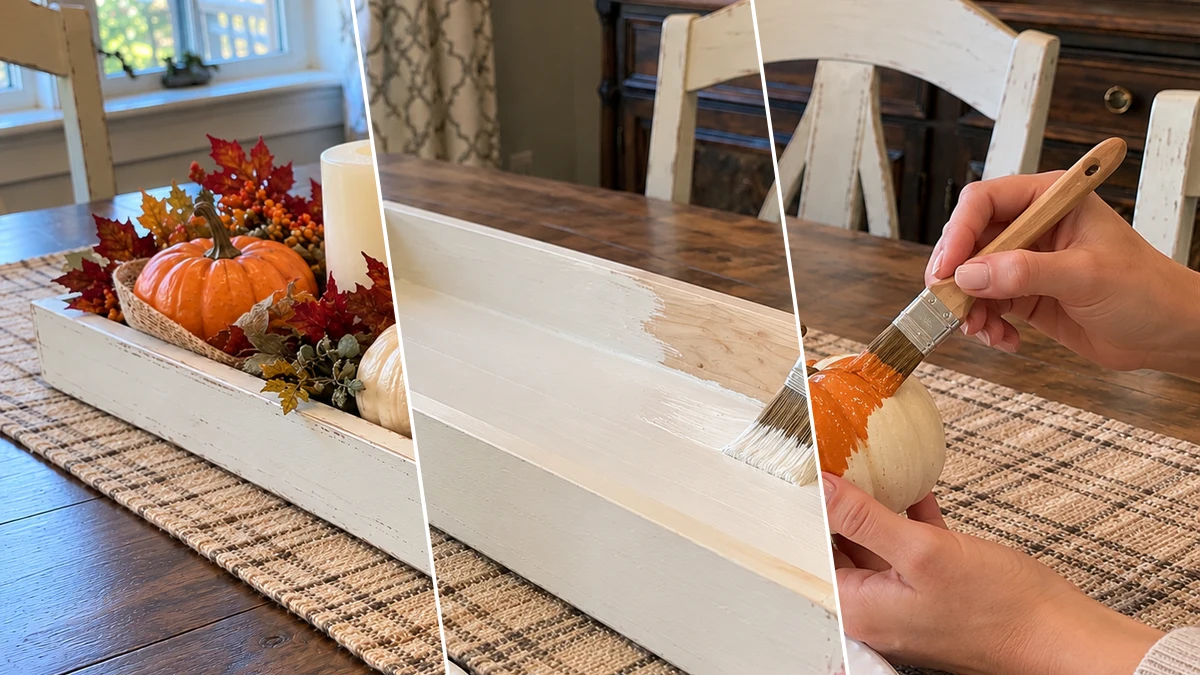
Bring the warm, inviting spirit of autumn to your home with a DIY Distressed Wooden Tray Fall Centerpiece. This project creates a beautiful farmhouse-style display featuring faux pumpkins, fall foliage, and pillar candles. It's an easy way to add seasonal charm to a dining table or console. Prepare to craft a welcoming focal point for your fall and Thanksgiving decor.
Project at a Glance
- Difficulty: Easy
- Estimated active time: 35 minutes to 55 minutes (drying and curing waits not included)
- Estimated component cost: $10 to $15 (reusable tools and general supplies excluded)
- Main material: Wood
- Suggested placement: Dining Table
Crafting a Farmhouse Fall Centerpiece
The farmhouse aesthetic, known for its rustic charm and cozy feel, is a popular choice for autumn decor. A distressed wooden tray provides the perfect foundation for this style, adding character and a sense of history to your seasonal display. This approach allows for a timeless piece that complements various home interiors.
This centerpiece combines the natural textures of burlap and wood with the vibrant colors of faux autumn foliage and pumpkins. The addition of pillar candles provides a soft, ambient glow, enhancing the cozy atmosphere. It is designed to be an accessible project, allowing for a custom fall display without complex techniques.
The arrangement is versatile, suitable for a dining table, coffee table, or entryway console. Its modular design also means components can be easily swapped out for different seasons or occasions, extending the life and utility of the distressed tray base.
Materials for DIY Distressed Wooden Tray Fall Centerpiece for a Thanksgiving Table
- Rectangular Wooden Tray
- Cream Acrylic Craft Paint
- Medium-Grit Sandpaper
- Burlap Ribbon (wide)
- Assorted Foam Pumpkins (various sizes)
- Faux Autumn Foliage & Berry Sprays
- Three Pillar Candles (cream/white)
Need another material? Browse current craft supplies and deals.
Assembling Your Distressed Wooden Tray Fall Centerpiece
Creating this fall centerpiece involves a few straightforward steps, from preparing the tray to arranging the decorative elements. The process focuses on layering textures and colors to achieve a cohesive autumn display. Follow these instructions to bring your farmhouse-inspired centerpiece to life.
Step 1: Paint the Wooden Tray
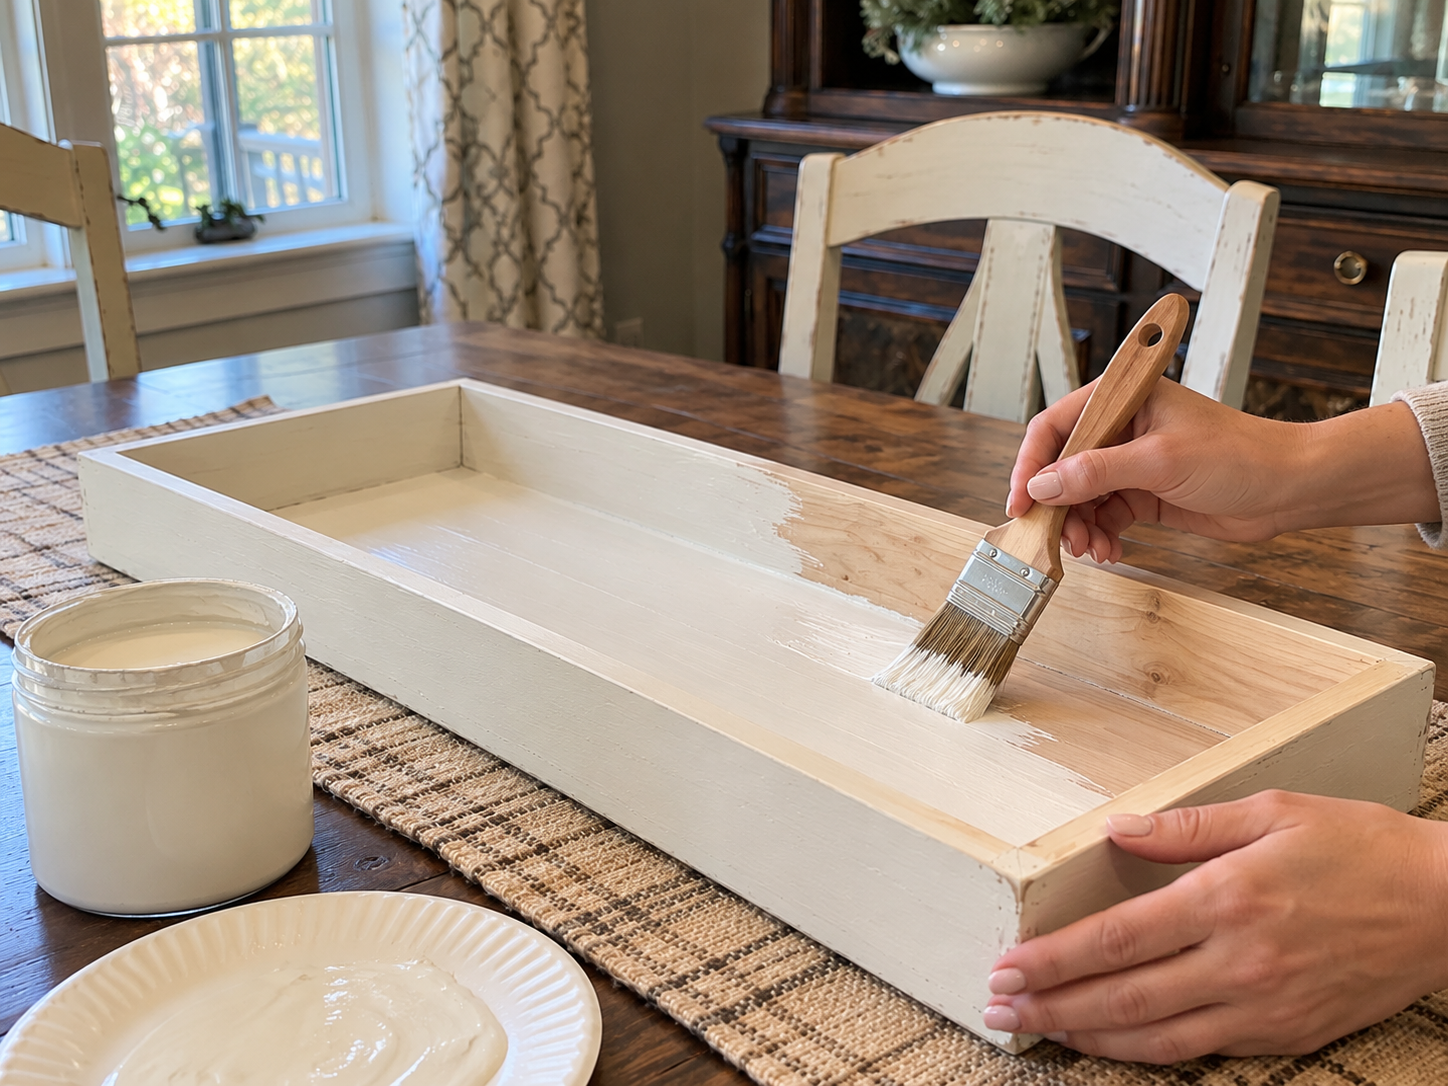
Begin by ensuring your wooden tray is clean and free of dust. Apply an even coat of cream-colored acrylic craft paint to the entire exterior and interior of the tray. Use a flat brush for smooth, consistent coverage. Allow the first coat to dry completely before applying a second coat if needed for opaque coverage.
Step 2: Distress the Tray Edges
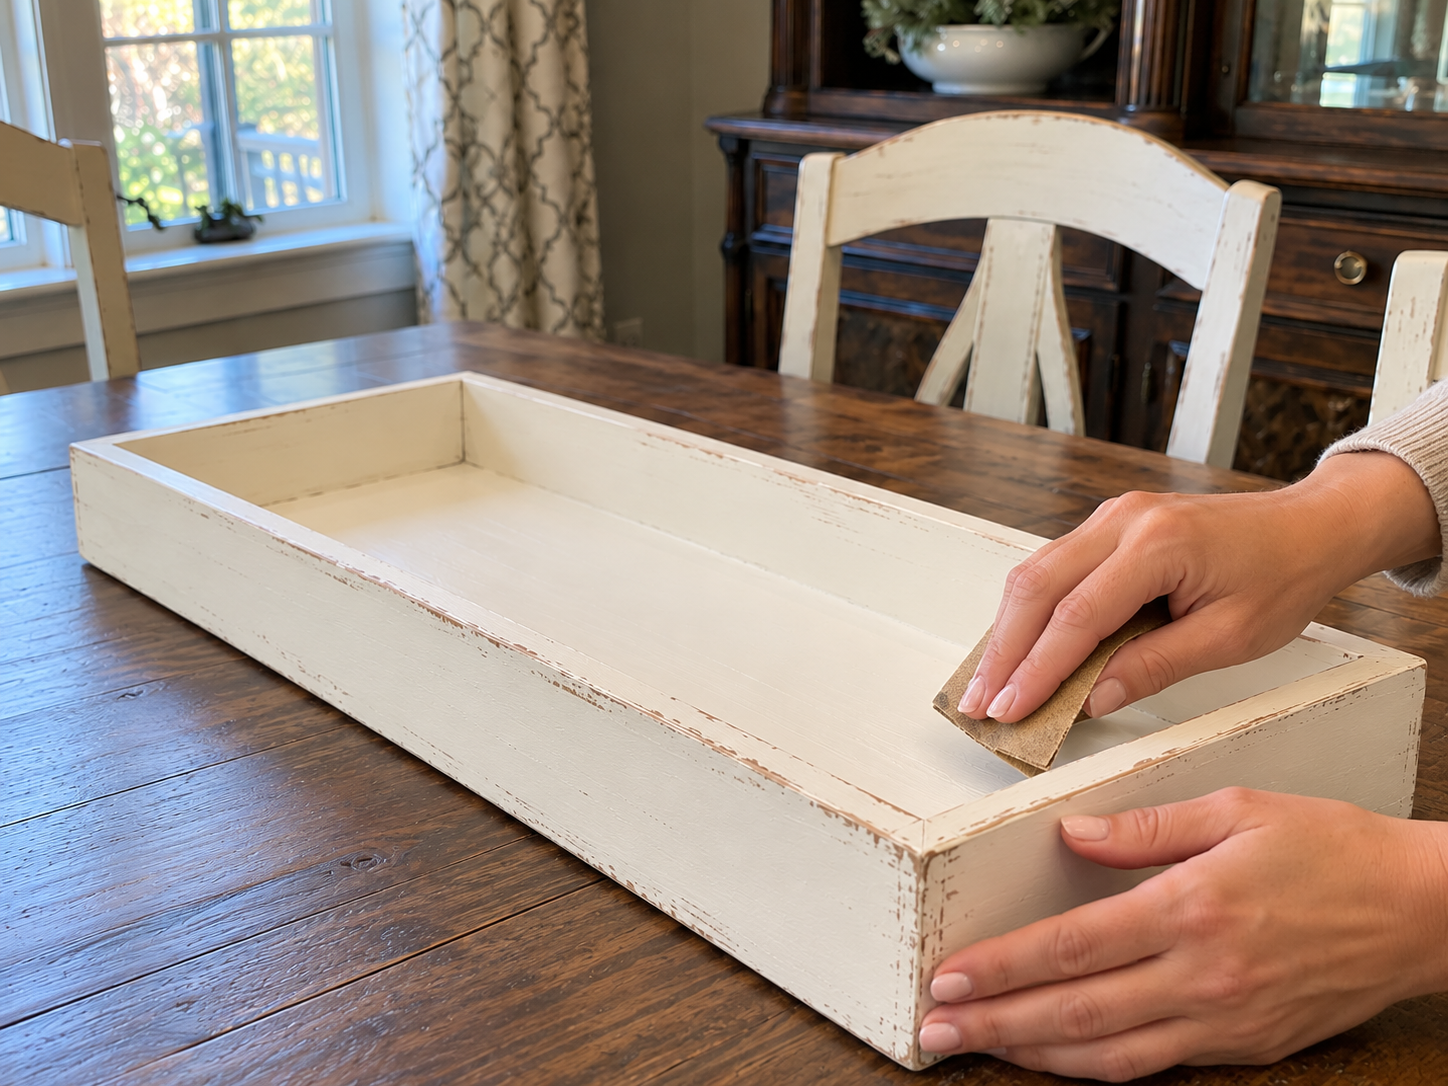
Once the paint is fully dry, take a piece of medium-grit sandpaper (around 120-180 grit). Lightly sand the edges, corners, and any raised areas of the tray. The goal is to gently remove some paint to reveal the natural wood underneath, creating a worn, farmhouse-style distressed look. Dust off any sanding residue with a dry cloth.
Step 3: Place the Burlap Runner
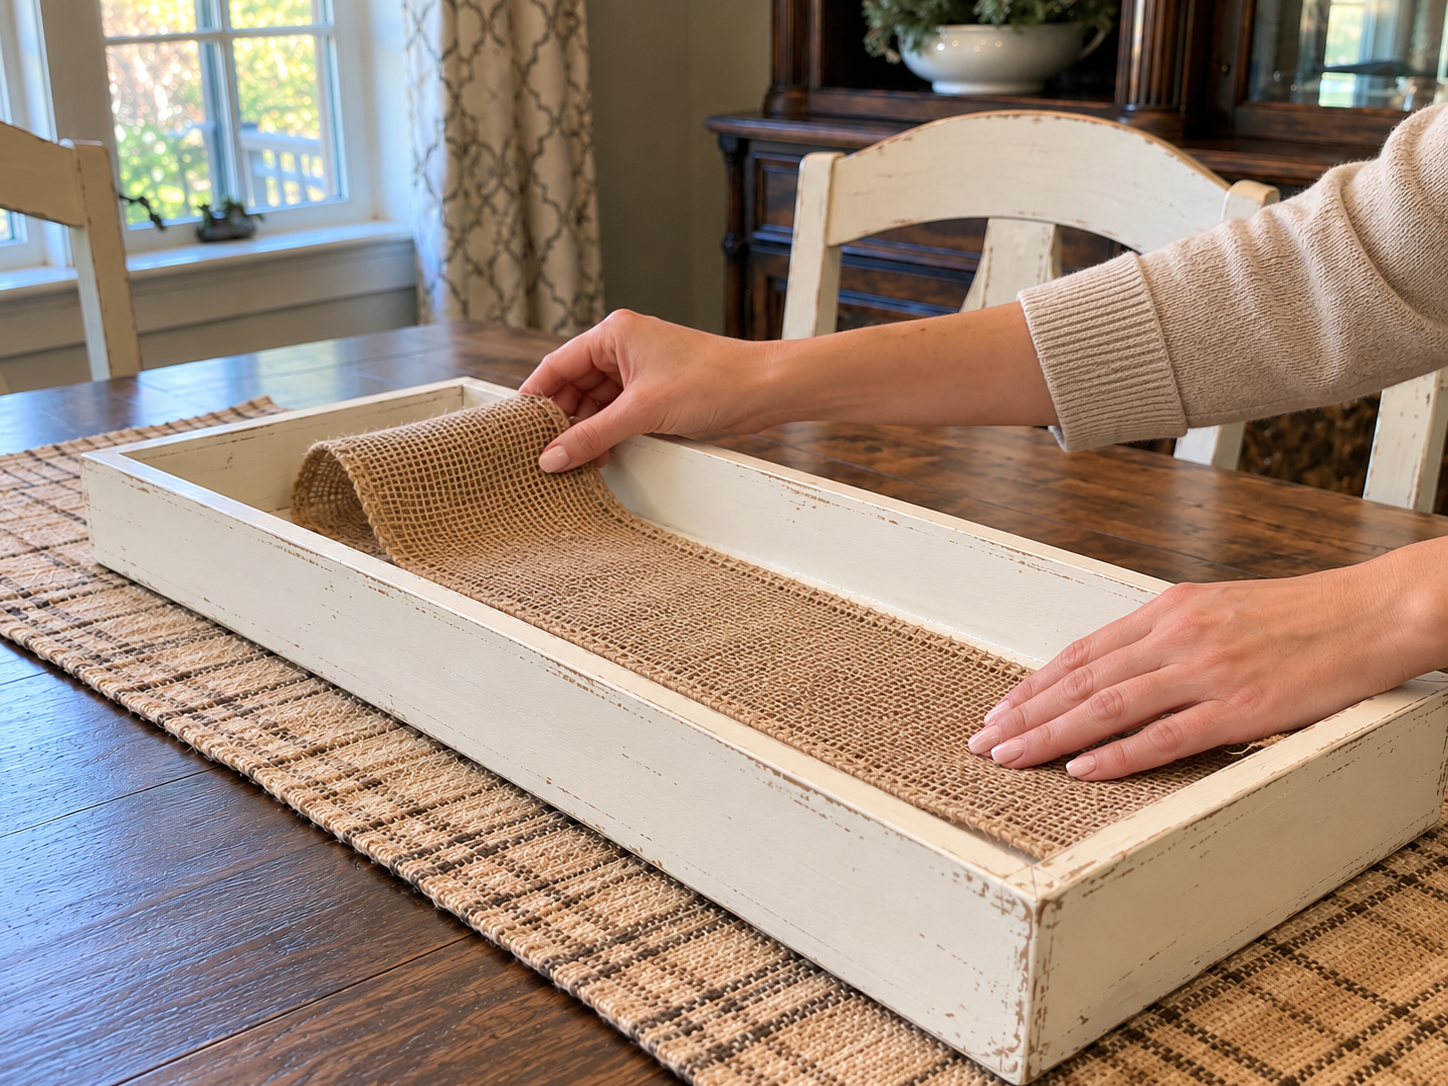
Measure and cut a length of wide burlap ribbon to fit the inside bottom of your distressed tray, allowing it to gather slightly if you desire more texture. Carefully lay the burlap ribbon inside the tray, centering it and adjusting it to form a soft 'runner' or base for your arrangement. No need to glue it down, as its weight and the items placed on it will hold it in place.


Step 4: Paint Foam Pumpkins
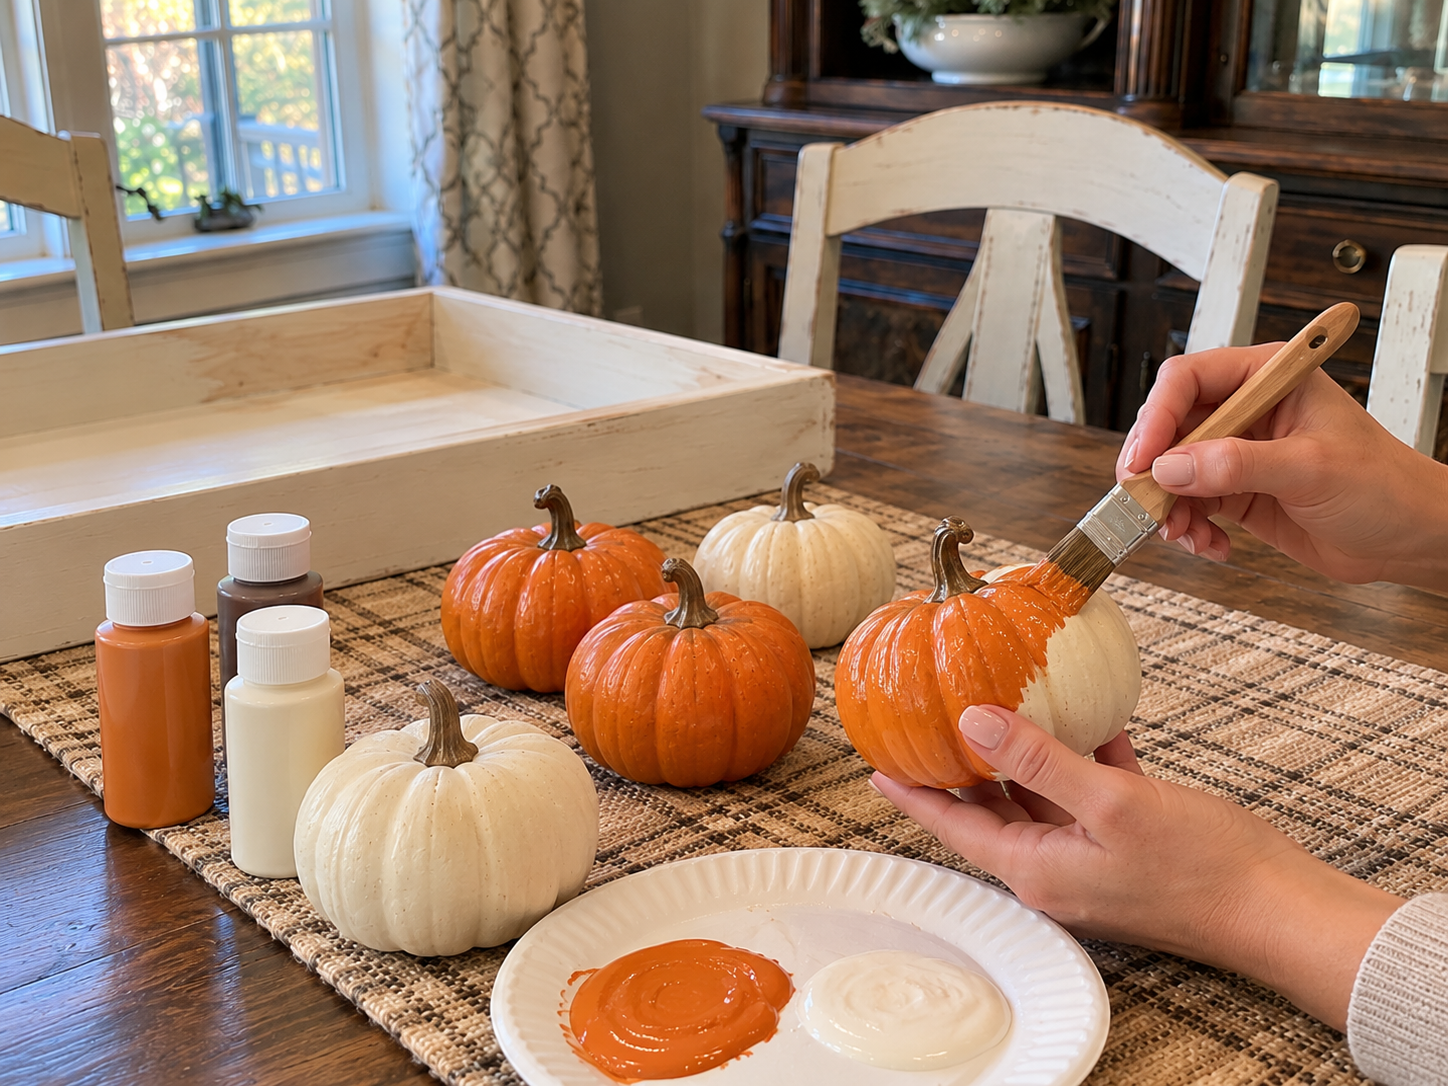
Take your assorted foam pumpkins. Choose some to paint classic autumn orange and others a soft cream or off-white. Apply acrylic craft paint with a brush or sponge, ensuring full coverage. You may need two coats for a smooth finish. Allow them to dry completely according to paint instructions before handling.
Step 5: Arrange Pumpkins on Burlap
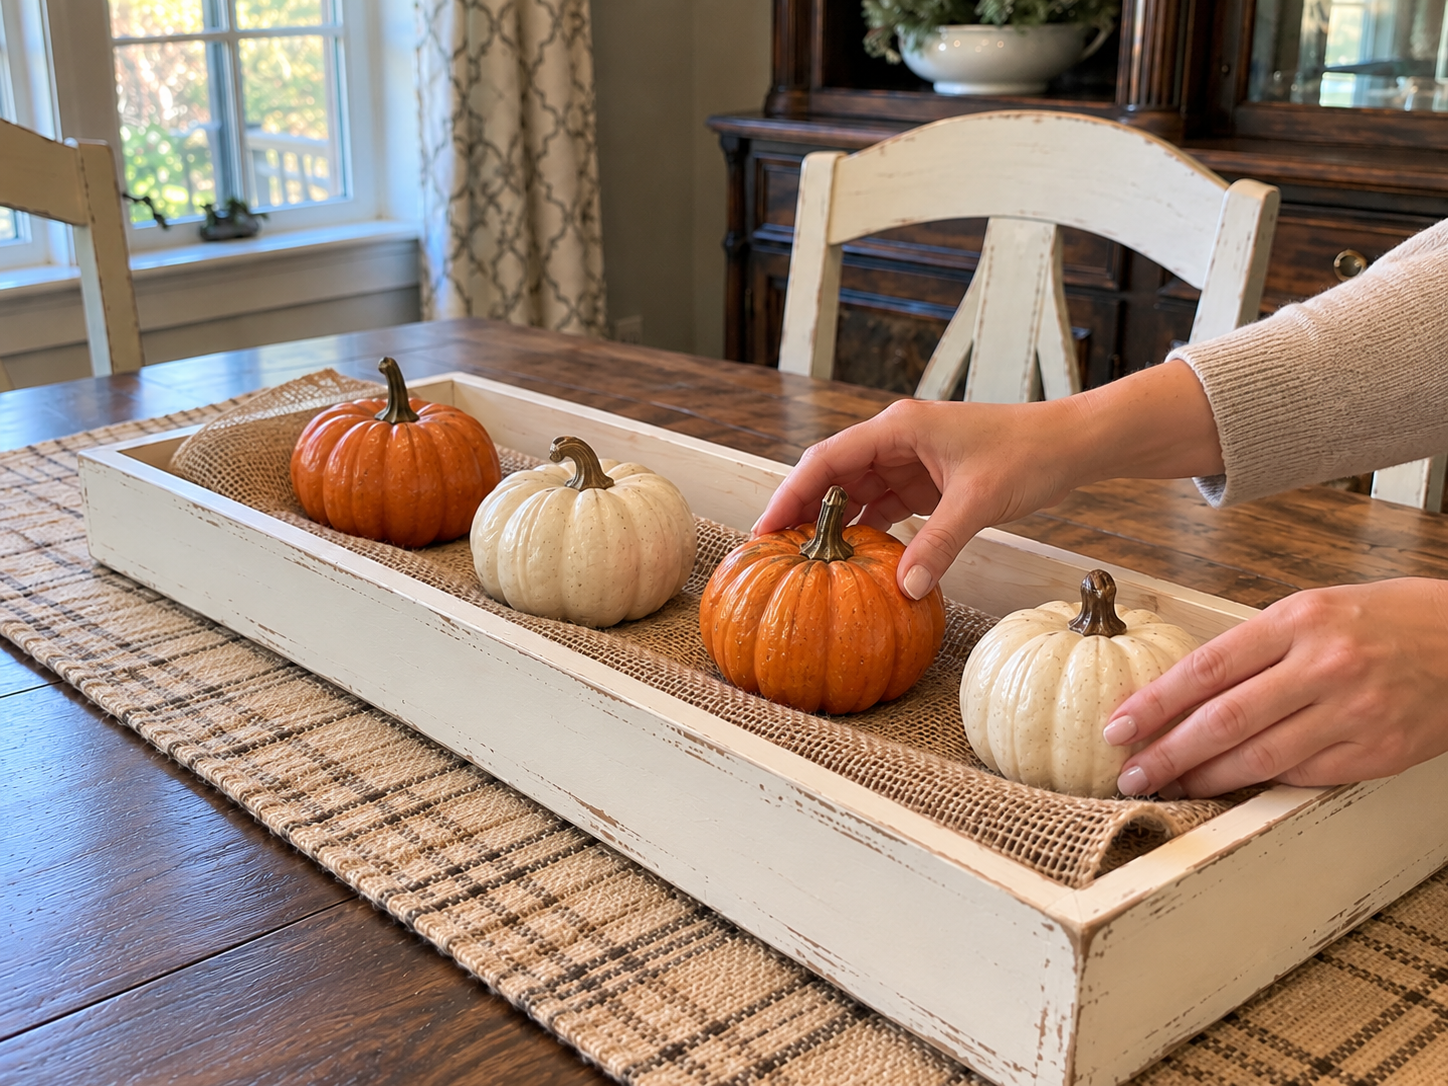
Once the painted pumpkins are dry, begin arranging them on top of the burlap runner inside the tray. Start with the largest pumpkins first, then fill in with smaller ones. Mix the orange and cream colors for visual interest, varying their placement to create a balanced, inviting display.
Step 6: Tuck Faux Autumn Foliage
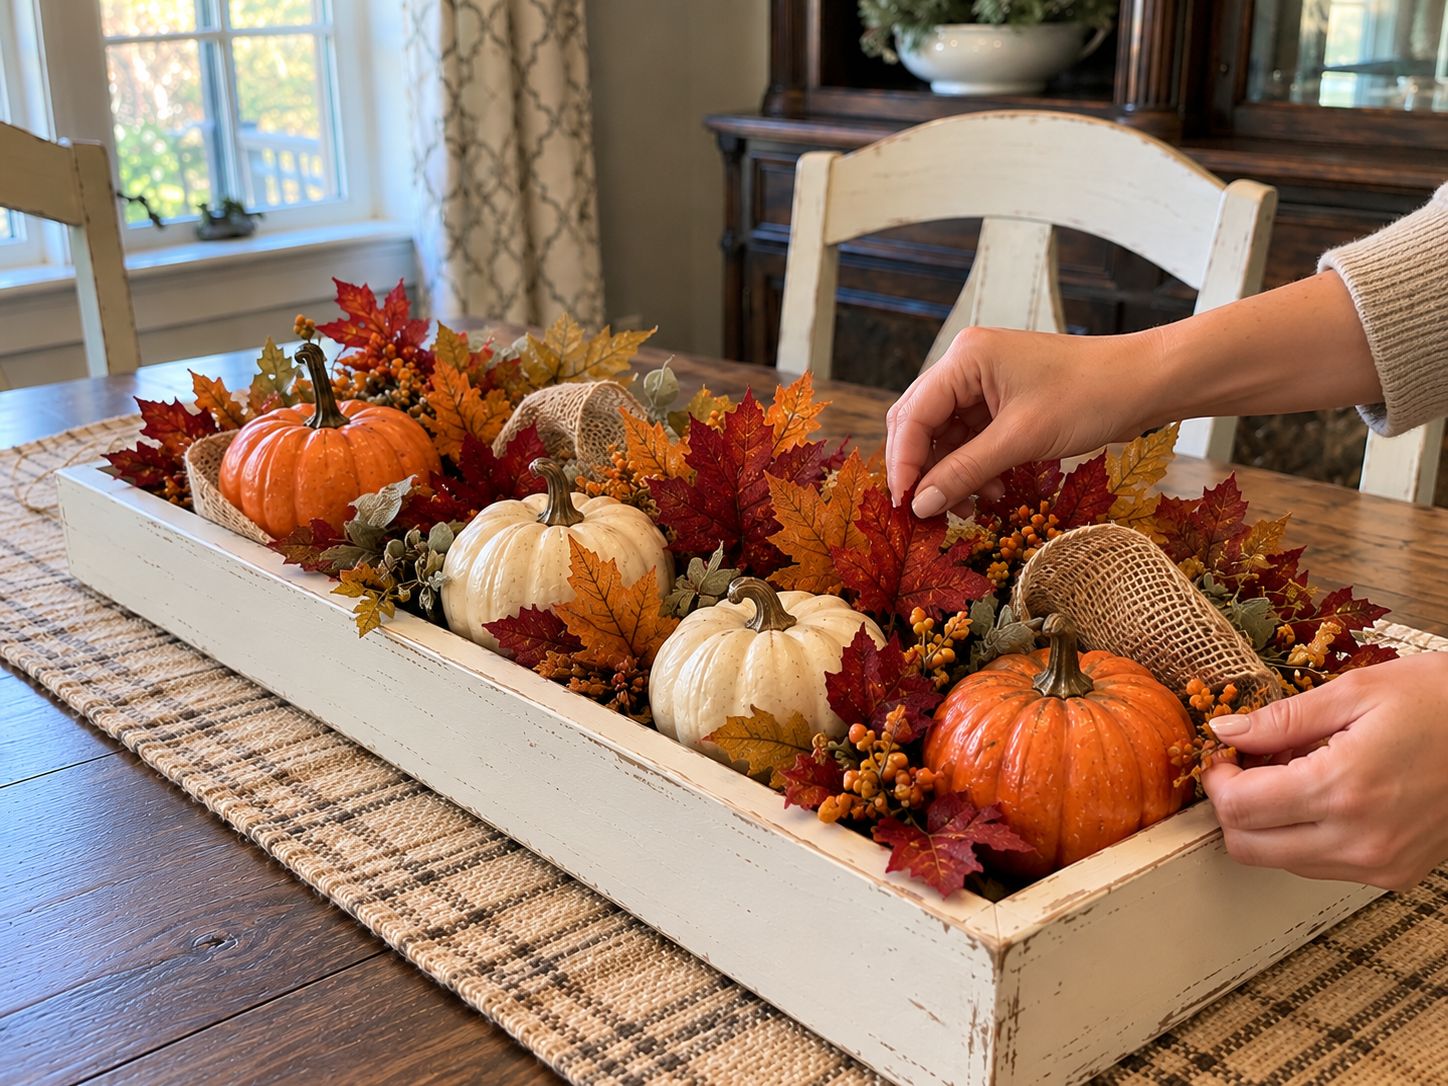
With your pumpkins in place, it's time to add volume and color with faux autumn foliage and berry sprays. Tuck individual leaves and berry clusters into the gaps around and between the pumpkins. Distribute the colors (reds, oranges, yellows) evenly to create a lush, abundant harvest look. Ensure some leaves spill over the edges of the pumpkins and the burlap for a natural feel.
Step 7: Add Pillar Candles
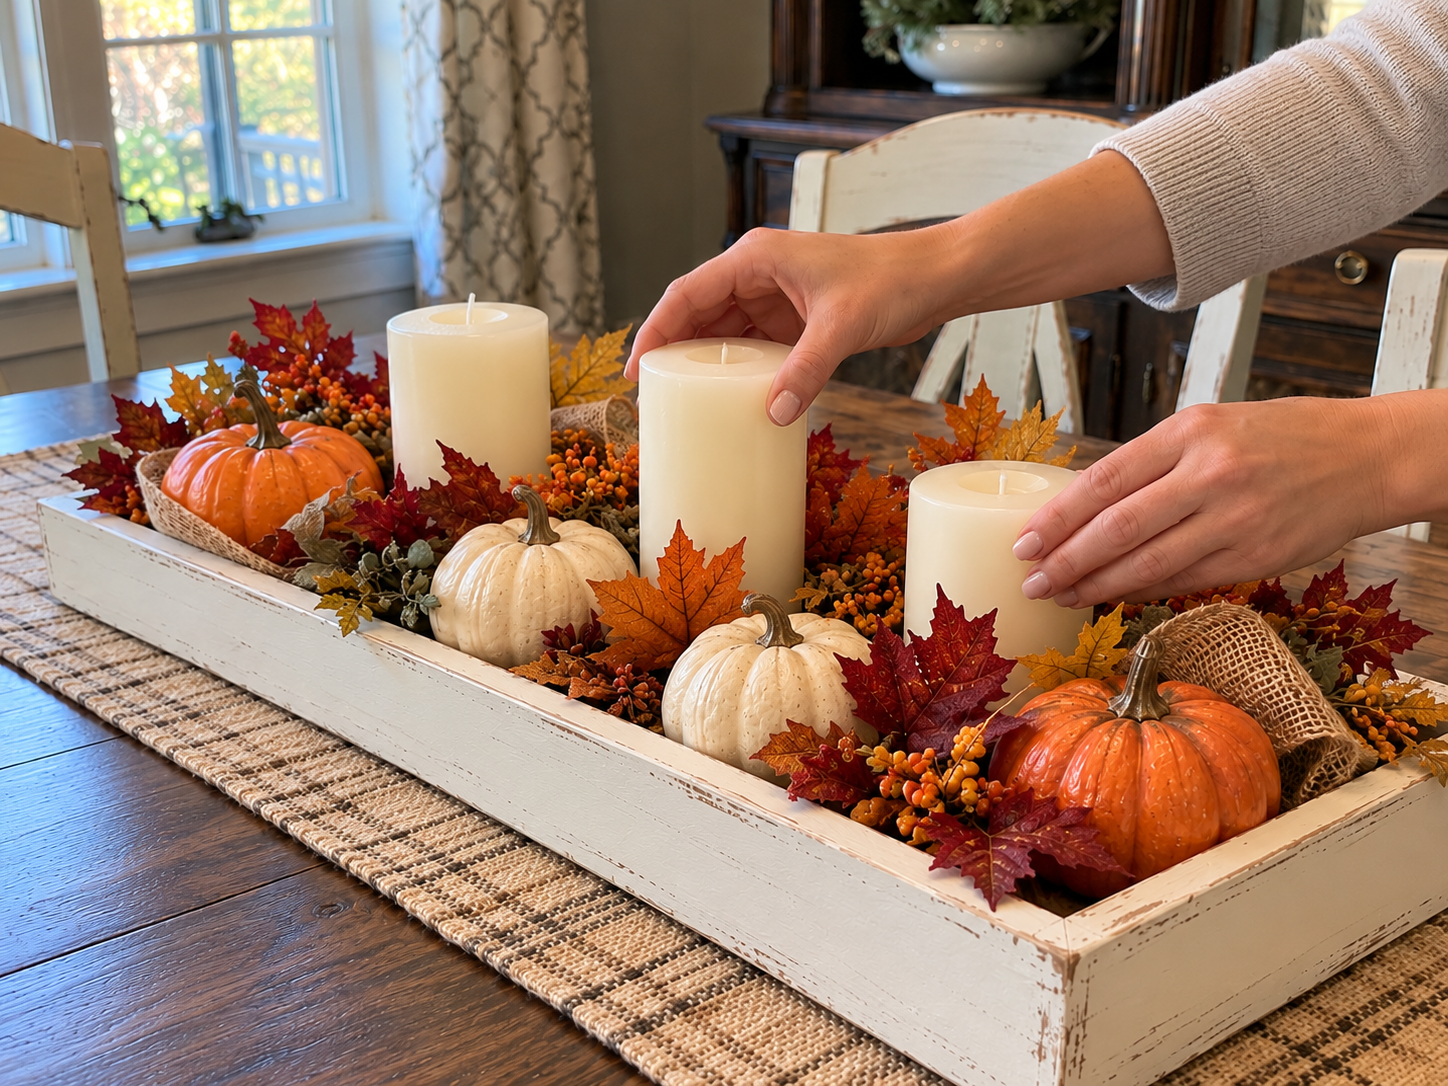
To complete your centerpiece, carefully place three pillar candles into the arrangement. Nestle them securely among the pumpkins and foliage. You can vary the heights of the candles if desired for added visual interest. Ensure the candles are stable and not too close to the faux foliage to prevent any fire hazards if you plan to light them (or opt for flameless LED candles).
Enjoy Your Farmhouse Fall Centerpiece
With these steps, a charming distressed wooden tray fall centerpiece is complete. This festive arrangement provides a warm, inviting focal point for any room during the autumn season. It is ready to grace your Thanksgiving table or add a touch of seasonal beauty to your home decor.
Related project collection: Mini Pumpkin Wooden Spoon Turkey Centerpiece for Thanksgiving Decor
Practical Questions About This Project
What type of tray is used for this centerpiece?
A rectangular wooden tray is used as the base for this fall centerpiece.
Can different colors of paint be used for the pumpkins?
Yes, the foam pumpkins can be painted in desired autumn shades beyond orange and cream to match specific decor preferences.
Are flameless candles suitable for this arrangement?
Yes, flameless LED pillar candles can be used as an alternative to traditional candles, especially if safety around faux foliage is a concern.
What type of foliage works best for this project?
Faux autumn foliage and berry sprays are recommended to create a lush, abundant harvest look around the pumpkins.
What is the estimated active time to create this centerpiece?
The estimated active time to assemble this centerpiece is between 35 and 55 minutes, excluding unattended drying and curing times.
Browse wood supplies at Dollar Tree.

Leave a Reply