
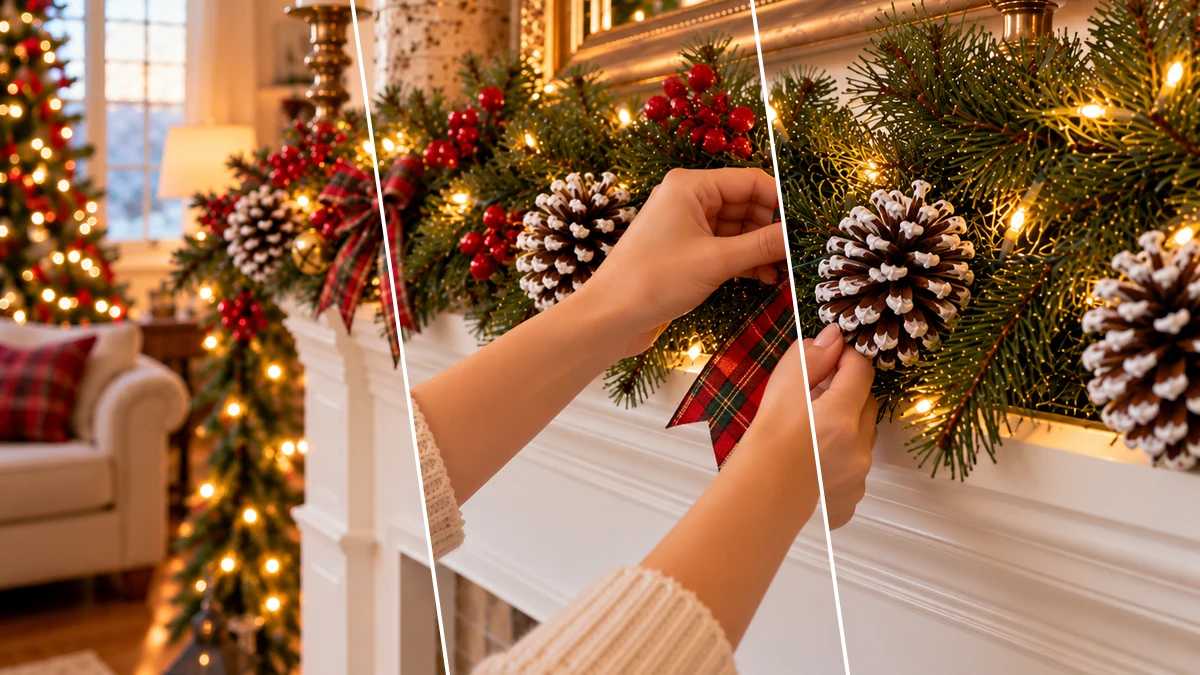
Create a festive focal point for your holiday home with a beautiful DIY Frosted Pinecone Christmas Mantel Garland. This project combines a faux pine base with frosted pinecones, vibrant red berries, classic plaid bows, and sparkling gold jingle bells. It's an easy way to add a cozy, traditional touch to your fireplace mantel this holiday season.
Project at a Glance
- Difficulty: Easy
- Estimated active time: 45 minutes to 75 minutes (drying and curing waits not included)
- Estimated component cost: $15 to $25 (reusable tools and general supplies excluded)
- Main material: Faux Florals
- Suggested placement: Mantel
Why Create a Frosted Pinecone Christmas Garland?
A beautifully decorated mantel can transform a room, making it feel warm and inviting for the holidays. This frosted pinecone Christmas garland offers a classic, rustic charm that complements various seasonal decor styles. By combining natural elements like pinecones with festive accents such as berries and plaid, you can achieve a sophisticated yet cozy display.
This project is designed for ease, allowing you to assemble a custom garland that perfectly fits your space. It's an excellent way to personalize your Christmas decorations and create a memorable focal point for family gatherings and festive celebrations.
Materials for DIY Frosted Pinecone Christmas Mantel Garland with Berries & Plaid Bows
- Faux Pine Garland
- Real Pinecones
- White Acrylic Paint
- Red Berry Picks or Sprays
- Plaid Christmas Ribbon
- Gold Jingle Bells
- Warm White String Lights
- Floral Wire or Craft Twine
- Small Sponge or Dry Paint Brush
Need another material? Browse current craft supplies and deals.
How to Assemble Your Frosted Pinecone Christmas Mantel Garland
Follow these steps to craft your own festive Frosted Pinecone Christmas Mantel Garland. This guide walks through preparing the pinecones, arranging the base, and adding all the charming embellishments. Take your time with each element to ensure a secure and visually appealing display.
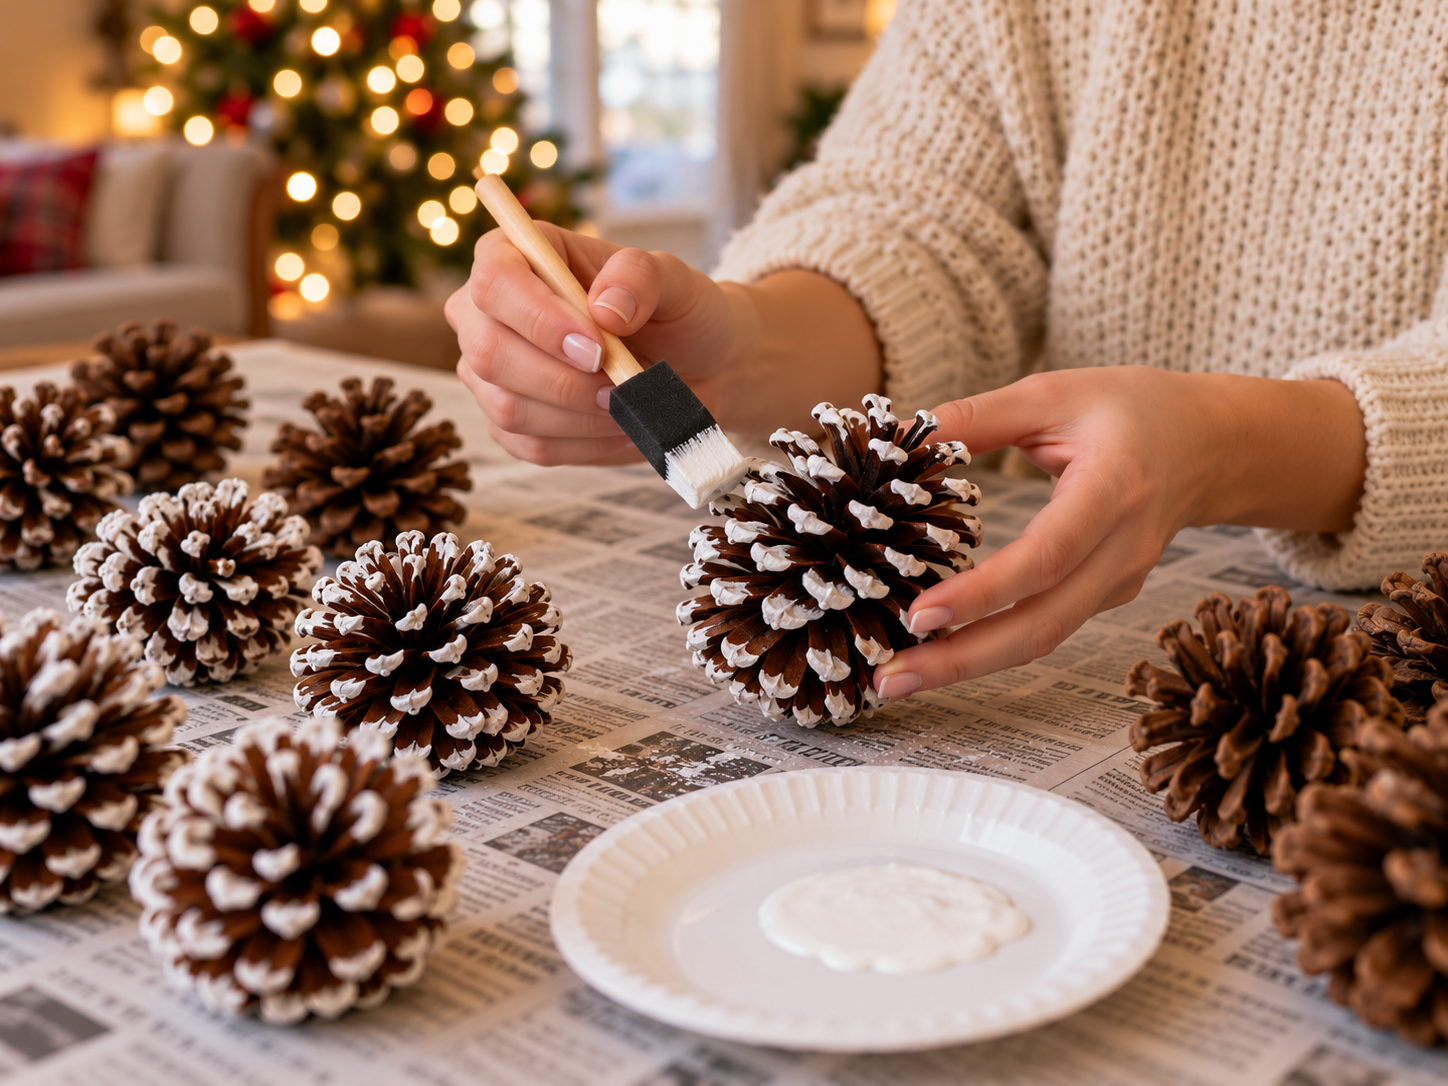
Step 1: Frost the Pinecones for a Snowy Look
Place your real pinecones on a protected surface, such as newspaper or parchment paper. Dip a small sponge or a dry, stiff-bristled paint brush into white acrylic paint. Gently dab and brush the paint onto the tips and edges of the pinecone scales, aiming for a 'frosted' or 'snow-dusted' appearance rather than a solid coat. Less is more here to achieve a natural winter look. Allow the painted pinecones to dry completely before handling, which may take 15-30 minutes depending on paint thickness.
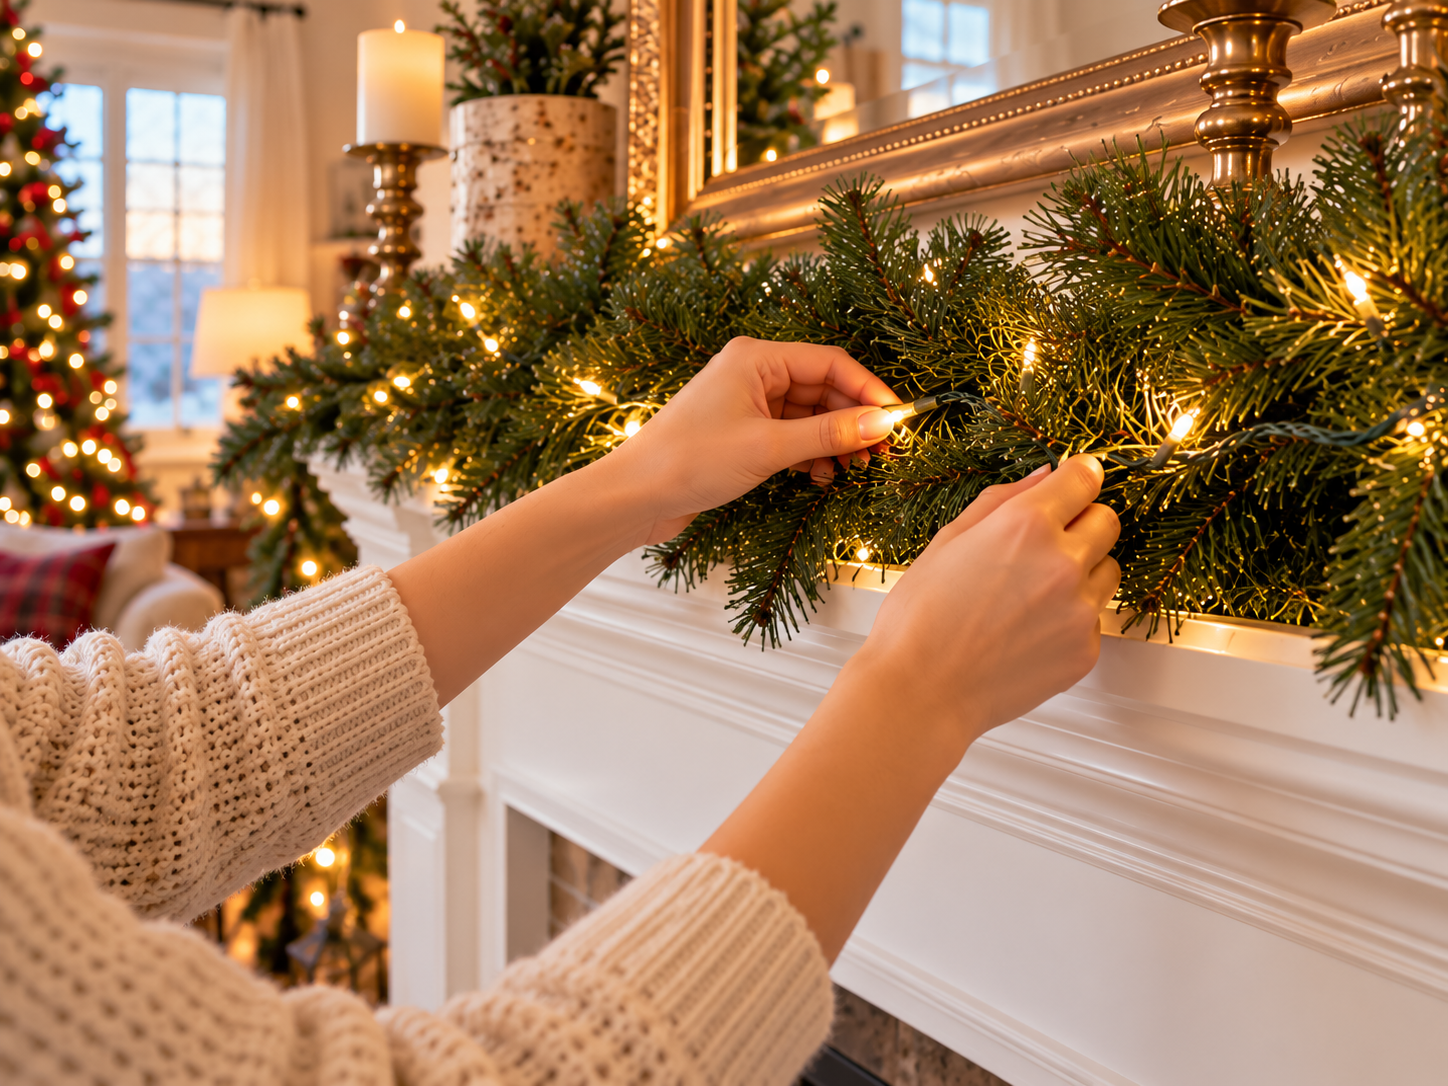
Step 2: Position Garland and Add Lights
Carefully drape your faux pine garland along the top of your fireplace mantel. Arrange it to create the desired flow and drape, ensuring it is securely anchored if necessary. Once the garland is in place, begin weaving the warm white string lights through the branches. Start at one end and work your way across, ensuring the lights are evenly distributed to provide a consistent glow. Conceal any battery packs or power cords behind or within the garland's branches.
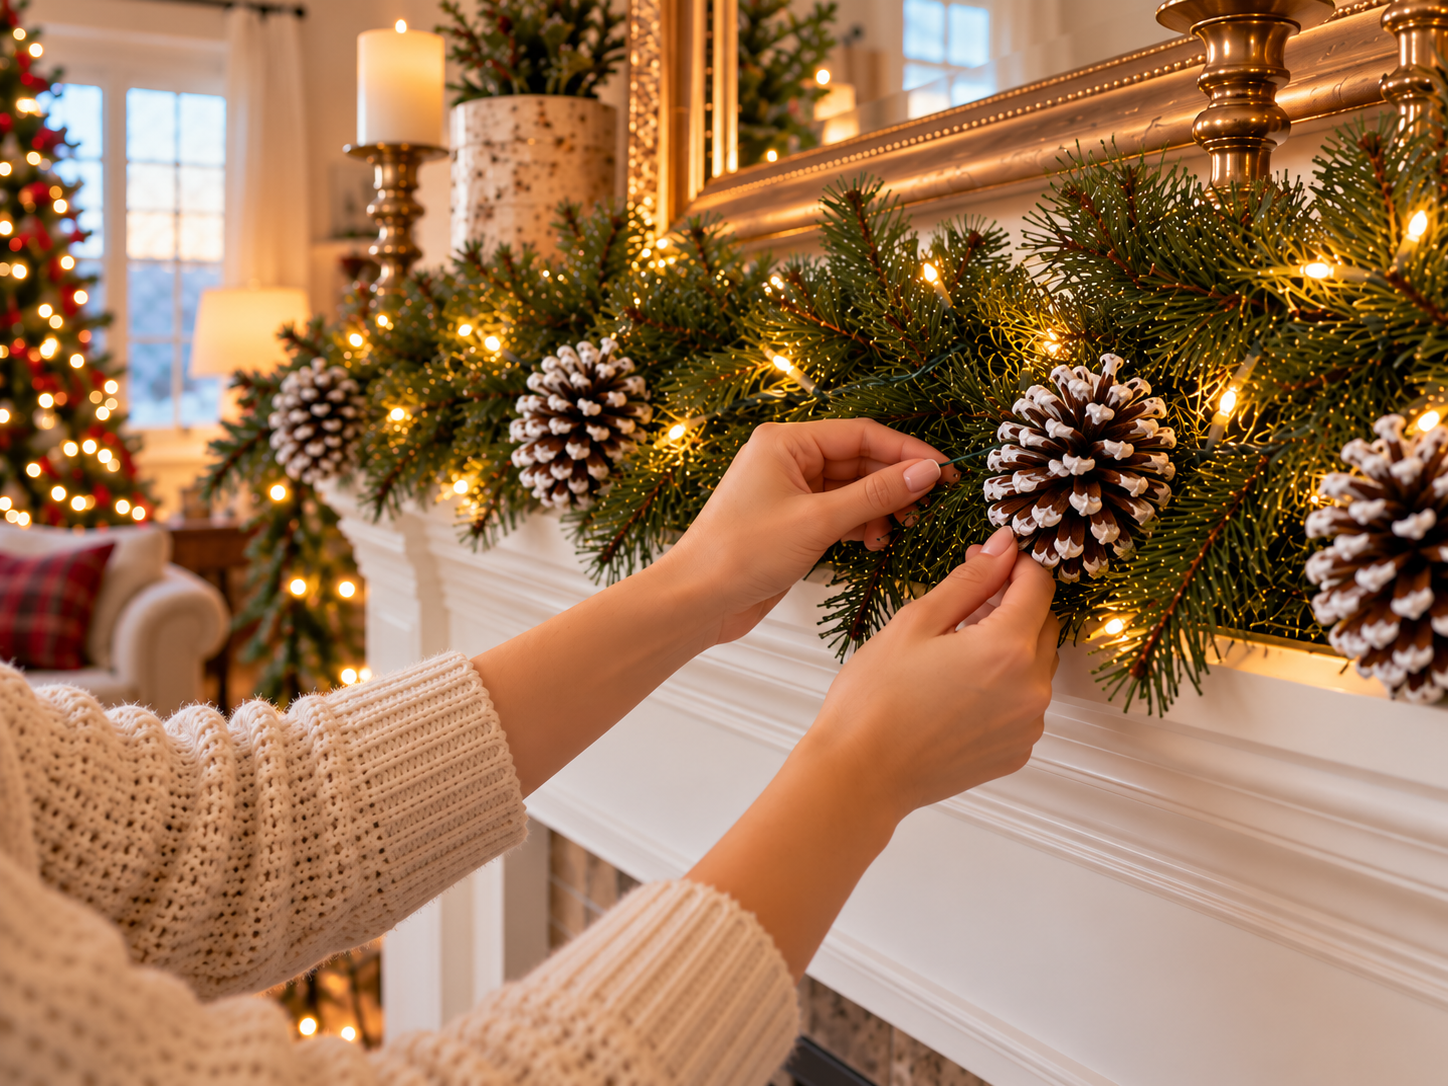
Step 3: Attach Frosted Pinecones
Take your dried, frosted pinecones and begin attaching them to the garland. Use short pieces of floral wire or craft twine. Wrap the wire around the base of each pinecone, then firmly twist the ends around a sturdy branch of the faux garland. Distribute the pinecones evenly along the entire length of the garland, making sure they are securely fastened and facing outwards for optimal visibility. Aim for a balanced, abundant look.


Step 4: Integrate Red Berry Clusters
Prepare your red berry picks by cutting them into smaller, manageable clusters if they are long sprays. Begin tucking these berry clusters into the garland, interspersing them among the pinecones and pine branches. You can gently bend the stems to hook them onto the garland, or use small pieces of floral wire to secure them in place if needed. Aim for natural-looking pops of color that complement the frosted pinecones.

Step 5: Tie and Attach Plaid Ribbon Bows
Create several plaid ribbon bows. You can either tie simple 'bunny ear' style bows or use a ribbon wrapping technique to form fuller bows. Once your bows are made, attach them to the garland. Use floral wire threaded through the back of each bow and twist it tightly around a garland branch. Position the bows strategically along the garland, ensuring they are facing forward and are evenly spaced to enhance the overall design.

Step 6: Add Sparkling Gold Jingle Bells
The final decorative touch is to add the gold jingle bells. If your bells have a loop, simply thread a small piece of floral wire or twine through it. If not, you may need to create a small loop with wire around the bell's top. Attach the bells to the garland, hanging them individually. Distribute them sparingly, often near a bow or a cluster of pinecones, to add a whimsical sparkle and sound. Ensure they are firmly secured.
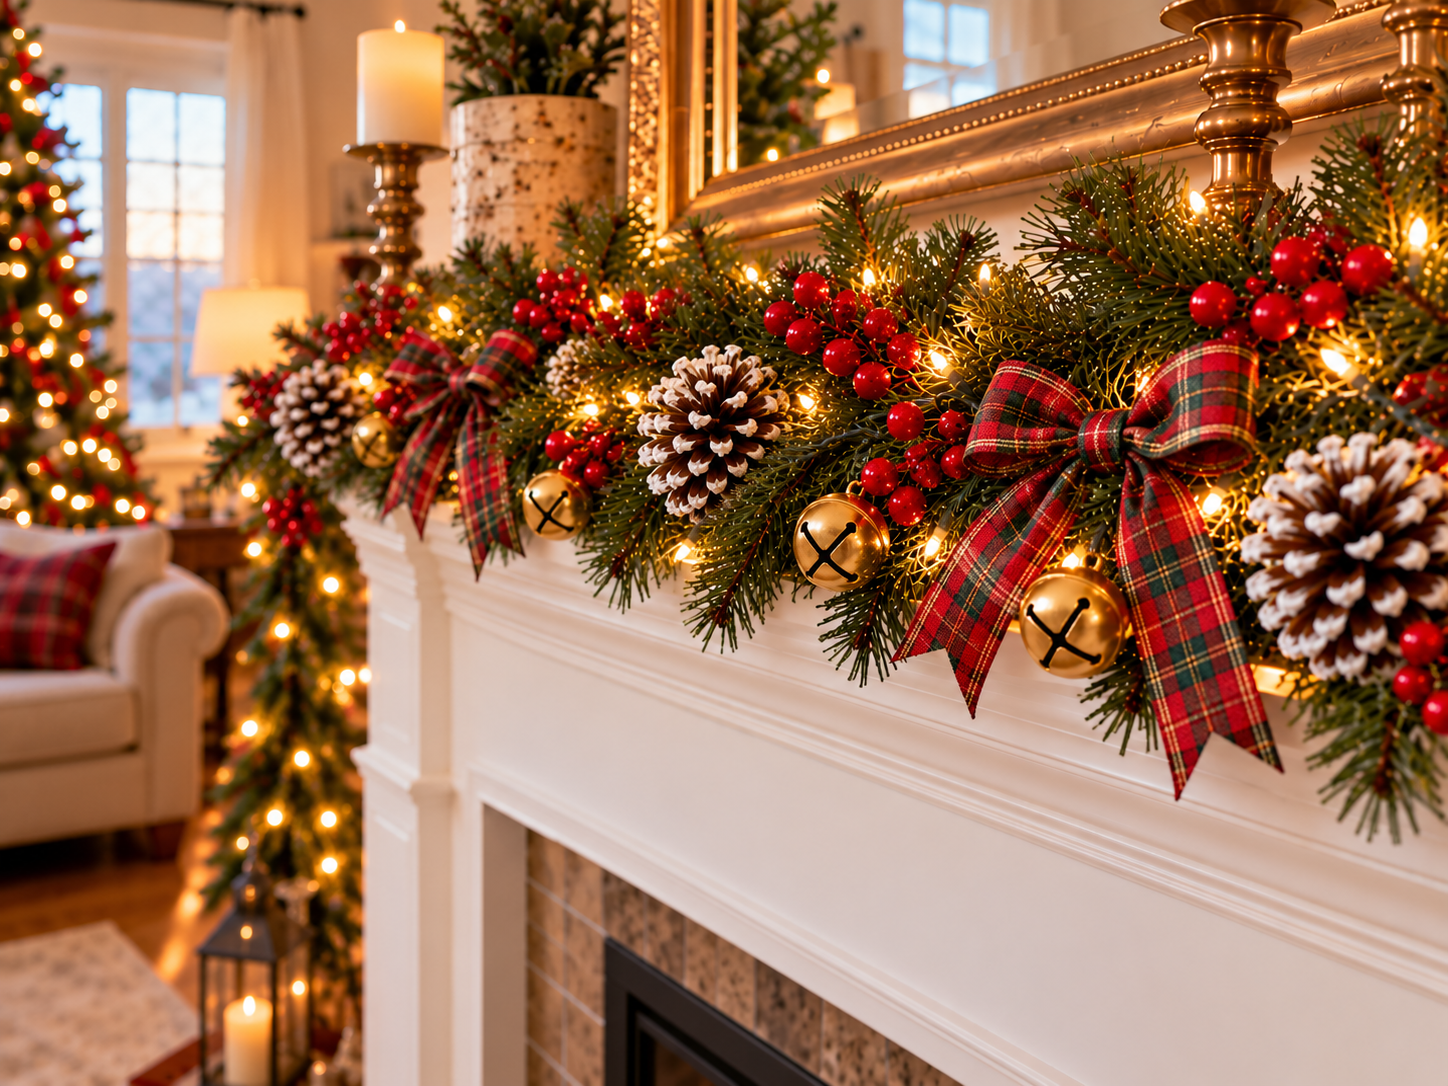
Enjoy Your Festive Frosted Pinecone Garland
Your DIY Frosted Pinecone Christmas Mantel Garland is now ready to bring a touch of traditional holiday cheer to your home. This handcrafted piece serves as a beautiful focal point, inviting warmth and festive spirit into your living space. Enjoy the cozy ambiance it creates throughout the Christmas season.
Related project collection: DIY Mini Jenga Block Christmas Trees for a Snowy Mantel Display
Practical Questions About This Project
What kind of pinecones are best for this project?
Real pinecones are recommended for this project to achieve a natural, rustic look when frosted with white paint.
How is the frosted effect applied to the pinecones?
The frosted look is achieved by gently dabbing and brushing white acrylic paint onto the tips and edges of the pinecone scales using a small sponge or a dry, stiff-bristled paint brush. The goal is a light, 'snow-dusted' appearance.
What type of lights should be used for the garland?
Warm white string lights are recommended to be woven through the faux pine garland. This provides a consistent, cozy glow to the overall display.
How are the decorative elements secured to the garland?
Floral wire or craft twine is used to securely attach elements like frosted pinecones, plaid ribbon bows, and gold jingle bells to the faux garland branches. Red berry picks can often be tucked in or also secured with wire if needed.
What is the estimated active time to complete this garland?
The estimated active time for assembling this garland is between 45 and 75 minutes. This estimate excludes any unattended drying time for the painted pinecones.
Browse faux florals supplies at Dollar Tree.

Leave a Reply