
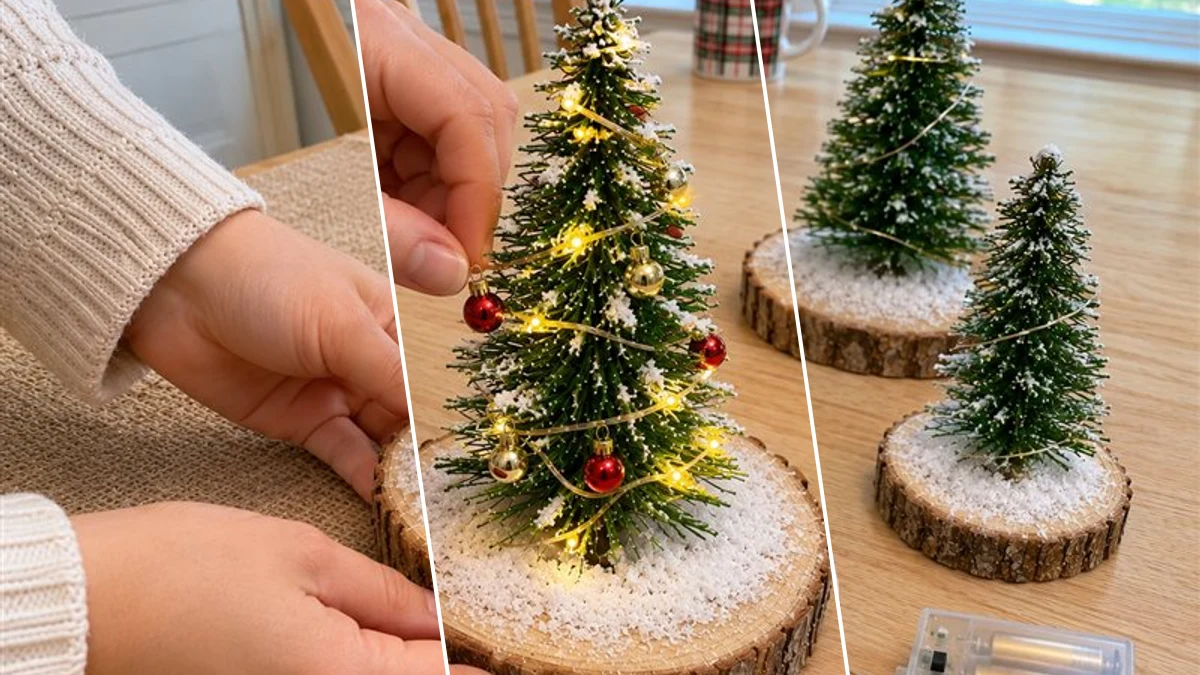
Looking for a quick and charming way to add rustic holiday cheer to your home? This DIY mini Christmas tree centerpiece brings a cozy, frosted woodland feel to any surface. Using just a few affordable materials, you can create a delightful display that sparkles with festive magic in under 20 minutes.
Project at a Glance
- Difficulty: Easy
- Estimated active time: 10 minutes to 20 minutes (drying and curing waits not included)
- Estimated component cost: $12 to $20 (reusable tools and general supplies excluded)
- Main material: Wood
- Suggested placement: Dining Table, Mantel
Why This Rustic Mini Christmas Tree Centerpiece is Perfect for Your Holidays
This project is wonderfully simple, making it ideal for crafters of all skill levels, even if you're short on time. We'll transform everyday mini artificial Christmas trees and natural wood slices into a beautiful holiday arrangement. The hot glue provides a quick, secure bond, and the addition of faux snow, tiny ornaments, and warm fairy lights elevates these humble supplies into something truly special.
The beauty of this centerpiece lies in its versatility and charm. The mini artificial Christmas trees typically stand about 6-12 inches tall, and the wood slices, often found in craft aisles, range from 3-6 inches in diameter, providing a lovely varying height and base for your display. Once assembled, this indoor decoration is quite durable and, with careful storage, can be brought out to adorn your home for many holiday seasons to come. Expect to spend about 10-20 minutes of active crafting time, with a total material cost estimated between $12-$20, depending on where you source your items.
The warm glow from the battery-operated fairy lights adds an inviting ambiance, making these trees perfect for a dining table centerpiece, a festive mantel accent, or even a cozy addition to a bookshelf or entryway console. They evoke a classic, frosted winter wonderland scene that complements farmhouse, rustic, or traditional holiday decor themes beautifully.
Materials for DIY Rustic Frosted Mini Christmas Tree Centerpiece on Wood Slices
- Mini Artificial Christmas Trees (3 in varying sizes)
- Natural Wood Slices (3 in varying sizes)
- Hot Glue Gun and Glue Sticks
- Faux Snow (or white acrylic paint with a sponge brush)
- Tiny Christmas Ornaments (e.g., small beads, mini baubles)
- Battery-Operated Warm White Fairy Lights (one strand per tree)
- Burlap Table Runner (optional, for display)
Need another material? Browse current craft supplies and deals.
Crafting Your Rustic Mini Christmas Tree Centerpiece
Ready to bring a touch of frosted woodland charm to your holiday decor? Follow these straightforward steps to assemble your mini Christmas tree centerpieces. You'll be amazed at how quickly these come together to create a stunning display.
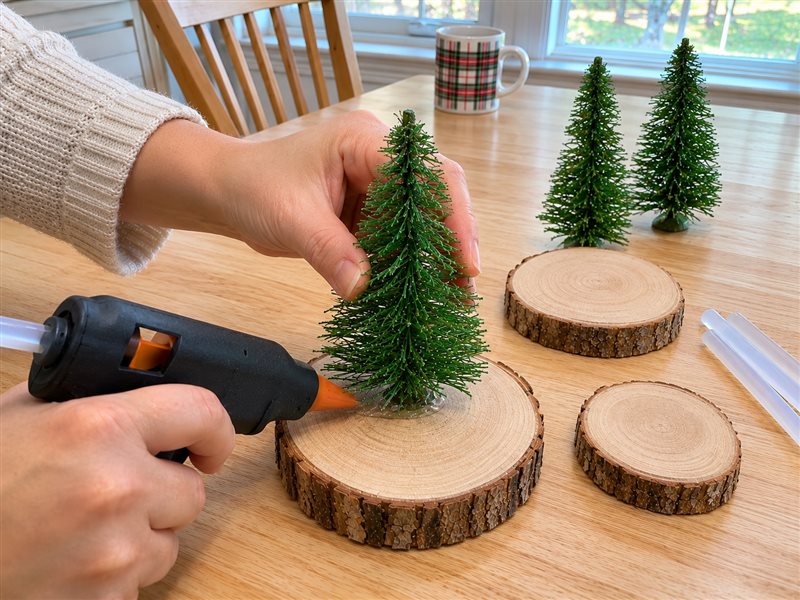
Step 1: Attach Trees to Wood Slices
Begin by selecting a mini artificial Christmas tree and a corresponding wood slice. Ensure the tree's base fits well on the wood slice, allowing for some space around the edges. Apply a generous amount of hot glue to the center of the wood slice, then firmly press the base of the mini tree onto the glue. Hold it in place for a few seconds until the glue cools and sets, ensuring the tree stands upright and is stable. Repeat this process for the remaining two trees and wood slices, varying the sizes for visual interest.
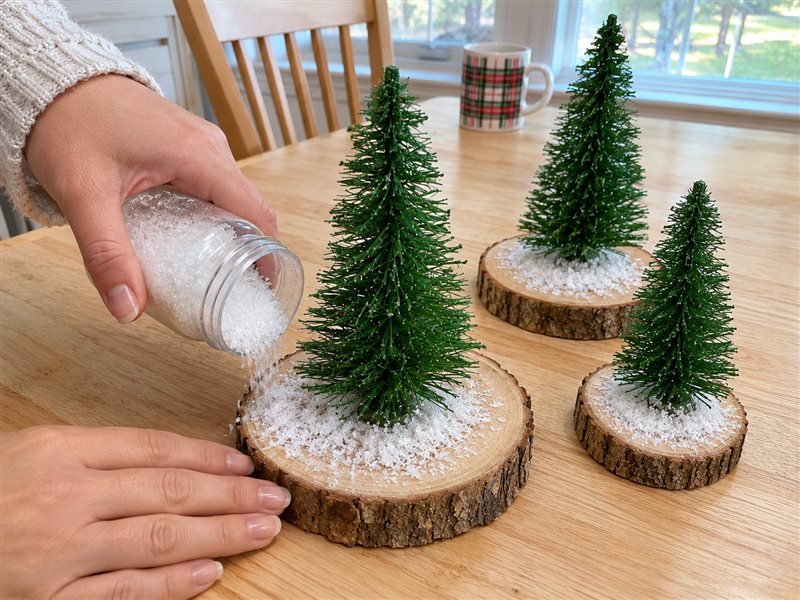
Step 2: Add Faux Snow Detailing
Once the hot glue has fully dried, it's time to add the festive faux snow. Generously sprinkle faux snow around the base of each tree on the wood slice, creating the appearance of a fresh snowfall. You can gently press it down to help it adhere slightly, or if using white acrylic paint, dab it lightly with a sponge brush for a textured snow effect. Allow any glue or paint to dry completely if you're using those methods to adhere the snow.
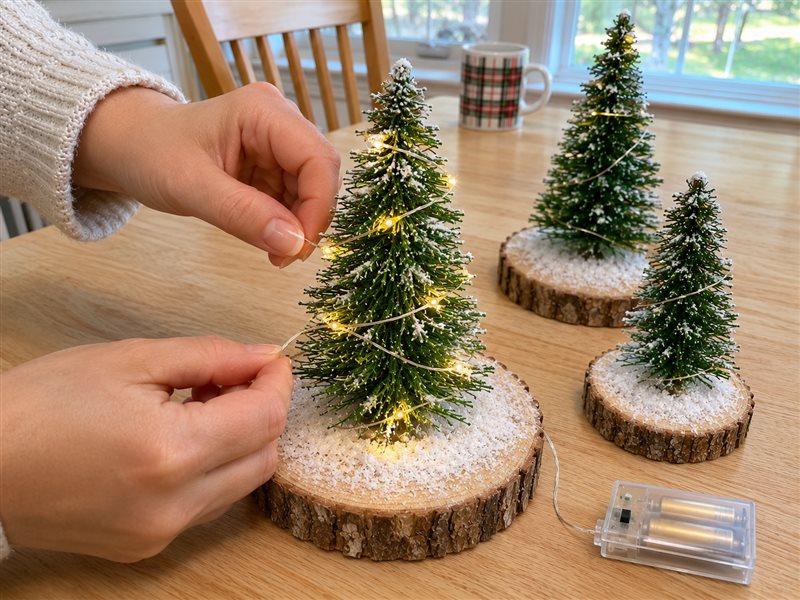
Step 3: Wrap with Fairy Lights
Take one strand of battery-operated fairy lights for each tree. Starting from the top, gently wrap the strand around the tree, working your way down. Tuck the battery pack discreetly behind the tree or beneath some faux snow on the wood slice. Ensure the lights are evenly distributed to create a warm, magical glow. Repeat for all three trees.


Step 4: Add Tiny Ornaments
Now for the final decorative touch! Carefully place or hang tiny ornaments, such as small red and gold beads or mini baubles, onto the branches of each mini Christmas tree. Distribute them sparsely and naturally across the tree, complementing the faux snow and fairy lights. Step back and assess the balance of the ornaments, adding or adjusting as needed.
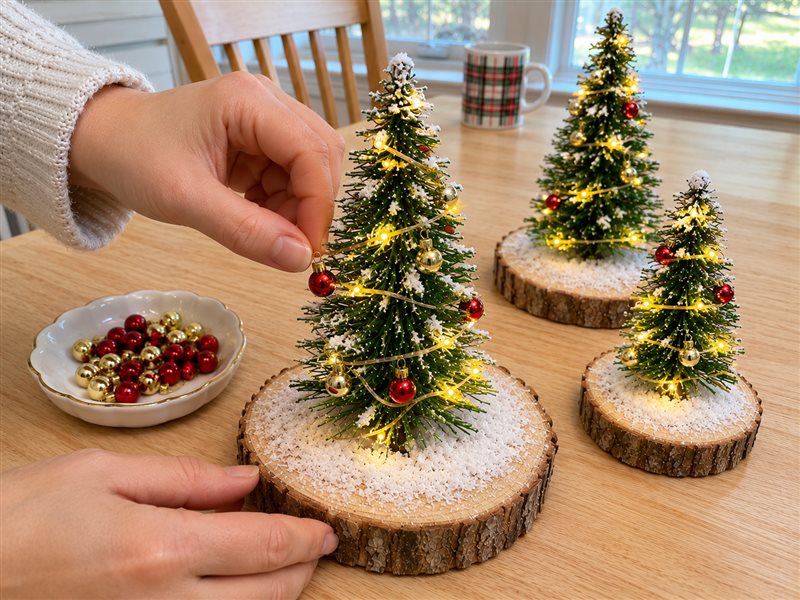
Step 5: Arrange Your Centerpiece
With all three mini Christmas trees decorated, it’s time to arrange your festive centerpiece. Lay out a burlap table runner on your chosen surface – a dining table, coffee table, or mantel. Position the three trees strategically along the runner, perhaps staggering their heights or grouping them slightly. Turn on the fairy lights to illuminate your rustic Christmas display, creating a warm and inviting atmosphere.
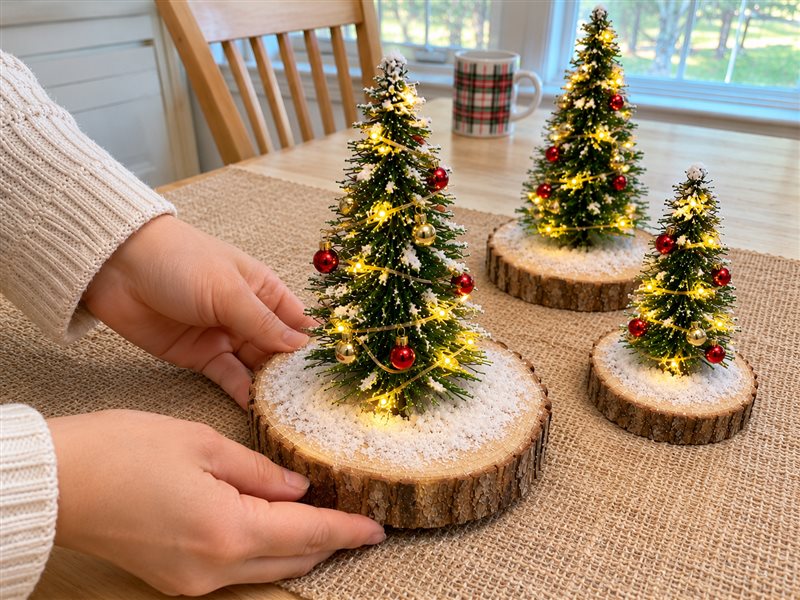
Your Finished Holiday Display
And there you have it! A beautiful, rustic mini Christmas tree centerpiece, ready to brighten your home for the holidays. This simple project is a fantastic way to add a personalized, festive touch without a lot of time or expense. Enjoy the warm glow and charming presence your new creation brings to your seasonal decor.
Related project collection: DIY Christmas Ornament Cone Tree Centerpiece with Mini Ornaments
Practical Questions About This Project
How long will my mini tree centerpiece last?
With careful handling and storage, your mini Christmas tree centerpiece can last for many holiday seasons. The artificial trees and wood slices are durable, and the hot glue provides a strong bond.
Can I use these mini trees outdoors?
No, this centerpiece is designed for indoor use. The materials, especially the hot glue, faux snow, and battery-operated fairy lights, are not typically weather-resistant and could be damaged by moisture or extreme temperatures.
What size wood slices and mini trees should I use?
Aim for mini artificial trees between 6-12 inches tall and natural wood slices with a diameter of 3-6 inches. Varying the sizes creates visual interest and a more dynamic display.
How do I clean or maintain my centerpiece?
Dust your centerpiece gently with a soft brush or cloth. If using battery-operated lights, remember to turn them off when not in use to conserve battery life and remove batteries for long-term storage.
Can I customize the look of my trees?
Absolutely! While this tutorial uses faux snow and small red and gold beads, you can choose different ornament colors, add glitter, or use miniature bows to match your specific holiday decor theme.
Explore wood craft supplies at Dollar Tree.

Leave a Reply