
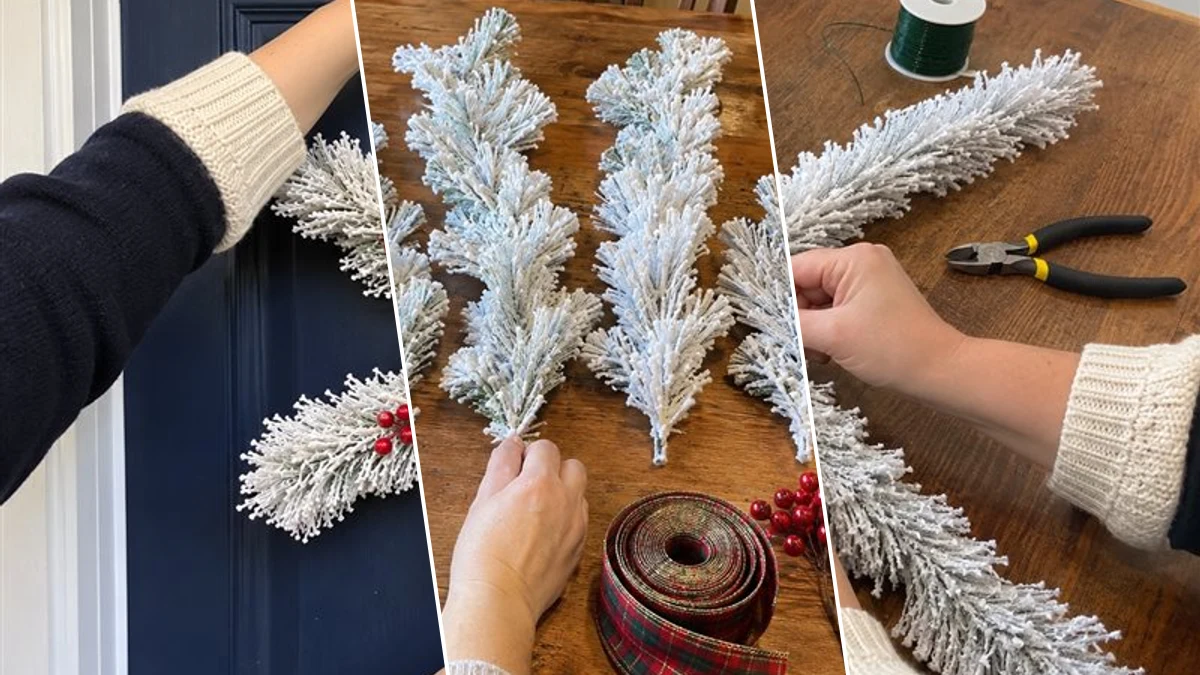
Bring a touch of winter wonderland charm to your home this holiday season with a beautiful DIY Frosted Snowflake Wreath. This easy project transforms simple flocked pine stems into a festive six-pointed snowflake, adorned with a classic plaid bow and bright red berries. It's the perfect welcoming decoration for your front door or above a cozy mantel. You'll love how quickly this craft comes together, adding handmade warmth to your Christmas decor.
Project inspiration: Denise Jeter
Project at a Glance
- Difficulty: Easy
- Estimated active time: 15 minutes to 45 minutes (drying and curing waits not included)
- Estimated component cost: $4 to $7 (reusable tools and general supplies excluded)
- Main material: Faux Florals
- Suggested placement: Front Door
A Charming Snowflake Wreath for Your Holiday Home
This frosted snowflake wreath captures the cozy, traditional spirit of Christmas with its classic elements. The white flocked pine stems mimic freshly fallen snow, creating a beautiful backdrop for the vibrant red and green plaid ribbon and cheerful berry picks. It's designed to be visually striking and instantly recognizable as a festive holiday accent.
One of the best parts of this project is its simplicity and affordability. Using readily available craft supplies, you can assemble this eye-catching wreath in about 15-45 minutes of active crafting time. Once finished, it's quite durable and can be stored carefully to be enjoyed for many Christmases to come, looking lovely both indoors and in a sheltered outdoor spot like a covered porch.
The six-pointed snowflake design offers a unique twist on traditional round wreaths, making it stand out on any door. Typically, a wreath like this will measure about 20-24 inches across, a great size for most standard doors. It's also versatile enough to hang on a wall, above a fireplace, or even as a cheerful accent in a large window.
Materials for DIY Frosted Snowflake Wreath for Your Christmas Front Door
- White Flocked Pine Stems or Garland (6 equal pieces)
- Green Floral Wire
- Wired Plaid Ribbon (red and green)
- Red Berry Picks
- Hot Glue Gun & Glue Sticks
- Over-the-Door Wreath Hanger or Command Hook
Need another material? Browse current craft supplies and deals.
Crafting Your Frosted Snowflake Wreath: Step-by-Step
Follow these simple steps to create your own beautiful frosted snowflake wreath. We'll guide you through arranging the flocked stems, securing the base, and adding the charming bow and berry accents. This easy project is perfect for crafters of all skill levels and comes together quickly, ready to adorn your home for the holidays.
Step 1: Prepare and Arrange Snowflake Stems
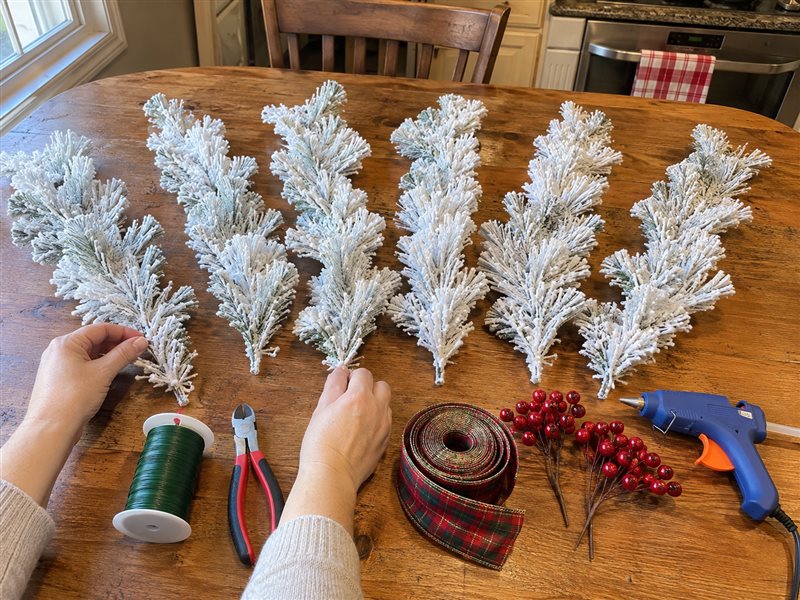
Begin by gathering all your materials and laying them out on your workspace. If using a long garland, cut it into six equal-length sections to form the 'arms' of your snowflake. Carefully arrange these six white flocked pine stems on a flat surface, crossing them at their centers to form a six-pointed star or snowflake shape.
Step 2: Secure the Snowflake Base
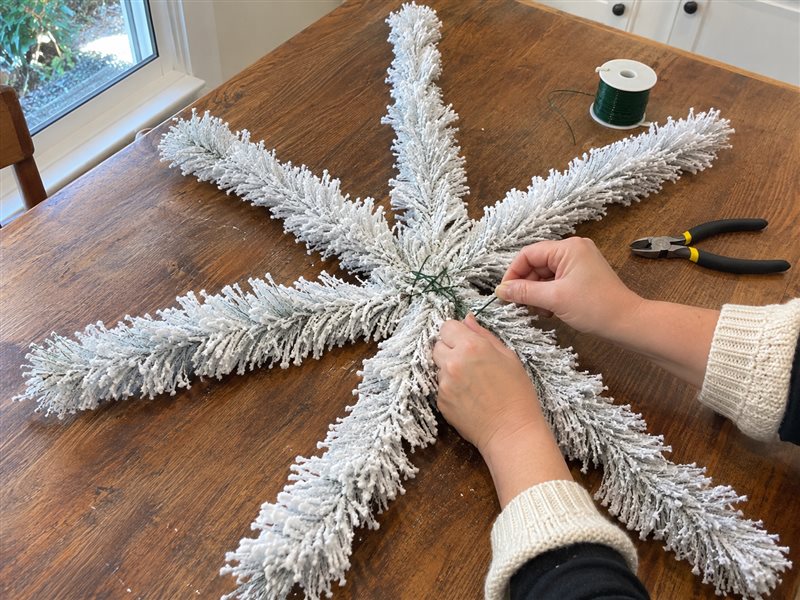
Once you are satisfied with the arrangement of your snowflake stems, use green floral wire to tightly bind them together at their central intersection. Wrap the wire multiple times around all the stems, twisting it securely on the back to ensure the snowflake structure is firm and stable. This creates the robust base for your wreath.
Step 3: Craft and Prepare the Bow
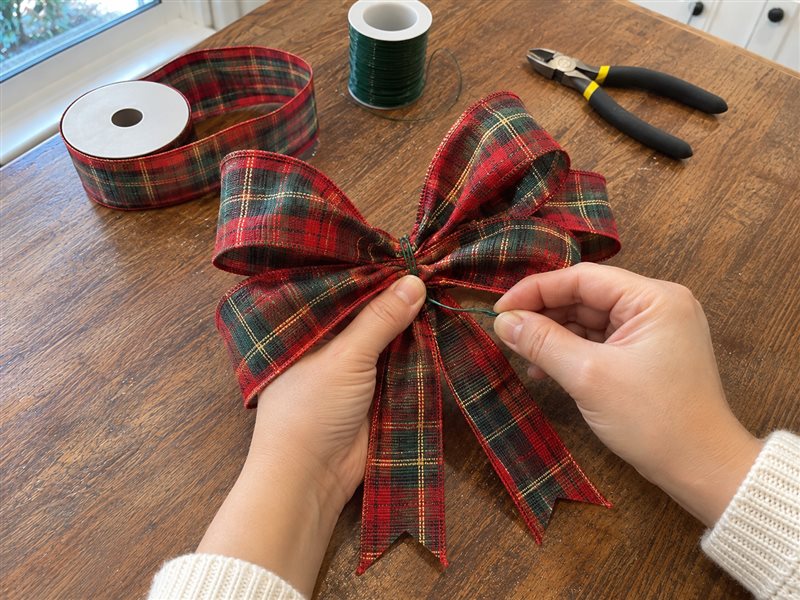
Take your wired plaid ribbon and create a multi-layered bow. Form several loops on each side, securing the center with a piece of floral wire or by twisting the ribbon itself. Leave long tails on your bow for added drape and visual interest. Set the finished bow aside, ready for attachment.


Step 4: Adorn with Bow and Berries
Position your plaid bow at the very center of your snowflake wreath, covering the wired intersection. Secure the bow firmly to the wreath base using the excess floral wire from the bow or by threading new wire through the back of the bow and around the stem bundle. Next, take your red berry picks and tuck them artfully into the flocked arms of the snowflake, around the base of the bow. Use a hot glue gun to apply a small dab of glue to the base of each berry pick to secure them in place.
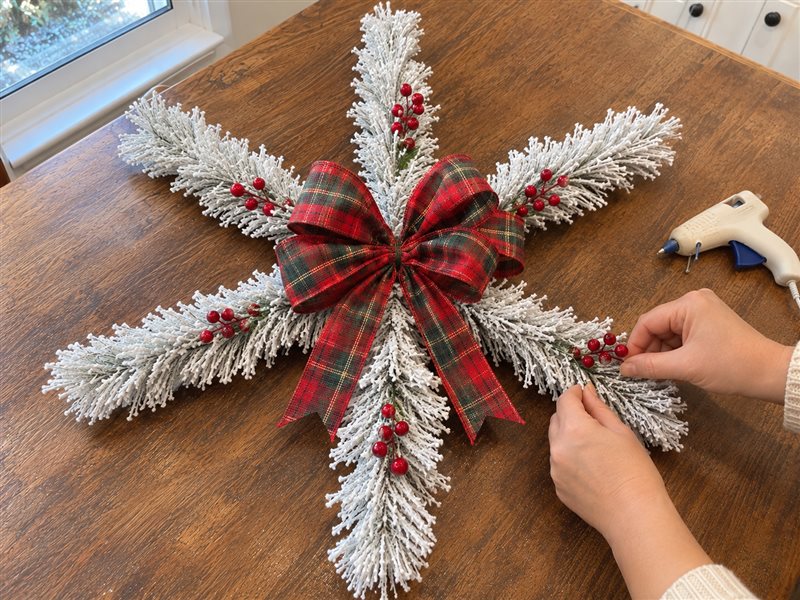
Step 5: Display Your Festive Wreath
Your beautiful frosted snowflake wreath is now complete! Choose a clear over-the-door wreath hanger or a strong Command hook to display your creation. Hang your wreath on your front door, above a mantel, or in any space that needs a touch of festive winter charm. Adjust the bow and berries as needed to ensure a perfect presentation.
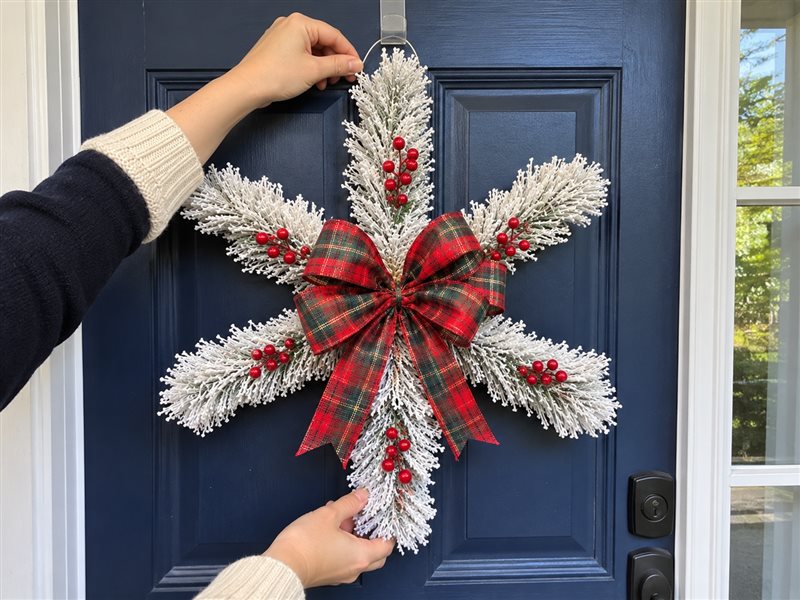
Enjoy Your Handmade Frosted Snowflake Wreath
With just a few simple steps, you've created a stunning frosted snowflake wreath that will bring joy to your home throughout the Christmas season. Its unique design and festive accents make it a truly special addition to your holiday decor. Hang it with pride and let its charm welcome guests and family alike.
Related project collection: DIY Plaid Ribbon Grapevine Christmas Wreath for a Festive Front Door
Practical Questions About This Project
How long does this wreath take to make?
It takes approximately 15 to 45 minutes of active crafting time to assemble this frosted snowflake wreath.
Can I use different colors for the bow?
Yes, you can absolutely customize the bow color. While a red and green plaid ribbon offers a classic Christmas look, a silver or gold plaid, or even a solid color like deep blue or burgundy, would also look beautiful with the white flocked stems.
How long will this wreath last?
With proper care and storage, this frosted snowflake wreath can last for many holiday seasons. The artificial pine stems and durable ribbon hold up well over time.
Can this wreath be displayed outdoors?
Yes, this wreath can be displayed outdoors in a sheltered location, such as on a covered porch or under an overhang, to protect it from direct rain and heavy snow. It holds up well in typical winter conditions.
What size does this snowflake wreath typically turn out to be?
When constructed with standard-sized pine stems, this frosted snowflake wreath typically measures about 20 to 24 inches in diameter, making it a good size for most front doors.
Explore faux florals craft supplies at Dollar Tree.

Leave a Reply