
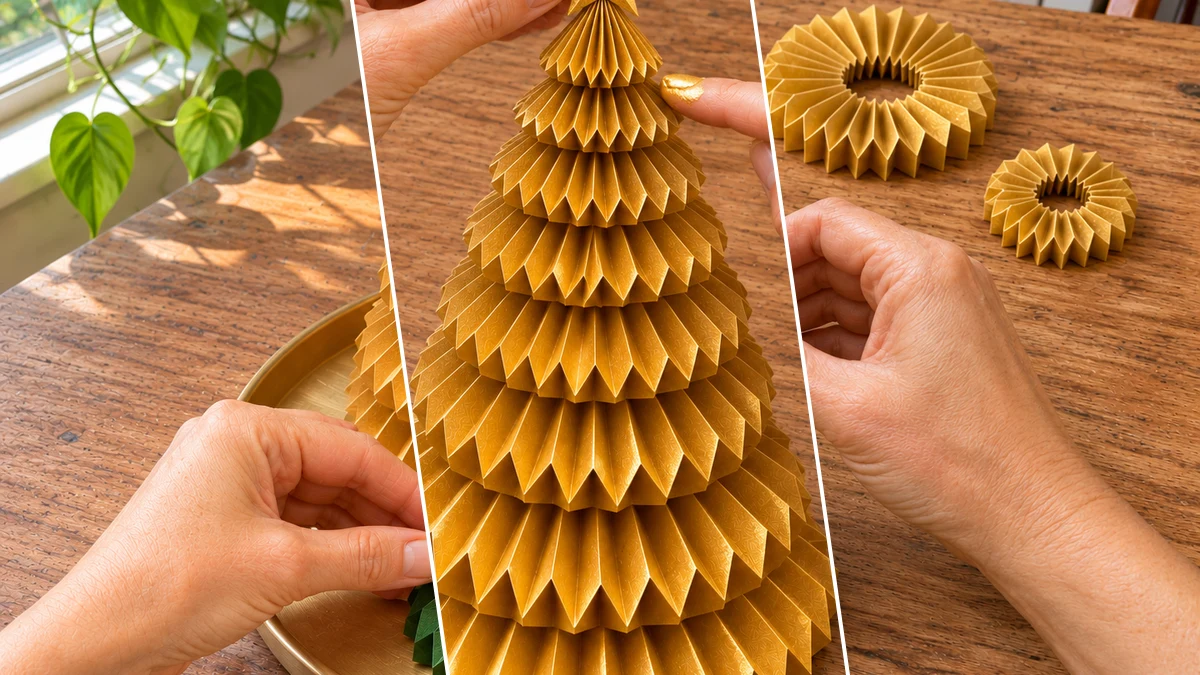
Transform simple paper into an elegant holiday display with these DIY honeycomb Christmas trees. This project creates a sophisticated trio of 3D paper sculptures, perfect for adding a refined touch to your seasonal decor. Each tree features intricate accordion-fold rosettes, topped with a glimmering gold star and subtle metallic accents.
Project at a Glance
- Difficulty: Easy
- Estimated active time: 80 minutes to 115 minutes (drying and curing waits not included)
- Estimated component cost: $7 to $18 (reusable tools and general supplies excluded)
- Main material: Paper
- Suggested placement: Tabletop, Mantel, Shelf
Creating an Elegant Honeycomb Christmas Tree Display
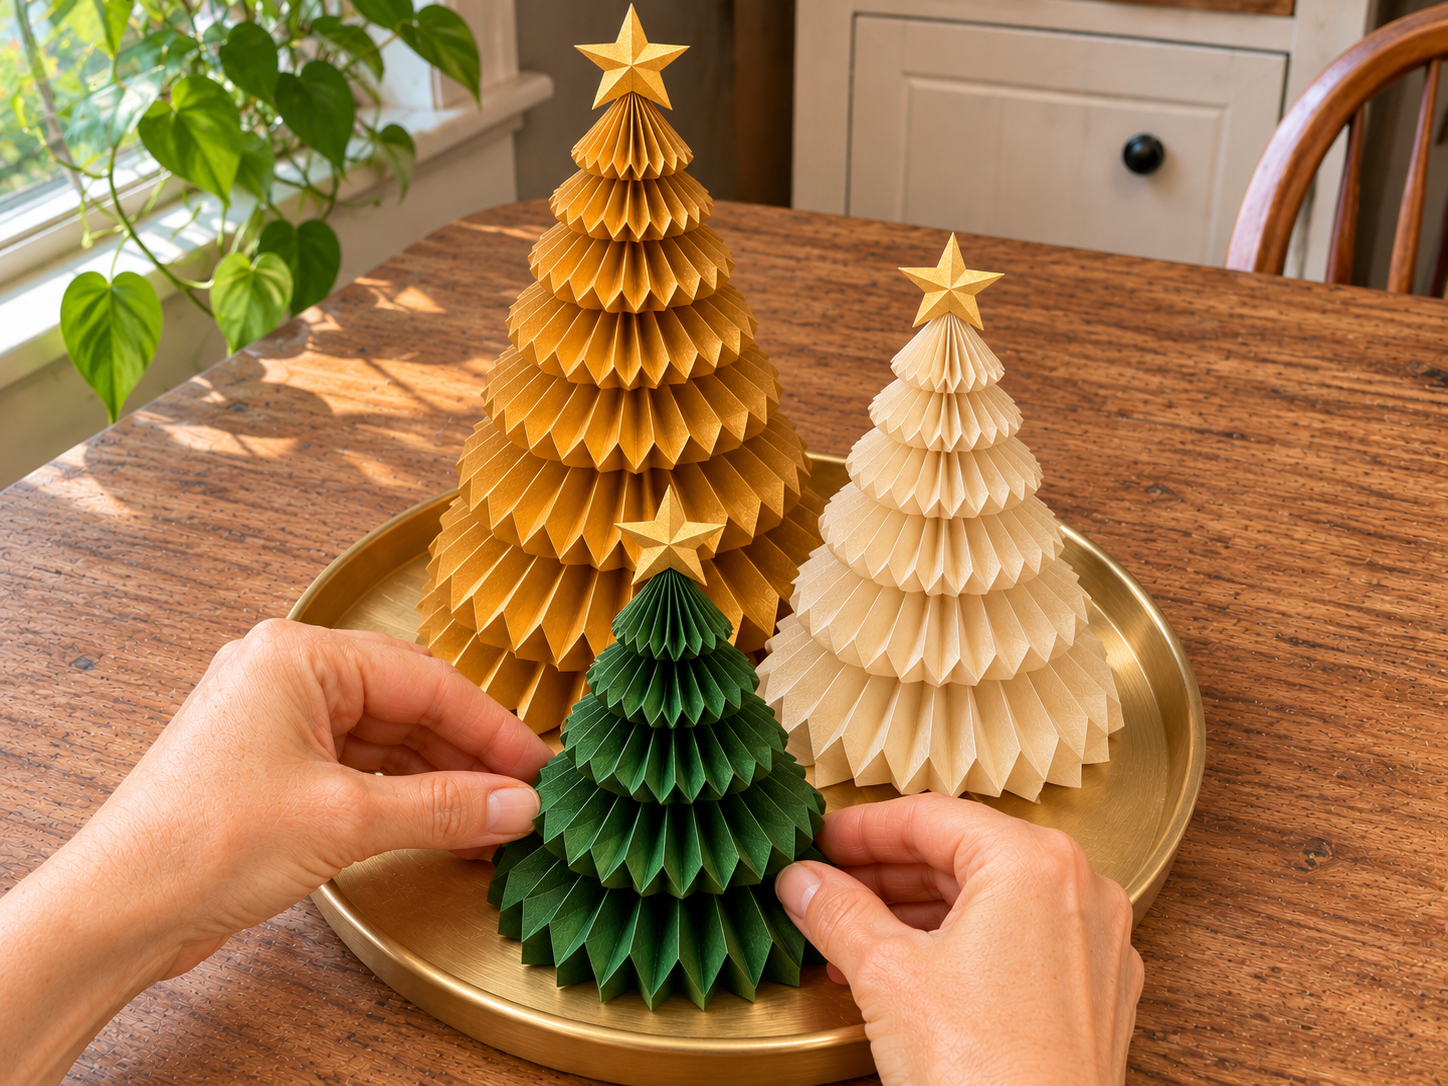
These honeycomb paper Christmas trees offer a charming way to enhance your holiday decor with a handcrafted, boutique aesthetic. The design includes three trees in graduated heights, crafted from gold, cream, and forest green cardstock or scrapbook paper. This specific color palette and varied sizing contribute to a visually appealing and cohesive display.
The distinctive honeycomb structure is achieved through careful accordion-folding and assembly, resulting in a textured, sculptural form. Each tree is finished with a gold paper star topper and metallic gold paint accents along the edges of the rosettes, providing a subtle shimmer and defining the layers for a polished appearance. This trio is ideal for placement on a mantelpiece, tabletop, or shelf.
Materials for DIY Honeycomb Paper Christmas Trees for Elegant Holiday Tabletop Decor
- Gold, Cream, and Forest Green Cardstock or Scrapbook Paper
- Paper Craft Cones (various heights)
- Craft Glue (glue stick or tacky glue)
- Scissors
- Gold Cardstock (for stars)
- Metallic Gold Paint Pen
- Ruler
- Pencil
Need another material? Browse current craft supplies and deals.
Crafting Your Honeycomb Paper Christmas Trees
This guide outlines the process for creating a trio of elegant honeycomb paper Christmas trees. Each step focuses on careful assembly to achieve a refined, sculptural holiday decoration. Paying attention to consistent pleating and rosette formation will help ensure a beautiful finish.
Step 1: Prepare Paper Strips & Accordion Fold
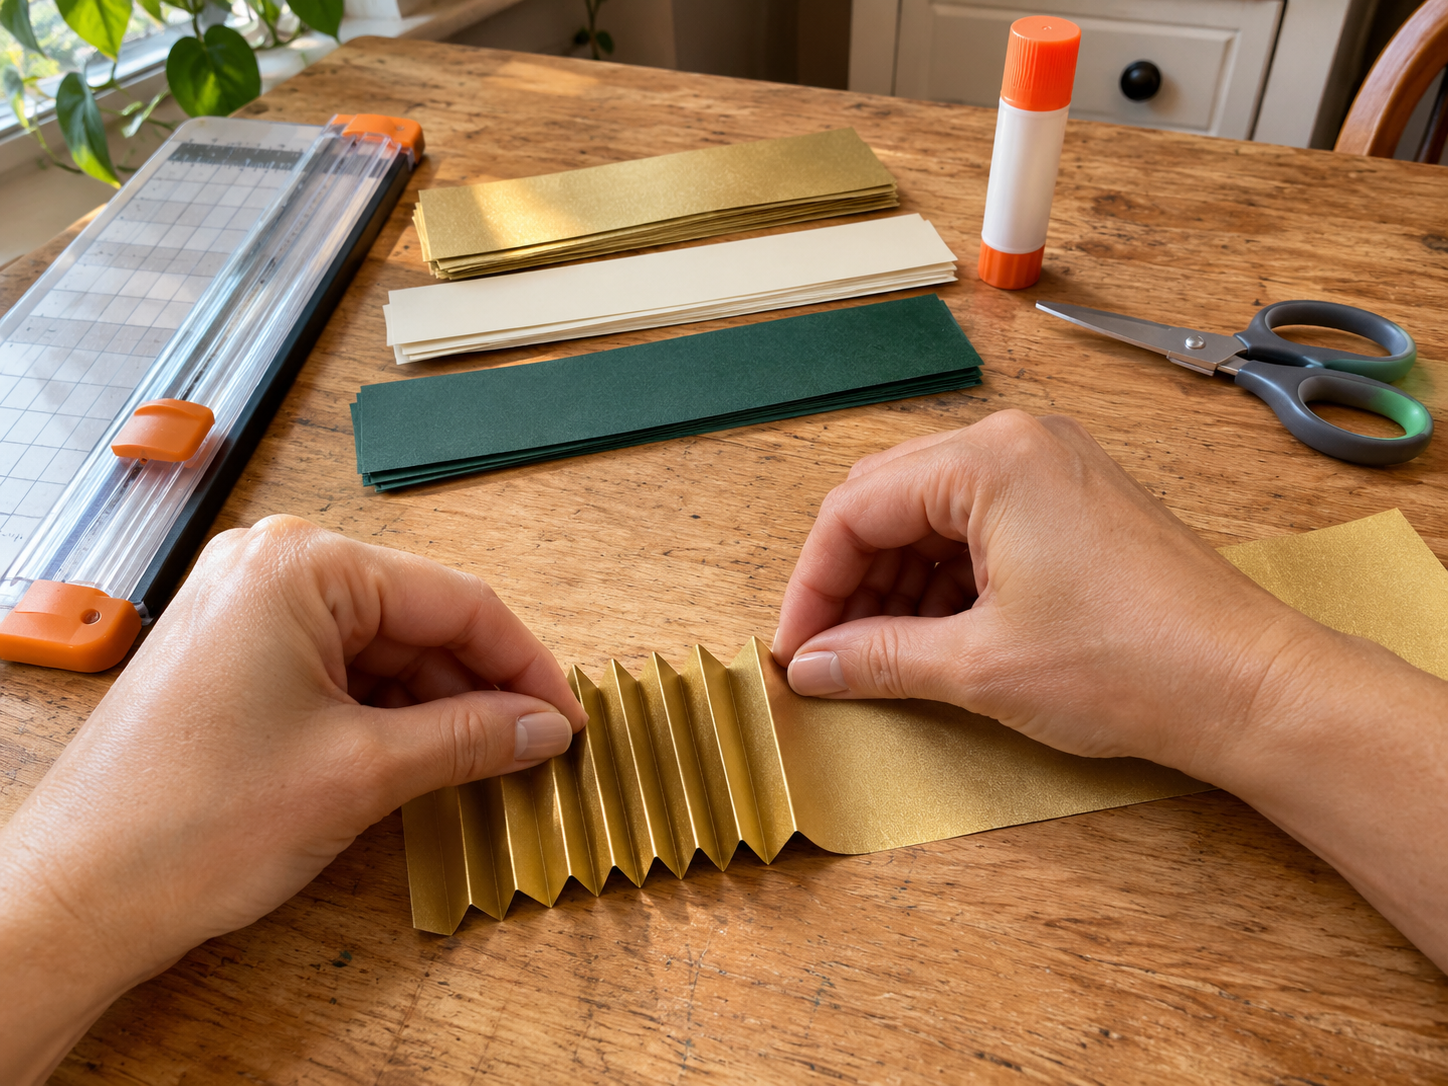
Select your cardstock colors. Using a ruler and pencil, mark and cut several strips of paper for each tree. The width of your strips will determine the 'fluffiness' of your honeycomb layers. Aim for strips of uniform length and width for each tier of the tree. Once cut, begin accordion-folding each strip, ensuring each pleat is even and crisp. Consistent pleating is key to a beautiful honeycomb effect.
Step 2: Form Honeycomb Rosettes
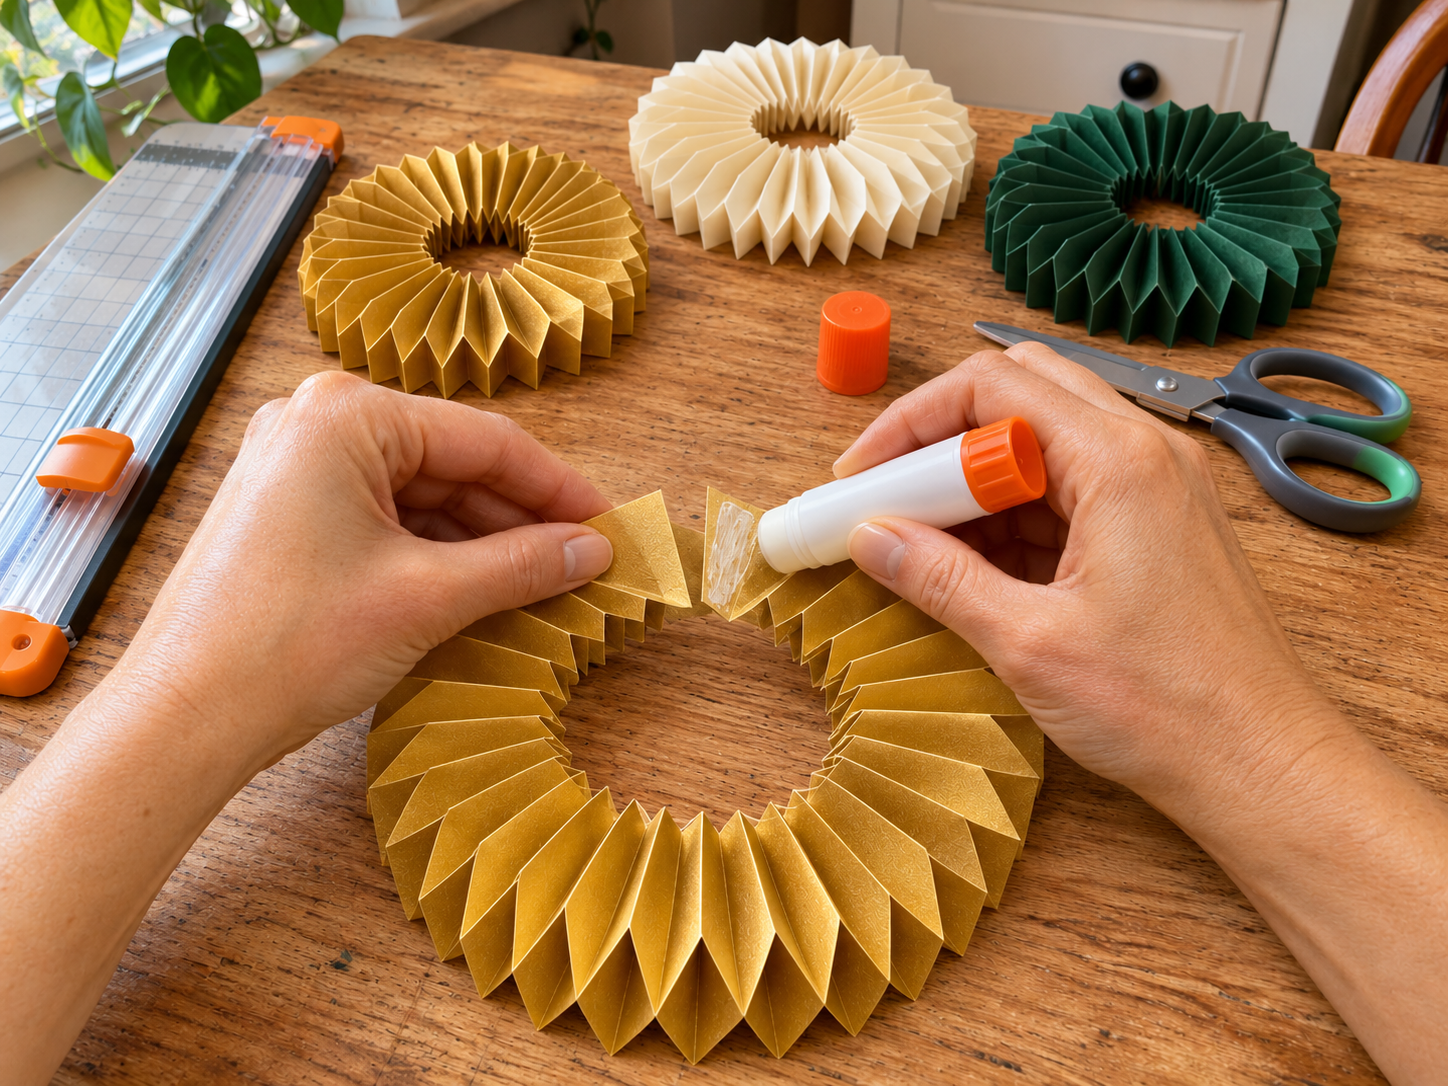
Take one accordion-folded strip and apply a small dab of glue (either glue stick or tacky glue) to one end. Carefully join it with the other end, forming a closed ring. For the honeycomb structure, you will create flat rosettes by gluing these pleated rings together at alternating points along their folds. For example, glue the first pleat from one ring to the first pleat of another, then skip a pleat, and glue the third pleat, and so on. Continue layering and gluing until you have a stack of flat, honeycomb-structured rosettes for each tree tier.
Step 3: Assemble Trees on Cones
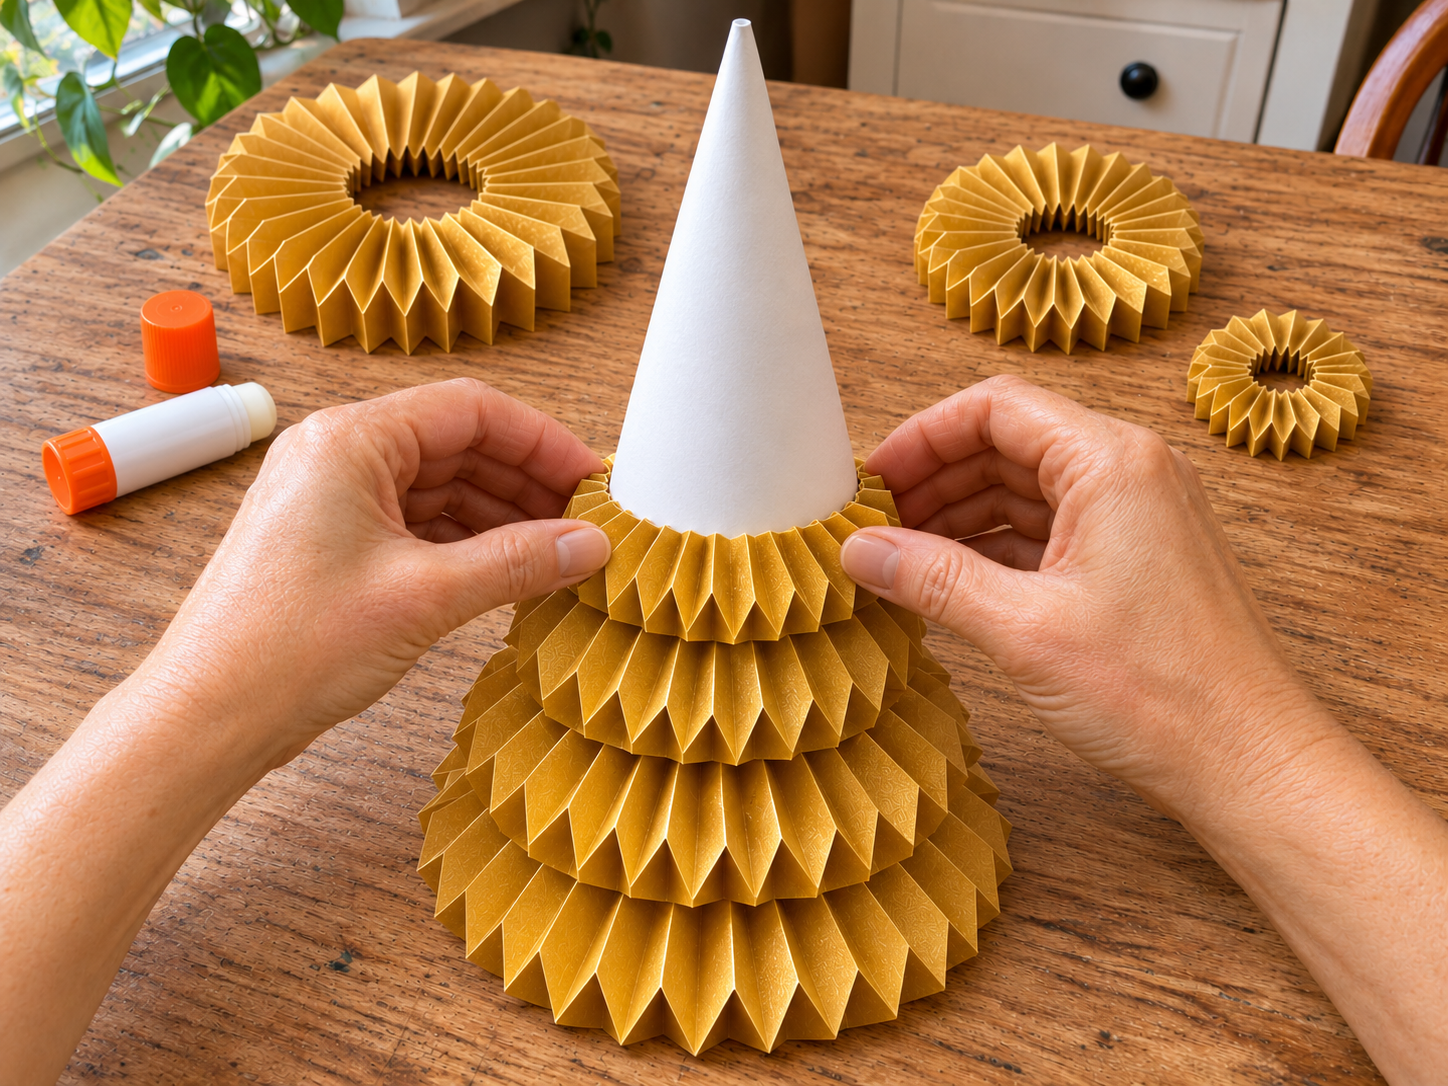
Gather your paper craft cones. Starting with the largest rosettes, apply glue to the inner fold of each rosette and firmly press it onto the base of a cone. Work your way around the cone, slightly overlapping each rosette layer to ensure a full, continuous look without gaps. As you move upwards, gradually switch to smaller rosettes to taper the tree shape, mimicking the natural form of a Christmas tree. Continue until the entire cone is covered.


Step 4: Add Star Toppers & Gold Accents
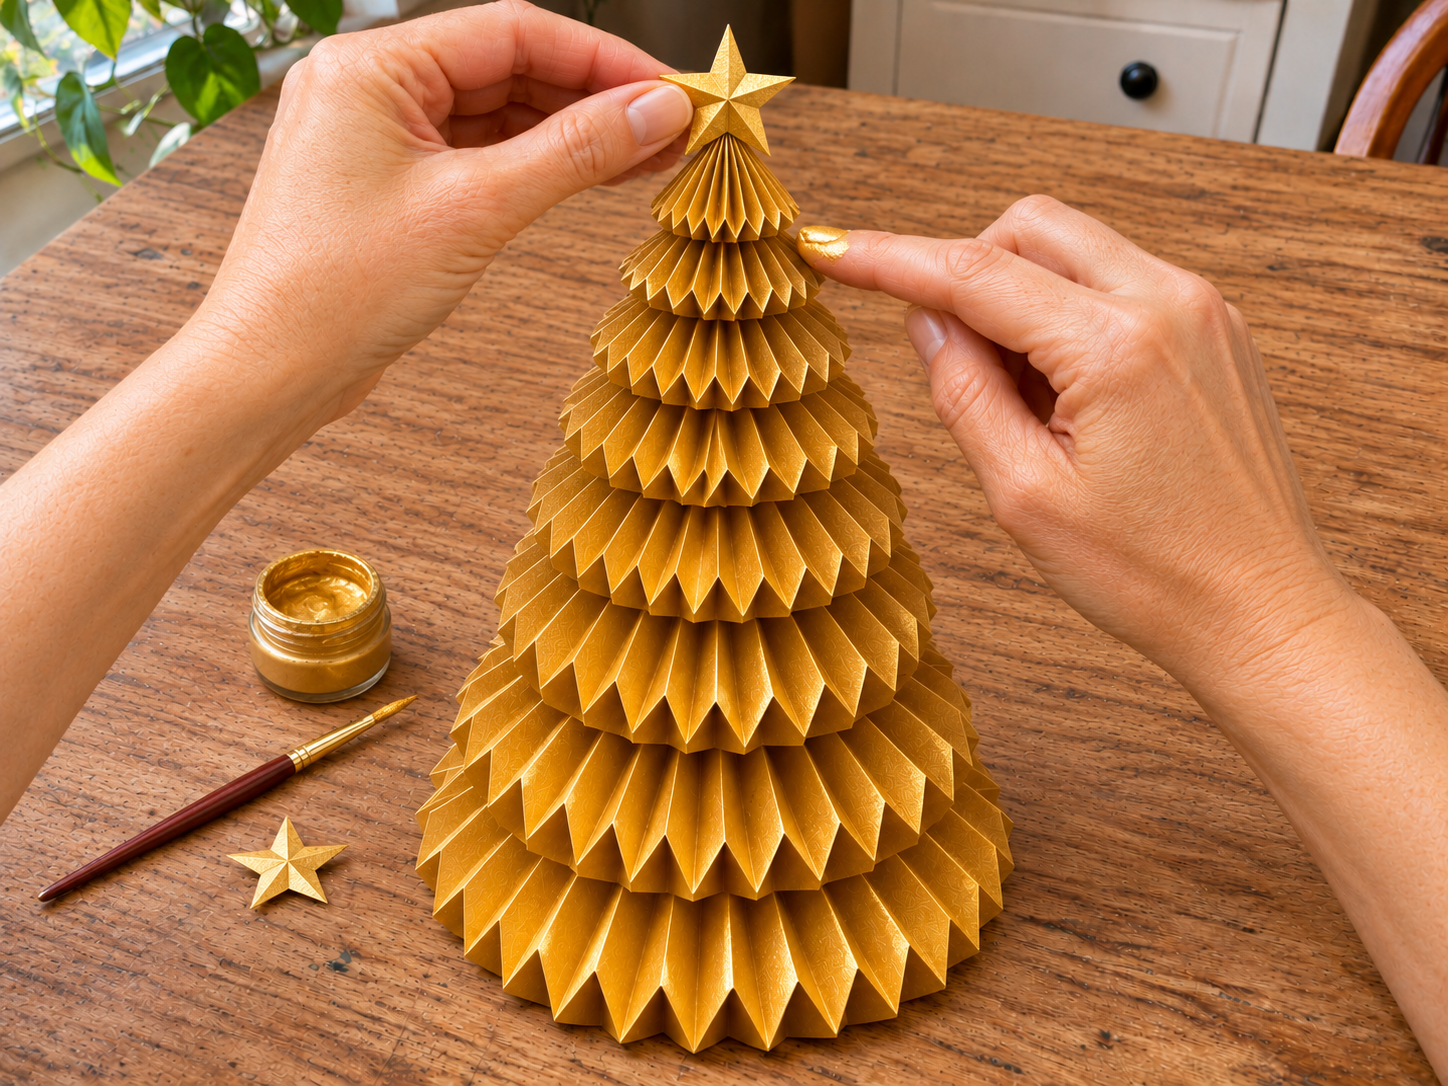
If using gold cardstock, draw and cut out small star shapes for each tree topper. Apply glue to the base of each star and firmly attach one to the very top of each finished honeycomb tree. Next, use a metallic gold paint pen to carefully dab or trace along the edges of the paper rosettes, especially on the gold and cream trees. This adds a subtle shimmer and defines the layers, giving your trees a polished, high-end appearance.
Step 5: Arrange & Display
Your trio of elegant honeycomb paper Christmas trees is now complete! Arrange them on a small decorative tray, mantelpiece, or shelf. Play with their graduated heights and colors to create a visually appealing cluster that enhances your holiday decor with a boutique, handcrafted touch.
Enjoying Your Honeycomb Christmas Tree Display
With these steps completed, your trio of elegant honeycomb paper Christmas trees is ready to enhance your holiday home. Arrange them on a small decorative tray or directly on your mantelpiece or shelf to create a sophisticated and festive focal point. These handcrafted decorations bring a unique, refined touch to any seasonal setting.
Related project collection: DIY Mini Jenga Block Christmas Trees for a Snowy Mantel Display
Practical Questions About This Project
How long does it take to complete this honeycomb Christmas tree project?
The estimated active crafting time for this project is between 80 and 115 minutes. This estimate excludes any unattended drying and curing times.
What is the estimated component cost for making these trees?
The estimated component cost for this project ranges from $7 to $18. This estimate excludes reusable tools and general supplies.
How are the honeycomb rosettes created for the trees?
Honeycomb rosettes are formed by accordion-folding paper strips, then gluing the ends to create rings. These pleated rings are then stacked and glued together at alternating points along their folds to build the flat honeycomb structure.
Where are these honeycomb paper Christmas trees designed to be displayed?
These elegant trees are designed for indoor display on a mantelpiece, tabletop, or shelf, often grouped on a small decorative tray to create a sophisticated holiday arrangement.
Explore paper craft supplies at Dollar Tree.

Leave a Reply