
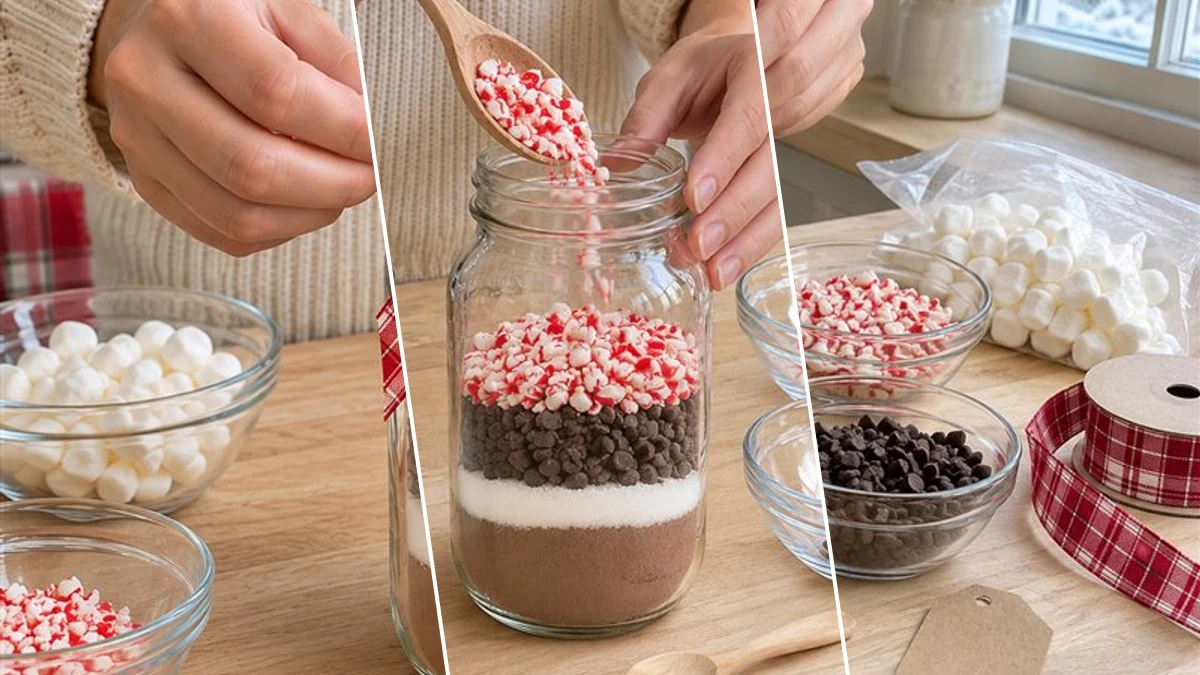
Create a thoughtful and festive gift with a layered hot cocoa mix in a clear quart mason jar. This easy project assembles pantry staples into a charming present, perfect for Christmas gifting. It makes a delightful offering for neighbors, teachers, and coworkers during the holiday season.
Project at a Glance
- Difficulty: Easy
- Estimated active time: 10 minutes to 20 minutes (drying and curing waits not included)
- Main material: Glass
The Appeal of Layered Hot Cocoa Jar Gifts
Layered hot cocoa mix jars offer a visually appealing and practical gift solution for the holiday season. The distinct layers of hot cocoa mix, white granulated sugar, mini chocolate chips, and crushed peppermint create a festive presentation, topped with mini marshmallows for a complete treat.
This project transforms common pantry items into a thoughtful, ready-to-enjoy present. Adorned with a red and white plaid ribbon, a small wooden spoon, and a blank kraft gift tag, each jar can be personalized. This makes them an ideal choice for Christmas gifting to neighbors, teachers, and coworkers.
Materials for DIY Layered Hot Cocoa Mix Mason Jar Christmas Gift for Neighbors and Teachers
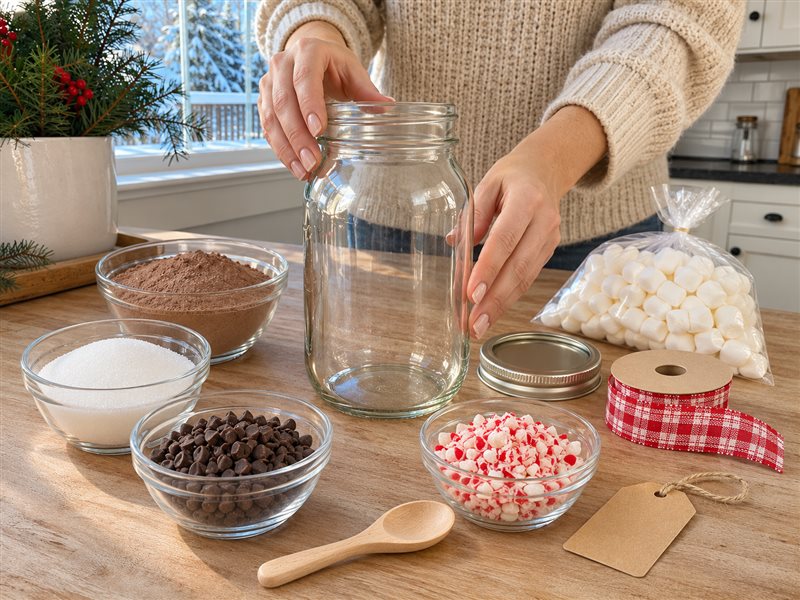
- Clear Quart Mason Jar with Lid
- Hot Cocoa Mix (powder)
- White Granulated Sugar
- Mini Chocolate Chips
- Crushed Peppermint Candy
- Mini Marshmallows
- Red and White Plaid Ribbon
- Small Wooden Spoon
- Blank Kraft Gift Tag
- Clean paper funnel (optional)
Need another material? Browse current craft supplies and deals.
Layering Your Hot Cocoa Mason Jar Gift
Creating these layered hot cocoa mix jars is a simple process that focuses on careful layering. Follow these steps to assemble each ingredient neatly, building a visually appealing and delicious gift. Ensure each layer is distinct for the best presentation.
Step 1: Gather and Prepare Your Jar
Begin by gathering all your pantry ingredients and decorative elements. Select a clean, clear quart-sized mason jar with its lid. Wash the jar thoroughly with warm, soapy water and allow it to air dry completely to prevent any moisture from affecting the cocoa mix. Arrange your ingredients in small bowls for easy access.
Step 2: Layer Cocoa Mix and Sugar
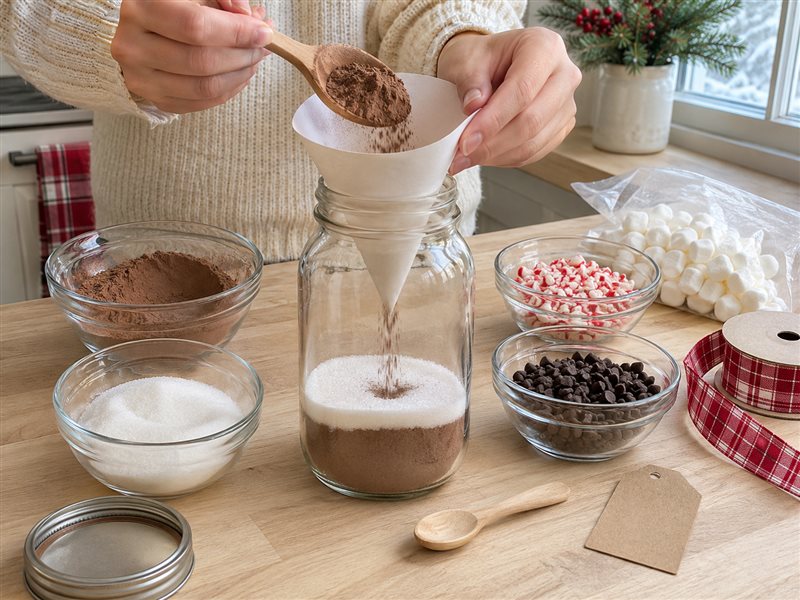
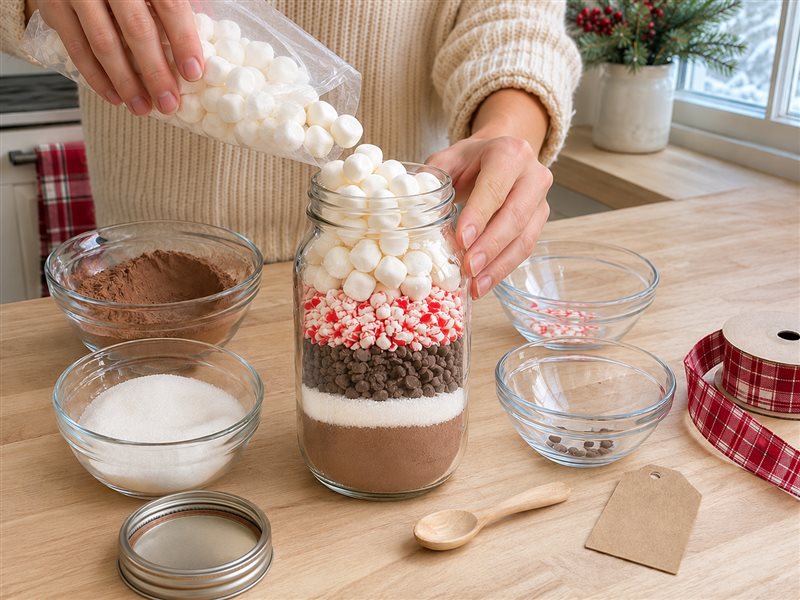
Using a clean paper funnel, carefully pour the hot cocoa mix into the bottom of the mason jar. Tap the bottom of the jar gently on your work surface to settle the cocoa and create a flat, even layer. Next, add the white granulated sugar, creating a distinct white layer directly on top of the cocoa. Repeat the tapping process to ensure it settles evenly.
Step 3: Add Chocolate Chips and Crushed Peppermint
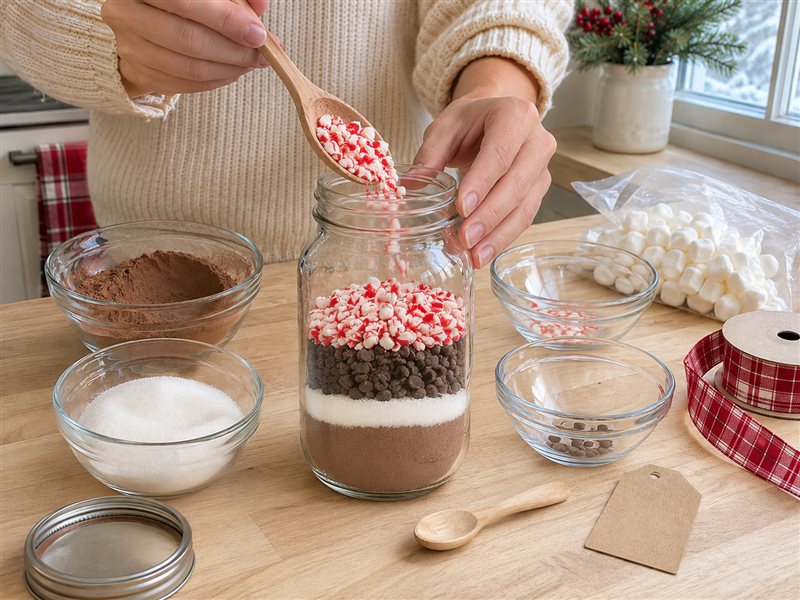
Continue building your layers. Carefully pour the mini chocolate chips on top of the sugar layer, ensuring an even distribution. Gently tap the jar again to settle the chips. Follow this with the crushed peppermint candy, creating a vibrant red and white layer. Take care to keep the layers as separate and defined as possible.


Step 4: Fill with Marshmallows and Seal
Once your four dry ingredient layers are complete, gently fill the remaining space in the jar with mini marshmallows. Pack them down lightly to ensure the jar is completely full to the brim, which helps prevent the ingredients from shifting during transport. Screw the mason jar lid on tightly to seal in the freshness.
Step 5: Decorate and Finish
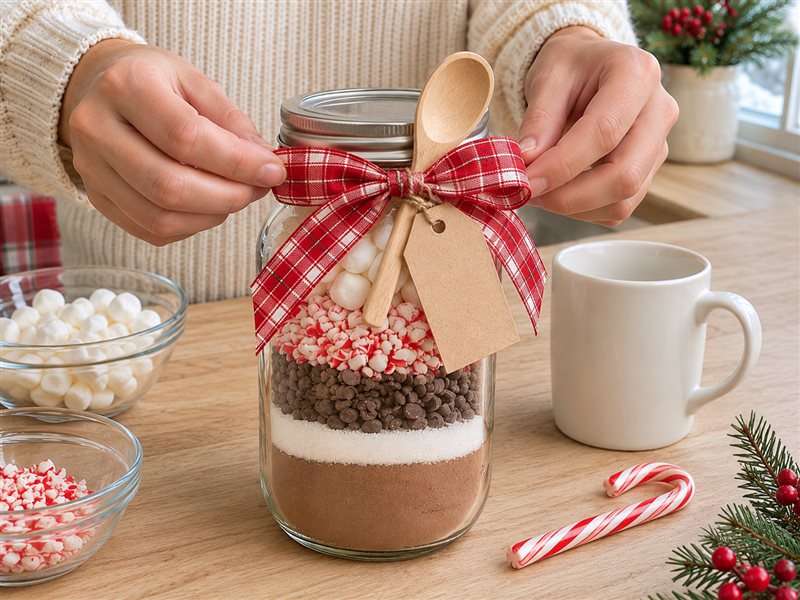
Complete your gift by adding the decorative touches. Take your red and white plaid ribbon and tie it neatly around the neck of the mason jar, creating a charming bow. Tuck the small wooden spoon behind the ribbon on one side, and attach the blank kraft gift tag to the bow. Your layered hot cocoa mix gift is now ready to present!
Presenting Your Layered Hot Cocoa Gifts
With all the layers complete and decorative elements added, your festive hot cocoa mix jars are ready to be shared. These charming, easy-to-make gifts are a thoughtful way to show appreciation during the holiday season. They offer a warm, comforting treat for anyone on your gift list.
Related project collection: DIY Peppermint Candy Christmas Wreath for Festive Holiday Door Decor
Practical Questions About This Project
What type of jar is recommended for this layered hot cocoa mix?
A clear quart-sized mason jar with a lid is recommended for creating this layered hot cocoa mix gift.
How long does it take to assemble one layered hot cocoa jar?
The estimated active time for assembling one layered hot cocoa jar is between 10 and 20 minutes, excluding any unattended drying or curing.
What occasions are these hot cocoa jar gifts suitable for?
These layered hot cocoa mix jars are ideal for Christmas gifting, especially for neighbors, teachers, and coworkers.
What is the purpose of tapping the jar after adding each ingredient layer?
Tapping the bottom of the jar gently after adding each ingredient helps settle the contents, creating flat, even, and distinct layers.
What decorative elements are used to finish the hot cocoa jar gift?
The finished hot cocoa jar is decorated with a red and white plaid ribbon tied around the neck, a small wooden spoon tucked under the ribbon, and a blank kraft gift tag attached.
Explore glass craft supplies at Dollar Tree.

Leave a Reply