
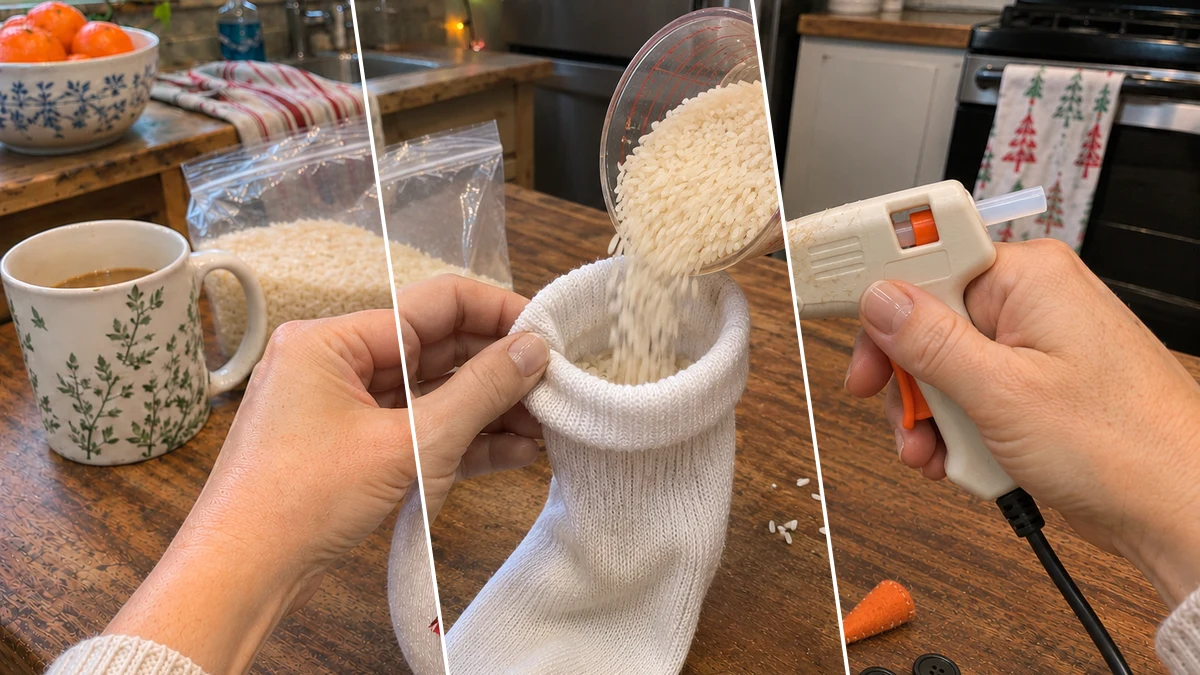
Create a charming no-sew rice-filled sock snowman, an easy and festive addition to your Christmas and winter decor. This cozy figurine is simple to assemble using common craft materials like a white sock, uncooked rice, and small fabric scraps. It makes a delightful accent for shelves, mantels, or tabletops, bringing a touch of winter charm to any room.
Project at a Glance
- Difficulty: Easy
- Estimated active time: 15 minutes to 25 minutes (drying and curing waits not included)
- Estimated component cost: $1 to $2 (reusable tools and general supplies excluded)
- Main material: Fabric
- Suggested placement: Shelf, Mantel, Tabletop
Why This Easy Sock Snowman is Perfect for Winter Decor
This no-sew rice-filled sock snowman is an ideal project for crafters seeking a quick and satisfying seasonal decoration. Its simple construction requires no sewing, making it accessible for beginners and a fun activity for families to enjoy together. The process focuses on basic shaping and gluing, resulting in a charming finished piece without complex techniques.
Crafting this snowman uses readily available and often inexpensive materials, such as a plain white crew sock and uncooked rice. The addition of small fabric scraps for a scarf and buttons for features allows for personalization and the use of leftover craft supplies. This approach makes it a budget-friendly option for creating festive holiday accents.
Once complete, this cozy snowman figurine can enhance various areas of your home. Place it on a mantel, a bookshelf, or as a centerpiece on a festive table to add a touch of rustic winter charm. Its sturdy, rice-filled base ensures it stands upright, making it a reliable and adorable element in your seasonal displays.
Materials for DIY No-Sew Rice-Filled Sock Snowman for Christmas Shelf Decor
- White crew socks
- Uncooked rice
- Twine or rubber bands
- Black buttons or beads (for eyes and body)
- Orange felt scrap (for nose)
- Red and black buffalo plaid fabric or ribbon scrap (for scarf)
- Hot glue gun and glue sticks
Need another material? Browse current craft supplies and deals.
How to Make Your Rice-Filled Sock Snowman
Creating your own no-sew rice-filled sock snowman is a straightforward process. Follow these steps to transform simple materials into a delightful winter decoration. The guide focuses on shaping the sock and adding decorative elements with ease, making it enjoyable for all skill levels.
Step 1: Fill the Sock Base
Start by inverting a plain white crew sock. This creates a cleaner outer surface. Carefully fill the sock with uncooked rice, compacting it gently as you go to form a firm, rounded base. Continue filling until the base is about 4-5 inches tall and feels stable. Once the desired amount of rice is in, gather the open end of the sock tightly and secure it with a piece of twine or a strong rubber band, forming a sealed bottom.
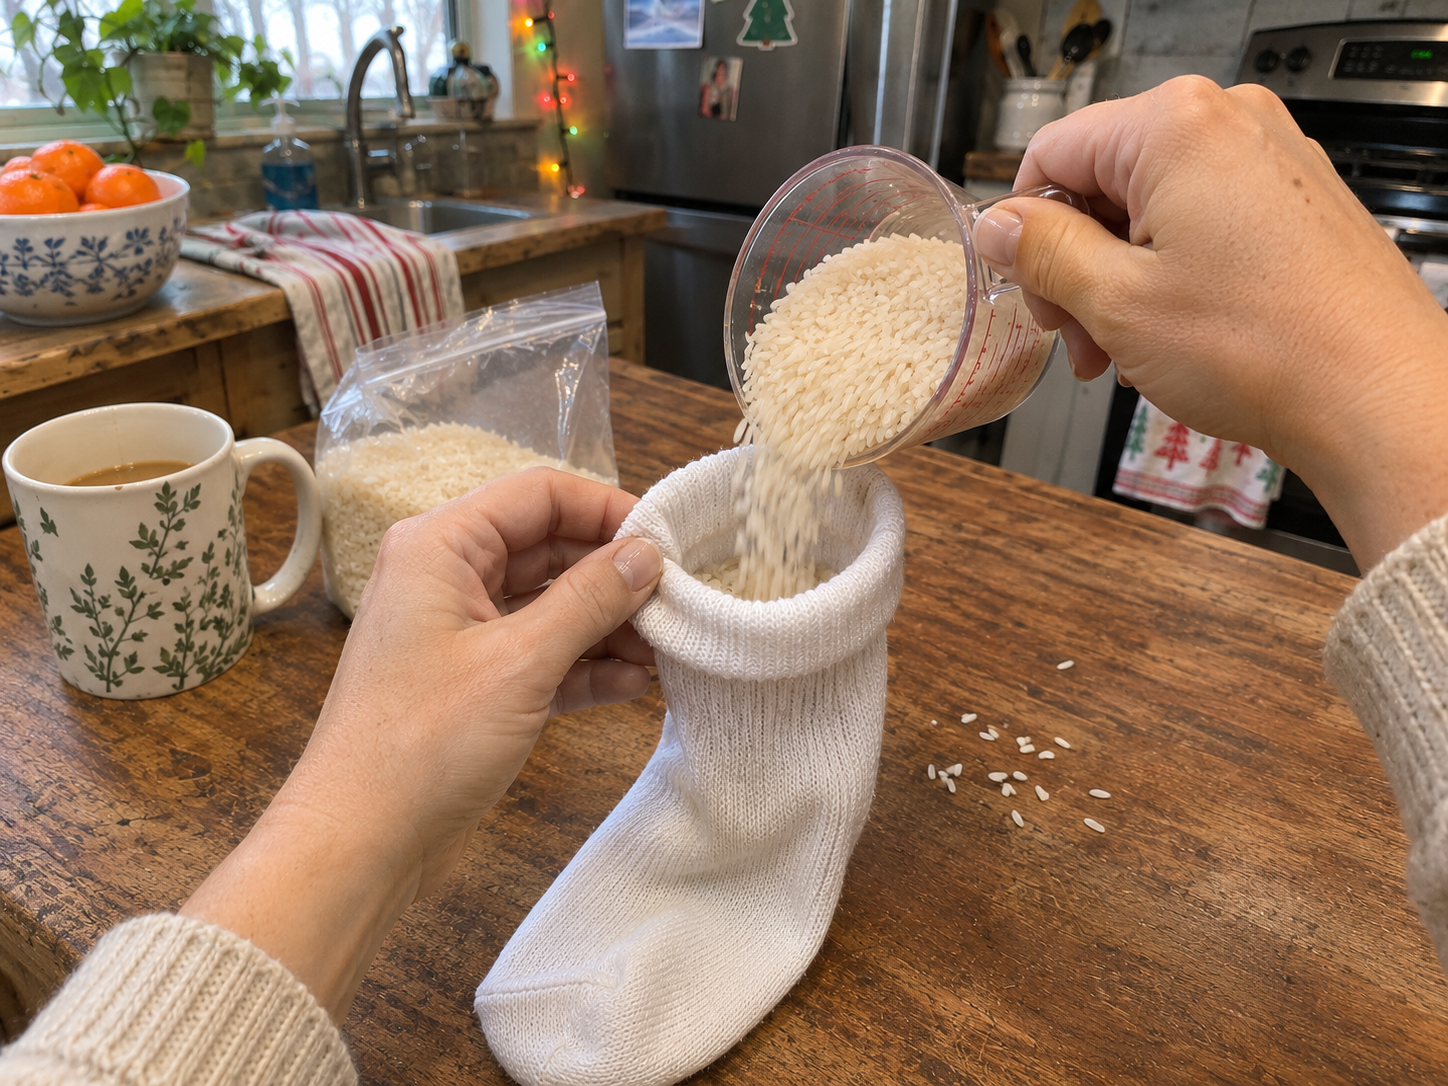
Step 2: Shape Body and Head
Once the base is filled and secured, gently shape the rice to create a larger bottom section for the snowman's body. Then, about 2-3 inches above the body, use another piece of twine or a rubber band to cinch the sock tightly, creating a defined 'neck' and separating the body from what will become the head. Ensure the rice is evenly distributed for a stable base and a well-proportioned head.
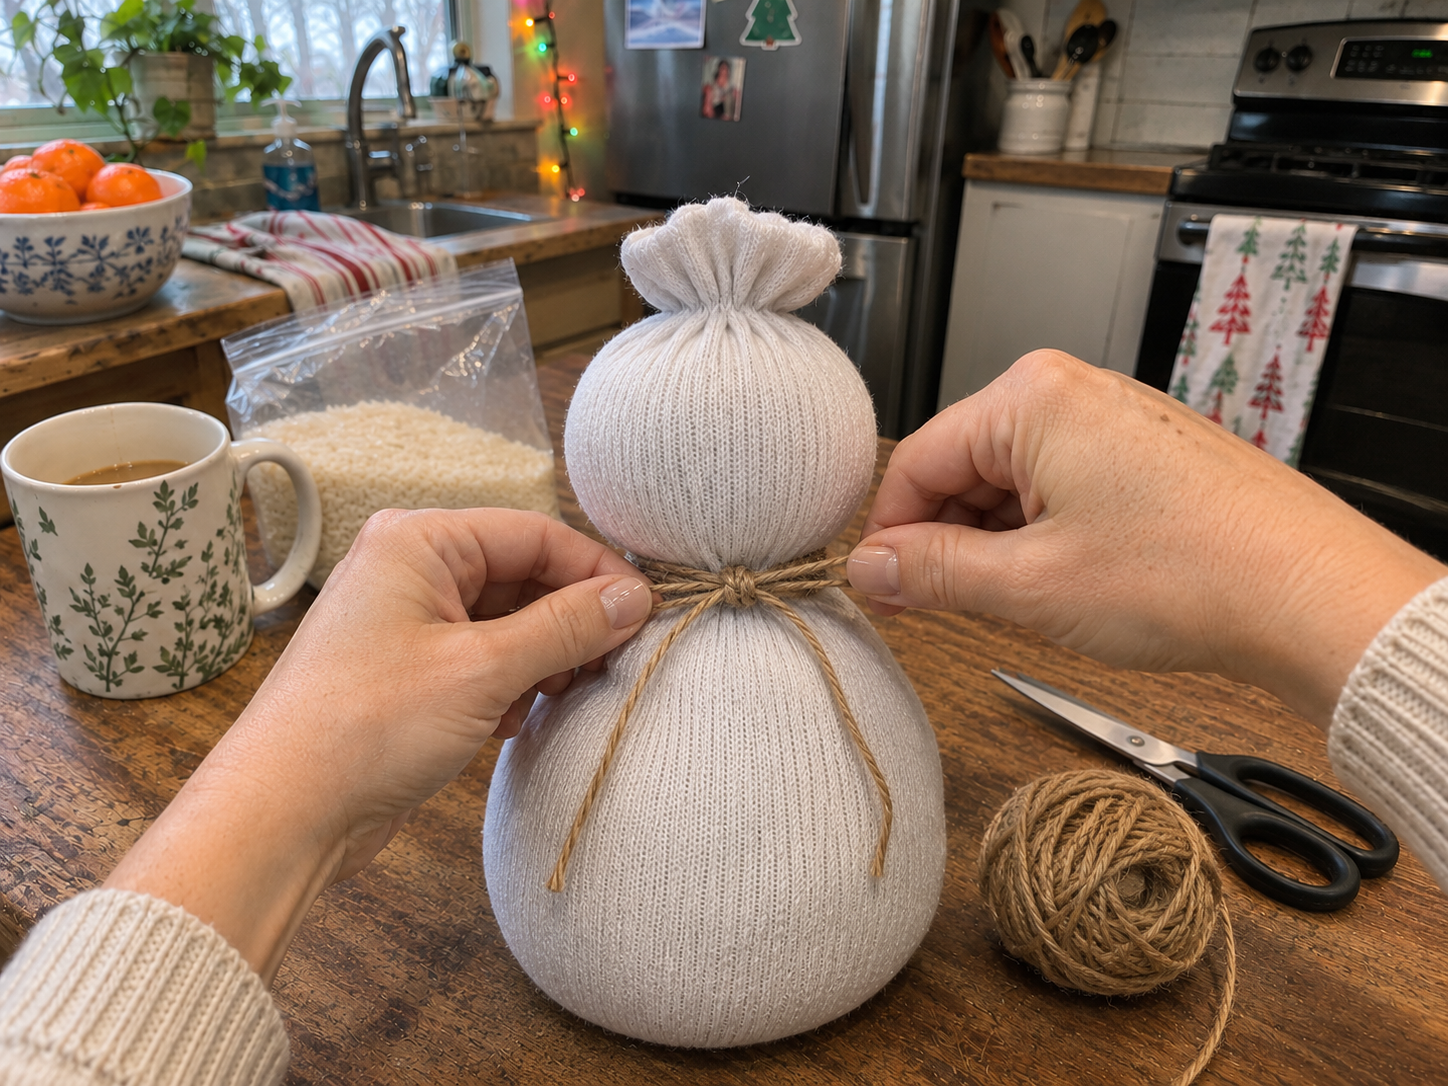
Step 3: Craft the Sock Hat
Take the remaining cuff of the sock above the head section and fold it down, then gather it gently upwards to form a small, slouchy hat. Secure the gathered top with a small piece of twine, tying it into a neat bow or knot. You can adjust the folds to give the hat a desired shape, making it look cozy and festive.
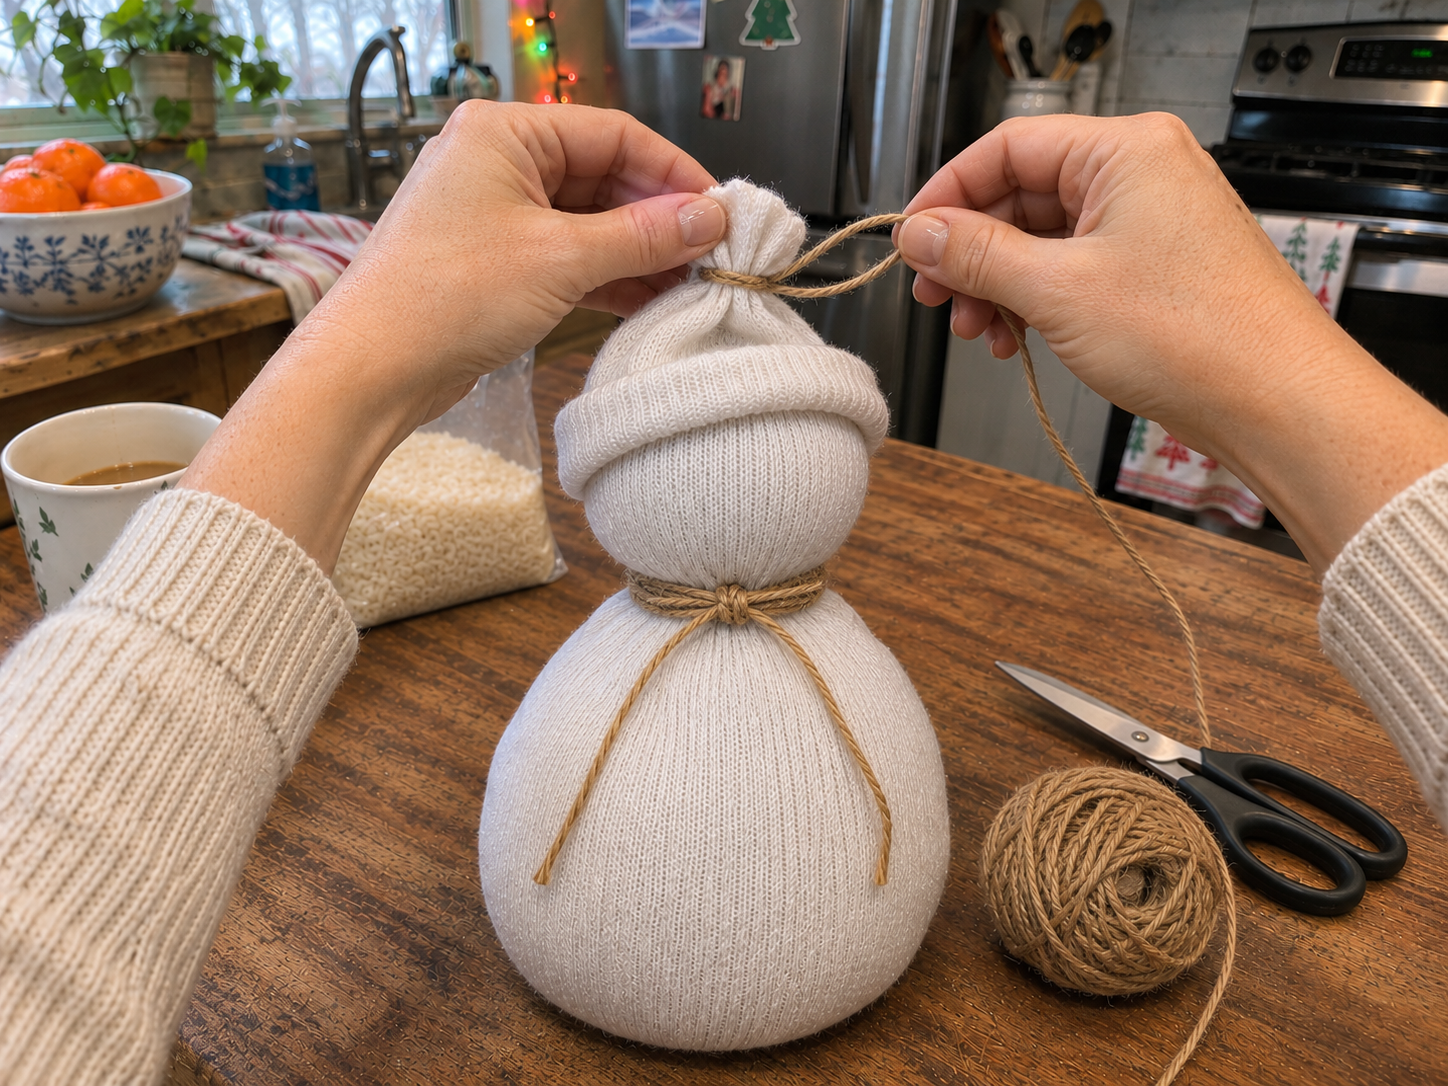


Step 4: Add Facial Features and Buttons
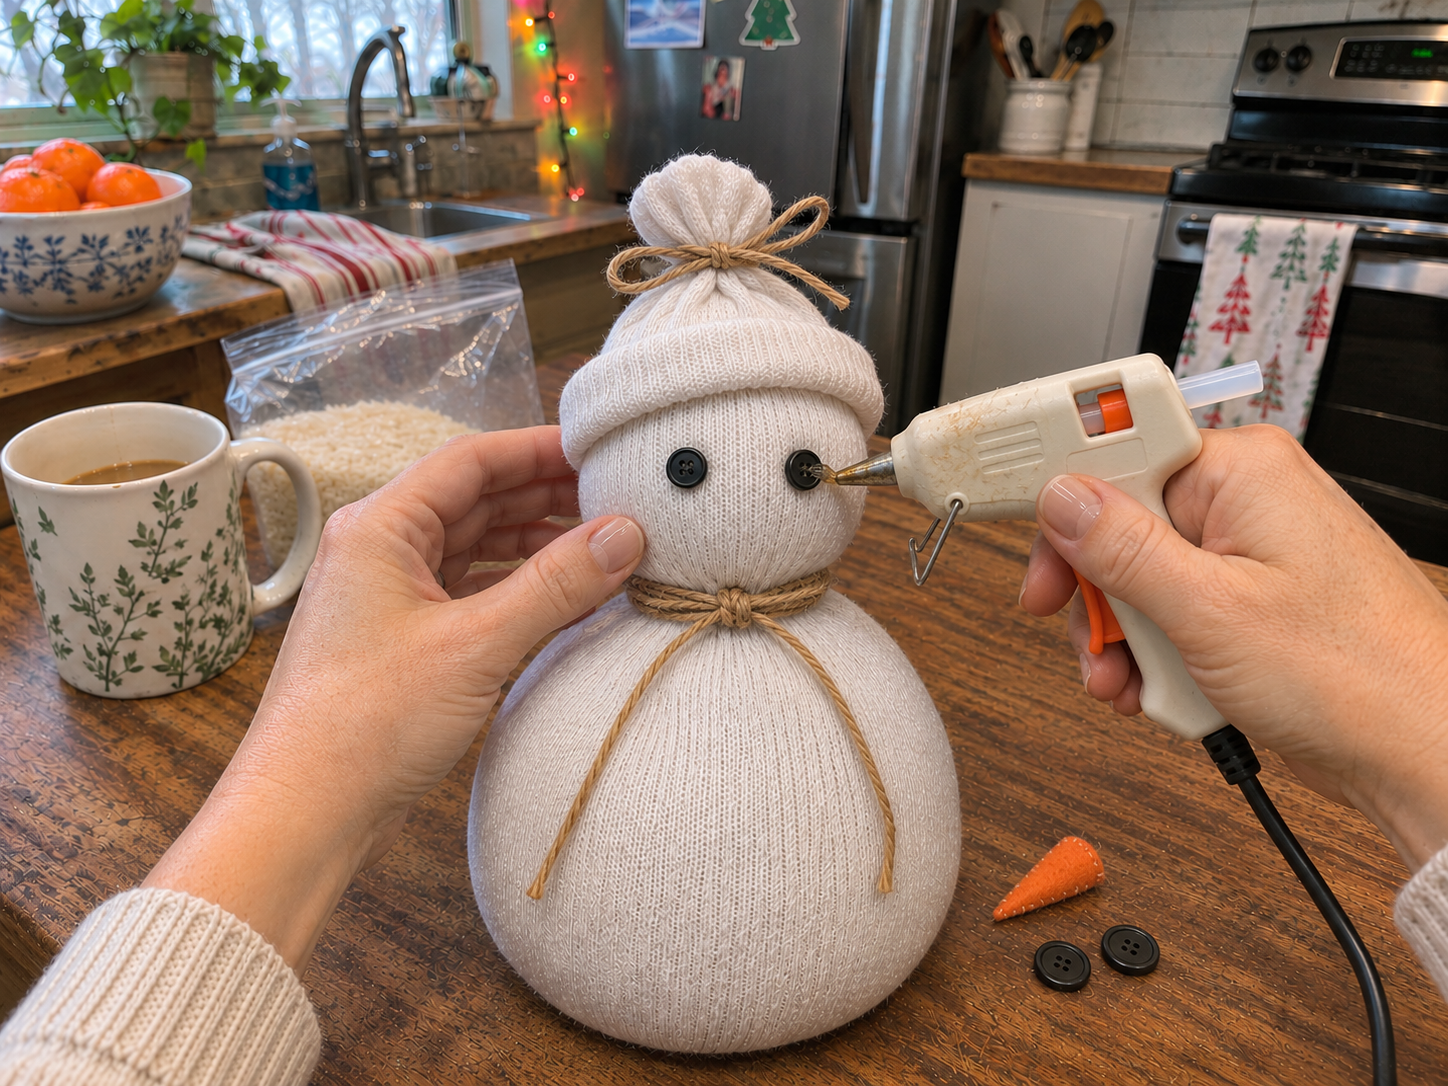
Using a hot glue gun, carefully attach two black buttons or beads for the snowman's eyes onto the head. Cut a small carrot shape from orange felt and hot glue it in place for the nose. Finally, hot glue three more black buttons or beads down the front of the snowman's body for its traditional button details.
Step 5: Complete with a Scarf
Take your red and black buffalo plaid fabric or ribbon scrap. Cut it to a length of about 10-12 inches, depending on how long you want the scarf ends to be. Wrap it around the snowman's neck, just below its head, and tie it into a simple knot or bow. You can fray the ends of the fabric slightly for a cozier, rustic look. Your adorable rice-filled sock snowman is now complete!
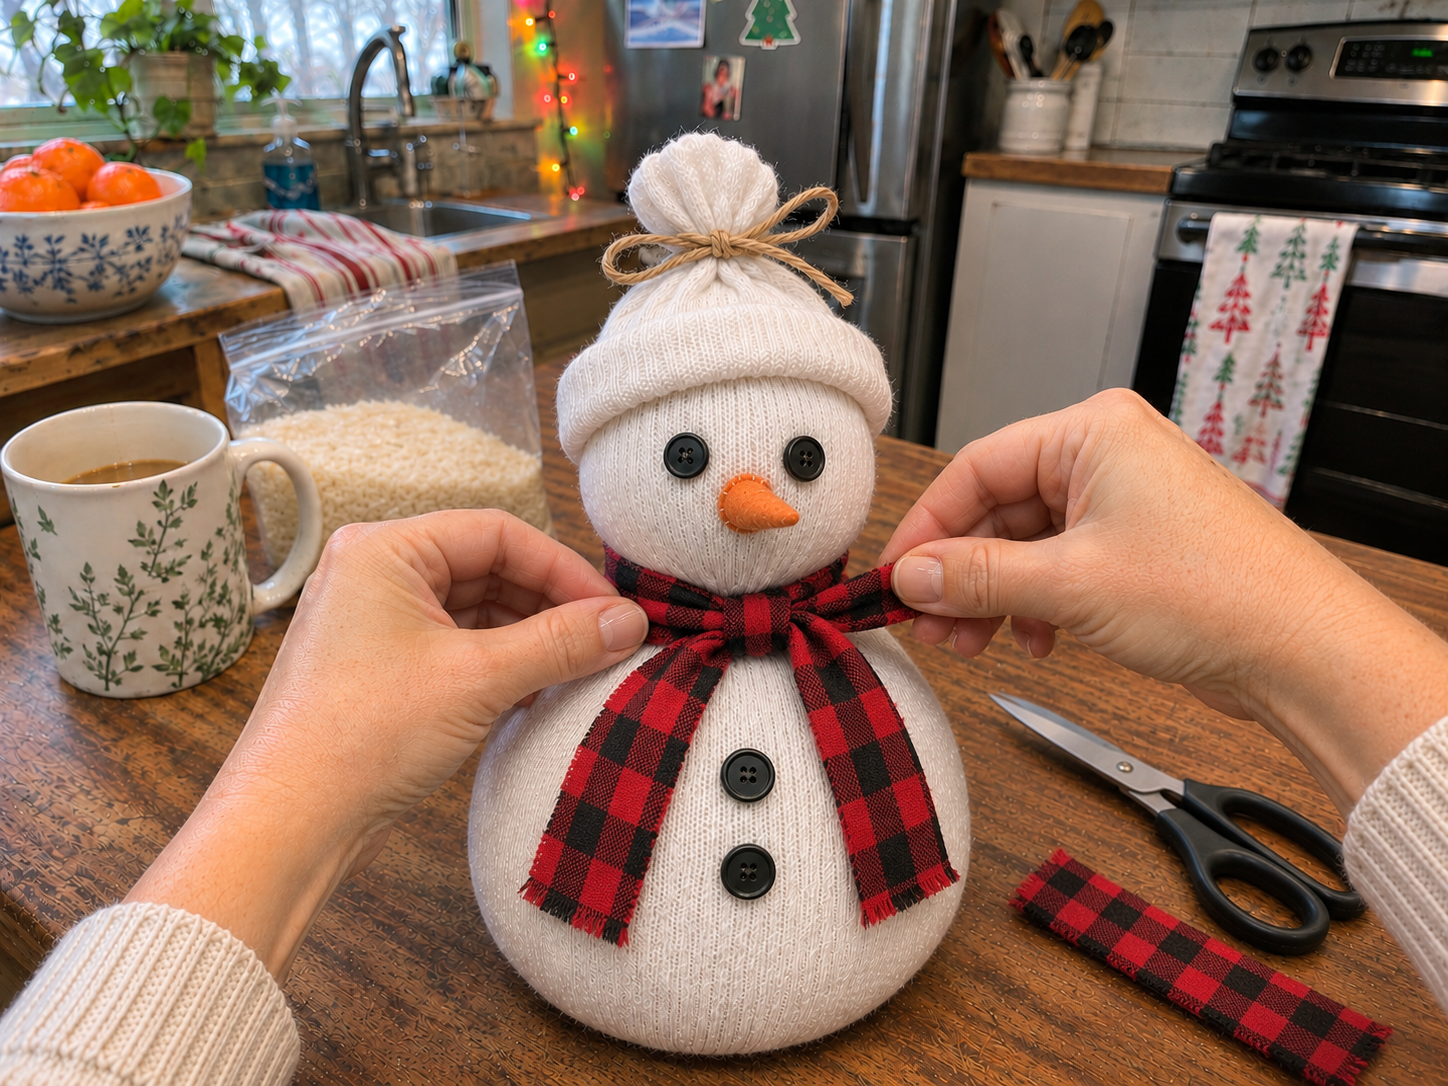
Enjoy Your Charming Rice-Filled Sock Snowman
With these simple steps, your adorable rice-filled sock snowman is ready to display. This cozy, no-sew craft offers a delightful way to add handmade charm to your home throughout the winter season. Place it where it can bring a smile and a touch of festive warmth to your decor.
Related project collection: DIY Glitter Putz Style Christmas Village for Festive Mantel Decor
Practical Questions About This Project
What kind of sock is best for this snowman?
A plain white crew sock is recommended for this project to achieve the classic snowman appearance and structure.
Can children help make this snowman?
Yes, this is an easy craft suitable for families and children with adult supervision, especially when using a hot glue gun.
What is the estimated time to complete this craft?
The estimated active time to create this rice-filled sock snowman is between 15 to 25 minutes, excluding any unattended drying or curing time.
Where can the finished sock snowman be displayed?
This charming snowman figurine is ideal for display on shelves, mantels, or tabletops, adding a cozy touch to your Christmas and winter decor.
Search Dollar Tree for fabric supplies.

Leave a Reply