
")
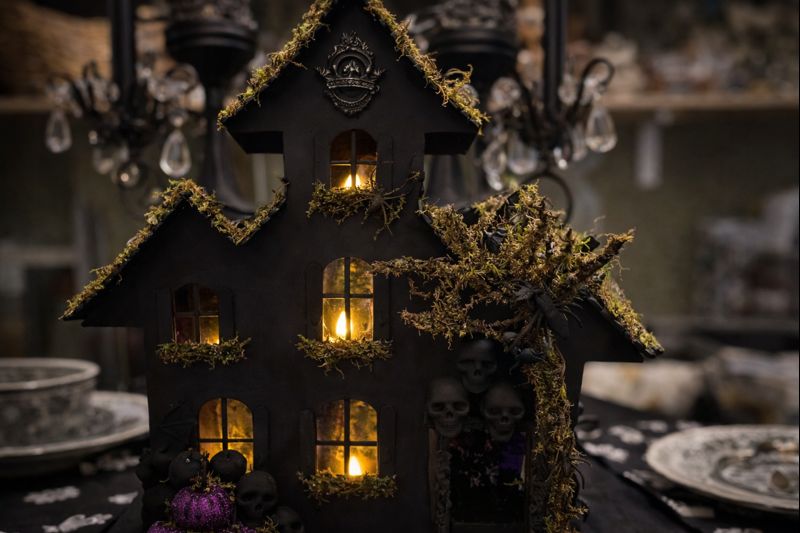
Create your own Spooky Enchanted Haunted House Luminaria with this easy step-by-step DIY craft tutorial. This light-up Halloween decoration adds a magical, haunted glow and is perfect for holiday and seasonal home decor lovers.
Theme: Halloween
Materials Needed
- Unfinished Wooden or Cardboard House Structure/Kit
- Black Acrylic or Spray Paint
- Assorted Craft Moss (e.g., Spanish moss, reindeer moss)
- Hot Glue Gun & Glue Sticks
- Miniature Halloween Embellishments (skulls, pumpkins, spiders, bats, decorative crests)
- Small LED Tea Lights or Fairy Lights
Step-by-Step Instructions
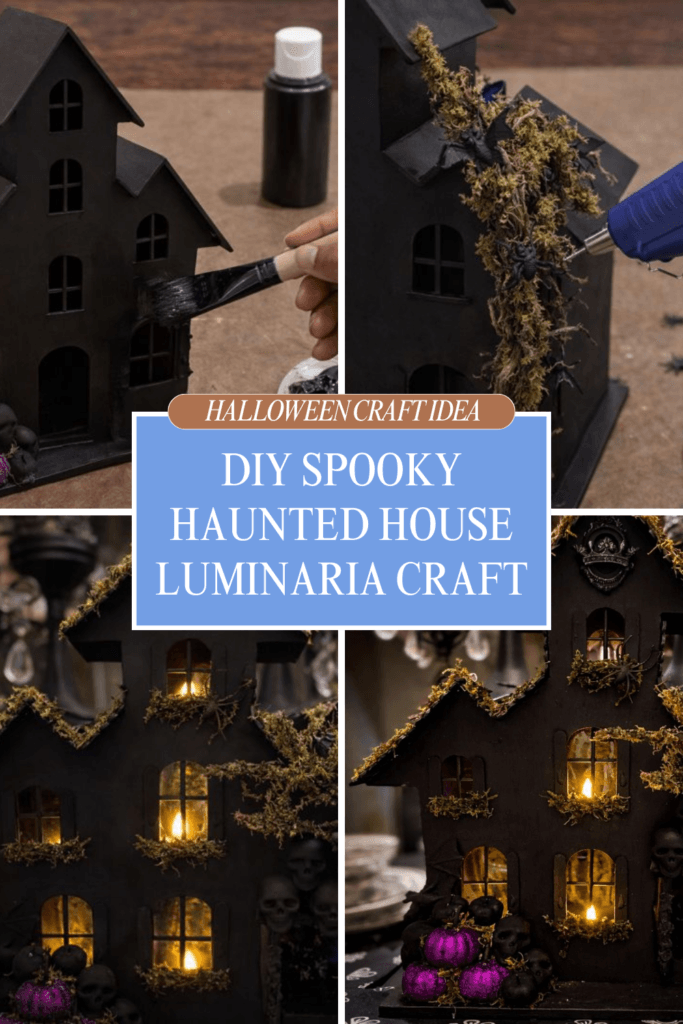
Step 1: Paint and Prepare the Haunted House Base
Begin by assembling your unfinished house structure according to the manufacturer’s instructions. Once the structure is sturdy, apply an even coat of black acrylic or spray paint over the entire exterior. Ensure all surfaces, including edges and crevices, are thoroughly covered.
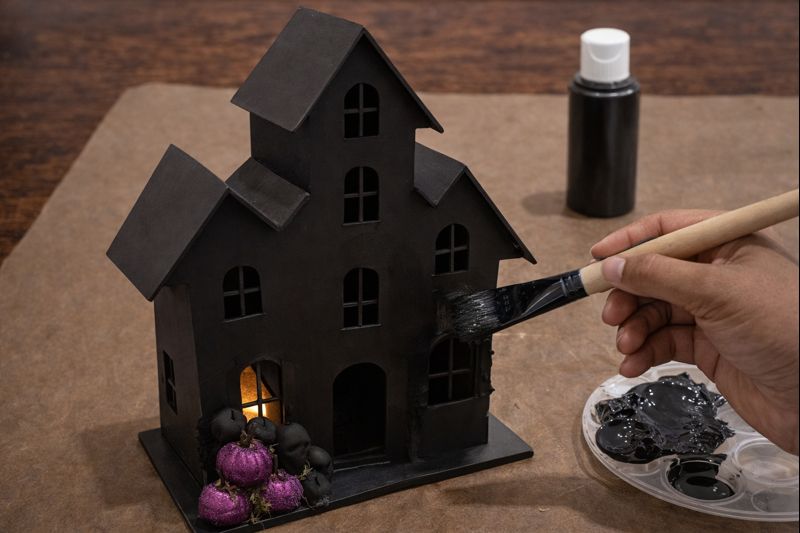
💡 Pro Tip: For a smooth, durable finish with spray paint, apply several thin coats instead of one thick one. This prevents drips and allows for better adhesion. If using acrylic paint, a sponge brush can help achieve an even texture and get into tight spots. Allow each coat to dry completely before reapplying or moving to the next step.
Step 2: Add Moss for an Aged, Overgrown Look
Once the black paint is fully dry, begin adding the moss details. Apply small, controlled beads of hot glue along the edges of the rooflines, gables, and around the window frames. Gently press small clusters of craft moss onto the hot glue, covering these areas to create an aged, overgrown, and spooky effect.
💡 Pro Tip: For a more organic and realistic look, vary the density and length of the moss. Don’t aim for perfect uniformity. Use different types of moss (like Spanish moss for draping and reindeer moss for texture) to add visual interest. Work in small sections so the hot glue doesn’t cool and harden before you can place the moss.
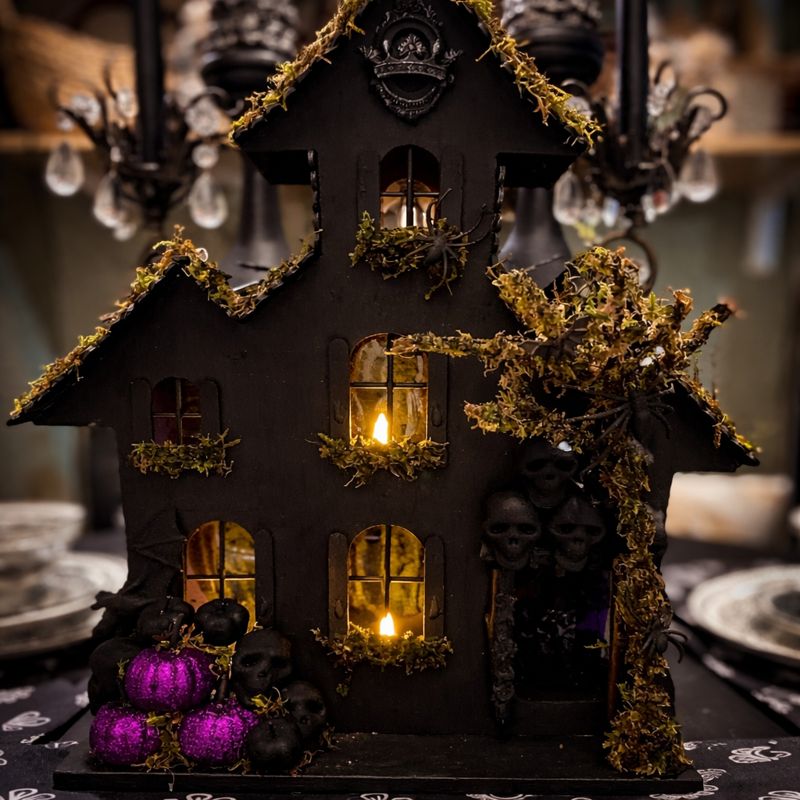
Step 3: Create Creepy Vines and Climbing Details
Create a dramatic, spooky vine or dead tree effect climbing up one side of the house. Select a more structured piece of moss or a small, twisted vine-like branch. Apply hot glue along the side of the house, mimicking a climbing plant, and attach the moss/branch, shaping it upwards. Integrate miniature spiders and small bat figurines into the moss for an extra creepy touch.
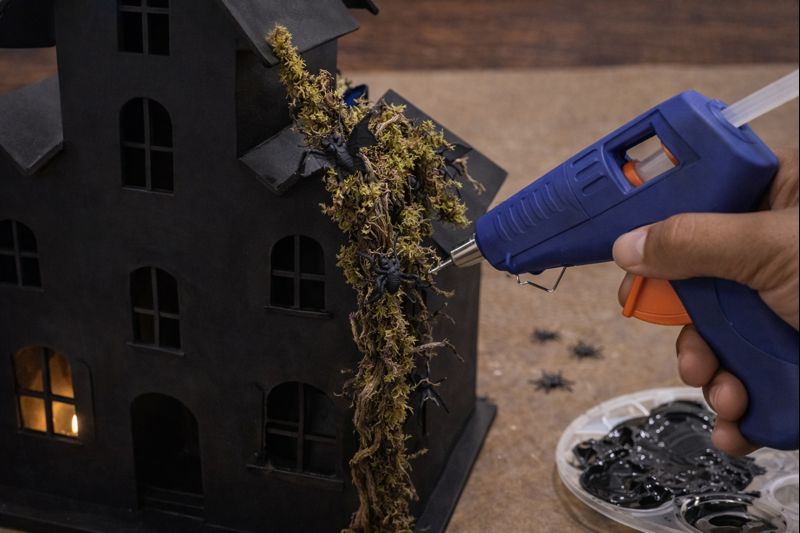
💡 Pro Tip: To make the vine more substantial, twist several strands of Spanish moss together before gluing. Allow some ends to hang freely for added dimension and a more natural, decaying look. Position the spiders and bats as if they are crawling or flying within the foliage, enhancing the haunted feel.
Step 4: Attach Mini Halloween Embellishments
Now it’s time to add the smaller Halloween embellishments. Arrange miniature skulls, black pumpkins, and the glittery purple pumpkins around the base of the house, particularly near the entrance and corners. Secure each item with hot glue. Add smaller bits of moss around these miniatures to help them blend into the overall haunted landscape.
💡 Pro Tip: Create visual impact by clustering your embellishments rather than scattering them sparsely. The mix of matte black, spooky skulls, and vibrant glitter pumpkins provides excellent contrast and focal points. Ensure the miniatures are securely glued and well-balanced to prevent the decor from tipping over.
Step 5: Install Warm Lights for a Spooky Glow
For the final magical touch, place small LED tea lights or strands of battery-operated fairy lights inside the house. Position them strategically behind the windows to create a warm, flickering, and inviting glow that brings the haunted house to life. Ensure the battery packs are hidden or easily accessible for switching the lights on and off. Add any last decorative touches, such as a small ornate crest above the main door or additional moss where needed.
💡 Pro Tip: Opt for warm white or amber LED lights to achieve that classic, cozy haunted glow, rather than a harsh bright white. If using fairy lights, carefully tuck and hide any visible wires. Always test your lights before fully securing them to make sure they cast the desired effect through the windows.
Also you can check 25 crafts for Halloween theme:
Discover the newest Dollar Tree arrivals for your next craft project here.
Inspiration / Credit: Nora Rodriguez-Cortez