
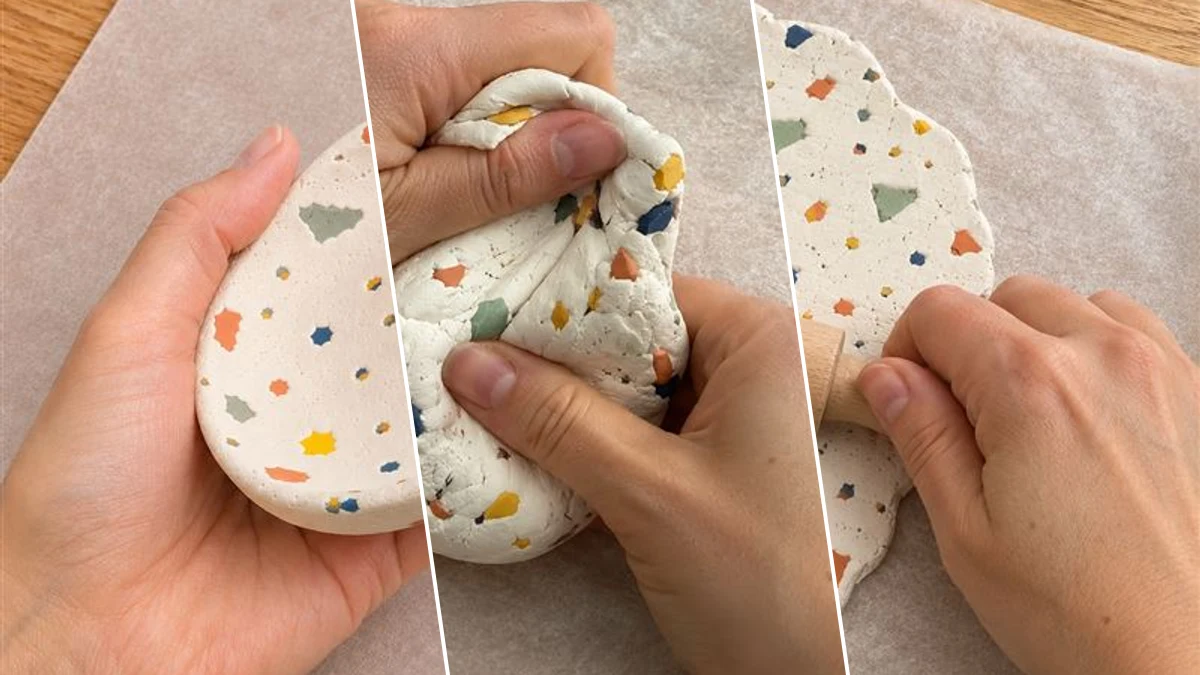
Craft a set of elegant terrazzo-style trinket dishes using air-dry clay. These small, decorative catch-all trays feature a colorful speckled pattern and a refined gold rim. They are ideal for organizing small items like rings, keys, or earrings on a vanity, nightstand, or entryway table, adding a touch of personalized style to any room.
Project at a Glance
- Difficulty: Easy
- Estimated active time: 60 minutes to 100 minutes (drying and curing waits not included)
- Estimated component cost: $7 to $15 (reusable tools and general supplies excluded)
- Main material: Clay
- Suggested placement: Tabletop, Shelf, Entryway
About Terrazzo Air-Dry Clay Trinket Dishes
Terrazzo-style decor offers a modern and elegant aesthetic, and these air-dry clay dishes provide a simple way to incorporate this trend into home decor. The process involves kneading small colored clay chips into a white base, creating a unique speckled pattern for each dish. The final touch of a gold rim elevates the design, making these pieces suitable for various interior styles.
These boutique-style dishes are designed for practical use in organizing small items. Place them on a bedroom vanity to hold rings and earrings, on a nightstand for loose change, or in an entryway to keep keys tidy. The use of air-dry clay simplifies the crafting process, as no baking is required, making it an accessible project for many skill levels.
After sealing, these dishes become water-safe for their intended purpose, ensuring durability for everyday use as decorative catch-all trays. It is important to note that these dishes are not intended for food use.
Materials for DIY Terrazzo Air-Dry Clay Trinket Dishes with Gold Rim for Home Decor
- White Air-Dry Clay
- Colored Air-Dry Clay Scraps (terracotta, sage, mustard, navy)
- Parchment Paper
- Small Rolling Pin
- Round Cookie Cutter (approx. 4 inches)
- Small Bowl (for molding, approx. 4-5 inches diameter)
- Fine Sanding Sponge or Sandpaper
- Clear Matte or Gloss Sealer (for air-dry clay)
- Gold Paint Pen or Gold Acrylic Paint with Fine Brush
Need another material? Browse current craft supplies and deals.
Creating Terrazzo Air-Dry Clay Trinket Dishes
Crafting these terrazzo air-dry clay trinket dishes involves a few straightforward steps, from preparing the speckled clay to molding and finishing. The process is designed to be accessible, allowing for the creation of stylish and functional decor. Follow these steps to make your own decorative catch-all trays.
Step 1: Create Terrazzo Clay
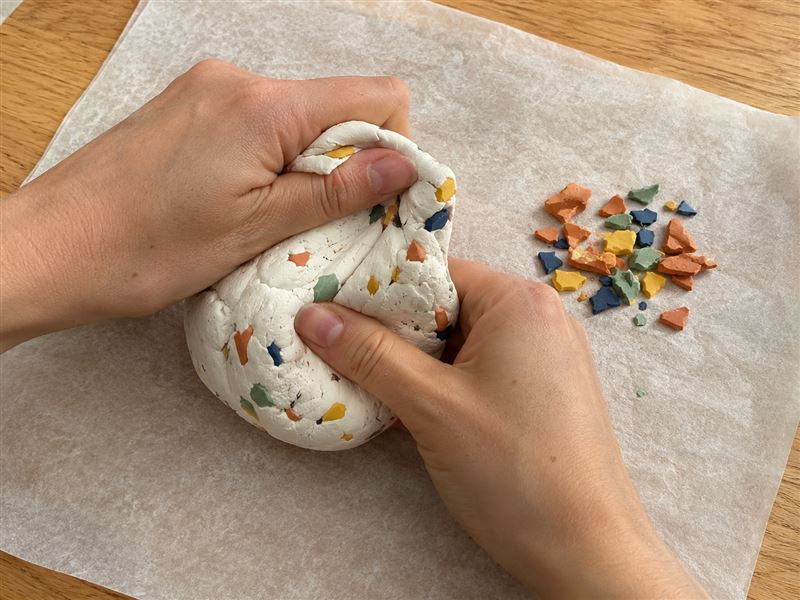
Begin by taking a portion of white air-dry clay. Roll out very thin pieces or tiny balls of your chosen colored clays (terracotta, sage, mustard, navy). Flatten these colored pieces, then break them into small, irregular chips. Scatter these chips over the white clay, then thoroughly knead and fold the clay, pressing the colored chips into the white base. Continue kneading until the chips are evenly distributed, creating a beautiful terrazzo effect throughout the clay without fully blending the colors.
Step 2: Roll and Even Out
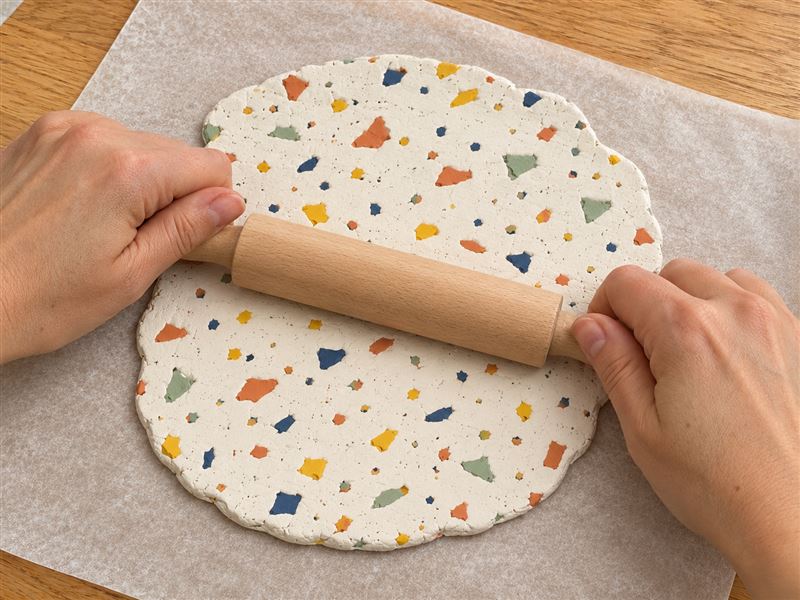
Place your terrazzo clay onto a fresh sheet of parchment paper. Using a small rolling pin, carefully roll the clay out to an even thickness, approximately 1/8 to 1/4 inch (3-6mm). Rolling between two sheets of parchment paper or using guide sticks can help achieve consistent thickness, which is crucial for the dishes to dry evenly and prevent warping. Ensure the surface is smooth and free of major imperfections.
Step 3: Cut and Mold Dishes
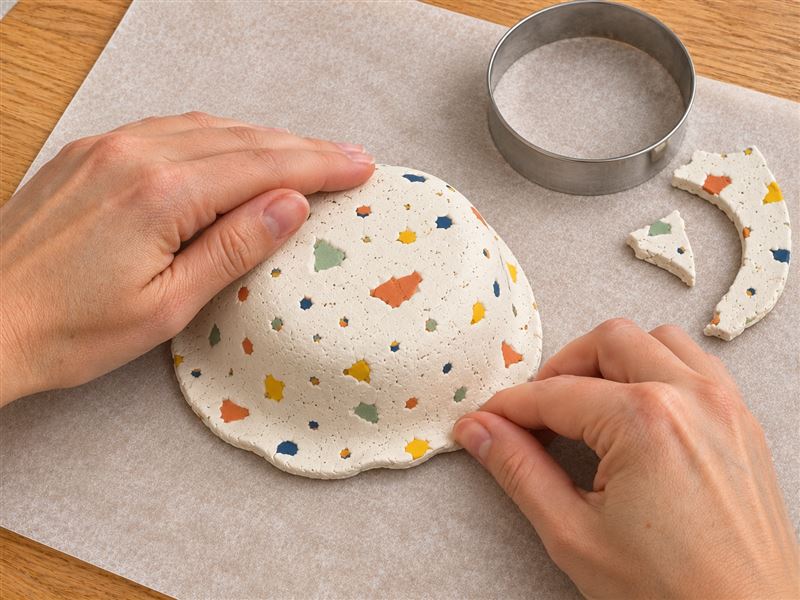
Once the clay is rolled to an even thickness, use a round cookie cutter (about 4 inches in diameter) to cut out circular shapes. Carefully lift each clay circle and gently place it over the inverted bottom of a small bowl (around 4-5 inches diameter), pressing and pinching the edges to form a shallow dish shape. Smooth out any wrinkles or unevenness with your fingers. This shaping step defines the final form and depth of your trinket dish.


Step 4: Dry and Smooth
Carefully remove the shaped clay dishes from their molds and place them on a flat surface or wire rack lined with parchment paper to dry. Allow them to air-dry completely for 24-48 hours, or according to your clay product's instructions. Drying time can vary based on thickness and humidity. Once thoroughly dry, use a fine sanding sponge or sandpaper to gently smooth any rough edges or imperfections on the dishes. This creates a refined surface ready for finishing.
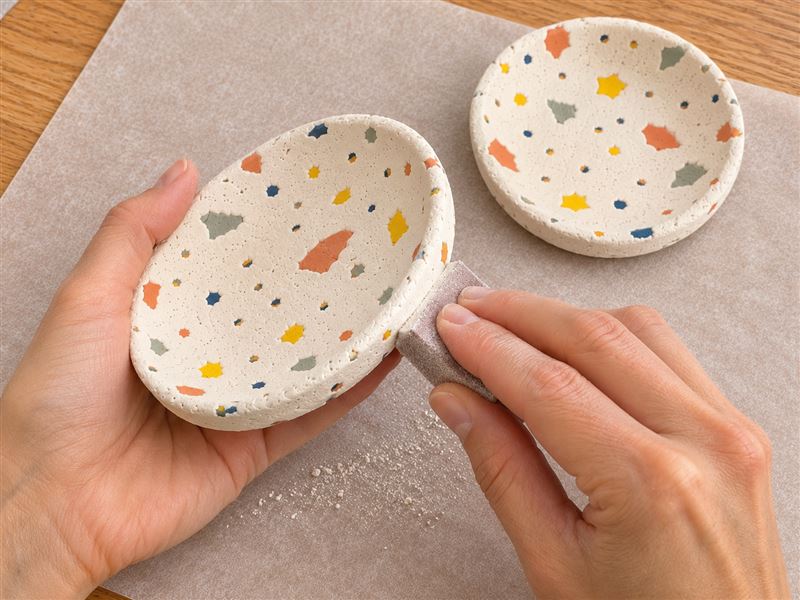
Step 5: Seal and Add Gold Rim
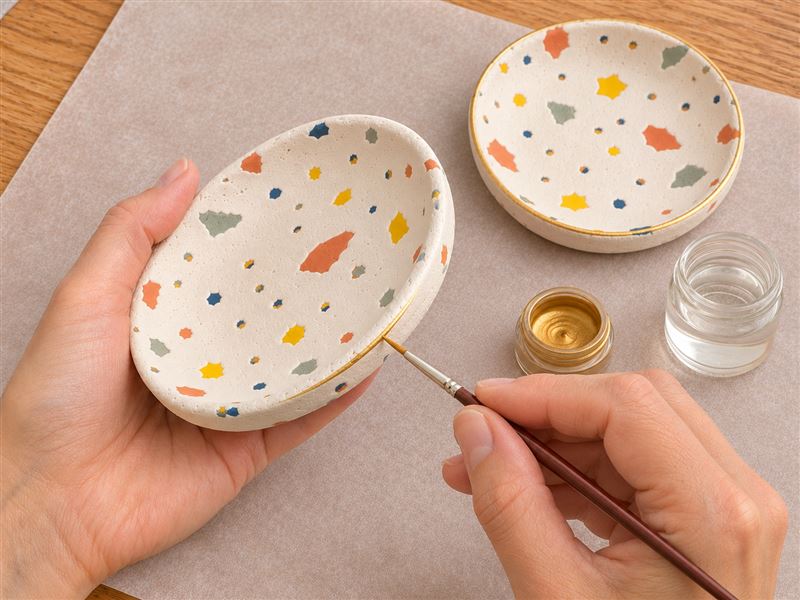
Apply a clear matte or gloss sealer to your dried and sanded dishes, following the product instructions for coats and drying times. This protects the clay and makes it water-safe for its intended use (not food). Once the sealer is completely dry, use a gold paint pen or a fine brush with gold acrylic paint to carefully draw a thin, even gold rim around the top edge of each dish. Let the paint dry completely before handling.
Displaying Your Terrazzo Trinket Dishes
The completed terrazzo air-dry clay trinket dishes offer a blend of personalized style and practical organization. Place them strategically around the home to gather small essentials while enhancing the aesthetic of any space. These decorative trays are a thoughtful addition to a vanity, nightstand, or entryway.
Related project collection: DIY Walnut Stained Entryway Key Rack with Floating Shelf and Brass Hooks
Practical Questions About This Project
Are these terrazzo trinket dishes safe for food?
No, these dishes are not intended for food use. They are designed for organizing small items and are water-safe only after sealing.
Why is a sealer used on air-dry clay dishes?
A clear sealer protects the air-dry clay and makes the dishes water-safe for their intended use as trinket holders. It helps ensure durability for everyday decor.
How long do the air-dry clay dishes need to dry?
The dishes typically need to air-dry completely for 24-48 hours. Actual drying time can vary based on the thickness of the clay and the humidity levels in the environment.
What is the approximate size of the finished trinket dishes?
These trinket dishes are designed to be approximately 4 inches across, made using a 4-inch round cookie cutter and molded over a small bowl of about 4-5 inches in diameter.
What materials are used to create the gold rim?
A gold paint pen or gold acrylic paint applied with a fine brush is used to create the thin gold rim around the top edge of each dish.
Browse clay supplies at Dollar Tree.

Leave a Reply