
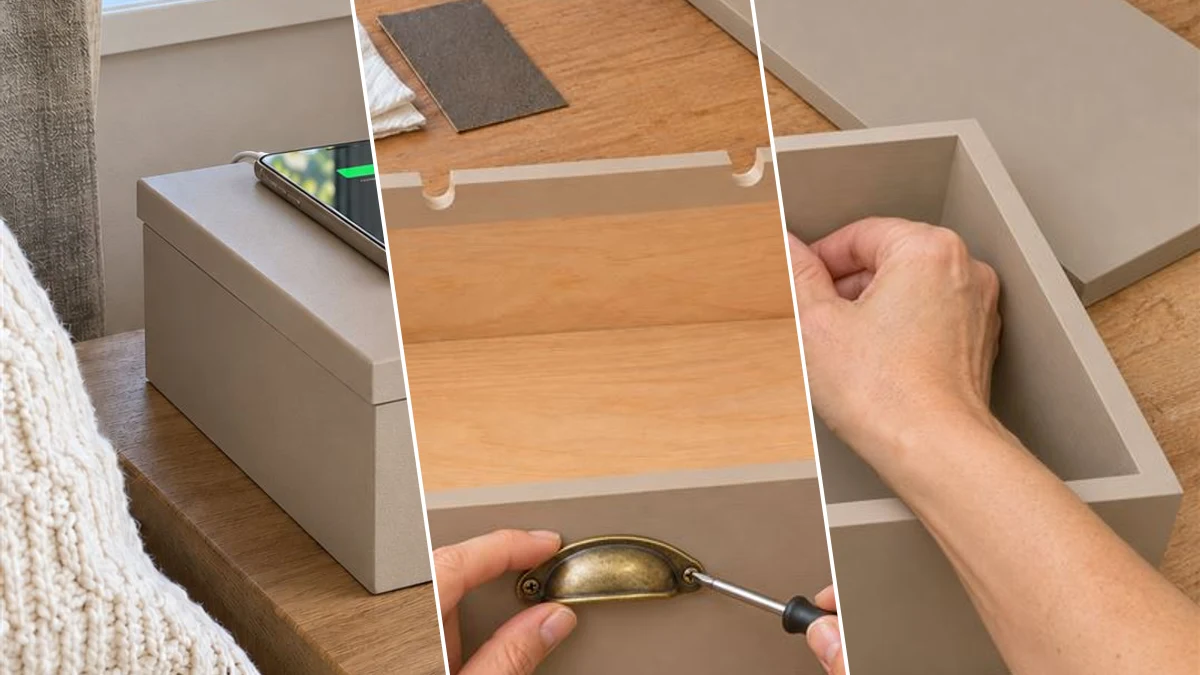
Keep your charging cables neatly organized and out of sight with a DIY Wooden Charging Cable Organizer Box. This simple project transforms a basic wooden box into a stylish charging station, perfect for tidying up a desk, nightstand, or entryway table. Enjoy a clutter-free space while keeping your devices ready to use.
Project at a Glance
- Difficulty: Easy
- Estimated active time: 55 minutes to 105 minutes (drying and curing waits not included)
- Estimated component cost: Budget friendly (reusable tools and general supplies excluded)
- Main material: Wood
- Suggested placement: Desk
Why Create a Discreet Charging Box?
Untidy charging cables can detract from an otherwise organized space, creating visual clutter on desks, nightstands, and entryways. This DIY charging cable organizer box offers a practical and stylish solution, designed to conceal tangled wires and power bricks while keeping devices accessible for charging.
By transforming a simple wooden box with a lid, you can create a functional piece that blends seamlessly with your home decor. The project focuses on a clean, modern aesthetic using neutral paint and a decorative handle, resulting in a charging station that looks like a curated boutique item rather than a utilitarian accessory.
Materials for DIY Wooden Charging Cable Organizer Box for Tidy Desks and Nightstands
- Wooden Storage Box with Lid (approx. 8×8 to 10×10 inches)
- Matte Craft Paint (Greige or Linen-Look Neutral)
- Decorative Handle (e.g., cup pull or flush pull)
- Adhesive Cable Clips (small)
- Sandpaper (fine-grit)
- Craft Knife or Small Hand Saw
- Pencil and Ruler
Need another material? Browse current craft supplies and deals.
Building Your Wooden Charging Cable Organizer
This tutorial guides you through transforming a plain wooden box into a functional and attractive charging station. The steps involve preparing the box, painting, adding hardware, and safely routing charging cables. Follow these instructions to create a tidy space for your devices.
Step 1: Mark and Cut Cable Slots
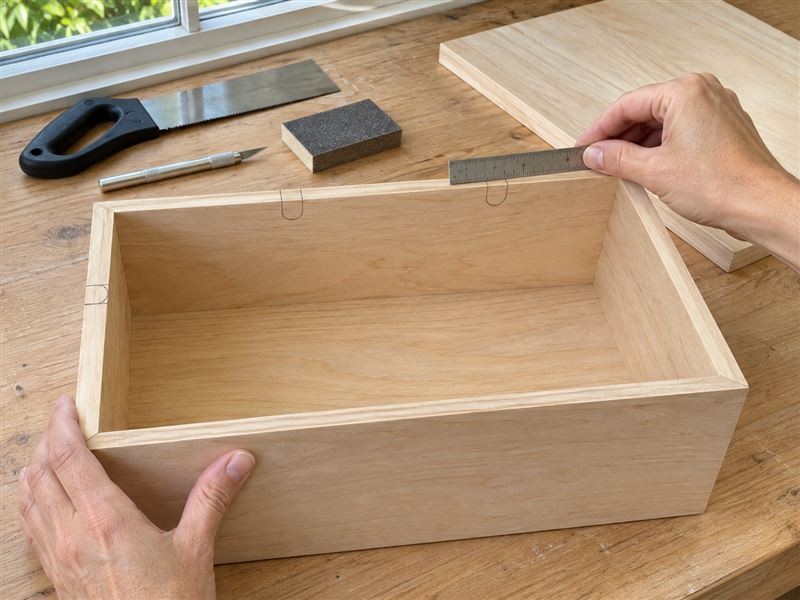
Begin by deciding where your charging dock will be placed, as this determines slot placement. Using a pencil and ruler, mark two small, rounded slots (approximately 1/2 inch wide and 1/4 inch high) on the back wall of the box, near the top edge. If desired, mark one additional slot on a side wall following the same dimensions. Carefully use a craft knife or small hand saw to cut out these slots. Take your time, making several shallow passes with the knife for clean cuts. Once cut, use fine-grit sandpaper to smooth all edges of the slots, ensuring cables will pass through without snagging.
Step 2: Paint and Attach Handle
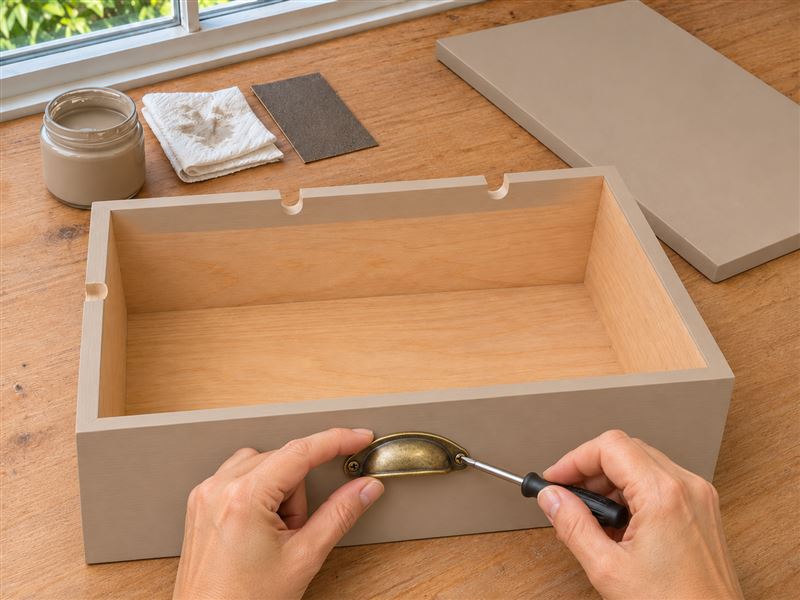
Prepare your box for painting by ensuring it's clean and dust-free. Apply your chosen matte craft paint (a greige or linen-look neutral works best for a boutique feel) to the entire exterior of the box. Use thin, even coats to avoid drips and achieve a smooth, professional finish. Allow each coat to dry completely according to paint manufacturer instructions before applying the next. You may need 2-3 coats. Once the paint is fully dry, position your decorative handle on the front center of the box. Mark the screw holes with a pencil, then carefully attach the handle using the provided hardware or strong adhesive, ensuring it's level and secure.
Step 3: Mount Interior Cable Clips
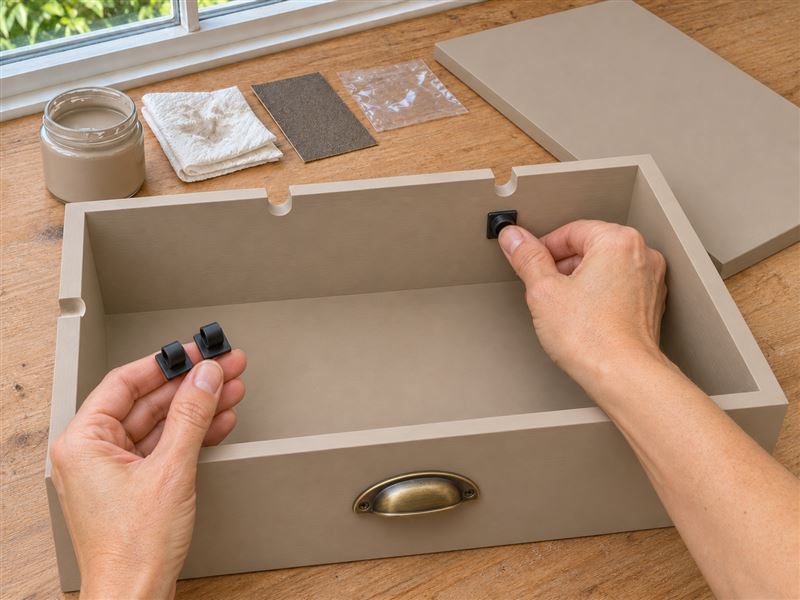
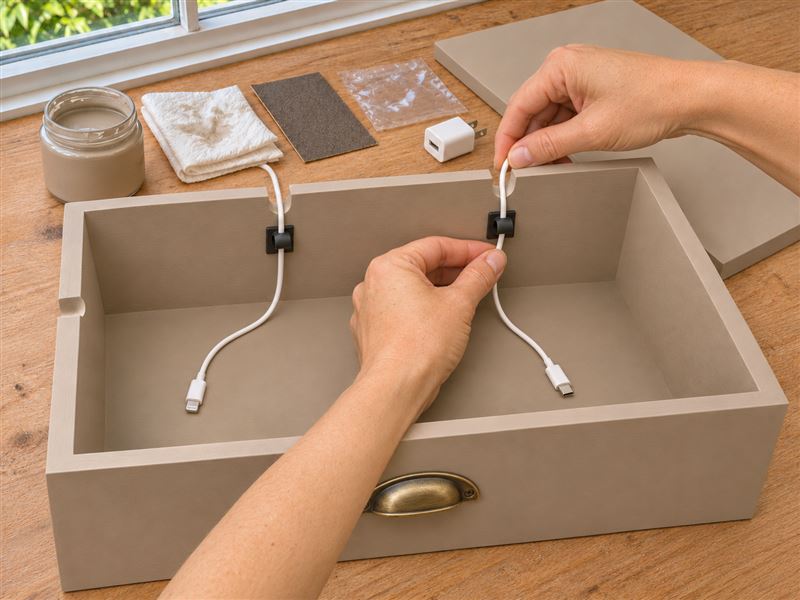
Open the box and, working on the inside walls, plan the placement of your adhesive cable clips. Position the clips to effectively guide your charging cables towards the cut slots and prevent them from tangling inside. Typically, placing one clip near each slot and a few more along the inner bottom edge or side walls will create a neat path for the cables. Peel the backing from the adhesive clips and firmly press them onto the clean, dry painted interior surfaces. Ensure they adhere well.


Step 4: Route Charging Cables (Safety Critical)
This step is crucial for both organization and safety. Gather the thin charging cables for your devices. **IMPORTANT SAFETY WARNING:** Never place a power strip, USB hub, or wall power adapter inside the closed box. These items generate heat and pose a significant fire risk. The power strip or wall adapter MUST remain outside the box, behind furniture. Only the thin charging cables should run through the designated slots. Feed the charging ends of your cables through the exterior slots into the box. Guide the cables along the interior clips, securing them to create a neat path. The charging ends should emerge from the slots ready to connect to your devices. Coil any excess cable neatly inside the box and secure with clips if needed, ensuring the lid can close without pinching wires.
Step 5: Close and Utilize
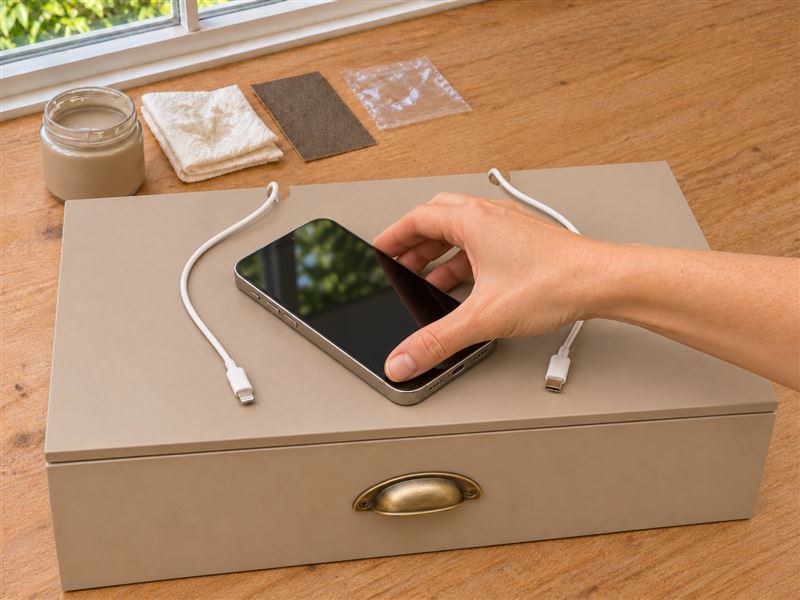
Carefully close the lid of your newly organized charging dock box, ensuring no cables are pinched. Position the box on your desired surface—a nightstand, desk, or entryway table. Place your phone or other devices on top of the closed lid, connecting them to the charging cables that emerge from the slots. Enjoy a tidy and functional charging station that blends seamlessly with your decor. Remember to always keep power strips and wall adapters outside the box for safety.
Enjoy Your Organized Charging Station
With this DIY project, you have created a functional and aesthetically pleasing solution for managing charging cables. Your new wooden charging box helps maintain a clutter-free environment while keeping your devices powered and ready. Enjoy the blend of practical organization and modern home decor.
Related project collection: DIY Sage Green Wooden Tray Organizer for a Bathroom Vanity
Practical Questions About This Project
Is it safe to place a power strip or wall adapter inside the charging box?
No, it is not safe to place power strips, USB hubs, or wall power adapters inside the closed box. These items generate heat and pose a significant fire risk. Only the thin charging cables should run through the designated slots, with power sources remaining outside the box.
What type of paint is recommended for this charging box?
A matte craft paint in a greige or linen-look neutral color is recommended. This type of finish helps achieve a sophisticated, modern, and boutique aesthetic for the organizer.
Where can this DIY charging cable organizer box be placed?
This charging box is designed for indoor use on surfaces such as a desk, nightstand, or entryway table. It helps tidy cables and provides a discreet charging station in various rooms.
How should I choose the right size wooden box for this project?
Select a wooden storage box with a lid that is approximately 8×8 to 10×10 inches, or a size that comfortably accommodates the charging cables you plan to store. Ensure it is large enough to hold coiled cables without pinching them when the lid is closed.
What if a suitable wooden storage box with a lid is difficult to find?
While a wooden storage box with a lid is ideal, any sturdy box made from a material that can be safely cut and painted could be adapted. Ensure the material is robust enough to support devices and allow for cable routing.
Search Dollar Tree for wood supplies.

Leave a Reply