
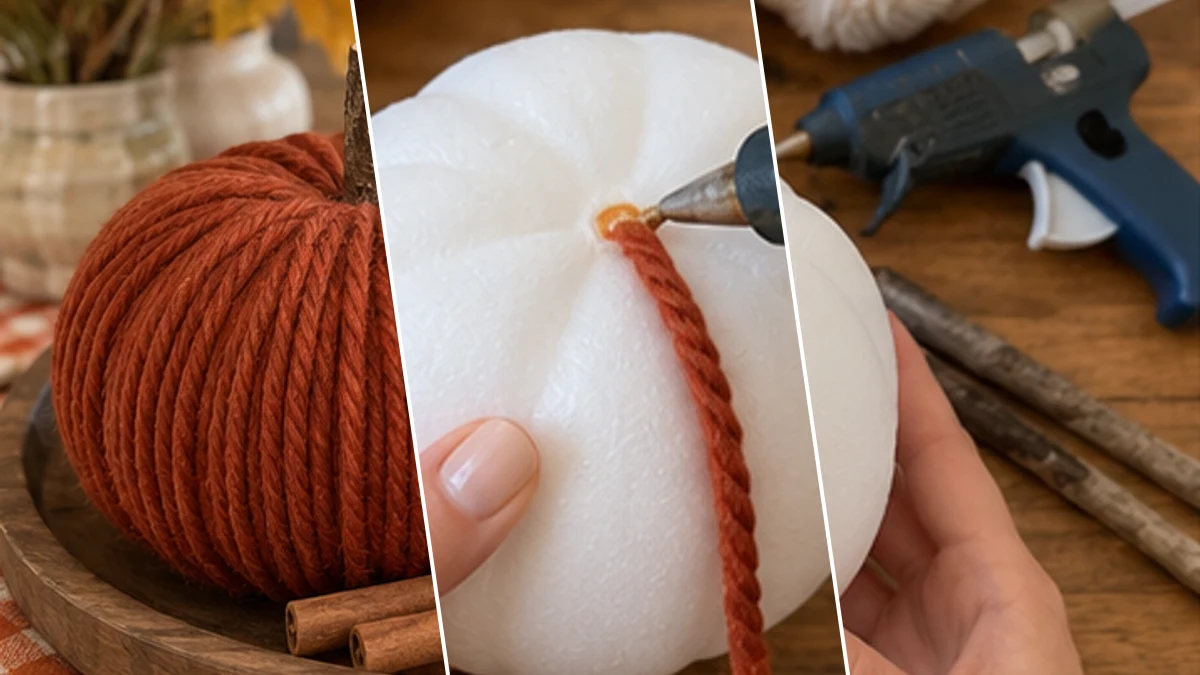
Create charming and cozy fall decor with these DIY yarn-wrapped pumpkins. This project transforms readily available foam pumpkins into rustic decorative pieces, perfect for autumn home styling. Featuring natural twig stems and soft yarn textures, these pumpkins offer a warm touch for the season.
Project at a Glance
- Difficulty: Easy
- Estimated active time: 30 minutes to 60 minutes (drying and curing waits not included)
- Estimated component cost: $6 to $11 (reusable tools and general supplies excluded)
- Main material: Foam
- Suggested placement: Mantel
Creating Cozy Fall Decor with Yarn-Wrapped Pumpkins
The autumn season invites warm textures and natural elements into home decor. Yarn-wrapped pumpkins provide a simple yet impactful way to achieve this aesthetic, blending the comfort of yarn with the iconic shape of fall pumpkins. The use of chunky yarn creates a visually appealing texture that enhances the cozy atmosphere of any room.
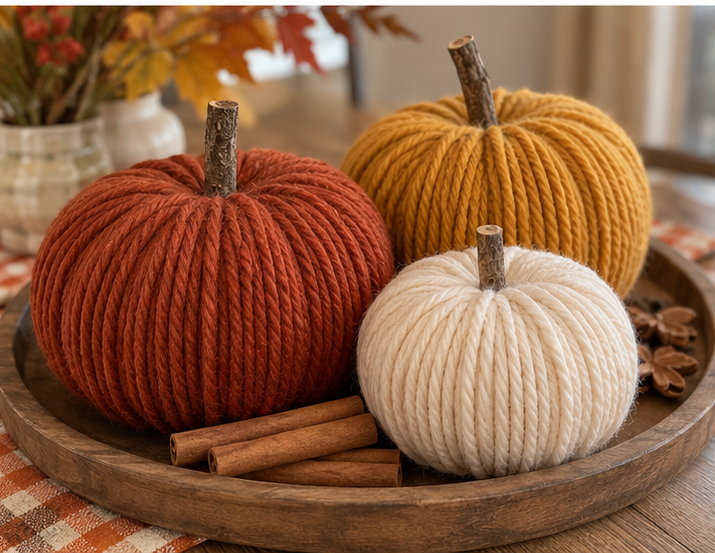
This craft utilizes foam pumpkins and chunky yarn in traditional fall colors such as rust, mustard, and cream. The addition of natural twig pieces as stems grounds the decor with an organic touch. Arranging the finished pumpkins on a wooden tray with cinnamon sticks can further enhance their rustic charm and create a welcoming display for Thanksgiving and beyond.
Materials for DIY Yarn-Wrapped Foam Pumpkins with Twig Stems for Fall Decor
- Foam pumpkins (assorted sizes)
- Chunky yarn (in fall colors like rust, mustard, and cream)
- Hot glue gun and glue sticks
- Natural twig pieces (for stems)
- Scissors or craft knife
- Optional: Wooden display tray and cinnamon sticks
Need another material? Browse current craft supplies and deals.
How to Make Yarn-Wrapped Foam Pumpkins
Transform plain foam pumpkins into charming fall decor by following these steps. The process involves securely wrapping each pumpkin with chunky yarn and adding a natural twig stem. Gather your materials and prepare your workspace to begin.
Step 1: Gather Materials and Prep Pumpkins
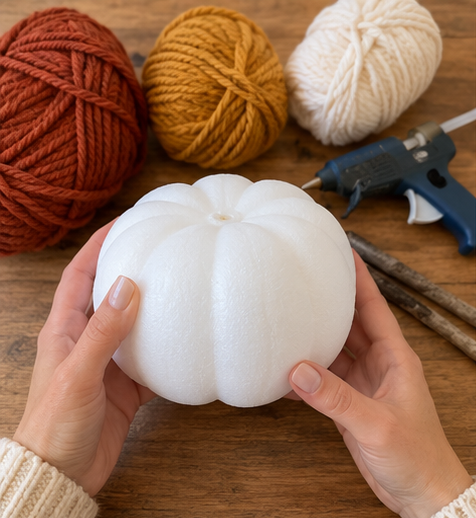
Lay out all your foam pumpkins, chunky yarn in your chosen fall colors, natural twig pieces, hot glue gun, and scissors or a craft knife on a clean workspace. If your foam pumpkins have any plastic stems, carefully remove them with a craft knife or by twisting them off to create a flat top surface for wrapping.
Step 2: Secure Yarn and Start Wrapping
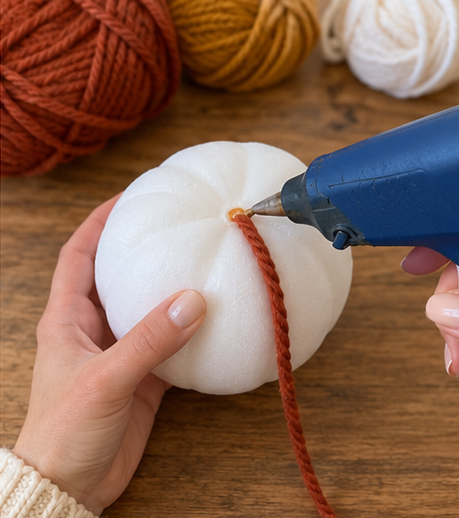
Heat your hot glue gun. Choose a foam pumpkin and a coordinating yarn color. Apply a small dot of hot glue to the very top center of the pumpkin. Press one end of the yarn securely into the glue. Once cooled, begin wrapping the yarn tightly around the top of the pumpkin, completely covering the initial glue spot and working your way outwards in concentric circles.
Step 3: Wrap the Pumpkin Body Tightly
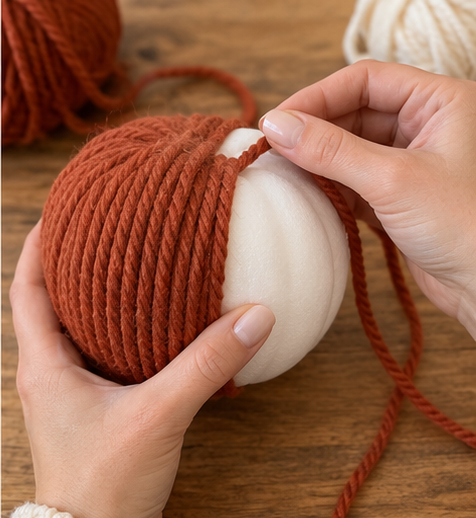
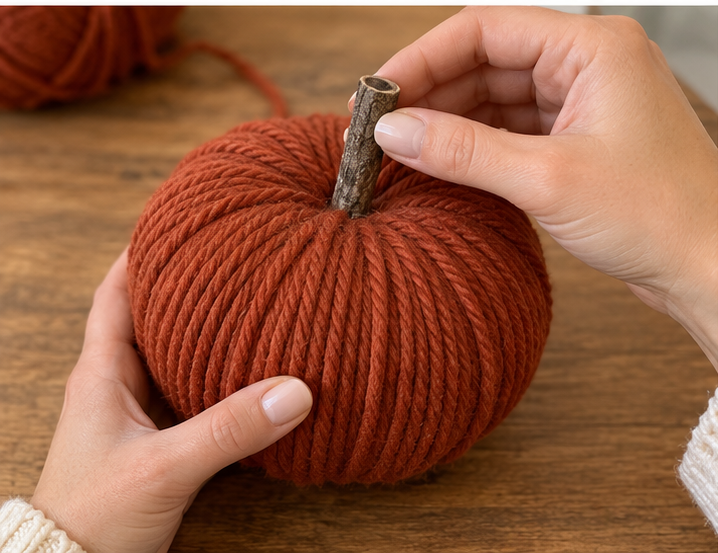
Continue wrapping the yarn around the pumpkin, moving downwards in consistent layers. Keep the yarn taut and push the rows together to ensure no foam shows through. For pumpkins with distinct ribs, gently press the yarn into the indentations as you wrap to maintain the natural pumpkin shape. Apply small dots of hot glue periodically (especially at the top and bottom, and every few wraps around the 'equator') to secure the yarn and prevent it from shifting.


Step 4: Finish Wrapping and Add Twig Stem
Once you've wrapped the entire pumpkin, carefully trim the yarn end, leaving about an inch. Apply a final dot of hot glue to the bottom center of the pumpkin and securely press the yarn end into it. Next, select a natural twig piece that is proportionate to your pumpkin's size. Push the twig firmly into the top center of the wrapped pumpkin. If the foam is very dense, use a craft knife to gently create a small pilot hole before inserting the twig stem. Secure with a tiny drop of hot glue around the base of the stem if needed.
Step 5: Group for a Cozy Fall Display
Repeat the wrapping and stem-adding process for all your foam pumpkins. Once finished, gather your set of yarn-wrapped pumpkins. Arrange them creatively on a wooden tray, a mantelpiece, or as a centerpiece for your Thanksgiving table. For an extra touch of warmth and fragrance, tuck a few cinnamon sticks around the base of the pumpkins on your tray, as shown in the inspiration image.
Displaying Your Finished Yarn Pumpkins
Once your yarn-wrapped pumpkins are complete, they are ready to enhance your fall and Thanksgiving displays. Arrange them as a centerpiece, on a mantel, or alongside other seasonal decor. These cozy, rustic pumpkins add a handmade touch to any autumn setting.
Related project collection: DIY Distressed Wooden Tray Fall Centerpiece for a Thanksgiving Table
Practical Questions About This Project
What colors of yarn are suitable for fall decor?
Fall colors such as rust, mustard, and cream are suggested to create a warm, autumnal aesthetic for your yarn-wrapped pumpkins.
How are the natural twig stems attached to the pumpkins?
Twig stems are inserted into the top center of the wrapped pumpkin. A small pilot hole can be made with a craft knife if the foam is dense, and hot glue can be used for extra security.
Can these pumpkins be displayed in different settings?
Yes, the finished yarn-wrapped pumpkins can be arranged on a wooden tray, a mantelpiece, or used as a centerpiece for a Thanksgiving table.
What if the foam pumpkins have existing plastic stems?
Any existing plastic stems on the foam pumpkins should be carefully removed with a craft knife or by twisting them off to create a flat surface for wrapping.
Browse foam supplies at Dollar Tree.

Leave a Reply