
")
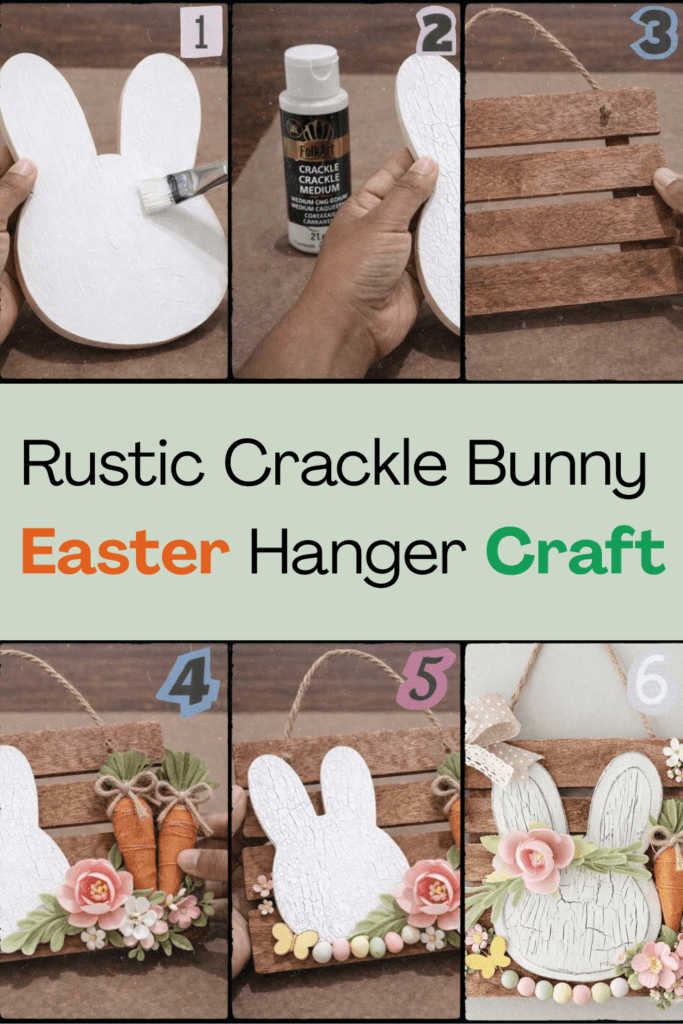
Create your own Rustic Crackle Bunny Easter Hanger with this simple step-by-step craft tutorial. This charming Easter decoration is perfect for adding a cozy farmhouse touch to your Holiday & Seasonal decor. Whether you love DIY home projects or you are looking for a unique handmade Easter hanger idea, this guide will help you bring your rustic bunny craft to life.
Theme: Easter
Materials Needed
- Wooden Slatted Plaque (approx. 8×8 inches)
- Wooden Bunny Cutout (approx. 5-6 inches tall)
- White Chalk or Acrylic Paint
- Crackle Medium
- Assorted Faux Flowers & Greenery (pink, white, leaves)
- Easter-themed Mini Embellishments (fabric carrots, pastel mini eggs, butterfly)
- Ribbons (polka dot wired ribbon, lace ribbon)
- Jute Rope
- Strong Craft Adhesive (e.g., Hot Glue Gun & Sticks, E6000)
- Paint Brushes & Foam Brushes
Step-by-Step Instructions
Step 1: Begin by gently sanding your wooden bunny cutout t…
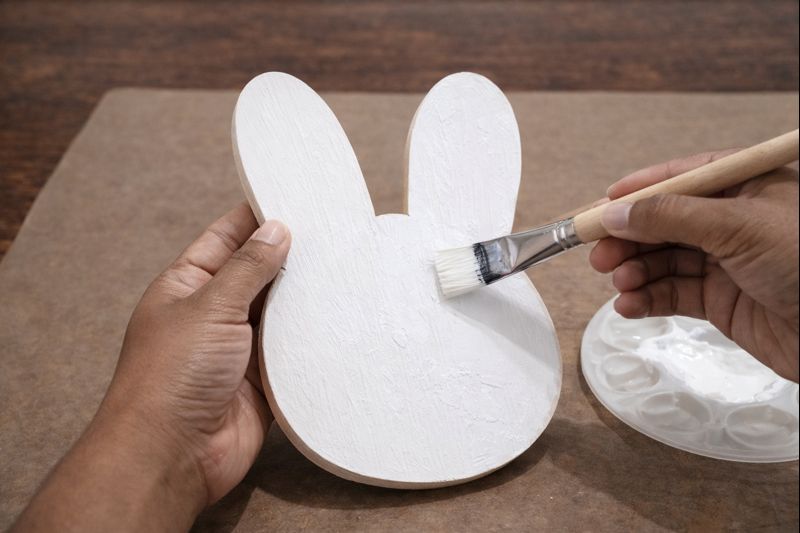
Begin by gently sanding your wooden bunny cutout to ensure a smooth surface, then wipe away any dust. Apply a generous, even coat of your chosen white chalk or acrylic paint to the bunny. This will be the base layer that shows through the cracks.
💡 Pro Tip: For best crackle results, a good quality chalk or matte acrylic paint works wonderfully as the base. Ensure the paint is completely dry before moving to the next step, ideally waiting at least an hour or according to paint instructions.
Step 2: Once the base coat is fully dry, apply a medium-th…
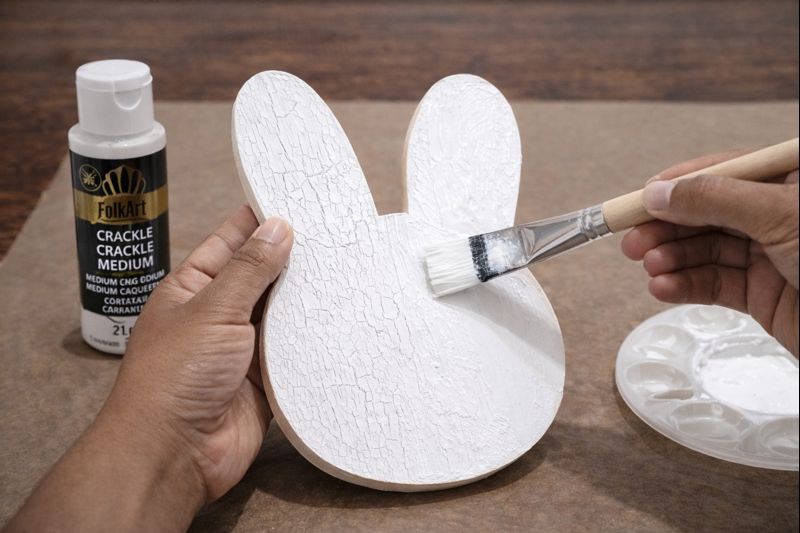
Once the base coat is fully dry, apply a medium-thick layer of crackle medium over the entire white bunny surface. Let this dry until it’s tacky but not completely dry (refer to your specific crackle medium’s instructions, usually 15-30 minutes). Then, apply a final, quick, and even coat of white paint over the crackle medium. Avoid over-brushing, as this will prevent the crackle effect from forming.
💡 Pro Tip: The thickness of the crackle medium and the final paint layer will influence the size and prominence of your cracks. A thicker layer often yields larger cracks. Apply the final paint coat in one swift, even motion in a single direction. Don’t go back over areas once applied, even if it looks uneven, to allow the crackle to develop properly.
Step 3: While the bunny is drying and the crackle develops…
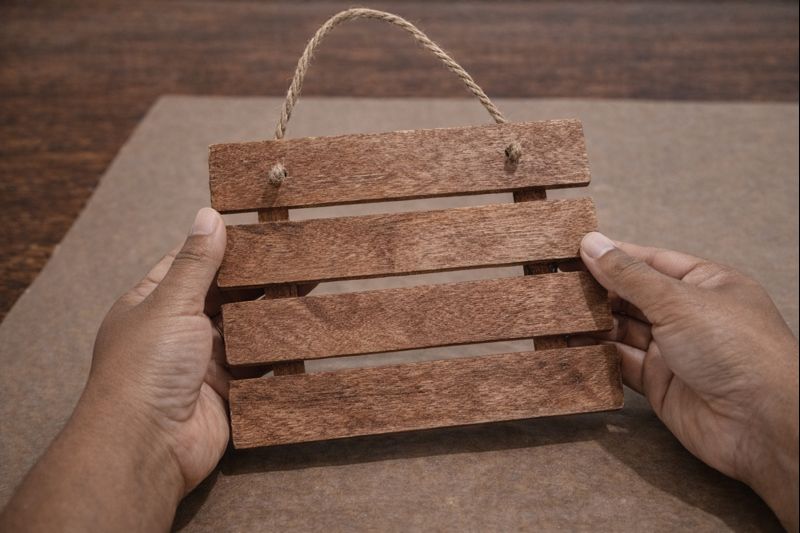
While the bunny is drying and the crackle develops, prepare your wooden slatted plaque. This particular plaque has a natural rustic look, so no further treatment like staining or painting is needed, enhancing the farmhouse aesthetic.
💡 Pro Tip: If your wooden plaque isn’t already rustic, you could lightly sand it and apply a distressed white wash or a wood stain to achieve a similar look before assembling. Always work in a well-ventilated area when using stains or sealants.
Step 4: Before gluing, dry-fit the main elements onto your…
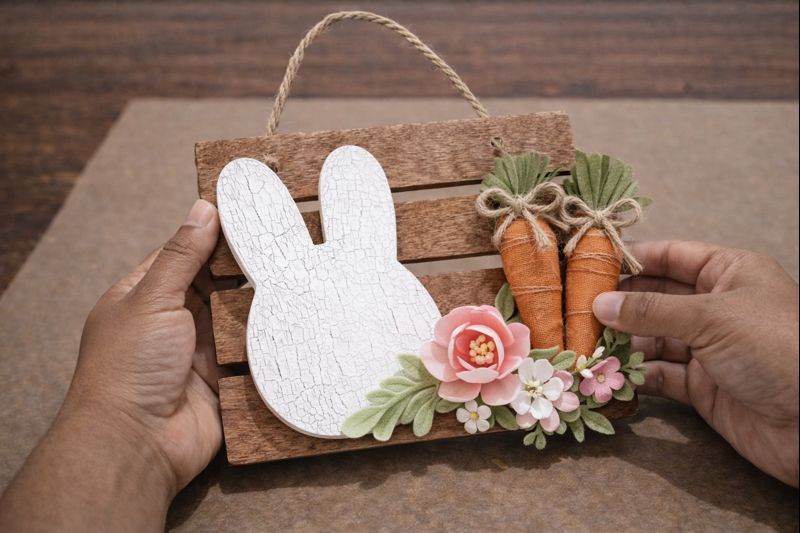
Before gluing, dry-fit the main elements onto your plaque. Position the crackled bunny slightly off-center towards the left, arranging the fabric carrots on the right side. Experiment with the placement of your larger faux flowers and greenery around the bunny’s ‘neck’ and base of the carrots until you are happy with the composition. Once satisfied, use strong craft adhesive to securely attach these pieces.
💡 Pro Tip: Dry-fitting is crucial for balance and aesthetics. Take a photo of your preferred arrangement before gluing to help you remember. Use a hot glue gun for quick adhesion of the bunny and carrots, but for smaller florals, a stronger craft glue like E6000 can provide a more lasting bond if needed.
Step 5: Now, fill in your arrangement with the smaller flo…
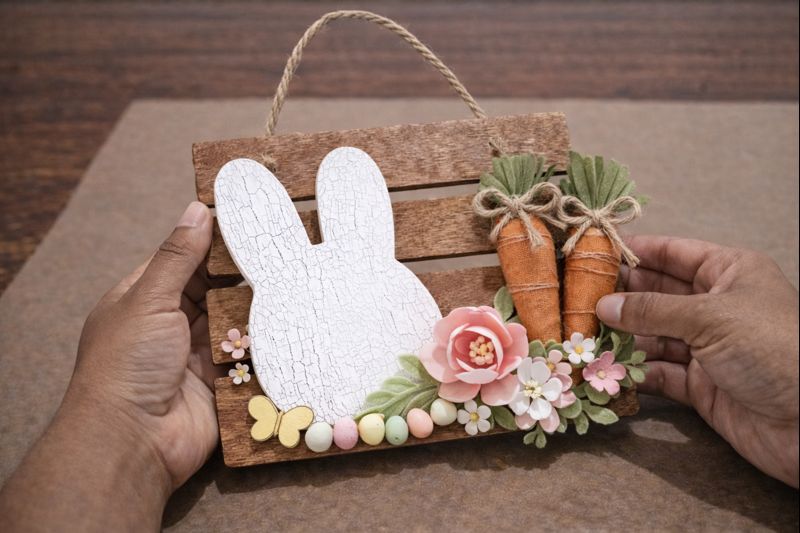
Now, fill in your arrangement with the smaller floral clusters, individual flowers, the cute pastel mini eggs, and the yellow butterfly. Place the smaller flowers around the base of the bunny and carrots, creating a natural ‘garden’ effect. Line up the mini eggs along the bottom edge of the bunny cutout. Adhere the butterfly near the bottom left.
💡 Pro Tip: Layer your floral embellishments for added depth and dimension. Use tweezers to precisely place small flowers and leaves. A dab of hot glue is usually sufficient for these lighter elements. Ensure the mini eggs are evenly spaced for a tidy look.
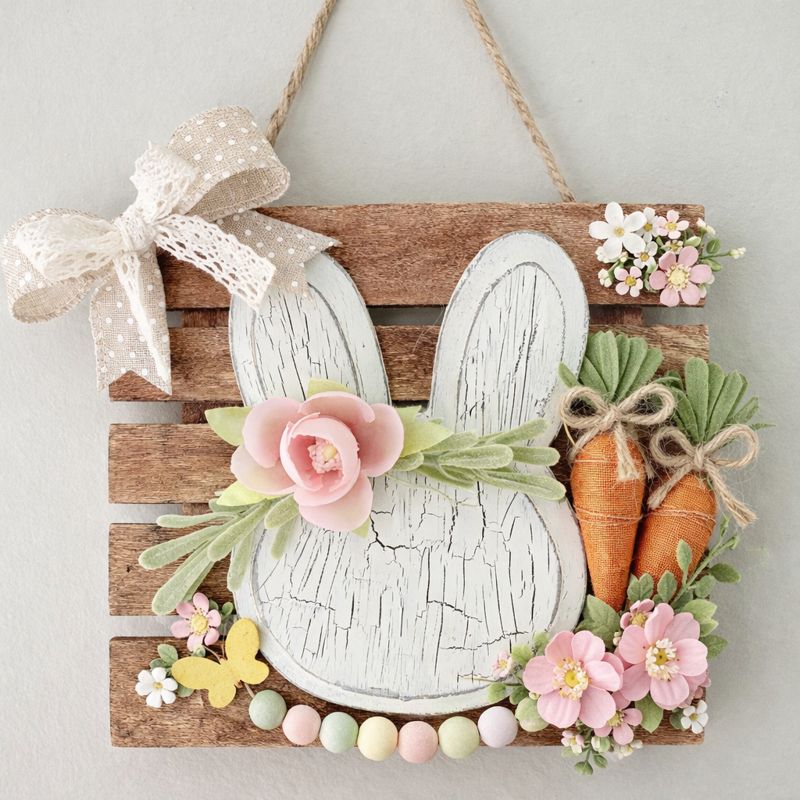
Step 6: Take your polka dot wired ribbon and lace ribbon. …
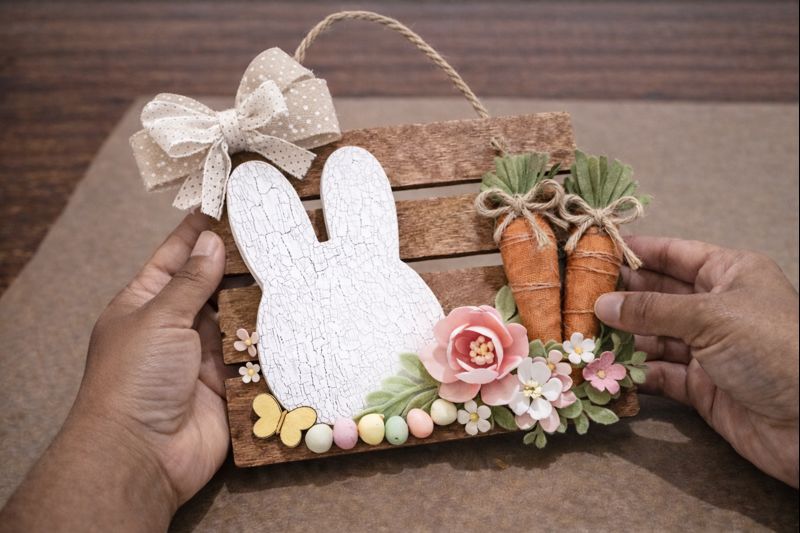
Take your polka dot wired ribbon and lace ribbon. Layer them together and tie a multi-loop bow. Secure the bow with a small piece of floral wire or string on the back, then trim the tails to your desired length. Attach the finished bow securely to the top-left corner of the wooden plaque using hot glue.
💡 Pro Tip: Using wired ribbon makes it much easier to shape and hold the loops of your bow. For a fuller bow, consider using a bow-making tool or simply make several loops and gather them in the center before wrapping with wire. Ensure the bow is firmly attached, as it’s often touched.
Before last step you can check another Easter Craft Project: Dollar Tree Easter Wreath
Step 7: Finally, cut a piece of jute rope to your desired …
Finally, cut a piece of jute rope to your desired hanging length (typically 12-18 inches). Tie knots at each end to create loops. Flip the plaque over and use strong craft adhesive (or even small staples for extra security) to attach the knotted ends of the jute rope to the top corners on the back of the wooden plaque. Allow sufficient drying time before hanging.
💡 Pro Tip: Reinforce the rope attachment points with extra glue, especially if the hanger will be exposed to movement or weather. For a truly sturdy hanger, you can drill small pilot holes and secure the rope with eye hooks or D-rings. Also if you want see more dollar tree easter item check here to go to Dollar Tree Store.
Note: This is a Premium craft. Download the full PDF guide for offline use!
Inspiration / Credit: Stacy Enloe Kucera