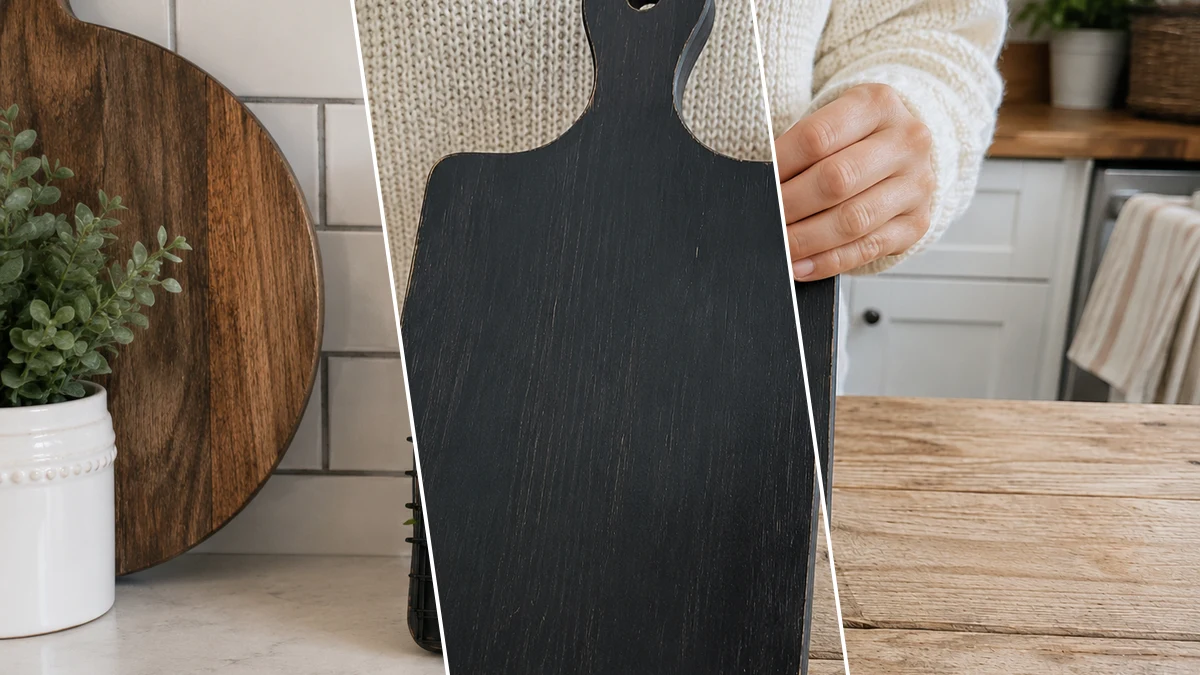
Okay, y’all, lemme tell you. I was just wandering the aisles at Dollar Tree, minding my own business, and suddenly BAM! This idea hit me for a super cute Rustic Farmhouse Kitchen Utensil Board Decor. It turned out even better than I imagined and now I just want to make more for all my friends!
Theme: Farmhouse / Rustic
Materials Needed
- Wooden Cutting or Paddle Board
- Black Acrylic or Chalk Paint
- Sandpaper (fine-grit)
- Galvanized Metal Panel (or mimic material, approx. 6×10 inches)
- Hot Glue Gun and Glue Sticks
- Small Wooden Kitchen Utensils (e.g., mini spoon, slotted spatula, fork)
- Small Black Wire Basket (approx. 4×6 inches)
- White ‘KITCHEN’ Label or Plaque
- Jute Rope (approx. 24 inches)
- Natural Wood Beads (2-3)
- Small Faux Greenery Pick
Why This Craft Works
This little beauty is just perfect for adding that cozy, country touch to your kitchen wall. It fits right in with a Farmhouse / Rustic style, whether you’re decorating your own space, creating a lovely gift for a friend, or even making a personalized piece for a bridal shower. It brings so much warmth and character, making your kitchen feel extra homey.
And get this, the whole thing ran me about $12-15 total, thanks to all those Dollar Tree goodies. You seriously can’t beat that price for a custom piece of Home Decor! I love finding those hidden gems that make a big impact without emptying my wallet.
Honestly, this project is super easy, even if you’re a total beginner. It took me about 30-45 minutes start to finish, not counting drying time, so it’s perfect for a quick afternoon craft session. If you need a last-minute gift or just want to try something fun and simple, this is definitely the one for you.
Step-by-Step Instructions for Rustic Farmhouse Kitchen Utensil Board Decor
Ready to get your craft on? This Rustic Farmhouse Kitchen Utensil Board Decor is so much fun to make, you won’t believe it. It’s a fantastic project for beginners, or if you just need a quick, adorable Farmhouse / Rustic update for your home. You’re going to love how easy these steps are!
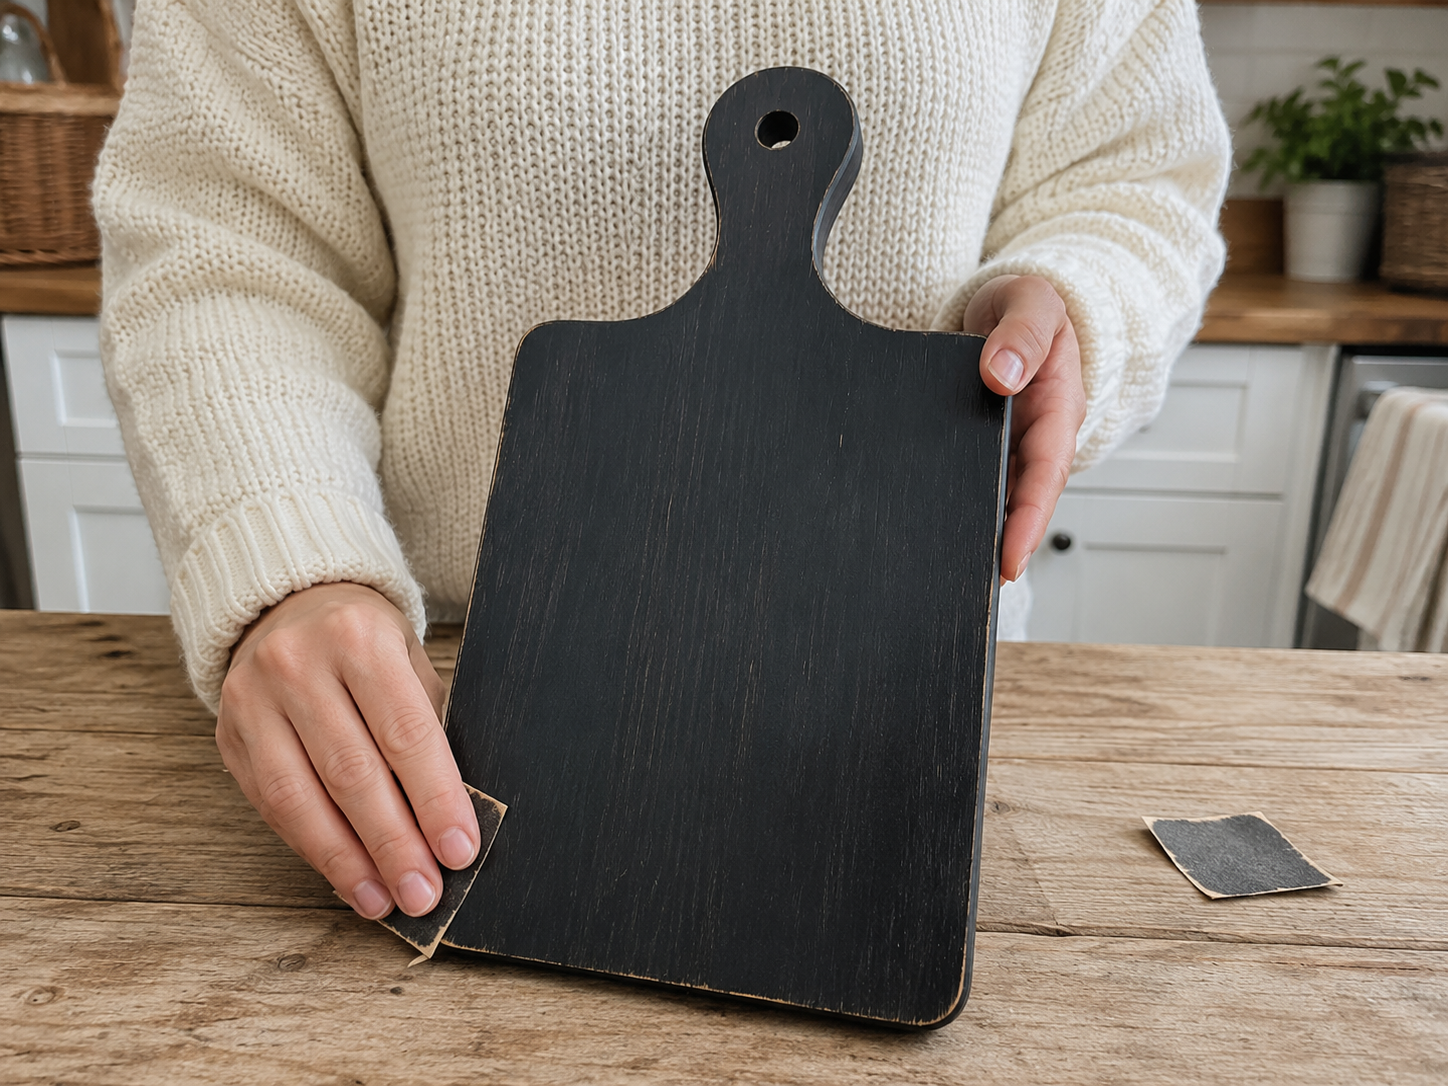
Step 1: Prepare & Distress Board Base
Start with your chosen wooden cutting board or paddle board. Apply an even coat of black acrylic or chalk paint over the entire surface, ensuring full coverage, especially around edges and any carved details. Let the paint dry completely according to the manufacturer’s instructions, which typically takes 1-2 hours for acrylic or chalk paint. Once dry, take a fine-grit sandpaper (180-220 grit) and lightly sand the edges and raised areas of the board. This creates a slightly worn, ‘farmhouse chic’ distressed look by allowing some of the natural wood to show through, making it appear aged rather than brand new.
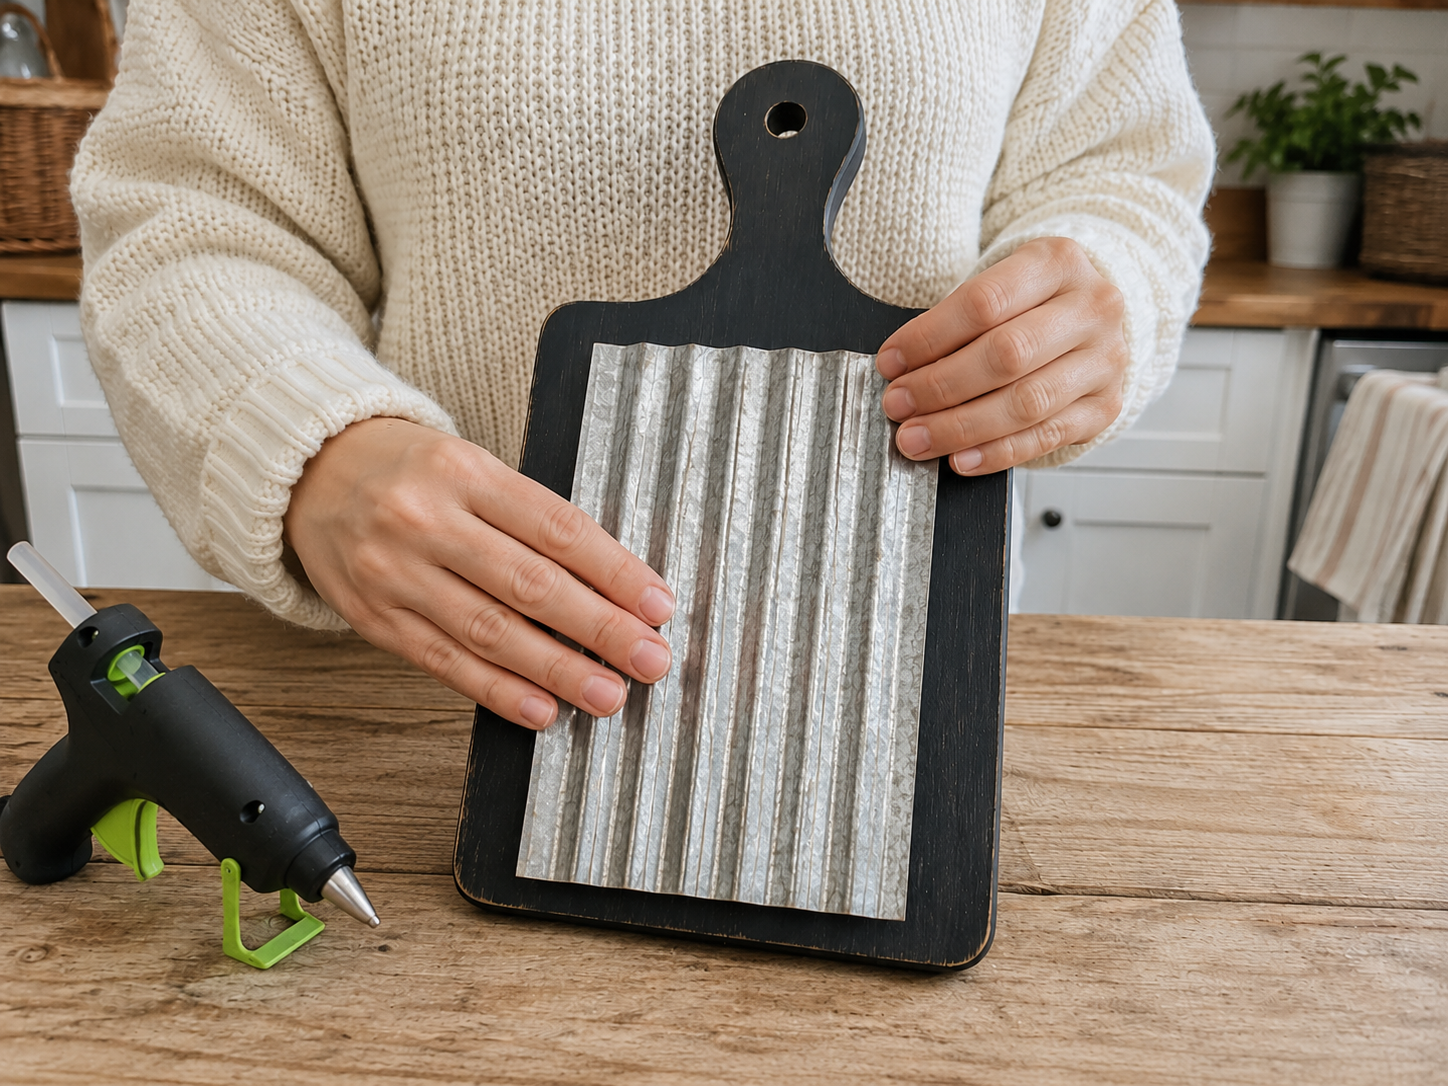
Step 2: Attach Galvanized Metal Panel
Take your galvanized-looking metal panel (real corrugated metal, a decor piece, or a painted mimic). Position it vertically in the exact center of your black-painted board, ensuring it is straight and evenly spaced from the sides. Apply a generous amount of hot glue to the back of the metal panel, focusing on the edges and a few dots in the center for good adhesion, then firmly press it onto the board. Hold in place for 15-20 seconds until the glue sets firmly.
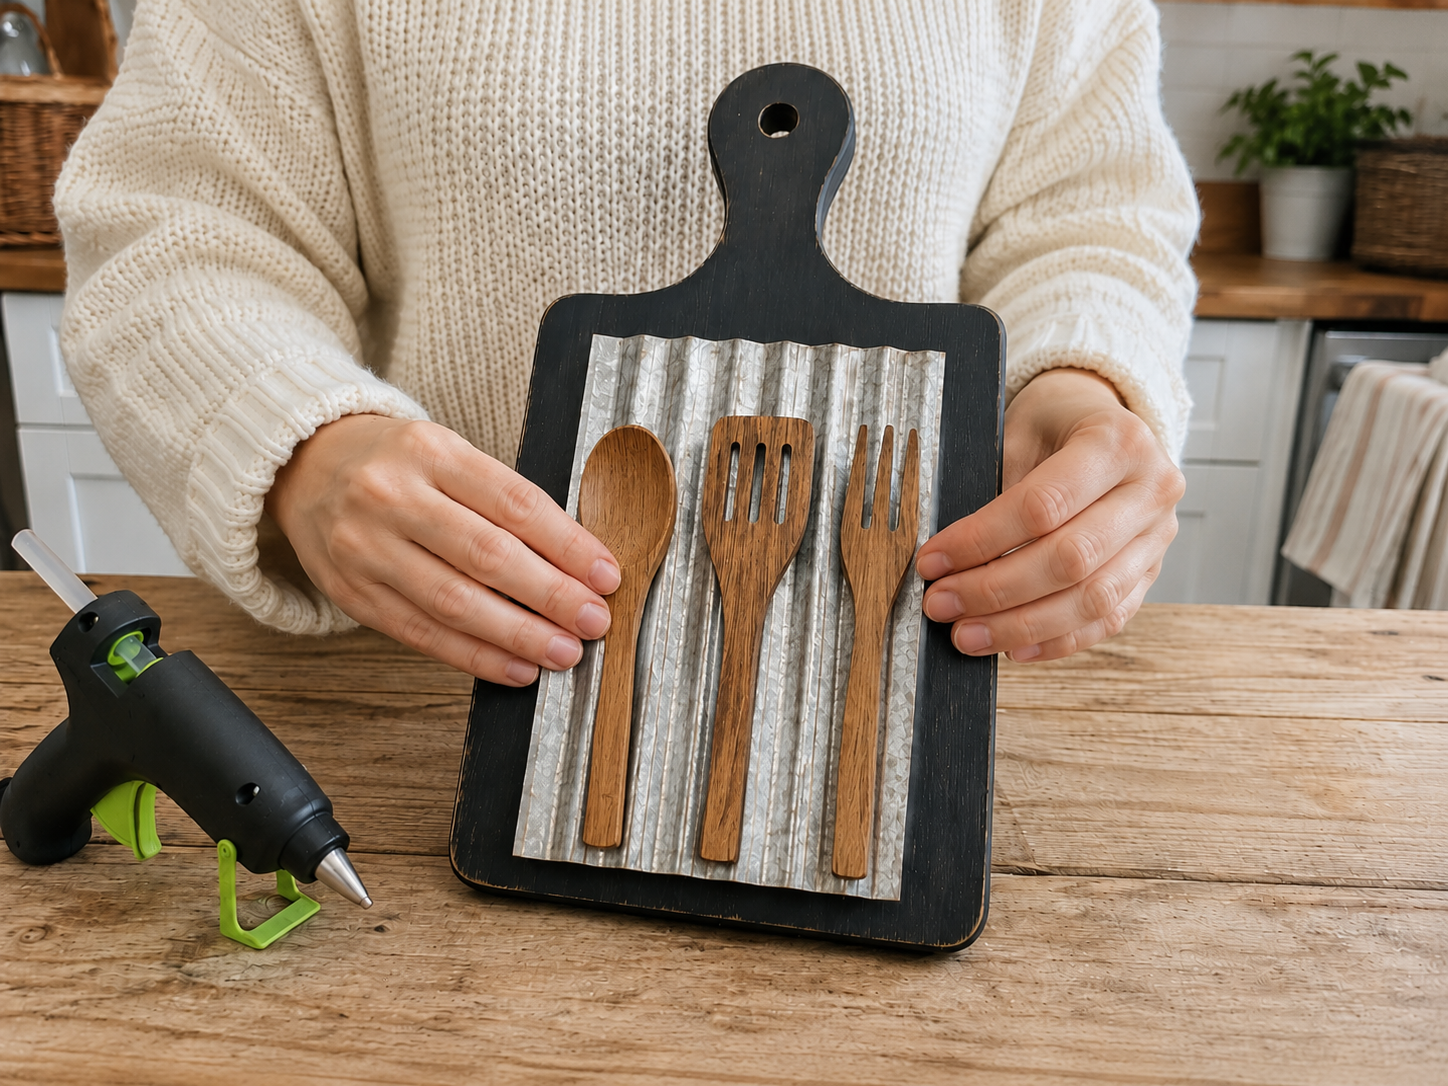
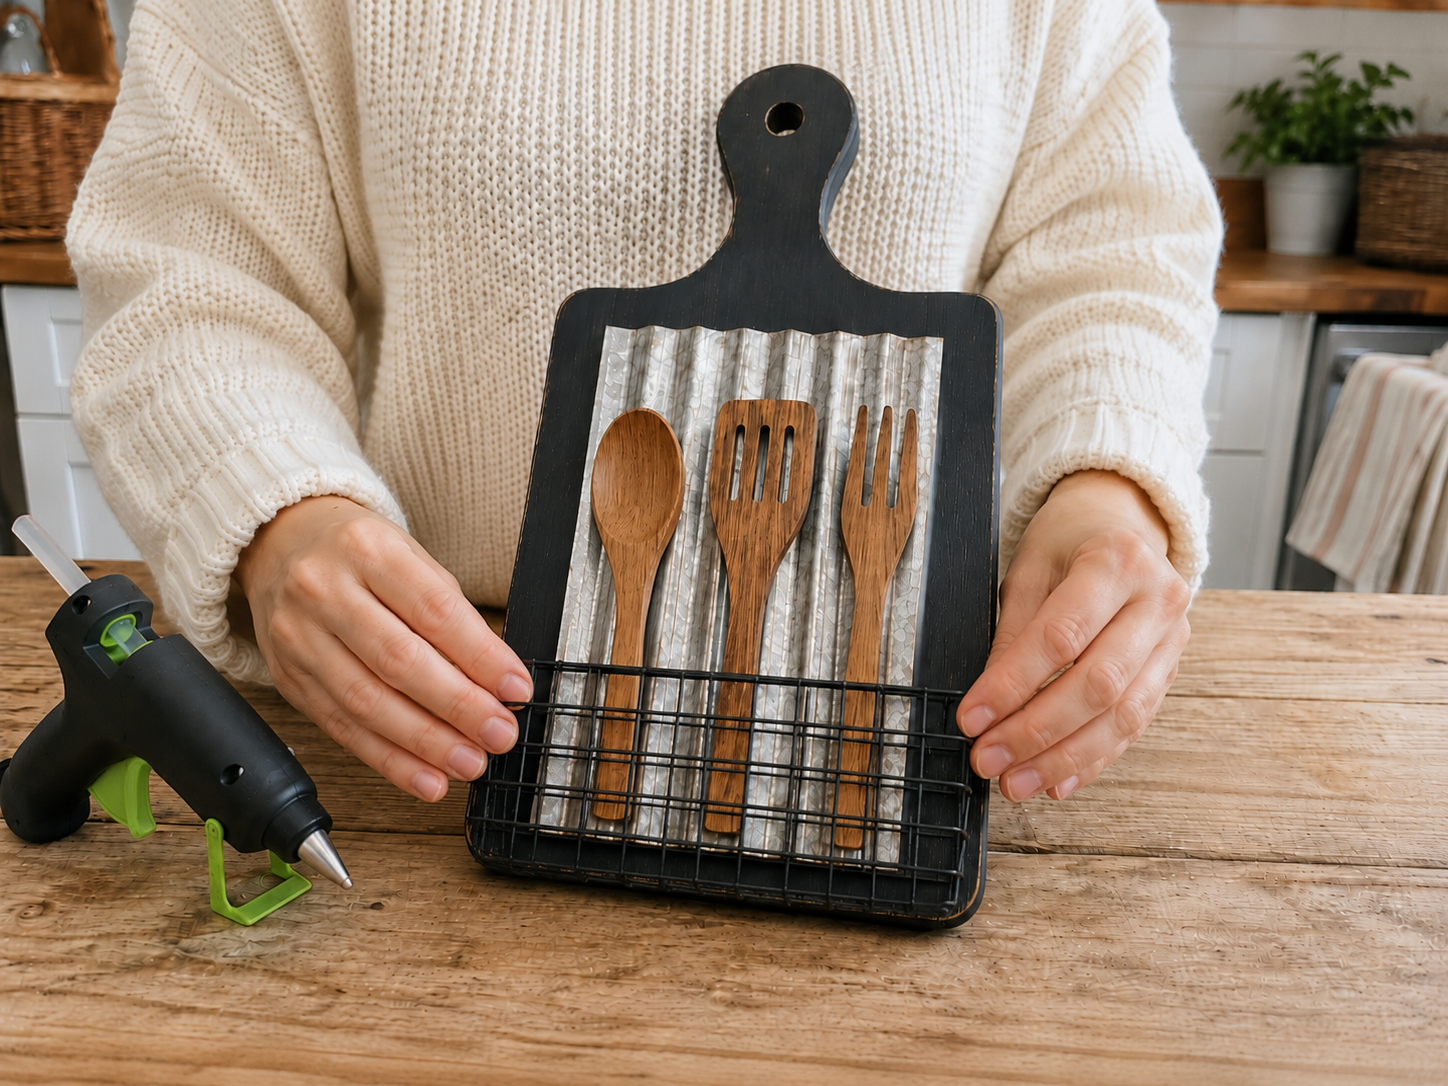
Step 3: Secure Wooden Utensils
Select 2-3 small wooden kitchen utensils (e.g., mini spoon, slotted spatula, small fork). Arrange them vertically side-by-side on top of the galvanized metal panel. Experiment with their placement to achieve a balanced and aesthetically pleasing look; typically, spacing them evenly works best. Once you’re happy with the arrangement, apply a small dab of hot glue to the back of each utensil where it touches the metal panel. Press each utensil firmly into place, holding for a moment until the glue cools and secures them.
Step 4: Attach Wire Basket
Take your small black wire basket. Position it on the lower front portion of the board, centered horizontally beneath the wooden utensils. Ensure it sits flush against the board. Apply a generous amount of hot glue to the back of the basket’s frame where it will contact the board. Press the basket firmly into place and hold until the glue cools and creates a strong bond. For extra security, especially if you plan to put heavier items in the basket, you could use small screws (if suitable for your board and basket) or even thin black zip ties threaded through the wire mesh and a pre-drilled hole in the board.
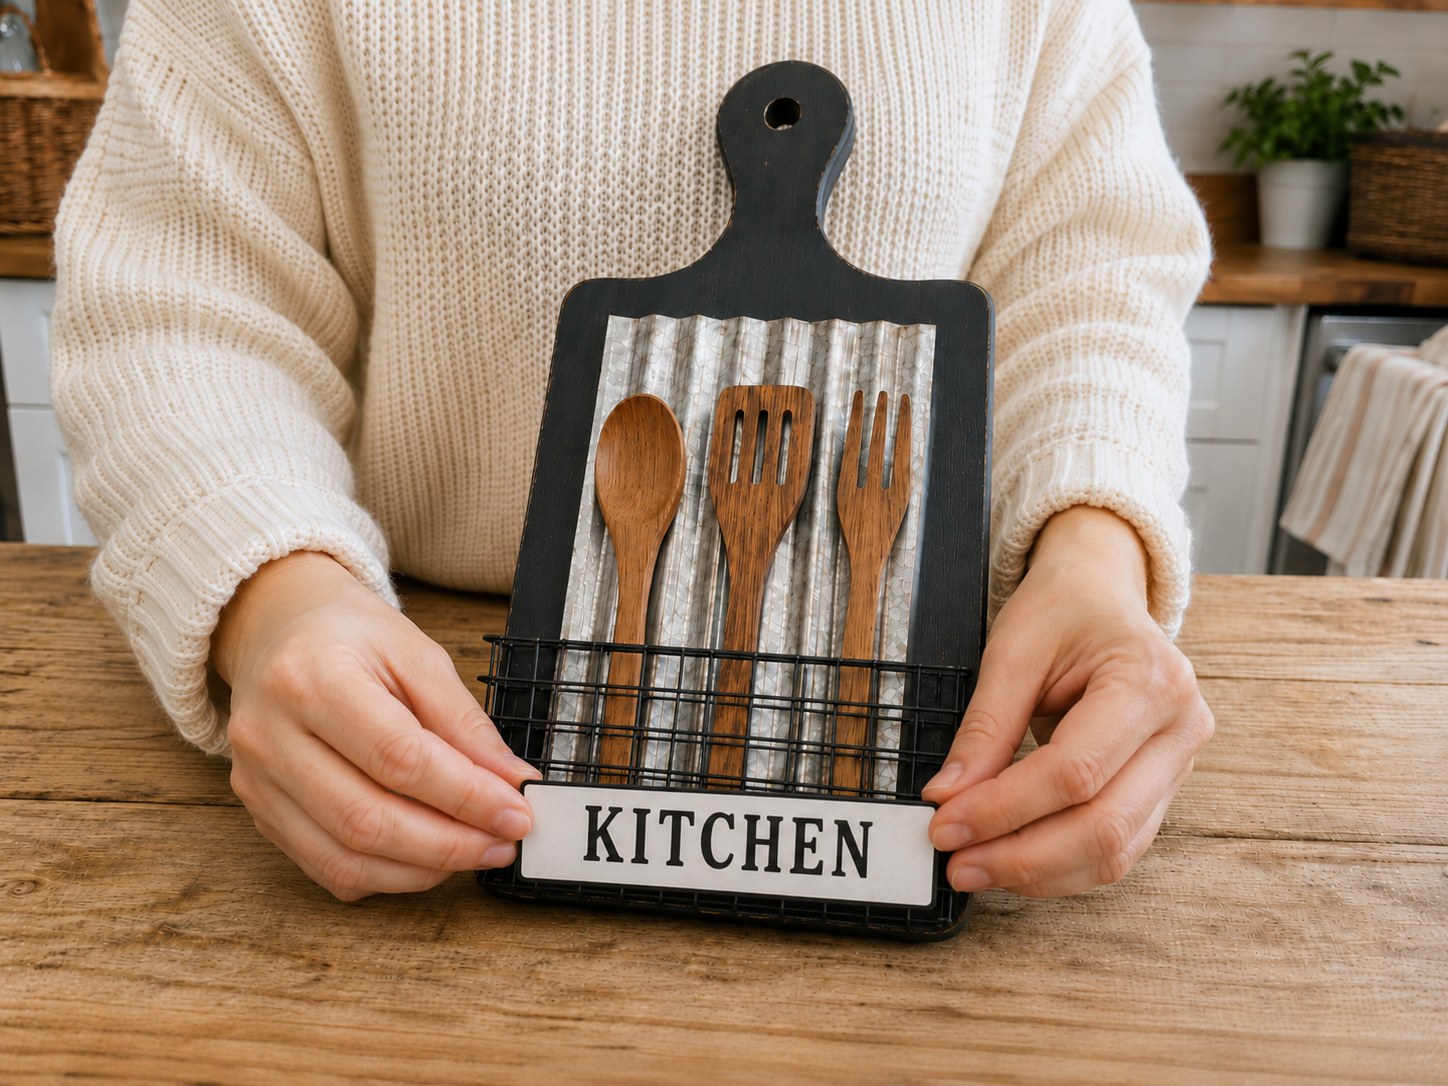
Step 5: Label the Basket ‘KITCHEN’
Obtain a small white label or plaque. This can be a pre-made sticker, a printable label, Cricut vinyl cut-out, or a hand-lettered piece. Carefully attach or write the word ‘KITCHEN’ onto the label, ensuring it’s clean, legible, and centered. Then, firmly affix this ‘KITCHEN’ label to the front of your black wire basket, usually in the middle. If using hot glue, use a minimal amount (just a few dots on the back) to avoid any visible excess.
📱 Craftino App
Make more crafts like this
1,000+ Farmhouse / Rustic ideas with photo guides & Pro Tips
✓ Step-by-step photo tutorials, nothing left out
✓ Pro Tips for every step
✓ Save crafts & browse fully offline
✓ New ideas added every week

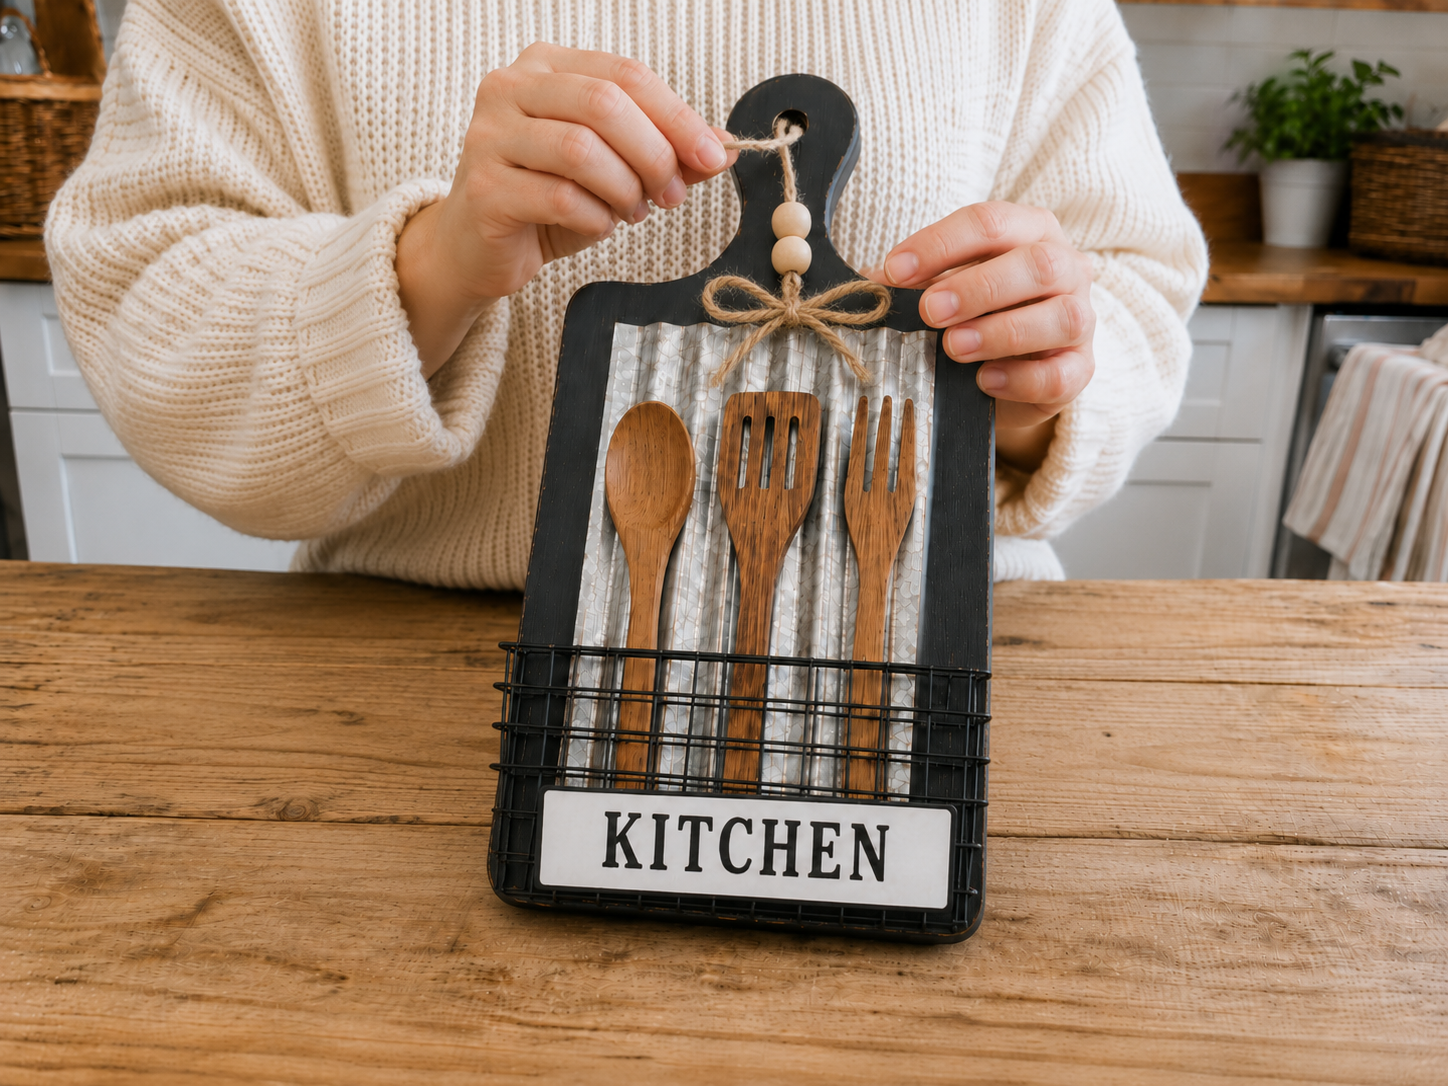
Step 6: Add Jute Rope Hanger
Cut a length of jute rope, approximately 18-24 inches, depending on your desired hanging length and the size of your board. Thread one end of the rope through the hole at the top of your cutting board’s handle. If you’re using natural wood beads, thread 2-3 beads onto the rope, positioning them symmetrically on either side of the hole or as a cluster above it for a simple accent. Bring both ends of the rope together at the back of the board, tie a secure knot to create a loop for hanging, and then fashion a decorative small bow near the top of the handle, just below the hanging loop, for a charming accent.
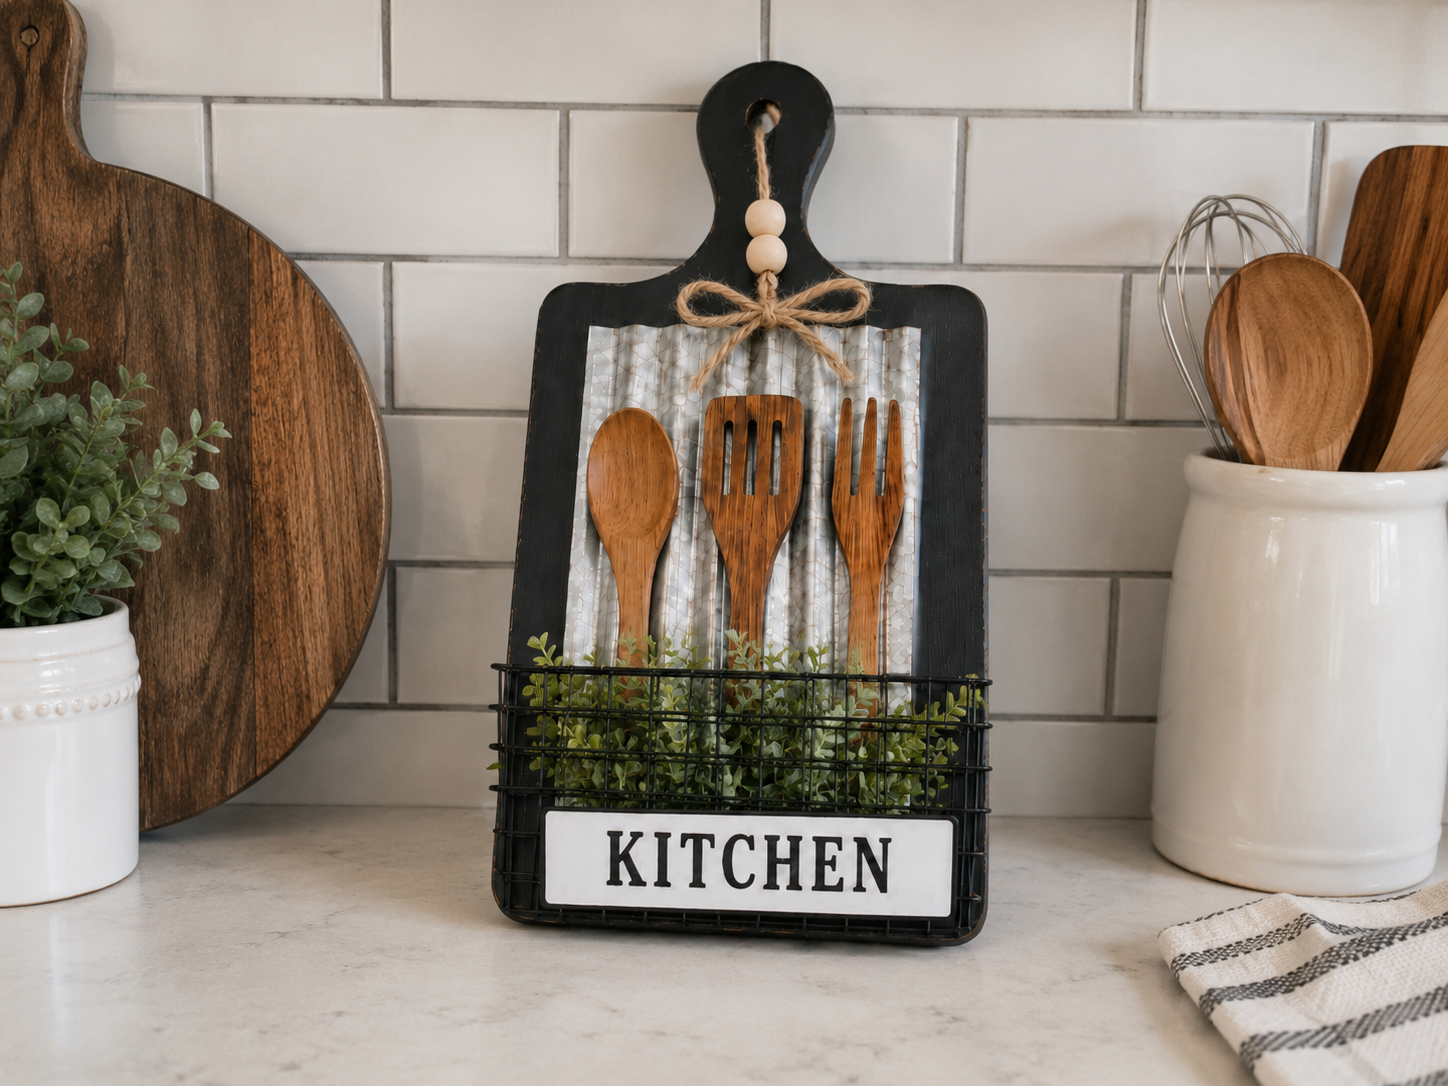
Step 7: Final Greenery & Display
For the finishing touch, place a small amount of faux greenery or other simple kitchen decor inside the black wire basket. A mini potted plant, a few sprigs of artificial herbs like rosemary or eucalyptus, or even some small recipe cards or seasoning packets fit perfectly. Be mindful not to overfill the basket, as the main visual elements – the black board, metal panel, wooden utensils, and the ‘KITCHEN’ label – should remain the focal points. Your rustic kitchen organizer is now complete and ready to hang on a wall or lean against a kitchen backsplash.
See also: Diy Coastal Farmhouse Cutting Board Decor
📋 Love staying organized while crafting? Check out our printable planners & craft designs at CraftersDT on Etsy and use code CRAFT20 for 20% off your entire order!
Your Farmhouse Kitchen Charm, Done!
Look at that! Your Rustic Farmhouse Kitchen Utensil Board Decor is all ready to hang and add that cozy touch to your kitchen. I just know it’s going to look amazing. Don’t forget to share your creation with me, or even try a different color scheme next time!
📱 Craftino App
Make more crafts like this
1,000+ Farmhouse / Rustic ideas with photo guides & Pro Tips
✓ Step-by-step photo tutorials, nothing left out
✓ Pro Tips for every step
✓ Save crafts & browse fully offline
✓ New ideas added every week
Frequently Asked Questions
What is the total cost for the Rustic Farmhouse Kitchen Utensil Board Decor DIY?
The total cost for the Rustic Farmhouse Kitchen Utensil Board Decor DIY project is typically around $12-15. This budget-friendly price is achievable by sourcing most of the materials from Dollar Tree stores.
How long does it take to make the Rustic Farmhouse Kitchen Utensil Board Decor?
It takes about 30-45 minutes to complete the Rustic Farmhouse Kitchen Utensil Board Decor, not including any drying time for paint or glue. This makes it a quick and rewarding craft project.
Is the Rustic Farmhouse Kitchen Utensil Board Decor suitable for beginner crafters?
Yes, the Rustic Farmhouse Kitchen Utensil Board Decor is perfect for beginner crafters. It involves simple steps like painting, gluing, and arranging, requiring no advanced skills.
Where can I find supplies for the Rustic Farmhouse Kitchen Utensil Board Decor?
Most supplies for the Rustic Farmhouse Kitchen Utensil Board Decor can be found at Dollar Tree, including the wooden board, faux greenery, small wooden words, and paint. You might find a few specialty items at craft stores like Hobby Lobby or Walmart if needed.
What kind of glue should I use for this Farmhouse / Rustic home decor project?
For attaching the faux greenery and small wooden pieces on your Rustic Farmhouse Kitchen Utensil Board Decor, a strong craft glue like E6000 or hot glue works best. Hot glue provides a quick hold, while E6000 offers a more permanent bond.
Can I customize the colors for my DIY Rustic Farmhouse Kitchen Utensil Board Decor?
Absolutely, you can customize the colors for your DIY Rustic Farmhouse Kitchen Utensil Board Decor by using any acrylic paint color that matches your kitchen’s theme. White, gray, and light blue are popular choices for a Farmhouse / Rustic look.
Is the Rustic Farmhouse Kitchen Utensil Board Decor a good gift idea?
Yes, the Rustic Farmhouse Kitchen Utensil Board Decor makes a wonderful, thoughtful gift for occasions like Mother’s Day, housewarmings, or birthdays. It’s especially appreciated by anyone who loves Farmhouse / Rustic style Home Decor.
How many faux floral picks do I need for this utensil board decor?
You will typically need 2-3 small faux floral picks or greenery bunches to create a nice arrangement on your Rustic Farmhouse Kitchen Utensil Board Decor. Dollar Tree often sells small bundles of eucalyptus or lambs ear that work perfectly.
Leave a Reply