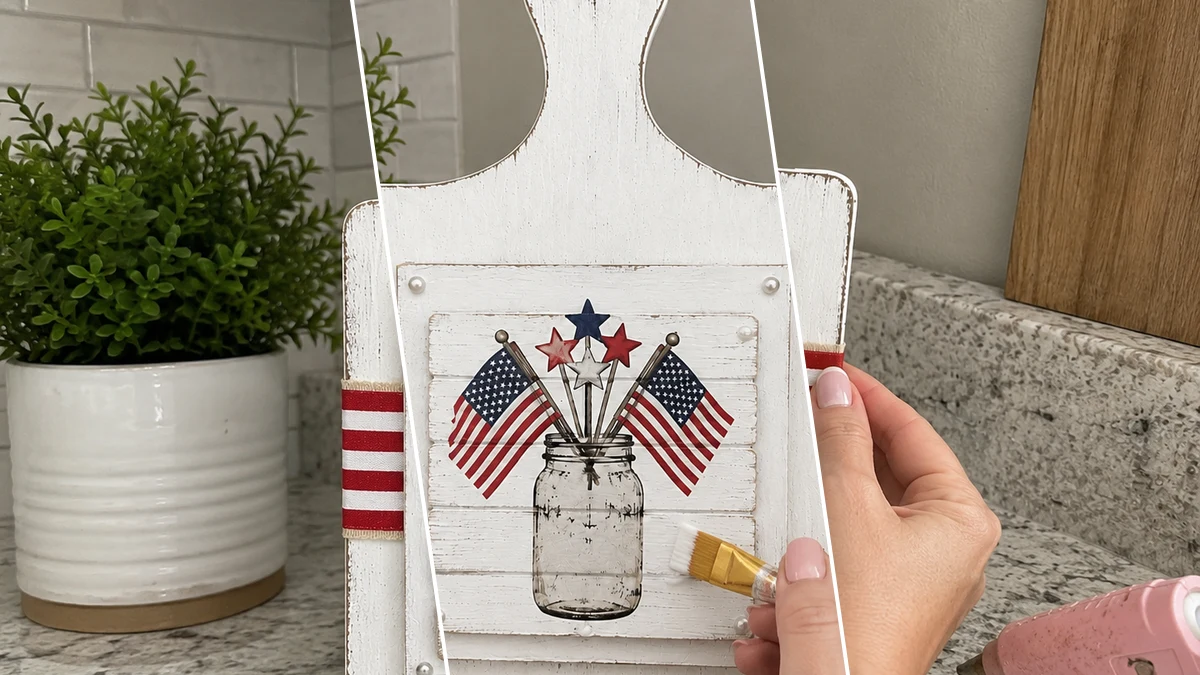
My heart just about burst with joy when I stumbled upon some plain cutting boards at Dollar Tree last week! I instantly knew I had to turn one into the cutest Rustic Patriotic Cutting Board for our 4th of July party. It’s such a fun way to add some Americana charm to your Home Decor.
Theme: Patriotic / 4th of July
Materials Needed
- Wooden Cutting Board Plaque or Wood Sign
- Mini Wood Panel or Jumbo Craft Sticks
- White Chalk Paint & Brown Distressing Paint/Stain
- Red-and-White Striped Ribbon
- Natural Raffia & Navy Wooden Star
- Patriotic Mason Jar Design (Napkin, Sticker, Transfer, or Printable)
- Craft Glue (e.g., Mod Podge) & Hot Glue Gun
- Basic Craft Tools (Scissors, Paintbrush, Sandpaper)
- Optional: Pearl Beads or Faux Nail-Head Accents
Why This Craft Works
This adorable Rustic Patriotic Cutting Board is just perfect for so many spots around your home. I love setting mine on the kitchen counter leaning against the backsplash, or even as a cute centerpiece on our dining table for our Patriotic / 4th of July celebrations. It’s a super charming piece of Home Decor that adds that cozy, Americana feel without being too flashy.
And guess what, sweet friends? Making this beauty won’t break the bank at all! With most of the supplies coming from Dollar Tree, this whole Rustic Patriotic Cutting Board project ran me about $11-14 total. It’s seriously one of the most budget-friendly ways to add some festive Home Decor to your space.
You’ll also be thrilled to know this craft is super easy, even for beginner crafters! I whipped up my Rustic Patriotic Cutting Board in about 30-45 minutes start to finish, which makes it perfect for a quick weekend project or even a last-minute gift idea. It’s a fantastic DIY for anyone wanting to add some homemade charm to their Patriotic / 4th of July Home Decor.
Step-by-Step Instructions for Rustic Patriotic Cutting Board
Are you ready to dive in and create your own amazing Rustic Patriotic Cutting Board? This DIY is so much fun and truly simple, you’ll be amazed at what you can make with just a few Dollar Tree finds. Grab your supplies, put on your favorite tunes, and let’s get crafting this perfect Patriotic / 4th of July Home Decor piece together!
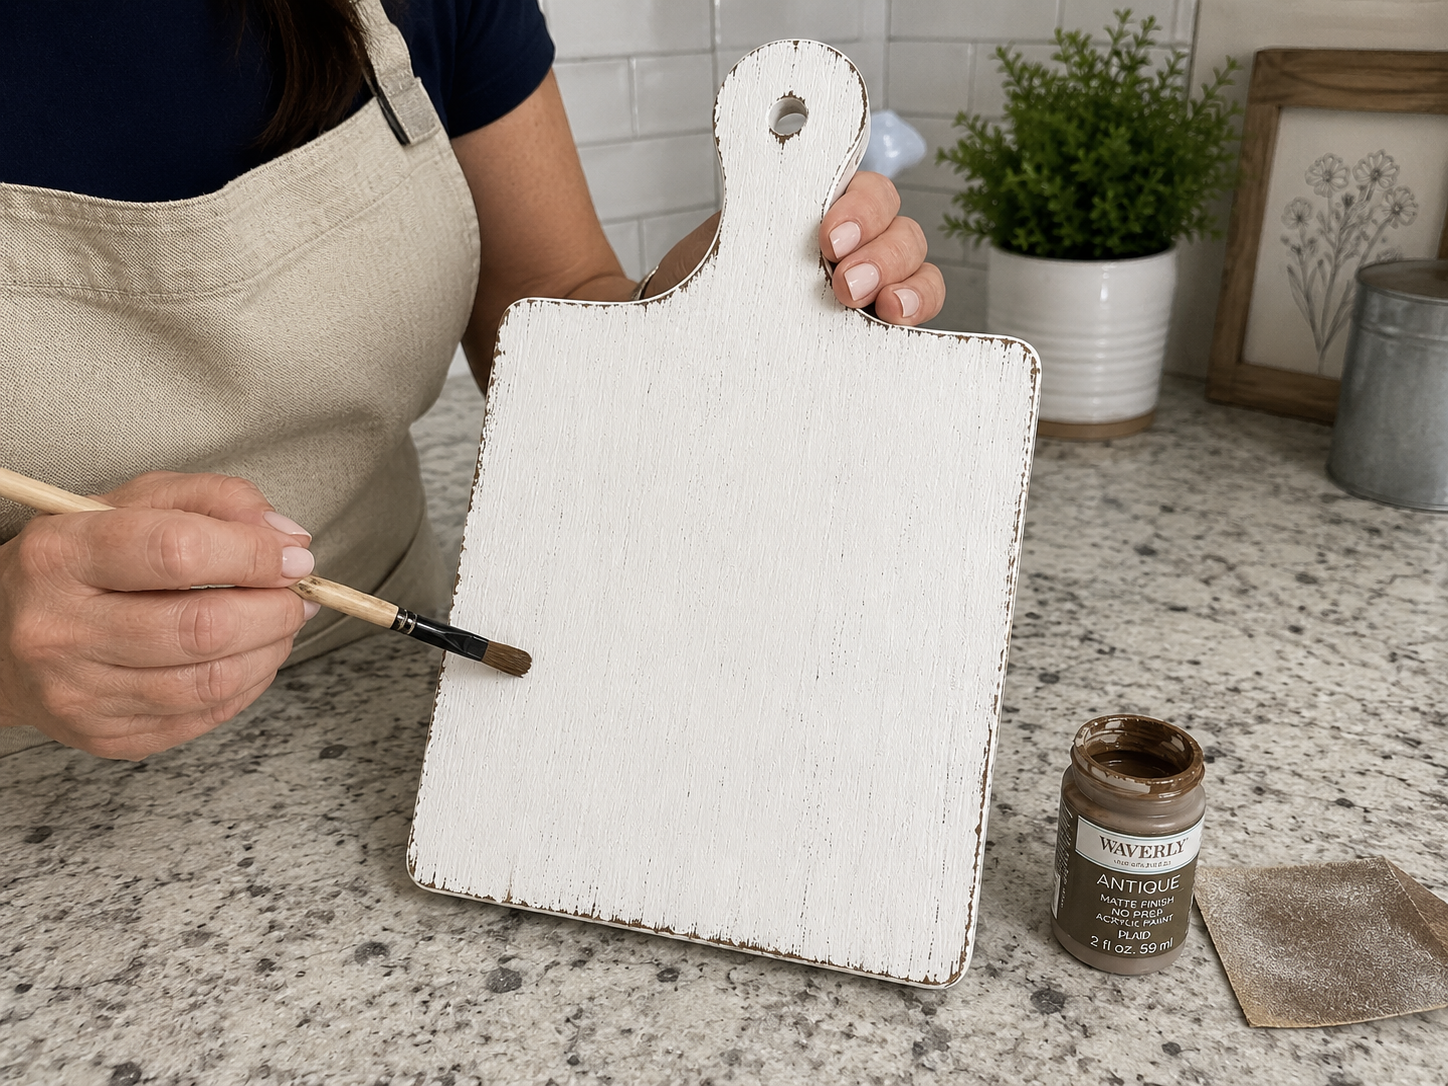
Step 1: Prepare & Distress Main Plaque
Begin by thoroughly cleaning your wooden cutting board plaque or Dollar Tree wood sign. Apply two even coats of white chalk paint to the entire surface, including the edges and handle, allowing each coat to dry completely before the next. Once dry, use a small amount of brown acrylic paint or stain on a dry brush, or fine-grit sandpaper, to gently distress the edges and raised areas. This technique creates an aged, farmhouse-inspired look without appearing overly worn or dirty.
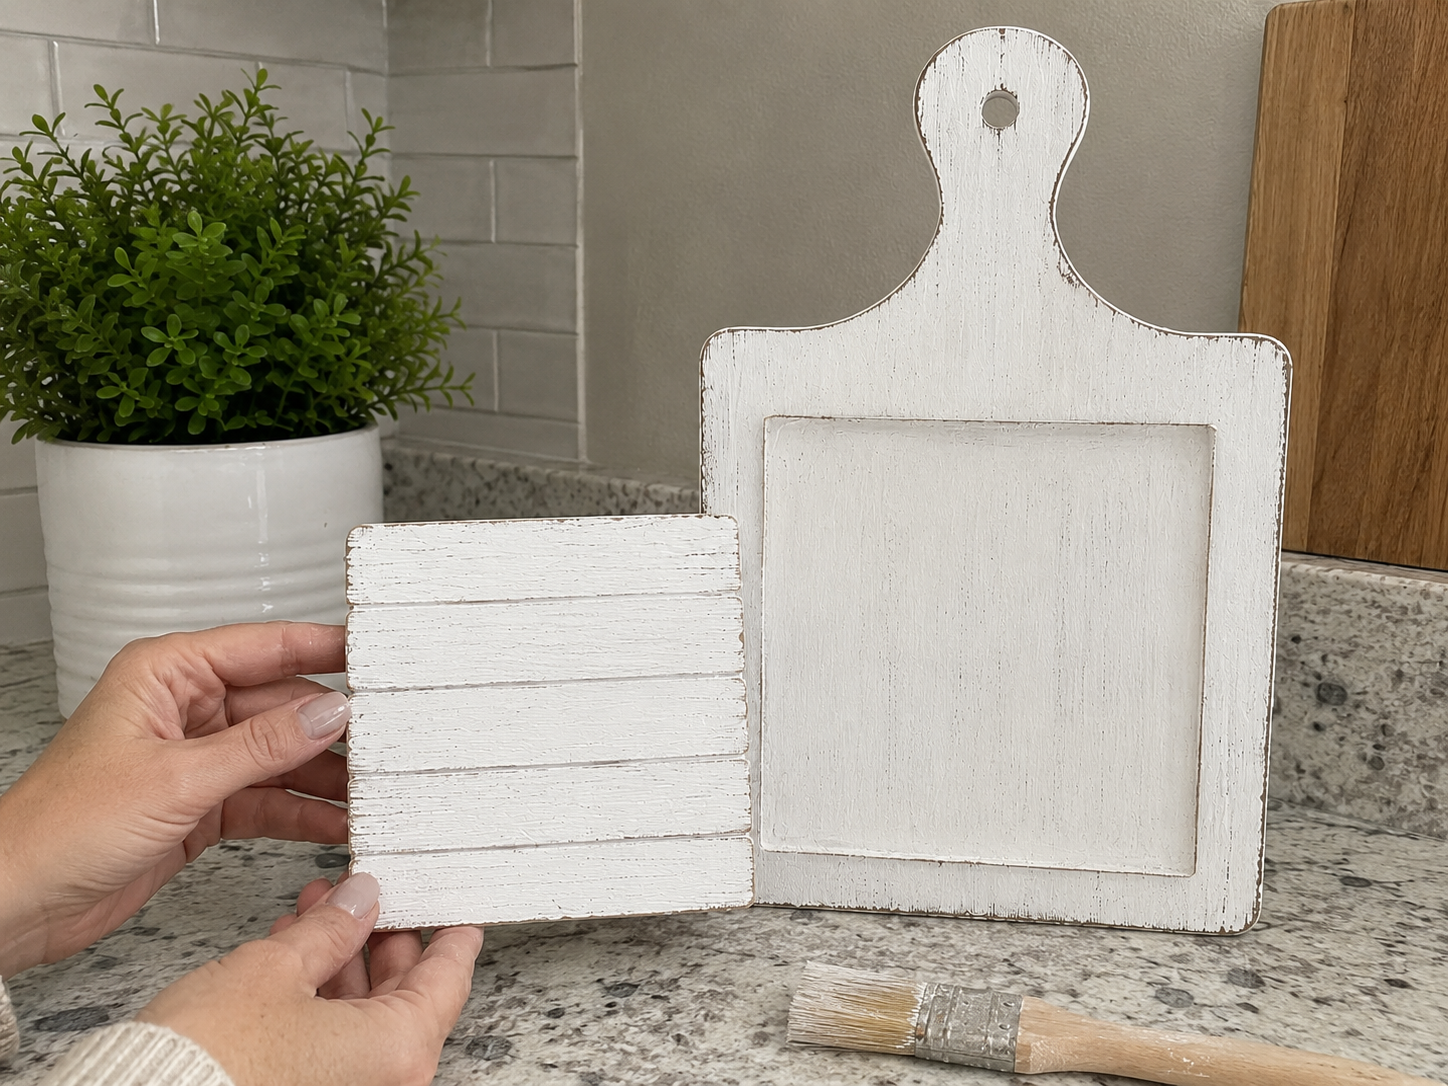
Step 2: Craft & Distress Center Panel
For the shiplap-style center panel, either use a pre-cut mini wood rectangle or create one by gluing several jumbo craft sticks side-by-side. Ensure the panel is sized to be smaller than your main plaque, leaving a consistent border once attached. Once assembled and dry, paint this panel with two coats of white chalk paint, allowing sufficient drying time between coats. Once completely dry, lightly distress the edges and, if using craft sticks, gently highlight the ‘grooves’ between them with a dry brush and a touch of brown paint or sandpaper to enhance the shiplap effect.
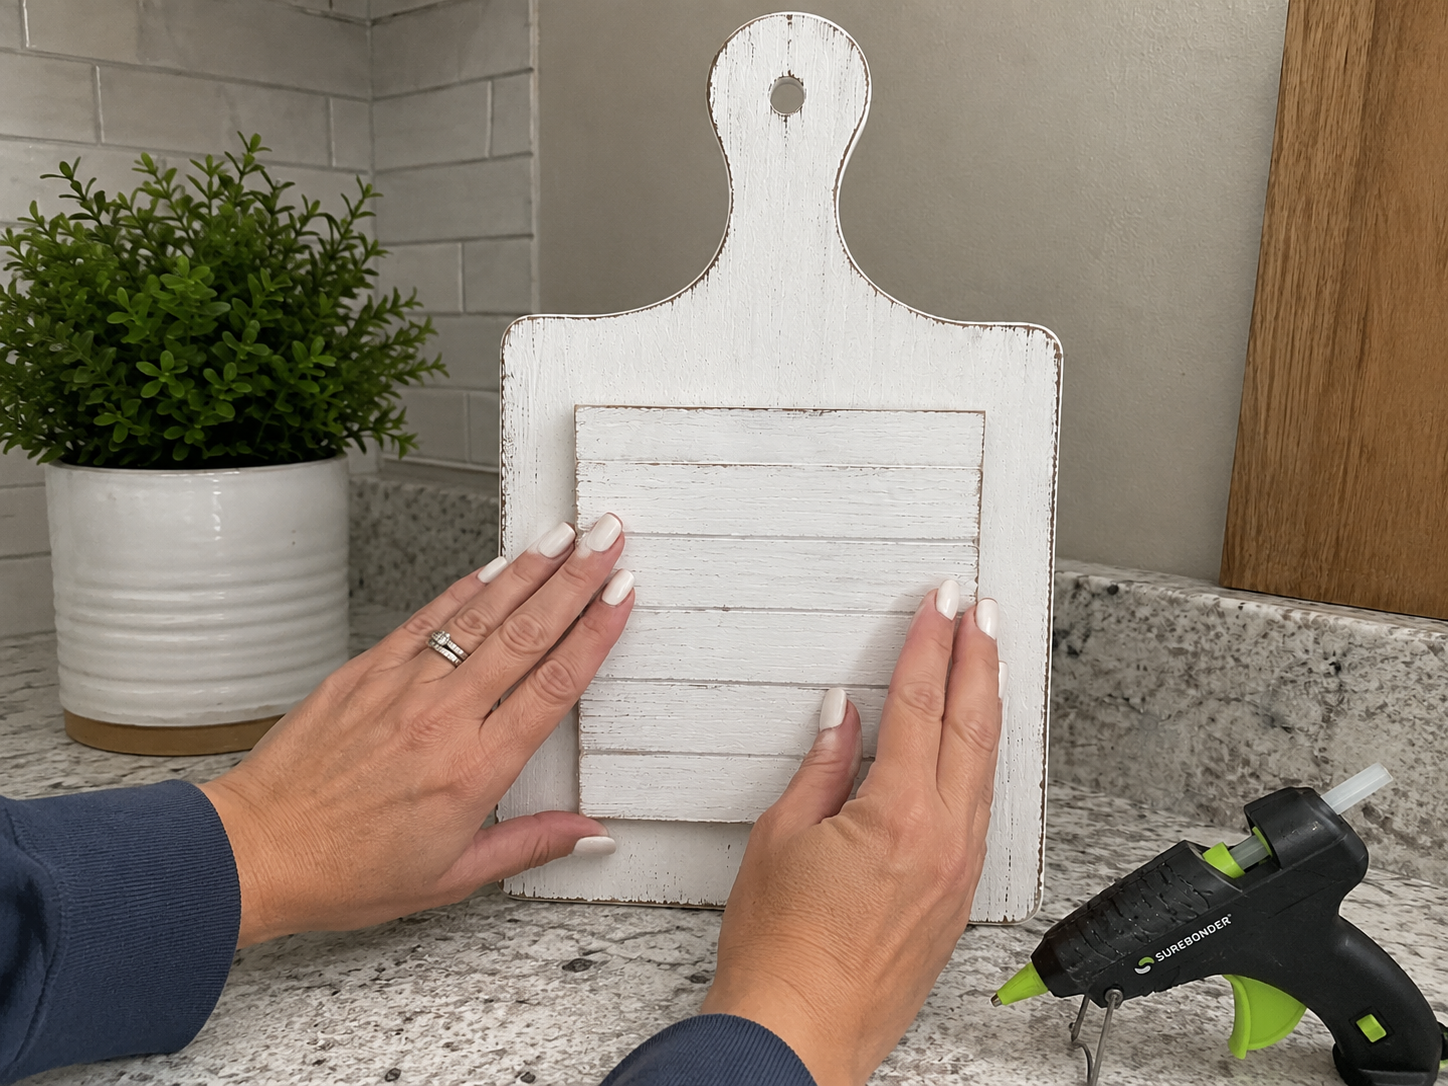
Step 3: Assemble Main Structure
Carefully center the smaller, distressed shiplap-style panel onto the main cutting board plaque. Take your time to ensure it is perfectly aligned, leaving an even border around all sides. Once positioned, use a hot glue gun to securely attach the center panel to the main plaque, applying glue to the back edges of the smaller panel. Press firmly for a few seconds to ensure a strong and lasting bond.
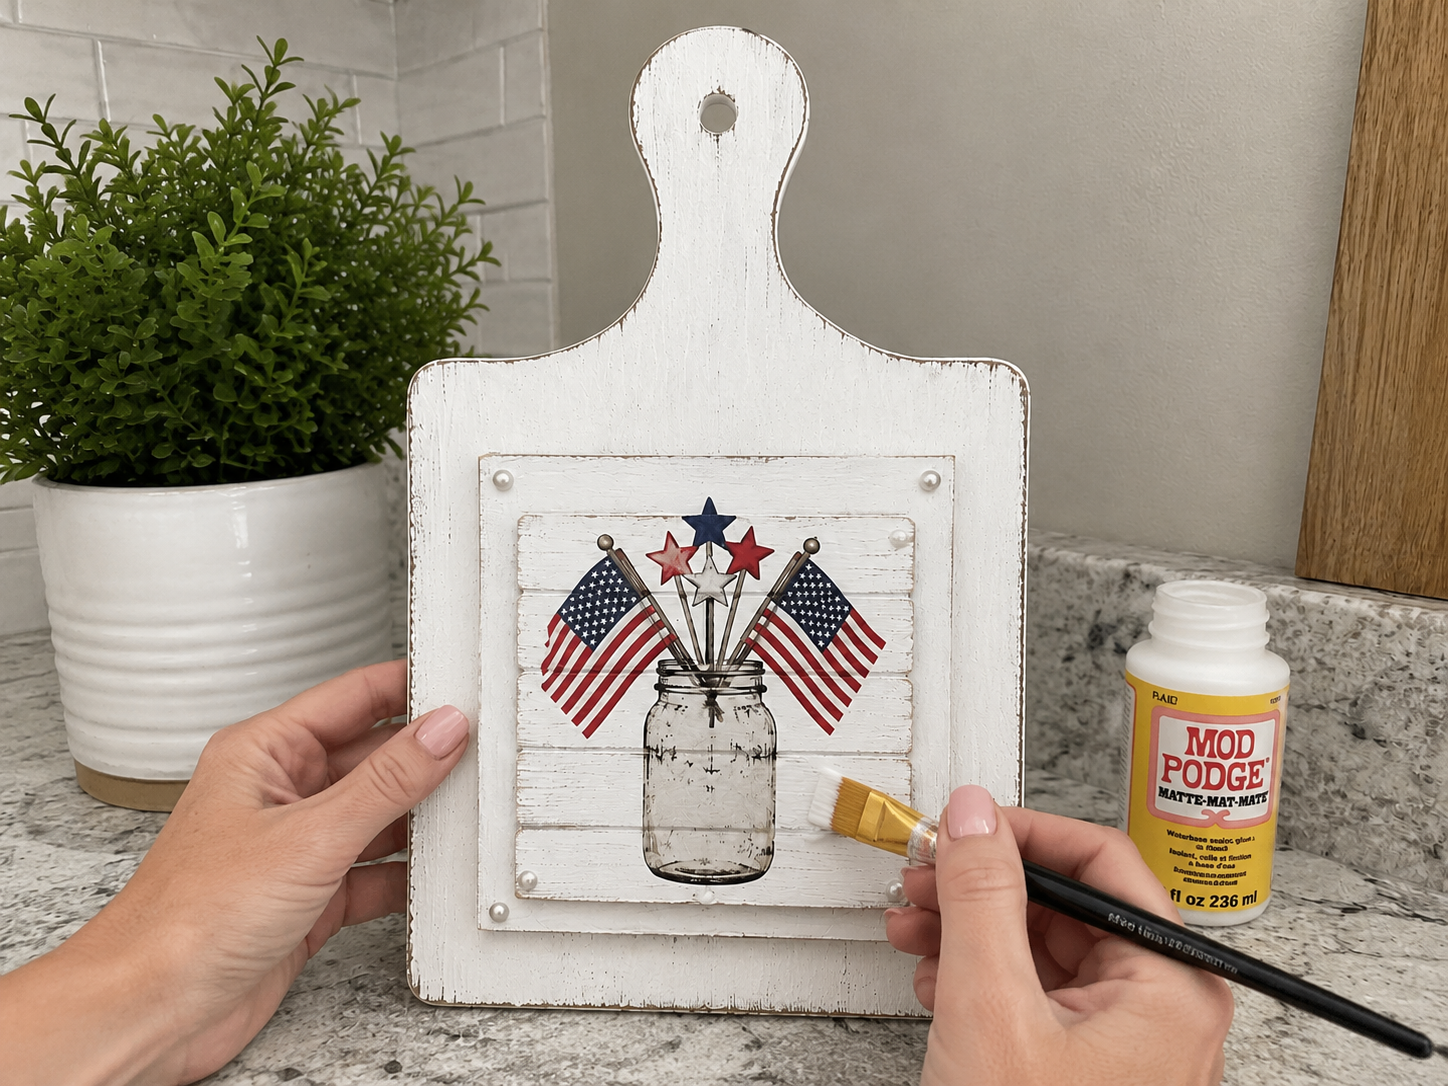
Step 4: Add Mason Jar Design
Now it’s time to add your chosen patriotic mason jar design. If using a printed napkin, carefully separate the patterned ply, position it on the center panel, and apply Mod Podge over it with a soft brush, working from the center outwards to smooth out any wrinkles. If using a sticker or rub-on transfer, follow the manufacturer’s instructions for application. If using a printable image, adhere it with a thin, even layer of Mod Podge or craft glue. Ensure the design is perfectly centered within the shiplap panel and has a clean, smooth finish.
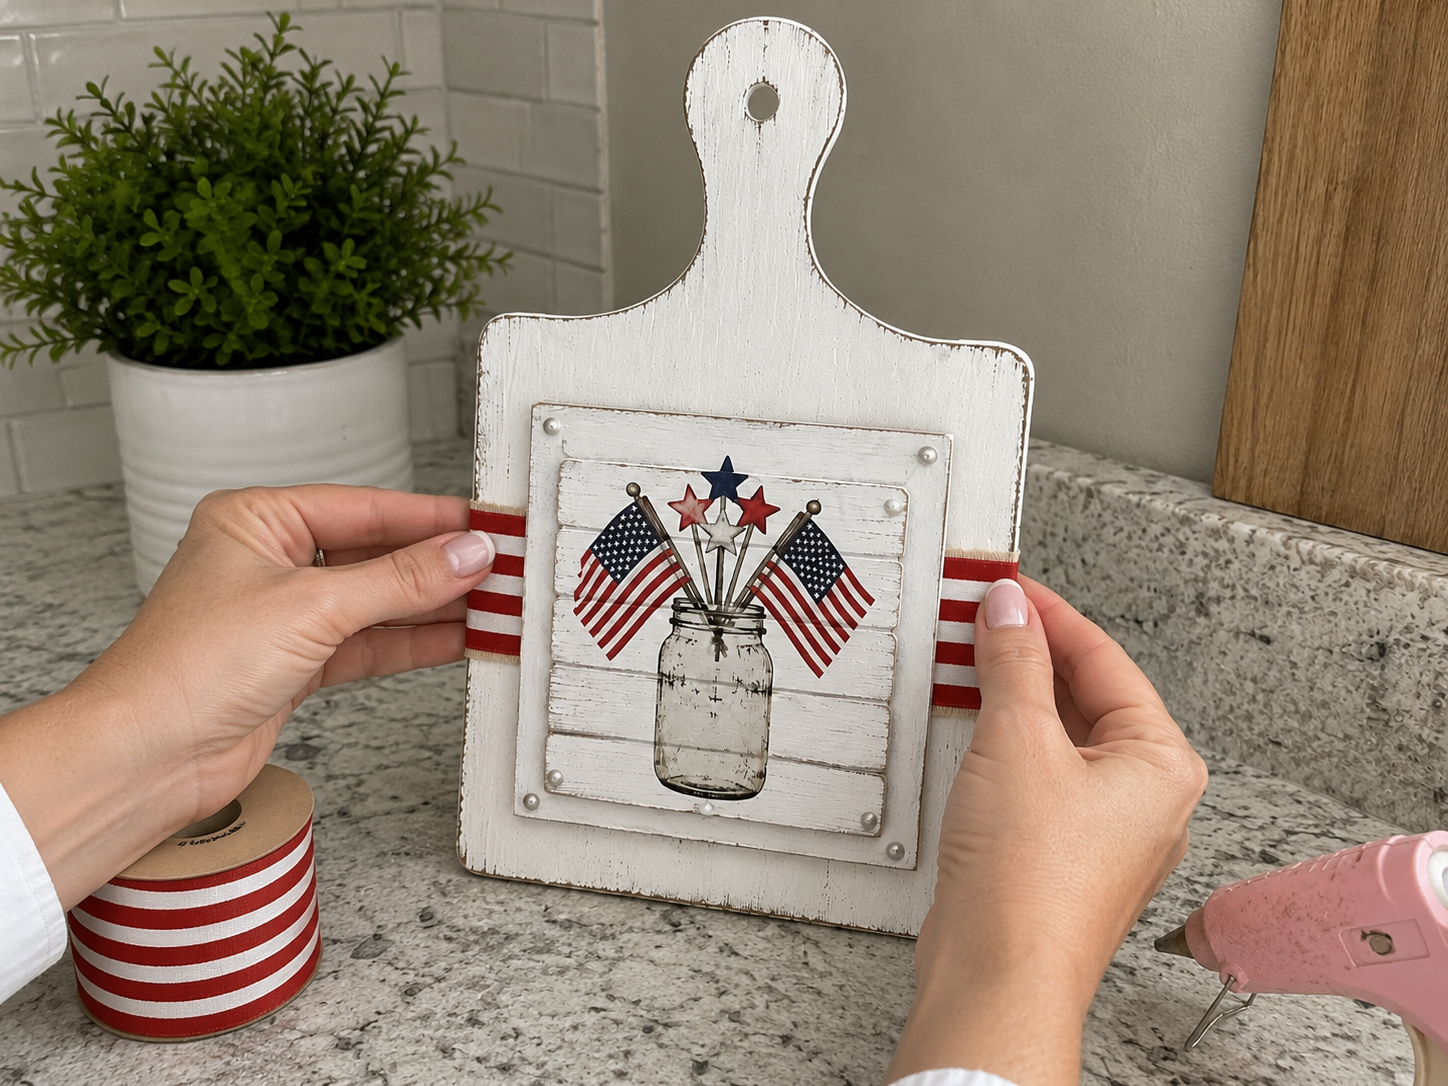
Step 5: Attach Side Ribbon Accents
Take your red-and-white striped ribbon and cut two equal lengths that are slightly longer than the width of your main plaque. Wrap one piece around the left side of the main plaque, allowing it to frame the center panel, and secure the ends tightly on the back with hot glue. Repeat this process for the right side, ensuring both ribbon bands are straight, evenly placed, and look clean and taut from the front. Trim any excess ribbon for a neat finish.
📱 Craftino App
Make more crafts like this
1,000+ Patriotic / 4th of July ideas with photo guides & Pro Tips
✓ Step-by-step photo tutorials, nothing left out
✓ Pro Tips for every step
✓ Save crafts & browse fully offline
✓ New ideas added every week

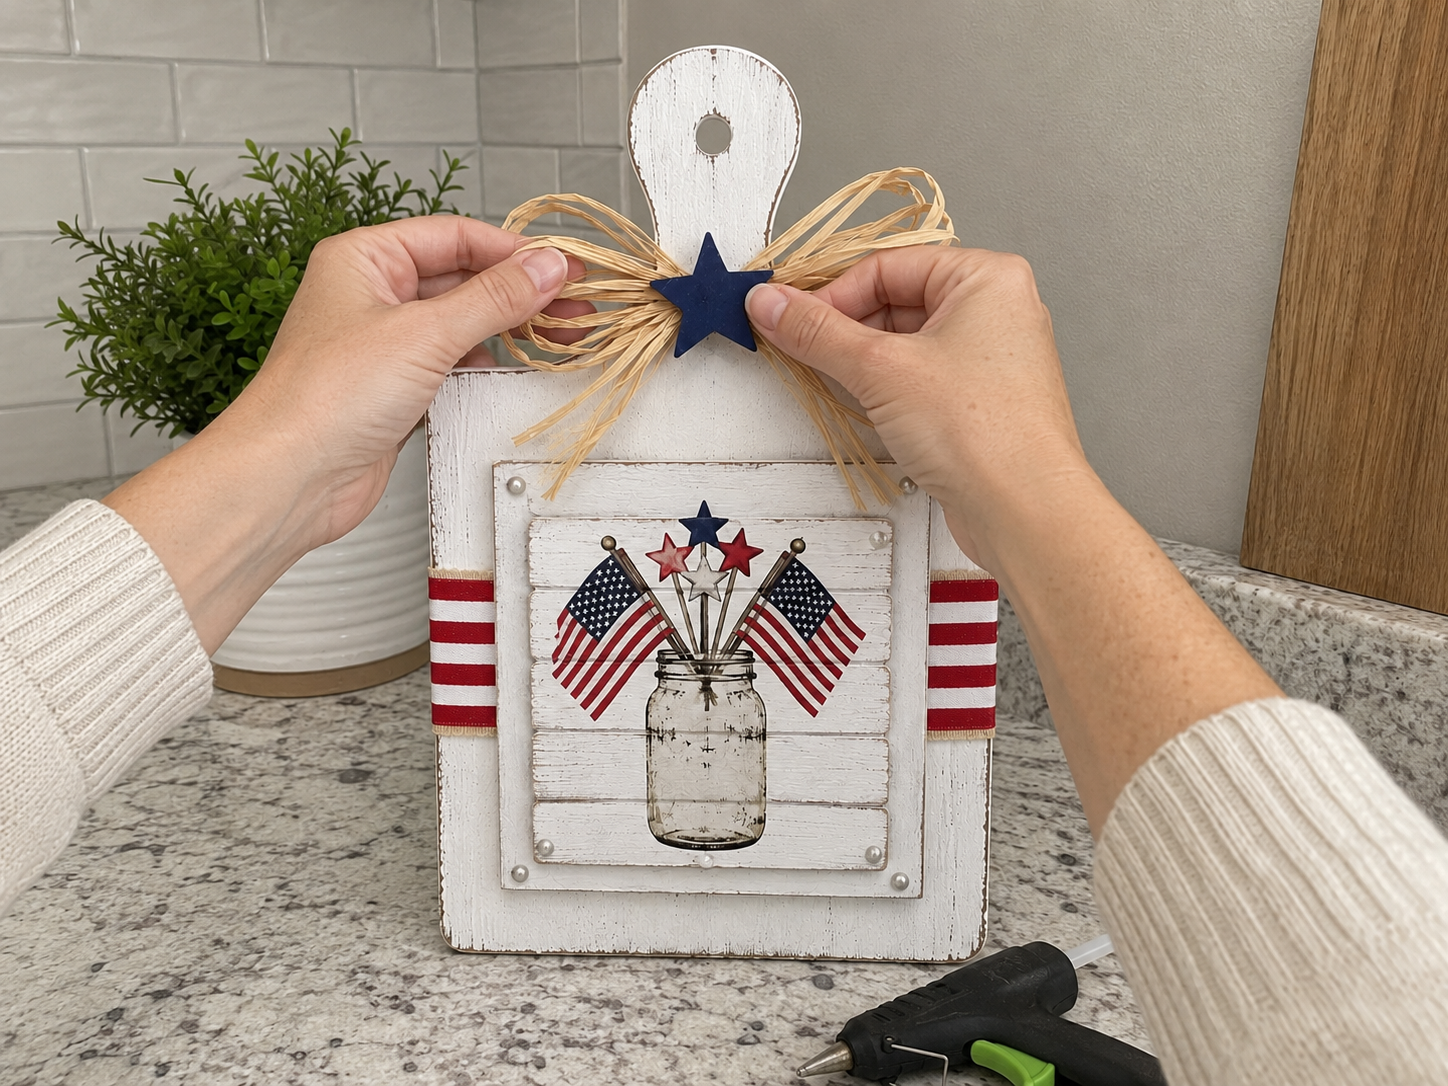
Step 6: Add Raffia Bow & Star
Gather a generous amount of natural raffia and tie it into a loose, full bow. Position this raffia bow horizontally across the upper section of the main plaque, just below the handle hole, and secure it firmly with hot glue. Next, take your navy wooden star cutout and glue it directly in the center of the raffia bow. Gently fluff the raffia ends to create a rustic, organic, and inviting look.
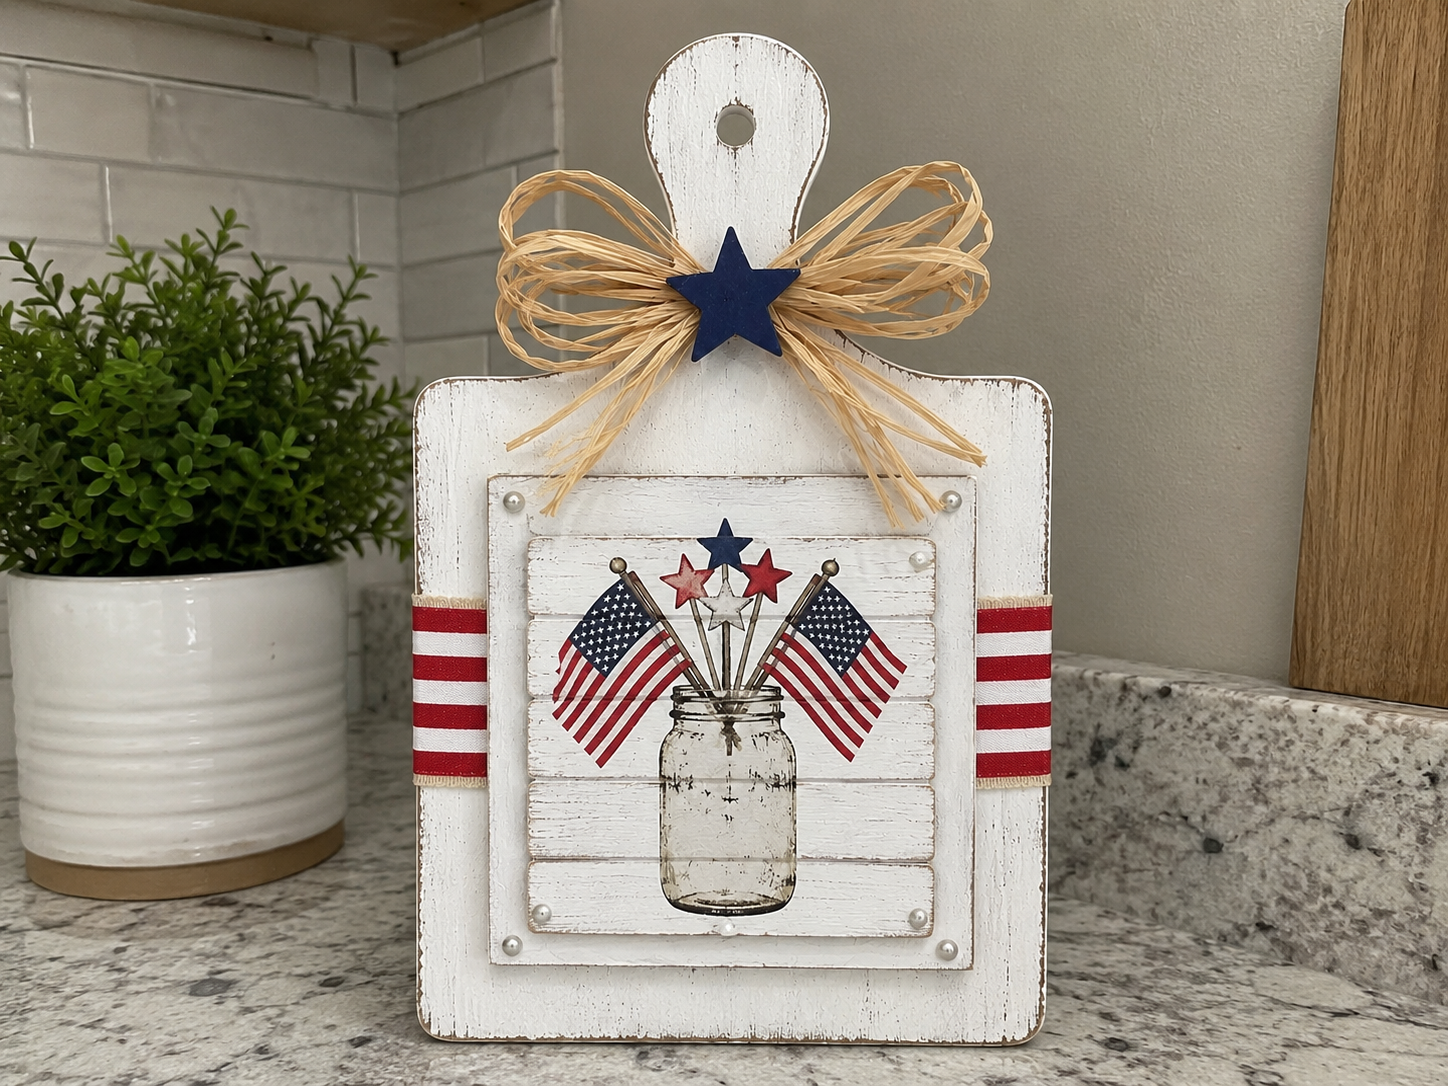
Step 7: Final Touches & Display
For an extra touch of detail, hot glue small pearl beads or faux nail-head accents to the four corners of the raised center panel, if desired. Take a moment to inspect your finished piece from all angles. Lightly distress any areas that look too ‘new’ or clean, if you prefer a more aged appearance. Trim any stray pieces of raffia to neaten the bow. Ensure all elements are securely attached and that the piece stands upright or hangs nicely. Your rustic patriotic decor piece is now ready to stand upright on a shelf or hang in your kitchen or entryway, celebrating American spirit!
See also: Farmhouse Cutting Board Crate Diy
📋 Love staying organized while crafting? Check out our printable planners & craft designs at CraftersDT on Etsy and use code CRAFT20 for 20% off your entire order!
Ready to Display Your Rustic Patriotic Cutting Board!
And just like that, your beautiful Rustic Patriotic Cutting Board is all done! It looks absolutely adorable perched on the kitchen counter or serving as a cute centerpiece for your summer gatherings. Don’t forget to share your finished craft with me, I’d love to see how you made it your own!
📱 Craftino App
Make more crafts like this
1,000+ Patriotic / 4th of July ideas with photo guides & Pro Tips
✓ Step-by-step photo tutorials, nothing left out
✓ Pro Tips for every step
✓ Save crafts & browse fully offline
✓ New ideas added every week
Frequently Asked Questions
What is the total cost to make the DIY Rustic Patriotic Cutting Board?
The total cost to make the DIY Rustic Patriotic Cutting Board is around $11-14. This budget-friendly craft uses mostly Dollar Tree supplies, making it an affordable Patriotic / 4th of July Home Decor project.
How long does it take to complete the Rustic Patriotic Cutting Board craft?
The Rustic Patriotic Cutting Board craft takes approximately 30-45 minutes to complete. This quick DIY project is perfect for adding last-minute Patriotic / 4th of July Home Decor to your space.
Is the Rustic Patriotic Cutting Board a good DIY project for beginners?
Yes, the Rustic Patriotic Cutting Board is an excellent DIY project for beginners. It involves simple steps like painting, gluing, and distressing, requiring no advanced crafting skills to create beautiful Patriotic / 4th of July Home Decor.
Where can I buy the supplies for the Dollar Tree Rustic Patriotic Cutting Board?
You can buy most of the supplies for the Dollar Tree Rustic Patriotic Cutting Board at Dollar Tree, including the cutting board, paint, and some embellishments. Other items like twine or sandpaper can be found at craft stores like Hobby Lobby or Walmart.
How much paint do I need for the Patriotic / 4th of July cutting board?
You will need small amounts of red, white, and blue acrylic craft paint for the Patriotic / 4th of July cutting board. Standard 2 oz bottles of each color from Dollar Tree or any craft store are more than enough for this project.
Is the DIY Rustic Patriotic Cutting Board a suitable gift?
Yes, the DIY Rustic Patriotic Cutting Board makes a wonderful handmade gift for friends, family, or hostesses. It’s especially thoughtful for summer birthdays, housewarmings, or as a unique Patriotic / 4th of July present.
Can I customize the design of my Rustic Patriotic Cutting Board?
Absolutely, you can easily customize the design of your Rustic Patriotic Cutting Board. Consider adding different stencils, changing the paint colors for other holidays, or incorporating personalized initial decals for unique Home Decor.
How durable is the DIY Rustic Patriotic Cutting Board for Home Decor?
The DIY Rustic Patriotic Cutting Board is durable for indoor Home Decor use, especially when sealed with a clear topcoat or Mod Podge. It’s designed as a decorative item, not for food preparation, ensuring its finish lasts for many Patriotic / 4th of July seasons.
Shop patriotic / 4th of july decor & supplies at Dollar Tree.
Leave a Reply