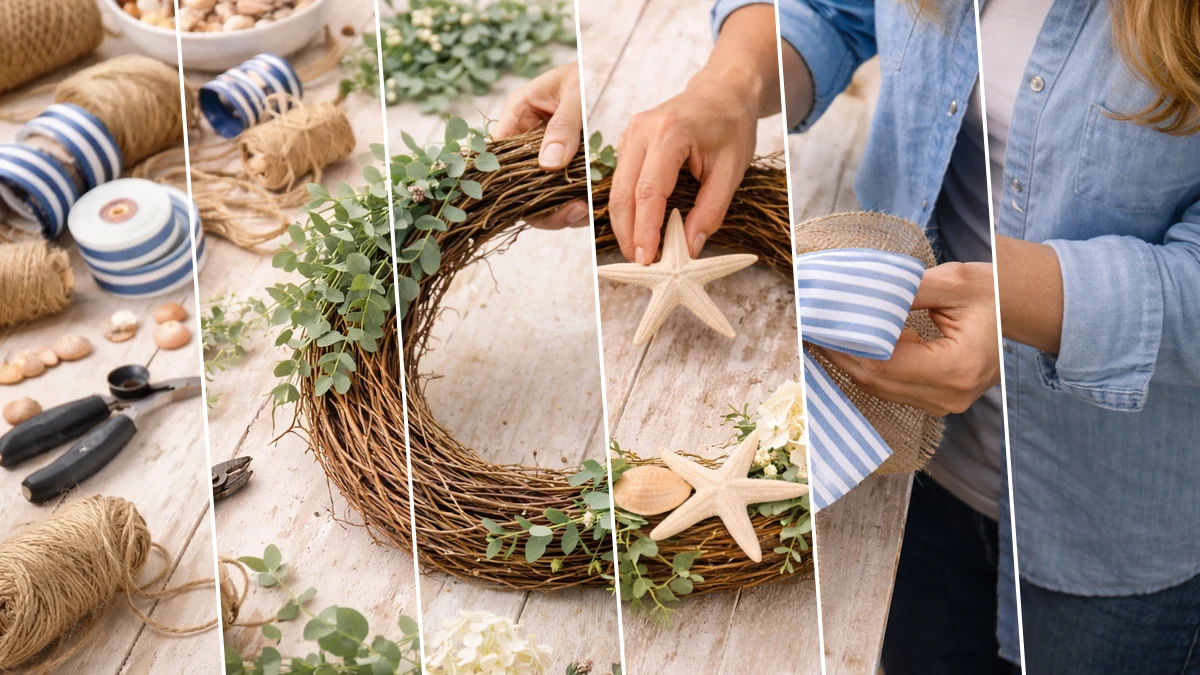
Ever walk into Dollar Tree just for one thing and leave with a whole cart full of treasures? Happens to me every time! That’s how I ended up making this super cute Charming Coastal Summer Wreath that’s perfect for your front door or anywhere you need some beachy vibes.
See also: Sparkling Patriotic Deco Mesh Wreath
Theme: Summer & Beach
Materials Needed
- Grapevine Wreath Base (approx. 14-18 inch)
- Assorted Faux Greenery (e.g., Eucalyptus, filler branches)
- Faux White Flowers & Berry Clusters (e.g., Hydrangeas, small sprigs)
- Natural Starfish & Assorted Seashells
- Burlap Ribbon (natural color, approx. 2.5 inches wide)
- Blue & White Striped Fabric Ribbon (approx. 2 inches wide)
- Twine or Floral Wire
- Hot Glue Gun & Glue Sticks
📋 Love staying organized while crafting? Check out our printable planners & craft designs at CraftersDT on Etsy and use code CRAFT20 for 20% off your entire order!
Step-by-Step Instructions for Charming Coastal Summer Wreath
Get ready to have some fun, friends! This project is seriously one of the easiest Home Decor crafts I’ve done in a while. I whipped up my Charming Coastal Summer Wreath in about 20 minutes, so it’s perfect if you’re a beginner or even want to get the kids involved. You’ll love bringing those Summer & Beach feels into your home!
📱 Free to Download
Join 50,000+ crafters already using Craftino
You’re still missing out?
✓ Save crafts & browse fully offline
✓ Download printable PDF guides for every project
✓ Step-by-step photo tutorials, nothing left out
✓ 1,000+ craft projects with new ones added every week
Step 1: Prepare Your Wreath Base
Begin by unboxing your grapevine wreath. Inspect it for any loose branches, dust, or debris. Gently shake it over a trash can or wipe it down to dislodge anything unwanted. This ensures a clean surface for your glue and materials to adhere properly.
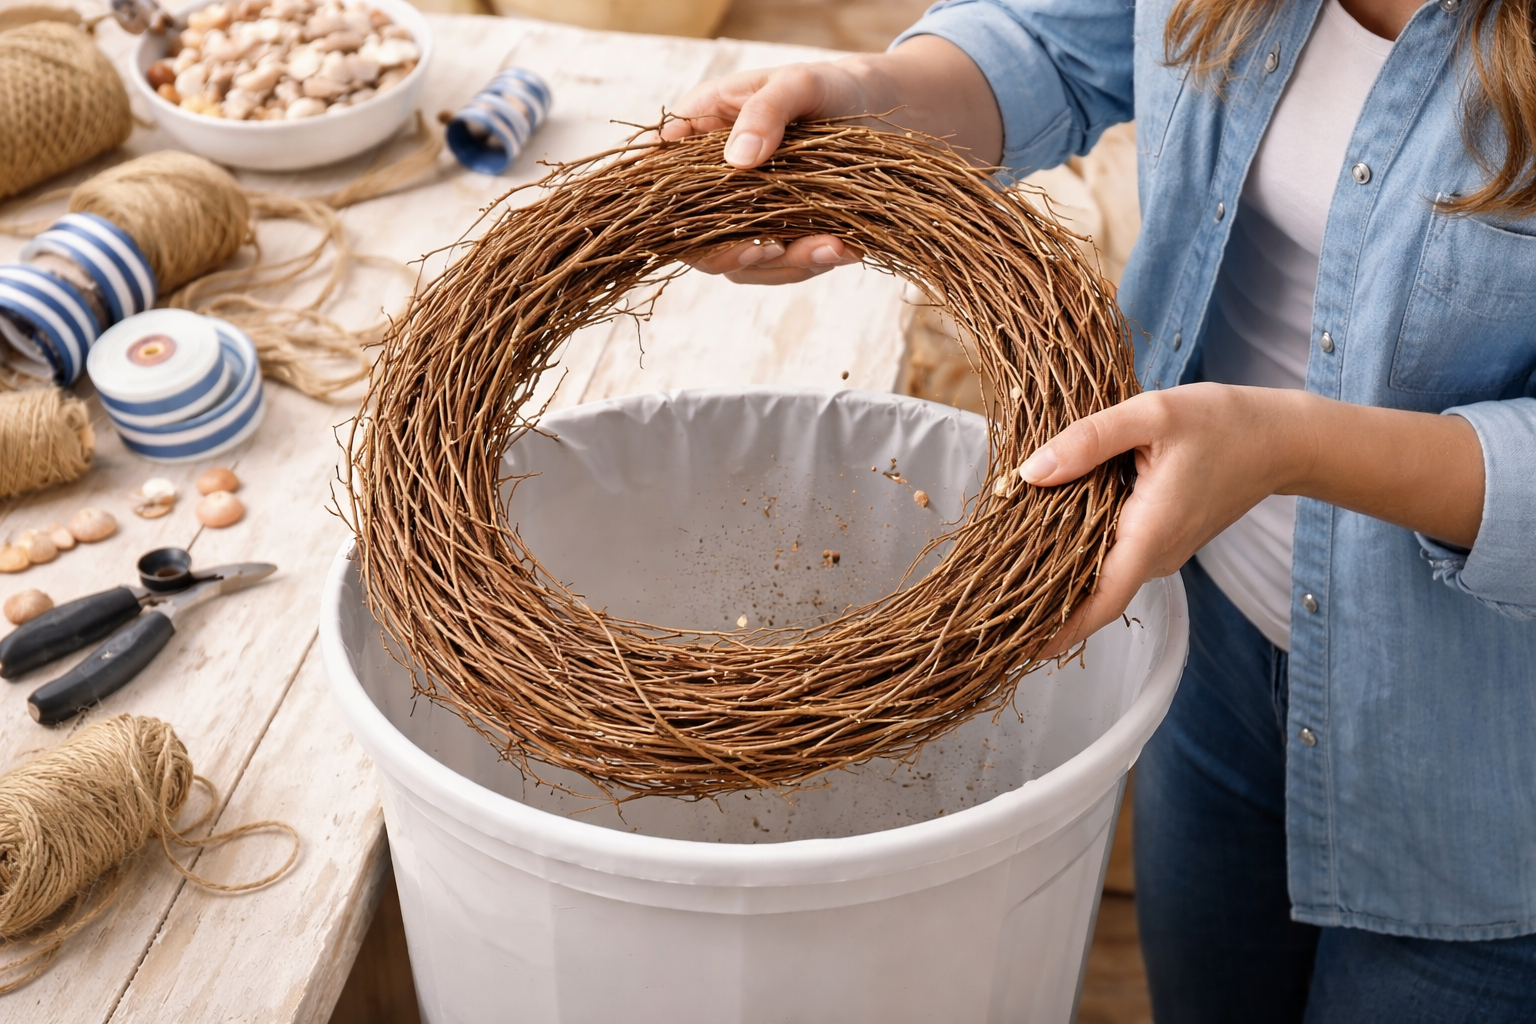
💡 Pro Tip: If your grapevine wreath feels too stiff or has unruly stray branches, you can gently trim them with wire cutters or use a small dab of hot glue to secure them in place for a neater foundation.
Step 2: Establish Greenery Foundation
Take your larger faux greenery branches, such as eucalyptus, and begin attaching them to the grapevine wreath using a hot glue gun. Work in sections, adhering the stems directly to the grapevine. Aim to cover approximately two-thirds to three-quarters of the wreath, leaving a natural grapevine section exposed for visual interest, mimicking the example.
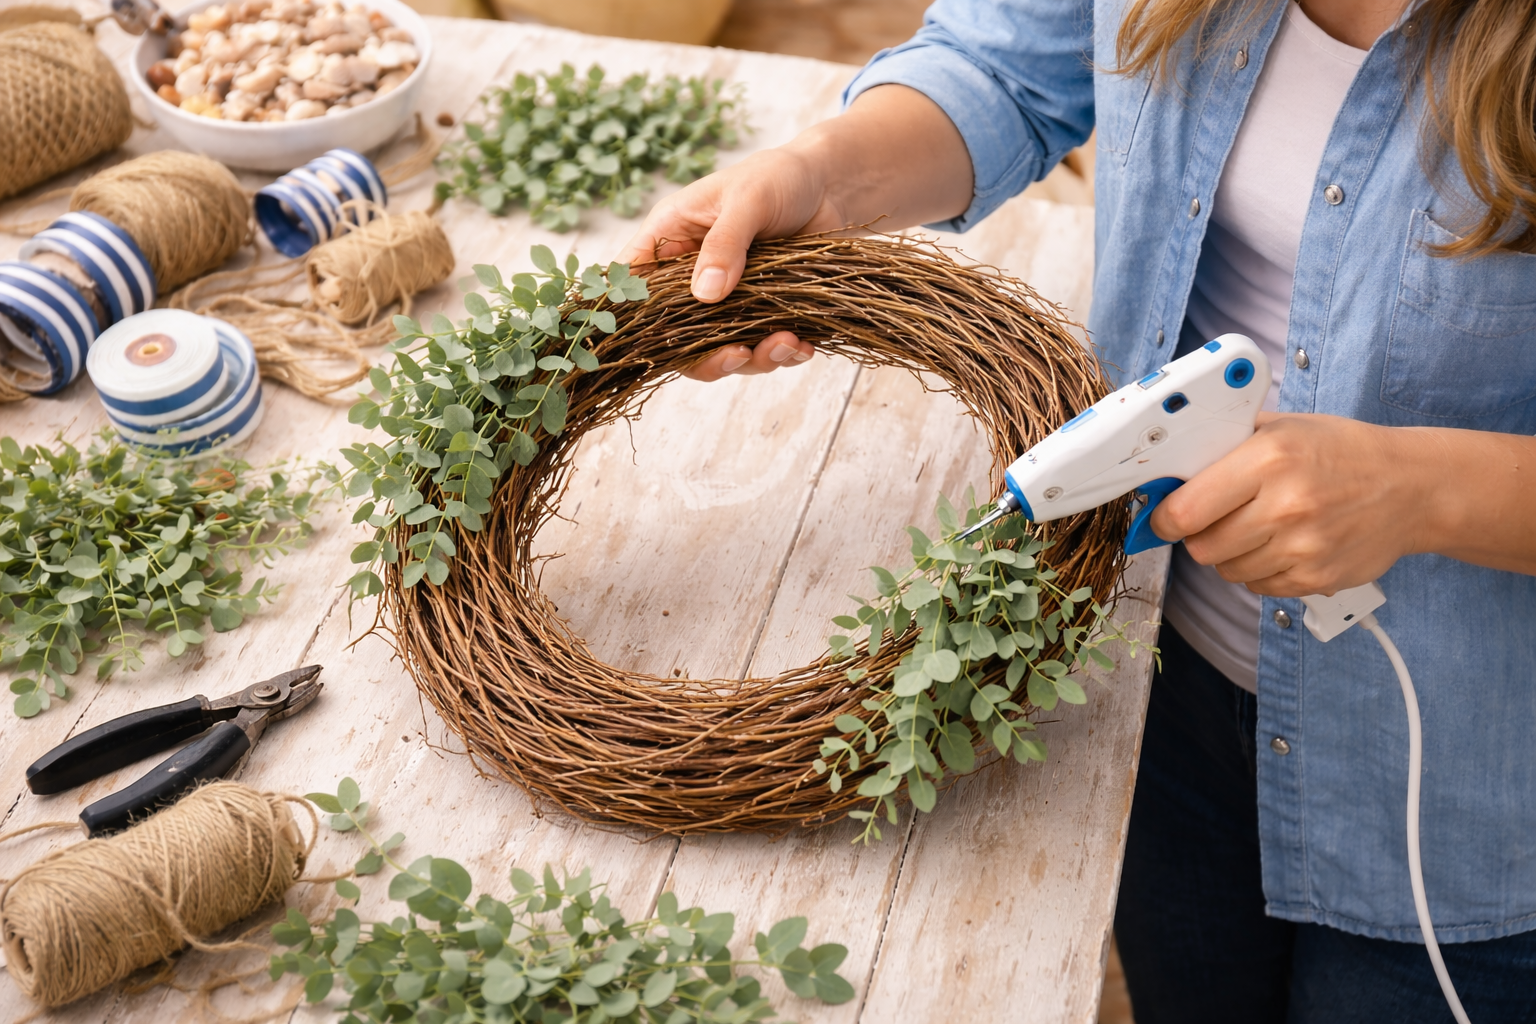
💡 Pro Tip: When applying greenery, position the stems so that the leaves naturally flow in the same direction around the wreath, creating a cohesive and realistic movement. Don’t be afraid to bend or trim stems to fit the curve.
🗓️ Keep all your craft projects on track! Explore our printable planners & templates at CraftersDT on Etsy and use code CRAFT20 for 20% off!
Step 3: Layer Floral Accents & Fillers
Once your base greenery is secure, start adding the faux white flowers (like small hydrangeas or similar clusters) and the smaller berry-like filler sprigs. Distribute these elements strategically within the greenery, ensuring they are evenly spaced and tucked in, adding depth and visual interest without overwhelming the natural elements. Use hot glue to secure each piece firmly.
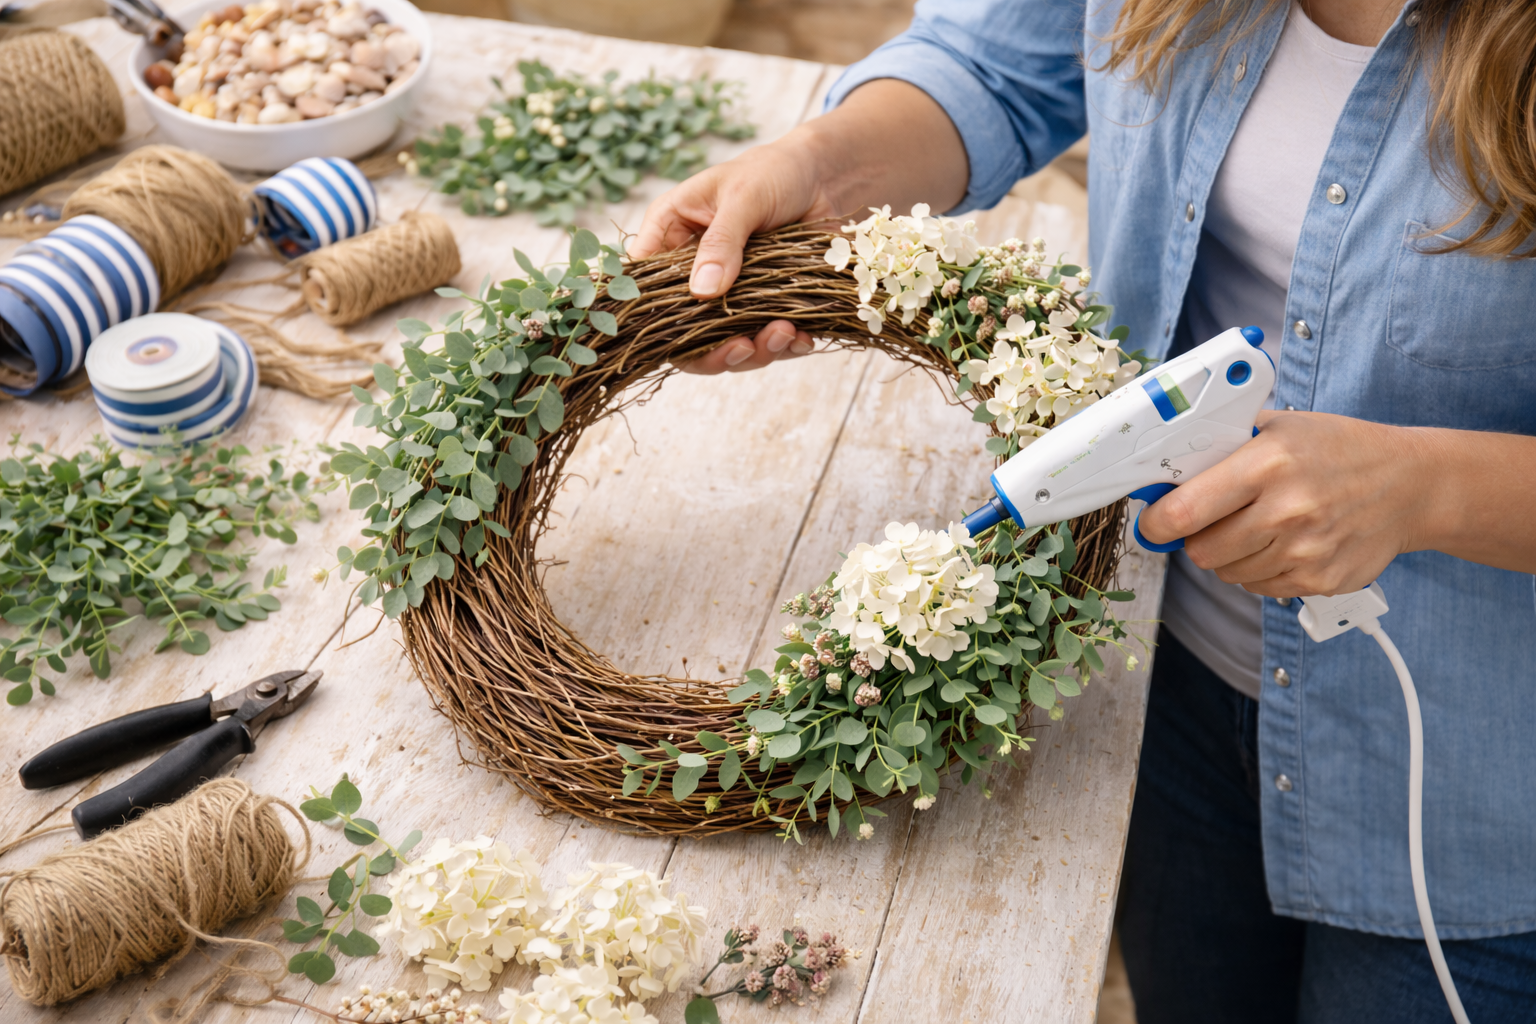
💡 Pro Tip: To create a more organic look, consider creating small ‘mini-bouquets’ of flowers and filler sprigs by grouping them together before gluing. This can make the arrangement look more natural and reduce the number of individual gluing points.
Step 4: Incorporate Starfish & Seashells
Now it’s time to add your signature coastal elements. Carefully place your natural starfish and assorted seashells onto the wreath. Before gluing, arrange them dry until you are happy with the placement, ensuring a balanced look. Use small, controlled dabs of hot glue on the back of each piece to secure them firmly to the grapevine or greenery.
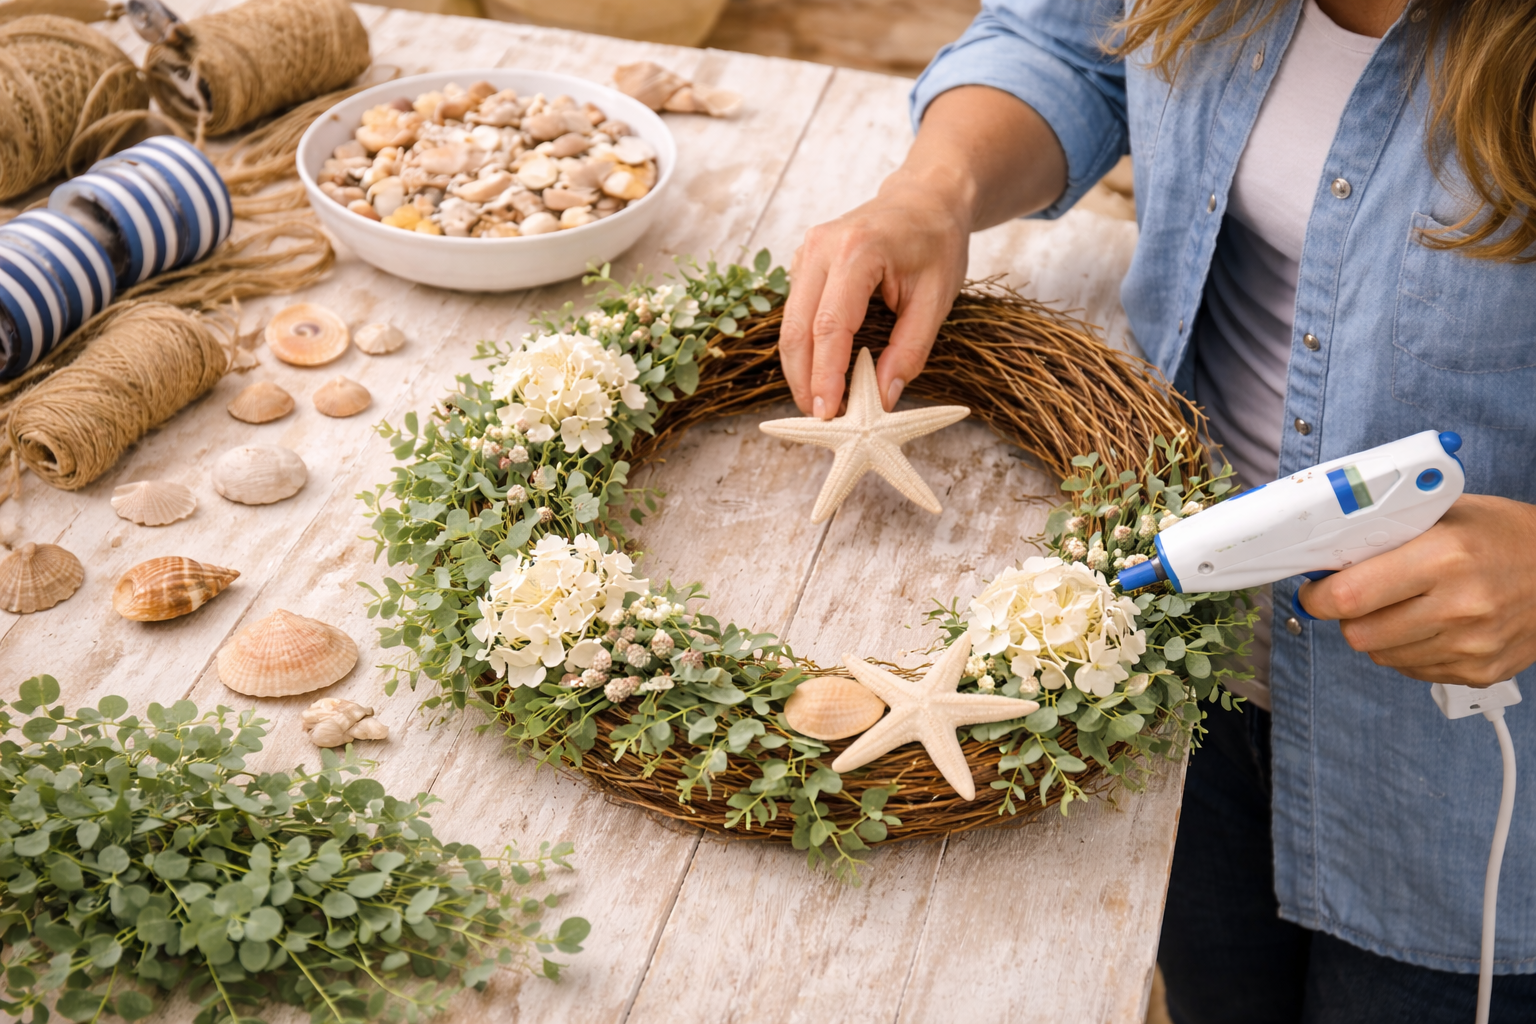
💡 Pro Tip: For a more natural and dynamic look, avoid placing all items on the exact same plane. Some shells can be slightly tucked into the greenery, while others are more prominent. Use varying sizes of starfish and shells for visual variety and depth.
Step 5: Craft & Attach Signature Bow
Create a multi-layered bow for the top of your wreath. Start with a base bow using the natural burlap ribbon, then layer the blue and white striped ribbon on top to form a slightly smaller bow. Secure the center of the bow tightly with a piece of twine or floral wire. Fluff the loops and trim the tails to your desired length. Once assembled, securely hot glue the finished bow to the top center of the wreath.
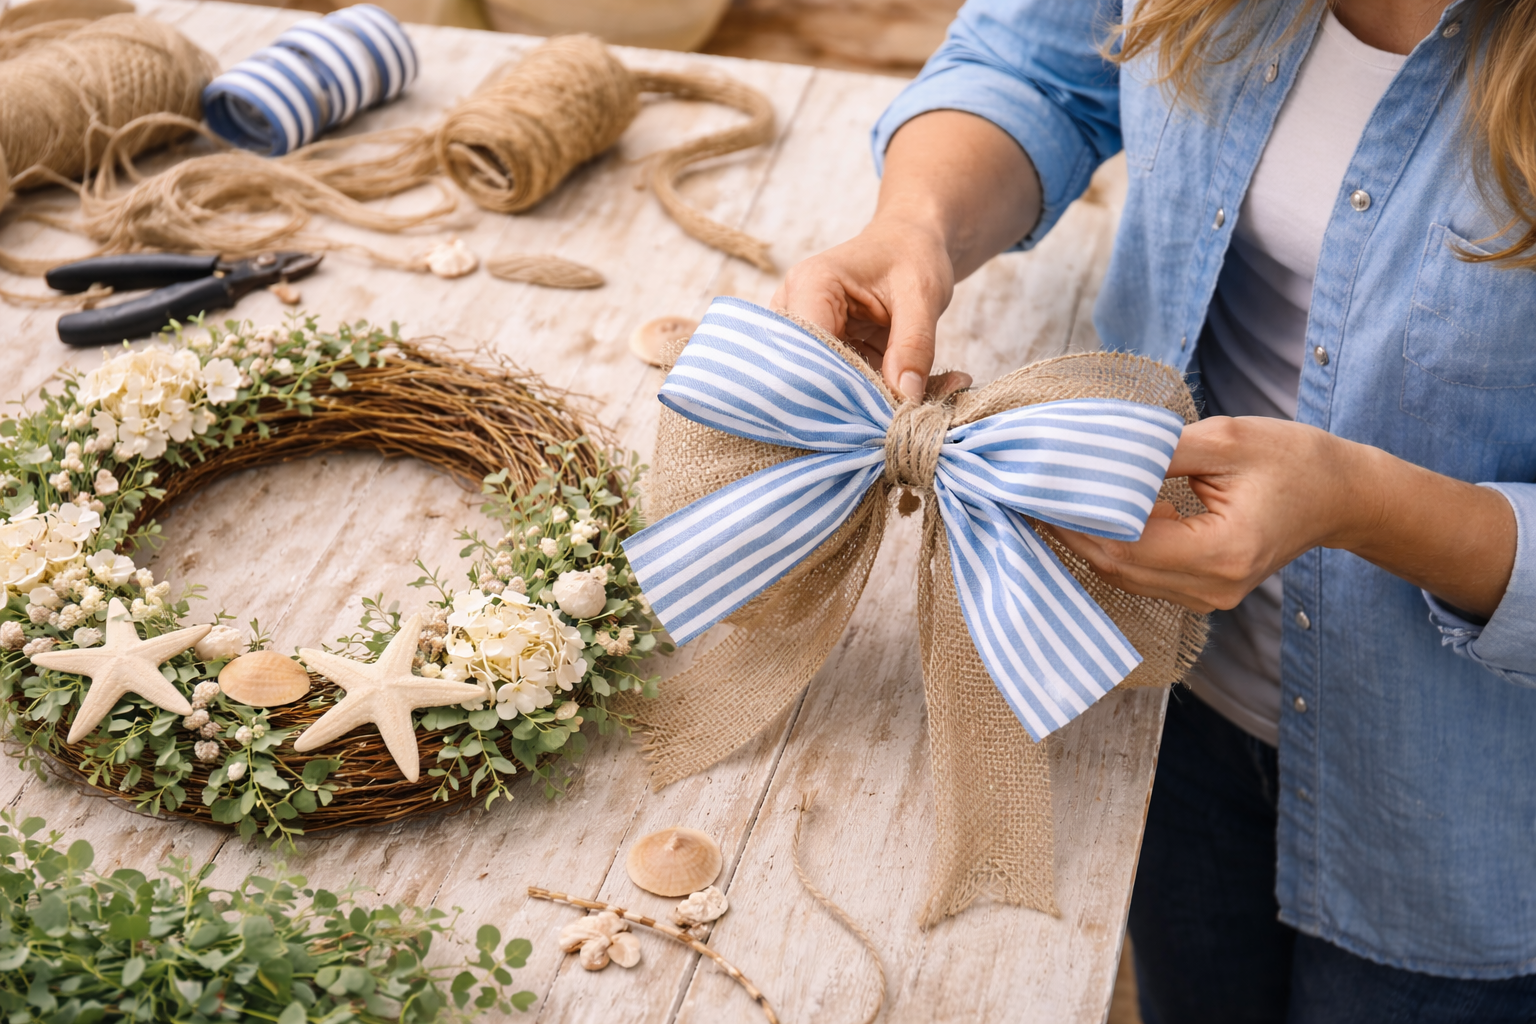
💡 Pro Tip: For a really professional-looking bow, use a bow maker tool, or pinch and twist the ribbon tightly in the center before wrapping with wire or twine. Ensure the bow is proportioned well to the size of your wreath – not too big, not too small.
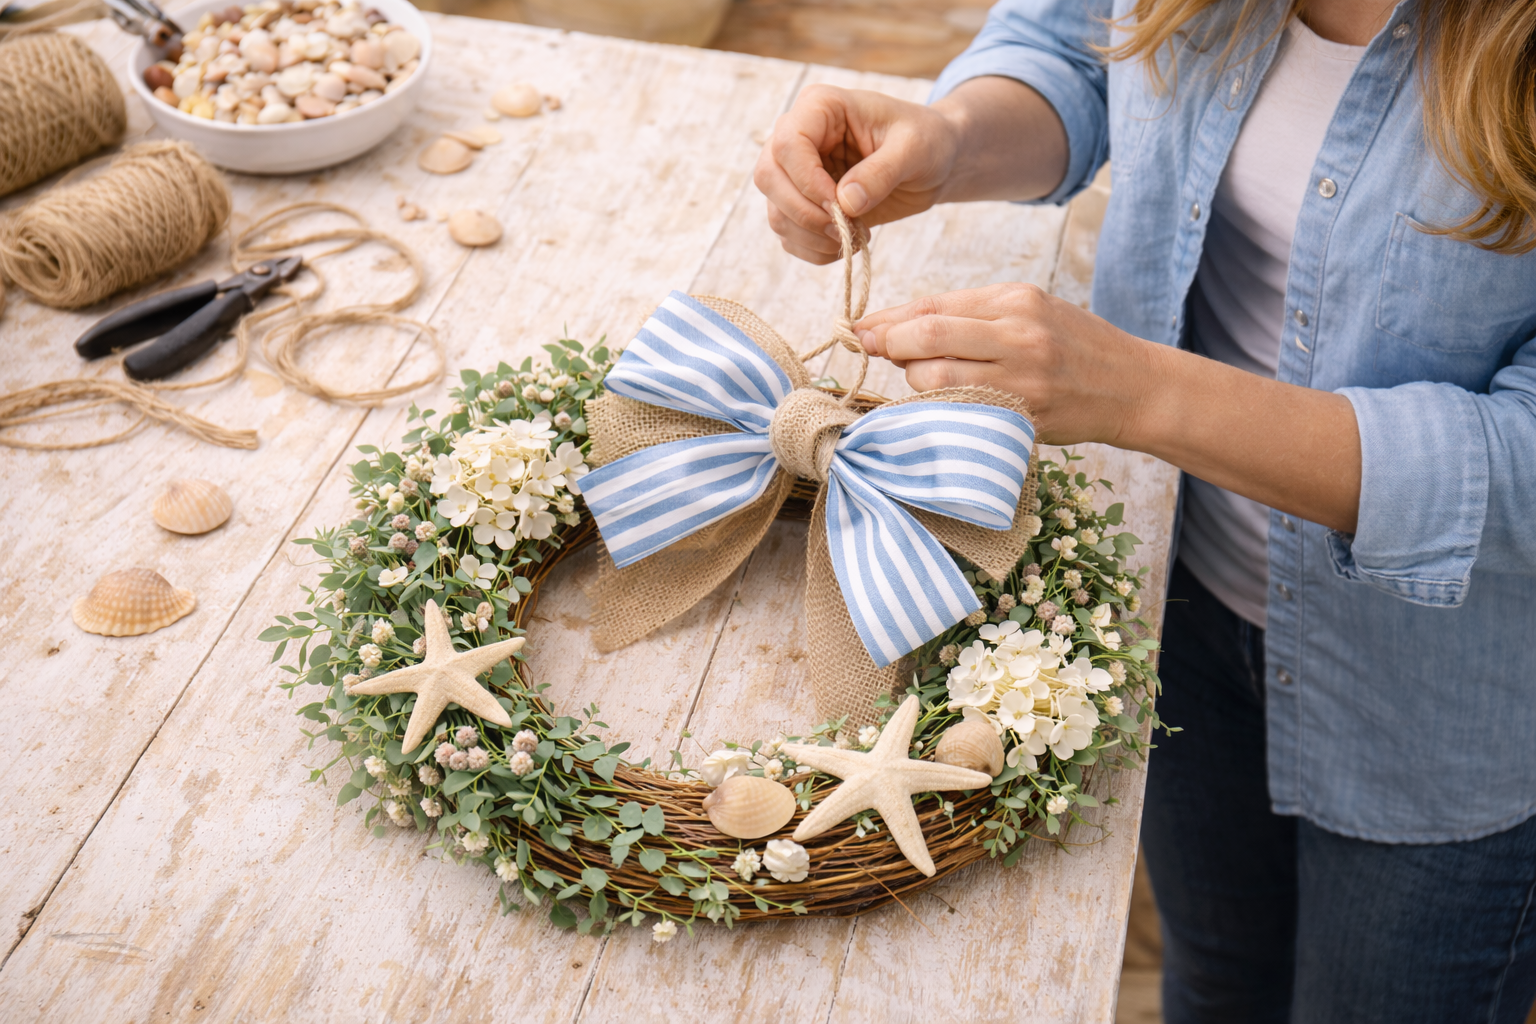
Step 6: Final Touches & Hanger
Take a moment to examine your entire wreath. Gently pull away any visible hot glue strings that may have formed. Adjust any greenery or flowers that might have shifted during the process. If you plan to hang it, cut a length of twine (about 12-18 inches) and loop it through the top of the grapevine wreath, tying the ends together to form a sturdy hanger.
💡 Pro Tip: For extra durability, especially if you plan to hang your wreath outdoors, apply an acrylic sealer spray to the entire wreath (avoiding the bow if it’s a delicate fabric) to protect the materials from sun and moisture. Allow it to dry completely before hanging.
Show Off Your Coastal Summer Charm!
Isn’t it just the cutest? I just love how my wreath looks hanging on my front door. It adds the perfect touch of beachy goodness. You can also hang yours inside or even make one as a sweet gift for a friend. Don’t forget to share your version with me, I’d love to see it!
📱 Free to Download
Craftino, The #1 Craft App
✓ Save crafts & browse fully offline
✓ Download printable PDF guides for every project
✓ Step-by-step photo tutorials, nothing left out
✓ 1,000+ craft projects with new ones added every week
Frequently Asked Questions
How long does it take to make this Charming Coastal Summer Wreath?
This wreath is super quick! You can usually finish your Charming Coastal Summer Wreath in about 20-30 minutes, depending on how detailed you want to get.
Is this a good craft for beginners?
Absolutely! This is a fantastic project for crafters of all skill levels. It’s really hard to mess up and looks great every time.
What kind of materials do I need for this Summer & Beach Home Decor?
Most of what I used came from Dollar Tree or a similar discount store, like a foam wreath, shells, rope, and some cute little beachy bits.
Can I change up the look of my Coastal Summer Wreath?
Definitely! Feel free to swap out colors, add different nautical elements, or use ribbon instead of rope to make it uniquely yours.
Discover the newest Dollar Tree arrivals for your next craft project here.
Leave a Reply