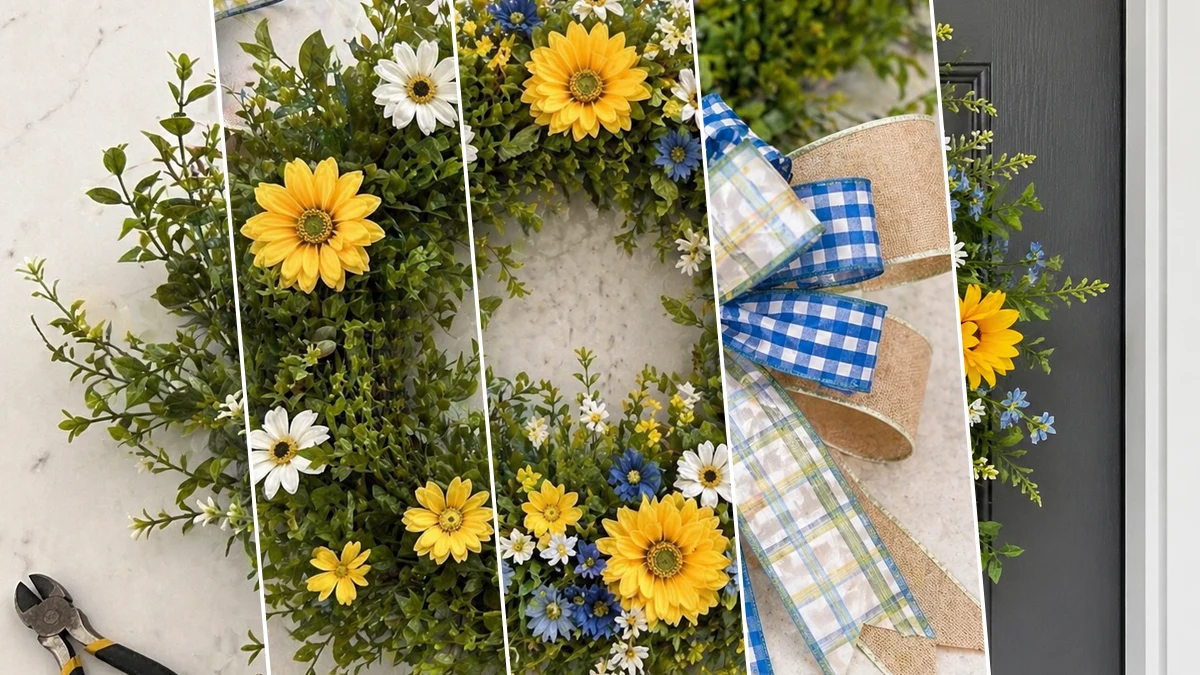
Okay, so confession time! I was at Dollar Tree last week, just grabbing some snacks for the kids, and totally stumbled into the floral aisle. Before I knew it, I had a cart full of pretty flowers and leaves, just begging to be turned into something amazing. That’s how my new favorite “Sunny Meadow Summer Wreath: A Budget-Friendly Floral Delight” was born, and honestly, I’m obsessed!
See also: Charming Coastal Summer Wreath
Theme: Summer & Beach
Materials Needed
- Grapevine Wreath Base
- Assorted Faux Greenery Stems
- Assorted Faux Summer Flowers (Yellow Daisies/Sunflowers, White Daisies, Small Blue Flowers, Tiny White Fillers)
- Craft Ribbons (Burlap, Blue Gingham, Soft Pastel Plaid)
- Hot Glue Gun & Glue Sticks
- Floral Wire & Wire Cutters
📋 Love staying organized while crafting? Check out our printable planners & craft designs at CraftersDT on Etsy and use code CRAFT20 for 20% off your entire order!
Why This Craft Works
This wreath is just perfect for bringing that sunny, relaxed “Summer & Beach” vibe into your home. Hang it on your front door to greet guests, display it over your mantel for some instant cheer, or even brighten up a bare wall in your living room or patio. It’s truly versatile “Home Decor” that screams summer fun!
📱 Free to Download
Join 50,000+ crafters already using Craftino
Browse 30+ Summer & Beach ideas and thousands more in the app
✓ Save crafts & browse fully offline
✓ Download printable PDF guides for every project
✓ Step-by-step photo tutorials, nothing left out
✓ 1,000+ craft projects with new ones added every week

The best part about this project is how super friendly it is on your wallet. I made my “Sunny Meadow Summer Wreath: A Budget-Friendly Floral Delight” for roughly $7 using mostly Dollar Tree supplies. You really can’t beat that price for something so charming and handmade.
You’ll be happy to know this is a super easy craft, even if you’re a total beginner or crafting with kids. It took me about 25-30 minutes from start to finish, so it’s a great quick project. Perfect for a rainy afternoon or a last-minute gift!
Step-by-Step Instructions for Sunny Meadow Summer Wreath: A Budget-Friendly Floral Delight
Alright, are you ready to get your craft on? This “Sunny Meadow Summer Wreath” project is so much fun, and you’re going to love how quickly it comes together. Honestly, I whipped mine up during a single episode of my favorite show! It’s super beginner-friendly, so don’t be shy, let’s dive in and make some beautiful “Home Decor” together.
Step 1: Build Greenery Foundation
Start by laying out your faux greenery stems around the grapevine wreath base. Don’t worry about attaching them yet; just spread them to cover the base evenly, allowing some pieces to naturally extend beyond the edge for a relaxed, organic feel. Once you’re happy with the overall placement and fullness, use hot glue to secure the main stems firmly to the grapevine wreath, ensuring good coverage and a sturdy base for your flowers.
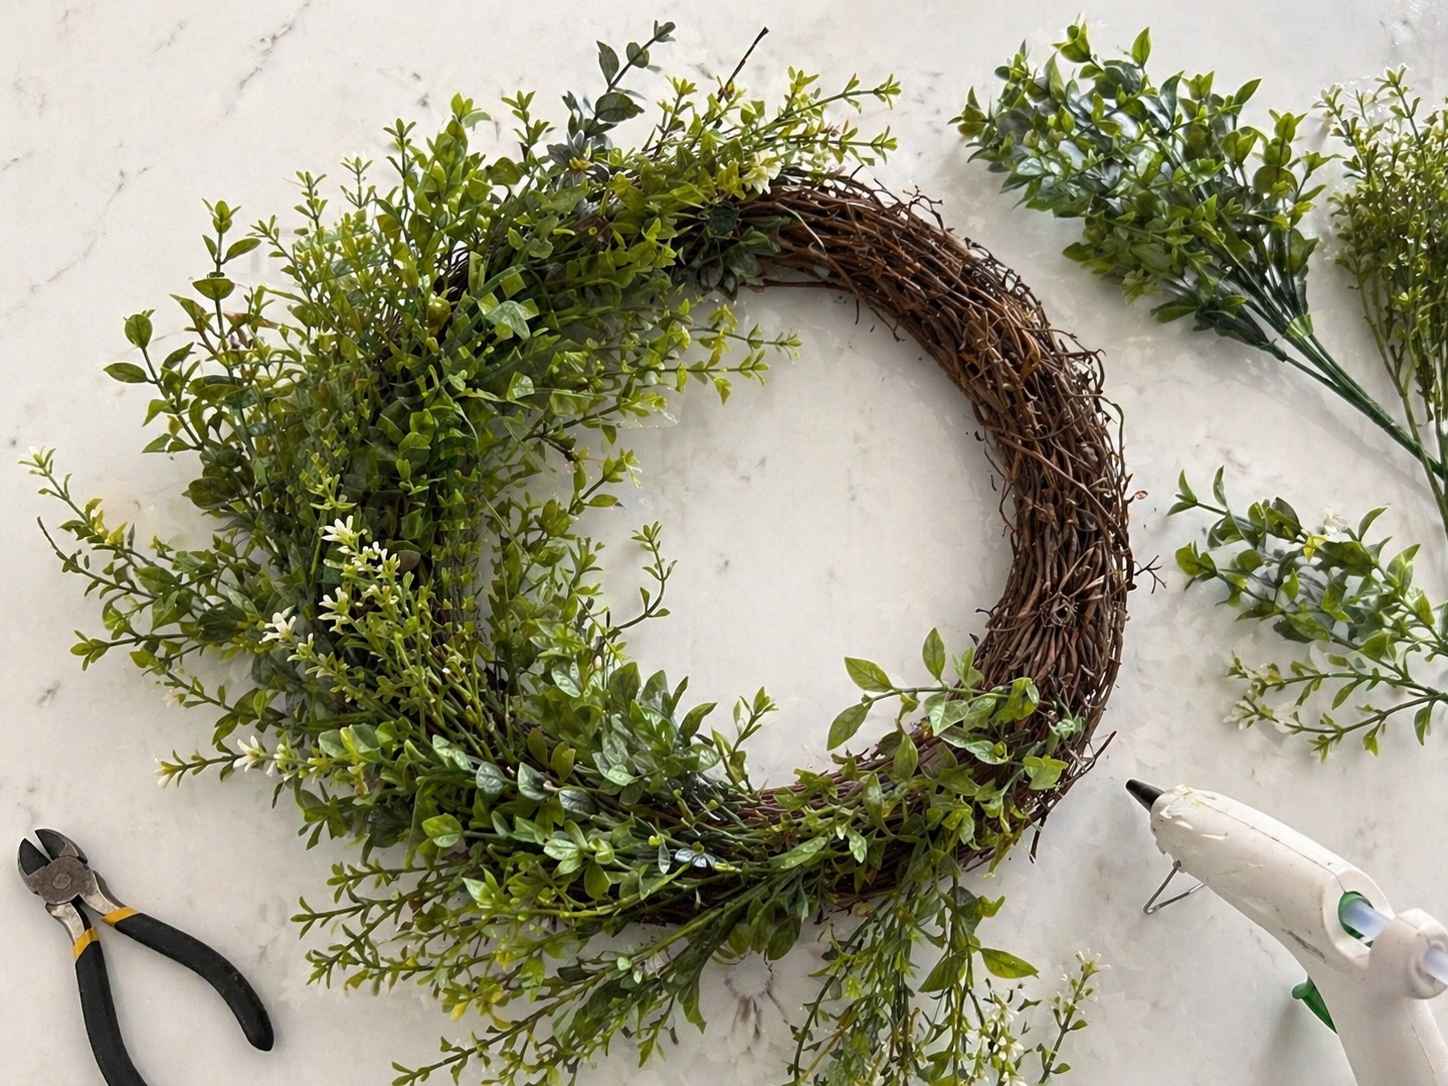
💡 Pro Tip: To achieve a truly natural look, vary the direction of your greenery stems. Instead of having them all point the same way, let some go clockwise, others counter-clockwise, or even stick straight out. This adds dimension and mimics real plant growth, making the wreath appear fuller and less artificial.
Step 2: Arrange Yellow & White Daisies
Now it’s time to introduce your main floral elements. Carefully trim the stems of your yellow daisy/sunflower-style and white daisy flowers, leaving about 2-3 inches of stem. Arrange them in small, balanced clusters around the wreath, ensuring an even distribution of colors and sizes. Avoid placing too many in one spot, aiming for a natural, scattered appearance. Once satisfied with the layout, apply a generous dab of hot glue to the end of each stem and insert it firmly into the greenery and grapevine base.
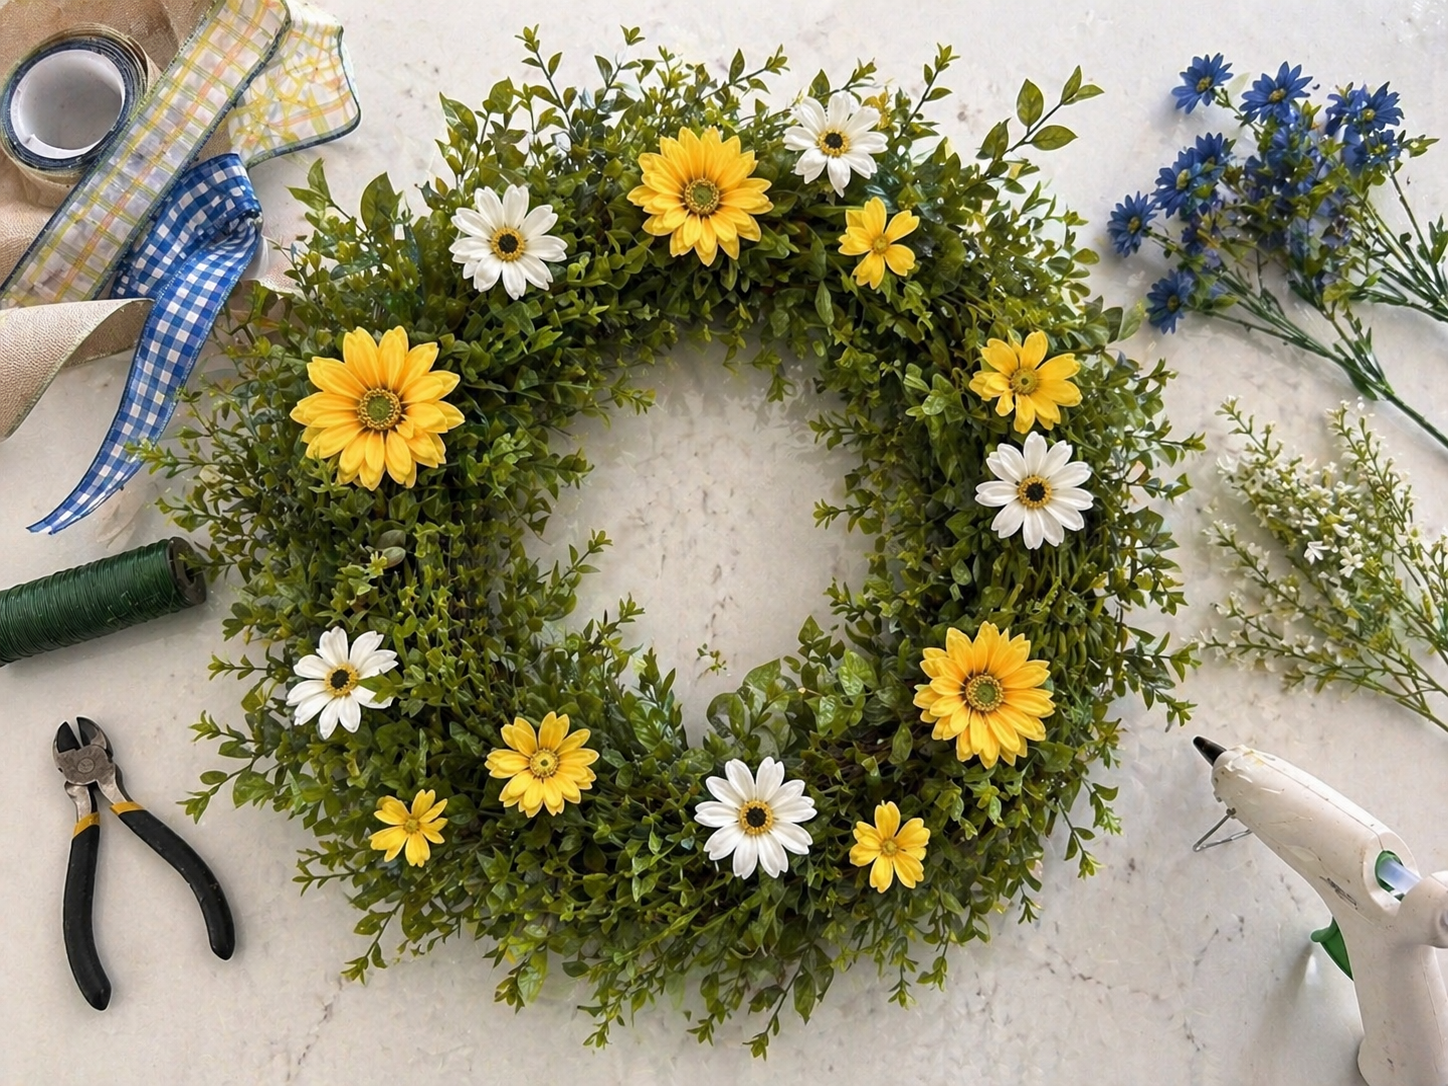
💡 Pro Tip: Before gluing, lay all your flowers out on the wreath *without* glue. Take a photo to see if the balance is right, and then step back to view it from a distance. This allows you to adjust the composition and density before making permanent attachments, preventing a ‘lopsided’ or overcrowded look.
🗓️ Keep all your craft projects on track! Explore our printable planners & templates at CraftersDT on Etsy and use code CRAFT20 for 20% off!
Step 3: Add Blue & Filler Accents
With your main flowers in place, it’s time to add depth and texture with the smaller blue faux flowers and tiny white filler flowers. Trim these stems shorter, about 1-2 inches. Place them strategically in the gaps between the larger flowers and within the greenery, ensuring they complement the existing arrangement rather than overpower it. These smaller elements help create a lush, ‘just picked’ garden feel. Secure each stem with hot glue. For any stems that feel loose, use a small piece of floral wire wrapped around the stem and wreath base for extra security.
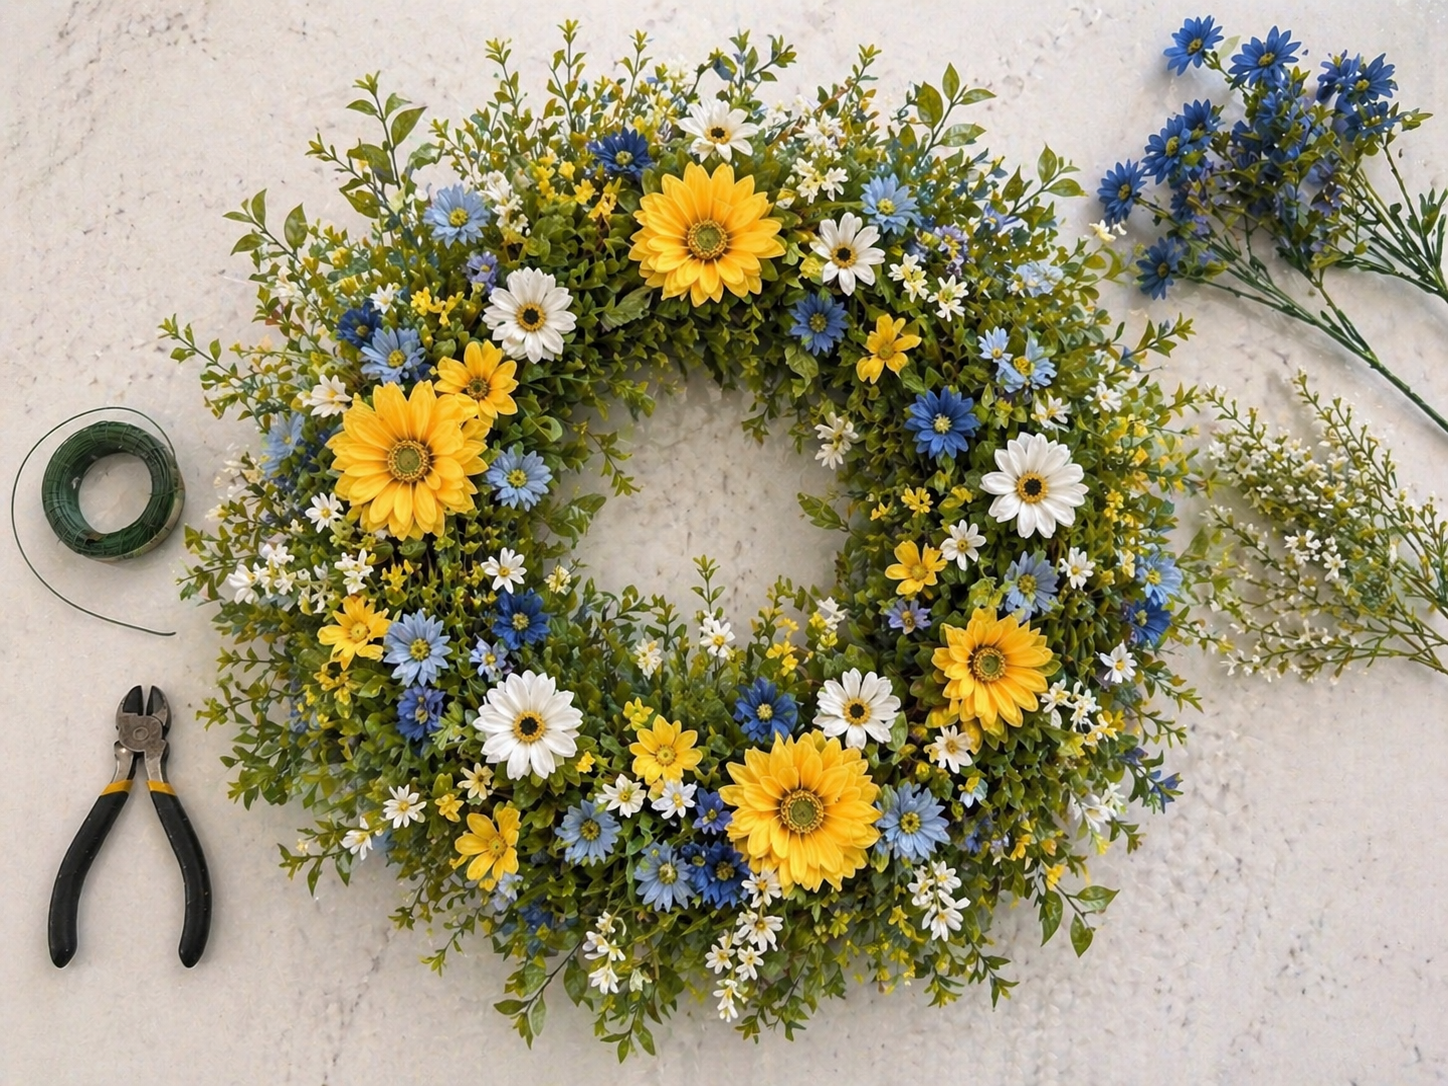
💡 Pro Tip: Use filler flowers to bridge color gaps and add visual interest, making the wreath feel more cohesive and abundant. Don’t be afraid to tuck them deep into the greenery or let them peek out subtly; they’re meant to fill and soften the overall look, providing a natural transition between larger elements.
Step 4: Assemble Multi-Ribbon Bow
Select your three ribbons: burlap, blue gingham, and soft pastel plaid. Start by making several loops with the burlap ribbon, forming the base of your bow. Layer the blue gingham ribbon on top, creating slightly smaller loops. Finish with the pastel plaid ribbon for the smallest loops and decorative tails. Pinch the center tightly together. Using a piece of floral wire, wrap it securely around the pinched center of all ribbons, twisting tightly at the back to form a strong tie. Trim the ends of your ribbon tails in a ‘V’ or diagonal cut for a professional finish.
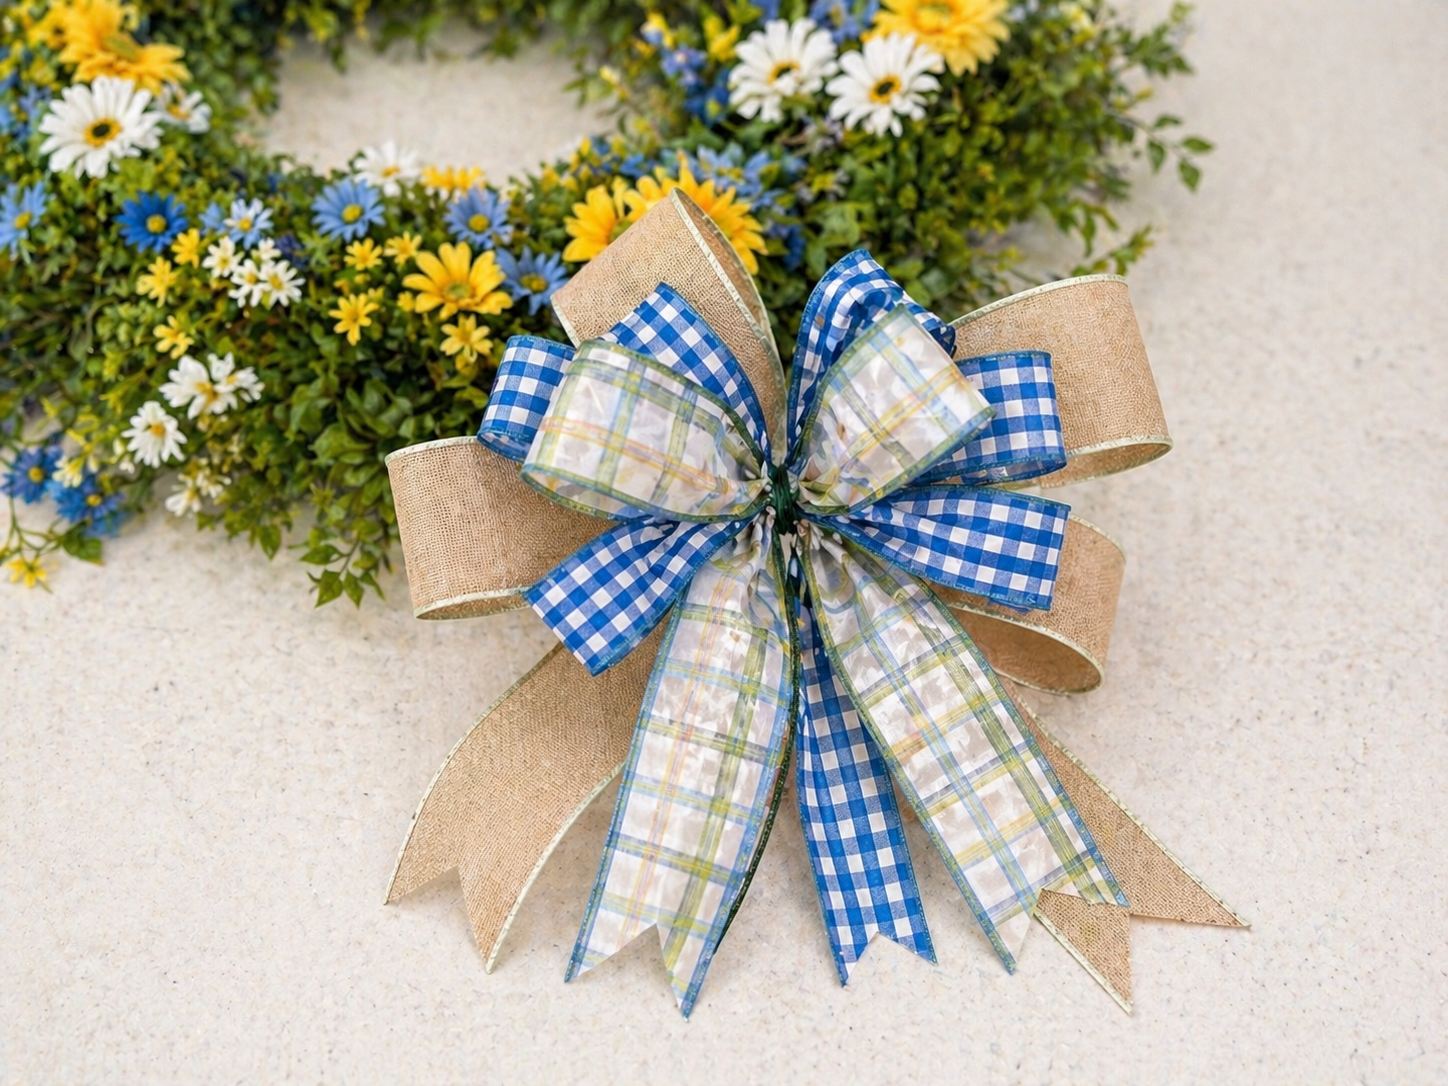
💡 Pro Tip: To make a consistently beautiful bow, practice a few times with scrap ribbon first. When layering, ensure the loops are progressively smaller for each ribbon to show off all patterns. Don’t be shy with the floral wire; a tight center is key to a sturdy, well-formed bow that holds its shape. Fluff the loops generously after tying.
📱 Free to Download
Join 50,000+ crafters already using Craftino
Browse 95+ Summer & Beach ideas and thousands more in the app
✓ Save crafts & browse fully offline
✓ Download printable PDF guides for every project
✓ Step-by-step photo tutorials, nothing left out
✓ 1,000+ craft projects with new ones added every week
Step 5: Secure Bow & Finish Wreath
Carefully attach the prepared layered bow to the left side of your wreath. Use the floral wire already securing the bow to thread it through the grapevine base and around a strong greenery stem. Twist the wire tightly at the back of the wreath to secure the bow firmly in place. Once attached, fluff the bow loops again to ensure they are full and shapely. Step back and examine your wreath, making any final adjustments to the flowers or greenery to achieve a balanced, cohesive, and cheerful summer look. Ensure a few small greenery pieces stick out for that relaxed, summer vibe.
💡 Pro Tip: Before fully securing the bow, hold it in place with one hand and step back to assess the placement. Sometimes moving it just an inch up or down can dramatically improve the overall balance of the wreath. Once satisfied, use multiple points of attachment with wire or even a dab of hot glue on the back of the bow to prevent it from shifting, especially if it will be exposed to outdoor elements.
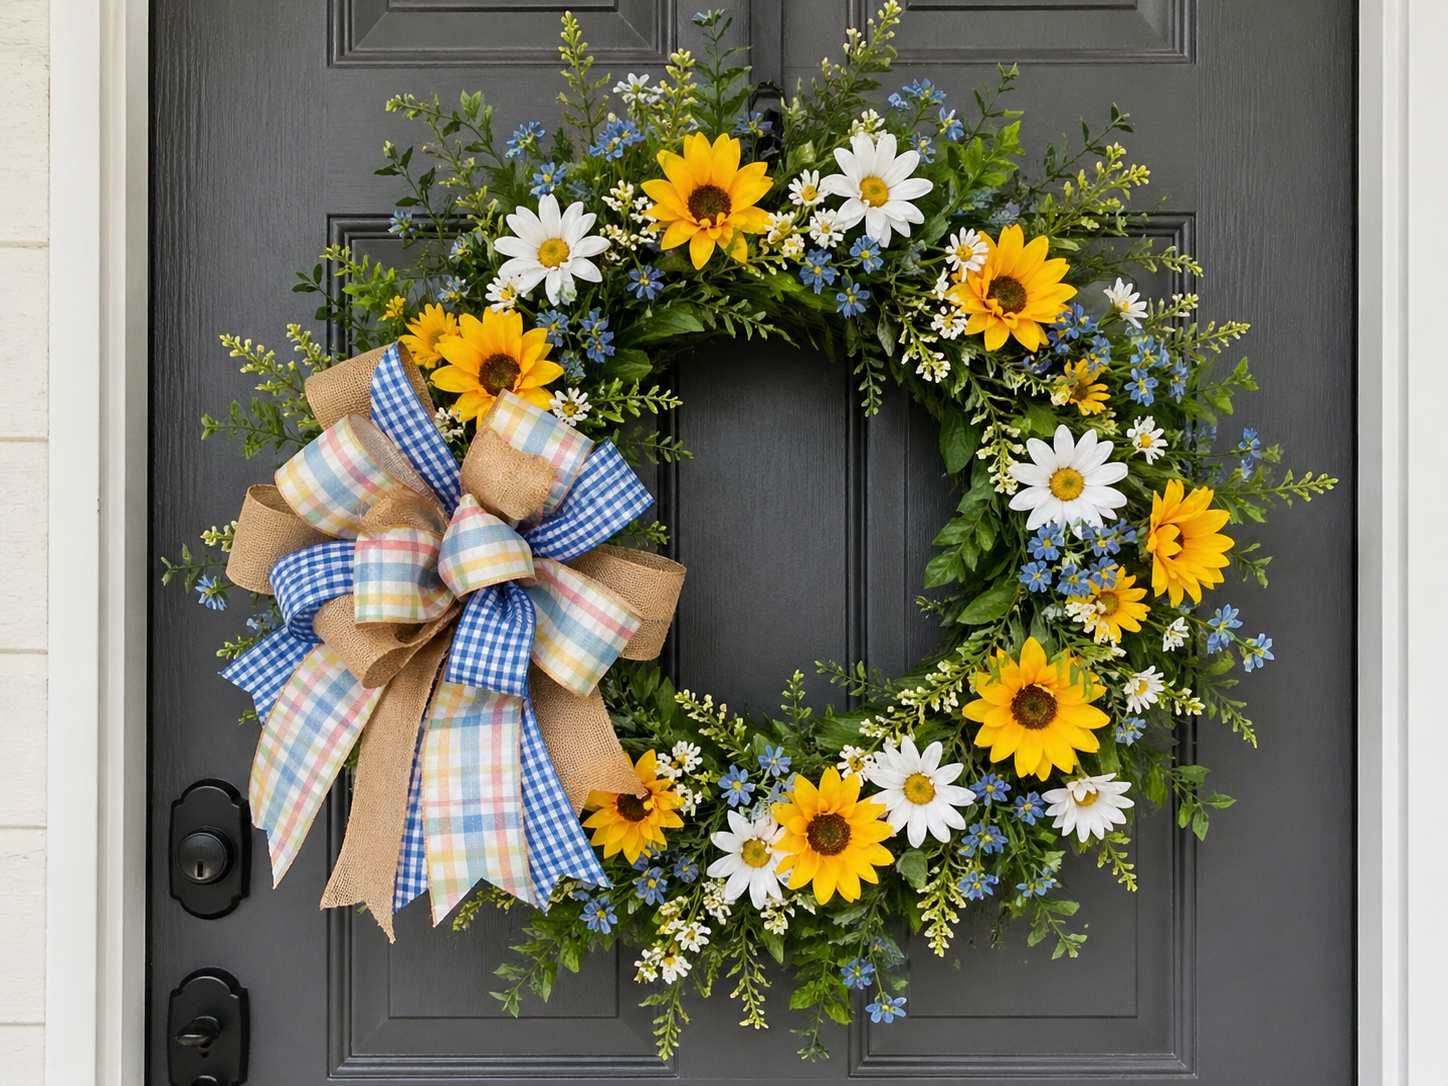
Your Sunny Summer Wreath Is Ready!
And just like that, you’ve got yourself a gorgeous, budget-friendly “Sunny Meadow Summer Wreath: A Budget-Friendly Floral Delight” to brighten up your home! Hang it on your front door, over a mirror, or even gift it to a friend who needs a little sunshine. Don’t forget to share a picture of your creation, I’d love to see how you made it your own!
📱 Free to Download
Join 50,000+ crafters already using Craftino
Browse 39+ Summer & Beach ideas and thousands more in the app
✓ Save crafts & browse fully offline
✓ Download printable PDF guides for every project
✓ Step-by-step photo tutorials, nothing left out
✓ 1,000+ craft projects with new ones added every week
Frequently Asked Questions
How much does it cost to make the “Sunny Meadow Summer Wreath: A Budget-Friendly Floral Delight”?
You can typically make this wreath for about $5 to $7, especially if you get most of your supplies like the wire wreath form and faux flowers from Dollar Tree.
What type of glue works best for this DIY Summer & Beach wreath?
A hot glue gun with all-purpose glue sticks works great for attaching the faux flowers and greenery securely to the wreath form. You’ll need about 3-4 glue sticks.
How long does it take to create this Dollar Tree floral wreath?
This project is super quick! Most crafters can complete their “Sunny Meadow Summer Wreath” in about 20 to 30 minutes, making it perfect for a fast crafting session.
Can kids help make this “Sunny Meadow Summer Wreath: A Budget-Friendly Floral Delight”?
Absolutely! This is an easy craft for older kids (around 8+ years old) with adult supervision, especially when using a hot glue gun. They’ll love picking out the colorful flowers.
What kind of flowers should I look for at Dollar Tree for my “Summer & Beach” wreath?
Look for small bunches of bright, summery faux flowers like daisies, sunflowers, or small roses, along with some green filler leaves. You’ll probably need 3-4 bunches of flowers and 1-2 green bunches.
How durable is a DIY “Sunny Meadow Summer Wreath” for outdoor “Home Decor”?
While the Dollar Tree faux flowers are pretty, direct sun and rain can fade them over time. For best results and to make it last for several seasons, display it on a covered porch or indoors.
Explore more home decor & floral craft essentials at Dollar Tree.
Leave a Reply