You know how sometimes you just wander into Dollar Tree for one thing and come out with a whole cart full of craft supplies you didn’t even know you needed? Yeah, me too! That’s exactly how my Effortless Spring Blossom Wreath: A Dollar Tree Floral Masterpiece came to life, and let me tell you, my front door is thanking me for this pop of Spring & Garden joy.
See also: Diy Dollar Tree Easter Wreath Simple And Budget Friendly
Theme: Spring & Garden
Materials Needed
- Foam wreath form (approx. 14-18 inch)
- Assorted silk flowers (e.g., roses, sunflowers/daisies, filler flowers)
- Jute twine or natural rope
- Hot glue gun and glue sticks
- Wire cutters or sturdy scissors
📋 Love staying organized while crafting? Check out our printable planners & craft designs at CraftersDT on Etsy and use code CRAFT20 for 20% off your entire order!
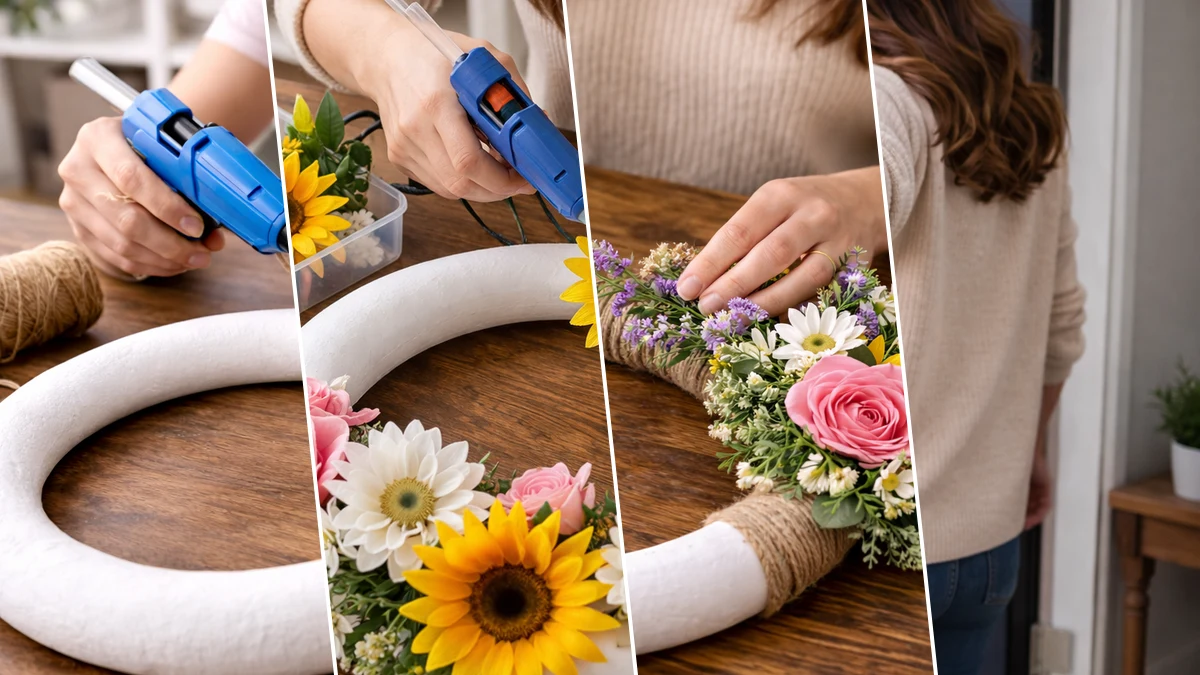
Step-by-Step Instructions for Effortless Spring Blossom Wreath: A Dollar Tree Floral Masterpiece
Get ready to get your craft on, sweet friend, because this project is seriously the easiest thing you’ll make all week! You don’t need any fancy skills or a ton of time, I whipped mine up in under 30 minutes while the kids were doing homework. It’s perfect for beginners, busy moms, or anyone who just wants to add a little bit of beautiful Home Decor to their space without breaking the bank. Trust me, you’re going to love it!
📱 Free to Download
Join 50,000+ crafters already using Craftino
You’re still missing out?
✓ Save crafts & browse fully offline
✓ Download printable PDF guides for every project
✓ Step-by-step photo tutorials, nothing left out
✓ 1,000+ craft projects with new ones added every week
Step 1: Wrap Wreath Form Base
Begin by taking your foam wreath form. Starting at one end of the section you intend to leave visible (like the bottom right in the example), apply a dab of hot glue and securely attach the end of your jute twine. Tightly wrap the twine around the wreath form, ensuring each strand is snug against the last, covering the desired portion of the foam evenly. Continue wrapping until you’ve created a clean, consistent segment. Secure the final end with another dab of hot glue, trimming any excess twine neatly.
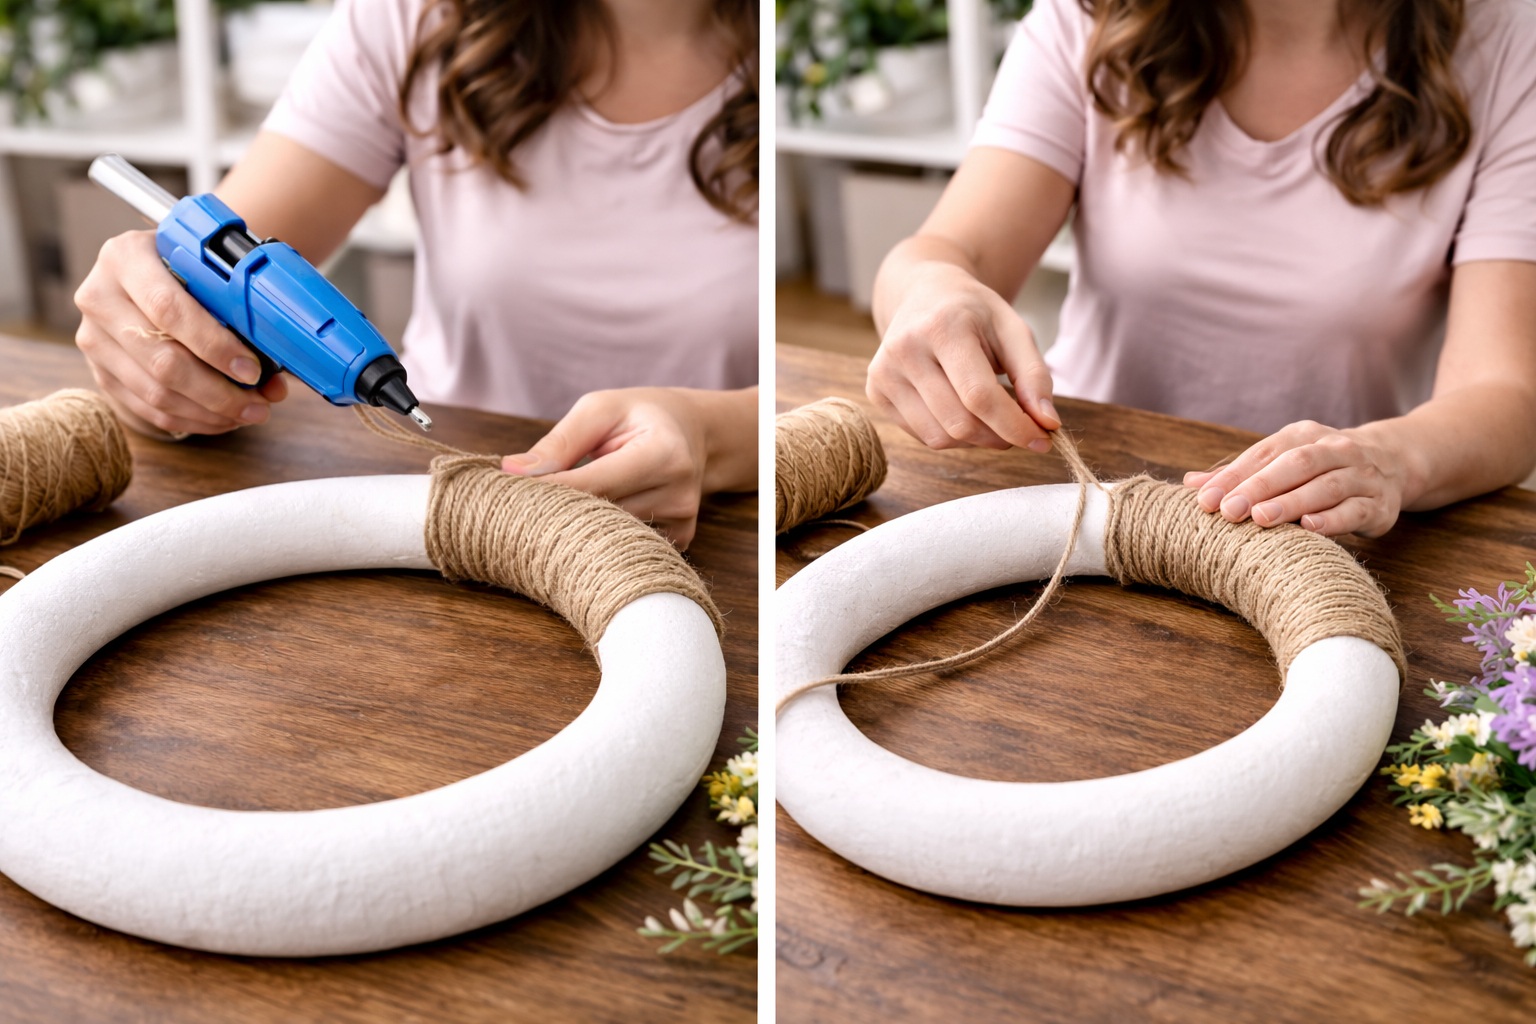
💡 Pro Tip: For a clean, professional finish, ensure your twine wraps are consistently taut and parallel. Overlap slightly to prevent gaps, but avoid creating excessive bulk. Use a generous amount of hot glue at the start and end for maximum security, but be careful not to burn your fingers!
Step 2: Place Focal Flowers
Now, unbox your larger silk flowers – the roses, sunflowers, or gerbera daisies. Before gluing, arrange them loosely around the unwrapped portion of the wreath to visualize your layout. Aim for an asymmetrical but balanced design, typically placing the largest blooms first to create clear focal points. Once you’re happy with the placement, trim the stems of each flower short, leaving just enough to push into the foam (if possible) or hot-glue securely to the wreath form. Begin hot-gluing them into their designated spots, ensuring a strong bond with the foam.
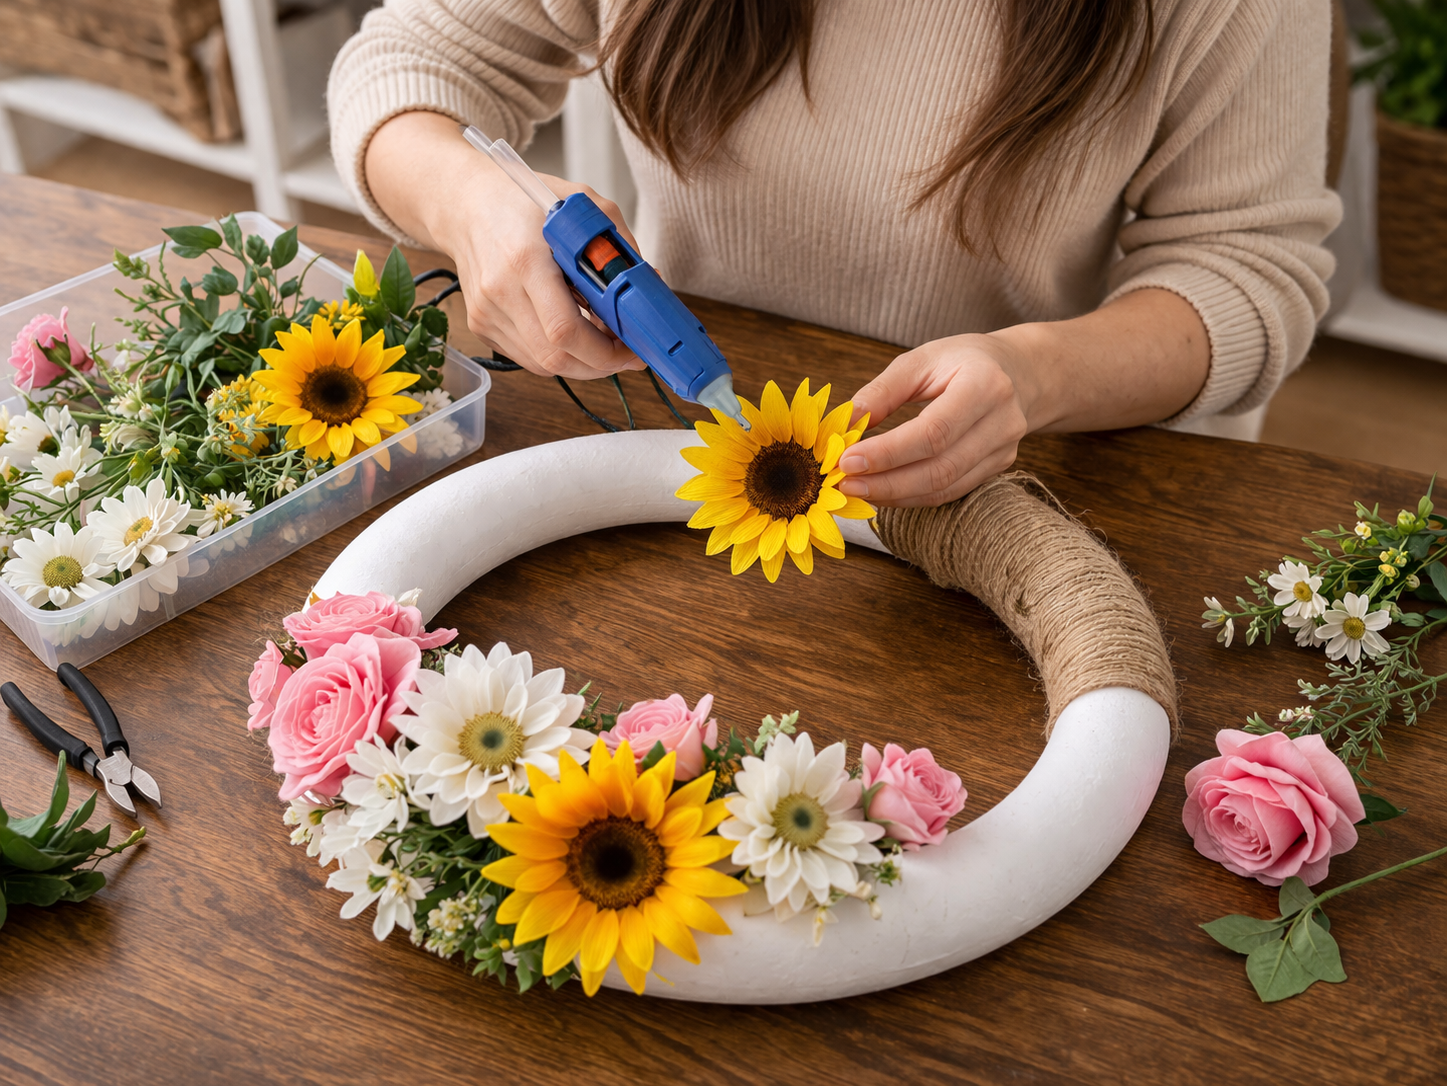
💡 Pro Tip: Create a ‘visual triangle’ with your largest flowers for an aesthetically pleasing arrangement. Don’t be afraid to pull flower heads off their plastic stems for easier application, especially if the stems are too bulky. Allow each glued flower to cool completely before moving on to prevent accidental shifting.
🗓️ Keep all your craft projects on track! Explore our printable planners & templates at CraftersDT on Etsy and use code CRAFT20 for 20% off!
Step 3: Add Filler & Greenery
With your main flowers in place, it’s time to fill in the gaps and add lushness. Take your smaller silk flowers (like the purple and white filler flowers in the example) and any accompanying greenery. Trim these stems as needed using wire cutters or sturdy scissors. Systematically work your way around the wreath, tucking these smaller elements between and around the larger blooms. Layer different colors and textures to create depth and hide any visible hot glue or wreath form. Ensure the wreath looks full and vibrant from all angles.
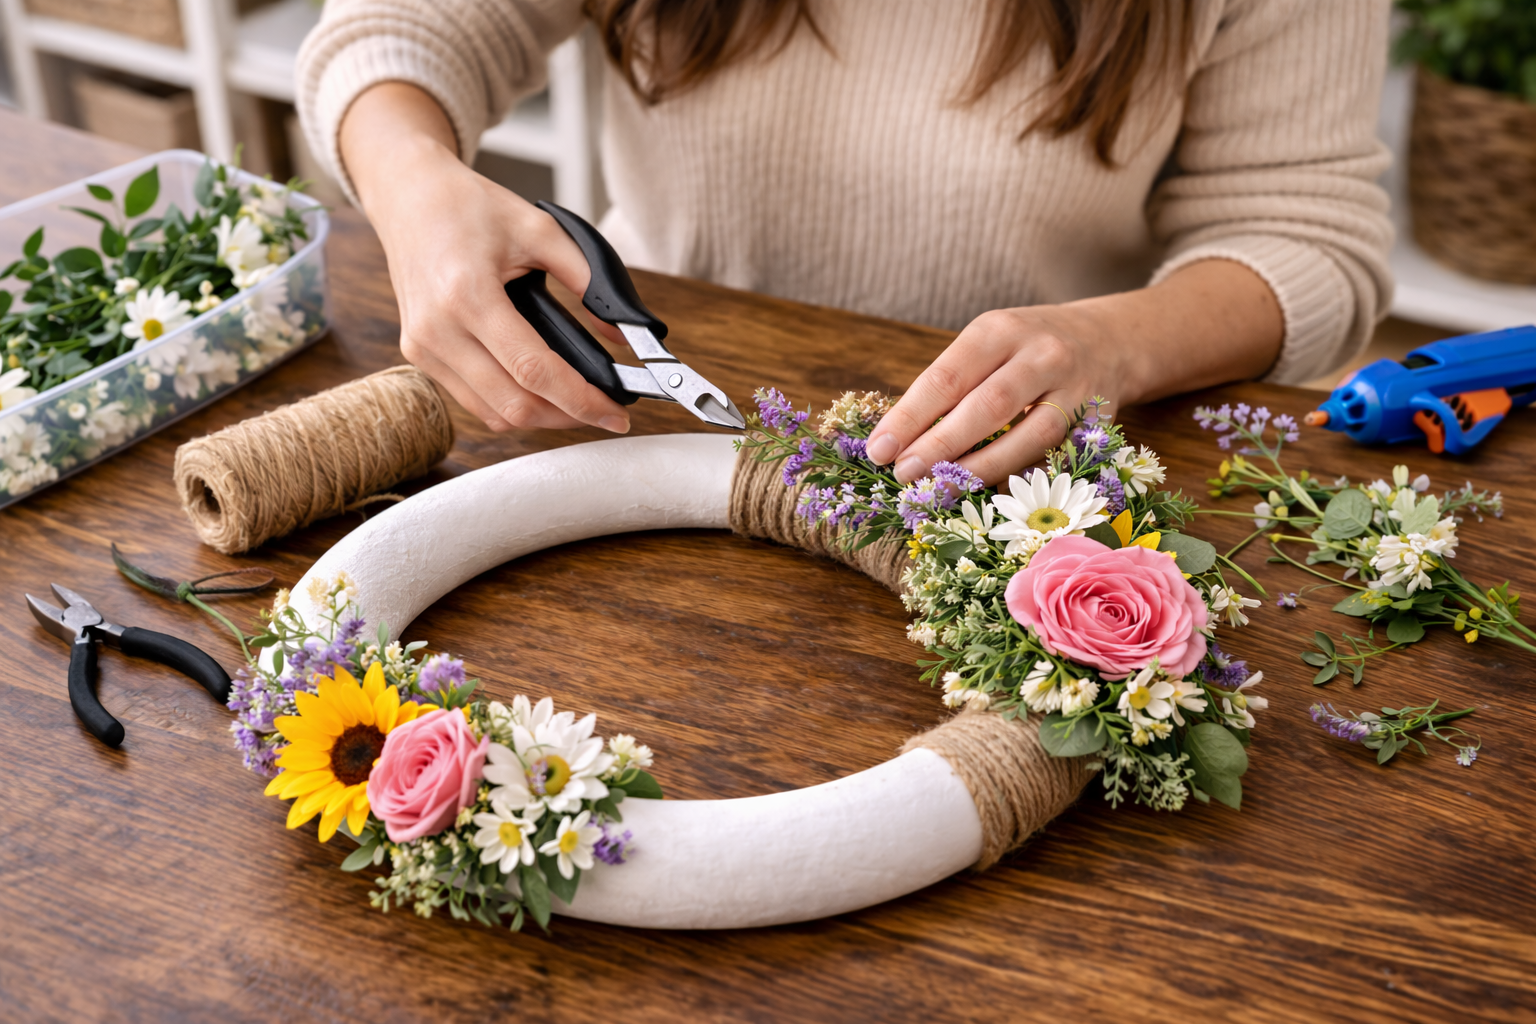
💡 Pro Tip: Vary the height and angle of your filler flowers to give the wreath a more natural, organic look. Use small clusters of filler flowers to bridge gaps effectively. For a truly seamless finish, try to tuck the base of your smaller flowers under the petals of the larger ones to hide the attachment point.
Step 4: Finalize & Prepare Hanging
Once all flowers are glued, hold your wreath at arm’s length and inspect it thoroughly. Look for any sparse areas, visible hot glue strings, or flowers that might be loose. Add additional small flowers or leaves to fill any remaining gaps. Gently fluff and arrange the petals of your silk flowers to ensure they look natural and full. If your wreath form doesn’t have an integrated hanger, create a simple loop using a length of floral wire or additional twine on the back for easy hanging.

💡 Pro Tip: For an invisible hanger, use clear fishing line tied securely around the top of the wreath form. This allows the wreath to appear as if it’s floating. If displaying outdoors, consider a light mist of UV-protectant spray to prolong the life and color of your Dollar Tree flowers.
Your Gorgeous Spring Wreath Is Ready!
And just like that, you’ve got a gorgeous new piece of **Home Decor** to brighten up your home! Hang your **Effortless Spring Blossom Wreath: A Dollar Tree Floral Masterpiece** on your front door, over a mantel, or even gift it to a friend who needs a little sunshine. Don’t forget to play around with different colors and flowers, and be sure to share your creations with me!
📱 Free to Download
Craftino, The #1 Craft App
✓ Save crafts & browse fully offline
✓ Download printable PDF guides for every project
✓ Step-by-step photo tutorials, nothing left out
✓ 1,000+ craft projects with new ones added every week
Frequently Asked Questions
How hard is it to make this Effortless Spring Blossom Wreath: A Dollar Tree Floral Masterpiece?
This wreath is super easy, even for beginners! You don’t need any special tools or crafting experience to get a beautiful result.
How long does it take to create this Spring & Garden Home Decor?
You can usually finish this project in about 20-30 minutes, making it perfect for a quick crafting session.
Can I use different Dollar Tree flowers for my Spring Blossom Wreath?
Absolutely! Feel free to mix and match any Dollar Tree florals that catch your eye to make it uniquely yours.
What else can I add to my Dollar Tree Floral Masterpiece?
You can add ribbon, a small sign, or even some tiny fairy lights to give your wreath extra charm!
Read more official craft tips & tricks on the Dollar Tree Value Seekers Blog.
Leave a Reply