Ever walk into Dollar Tree just for paper towels and walk out with a whole new craft project idea? Same here! My kiddos spotted some cute little bunnies and colorful eggs last week, and boom, we had to make this Charming Pastel Easter Bunny & Egg Tree. It was so much fun and just perfect for our Holiday & Seasonal decor!
See also: Whimsical Speckled Easter Egg Topiaries Craft
Theme: Easter
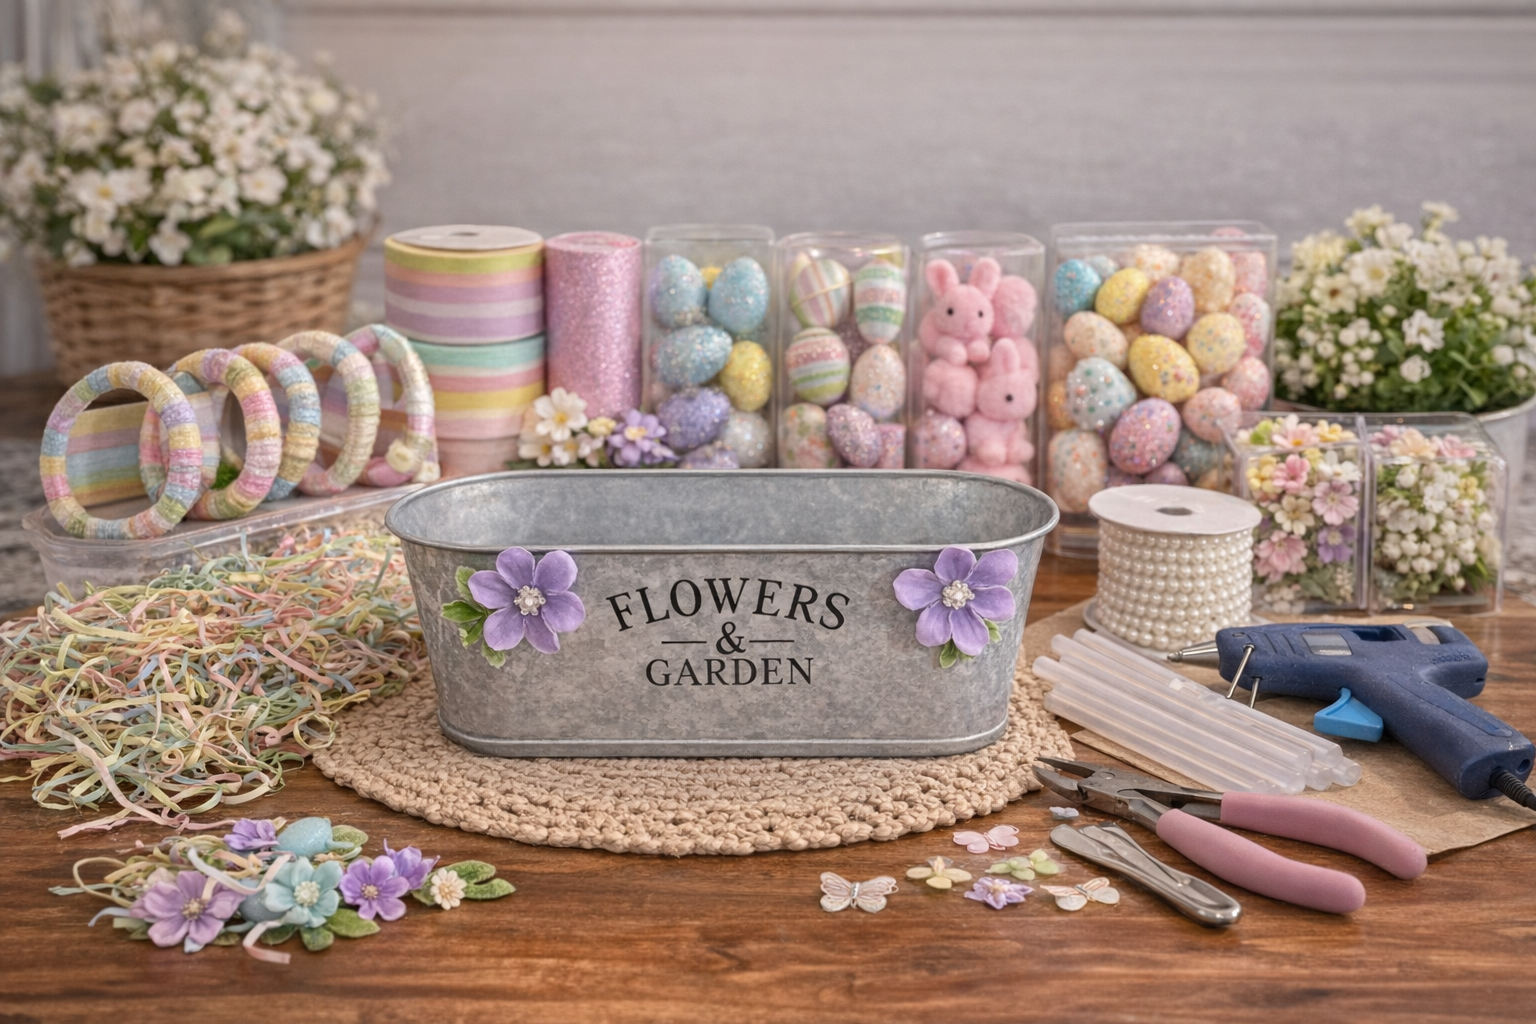
Materials Needed
- Galvanized Planter or Decorative Container
- Plastic Shower Curtain Hooks
- Assorted Pastel Yarn
- Assorted Pastel Ribbons (including glittered)
- Small Decorative Flowers (fabric/felt)
- Flocked Bunny Ornaments or Miniatures
- Decorative Easter Egg Ornaments
- Easter Grass Filler
- Hot Glue Gun & Glue Sticks
📋 Love staying organized while crafting? Check out our printable planners & craft designs at CraftersDT on Etsy and use code CRAFT20 for 20% off your entire order!
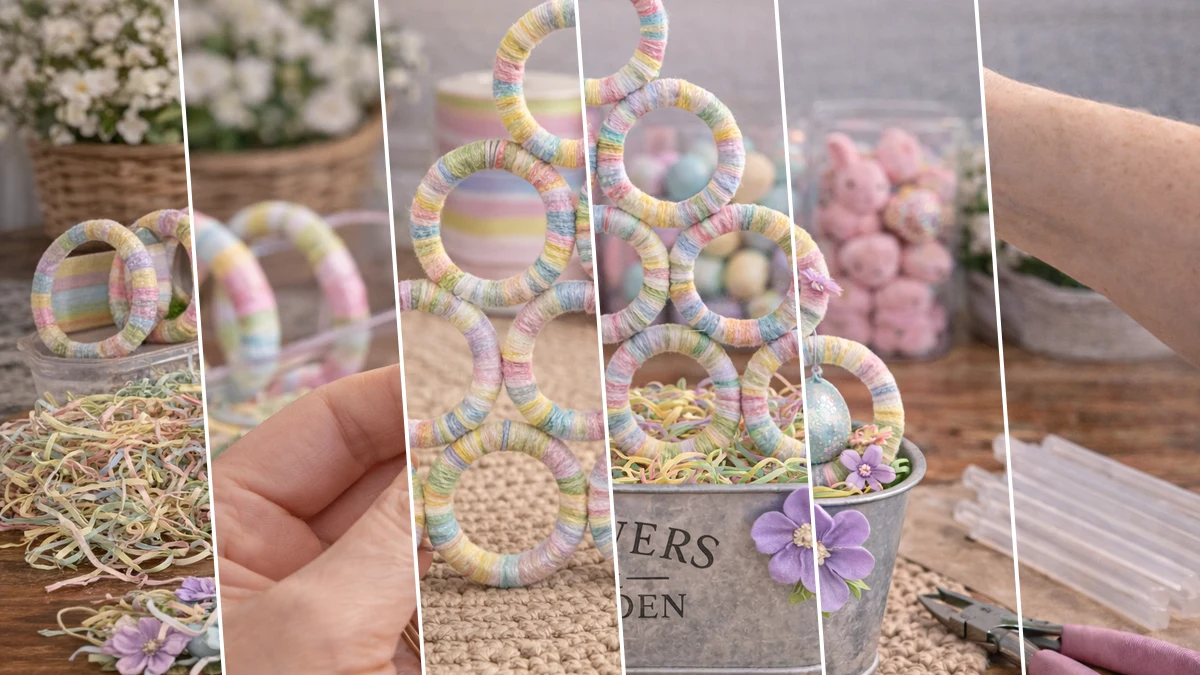
Step-by-Step Instructions for Charming Pastel Easter Bunny & Egg Tree
Okay, crafters, get ready because this project is seriously one of the easiest and cutest things you’ll make all spring! I whipped up my Charming Pastel Easter Bunny & Egg Tree in less than an hour, even with a little helper. It’s totally beginner-friendly and super fun for kids to join in on too. You’ll be amazed at how quickly your little tree comes to life!
📱 Free to Download
Craftino, The #1 Craft App
✓ Save crafts & browse fully offline
✓ Download printable PDF guides for every project
✓ Step-by-step photo tutorials, nothing left out
✓ 1,000+ craft projects with new ones added every week
Step 1: Prepare Planter & Gather Supplies
Begin by selecting your galvanized planter or decorative container. If desired, hot glue a few decorative flowers to the exterior of the planter for an initial accent. Lay out all your remaining materials, organizing them by type or color to ensure easy access during assembly.
💡 Pro Tip: Pro Tip: Clean the inside and outside of your planter thoroughly before starting to ensure hot glue adheres properly. Organizing materials saves time and helps visualize your color scheme, especially for yarn and ribbon choices.
Step 2: Wrap Shower Hooks with Yarn
Take one plastic shower curtain hook. Apply a tiny dot of hot glue to an inconspicuous spot (like the inside curve) to secure the beginning of your chosen pastel yarn strand. Tightly wrap the yarn around the entire hook, overlapping each strand slightly to ensure full coverage and a smooth finish. Once the hook is completely covered, trim the yarn and secure the end with another small dot of hot glue. Repeat this process for all shower hooks, varying the yarn colors for a striped effect or using solid colors as desired.
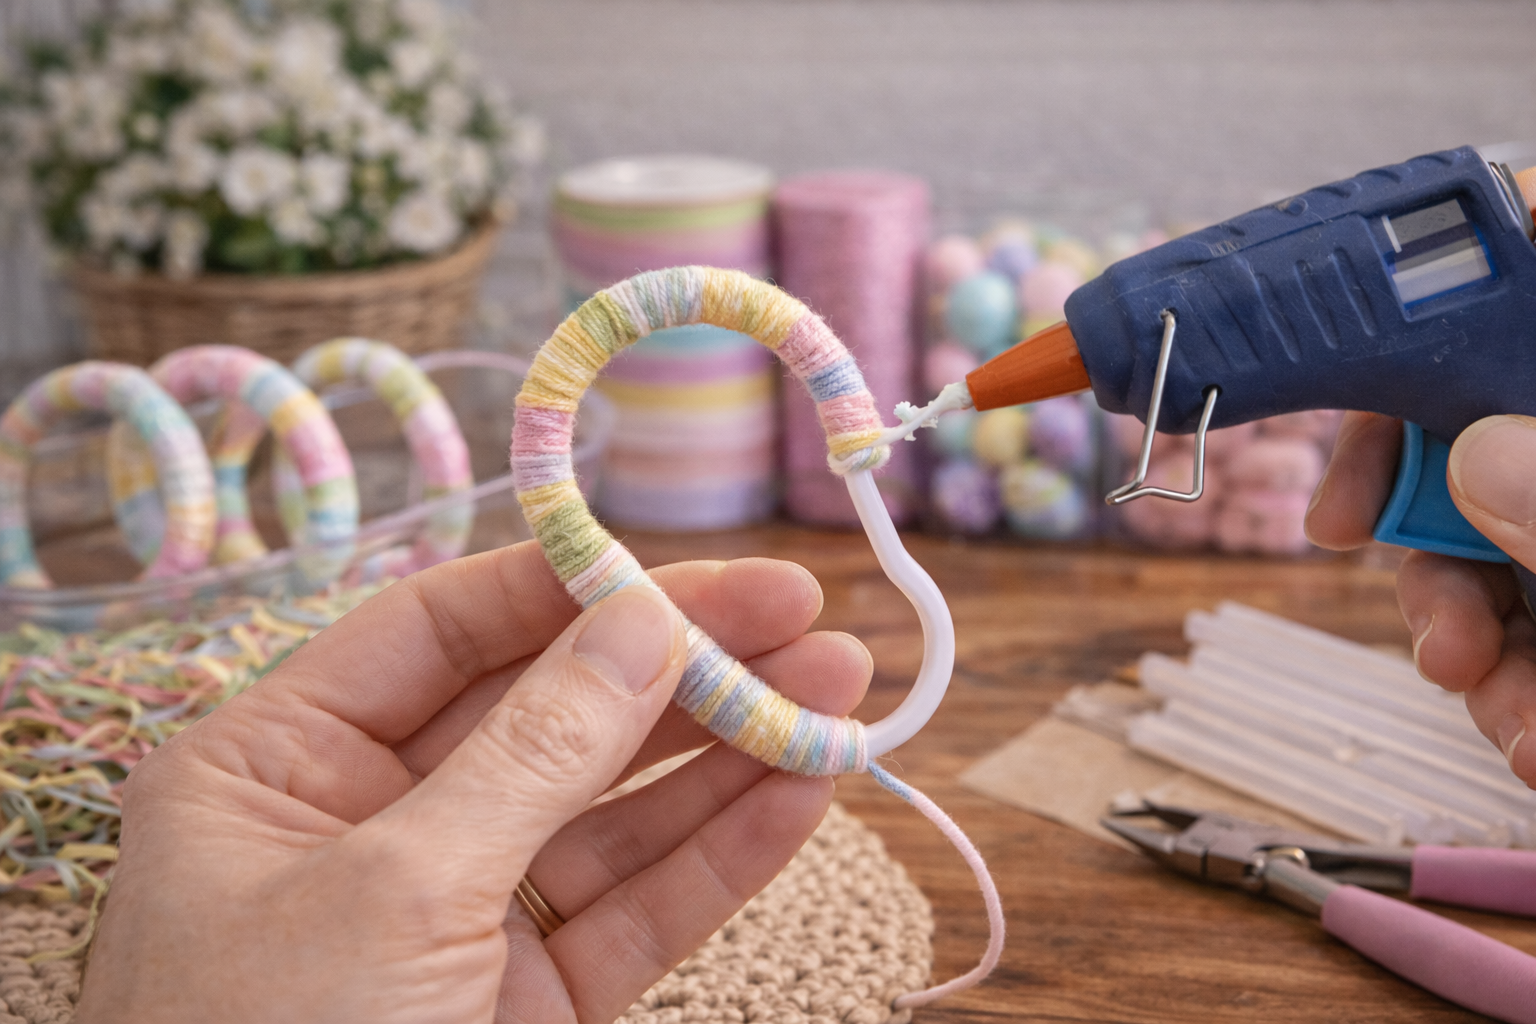
💡 Pro Tip: Pro Tip: For a polished look, maintain consistent tension while wrapping the yarn. If you’re going for a multi-color stripe, use quick-drying fabric glue to transition between colors to avoid bulky knots, and ensure ends are hidden within the wraps. You’ll need about 10-15 rings depending on your desired tree height.
🗓️ Keep all your craft projects on track! Explore our printable planners & templates at CraftersDT on Etsy and use code CRAFT20 for 20% off!
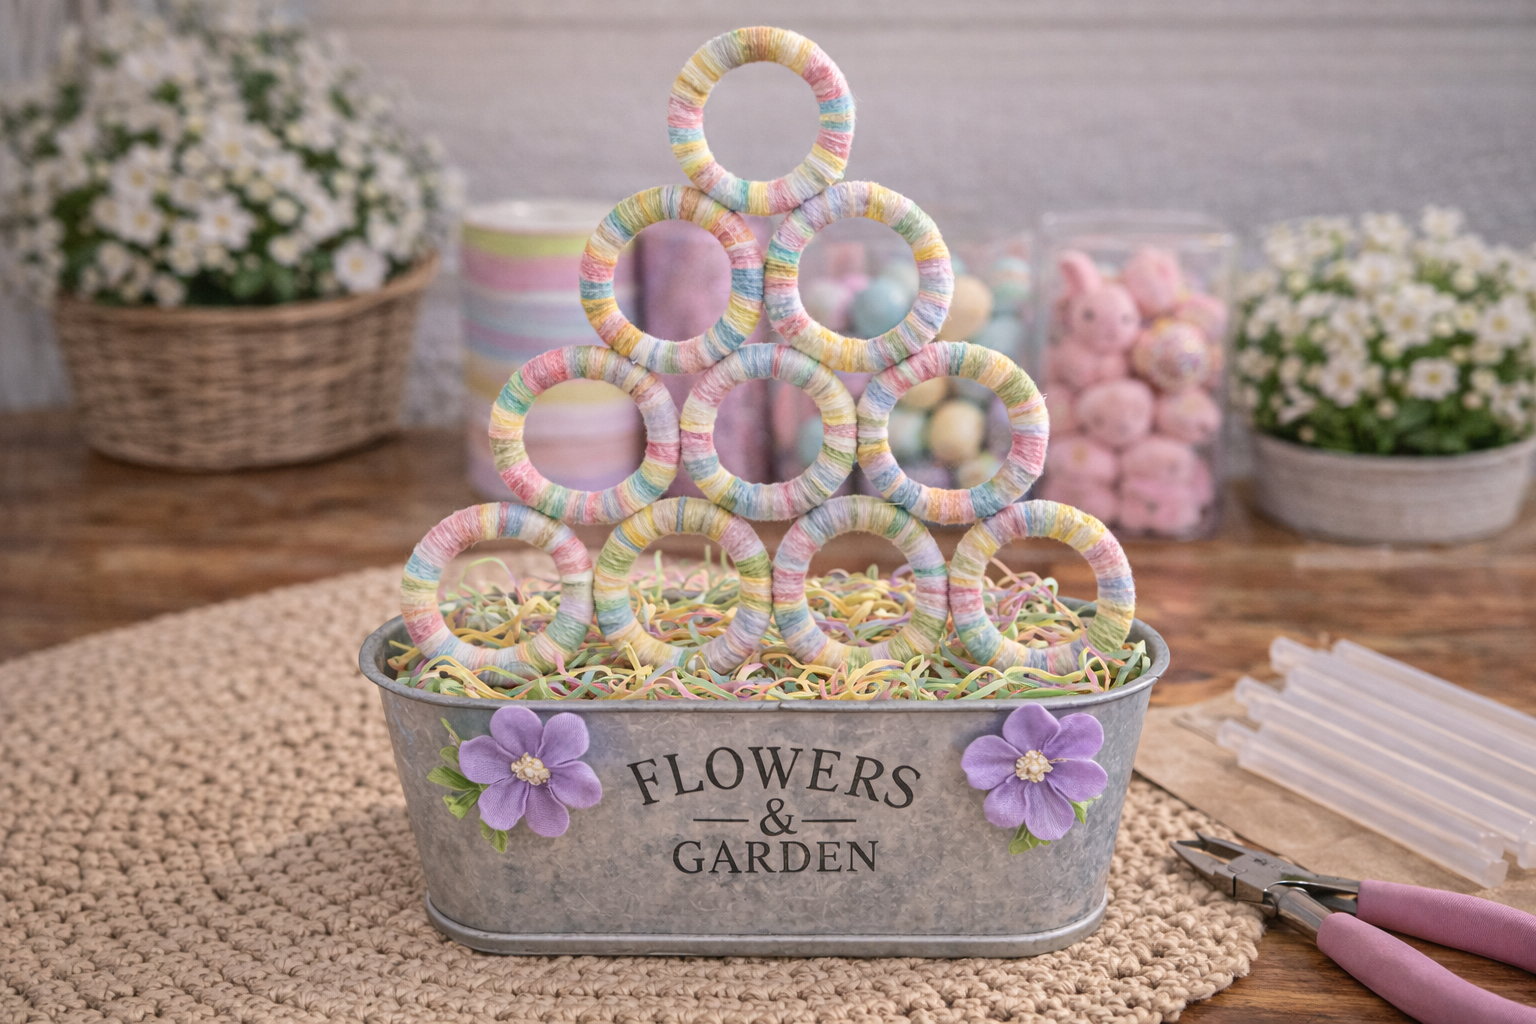
Step 3: Assemble the Ring Tree Structure
Arrange your yarn-wrapped rings into a pyramid shape, starting with the widest base row (e.g., 5 rings). Place the next row (e.g., 4 rings) on top, nestled into the gaps of the row below. Continue reducing the number of rings per row until you reach a single ring at the apex. Once you’re satisfied with the layout, use your hot glue gun to securely attach the rings wherever they touch. Apply glue sparingly but firmly, holding each joint until the glue sets.
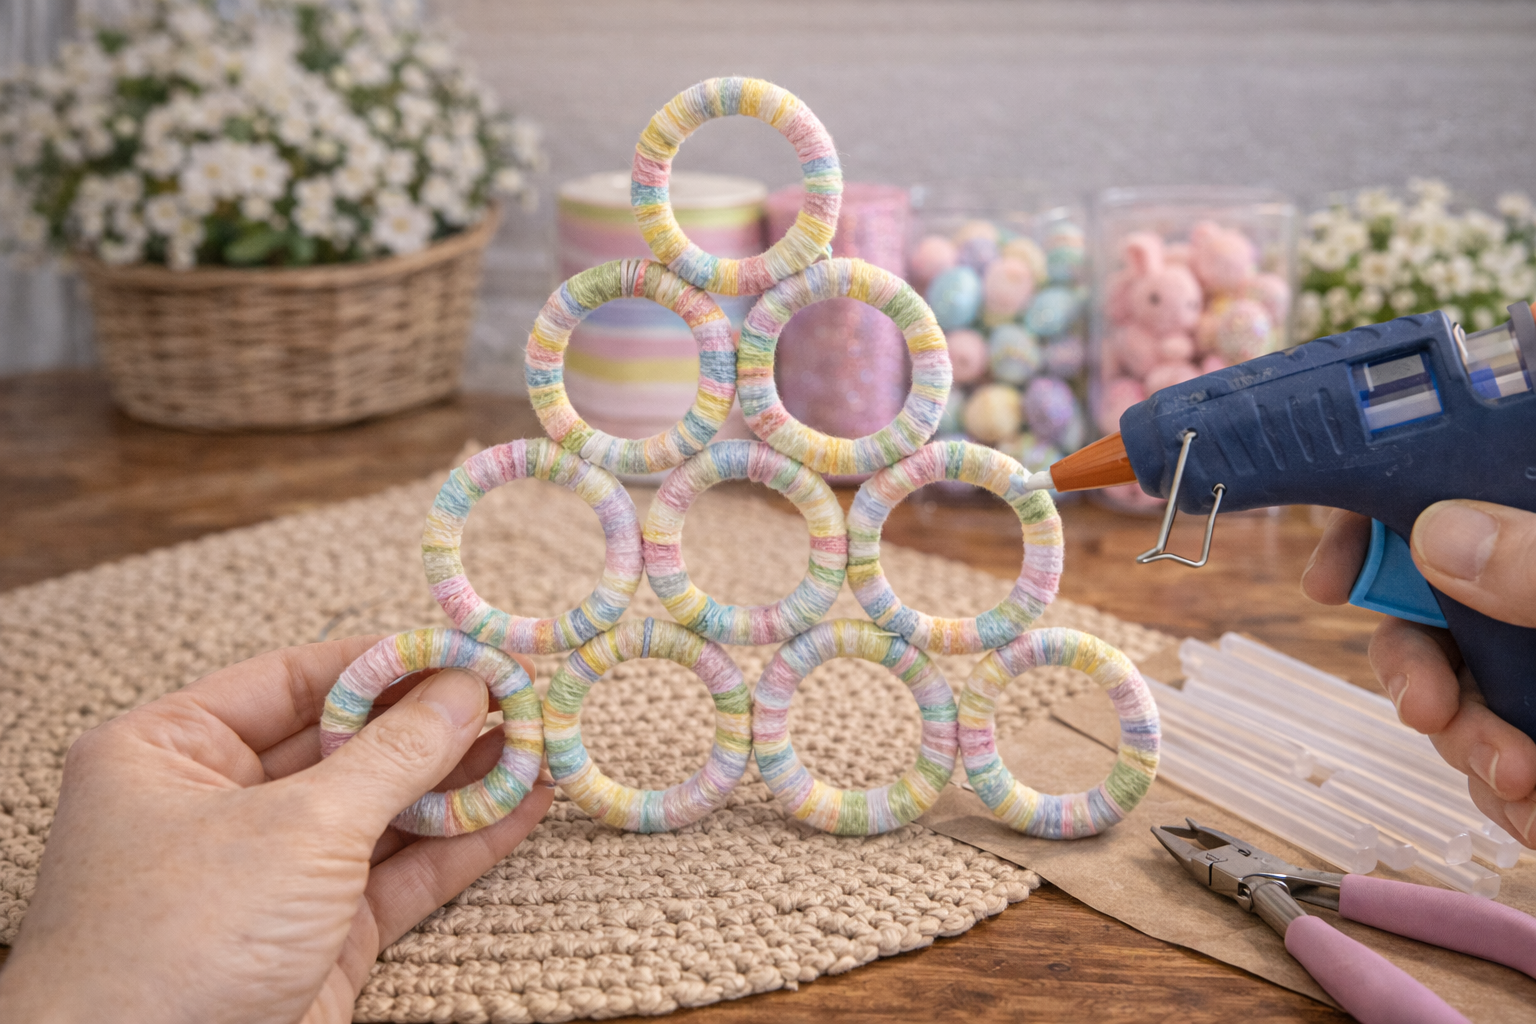
💡 Pro Tip: Pro Tip: Always ‘dry-fit’ your entire structure first without glue. This allows you to adjust the spacing and ensure stability before making permanent attachments. Small, strategic dots of glue are better than large blobs, as excess glue can be visible and detract from the craft’s finish. Press and hold each joint for 10-15 seconds for optimal adhesion.
Step 4: Anchor Tree in Planter Base
Fill your galvanized planter generously with colorful Easter grass filler, creating a soft yet stable bed. Gently lower the assembled ring tree structure into the planter, pressing it down into the grass until it feels secure and stands upright. You may need to adjust the amount of grass around the base and even add a few dabs of hot glue to the bottom rings or grass to ensure the tree doesn’t wobble.
💡 Pro Tip: Pro Tip: To maximize stability, create a slight indentation in the center of the Easter grass where the tree’s base will sit. For a more permanent fixture, apply a ring of hot glue to the bottom-most rings of the tree before pressing it firmly into the grass and against the planter sides.
Step 5: Decorate with Ornaments & Flowers
Begin decorating your Easter tree! Hang the flocked bunny and decorative Easter egg ornaments from various rings. Distribute them evenly, considering color balance and visual appeal. Use hot glue to attach additional small decorative flowers to the rings, especially at the points where rings connect, and around the base of the tree in the planter to enhance the ‘garden’ feel.
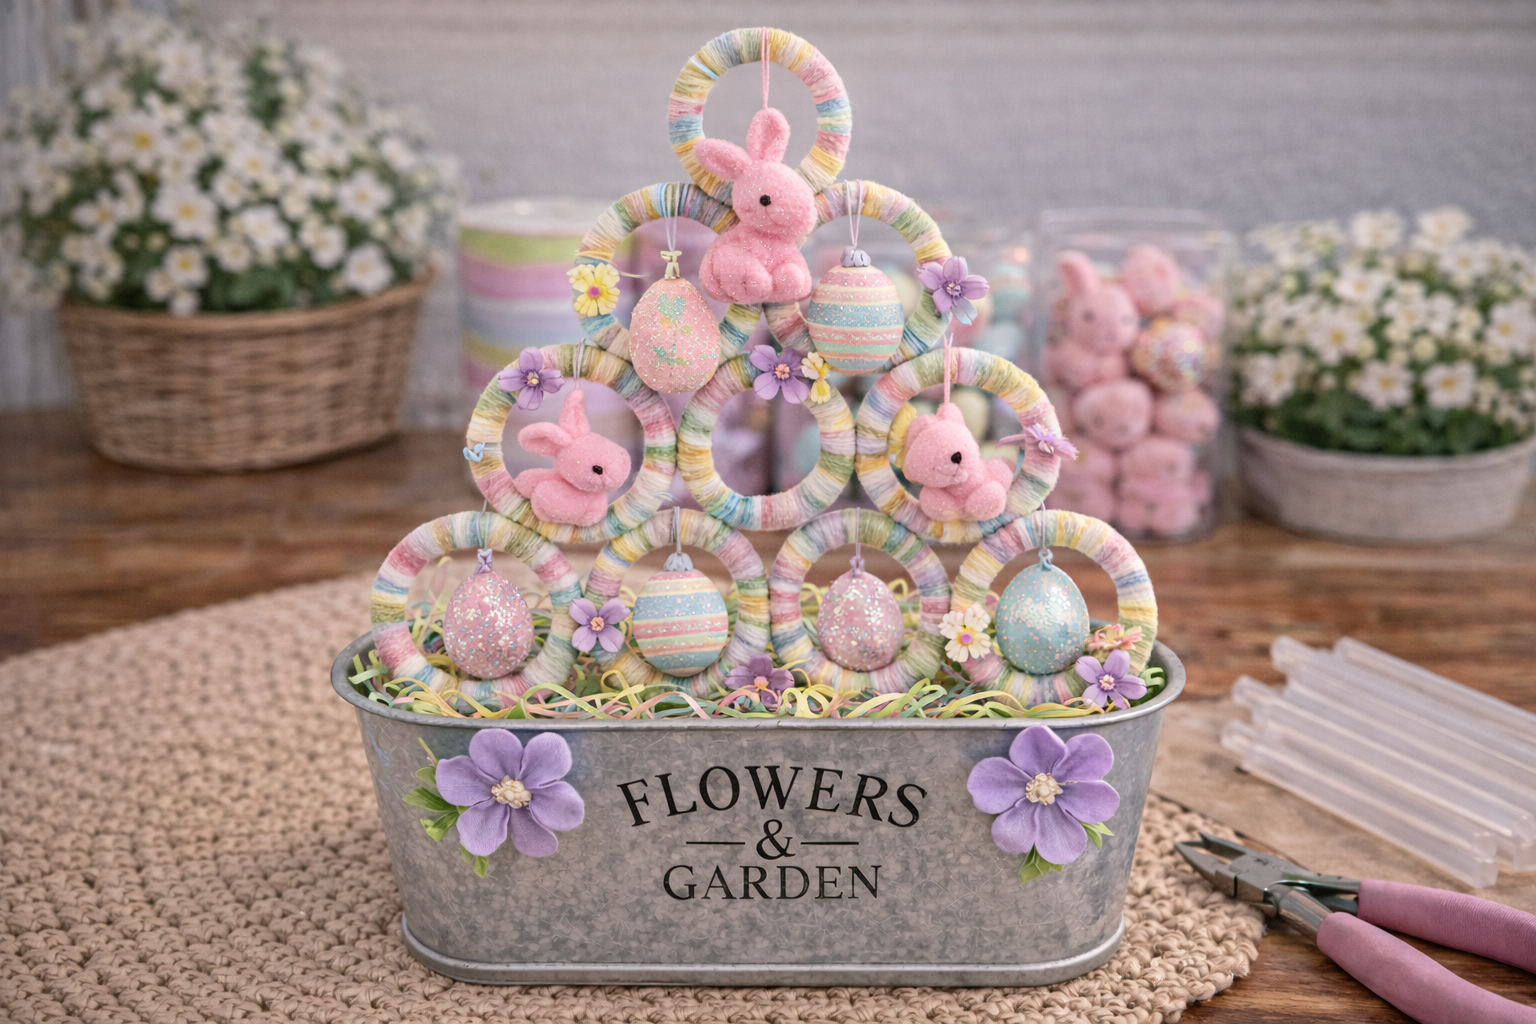
💡 Pro Tip: Pro Tip: Step back periodically to assess your ornament placement. Arrange larger items first, then fill in with smaller details. For a whimsical touch, vary the hanging heights of the ornaments. Use tweezers to place small flowers precisely without burning your fingers with the hot glue.
Step 6: Add the Finishing Bow
Select your chosen ribbons for the top bow. Create a multi-loop bow, combining a plain pastel ribbon with a glittered or patterned one for texture and sparkle. Secure the bow tightly with a small piece of floral wire or a thin ribbon, then hot glue it to the very top ring of your Easter tree. Fluff and adjust the loops and tails of the bow for a full, elegant, and festive appearance.
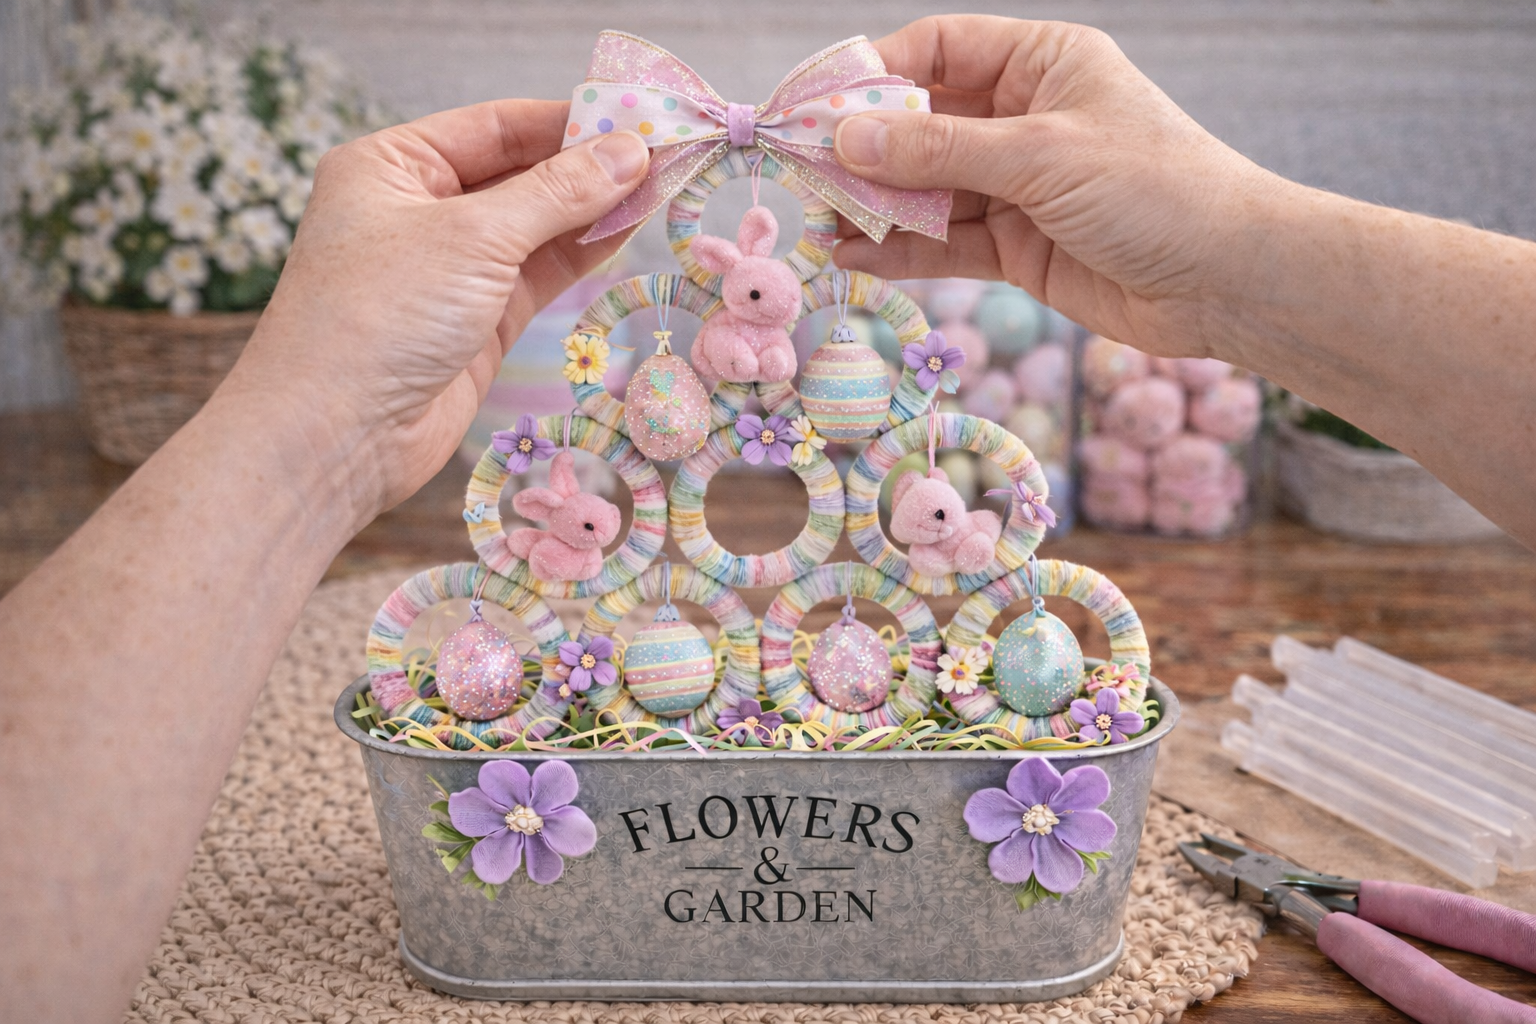
💡 Pro Tip: Pro Tip: For a professional-looking bow, use wired ribbon, as it allows you to shape and position the loops easily. To create a multi-layered bow, stack smaller bows on top of larger ones. If your ribbon tends to fray, dab a tiny bit of clear craft glue or fray check on the cut ends.
Your Charming Easter Tree, Hooray!
Isn’t it just the cutest little thing? This Charming Pastel Easter Bunny & Egg Tree looks adorable on our entryway table, adding that perfect touch of Easter cheer. Go ahead and show off your creation, or make a few more for gifts!
📱 Free to Download
Craftino, The #1 Craft App
✓ Save crafts & browse fully offline
✓ Download printable PDF guides for every project
✓ Step-by-step photo tutorials, nothing left out
✓ 1,000+ craft projects with new ones added every week
Frequently Asked Questions
How hard is it to make this Charming Pastel Easter Bunny & Egg Tree?
Not hard at all! This craft is super easy and perfect for beginners, even kids can help out with supervision.
How long does it take to create a Charming Pastel Easter Bunny & Egg Tree?
You can usually finish this project in about 30-60 minutes, depending on how detailed you want to get with your decorations.
Where can I find materials for my Charming Pastel Easter Bunny & Egg Tree?
I grabbed most of my supplies at Dollar Tree, but craft stores like Hobby Lobby or Michaels will also have everything you need.
Can I change up the look of my Easter Bunny & Egg Tree?
Absolutely! Feel free to use different colors, add glitter, or swap out bunnies for chicks. Make it totally yours!
Discover the newest Dollar Tree arrivals for your next craft project here.
Leave a Reply