Getting Ready with Dollar Tree Supplies
It’s gardening season again! I’ve been looking forward to this time of year because it means I get to plan and plant flowers and veggies. And no garden is complete without some decorations, right? With a little creativity and some affordable items from Dollar Tree, you can add a lot of charm to your outdoor space. Here are some fun and budget-friendly garden projects to get you started.
Planning Your Dollar Tree Garden Projects
Before you start, it’s good to have a plan. Think about the space you have and what kinds of plants and decorations you want. Head over to Dollar Tree and see what grabs your attention. They have all sorts of containers, craft supplies, and other goodies, so you can do a lot without spending too much. I recommend you visit my Instagram page, DollarTreeCraft. I share many craft videos. Among these videos, you can see many different contents about your garden.
Essential Tools and Materials
Before we jump into the craft projects, I want to list some essential craft tools and materials to give you an idea of what you’ll need. These are general tools, and you can always substitute some of them with items you already have at home. Feel free to get creative and make adjustments based on what you have on hand. This will not only save you money but also make your projects more personalized. Also, you check our cheap craft supplies article.
Here are some must-have tools and materials from Dollar Tree to get you going:
- Gardening gloves: Keep your hands clean and protected.
- Trowels and small spades: Great for planting and digging.
- Watering cans and spray bottles: Keep your plants happy and hydrated.
- Planters and pots: Various sizes and styles to suit your needs.
- Craft supplies: Paint, glue, and other items for decorating your projects.
Budget-Friendly Dollar Tree Garden Craft Ideas
Creating beautiful garden projects doesn’t have to be expensive. With Dollar Tree supplies, you can make charming and unique decorations for your garden. Here are some fun and easy craft ideas to get you started.
Create Your Own Garden Jar Solar Lights
Looking for a simple and charming way to light up your garden? These Garden Jar Solar Lights are just what you need! With just a few items from Dollar Tree, you can add a beautiful glow to your outdoor space for only $10.
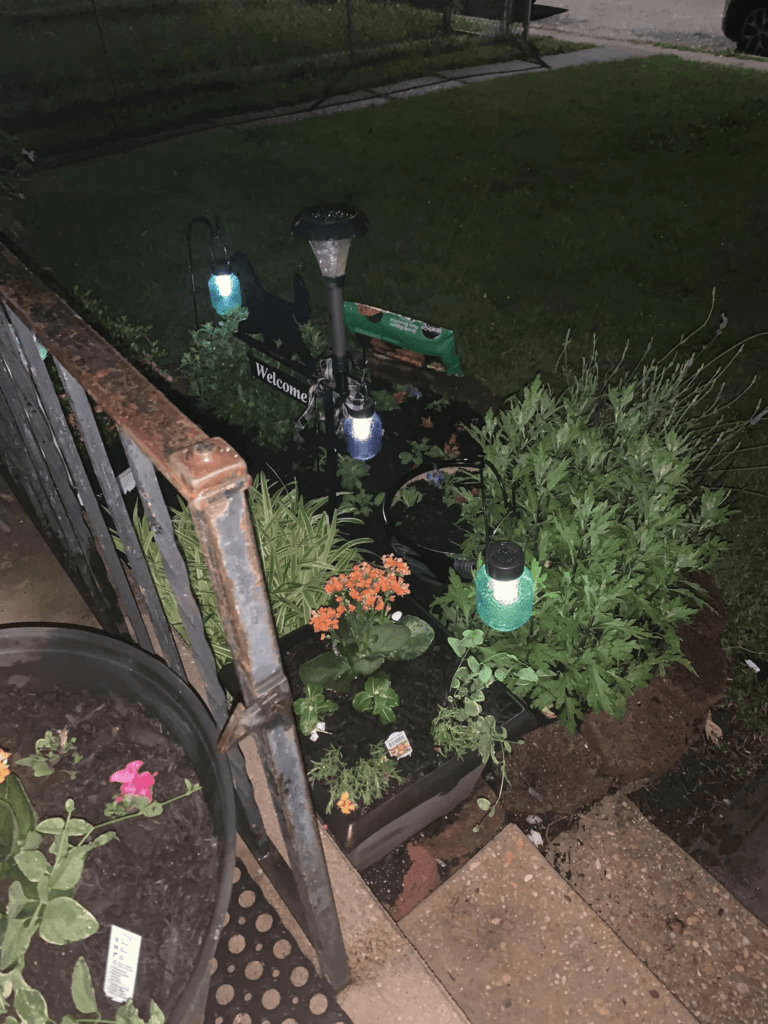
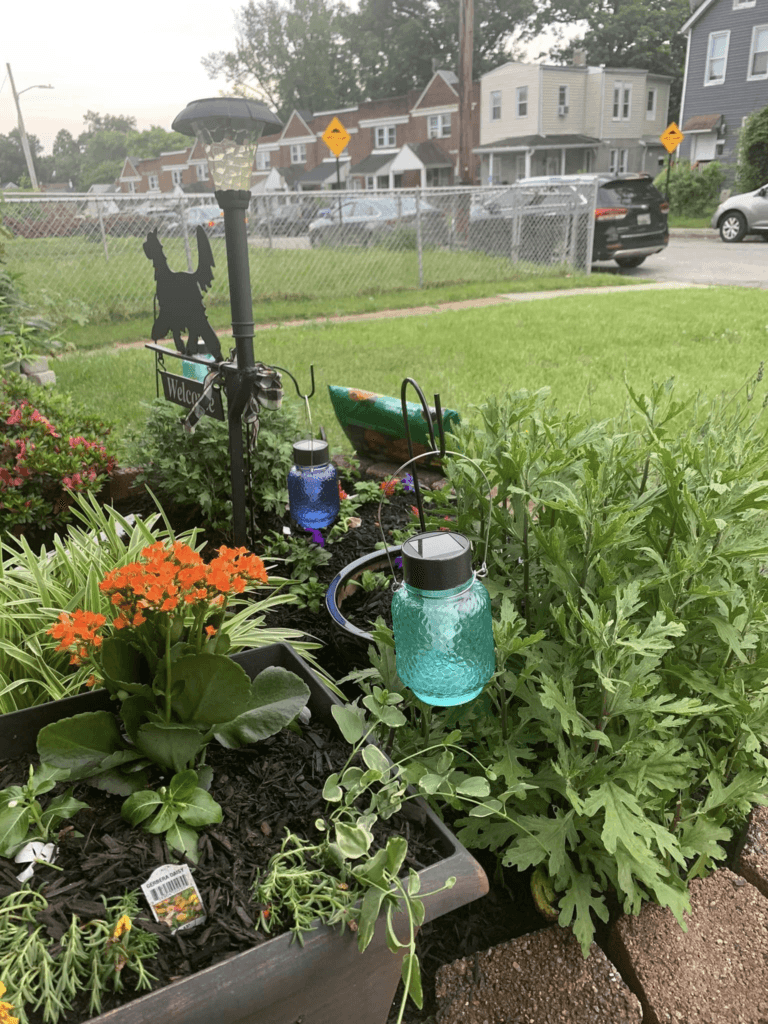
Credit: Adrienne Wood
Materials Needed:
- 4 solar lights
- 4 glass jars
- Glue
How to Make It:
- Prepare the Jars: Clean and dry the glass jars thoroughly.
- Attach the Solar Lights: Remove the stakes from the solar lights. Apply glue around the rim of the solar light tops and place them inside the jar lids.
- Let It Dry: Allow the glue to dry completely before handling.
- Place in Your Garden: Find spots in your garden where you want to add some light. Nestle the jars among your plants or place them along a pathway.
These easy-to-make lights will add a magical touch to your garden, perfect for evening enjoyment!
DIY Bee-Themed Garden Washboard Decoration
Want to add a cute and unique touch to your garden? This bee-themed garden decoration made from a vintage washboard and Dollar Tree items is perfect! It’s a fun and creative way to spruce up any garden space.
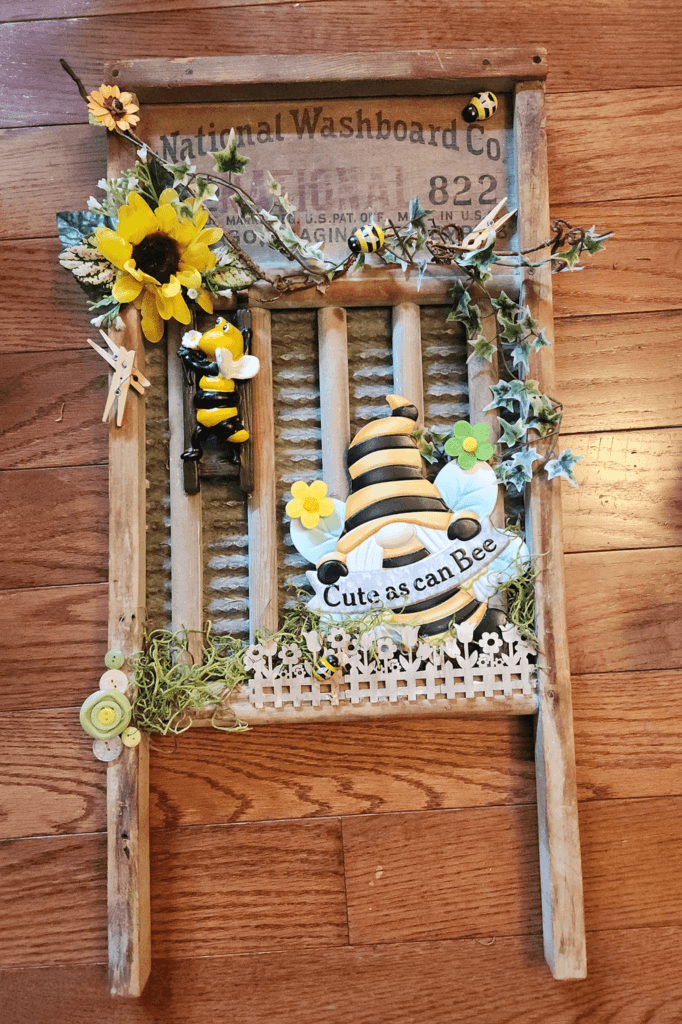
Credit: Nanette Benanti
Materials Needed:
- $1.00 old washboard
- Dollar Tree Gnome garden stake
- Dollar Tree Bee pot hanger
- Dollar Tree mini Bees
- Dollar Tree Mini clothes pins
- Dollar Tree Mini unfinished picket fence
- Old buttons
- Spring of greenery vine
How to Make It:
- Prepare the Washboard: Clean the old washboard thoroughly to remove any dirt or grime.
- Attach the Picket Fence: Glue the mini unfinished picket fence to the bottom of the washboard.
- Decorate with Bees and Gnome: Arrange and glue the Dollar Tree mini bees, bee pot hanger, and gnome garden stake onto the washboard.
- Add Greenery and Buttons: Attach the spring of greenery vine along the sides and glue the old buttons as additional decorative elements.
- Finishing Touches: Use the mini clothes pins to clip any additional small items or decorations you desire.
This delightful decoration will bring a touch of whimsy to your garden, making it a lovely addition to any outdoor space.
DIY Gnome and Fairy Garden
Creating a whimsical gnome and fairy garden is a delightful project that kids will love. Most of the items can be found at Dollar Tree, making it an affordable way to add magic to your garden. Here’s how you can make your own enchanting garden.
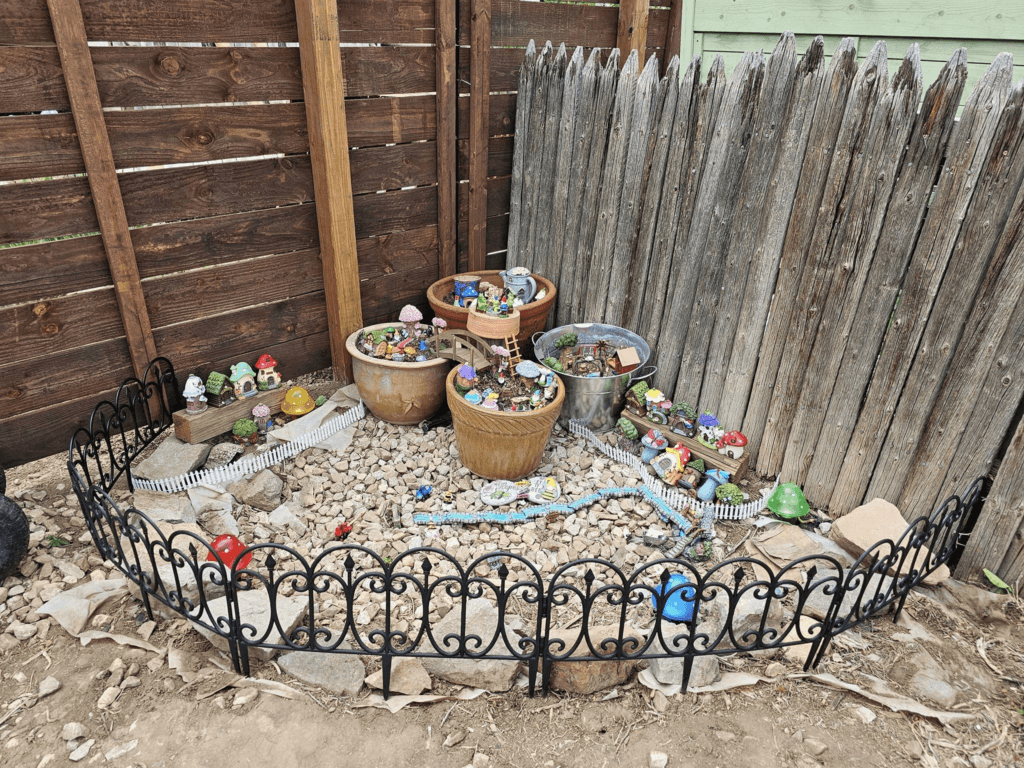
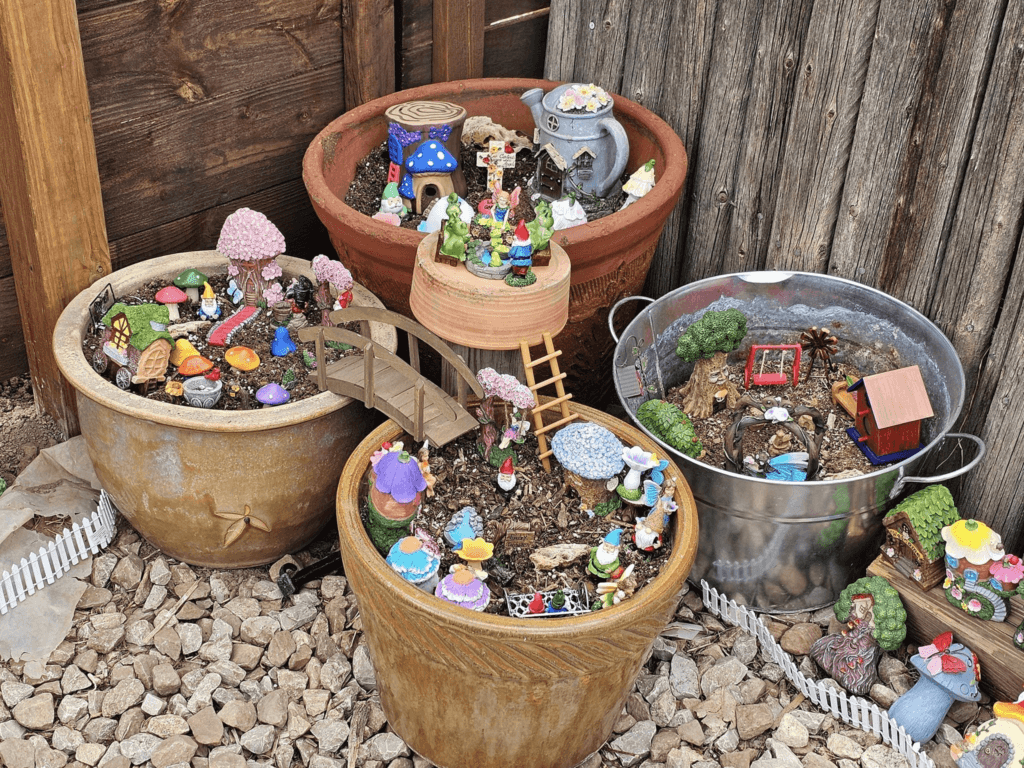
Credit: Meredith Duvall
Materials Needed:
- Various gnome and fairy figurines (Dollar Tree)
- Small houses and accessories (Dollar Tree)
- Plant pots of different sizes
- Paint (optional, for customizing items)
- Decorative stones and pebbles
- Small fences and bridges (Dollar Tree)
- Any additional items from random stores
How to Make It:
- Arrange the Pots: Place the plant pots in your desired layout. Use different sizes to create levels and interest.
- Add Soil and Pebbles: Fill the pots with soil and top with decorative stones and pebbles for a finished look.
- Place the Figurines: Arrange the gnome and fairy figurines around the pots. Create little scenes with houses, bridges, and other accessories.
- Customize Your Items: If you have duplicate items, paint them in different colors to add variety.
- Add Final Touches: Include any additional items from random stores to complete your garden. Use small fences to outline the garden and make it feel cozy.
This gnome and fairy garden will add a touch of magic to your yard and provide endless fun for kids and adults alike.
DIY Mushroom Garden Decoration
This cute mushroom decoration is a perfect addition to your gnome garden. Made with Dollar Tree items, it’s an easy and fun project that brings a whimsical touch to your outdoor space.

Credit: Meredith Chuck
Materials Needed:
- Dollar Tree plastic bowl (red)
- Dollar Tree plastic container (white)
- White paint
- Paintbrush
- Gnome figurines (Dollar Tree)
How to Make It:
- Paint the Bowl: Paint white spots on the red plastic bowl to create the mushroom cap. Let it dry completely.
- Prepare the Base: Turn the white plastic container upside down to serve as the mushroom stem.
- Assemble the Mushroom: Place the painted bowl upside down on top of the white container.
- Add the Gnomes: Position the gnome figurines around the mushroom to complete your garden scene.
This charming decoration will add a playful element to your garden and delight anyone who sees it.
DIY Garden Decor Sign: Dollar Tree Garden Projects
Add a personal touch to your garden with this charming DIY sign. Using Dollar Tree supplies, you can create a beautiful and unique garden sign to brighten up any outdoor space.
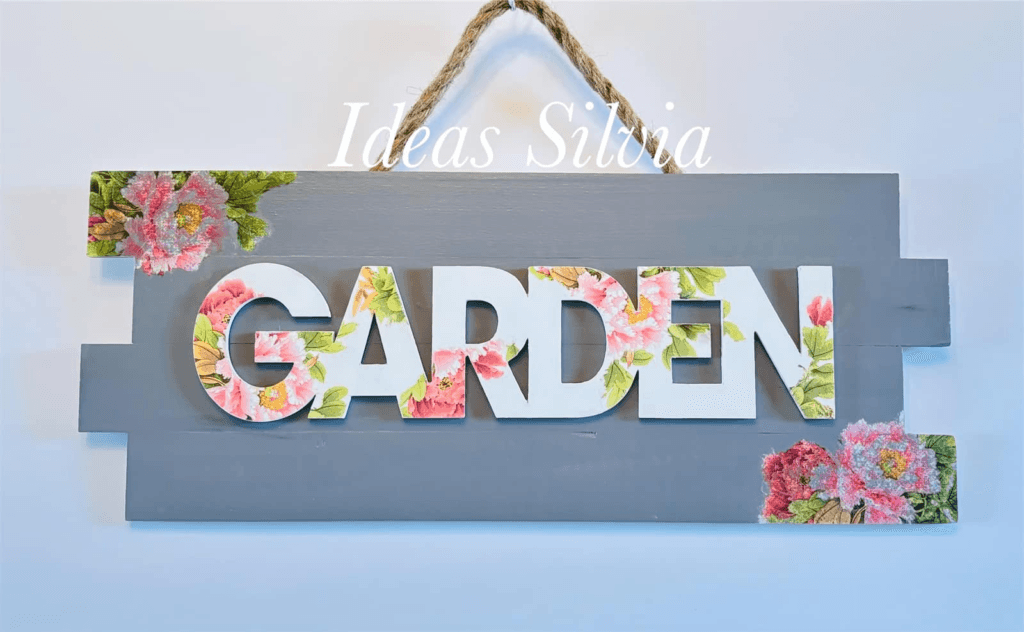
Credit: Ideas Silvia
Materials Needed:
- 4 wooden boards
- Wood glue
- Large wooden letters (GARDEN)
- Decorative napkins with flower patterns
- Mod Podge
- Paint (optional)
- Rope for hanging
How to Make It:
- Assemble the Base: Glue the four wooden boards together with wood glue to form the base of the sign. Let it dry completely.
- Prepare the Letters: If you like, paint the wooden letters in a color of your choice and let them dry.
- Decorate the Letters: Cut out flower patterns from the decorative napkins and use Mod Podge to attach them to the wooden letters. Seal the letters with another layer of Mod Podge to protect the design.
- Attach the Letters: Glue the decorated letters onto the wooden board base, spelling out “GARDEN.”
- Add the Hanging Rope: Attach a piece of rope to the back of the sign for hanging.
This lovely garden sign will add a delightful and welcoming touch to your garden decor.
DIY Bunny Face Floral Arrangement
Brighten up your home with this adorable bunny face floral arrangement. Using Dollar Tree supplies and a few extra touches, you can create a charming centerpiece for any room.

Credit: Chris Whitfield
Materials Needed:
- Metal tub with “Flowers & Garden” label (Dollar Tree)
- Floral foam (Dollar Tree)
- Artificial flowers (Dollar Tree and peach-colored flowers from Walmart)
- Bunny face decoration (Dollar Tree or DIY with fabric and cotton)
- Decorative eggs (Dollar Tree)
- Floral moss (Dollar Tree)
How to Make It:
- Prepare the Base: Place the floral foam inside the metal tub. This will help keep your decorations in place.
- Add the Bunny Face: Insert the bunny face decoration into the foam, positioning it towards the front.
- Arrange the Flowers: Add the artificial flowers around the bunny face. Mix in the peach-colored flowers for added color.
- Insert Decorative Eggs: Place the decorative eggs among the flowers for a festive touch.
- Fill with Moss: Use the floral moss to cover the foam and fill in any gaps, creating a finished look.
This cheerful arrangement is perfect for spring and Easter, adding a touch of whimsy to your home decor.
DIY Bee Garden Decorations
Add a buzz to your garden with these delightful bee decorations. These cute little bees are easy to make with Dollar Tree supplies and will bring a cheerful touch to your outdoor space. These dollar tree garden projects will make your garden vibrant and fun.

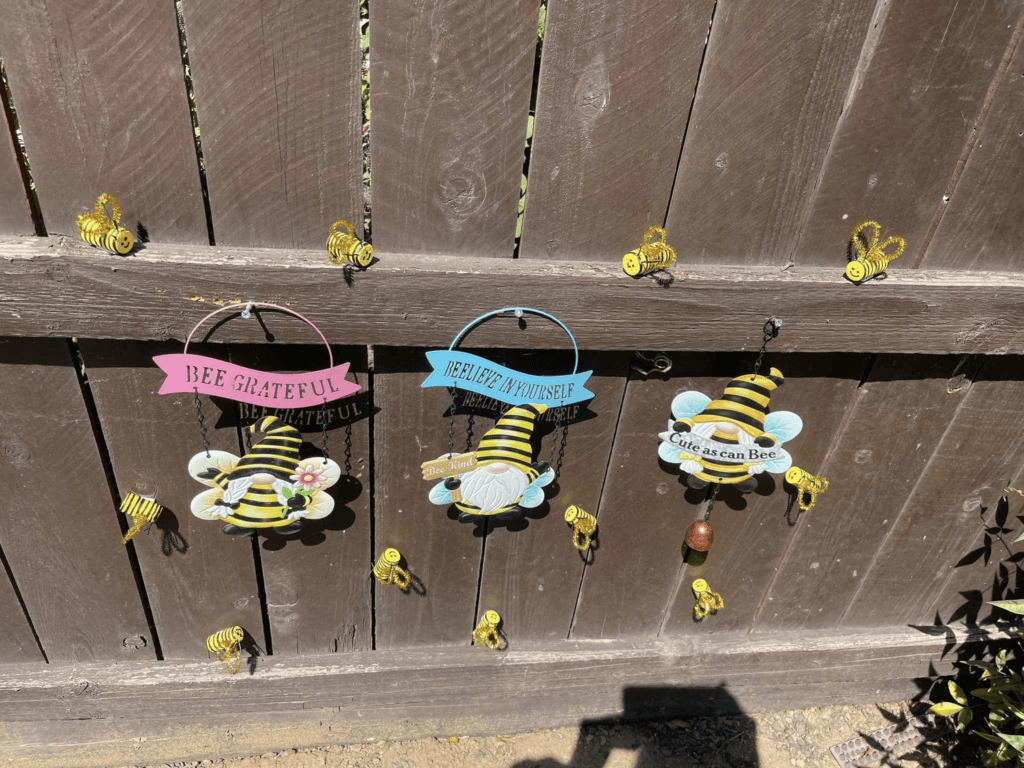
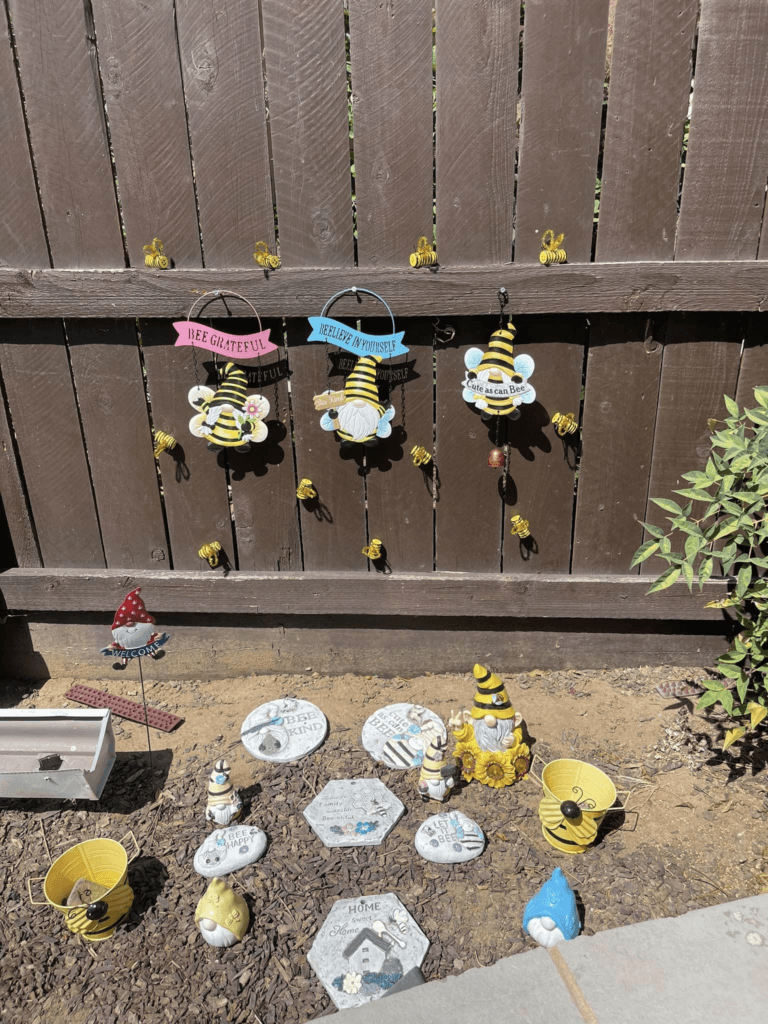
Credit: Rebecca Miller
Materials Needed:
- Yellow and black pipe cleaners
- Yellow foam or felt circles
- Black marker
- Googly eyes
- Hot glue gun and glue sticks
How to Make It:
- Create the Bee Body: Take a yellow foam or felt circle and use a black marker to draw stripes on it. This will be the bee’s body.
- Add the Face: Glue on googly eyes and draw a smiley face on the yellow circle.
- Make the Wings: Bend a yellow pipe cleaner into a wing shape and attach it to the back of the bee body with hot glue.
- Attach the Antennae: Cut a small piece of black pipe cleaner, bend it in half, and glue it to the top of the bee’s head to create antennae.
- Repeat for More Bees: Make as many bees as you like to decorate your garden.
These charming bee decorations are perfect for adding a playful touch to your garden fence or flower beds.
DIY Herb Garden Decoration
Creating a little herb garden is a wonderful way to encourage a love for cooking and gardening. Using Dollar Tree supplies and a few extra touches, you can make a cute and functional herb garden.
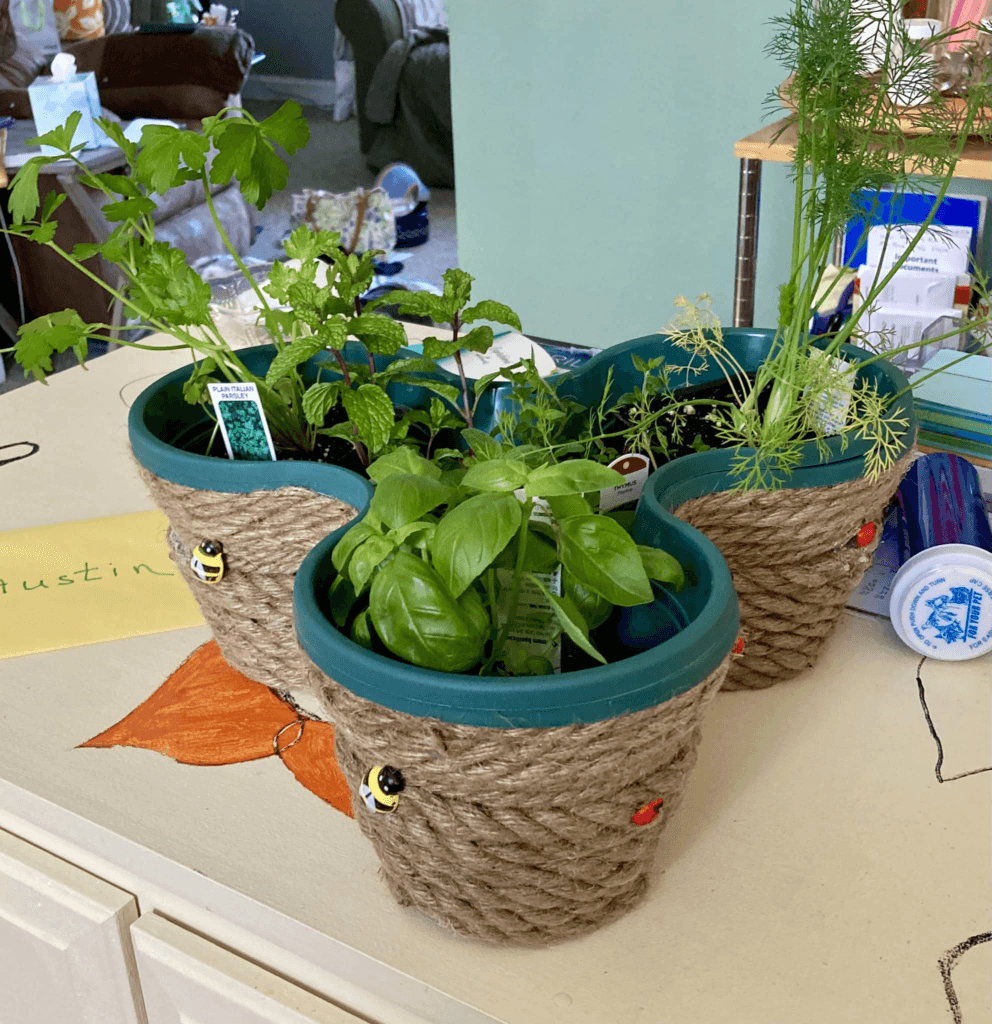
Credit: Ruth Elizabeth Landis
Materials Needed:
- Plastic pots (Dollar Tree)
- Nautical rope (Dollar Tree)
- 3D bee and ladybug decorations (Dollar Tree)
- Herbs (from a nursery or garden center)
- Hot glue gun and glue sticks
How to Make It:
- Wrap the Pots: Start by wrapping the nautical rope around the plastic pots. Secure the rope with hot glue as you go, covering the entire exterior of the pots.
- Add the Decorations: Once the rope is in place, glue the 3D bee and ladybug decorations onto the pots for a playful touch.
- Plant the Herbs: Fill the pots with soil and plant your chosen herbs. Some great options include basil, parsley, dill, and mint.
- Arrange Your Garden: Place the pots in a sunny spot where they can thrive. Water them regularly and enjoy fresh herbs for cooking.
This herb garden is a great project to do with kids and makes a lovely addition to any kitchen or patio.
DIY Garden Ornaments
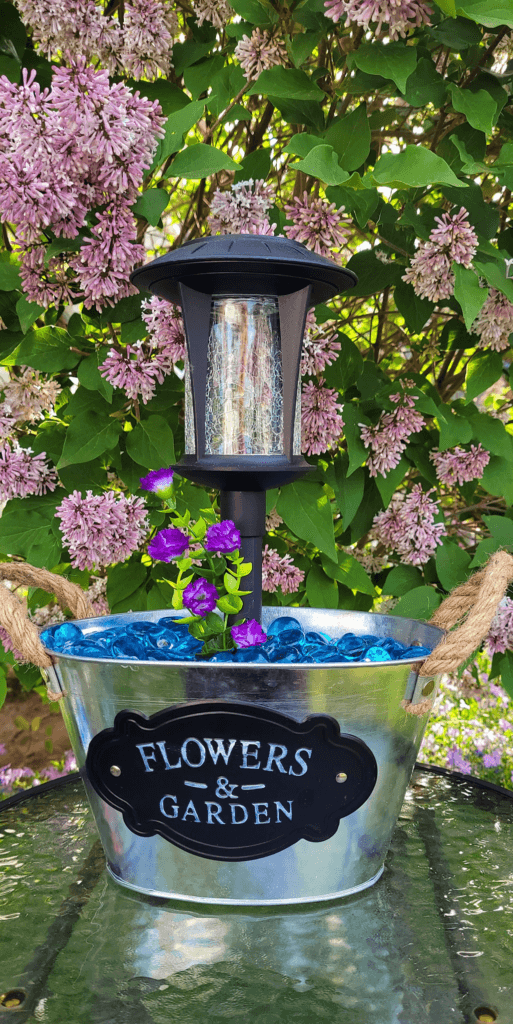
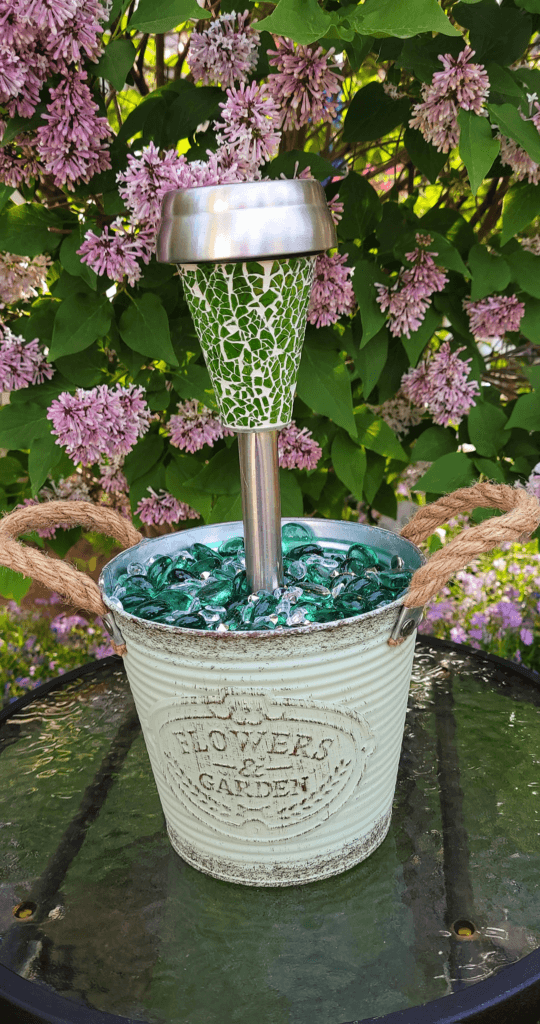
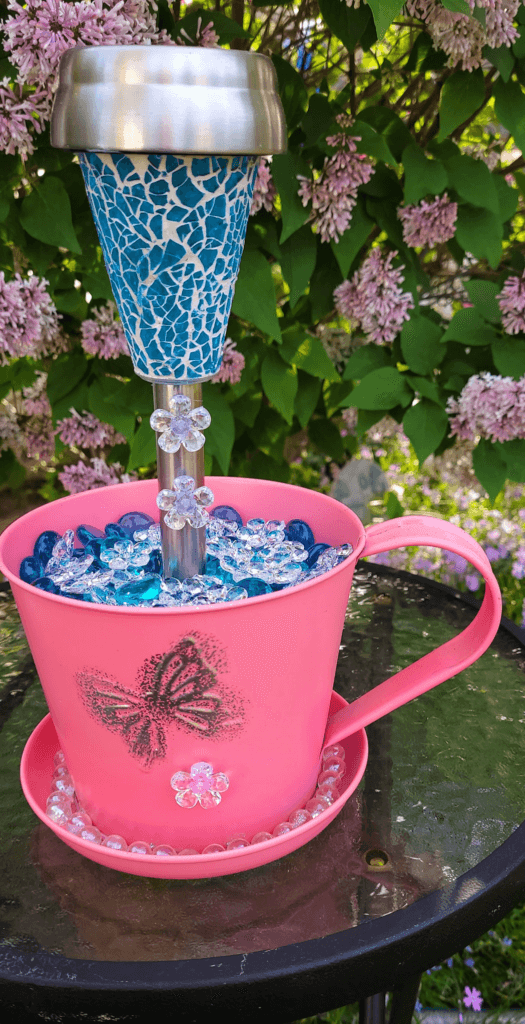
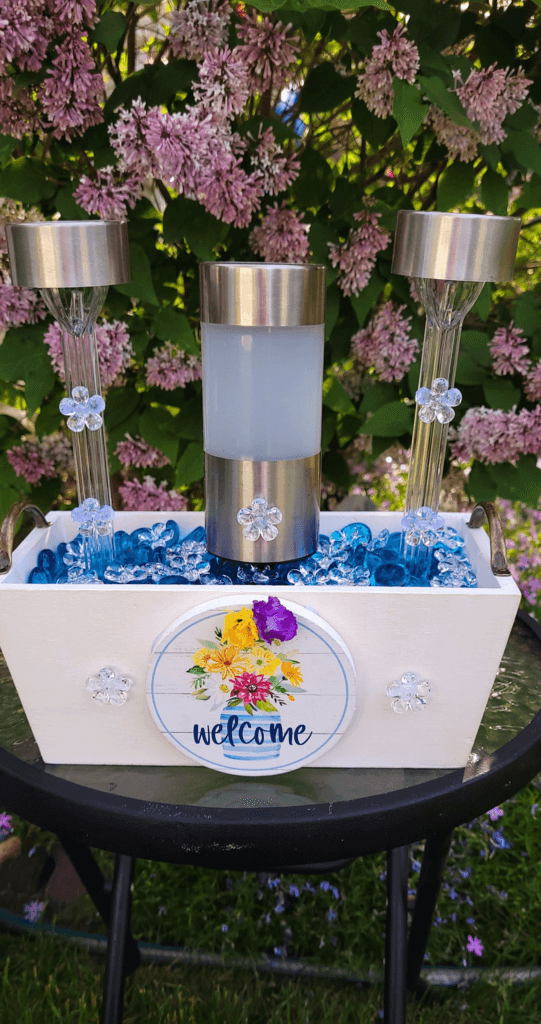
Add some flair to your garden with these delightful DIY ornaments made entirely from Dollar Tree products. These creative decorations are not only budget-friendly but also easy to make, adding a unique touch to your outdoor space. These dollar tree garden projects will enhance your garden’s charm without breaking the bank.
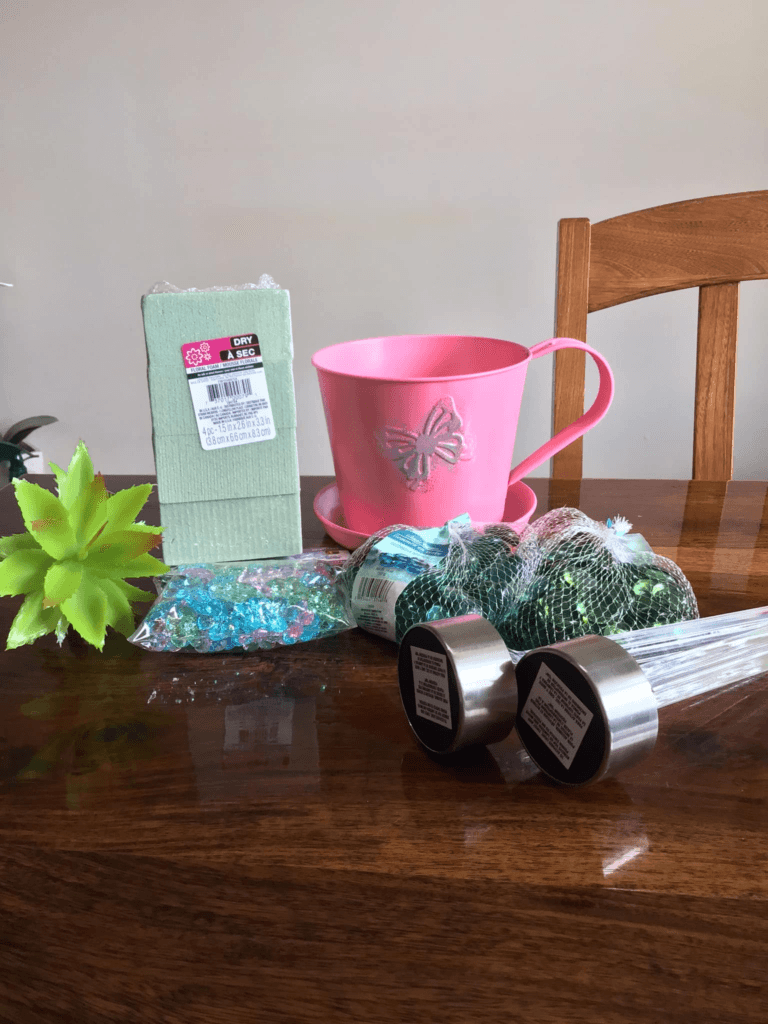
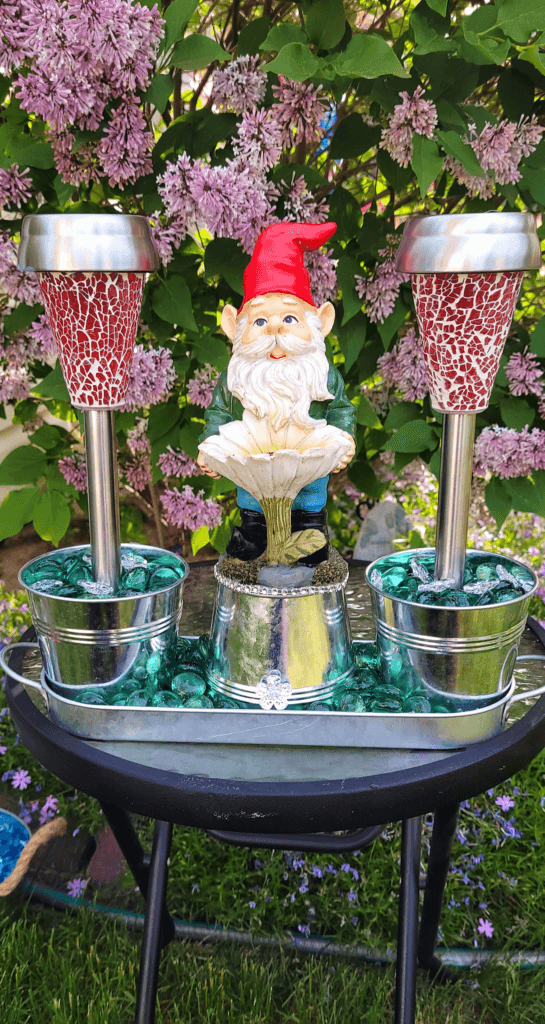
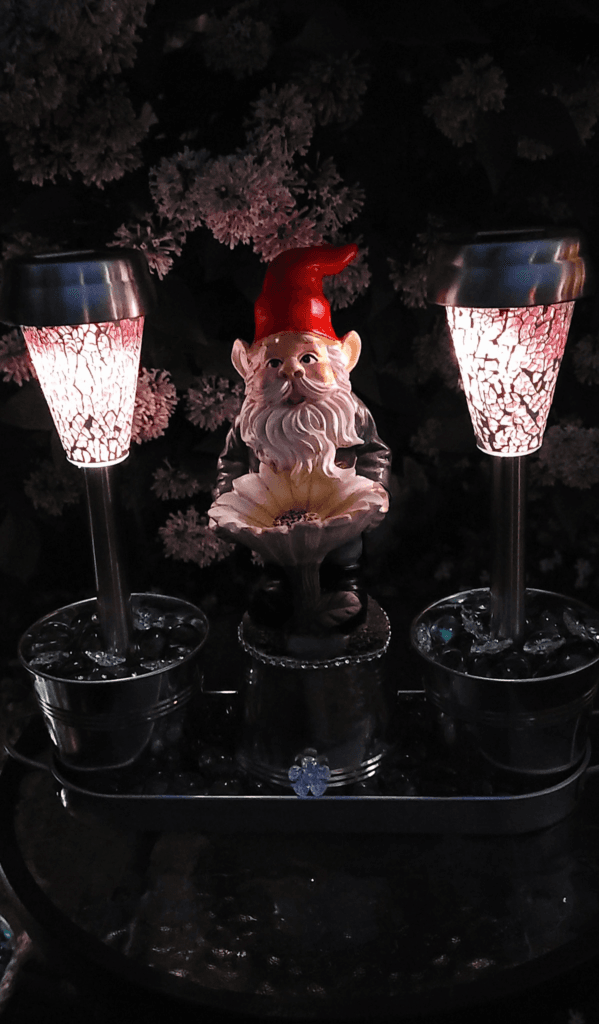
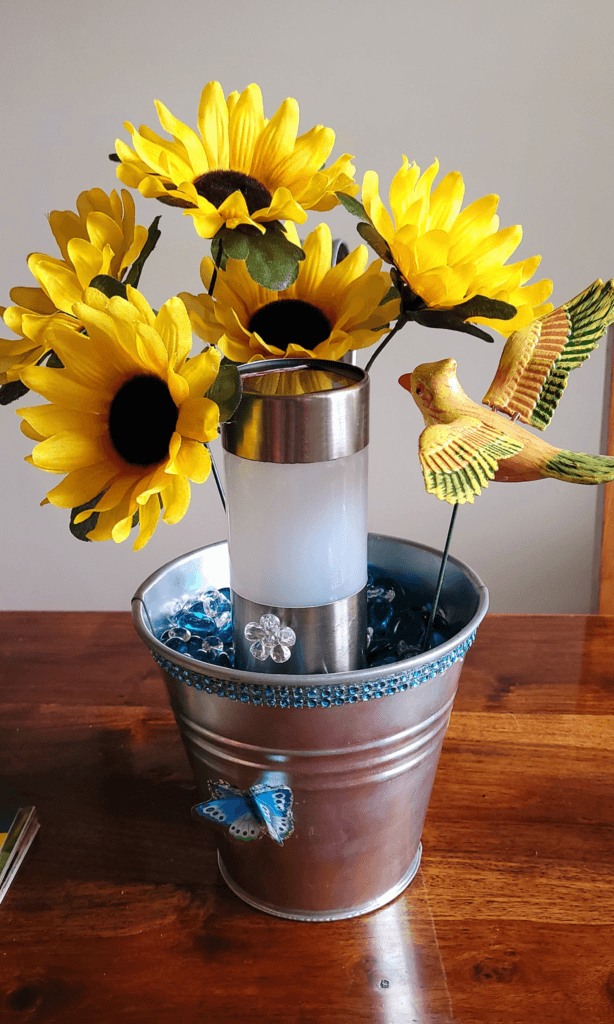
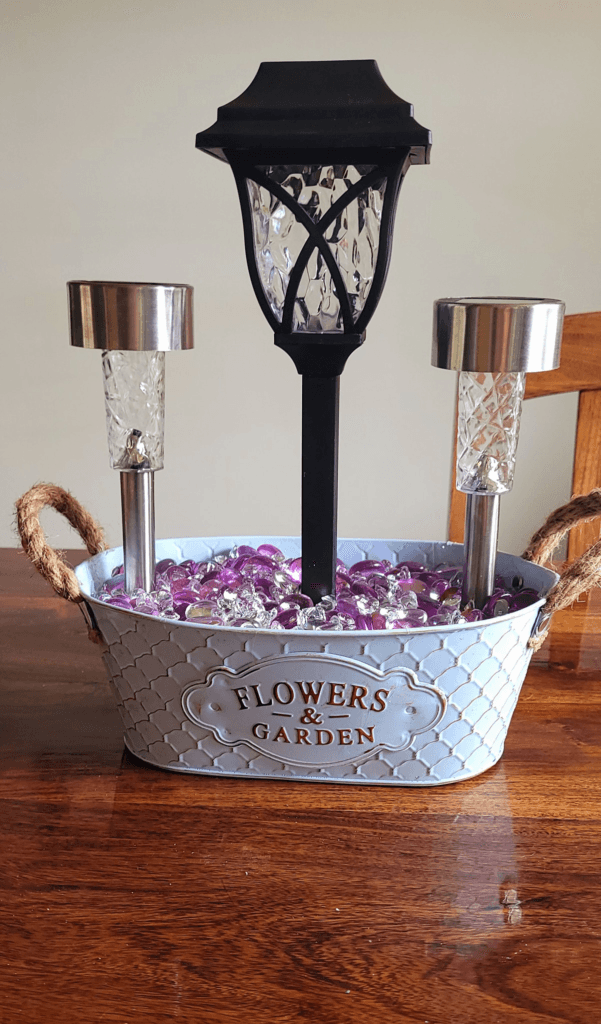
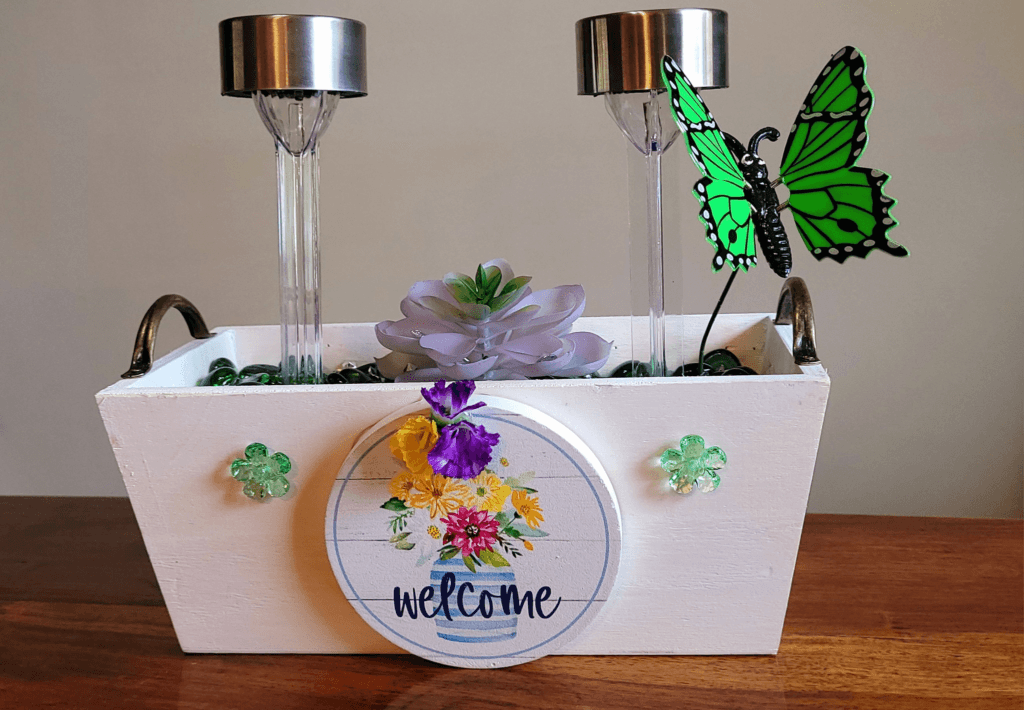
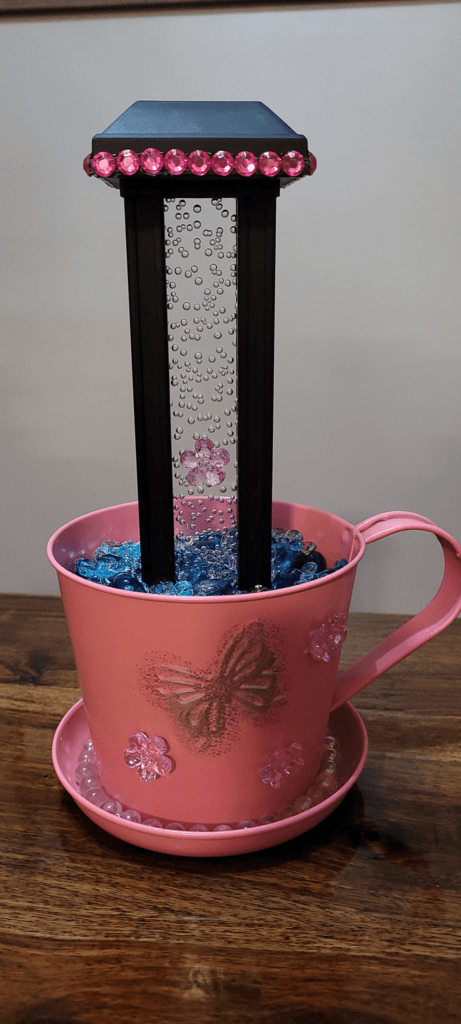
Credit: Laurie McKenzie Carmichael
Materials Needed:
- Solar lights (Dollar Tree)
- Decorative containers (buckets, cups, etc. from Dollar Tree)
- Glass gems (Dollar Tree)
- Rope (Dollar Tree)
- Hot glue gun and glue sticks
- Paint and paintbrushes (optional)
- Decorative stickers or decals (optional)
How to Make It:
- Prepare the Containers: Choose your decorative containers. You can use metal buckets, large cups, or any other container that suits your garden style. Paint them if desired and let them dry.
- Attach the Solar Lights: Place the solar lights inside the containers. If the containers are deep, you can fill them partially with glass gems to raise the lights to the desired height.
- Decorate the Containers: Use hot glue to attach rope around the edges of the containers for a rustic look. Add decorative stickers or decals if you want to personalize them further.
- Fill with Glass Gems: Fill the containers with glass gems to cover the bases of the solar lights and give them a sparkling finish.
- Place in Your Garden: Find the perfect spots in your garden to display your new ornaments. The solar lights will charge during the day and light up beautifully at night.
These charming garden ornaments will bring light and color to your garden, making it a lovely place to relax and enjoy.
DIY Memorial Garden Cross: Dollar Tree Garden Projects
Creating a memorial garden cross is a meaningful way to honor a loved one. I remember the first time I made one for my husband’s memorial garden; it brought a sense of peace and remembrance. Using Dollar Tree supplies, you can craft a beautiful cross to place in your garden. These dollar tree garden projects not only help you save money but also allow you to create something truly personal and heartfelt.

Credit: Ruth Barlow
Materials Needed:
- Large cross frame (from Dollar Tree or any other store)
- Artificial flowers (Dollar Tree)
- Decorative mesh ribbons (Dollar Tree)
- Floral wire
- Hot glue gun and glue sticks
How to Make It:
- Prepare the Cross Frame: If you are using a large cross frame, ensure it is clean and ready for decoration.
- Attach the Flowers: Start by attaching the artificial flowers to the center of the cross using hot glue. Arrange them in a way that looks balanced and appealing.
- Add the Mesh Ribbons: Cut strips of decorative mesh ribbons and attach them to the cross frame using floral wire. Layer the ribbons to create a full and textured look.
- Secure Everything: Make sure all the decorations are securely attached to the cross frame. Use extra floral wire or hot glue if needed.
- Place in Your Garden: Find a special spot in your garden to place the memorial cross. Ensure it is secure and won’t tip over.
This heartfelt project is a beautiful addition to any garden, serving as a touching tribute to a loved one. Dollar tree garden projects like this can be both meaningful and affordable.

