
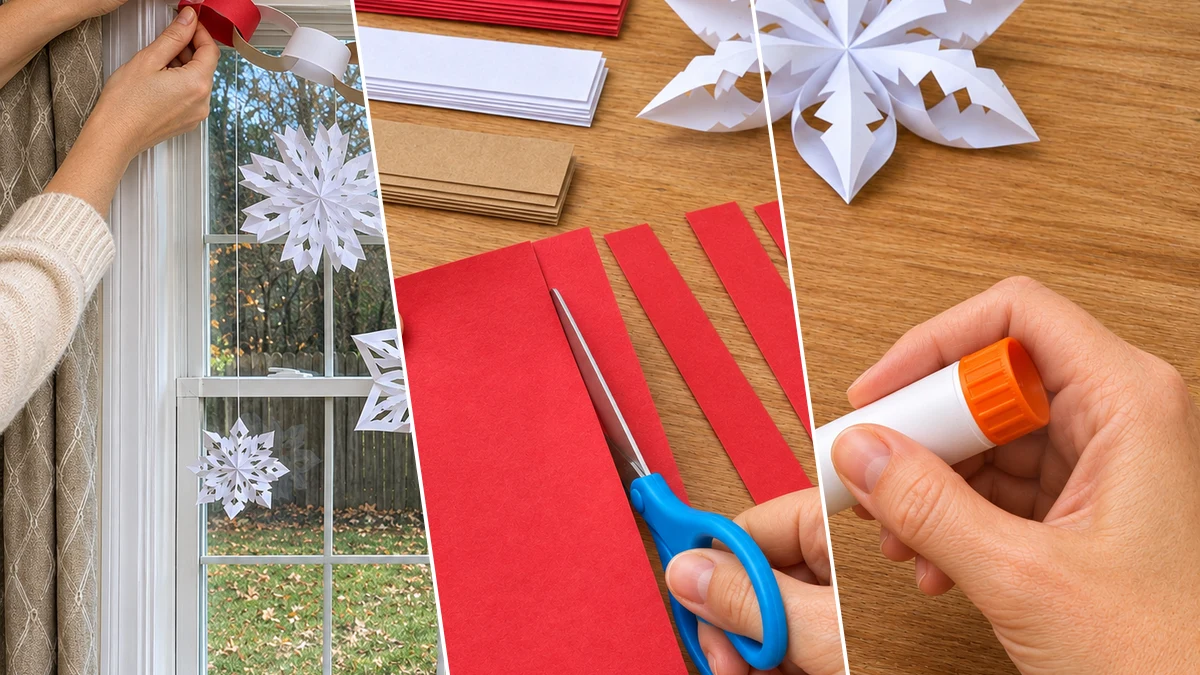
Add a touch of winter magic and holiday cheer to your home with handmade 3D paper snowflakes and a festive Christmas paper chain garland. This accessible paper craft offers a charming way to decorate windows for the season. Using simple materials, these decorations bring a whimsical, traditional feel to any room.
Project at a Glance
- Difficulty: Easy
- Estimated active time: 60 minutes to 120 minutes (drying and curing waits not included)
- Estimated component cost: Very low cost (reusable tools and general supplies excluded)
- Main material: Paper
- Suggested placement: Window
Crafting Festive Window Displays with Paper
Paper decorations offer a versatile and cost-effective way to transform your home for the holidays. Lightweight and easy to work with, paper is an ideal material for crafting intricate designs like snowflakes and long garlands that can be safely hung or draped without heavy fixtures. This allows for creative seasonal displays that are simple to install and remove.
This project combines two classic elements of winter and Christmas decor: delicate 3D paper snowflakes and a colorful Christmas paper chain garland. Hung together, they create a layered visual effect, bringing a whimsical and traditional aesthetic to your windows. The combination of white snowflakes and vibrant red, white, and kraft paper chains provides a balanced and festive look suitable for any indoor space.
Materials for DIY 3D Paper Snowflakes and Christmas Paper Chain Garland for Window Decor
- White Printer Paper
- Red Paper
- Kraft Paper (or Brown)
- Scissors (Child-friendly)
- Glue Stick (or Craft Glue)
- Thin White Thread
- Clear Tape
Need another material? Browse current craft supplies and deals.
How to Create Your 3D Paper Snowflakes and Christmas Paper Chain
This guide outlines the process for making both the dimensional paper snowflakes and the festive paper chain garland. Follow these steps to assemble charming window decorations. Each section is designed to be straightforward, allowing for an enjoyable crafting experience.
Step 1: Prepare Snowflake Bases
Begin by taking a square piece of white printer paper. If using standard rectangular paper, fold one corner diagonally to meet the opposite edge, forming a large triangle. Trim off the excess paper strip along the bottom edge to create a perfect square once unfolded. Keep the paper folded in this triangle shape.

Step 2: Cut Snowflake Patterns
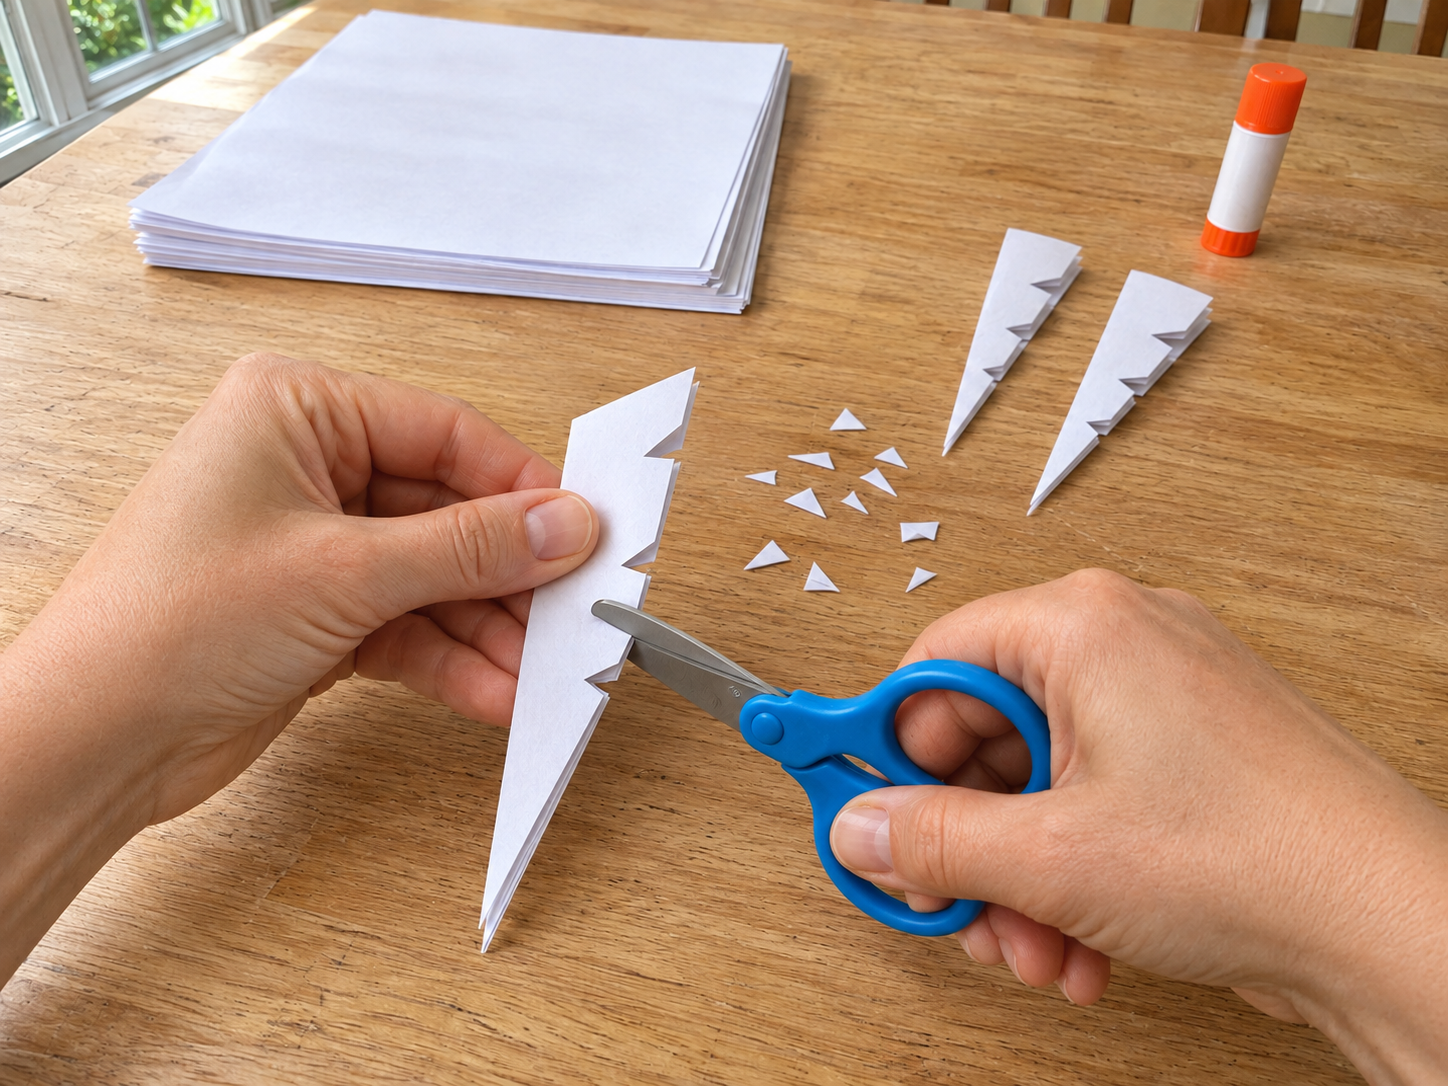
From your initial triangle, fold it twice more to create a narrow, elongated wedge. This multi-folded shape is where you will make your cuts. With scissors, snip various notches, slits, and shapes along the edges of the wedge, taking care not to cut all the way through the central fold. Experiment with different patterns to create unique snowflake designs.
Step 3: Assemble 3D Paper Snowflakes
Carefully unfold your cut paper design to reveal a flat, intricate snowflake. To create the 3D effect, gently curl the tip of each 'arm' or section of the snowflake inwards towards the center. Apply a small dab of glue from your glue stick to the underside of the curled tip and adhere it to the adjacent section of the snowflake, creating a raised, dimensional look. Repeat this for all snowflake arms, holding each tip gently until the glue sets.



Step 4: Prepare Paper Chain Strips
For your Christmas paper chain, take sheets of red, white, and kraft (or brown) paper. Using your scissors, cut each sheet into uniform 1-inch wide strips. The length of your strips will determine the size of your chain loops. Ensure you have a good quantity of strips in each color to create a long and varied garland.

Step 5: Link Christmas Paper Chains
Take one paper strip and form it into a loop, securing the ends together with a dab of glue stick. This creates your first link. For the next strip, thread it through the first loop before forming it into a second loop and gluing its ends. Continue this process, alternating colors as desired, to create a long, interlocking Christmas paper chain garland. Make sure each loop is securely glued before linking the next to ensure the chain stays intact.

Step 6: Hang Window Decorations
To hang your 3D paper snowflakes, cut lengths of thin white thread and attach one end to the top of each snowflake, securing it with a small piece of clear tape or a dab of glue. Use tape to attach the other end of the thread to the top of your window frame or curtain rod, letting the snowflakes dangle at varying heights. Finally, drape your finished Christmas paper chain garland across the top of the window, securing it with clear tape at intervals along the frame.

Displaying Your Handmade Holiday Window Decor
With your 3D paper snowflakes and Christmas paper chain garland complete, your windows are now adorned with festive, handcrafted charm. These decorations add a personalized touch to your holiday display, creating a welcoming and cheerful atmosphere. Enjoy the seasonal beauty these paper crafts bring to your home.
Related project collection: DIY Honeycomb Paper Christmas Trees for Elegant Holiday Tabletop Decor
Practical Questions About This Project
What type of paper is needed for the snowflakes?
Plain white printer paper is used to create the 3D paper snowflakes.
How are the paper chain loops linked together?
Paper strips are formed into loops and linked together by threading a new strip through the previous loop before gluing its ends.
How are these paper decorations displayed on a window?
The 3D paper snowflakes are hung from thin white thread, and the Christmas paper chain garland is draped and secured with clear tape across the window.
What is the estimated cost for the materials?
The estimated project component cost is very low, excluding reusable tools and general supplies.
Search Dollar Tree for paper supplies.

Leave a Reply