
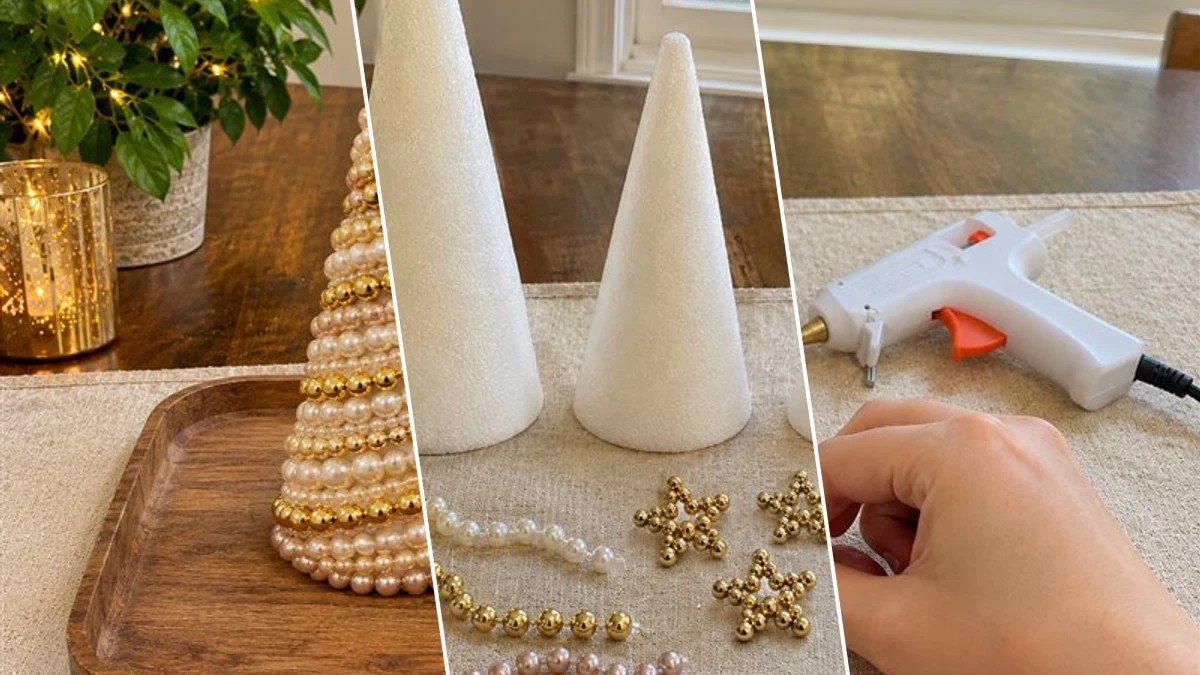
Add a touch of elegant sparkle to your holiday home with a trio of DIY beaded cone Christmas trees. These festive decorations feature spiraling strands of pearl, gold, and champagne beads, each topped with a delicate star ornament. They are ideal for mantels, shelves, or as a sophisticated centerpiece.
Project at a Glance
- Difficulty: Easy
- Estimated active time: 30 minutes to 60 minutes (drying and curing waits not included)
- Estimated component cost: Budget-friendly (reusable tools and general supplies excluded)
- Main material: Beads
- Suggested placement: Mantel, Tabletop
About This Elegant Beaded Christmas Tree Trio
This craft guides you through creating three distinct cone-shaped Christmas trees, each varying in size to form a cohesive decorative set. The project involves wrapping foam or cardboard cones with lustrous strands of beads in a sophisticated palette of pearl, gold, and champagne. Each tree is then finished with a small, shimmering star bead topper.
Designed for tabletop display, these beaded trees offer an elegant, traditional style suitable for various indoor placements. They can serve as a focal point on a mantel, add festive charm to shelves, or create a sophisticated centerpiece for your holiday gatherings. The project uses Dollar Tree style budget supplies, making it an accessible option for seasonal decorating.
Materials for DIY Beaded Cone Christmas Trees for Elegant Holiday Tabletop Decor
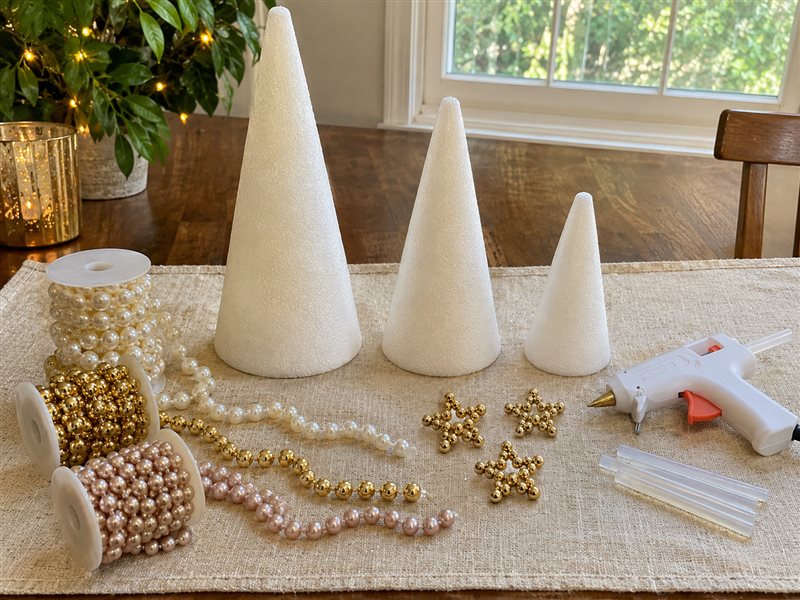
- Craft Cones (foam or cardboard, various sizes)
- Strands of Beads (pearl, gold, champagne)
- Low-Temp Glue Gun
- Glue Sticks
- Small Star Bead Ornaments (for toppers)
- Wooden Tray or Board (optional, for display)
Need another material? Browse current craft supplies and deals.
How to Craft Beaded Cone Christmas Trees
Transform simple craft cones into sparkling holiday decorations by following these steps. The process involves securing and spiraling bead strands with a low-temp glue gun, integrating different colors for visual interest, and adding a finishing star topper.
Step 1: Gather Materials and Prepare Cones
Lay out all your craft cones (foam or cardboard), bead strands (pearl, gold, champagne), low-temp glue gun with glue sticks, and star bead ornaments on a clean, flat workspace. Ensure your cones are stable and ready for wrapping. If using cardboard cones, ensure they are sturdy and well-formed. Take a moment to untangle bead strands if necessary, so they are easy to work with.
Step 2: Anchor the First Bead Strand
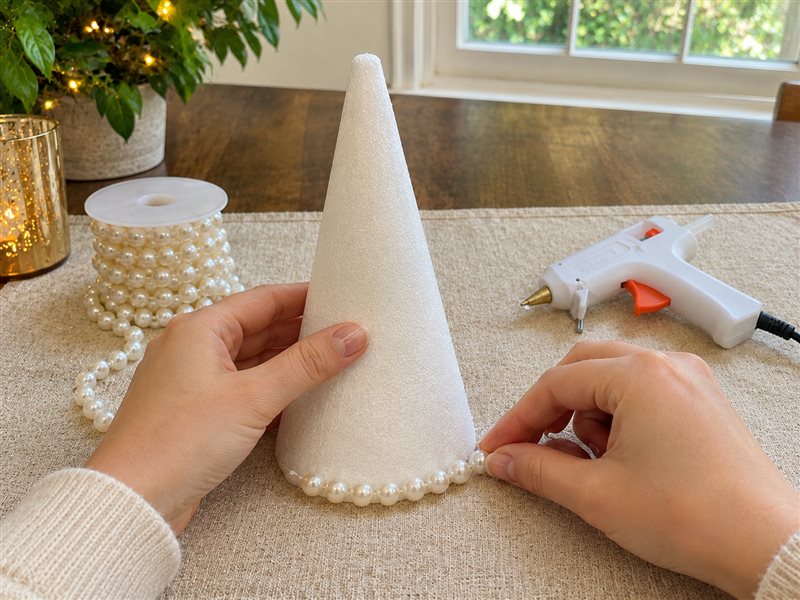
Begin with your largest cone and a strand of pearl beads. Apply a small, pea-sized dab of hot glue at the very bottom edge of the cone, near the base. Immediately press the end of the pearl bead strand firmly into the glue, holding it in place for a few seconds until the glue sets and the strand is securely anchored. This initial attachment point is crucial for a neat and lasting base.
Step 3: Spiral Main Beads Upward
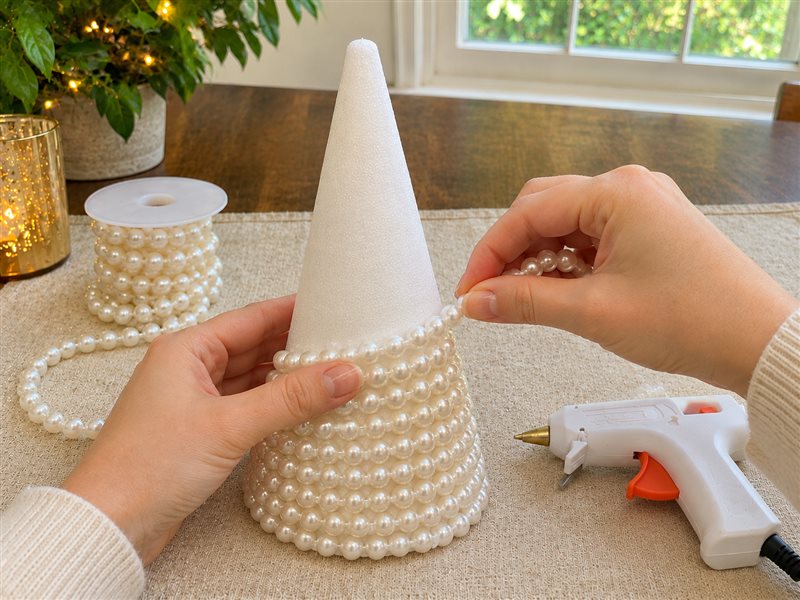
Continue wrapping the pearl bead strand around the cone, working your way upward in tight, even spirals. As you wrap, apply small dots of hot glue every few inches along the cone's surface directly underneath where the bead strand will lay. Press the bead strand into these glue dots to secure it. Aim to keep the rows as close together as possible, covering the cone completely without leaving large gaps. Rotate the cone as you wrap to maintain consistent tension and a uniform spiral.


Step 4: Integrate Accent Bead Colors
Once your main pearl bead layers are established, introduce strands of gold and champagne beads to add visual interest. Strategically place these accent strands between the pearl rows, or create distinct bands of color, securing them with small dabs of hot glue just as you did with the pearl beads. Work carefully to integrate them seamlessly, ensuring tight, even rows. When you finish a section of a color, trim any excess bead strand and tuck the end neatly underneath an adjacent bead row to hide the cut edge.
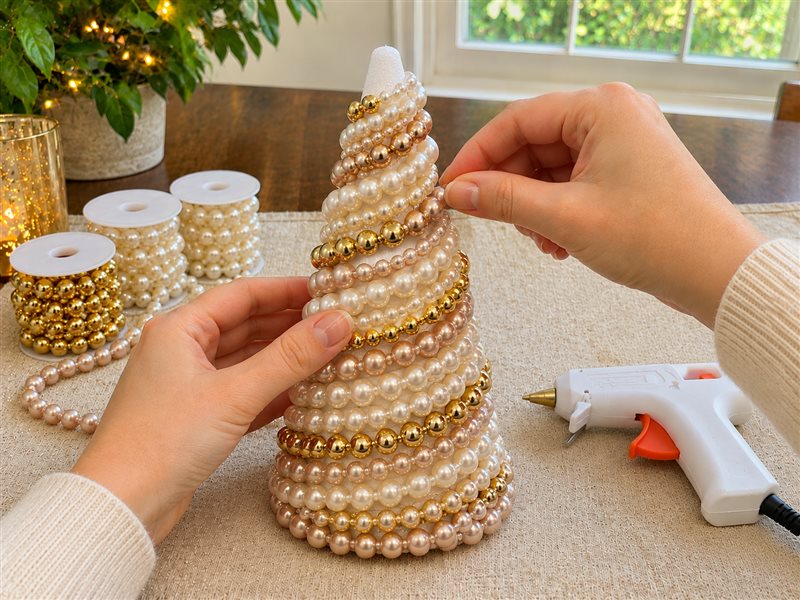
Step 5: Attach Toppers and Arrange Display
For each finished bead-wrapped cone, apply a generous dab of hot glue to the very tip. Carefully place a small star bead ornament on top, holding it firmly until the glue completely sets and the star is stable. Repeat this process for all three trees. Once all your beaded trees are complete with their star toppers, arrange them artfully on a wooden tray or board. Add any desired additional embellishments like faux greenery, fairy lights, or scattered loose beads for a festive and cohesive holiday display.
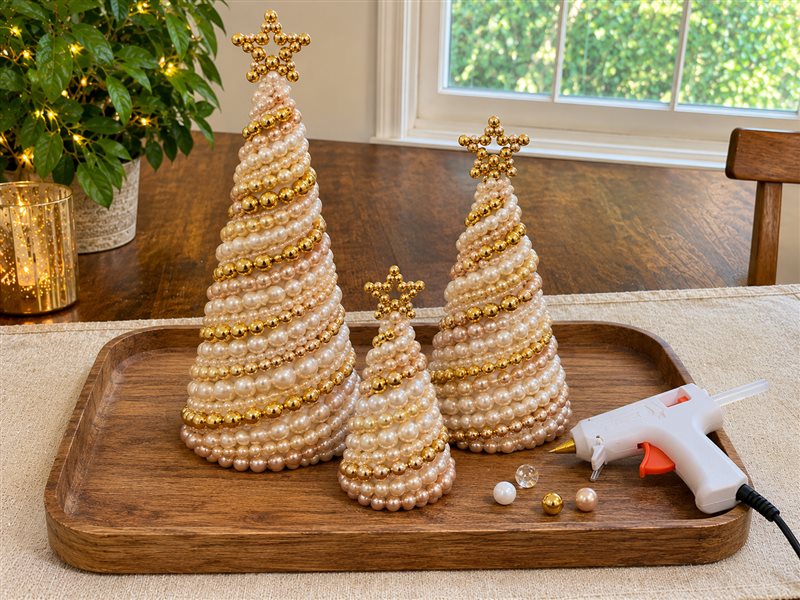
Displaying Your Beaded Christmas Trees
Once your trio of beaded Christmas trees is complete, arrange them together on a wooden tray or board to create a unified and elegant display. Consider adding faux greenery, delicate fairy lights, or a scattering of loose beads around the base for an enhanced festive arrangement. These pieces offer a beautiful, custom touch to your holiday decor.
Related project collection: DIY Honeycomb Paper Christmas Trees for Elegant Holiday Tabletop Decor
Practical Questions About This Project
What materials are needed for these beaded trees?
Craft cones (foam or cardboard, various sizes), strands of beads (pearl, gold, champagne), a low-temp glue gun with glue sticks, and small star bead ornaments for toppers are the primary materials. A wooden tray or board is optional for display.
What skill level is required for this craft?
This project is classified as easy, making it suitable for beginner crafters. The main techniques involve hot glue assembly, assembling, and wrapping.
How long does it take to make these beaded cone trees?
The estimated active crafting time for this project is between 30 and 60 minutes. This estimate excludes any unattended drying or curing time.
What is the estimated component cost for this project?
The estimated component cost for this project is low. This estimate excludes reusable tools and general crafting supplies.
Where can these beaded cone trees be displayed?
These beaded cone trees are perfect for indoor tabletop display, such as on a mantel, shelf, or as a festive centerpiece in a living room.
Explore beads craft supplies at Dollar Tree.

Leave a Reply