
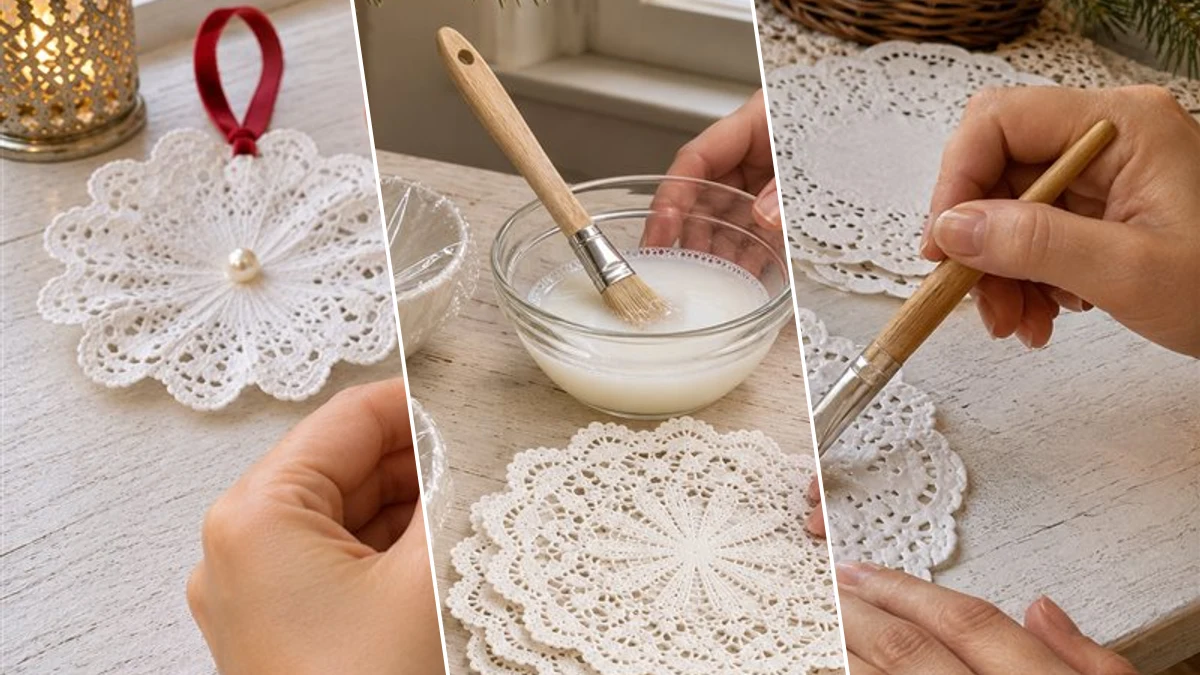
Transform simple paper lace doilies into delicate, vintage-inspired snowflake ornaments for your Christmas tree. This easy craft uses a stiffening method to create rigid, elegant decorations, perfect for adding a touch of classic charm to your holiday display. The process is straightforward, allowing you to craft a collection of these beautiful ornaments in an estimated 30-60 active minutes.
Project at a Glance
- Difficulty: Easy
- Estimated active time: 30 minutes to 60 minutes (drying and curing waits not included)
- Estimated component cost: a few dollars (reusable tools and general supplies excluded)
- Main material: Paper
- Suggested placement: Wall
About These Vintage-Inspired Christmas Ornaments
These stiffened paper doily ornaments offer a charming, vintage aesthetic that complements traditional and classic holiday decor. The delicate lace patterns, once stiffened, hold their shape beautifully, creating a lightweight yet durable decoration. Adorned with a small pearl bead and a festive red velvet ribbon, each ornament brings a touch of old-world elegance to your seasonal display.
Crafting these ornaments is an accessible project, ideal for beginner crafters and those looking for budget-friendly holiday ideas. The primary material, white paper lace doilies, can often be found at stores like Dollar Tree, making this an economical choice for creating multiple decorations. The simple technique of stiffening and shaping allows for a satisfying craft experience with a lovely outcome.
Consider these handmade snowflake ornaments not only for your Christmas tree but also as thoughtful gifts, elegant package toppers, or accents for garlands and wreaths. Their unique texture and classic design make them versatile additions to any indoor holiday setting, enhancing the cozy atmosphere of winter.
Materials for DIY Stiffened Paper Doily Snowflake Ornaments for Christmas
- White paper lace doilies
- White craft glue (PVA glue) or fabric stiffener
- Small round bowls or cups (for shaping)
- Plastic wrap
- Paintbrush
- Red velvet ribbon
- Small pearl beads
- Craft needle and thread (or strong craft glue)
Need another material? Browse current craft supplies and deals.
How to Craft Stiffened Doily Snowflake Ornaments
Creating these delicate snowflake ornaments involves a simple stiffening and shaping process, followed by embellishment. Gather your materials and prepare your workspace to ensure a smooth crafting experience. Each step is designed to guide you through transforming pliable doilies into rigid, decorative pieces.
Step 1: Prepare Stiffening Mixture and Shaping Forms
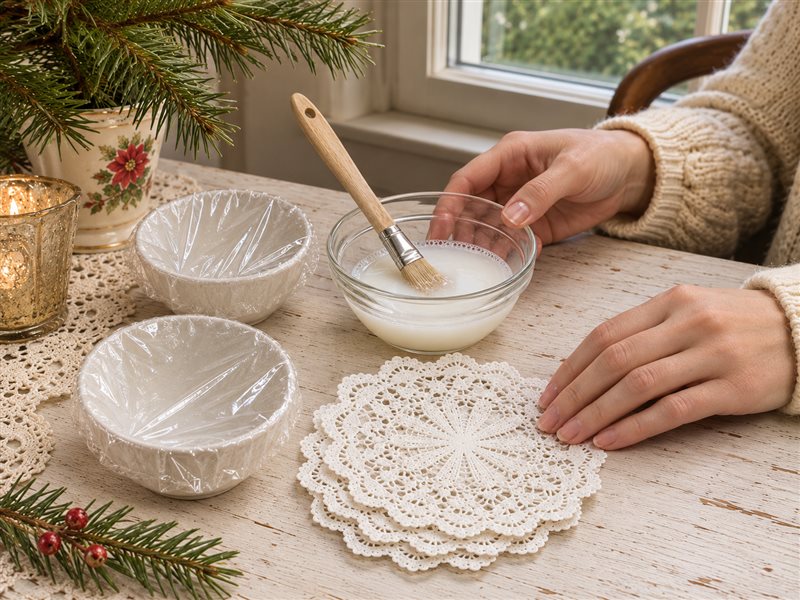
In a small bowl, combine white craft glue with a small amount of water (approximately a 2:1 glue-to-water ratio is a good starting point) or prepare your fabric stiffener according to its product instructions. The mixture should be thin enough to brush easily but still have enough body to stiffen the doilies. Next, cover several small, round bowls or cups with plastic wrap; these will serve as your forms for shaping the doilies as they dry.
Step 2: Saturate Doilies with Stiffener
Place a single paper lace doily flat on your protected work surface. Using a clean paintbrush, generously brush the glue mixture or fabric stiffener over the entire surface of the doily, ensuring it is thoroughly saturated and all lace fibers are coated. Flip the doily over and repeat on the reverse side. The doily should become flexible and pliable, but avoid making it so wet that it's dripping excessively.

Step 3: Form the Snowflake Shape
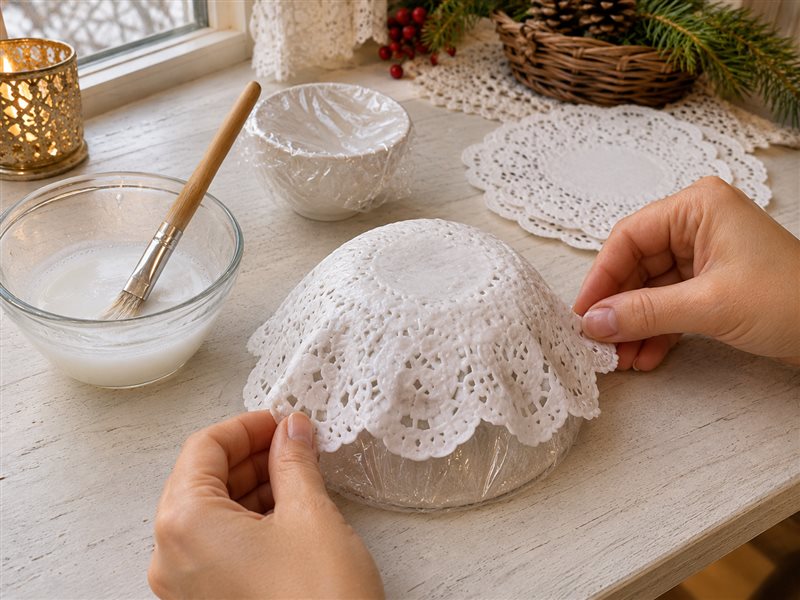
Carefully pick up the saturated doily, handling it gently to avoid tearing. Drape it over one of the inverted, plastic-wrapped bowls or cups, centering it as accurately as possible. Gently press down on the edges of the doily to ensure good contact with the form, allowing the doily to sag slightly into a delicate, shallow cup or snowflake-like shape. Repeat this process for all remaining doilies.


Step 4: Allow Doilies to Dry Completely
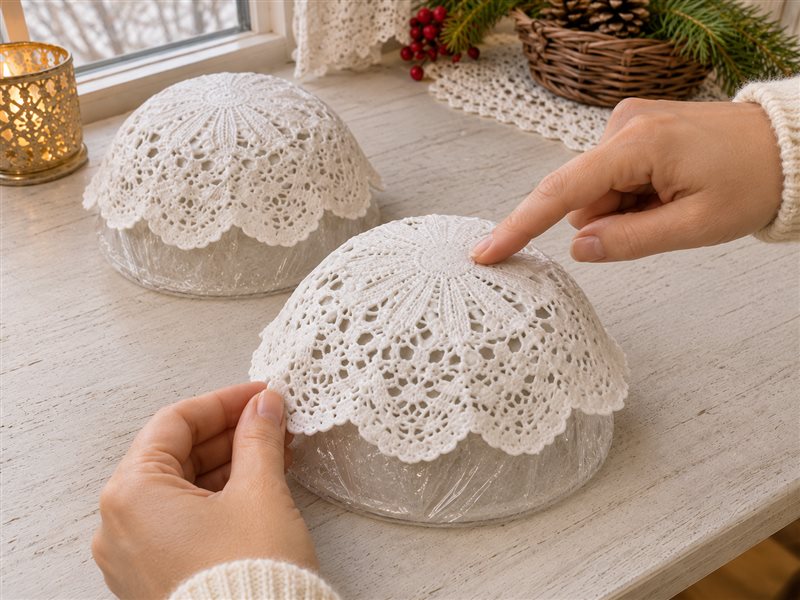
Leave the doilies undisturbed on their forms in a well-ventilated area until they are completely dry and stiff to the touch. This drying process may take several hours or even overnight, depending on the humidity in your crafting space and the thickness of your glue mixture. Once fully dry, carefully remove the stiffened doilies from their plastic-wrapped forms, which should now hold their delicate, rigid snowflake-like shapes.
Step 5: Embellish with Pearl Beads
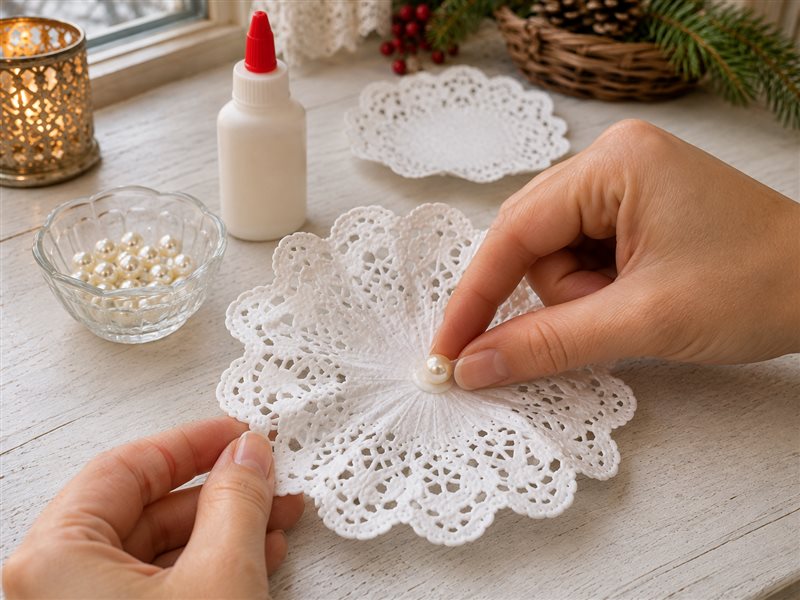
Once the doilies are thoroughly dry and stiff, apply a small dab of white craft glue to the very center of each shaped doily. Carefully place a small pearl bead onto the glue, pressing gently to ensure it is securely adhered. Take care not to use too much glue, as it can seep through the delicate lace. Allow the glue holding the pearl to dry completely before proceeding to the final step.
Step 6: Add Ribbon Hangers
Cut a length of red velvet ribbon, approximately 6-8 inches long, for each ornament. Fold the ribbon in half to create a loop. Using a craft needle and thread, securely sew the two raw ends of the ribbon to the back top edge of the doily. Alternatively, if sewing is not preferred, use a strong dab of hot glue or super glue to firmly attach the ribbon ends to the back. Ensure the loop is centered and strong enough to support the ornament for hanging.

Displaying Your Handmade Snowflake Ornaments
Once your stiffened paper doily snowflake ornaments are complete, they are ready to adorn your Christmas tree or other holiday displays. Their delicate appearance and vintage charm make them a lovely addition to any festive setting. Enjoy the unique, handmade touch they bring to your seasonal decor.
Related project collection: DIY Christmas Ornament Cone Tree Centerpiece with Mini Ornaments
Practical Questions About This Project
How long does it take for the doilies to dry and stiffen?
Drying time can vary, typically taking several hours or even overnight. Factors like humidity in your crafting space and the thickness of the glue mixture will influence the total drying period.
Can other embellishments be used instead of pearl beads?
Yes, while small pearl beads are suggested for a vintage look, you can also use glitter, small rhinestones, or other tiny decorative elements to personalize your ornaments.
Are these stiffened doily ornaments suitable for outdoor use?
No, these delicate paper lace ornaments are designed for indoor display only. Exposure to outdoor elements like moisture or strong winds could damage them.
What is the recommended glue-to-water ratio for stiffening?
A good starting point is approximately a 2:1 glue-to-water ratio for white craft glue. If using fabric stiffener, follow the specific product instructions for the best results.
Explore paper craft supplies at Dollar Tree.

Leave a Reply