
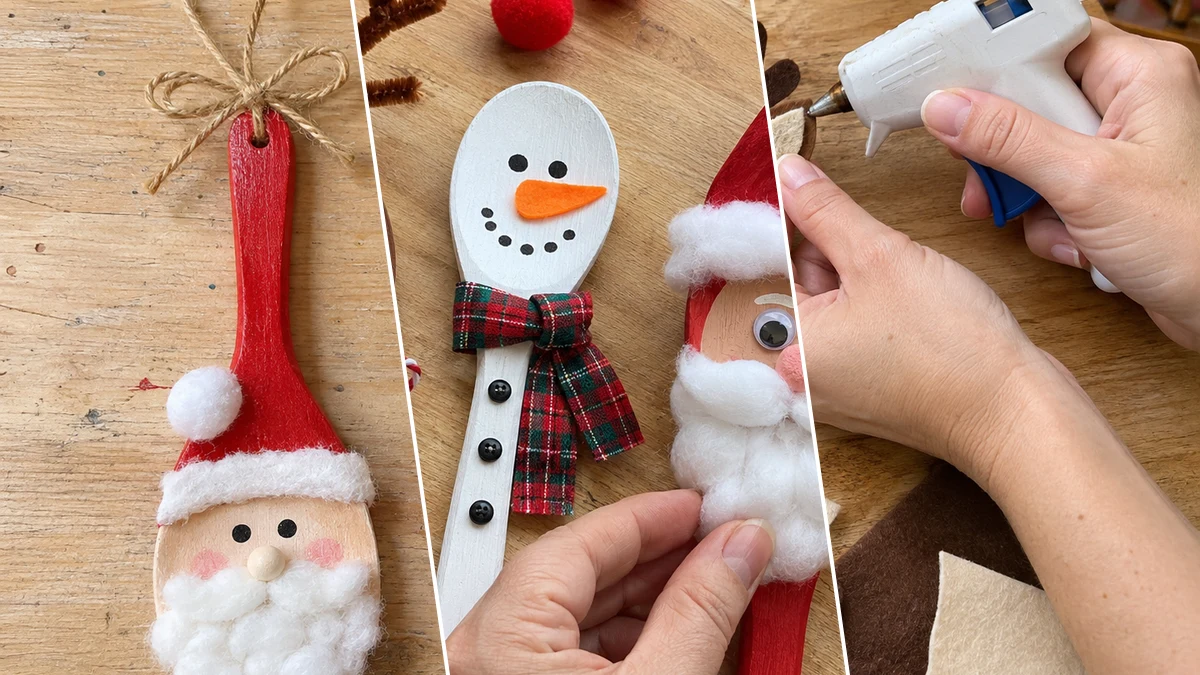
Create festive Christmas decor by transforming simple wooden spoons into charming Santa, snowman, and reindeer ornaments. These whimsical characters are ideal for adding a handmade touch to a holiday mantel or garland display. The project uses common craft supplies and basic painting and gluing techniques. Follow these steps to craft a set of unique holiday decorations.
Project at a Glance
- Difficulty: Easy
- Estimated active time: 60 minutes to 90 minutes (drying and curing waits not included)
- Estimated component cost: $5 to $12 (reusable tools and general supplies excluded)
- Main material: Wood
- Suggested placement: Mantel, Wall
Ideas for Displaying Your Wooden Spoon Ornaments
These charming wooden spoon ornaments offer a versatile way to enhance your Christmas decor. They are designed with twine loops, making them ideal for hanging on a festive mantelpiece, draping along a holiday garland, or even as unique additions to a Christmas tree. Their whimsical character designs bring a cheerful, handmade touch to any seasonal display.
Beyond home decoration, these ornaments also make thoughtful, personalized gifts. Consider crafting a set for friends, family, or as a special token for teachers and neighbors. The rustic appeal and distinct character of each spoon provide a memorable handmade present.
This project can also serve as a delightful family activity. Children can assist with painting the base coats and adding initial details, while adults handle the hot glue and drilling steps. Creating these together can become a cherished holiday tradition.
Materials for DIY Christmas Wooden Spoon Ornaments: Santa, Snowman, and Reindeer Characters
- Wooden Spoons (3 count)
- Acrylic Craft Paint (Red, White, Brown, Black, Orange, Peach/Pink)
- Felt Scraps (Brown, Tan/Cream)
- Cotton Balls
- Small Red Pom-Poms
- Twine
- Hot Glue Gun & Glue Sticks
- Assorted Paintbrushes
- Fine-tip Black Marker or Paint Pen
Need another material? Browse current craft supplies and deals.
Crafting Your Christmas Wooden Spoon Ornaments
Transform plain wooden spoons into festive Christmas characters with these detailed instructions. This guide outlines the process for creating Santa, snowman, and reindeer ornaments using paint, felt, and other craft embellishments. Follow each step carefully to assemble your set of unique holiday decorations. The estimated active crafting time for this project is 60 to 90 minutes, excluding unattended drying and curing.
Step 1: Prepare Spoons & Hanger Holes
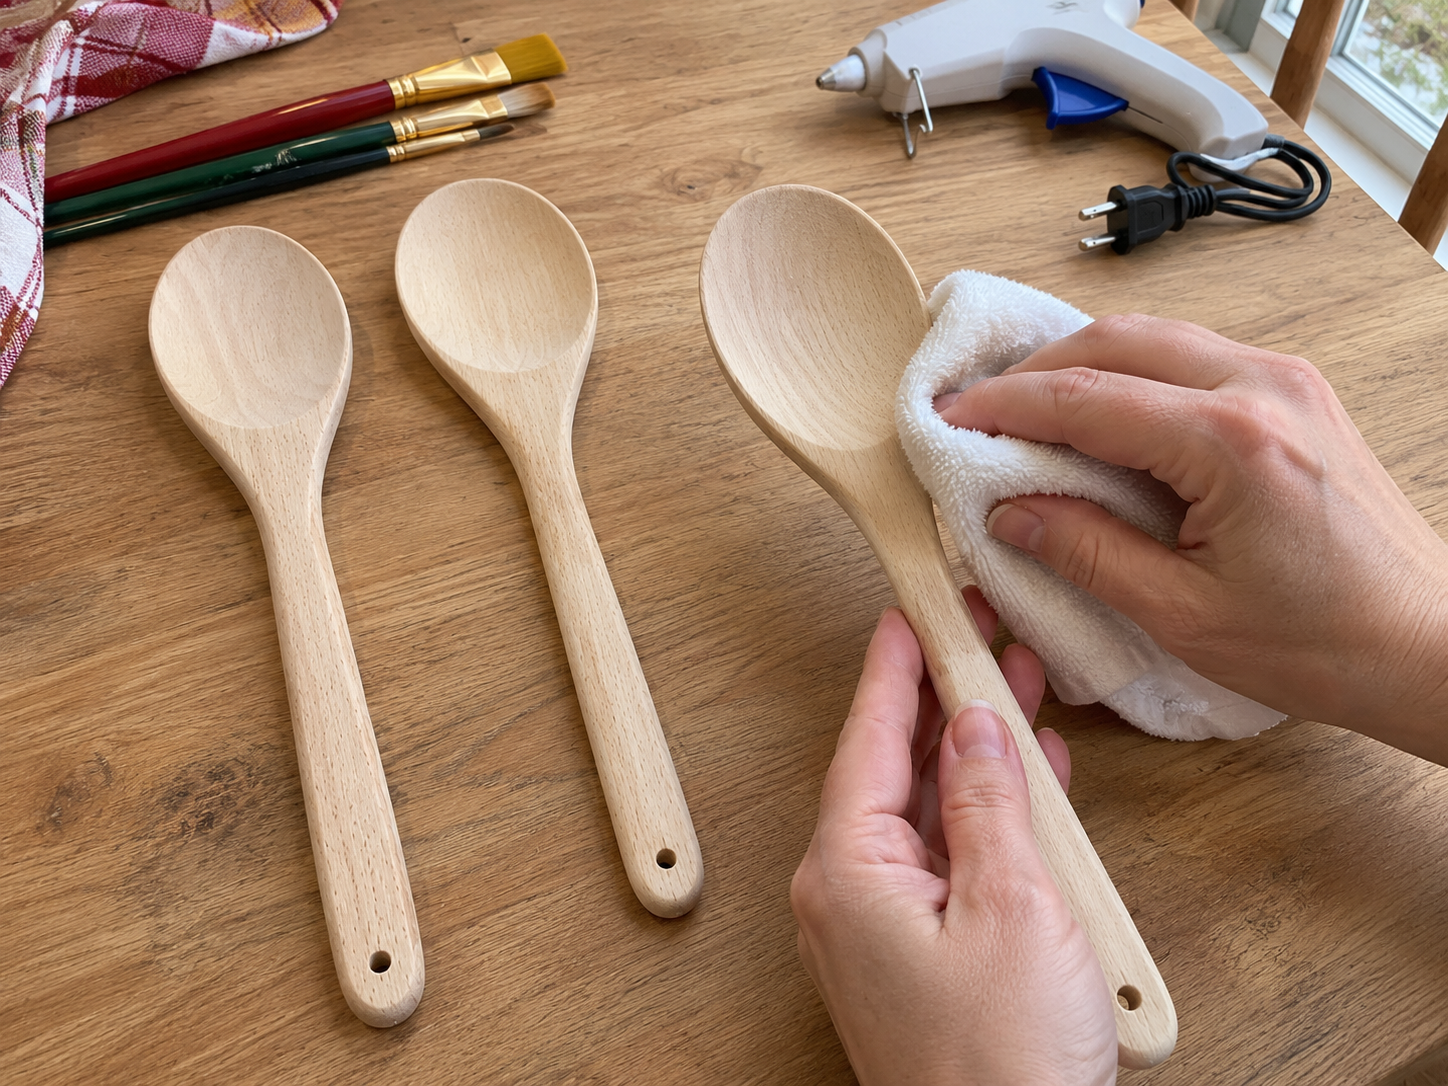
Begin by wiping down each wooden spoon with a damp cloth to ensure they are clean and free of dust or oils. Once dry, use a small drill bit (suitable for twine) to carefully create a single hole at the very top of the handle on each spoon. This hole will be used for hanging your finished ornaments.
Step 2: Apply Base Paint Coats
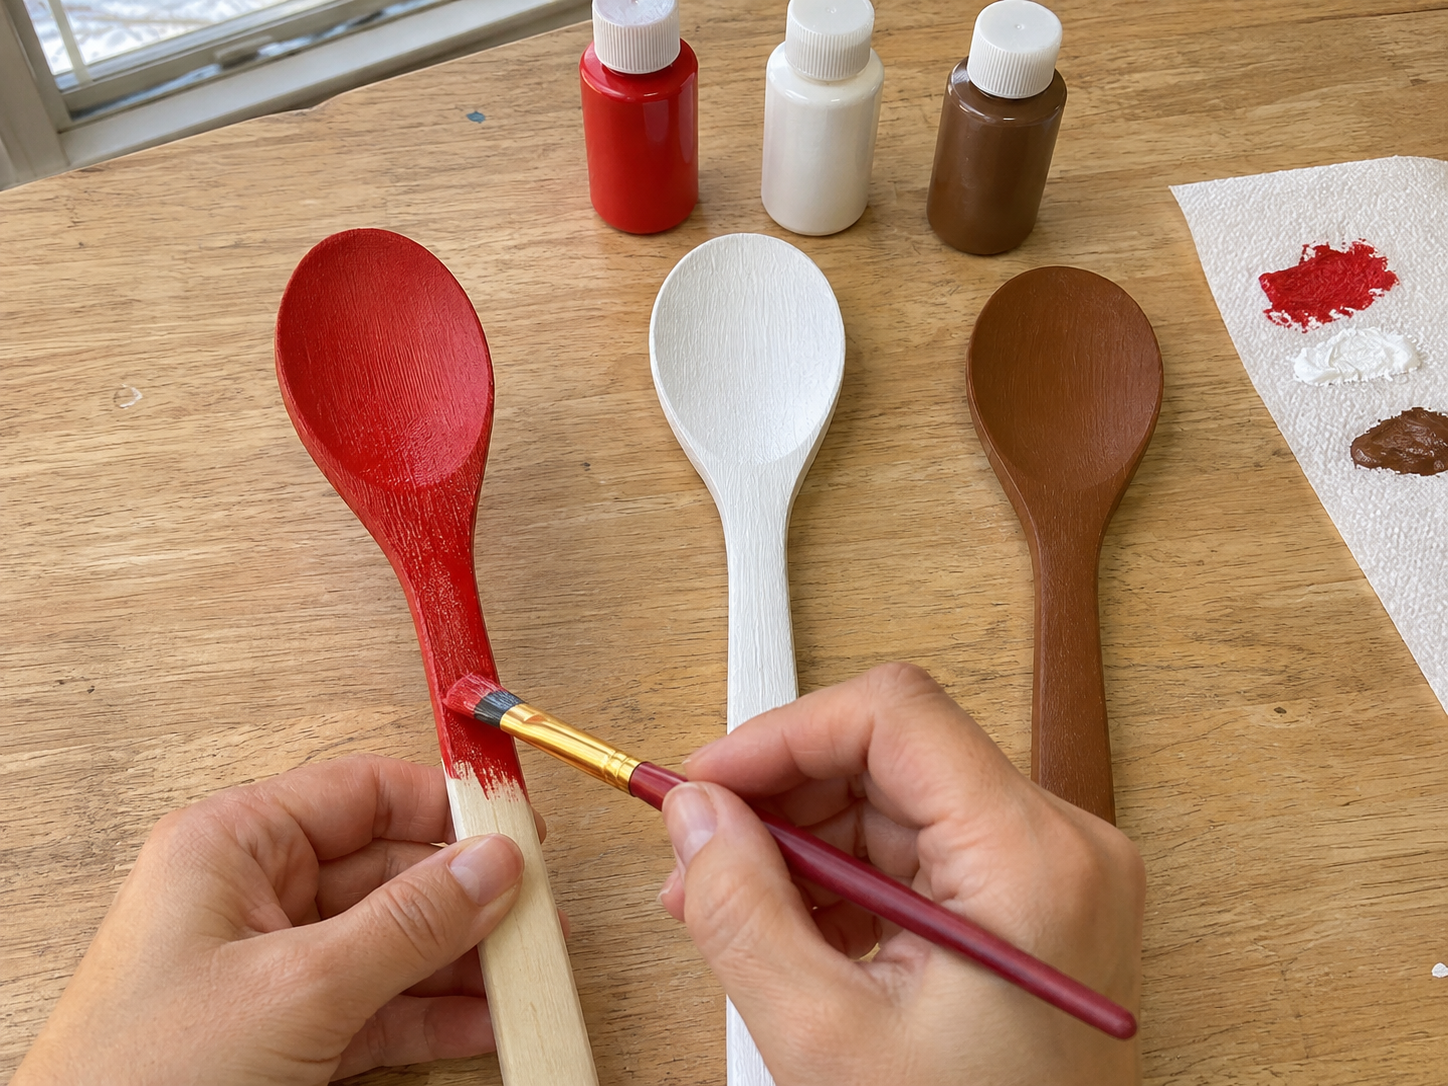
Now, it’s time to add the base colors. For the Santa spoon, paint the handle and top portion red for the hat, leaving the bowl area unpainted for the face. For the snowman, paint the entire spoon white, aiming for a slightly distressed or rustic look if desired. For the reindeer, paint the entire spoon a warm brown. Apply even coats and allow each spoon to dry completely before proceeding, adding a second coat if needed for opaque coverage.
Step 3: Paint Initial Character Details
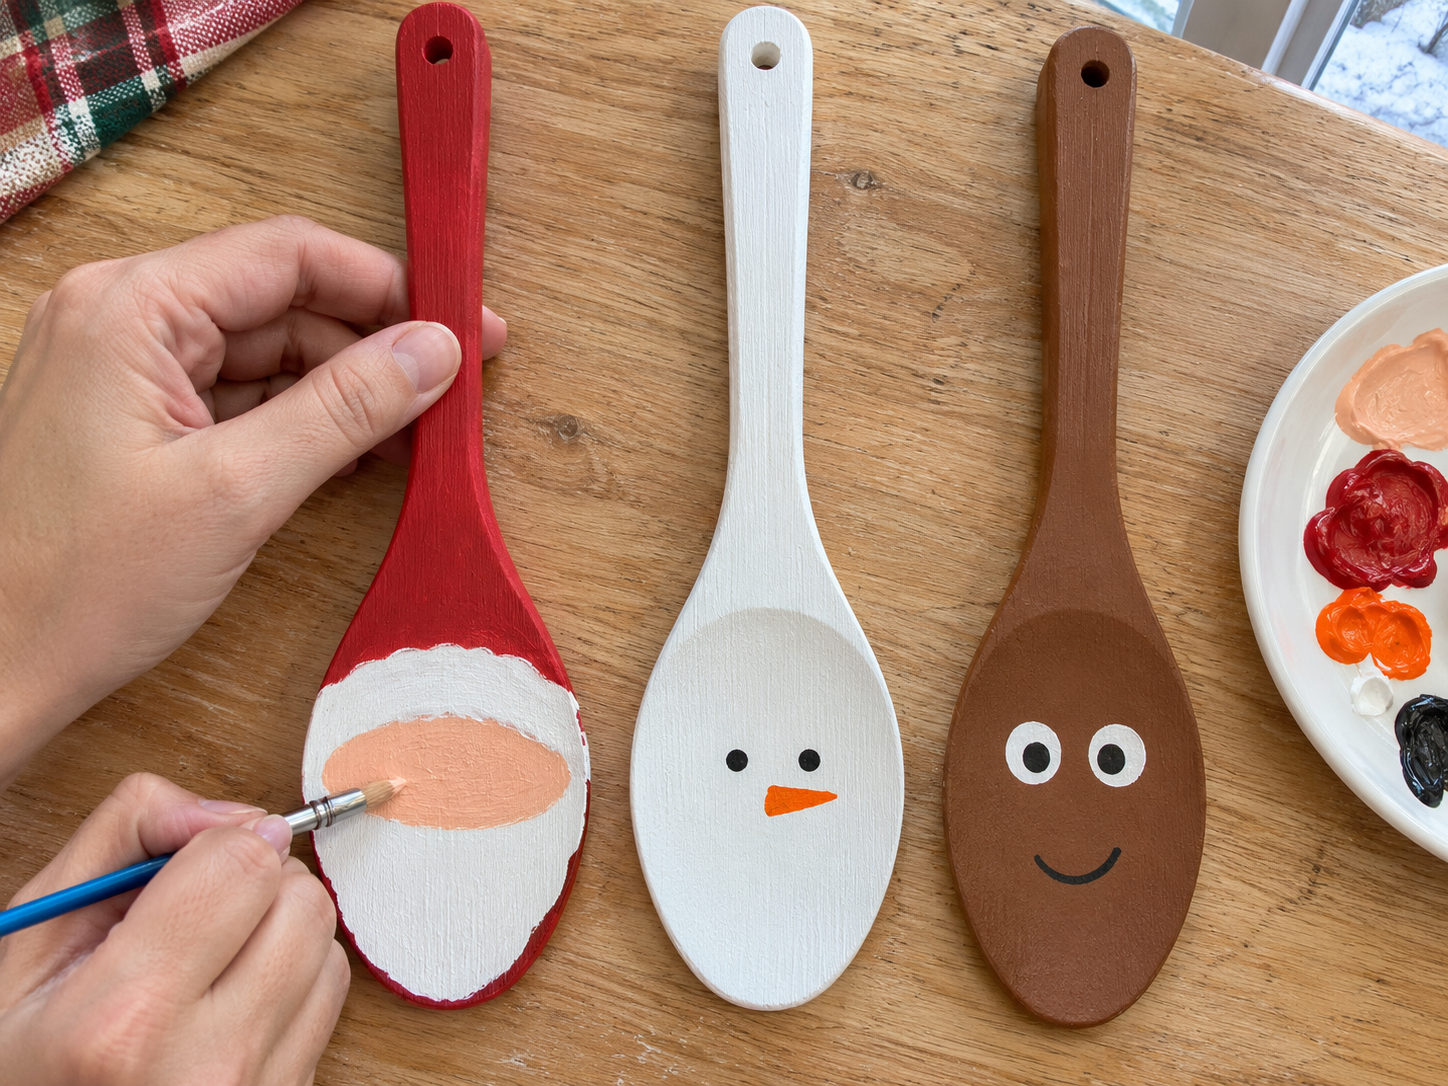
Once the base coats are fully dry, begin painting the initial character details. For Santa, paint a peach or light pink oval on the spoon's bowl for his face. For the snowman, paint an orange triangle for the carrot nose and small black dots for his eyes and buttons. For the reindeer, paint two white circles for the eye bases and a simple black curved line for his mouth.


Step 4: Attach Felt & Fabric Elements
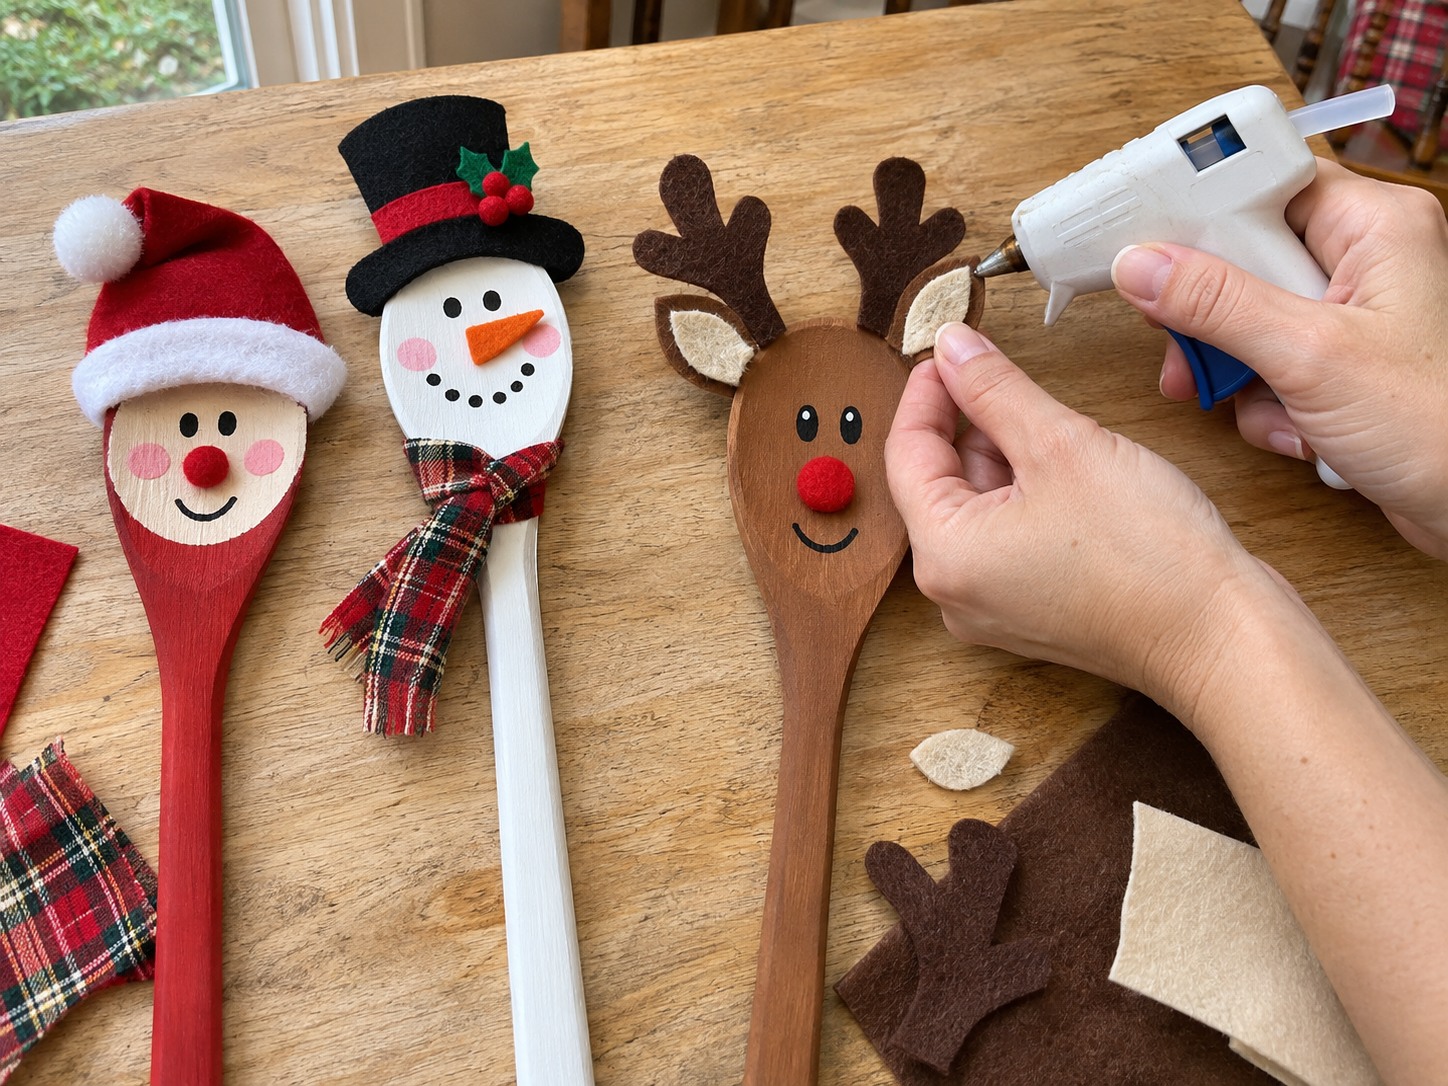
Prepare the felt elements for the reindeer: cut out two small brown antler shapes and two smaller tan or cream inner ear shapes. Use hot glue to carefully attach the brown antlers to the back of the reindeer spoon handle, just below the drilled hole. Then, hot glue the tan inner ear pieces onto the larger brown felt ears, and attach these to the sides of the reindeer's head with hot glue. For the snowman, take a small strip of plaid fabric and tie it around the spoon's handle to form a festive scarf.
Step 5: Add Dimensional Embellishments
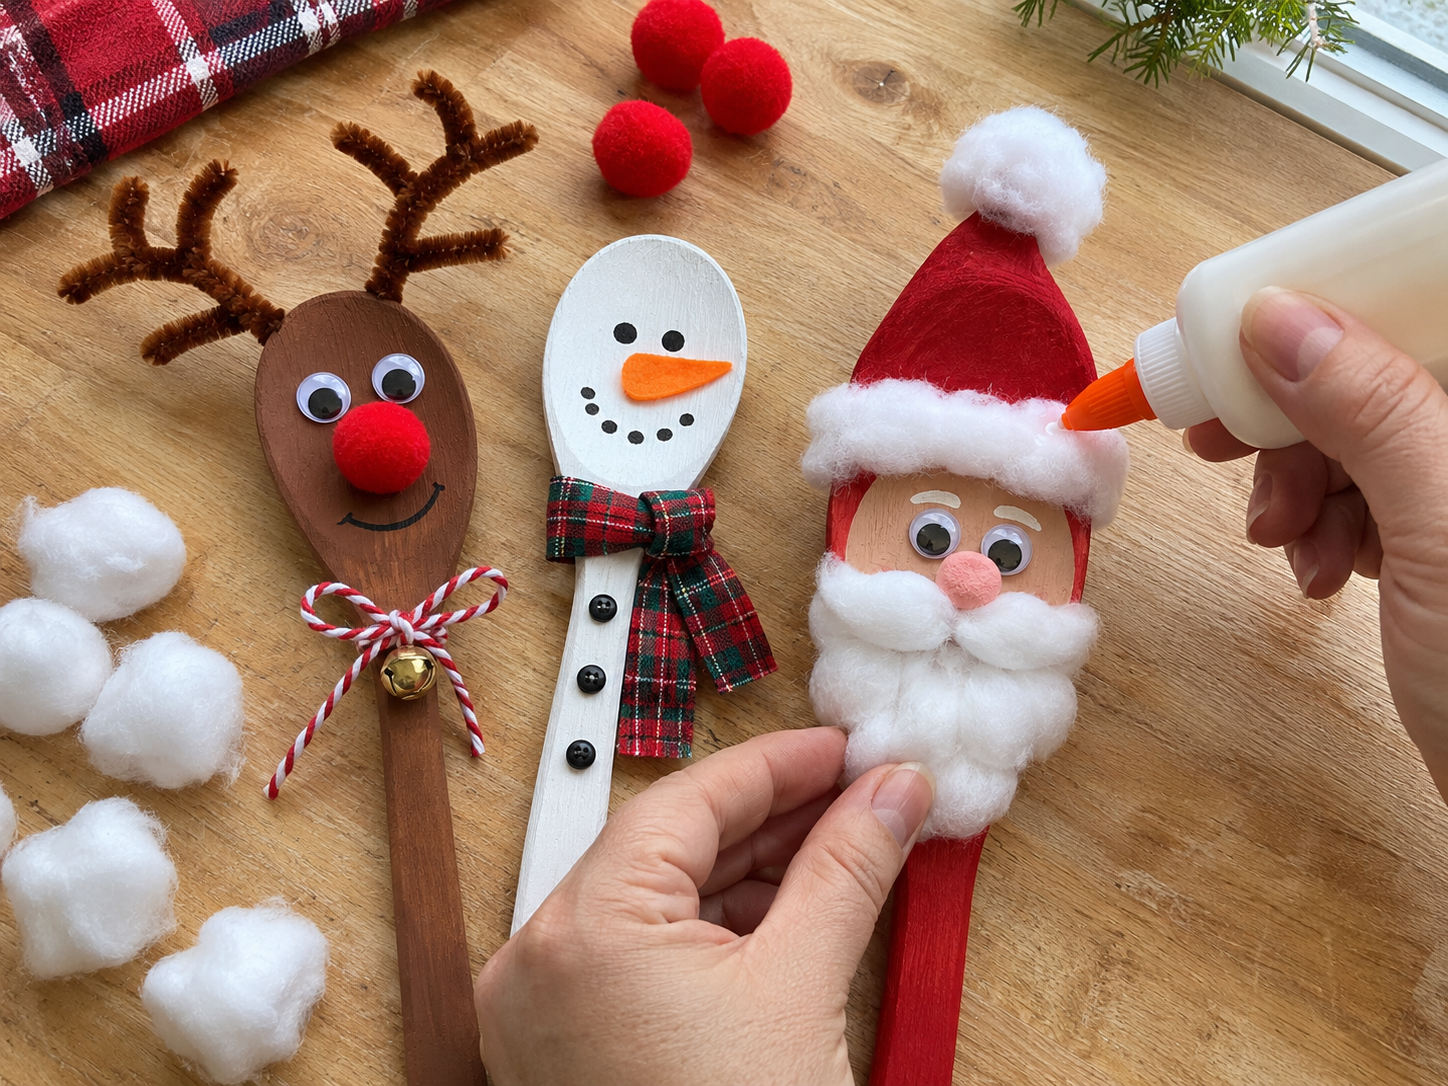
Now, bring more texture and dimension to your characters. For the Santa spoon, use hot glue to meticulously attach cotton balls to form his fluffy white beard, mustache, and the trim around his red hat. For the reindeer, carefully hot glue a small red pom-pom in the center of its face for a prominent Rudolph nose.
Step 6: Complete Faces & Add Hangers
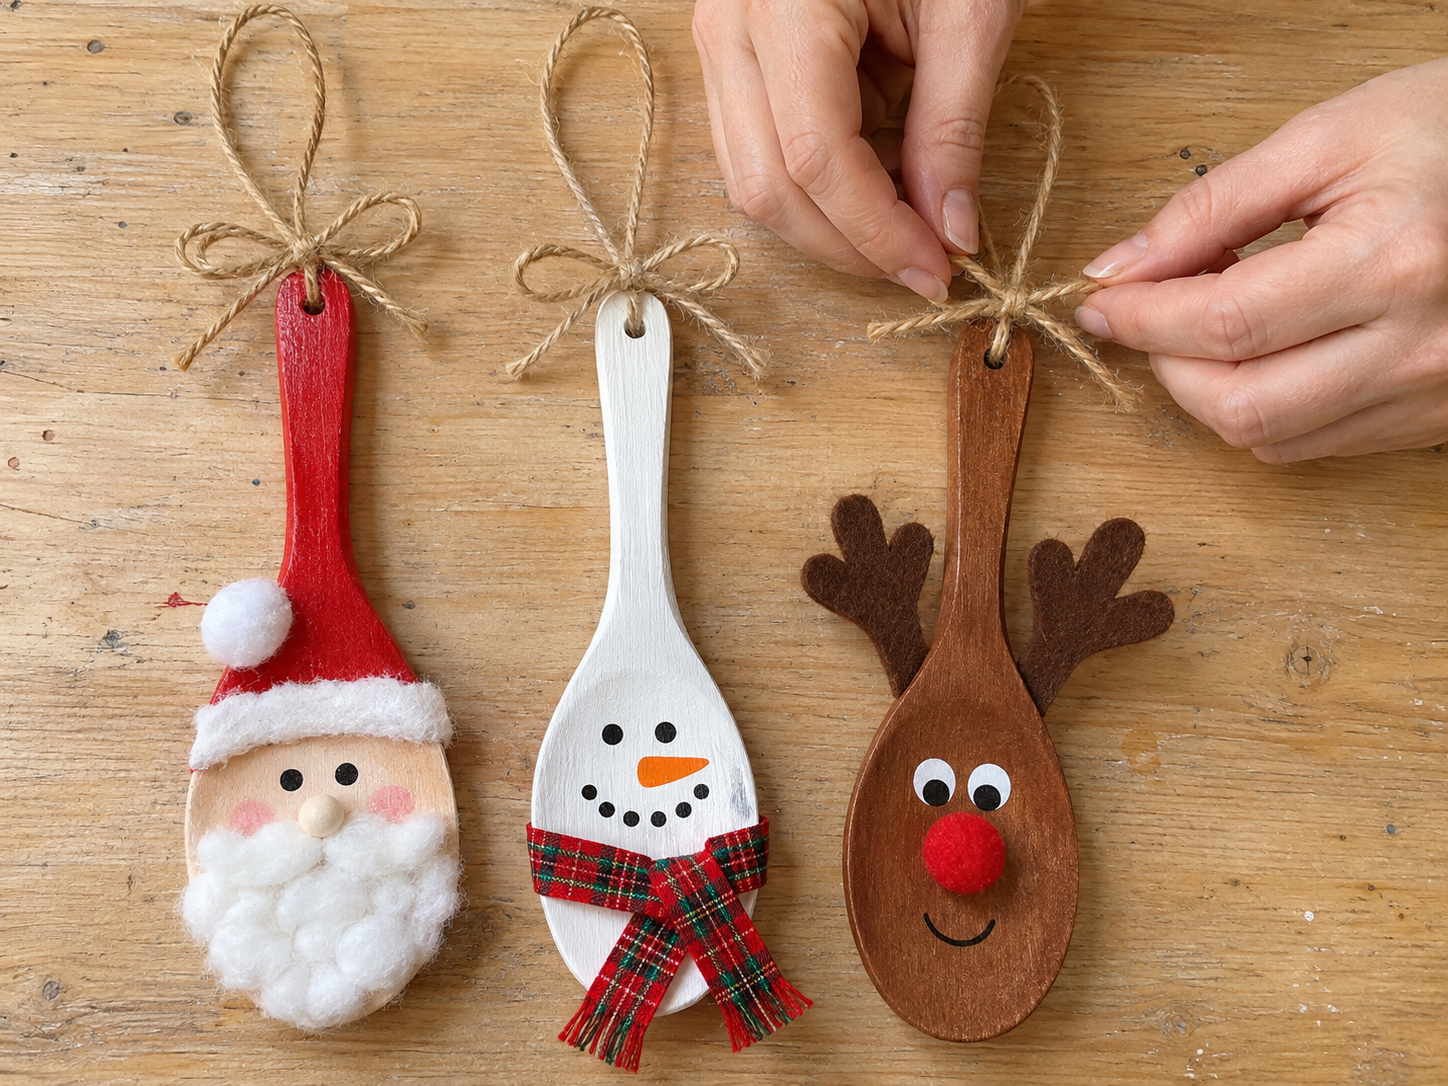
With all the larger elements in place, add the final charming details to your characters' faces. Use a fine-tip black marker or paint pen to draw pupils in the reindeer's white eyes and add small rosy cheeks to Santa's face. Double-check all details. Finally, cut three lengths of twine, approximately 6-8 inches each. Thread one end of the twine through the drilled hole in each spoon handle, bring the ends together, and tie them into a secure knot to form a hanging loop. Your festive spoon ornaments are now ready to display!
Enjoying Your Finished Wooden Spoon Ornaments
With these steps, a collection of charming Christmas wooden spoon ornaments can be created. These handmade Santa, snowman, and reindeer characters add a rustic and whimsical touch to holiday displays. Display them proudly on a mantel or garland, or share them as thoughtful gifts.
Related project collection: DIY Christmas Ornament Cone Tree Centerpiece with Mini Ornaments
Practical Questions About This Project
What type of wooden spoons work best for this project?
Plain, standard-sized wooden spoons are ideal for this project. The craft record specifies using three wooden spoons.
What kind of paint is recommended for these ornaments?
Acrylic craft paint is recommended for this project. Specific colors include red, white, brown, black, orange, and peach/pink.
Is this craft suitable for children?
This craft can be kid-friendly with adult help, especially for steps involving hot glue and drilling. Children can assist with painting and some assembly.
How are the wooden spoon ornaments hung?
Each ornament has a small hole drilled at the top of its handle. Twine is threaded through this hole and tied to form a hanging loop.
Which Christmas characters are featured in this ornament set?
This set features three classic Christmas characters: Santa Claus, a snowman, and a reindeer.
Browse wood supplies at Dollar Tree.

Leave a Reply