
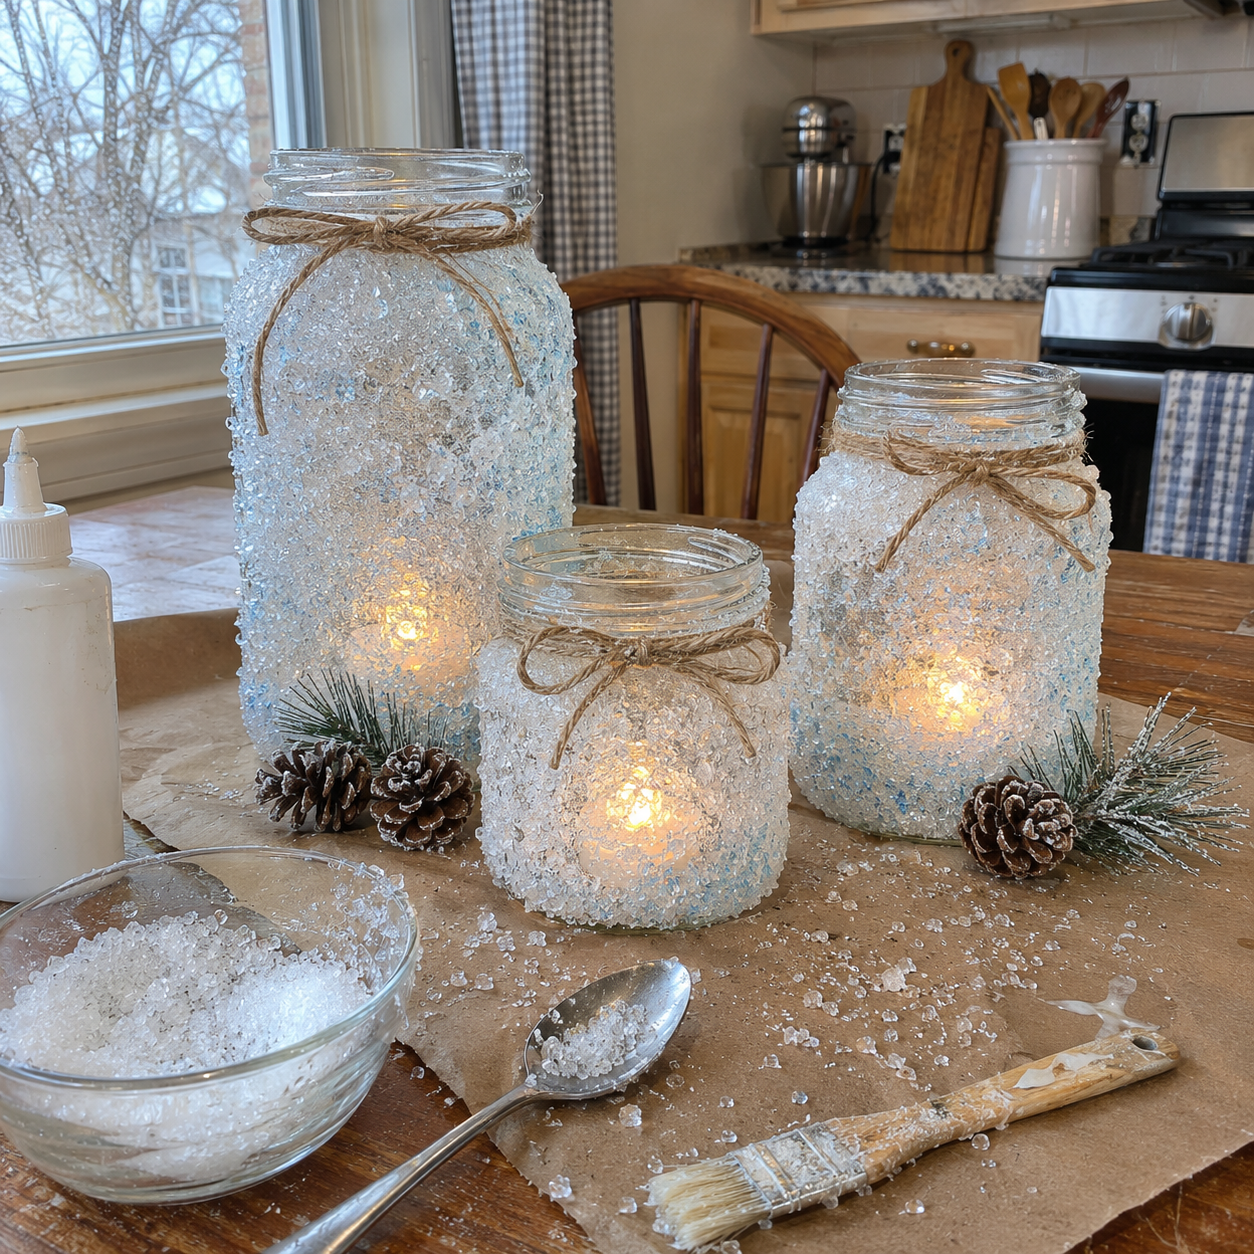
Create a cozy, sparkling ambiance for your home with frosted Epsom salt jar lanterns. These DIY lanterns feature a delicate icy white and pale blue frost effect on recycled glass jars. Adorned with natural twine, small pinecones, and faux pine sprigs, they glow warmly with flameless LED tea lights, perfect for winter or Christmas decor.
Project at a Glance
- Difficulty: Easy
- Estimated active time: 25 minutes to 40 minutes (drying and curing waits not included)
- Estimated component cost: $8 to $18 (reusable tools and general supplies excluded)
- Main material: Glass
Bring Winter Sparkle to Your Home Decor
These frosted Epsom salt jar lanterns offer a simple yet elegant way to infuse your space with winter charm. The unique application of Epsom salt creates a beautiful icy white and pale blue frost, reminiscent of a snowy landscape, enhanced by the warm glow of flameless LED tea lights. The natural jute twine, small pinecones, and faux pine sprigs add a rustic, cozy touch.
Utilizing assorted glass jars, this project is an excellent way to upcycle common household items into decorative pieces. The use of either white school glue or Mod Podge ensures the Epsom salt adheres securely, providing a durable frosted finish. For safety and a consistent flickering effect, flameless LED tea lights are recommended.
Whether arranged as a centerpiece, displayed on a mantel, or placed on a windowsill, these lanterns complement various decor styles, including rustic, farmhouse, and neutral aesthetics. They are an easy and accessible craft, suitable for adding a handmade touch to your holiday or everyday winter home decor.
Materials for DIY Frosted Epsom Salt Jar Lanterns for Winter or Christmas Decor
- Assorted Glass Jars
- Epsom Salt (plain or with subtle blue tint)
- White School Glue or Mod Podge
- Craft Brush
- Natural Jute Twine
- Flameless LED Tea Lights
- Small Pinecones
- Faux Frosted Pine Sprigs
- Parchment or Kraft Paper
Need another material? Browse current craft supplies and deals.
How to Craft Frosted Epsom Salt Jar Lanterns
Transform ordinary glass jars into enchanting frosted lanterns with this straightforward guide. The process involves simple steps like applying adhesive and Epsom salt, then adding natural embellishments. Follow these instructions to create your own sparkling winter display.
Step 1: Prepare Workspace and Jars
Start by thoroughly cleaning your glass jars to ensure they are free of any labels, dirt, or oils. A quick wash with soap and water, followed by a rinse and air dry, is usually sufficient. Lay down parchment or kraft paper to cover your work surface; this will protect your table from glue and make cleanup of spilled Epsom salt much easier.

Step 2: Apply Adhesive to Jars
Working with one jar at a time, use your craft brush to apply an even, medium layer of white school glue or Mod Podge to the entire exterior surface of the jar. Ensure consistent coverage, reaching all areas where you want the Epsom salt to adhere. Avoid applying too much glue in one spot, which could lead to drips, or too little, which could result in patchy frost.

Step 3: Create the Frosted Effect
Immediately after applying the glue, roll the jar in a bowl of Epsom salt, or generously sprinkle the salt over the entire glued surface. Gently pat the salt onto the jar to ensure good adhesion and even distribution. If using Epsom salt with a subtle blue tint or mixed with blue glitter, ensure it's evenly distributed for a delicate icy blue effect, as seen in the final product. Tap off any excess salt back into your bowl.



Step 4: Allow Jars to Fully Dry
Place your salt-coated jars upright on the parchment or kraft paper to dry completely. Drying time can vary depending on the type of glue and humidity, so follow the product's instructions. Ensure the jars are undisturbed during this period. For best results, allow them to cure for several hours or even overnight, especially if you applied a thick layer of glue and salt.

Step 5: Adorn with Natural Twine
Once the jars are completely dry and the Epsom salt is firmly adhered, cut a length of natural jute twine for each jar. Wrap the twine once or twice around the neck of the jar, just below the rim, and tie it into a simple bow. Trim any excess twine to create a neat and rustic finish.

Step 6: Final Arrangement and Illumination
To complete your lanterns, arrange small pinecones and faux frosted pine sprigs around the base of each jar. This adds a natural, wintery touch. Finally, place a flameless LED tea light inside each jar. Turn them on to enjoy the warm, flickering glow through the sparkling frosted glass. Always use flameless LED tea lights for safety.

Illuminate Your Space with Winter Charm
These frosted Epsom salt jar lanterns offer a charming way to brighten your home during the colder months. Their gentle glow and natural accents create a cozy atmosphere for any room, centerpiece, or mantel. Enjoy the sparkling, winter-inspired beauty they bring to your seasonal decor.
Related project collection: DIY Frosted Pinecone Christmas Mantel Garland with Berries & Plaid Bows
Practical Questions About This Project
Can assorted glass jars be used for this project?
Yes, assorted glass jars or recycled jars work well. Ensure they are thoroughly clean and dry before starting the project to ensure proper adhesion.
What type of adhesive is recommended for applying Epsom salt?
White school glue or Mod Podge can be used to adhere the Epsom salt. Both provide a good base for creating the frosted effect on the glass jars.
Is it safe to use real candles in these frosted jar lanterns?
For safety, always use flameless LED tea lights. Real candles can pose a fire risk and may also damage the Epsom salt coating over time.
How long does the Epsom salt coating need to dry?
Drying time varies based on the type of glue used and local humidity. Allow several hours or even overnight for the coating to fully cure and ensure the salt is firmly adhered.
Can the Epsom salt be tinted for a different color effect?
The craft record supports using plain Epsom salt or salt with a subtle blue tint for an icy blue effect. Adapting the tint or embellishments could change the seasonal theme.
Search Dollar Tree for glass supplies.

Leave a Reply