
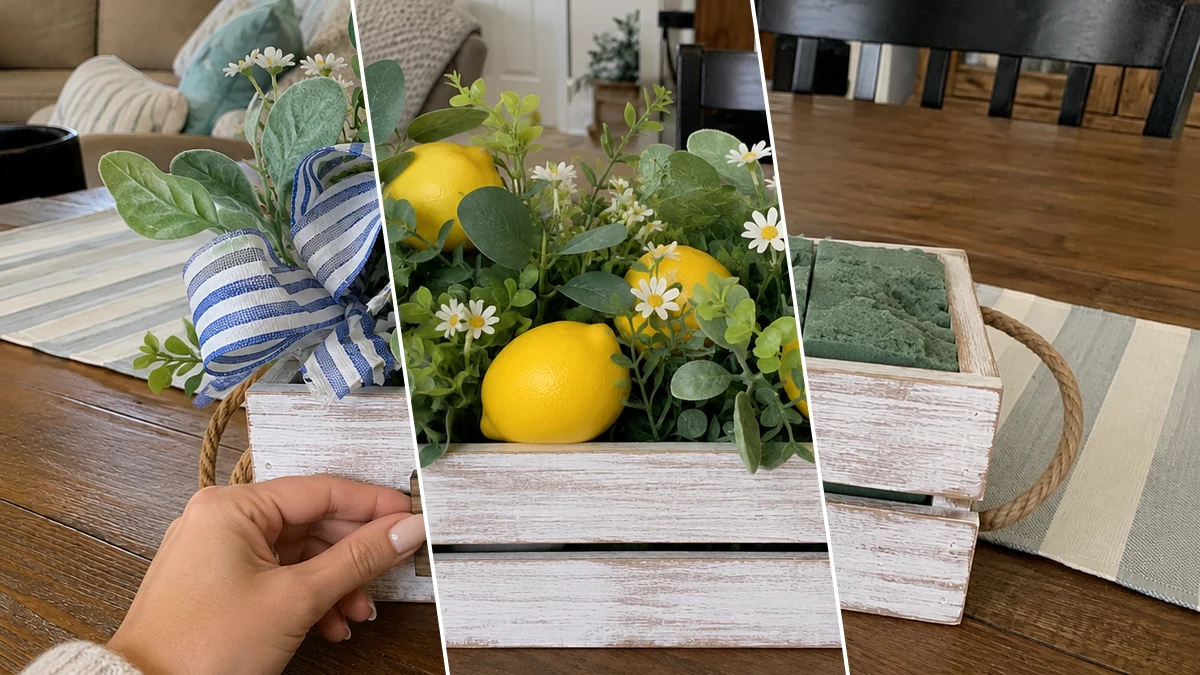
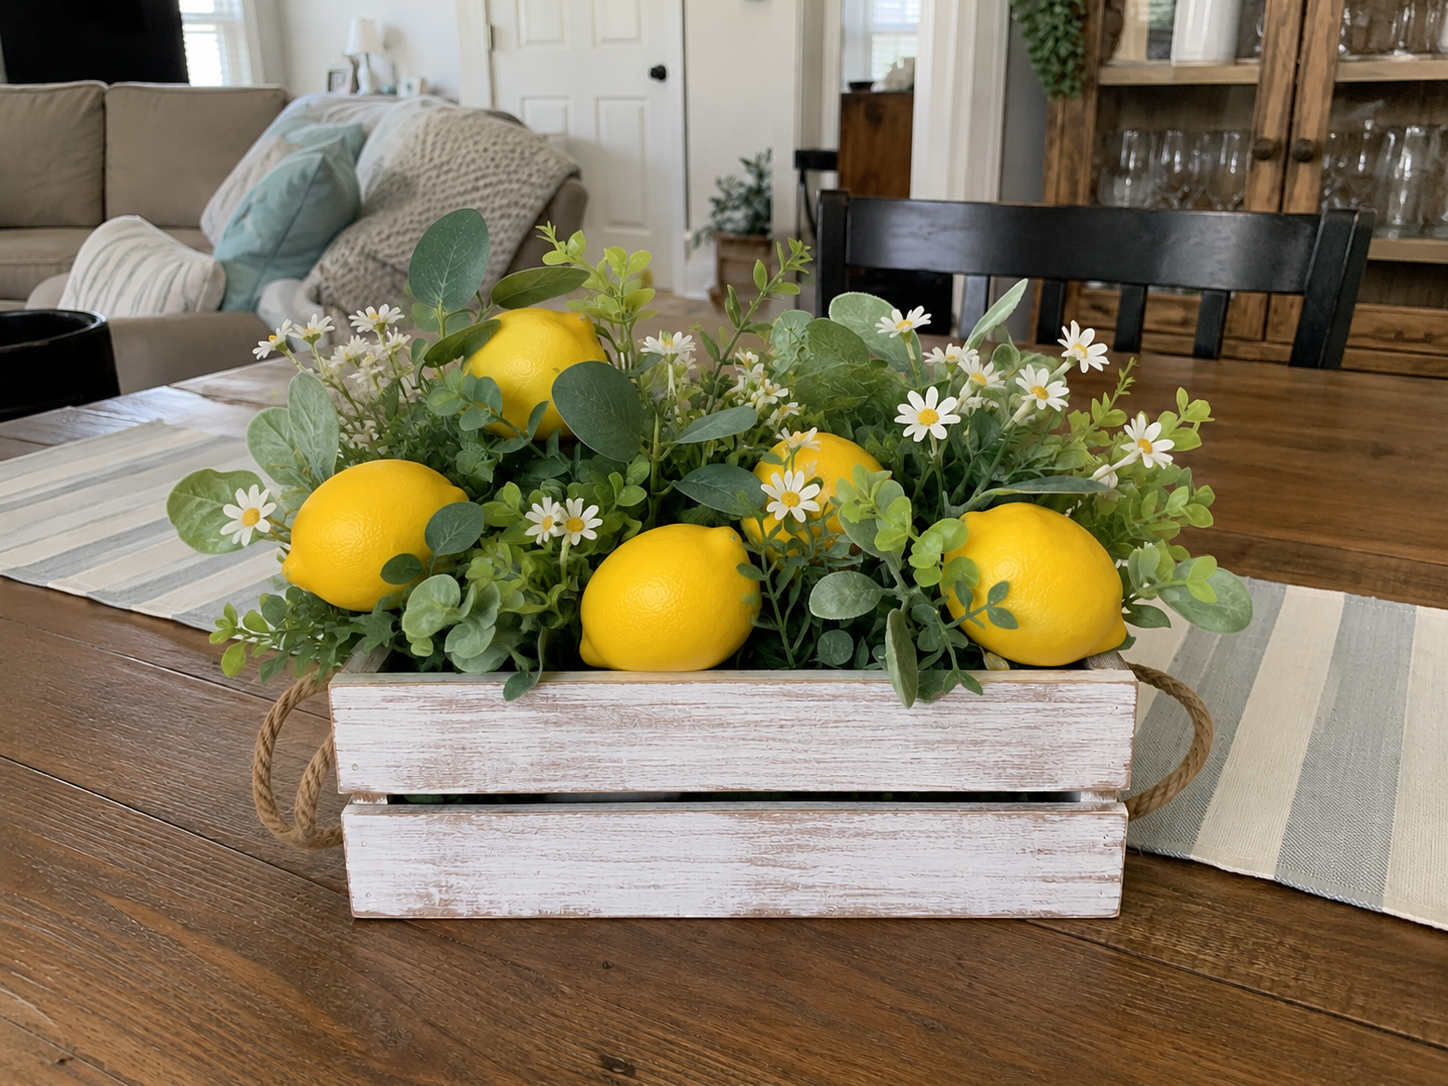
Oh my goodness, y’all! I was just strolling through Dollar Tree the other day, minding my own business, when I spotted these adorable little crates and knew I had to make something for my kitchen table. And that’s how this super cute DIY Rustic Lemon & Daisy Summer Centerpiece Crate was born! It’s got all those happy summer vibes.
Theme: Summer & Beach
Materials Needed
- Small Wooden Crate (or slatted wood box)
- Chalk/Acrylic Paints (White & Brown)
- Jute Rope (if needed for handles)
- Floral Foam & Filler (or crumpled paper)
- Faux Lemons (4-5 pieces)
- Faux Greenery & White Daisy Stems
- Blue-and-White Striped Ribbon
- Small Wood Plaque & Black Paint Pen
- Hot Glue Gun & Glue Sticks
- Scissors & Wire Cutters
Why This Craft Works
This little crate is just perfect for bringing a fresh, sunny touch to your home. I love how it looks on my farmhouse kitchen island, but it would be just as charming on a patio table for a summer BBQ, or even as a cheerful accent in your living room for that bright Summer & Beach decor feel. It’s got that cozy, rustic vibe without being fussy.
And let’s talk budget, because who doesn’t love a good deal? This entire project, including the crate and all the pretty bits, ran me about $12-15 in supplies. Seriously! Almost everything came from Dollar Tree, which is my absolute happy place for crafting. You really can’t beat that for a custom piece of Home Decor.
Now, don’t let the word “DIY” scare you! This craft is super easy, truly perfect for beginners or if you just need something quick and fun to do. From start to finish, it took me about 40-60 minutes to put together. It’s the kind of project you can do while catching up on your favorite show, and you’ll have a beautiful centerpiece by the time the credits roll!
Step-by-Step Instructions for DIY Rustic Lemon & Daisy Summer Centerpiece Crate
Alright, crafters, are you ready to get started? This DIY Rustic Lemon & Daisy Summer Centerpiece Crate is so much fun, and you’re gonna be amazed at how quickly it comes together. We’re talking easy peasy lemon squeezy, literally! You’ll have your own adorable Summer & Beach Home Decor in no time. Let’s grab those supplies and make some magic!
Step 1: Paint Crate Base White
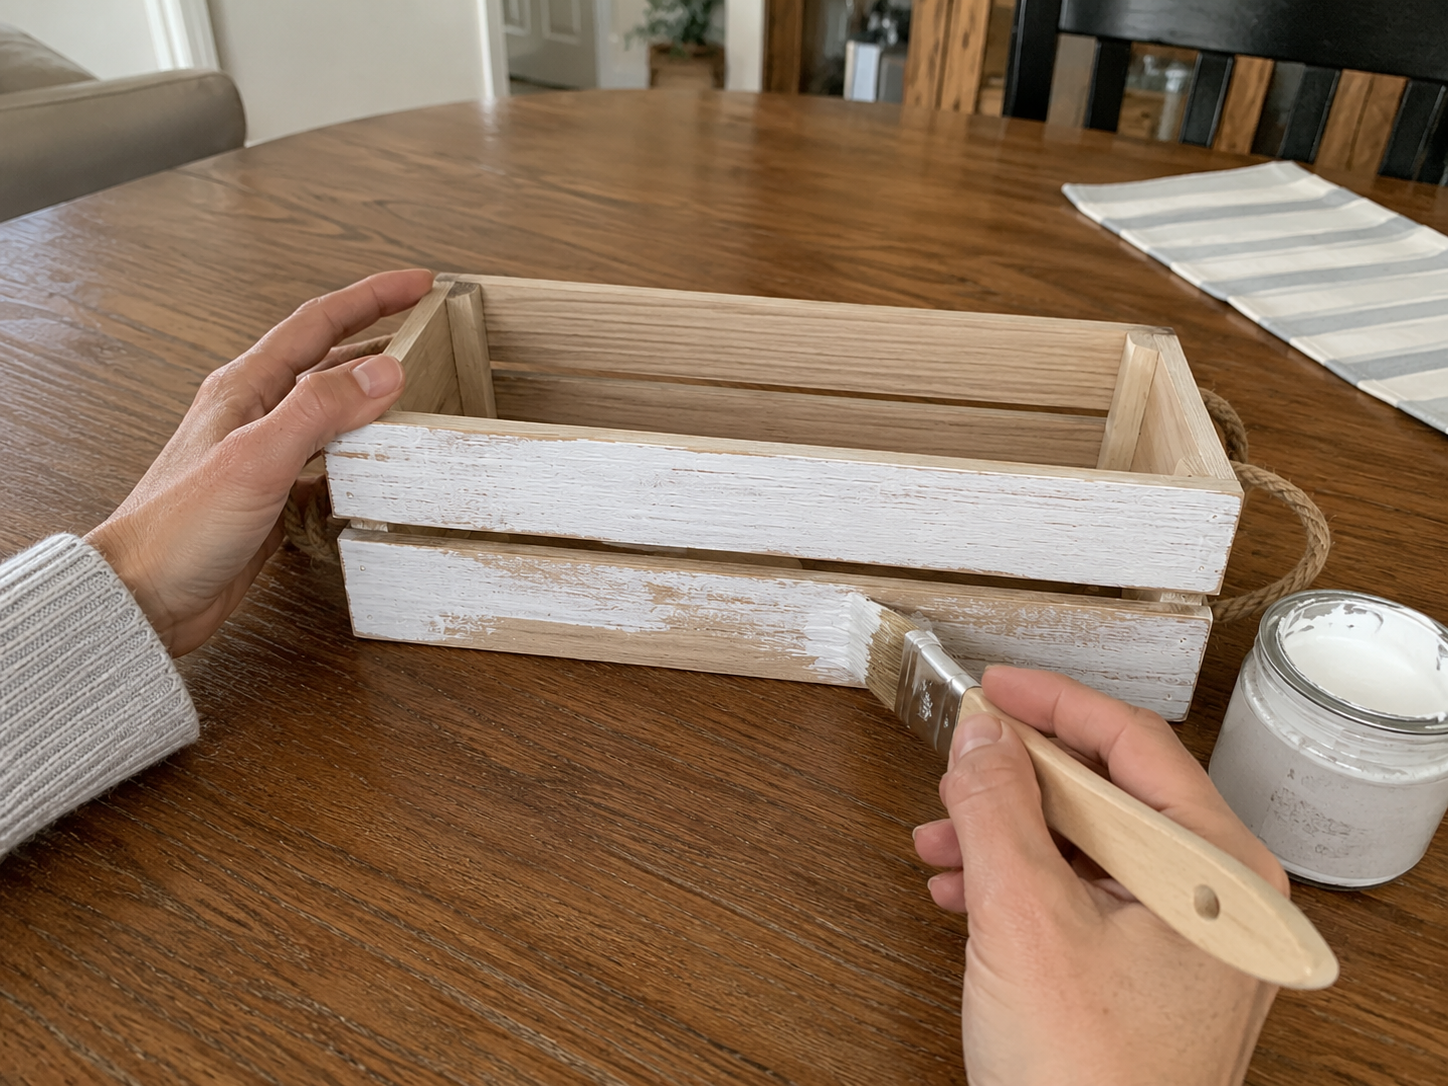
Begin by cleaning your wooden crate, ensuring it’s free of dust or debris. If the wood is very rough, you might do a light sanding first. Apply a generous, even coat of white chalk paint or white acrylic paint to the entire exterior and the top edges of the interior. Allow the paint to dry completely according to the paint manufacturer’s instructions, usually 1-2 hours. You may need a second coat for full coverage.
Step 2: Distress Crate for Rustic Look
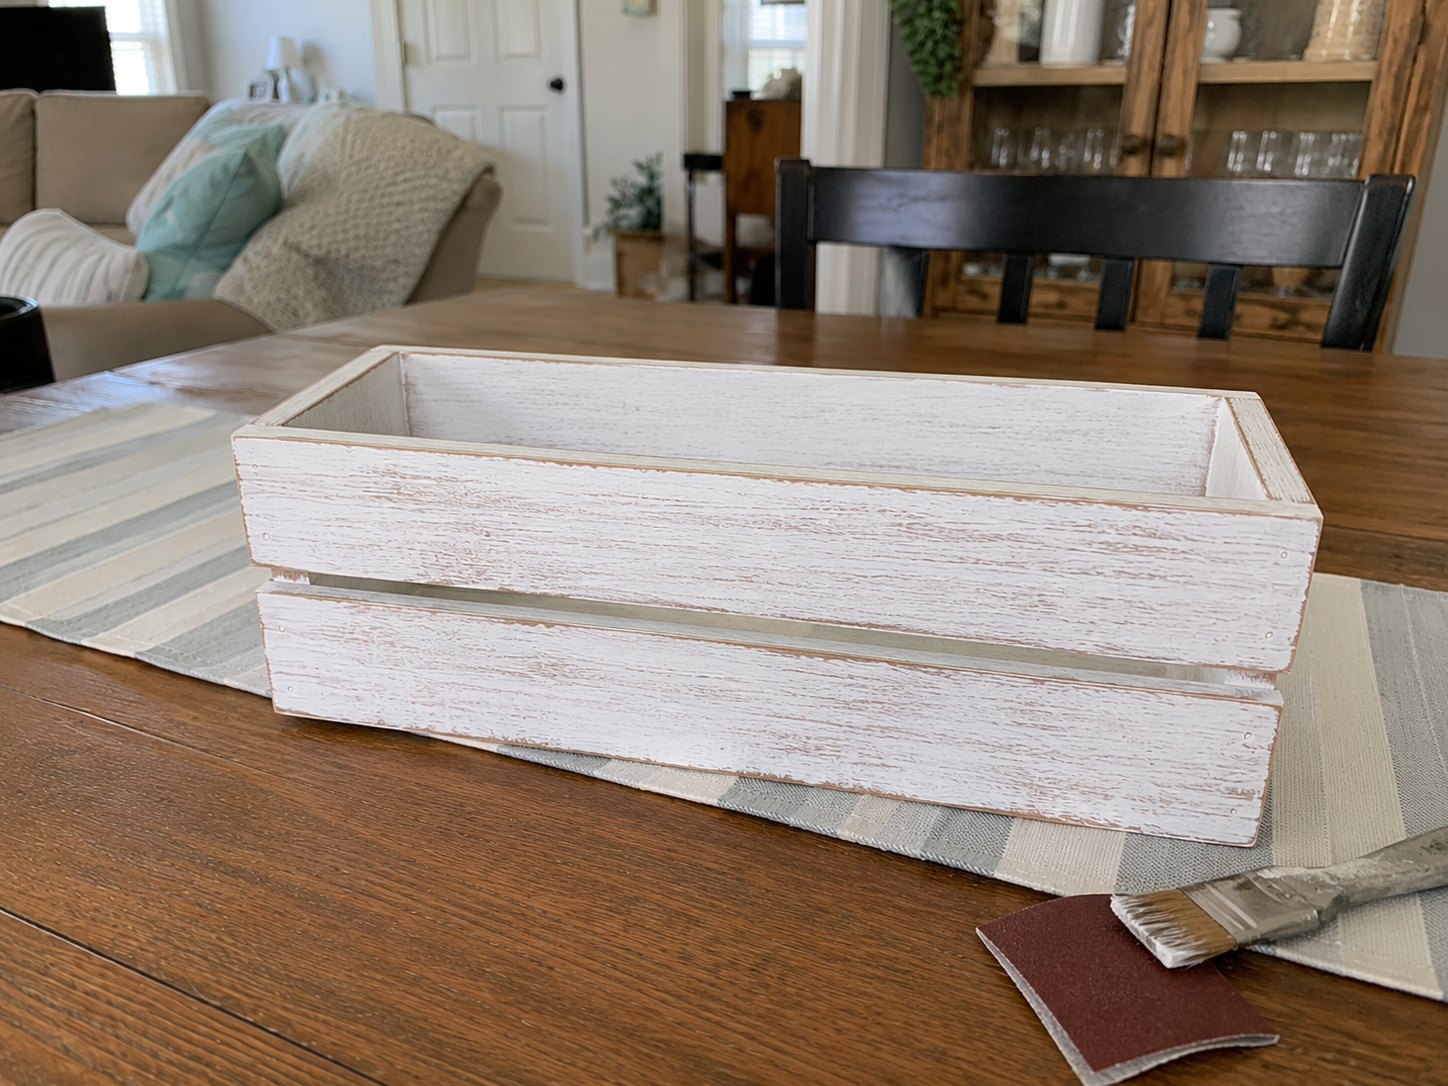
Once the white paint is fully dry, it’s time to add a distressed, rustic look. You can achieve this in two ways: * **Sandpaper Method:** Lightly sand the edges, corners, and raised areas of the crate using fine-grit sandpaper (150-220 grit). This will reveal some of the natural wood underneath, creating a worn, weathered effect. * **Brown Distressing Paint Method:** Dip a dry brush very lightly into brown acrylic or distressing paint. Offload most of the paint onto a paper towel. Then, lightly brush or “dry-brush” the brown paint over the edges and crevices of the white crate, creating subtle shadows and an aged appearance. Use a very light hand – you want just a hint of brown, not full coverage.
Step 3: Attach Jute Rope Handles
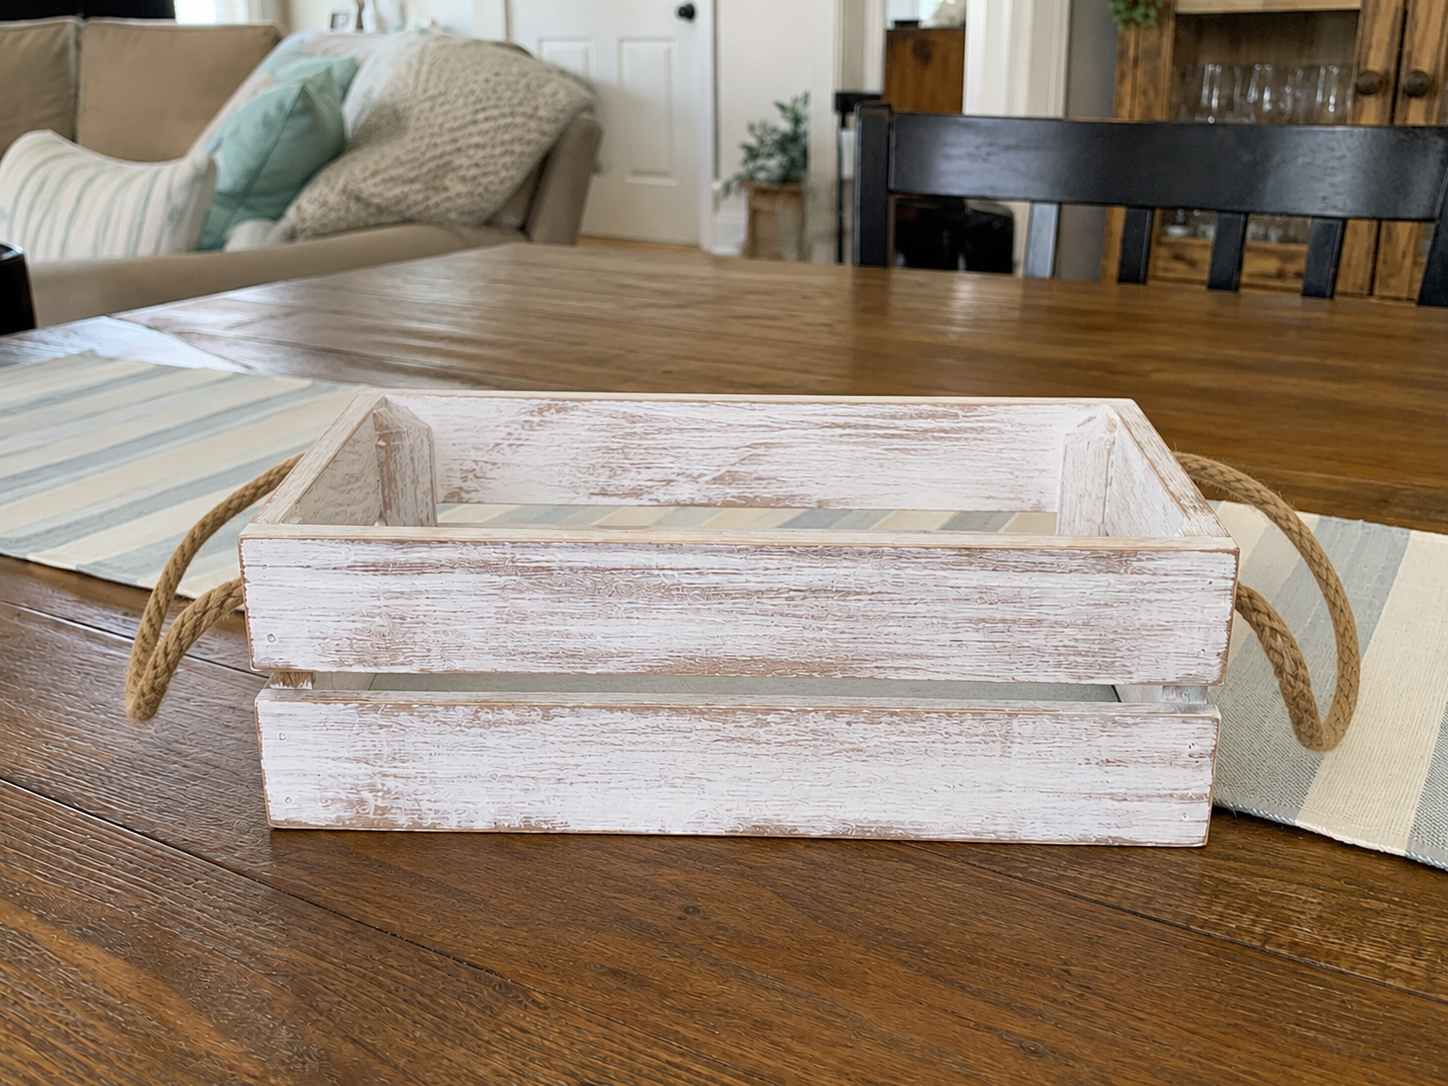
If your wooden crate doesn’t already have rope handles, now is the time to add them. Cut two pieces of jute rope, each about 12-15 inches long (adjust based on your desired loop size). Thread one end of a rope piece through a pre-drilled hole on one side of the crate, tie a secure knot on the inside to hold it in place. Repeat for the other end of the rope on the opposite hole. Do the same for the second handle on the other side of the crate. Ensure both handles are symmetrical and securely fastened. Use a dab of hot glue on the knots inside for extra security if desired.
Step 4: Letter ‘Hello Sunshine’ Sign
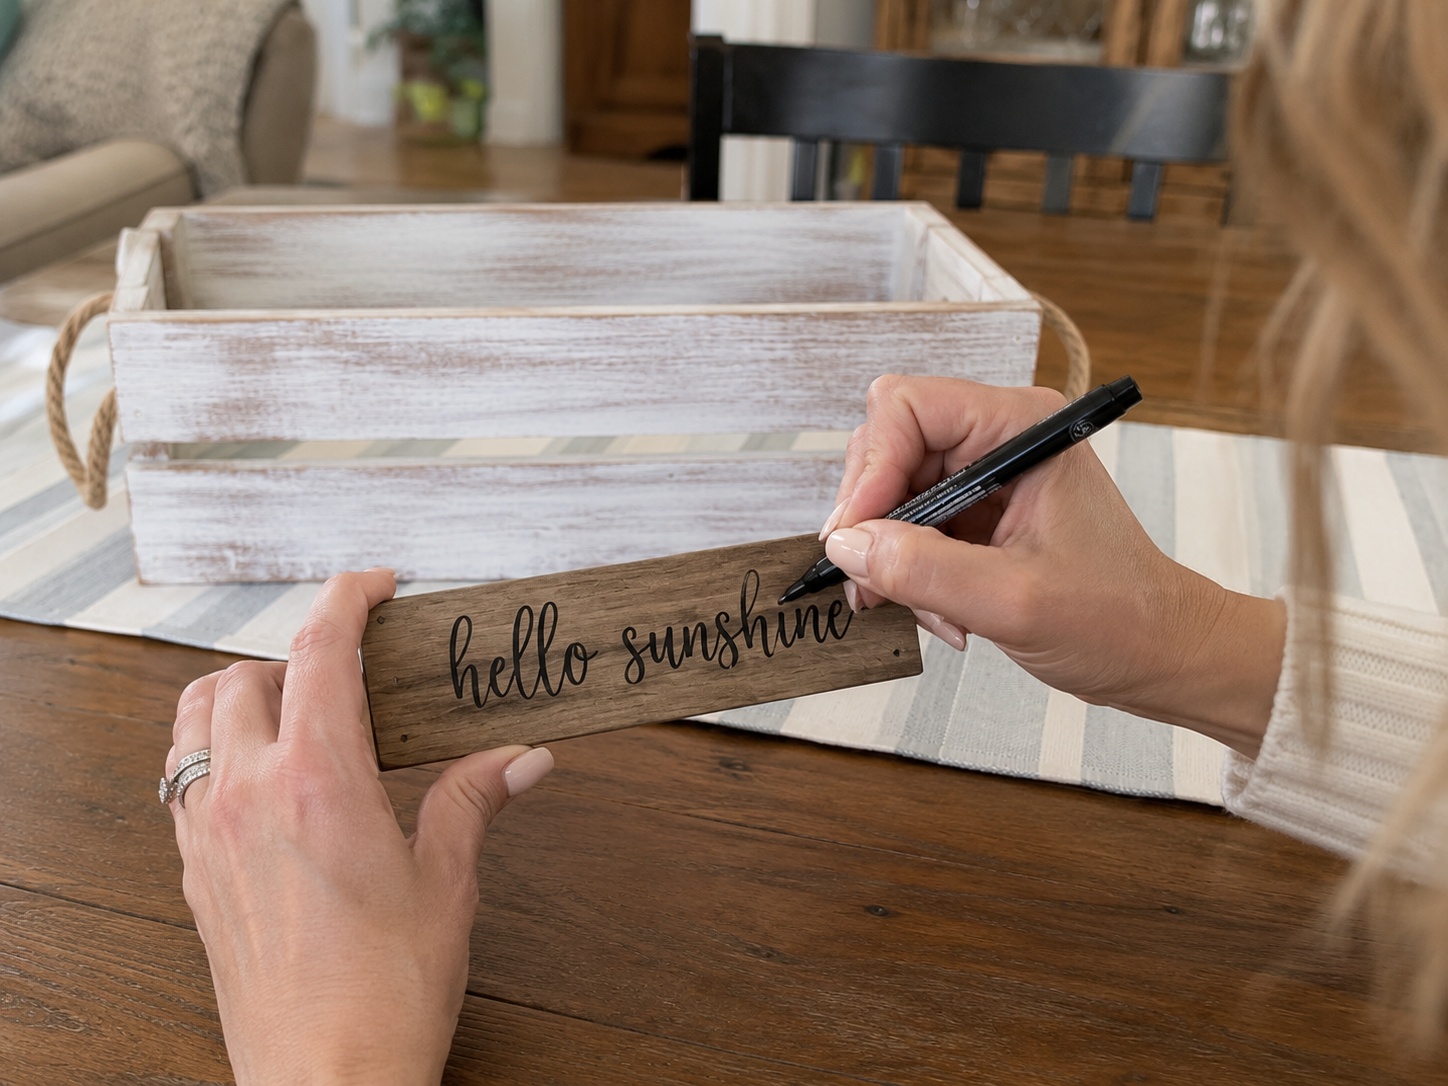
Take your small rectangular wood plaque. Using a black paint pen, carefully write “hello sunshine” in a legible, cursive script onto the plaque. Allow the paint pen ink to dry completely. If you’re not confident in your freehand lettering, you can print out the phrase, trace it onto the wood with transfer paper, or use vinyl lettering if you have a cutting machine.
Step 5: Place Internal Crate Filler
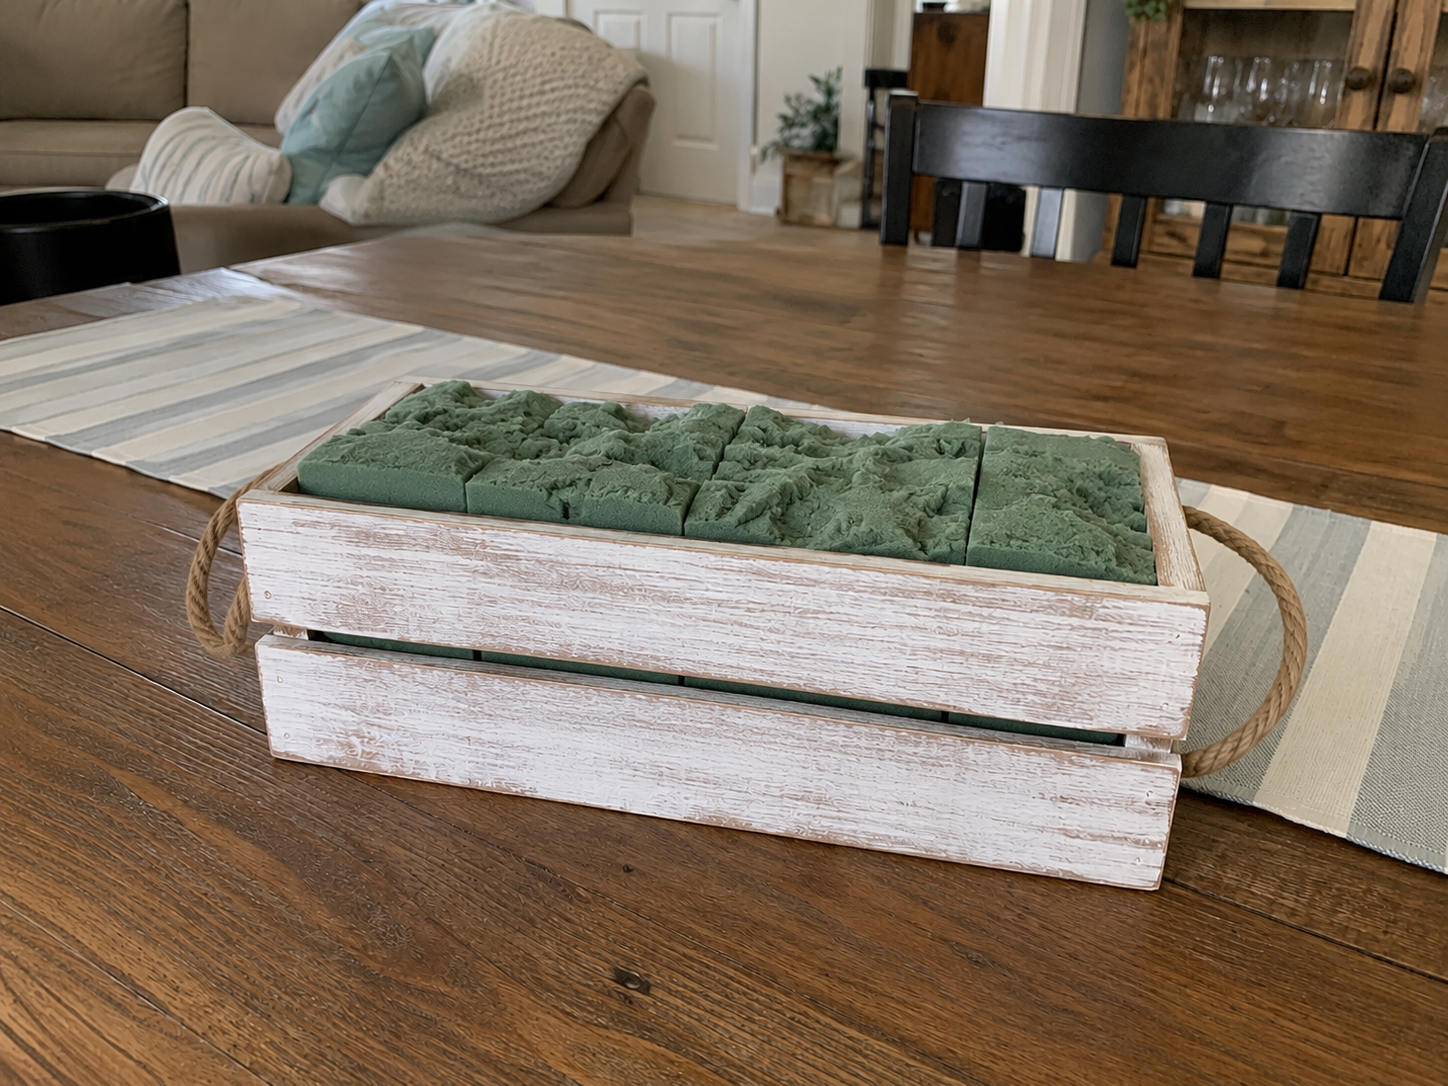
Place floral foam blocks or crumpled paper into the bottom of the distressed wooden crate. The goal is to fill the crate loosely, providing a base for your faux stems and lemons to sit on and be securely arranged. You want it to come up high enough so that your greenery will extend above the crate’s edges without sinking to the very bottom.
📱 Craftino App
Make more crafts like this
1,000+ Summer & Beach ideas with photo guides & Pro Tips
✓ Step-by-step photo tutorials, nothing left out
✓ Pro Tips for every step
✓ Save crafts & browse fully offline
✓ New ideas added every week


Step 6: Arrange Faux Greenery Base
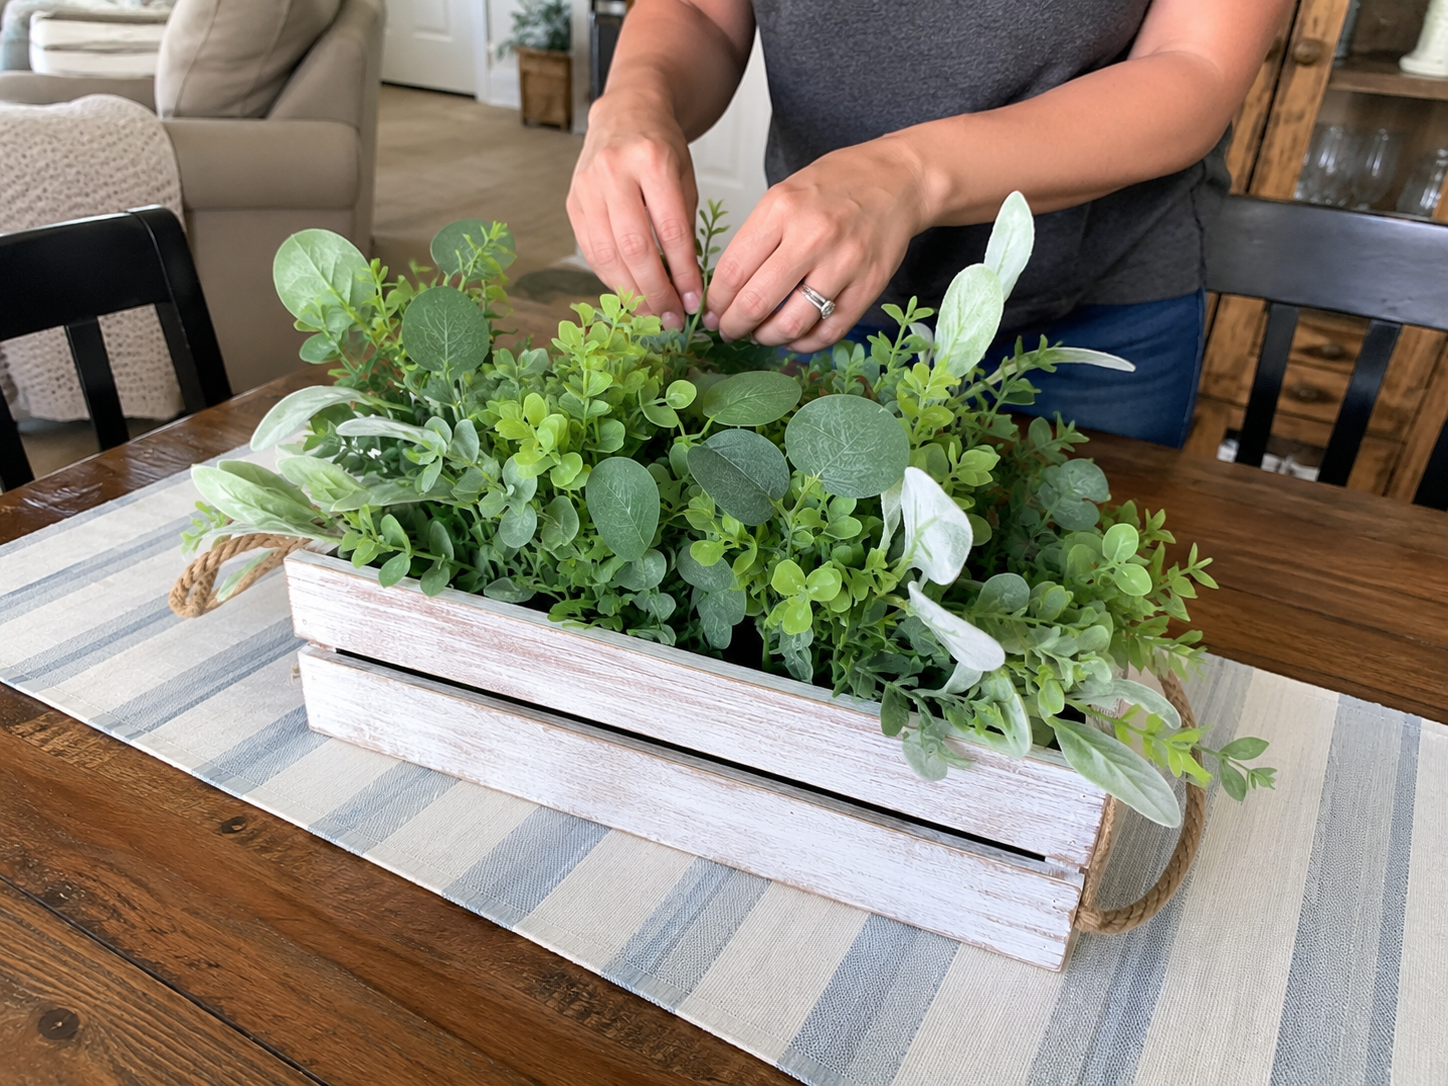
Begin by inserting your faux greenery stems (eucalyptus, lamb’s ear, mixed greenery) into the floral foam or tucking them into the paper filler. Start with the larger, fuller stems to establish the overall shape and fullness of your arrangement. Distribute them evenly, aiming for a lush, natural look that extends slightly over the edges of the crate. Trim stems with wire cutters if they are too long.
Step 7: Add White Daisy Accents
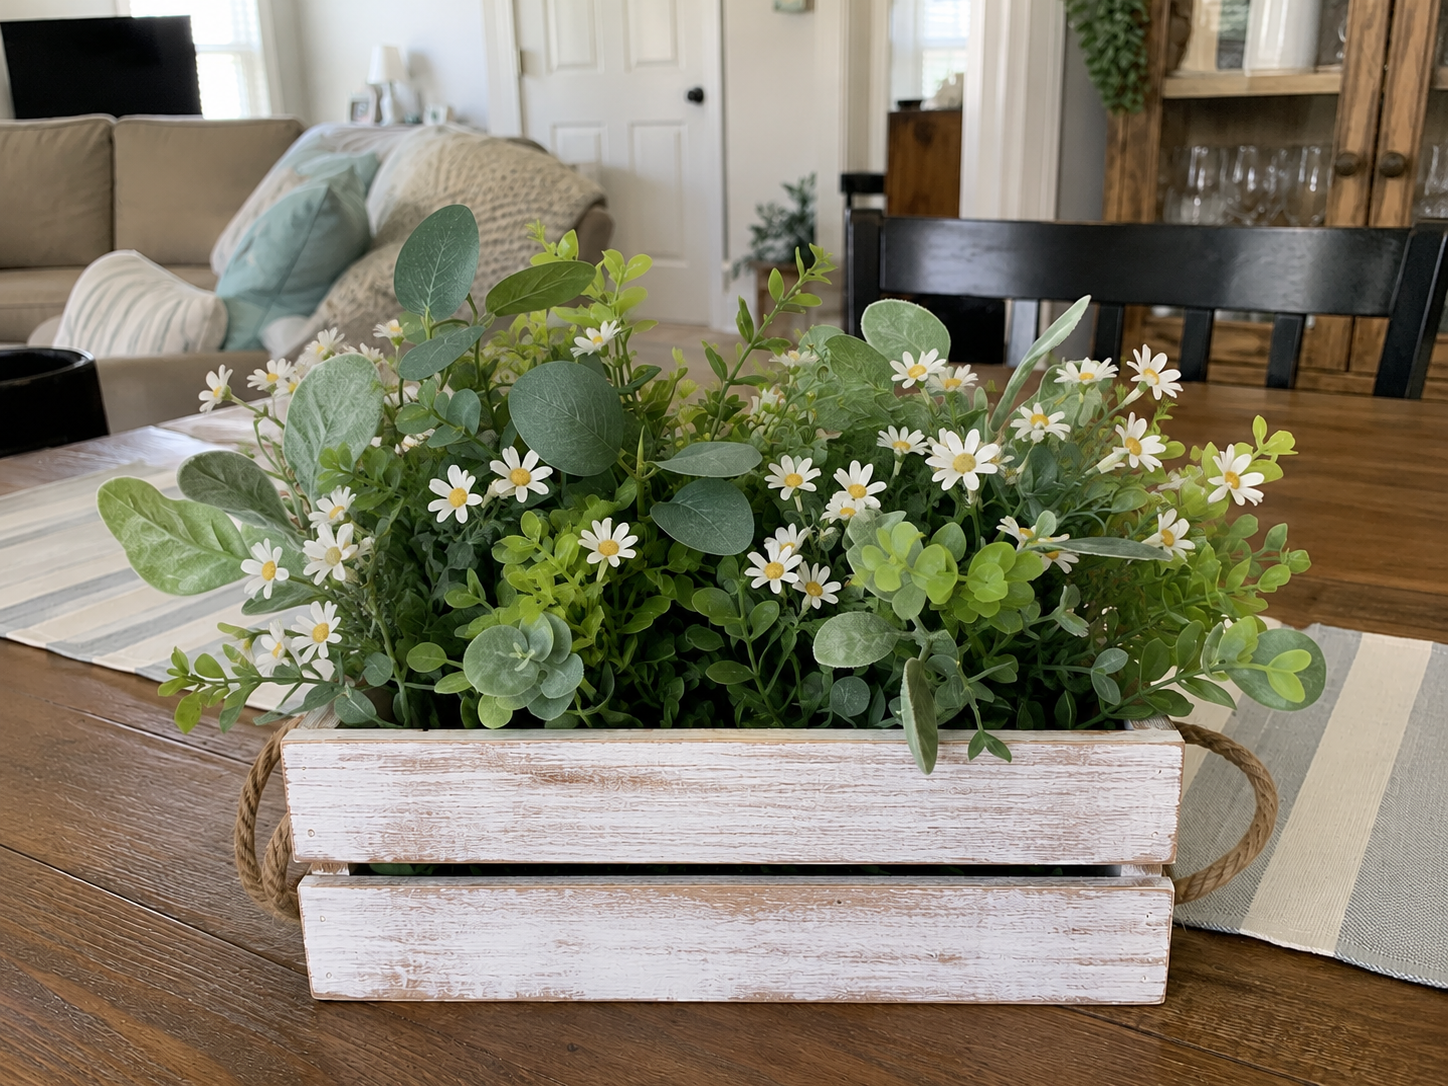
Once your greenery base is established, begin tucking in the small faux white daisy stems. Distribute them throughout the greenery, focusing on creating little pops of white that mimic freshly bloomed flowers. Again, vary their heights and positions to avoid a stiff, unnatural look. Use wire cutters to shorten stems if needed.
Step 8: Place Faux Lemons Evenly
Now, carefully place the faux lemons amongst the greenery and daisies. Position them to be the main focal points, ensuring they are evenly distributed around the arrangement. Gently nestle them into the stems so they look securely placed and appear to be growing naturally. Aim for a balanced look, avoiding clumping them together.
Step 9: Create & Attach Striped Bow
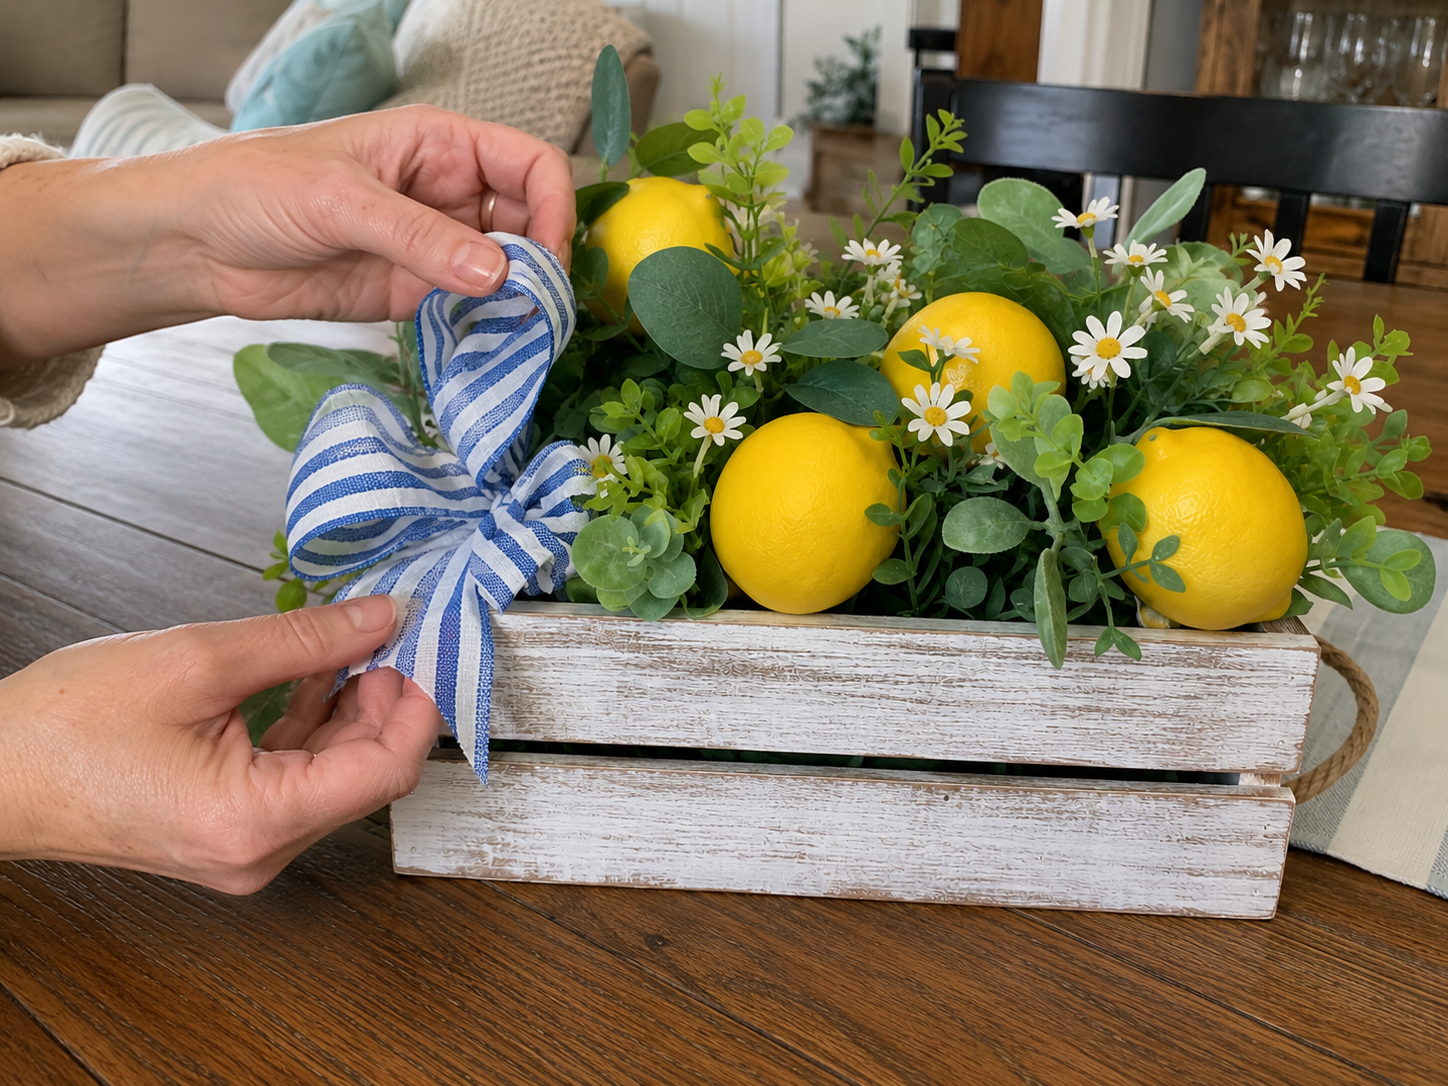
Take your blue-and-white striped ribbon. Fashion a simple bow (a classic shoelace-style bow works well, or a multi-loop bow for more volume). Once tied, trim the ends of the ribbon at an angle or dovetail for a neat finish. Apply a generous dab of hot glue to the back of the bow and securely attach it to the top left side of the crate, slightly overlapping the crate’s edge and the greenery.
Step 10: Mount ‘Hello Sunshine’ Sign
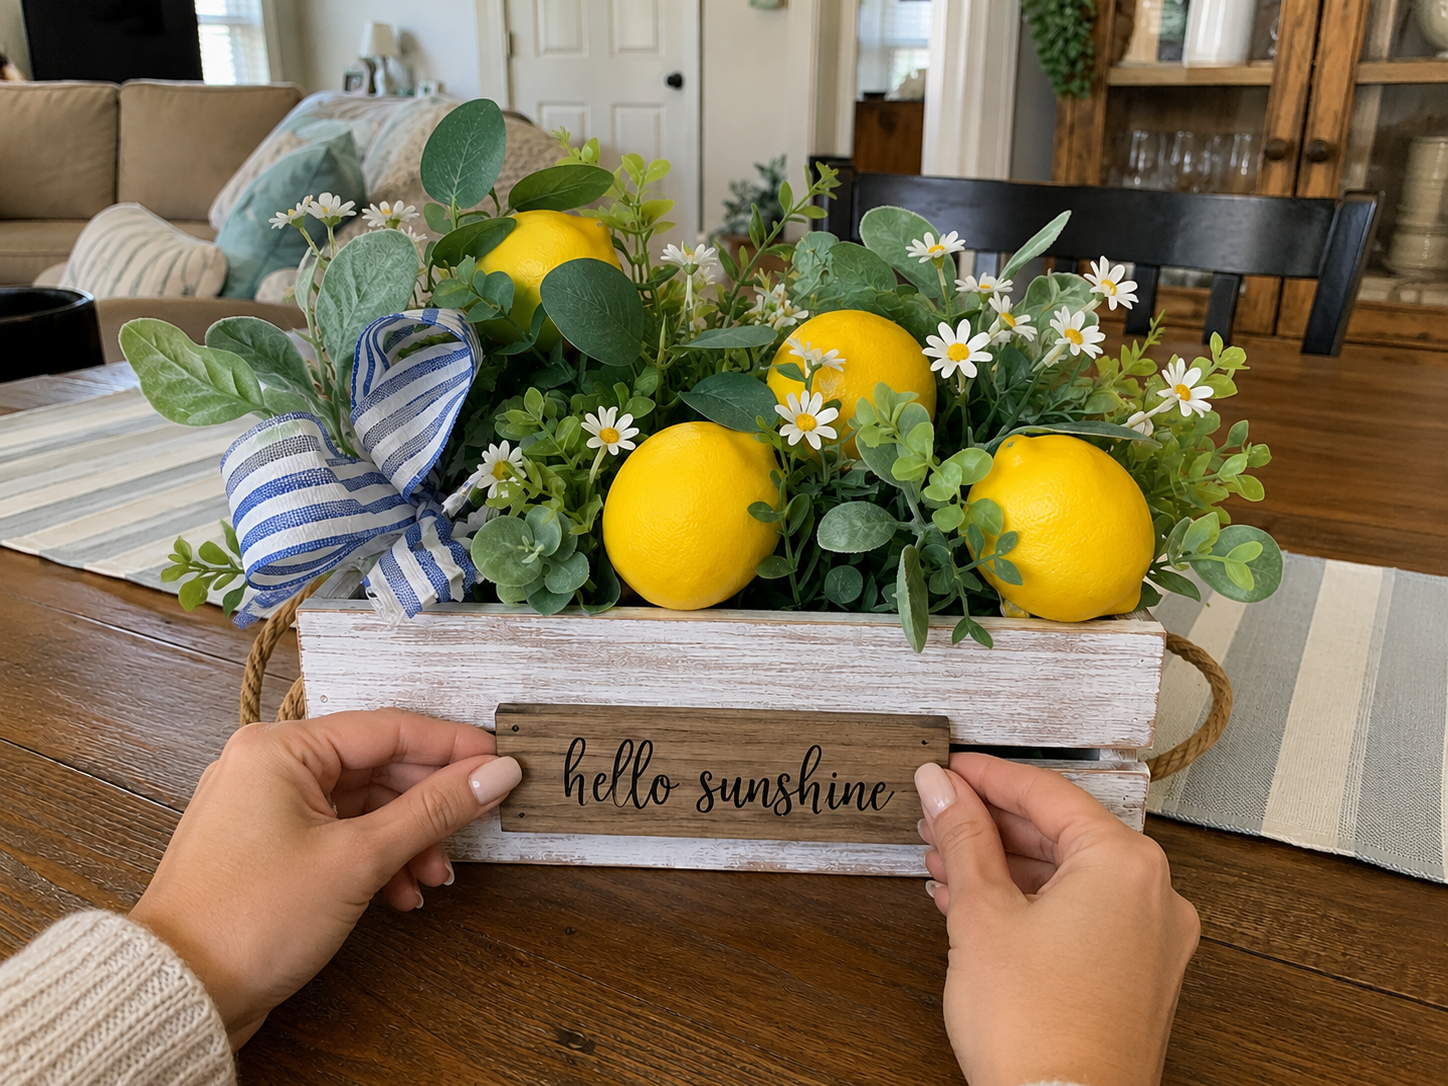
Take your prepared “hello sunshine” wooden plaque. Apply hot glue generously to the back of the plaque, along the entire perimeter and across the middle. Carefully center the plaque on the front of the distressed wooden crate, positioning it between the top and bottom slats. Press firmly for several seconds to ensure a secure bond.
See also: Gilded Lemon Drip Farmhouse Vase Dollar Tree Diy
📋 Love staying organized while crafting? Check out our printable planners & craft designs at CraftersDT on Etsy and use code CRAFT20 for 20% off your entire order!
Your Rustic Lemon & Daisy Crate Shines!
And there you have it! Your very own DIY Rustic Lemon & Daisy Summer Centerpiece Crate is ready to brighten up any corner of your home. It just makes me smile every time I walk by it. Don’t forget to snap a pic and share your creation with me, or try mixing up the flowers for a totally different look!
📱 Craftino App
Make more crafts like this
1,000+ Summer & Beach ideas with photo guides & Pro Tips
✓ Step-by-step photo tutorials, nothing left out
✓ Pro Tips for every step
✓ Save crafts & browse fully offline
✓ New ideas added every week
Frequently Asked Questions
What is the total cost to make the DIY Rustic Lemon & Daisy Summer Centerpiece Crate?
The total cost to create the DIY Rustic Lemon & Daisy Summer Centerpiece Crate is typically around $12-15. Most of the necessary craft supplies can be found affordably at Dollar Tree.
How long does it take to assemble the DIY Rustic Lemon & Daisy Summer Centerpiece Crate?
You can assemble the DIY Rustic Lemon & Daisy Summer Centerpiece Crate in about 40-60 minutes. This makes it a great project for a quick afternoon craft session.
Is the DIY Rustic Lemon & Daisy Summer Centerpiece Crate suitable for beginners?
Yes, the DIY Rustic Lemon & Daisy Summer Centerpiece Crate is very beginner-friendly. It requires basic crafting skills like hot gluing and arranging, making it perfect for those new to DIY Home Decor.
Where can I find the supplies for the DIY Rustic Lemon & Daisy Summer Centerpiece Crate?
Most of the supplies for the DIY Rustic Lemon & Daisy Summer Centerpiece Crate can be found at Dollar Tree. You can also check craft stores like Hobby Lobby or Walmart for similar items if your Dollar Tree stock is low.
What type of glue should I use for this Summer & Beach centerpiece?
For this Summer & Beach centerpiece, hot glue is recommended for quick and secure assembly of the faux greenery and flowers. A standard low-temp hot glue gun with general-purpose glue sticks works perfectly.
Can I customize the colors for my DIY Rustic Lemon & Daisy Summer Centerpiece Crate?
Absolutely, you can customize the colors for your DIY Rustic Lemon & Daisy Summer Centerpiece Crate by swapping out the daisy colors for different faux flowers, like sunflowers or hydrangeas, or by painting the wooden crate a different shade such as white or light blue.
How many artificial lemons and daisies do I need for this Dollar Tree craft?
For this Dollar Tree craft, you typically need about 4-6 artificial lemons and 6-8 daisy bunches (each with multiple flower heads) to create a full and vibrant look within the crate.
Is the DIY Rustic Lemon & Daisy Summer Centerpiece Crate durable enough for outdoor Summer & Beach decor?
The DIY Rustic Lemon & Daisy Summer Centerpiece Crate is best suited for indoor use or covered outdoor areas, such as a porch or patio. Most Dollar Tree craft materials, like faux flowers and wooden crates, are not designed to be weather-resistant or withstand prolonged direct sunlight.
What are some common mistakes to avoid when making this DIY rustic centerpiece?
A common mistake to avoid when making this DIY rustic centerpiece is using too much hot glue, which can show through or create messy strings. Apply glue sparingly and precisely to the base of stems and leaves for a cleaner finish.
Find more summer & beach craft ideas & supplies at Dollar Tree.

Leave a Reply