
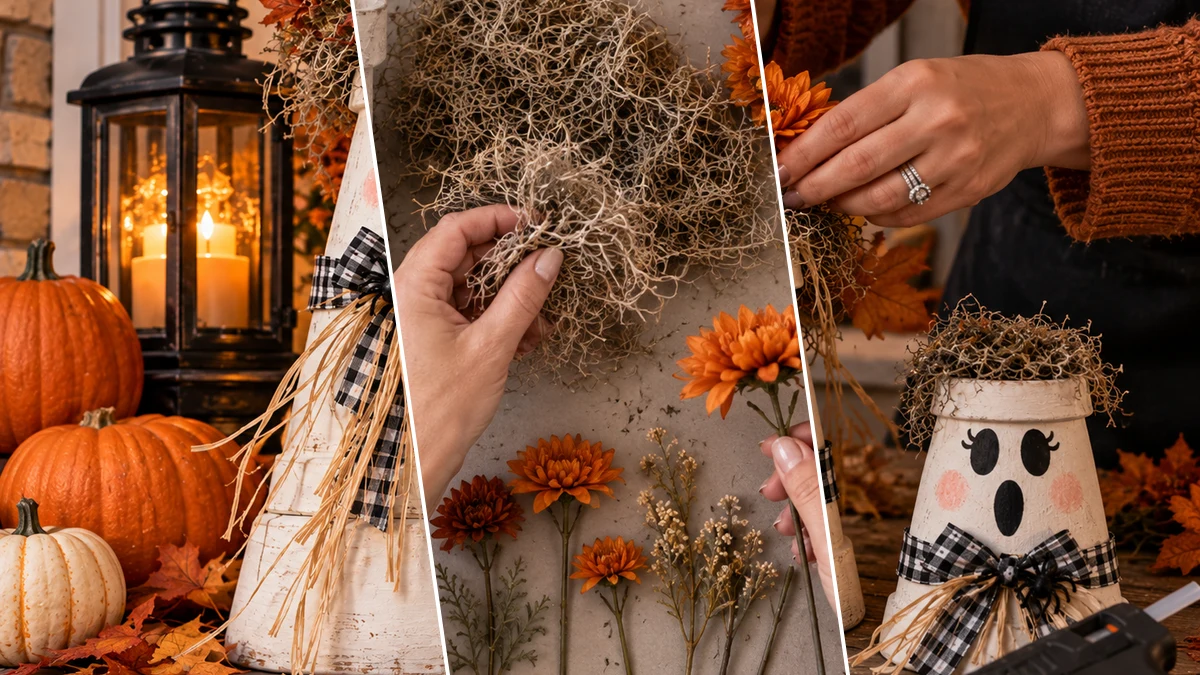
Create a charming set of three distressed terracotta ghost pots to welcome guests to your Halloween porch or entryway. This easy DIY project transforms simple flower pots into cute, spooky-chic characters. Each ghost features a weathered white finish, a hand-painted face with blush cheeks, a buffalo plaid bow, and an autumnal floral topper.
Project at a Glance
- Difficulty: Easy
- Estimated active time: 75 minutes to 114 minutes (drying and curing waits not included)
- Estimated component cost: $20 to $42 (reusable tools and general supplies excluded)
- Suggested placement: Porch, Entryway
Creating Your Spooky-Chic Ghost Pot Display
These ghost pots offer a delightful blend of rustic charm and Halloween whimsy, perfect for adding a welcoming touch to your home. The distressed warm white finish gives them a weathered farmhouse appeal, complemented by cute hand-painted ghost faces with soft blush cheeks. Each character is adorned with a classic black-and-white buffalo plaid bow layered with natural raffia, creating a cozy aesthetic.
Designed as a set of three graduated sizes, these ghost pots are styled for an inviting porch or entryway display. The inverted terracotta pots serve as the bodies, with vibrant autumnal floral toppers emerging from what would typically be the pot's base. This project provides an opportunity to craft a unique and cohesive Halloween decoration.
Materials for DIY Set of 3 Distressed Terracotta Ghost Pots for Halloween Porch Decor
- 3 Terracotta-style flower pots (graduated sizes)
- Acrylic Paints (White/Ivory, Black, Blush Pink)
- Paintbrushes (various sizes)
- Hot glue gun and glue sticks
- Black-and-white buffalo plaid ribbon
- Natural raffia or straw ribbon
- Craft moss (e.g., Spanish moss or green craft moss)
- Faux fall florals & leaves (orange mums, autumn leaves, neutral filler stems)
- Optional: Sandpaper (fine-grit), Floral foam, Small Halloween accents (e.g., black spider)
Need another material? Browse current craft supplies and deals.
Assembling Your Distressed Terracotta Ghost Pots
Follow these clear, step-by-step instructions to create your set of three charming ghost flower pots. The process involves painting, distressing, and assembling decorative elements. Each step is designed to guide you through transforming simple materials into a festive Halloween display.
Step 1: Prep & Paint Pots White
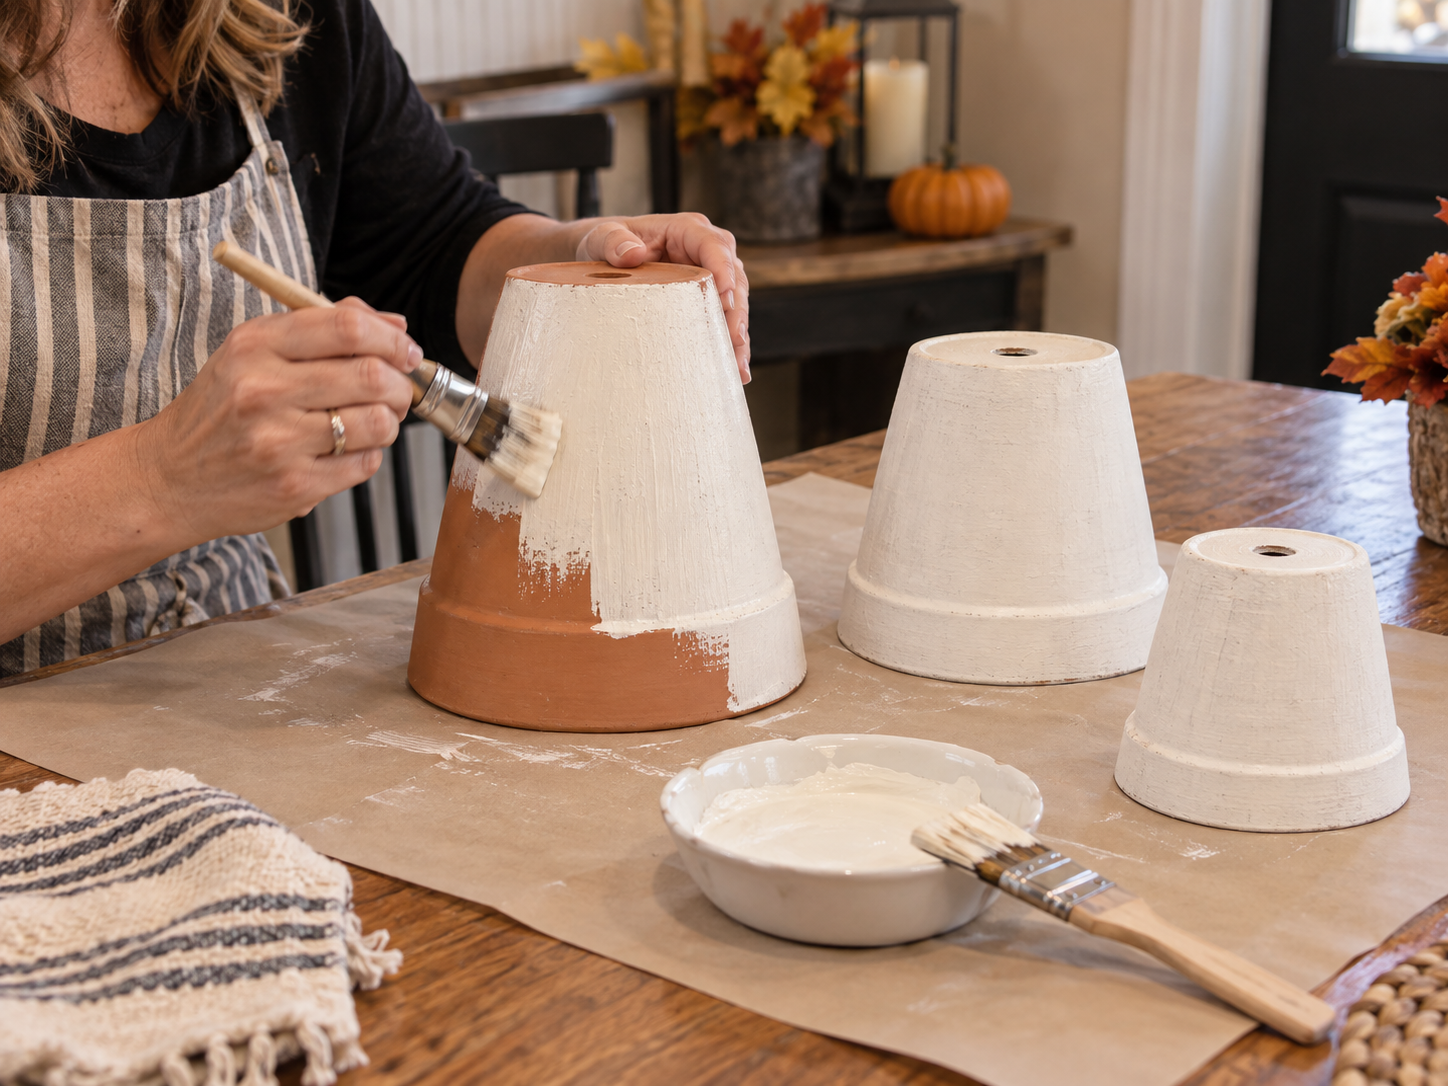
Begin by cleaning your terracotta pots thoroughly to remove any dirt or dust. Ensure they are completely dry. Apply 2-3 coats of warm white or ivory chalk or acrylic paint to the entire exterior of each pot, allowing ample drying time between coats. Focus on achieving even, opaque coverage. These pots will be displayed upside down, so paint all visible areas.
Step 2: Lightly Distress for Farmhouse Look
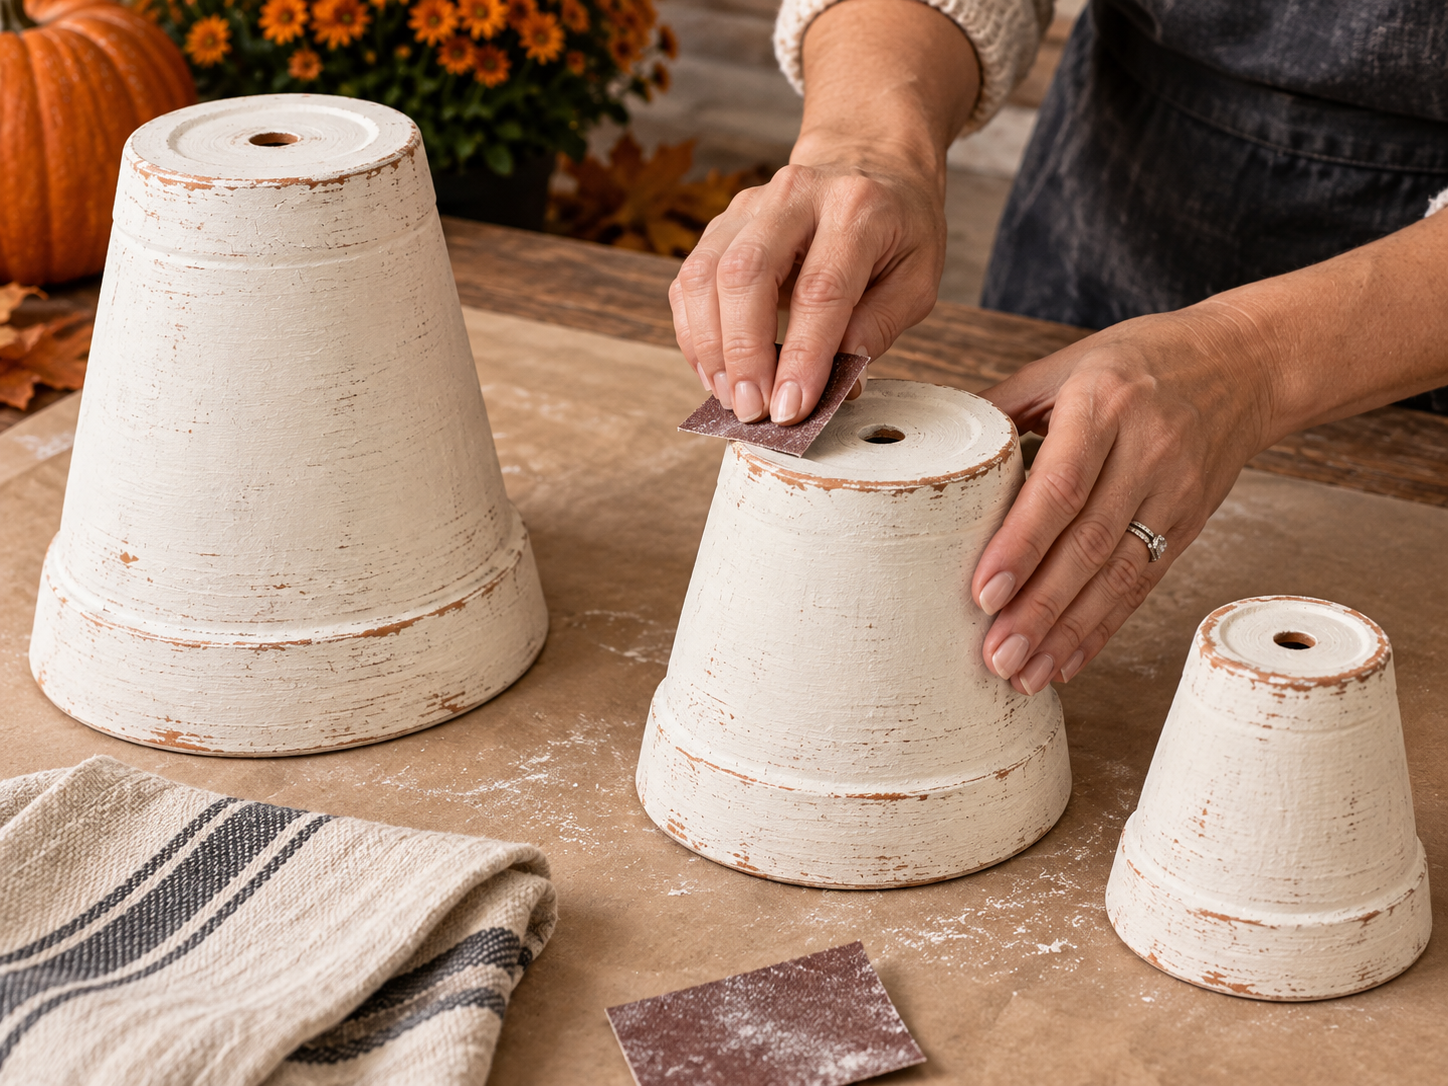
Once the white paint is completely dry, use fine-grit sandpaper (120-220 grit) to gently distress the pots. Focus on the rims and any raised edges where natural wear would occur. The goal is to lightly expose hints of the terracotta beneath, creating a charming, weathered farmhouse finish. After distressing, wipe away any paint dust with a dry cloth.
Step 3: Paint Ghost Faces & Cheeks
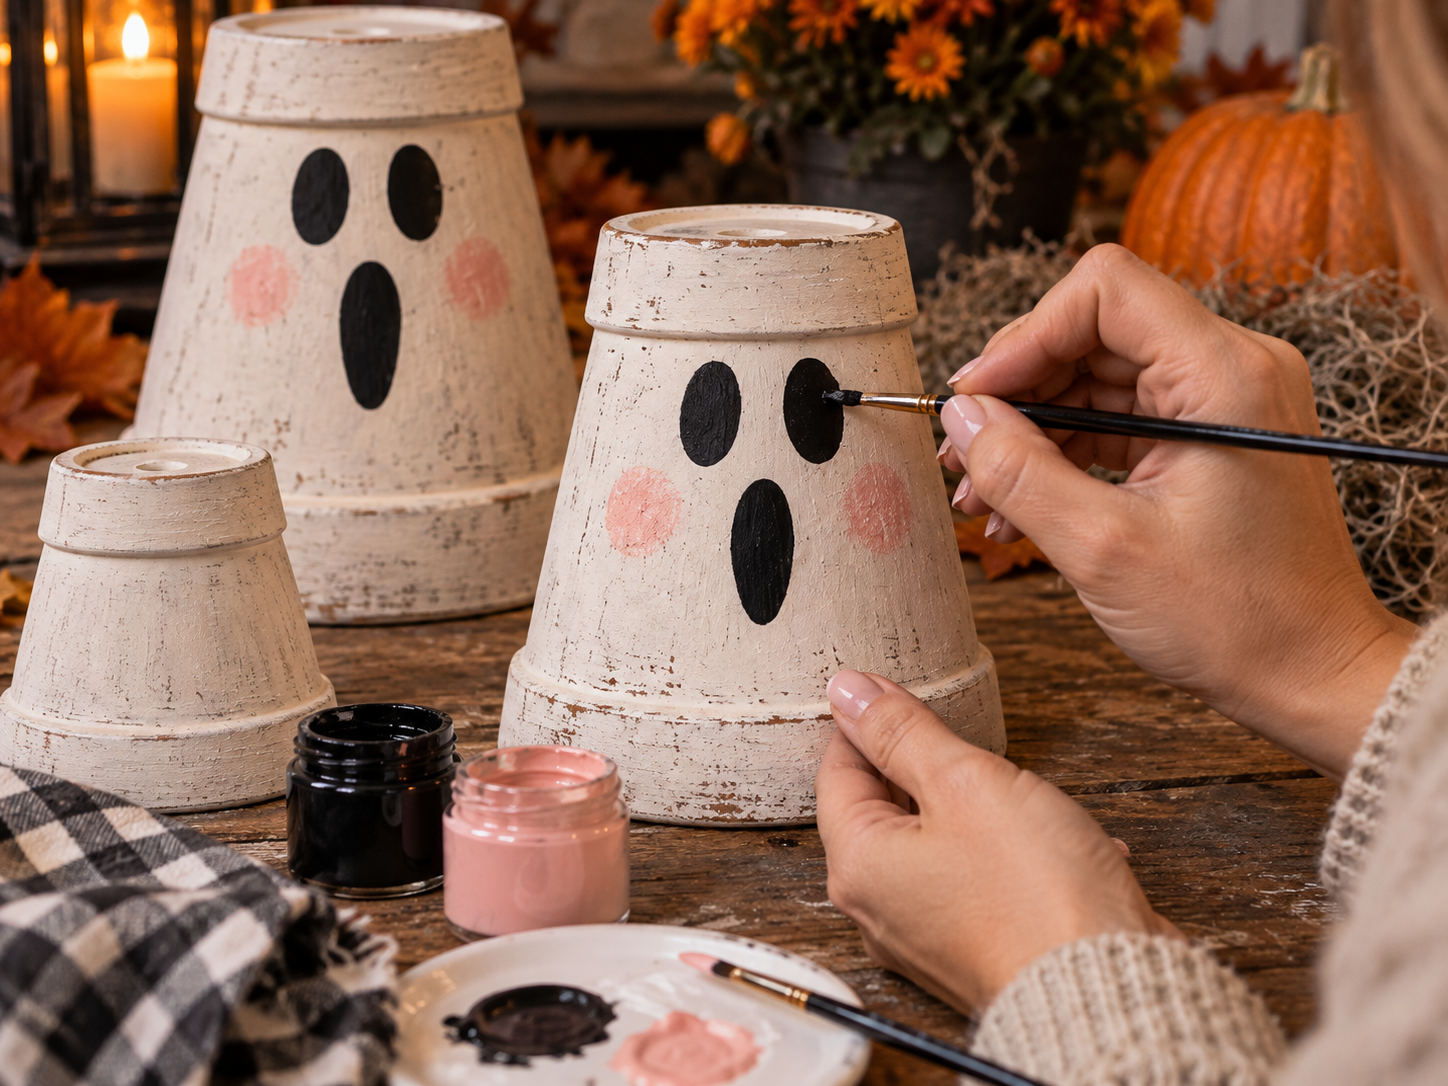
Using black acrylic paint and a small detail brush, paint two simple oval eyes and a long, slender oval mouth on the front of each pot. Once the black paint is dry, use a clean small brush or a sponge to gently dab soft blush pink paint onto the pot, creating rosy cheeks on either side of the mouth. This gives your ghosts a cute, spooky-chic character.


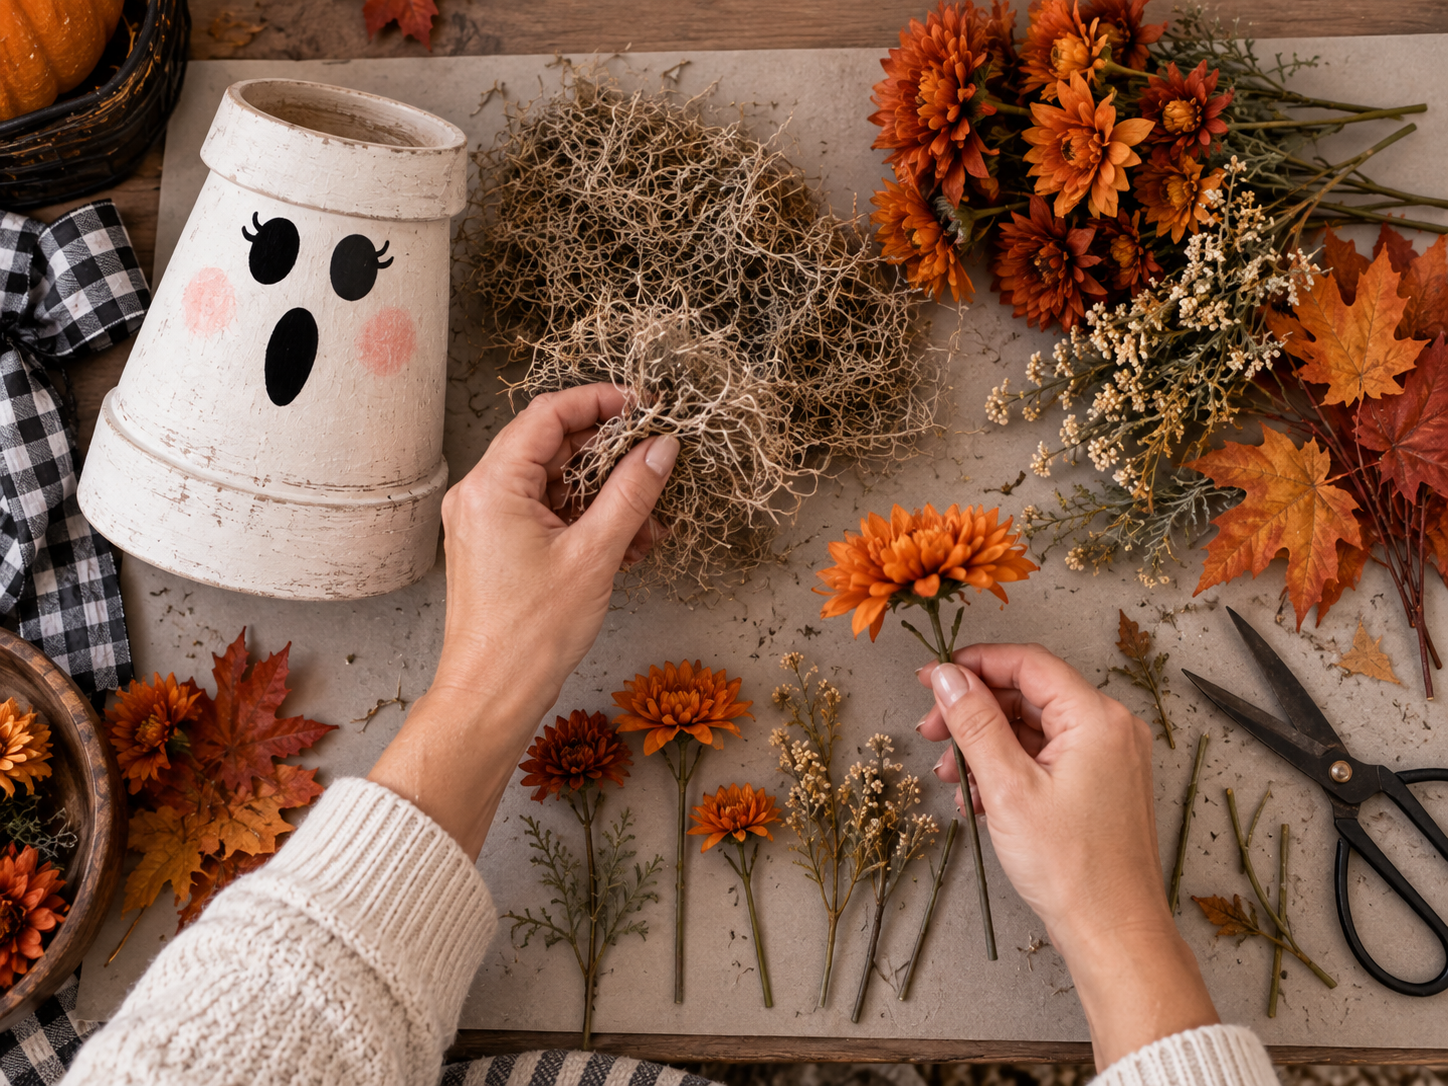
Step 4: Prepare Floral Toppers
Gather your Spanish moss (or other craft moss), faux orange mums or daisy-style fall florals, autumn leaves, and any light neutral filler stems. Gently fluff out the moss and separate your floral components. Trim the stems of the faux flowers and leaves to varying lengths, preparing them for arrangement into the pot openings.
Step 5: Assemble Floral Arrangements
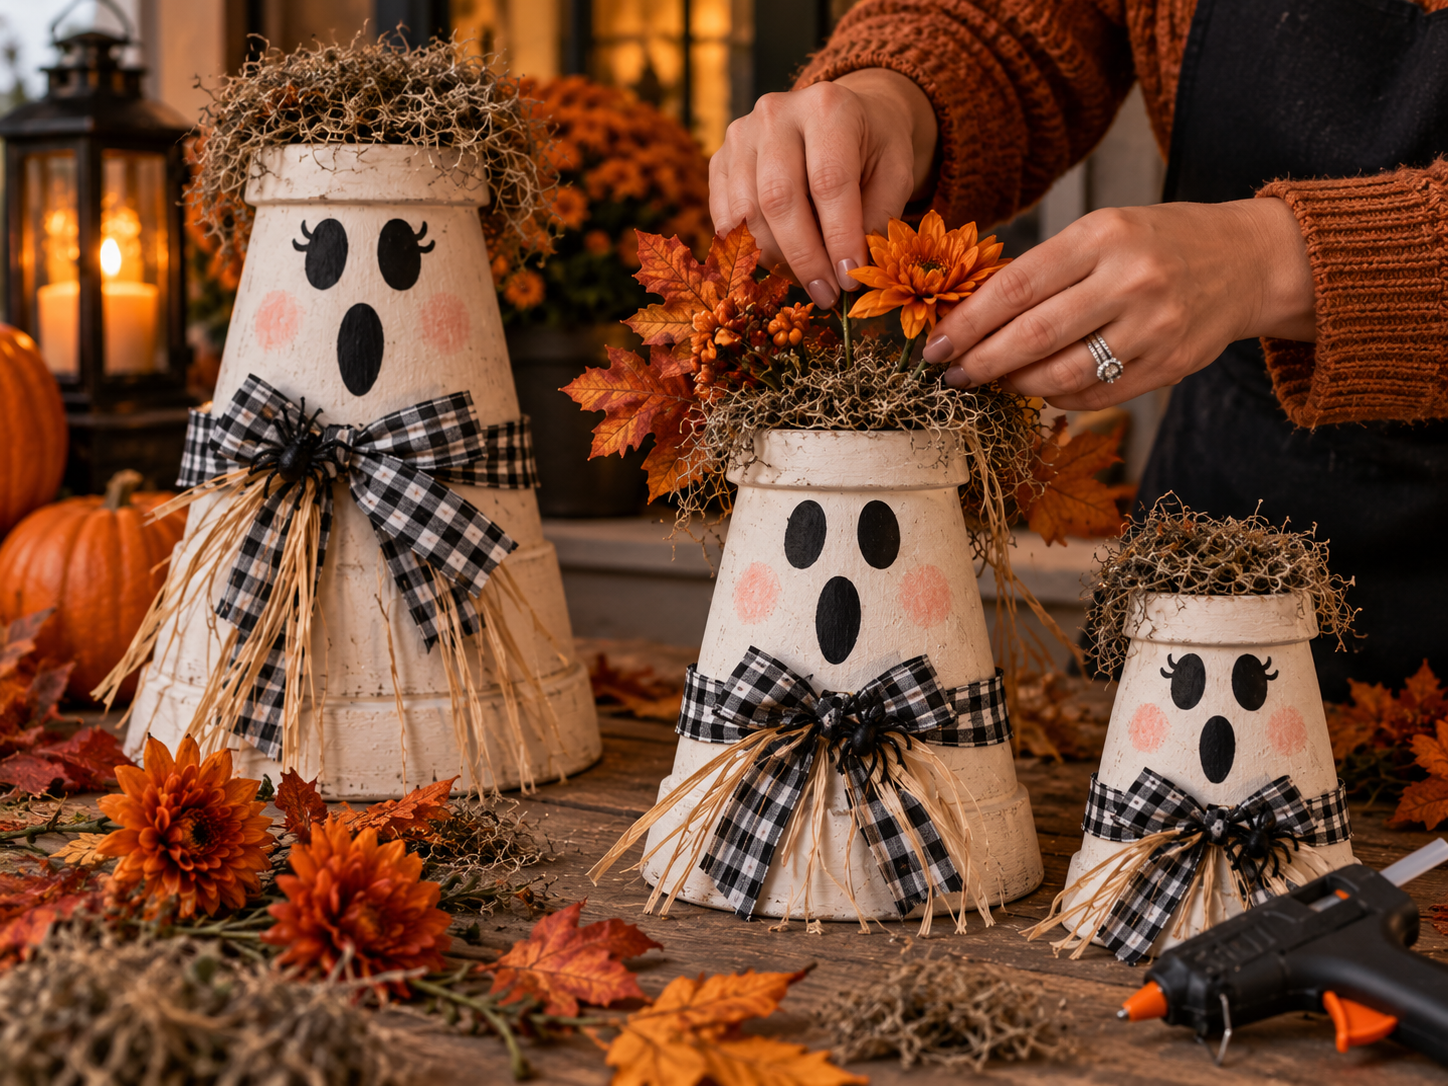
If desired, hot glue a piece of floral foam into the top opening of each pot to provide a sturdy base. Next, hot glue a generous layer of Spanish moss or green craft moss around the rim and over the floral foam (if used). Then, begin inserting and hot gluing your faux orange mums, autumn leaves, and filler stems into the moss, building a full and vibrant floral topper for each ghost.
Step 6: Create & Attach Ribbon Bows
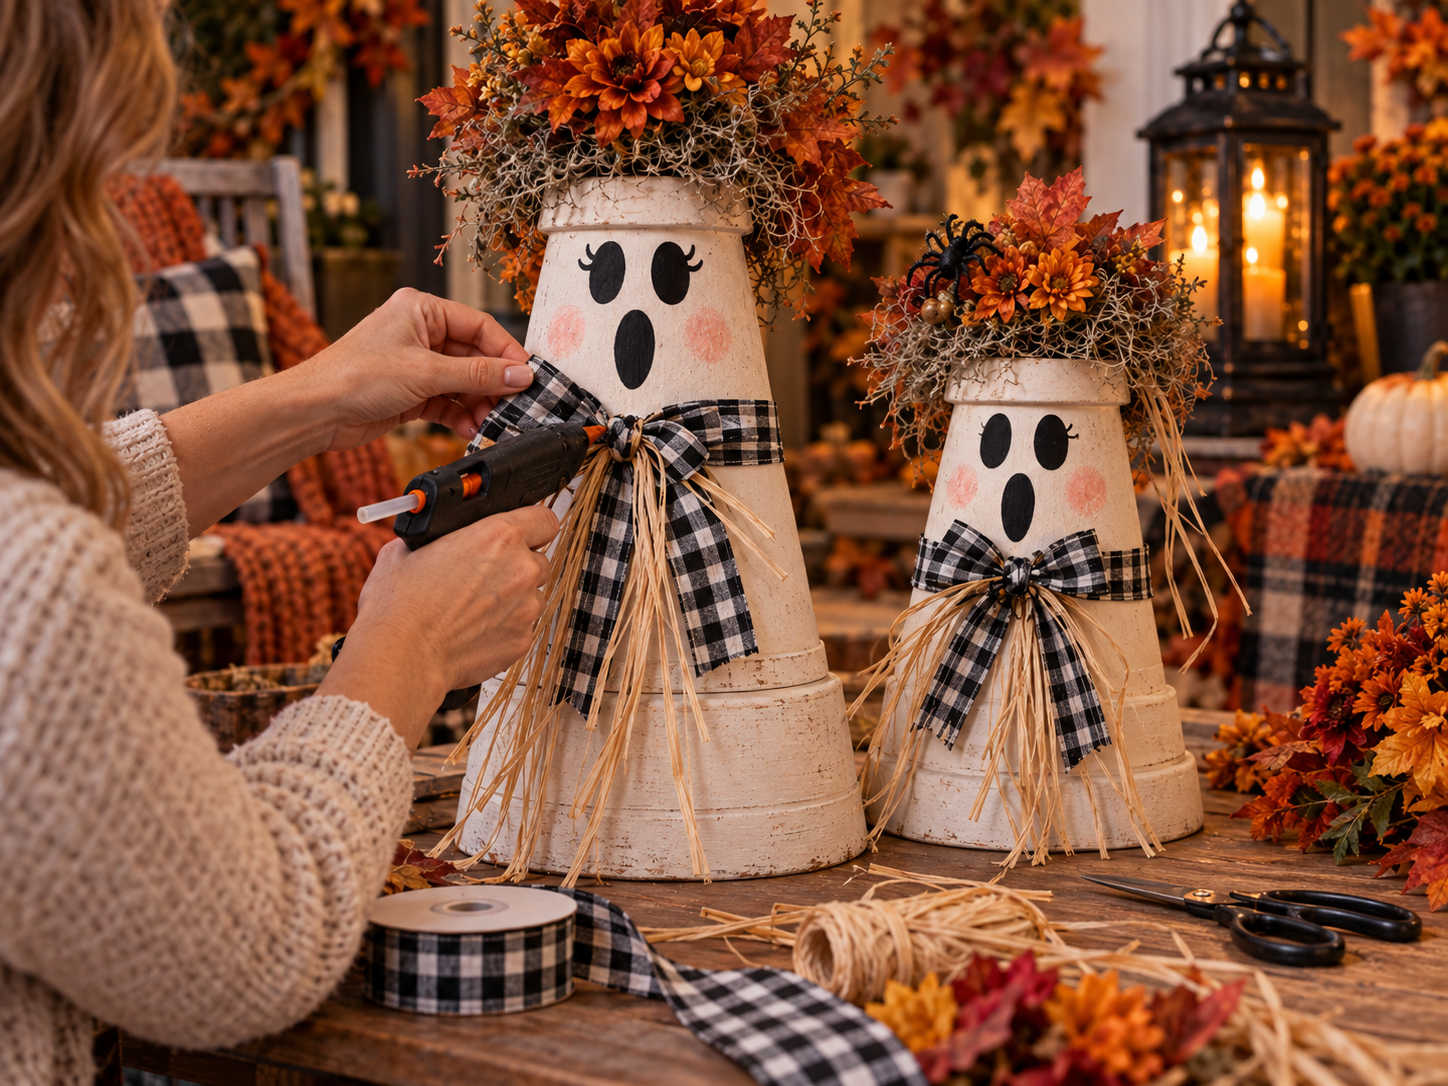
Cut lengths of black-and-white buffalo plaid ribbon and natural raffia or straw ribbon. Create a simple bow with the buffalo plaid ribbon. Gather several strands of raffia and tie or hot glue them to the back of the plaid bow, allowing the raffia tails to hang down. Hot glue this completed layered bow to the 'neck' or upper-front area of each ghost pot, ensuring it's centered and secure.
Step 7: Add Accents & Display
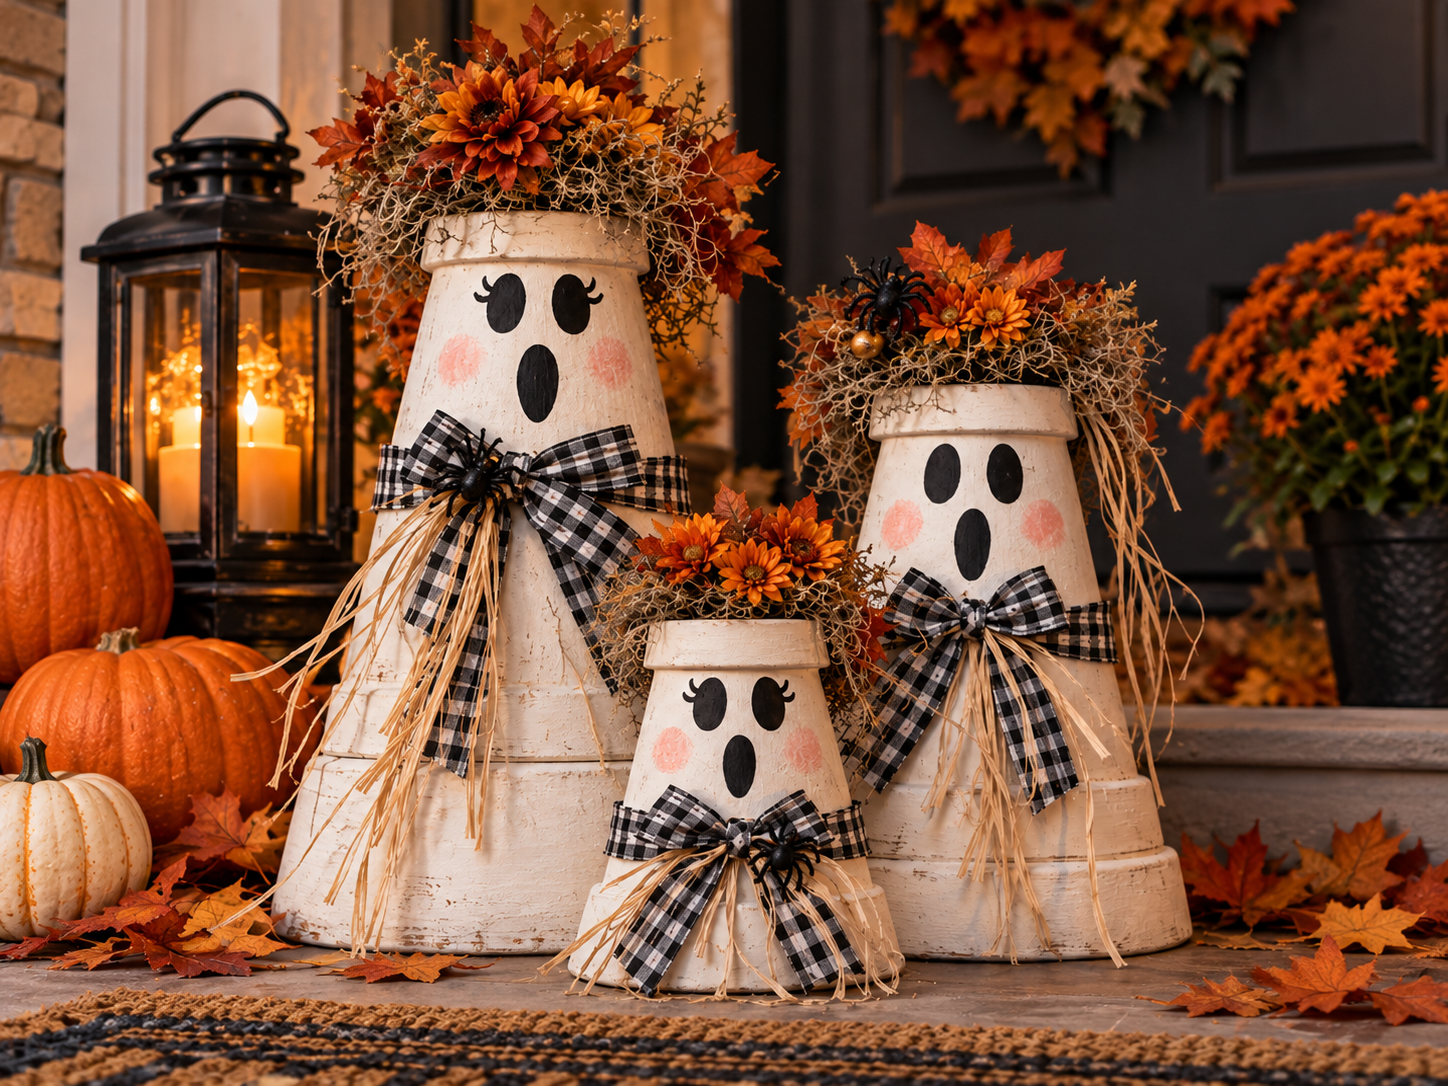
For a subtle touch of Halloween fun, hot glue one or two small black spider embellishments into the floral toppers of one or two of your ghost pots. Finally, arrange your three finished ghost flower pots on your porch or entryway. Group them in varying sizes to create a dynamic and welcoming spooky-chic display for the Halloween season.
Showcasing Your Halloween Ghost Pot Display
Once your set of three distressed terracotta ghost pots is complete, arrange them together on your porch or entryway. This charming display offers a unique, spooky-chic welcome for the Halloween season. Enjoy the handcrafted touch these characters bring to your outdoor decor.
Related project collection: Spooky Chic Ghost Flower Pot Porch Decor
Practical Questions About This Project
What kind of pots are used for this craft?
Terracotta-style flower pots in graduated sizes are used as the base for these ghost characters.
How is the distressed look achieved on the pots?
The distressed look is achieved by gently sanding the dry white paint along the rims and edges of the pots, allowing hints of the terracotta to show through.
What gives the ghost faces a cute character?
The ghost faces are given a cute, spooky-chic character by adding soft blush pink cheeks on either side of the painted mouth.
What materials are used to create the floral toppers?
The floral toppers are created using craft moss, faux orange mums or daisy-style fall florals, autumn leaves, and light neutral filler stems.
Where are the finished ghost pots typically displayed?
These finished ghost flower pots are designed for display on a porch or entryway, grouped together to create a welcoming Halloween arrangement.
Search Dollar Tree for planter supplies.

Leave a Reply