
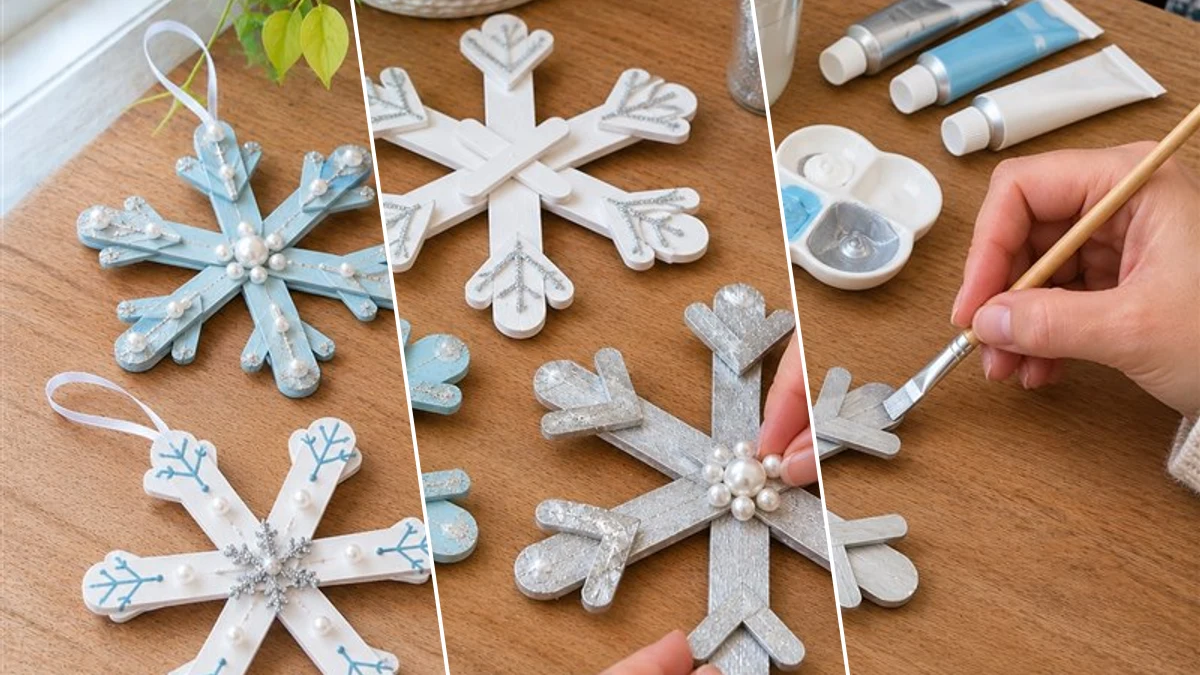
Bring a touch of frosty elegance to your holiday season with these charming craft stick snowflake ornaments! Perfect for adorning your Christmas tree or adding a whimsical touch to winter decor, this project is as fun to make as it is beautiful to display. With simple materials and easy steps, you can create a unique collection of sparkling snowflakes that capture the magic of the season.
Project at a Glance
- Difficulty: Easy
- Estimated active time: 45 minutes to 75 minutes (drying and curing waits not included)
- Estimated component cost: $2 to $5 (reusable tools and general supplies excluded)
- Main material: Craft Sticks
- Suggested placement: Wall
Why Craft Stick Snowflakes are Perfect for Winter Decor
These craft stick snowflake ornaments are a fantastic way to embrace the winter season without breaking the bank. Using readily available and inexpensive materials, you can craft a stunning set of personalized decorations. They're ideal for a cozy afternoon project, whether you're crafting solo or looking for a fun, creative activity to do with kids.
Beyond their cost-effectiveness, these snowflakes offer endless possibilities for customization. While we'll guide you through creating classic icy white, blue, and silver designs with glitter and pearl beads, feel free to experiment with any colors or embellishments that match your home's holiday theme. The active crafting time is typically 45-75 minutes, making it a manageable project that yields impressive results.
Once completed, your handmade snowflake ornaments are durable for indoor use and will last for many holiday seasons to come. Just ensure they are stored carefully to prevent damage to the delicate stick structures or embellishments. They make wonderful gifts, thoughtful additions to a gift package, or simply delightful accents for your own festive home.
Materials for Easy Craft Stick Snowflake Ornaments for Christmas Decor
- Craft Sticks (standard and mini)
- Acrylic Paint (White, Icy Blue, Silver)
- Craft Glue (or Hot Glue Gun with glue sticks)
- Fine Glitter
- Pearl Beads (assorted sizes)
- Thin White Ribbon
- Paintbrushes
- Scissors
Need another material? Browse current craft supplies and deals.
How to Make Your Craft Stick Snowflake Ornaments
Ready to create your own winter wonderland? Follow these simple steps to transform ordinary craft sticks into dazzling snowflake ornaments. Take your time with each stage, especially allowing glue and paint to dry thoroughly for the best results. Let's get crafting!
Step 1: Assemble Main Snowflake Structure
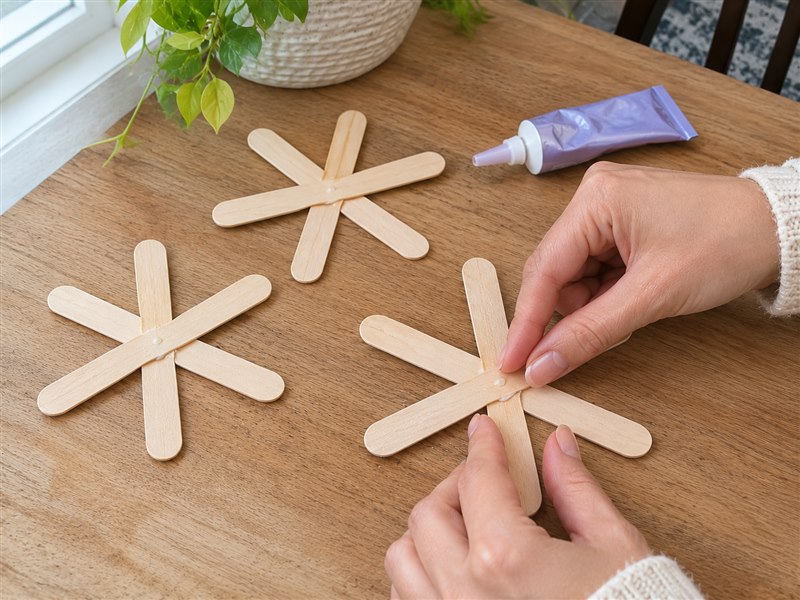
Begin by laying out six craft sticks in a star or asterisk shape. Ensure they are evenly spaced and intersect at a central point. Apply a generous dab of craft glue or a quick bead of hot glue at the center where all sticks meet. Press firmly and hold until the glue sets enough to hold the shape. Repeat this process for each snowflake ornament you plan to make, forming the basic six-pointed structure. Allow them to dry completely according to your glue's instructions.
Step 2: Add Layered Details and Shapes
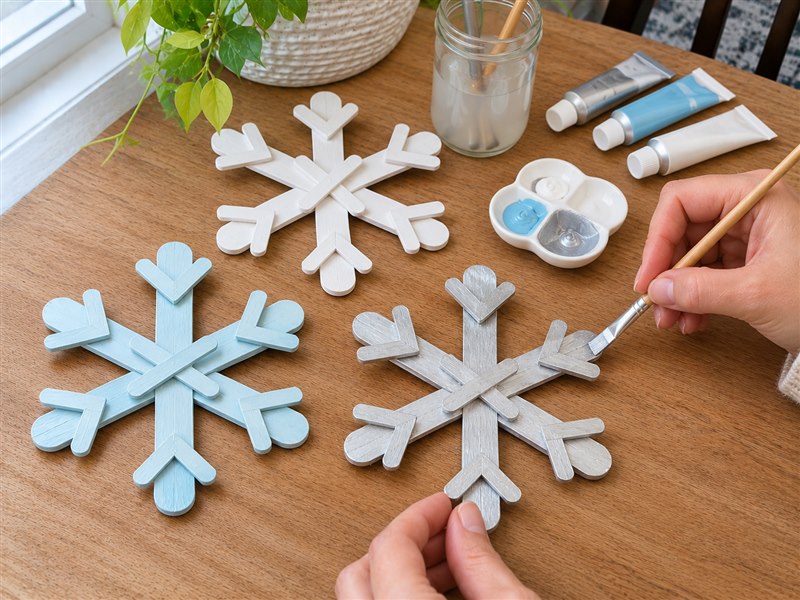
Once the main snowflake bases from Step 1 are dry and sturdy, you can add more intricate details. For some designs, glue smaller craft sticks or cut pieces of standard sticks onto the ends or between the arms of the main snowflake structure. Experiment with different lengths and placements to create unique patterns for each snowflake. For example, glue two smaller sticks in a 'V' shape at the end of each arm, or cross small sticks near the center. Secure these new layers with glue and allow them to dry completely.

Step 3: Paint Base Colors
Now it's time to bring your snowflakes to life with color! Using a paintbrush, apply an even coat of acrylic paint to each snowflake. Use white for a classic look, icy blue for a frosty feel, or silver for a shimmering base. You can choose one color per snowflake or combine colors. For best coverage, you might need two coats, allowing the first coat to dry completely before applying the second. Ensure all surfaces, including the edges and any layered sticks, are well covered.


Step 4: Apply Glitter and Pearl Embellishments
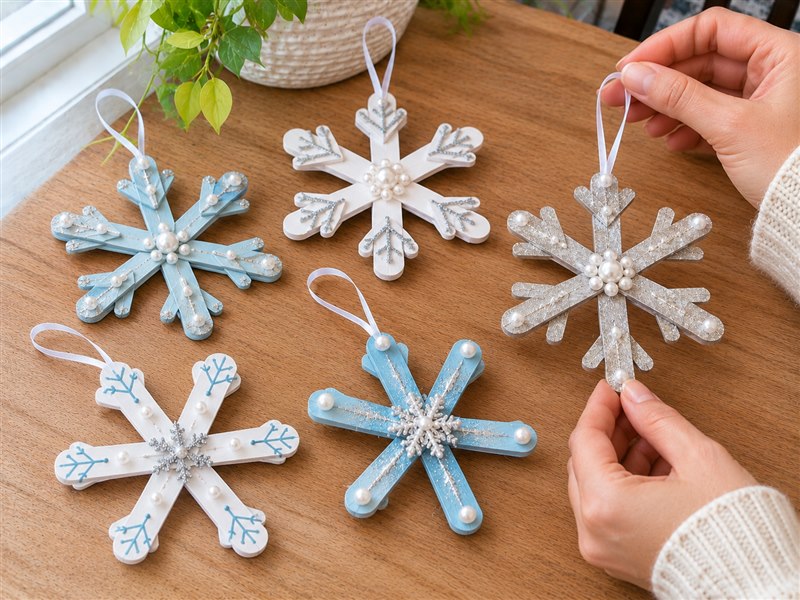
Once the paint is completely dry, it's time for the sparkle! Apply craft glue in areas where you want glitter to adhere, such as the tips of the sticks or across the entire surface for a full shimmer. Immediately sprinkle fine glitter over the wet glue, then gently tap off any excess. Next, using craft glue, attach pearl beads to the center of each snowflake and along the arms for added texture and elegance. You can use different sizes of pearls to create depth. Allow all glue and glitter to dry thoroughly.

Step 5: Attach Hanging Ribbons
For the final touch, cut approximately 6-8 inch (15-20 cm) lengths of thin white ribbon for each ornament. Fold each ribbon length in half to create a loop. Apply a small amount of craft glue or hot glue to the folded ends of the ribbon and press them firmly onto the back of one of the snowflake's arms, ensuring the loop extends upwards. Hold until the glue sets. Repeat for all your finished snowflakes. Once dry, your sparkling craft stick snowflake ornaments are ready to hang!
Enjoy Your Handmade Snowflake Ornaments
You've successfully created a beautiful collection of unique craft stick snowflake ornaments! Hang them proudly on your Christmas tree, string them together to make a festive garland, or use them as charming accents around your home. Your handmade creations add a special, personal touch to your holiday decorations that store-bought items simply can't match.
Related project collection: DIY Christmas Ornament Cone Tree Centerpiece with Mini Ornaments
Practical Questions About This Project
Can kids make these craft stick snowflakes?
Yes, this is an easy, kid-friendly craft! Younger children will need adult supervision, especially when using a hot glue gun or handling paint and glitter. Craft glue is a great alternative for little hands, though it requires longer drying times.
How long do these snowflake ornaments take to make?
The active crafting time for a set of 5-10 ornaments is typically 45-75 minutes. This estimate does not include the unattended drying time for glue and paint, which can add several hours depending on the products used.
What kind of glue works best for these ornaments?
Craft glue is versatile for both assembly and attaching embellishments, offering a strong bond once cured. For quicker assembly of the main craft stick structure, a hot glue gun provides instant adhesion, significantly speeding up the initial steps.
Can I use different colors or embellishments?
Absolutely! While icy blues, whites, and silvers create a classic winter look, feel free to use any acrylic paint colors you prefer. Small sequins, beads, buttons, or even different types of glitter can be used in place of or in addition to pearl beads for unique designs.
How durable are these craft stick snowflakes?
These ornaments are designed for indoor use and are quite durable if handled with care. To ensure they last for many holiday seasons, store them in a protective container when not on display, preventing pressure on the delicate craft stick structures or glued embellishments.
Search Dollar Tree for craft sticks supplies.

Leave a Reply