
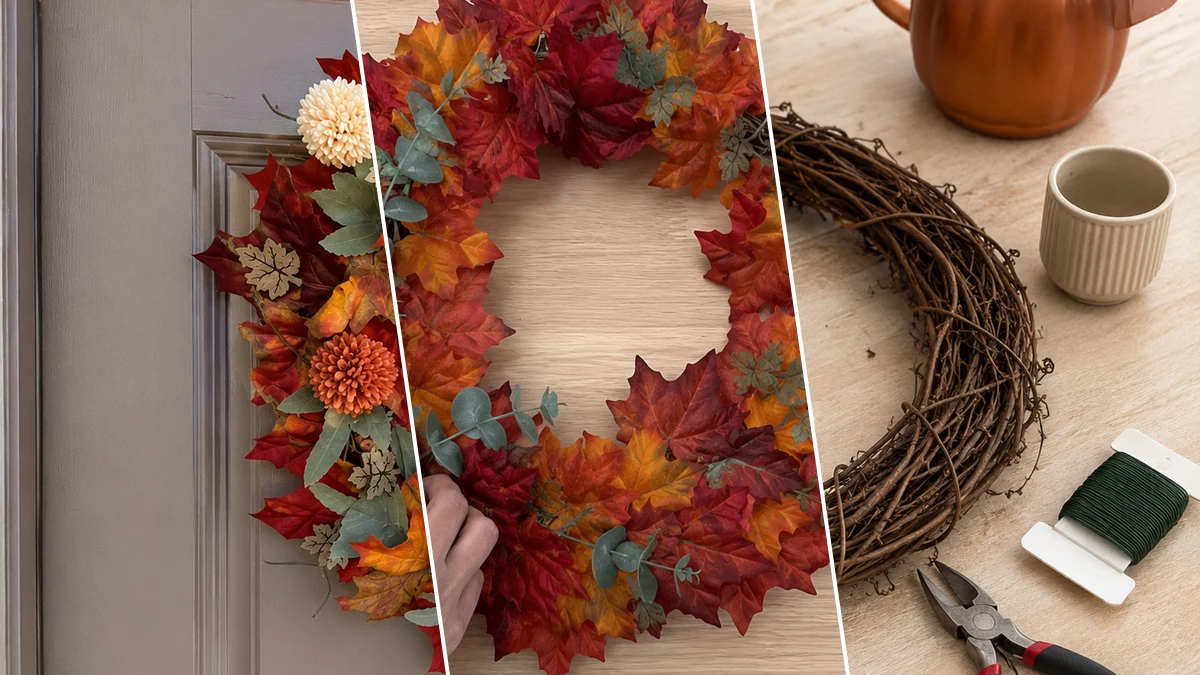
Ever walk into Dollar Tree and grab stuff you don’t even need, just because it’s cute? Same! That’s exactly how I ended up making this super cute Harvest Haven Wreath: A Dollar Tree-Style Fall Statement. I just knew it would be perfect for our front door to welcome all the beautiful Fall & Autumn vibes, and guess what? It totally was!
Theme: Fall & Autumn
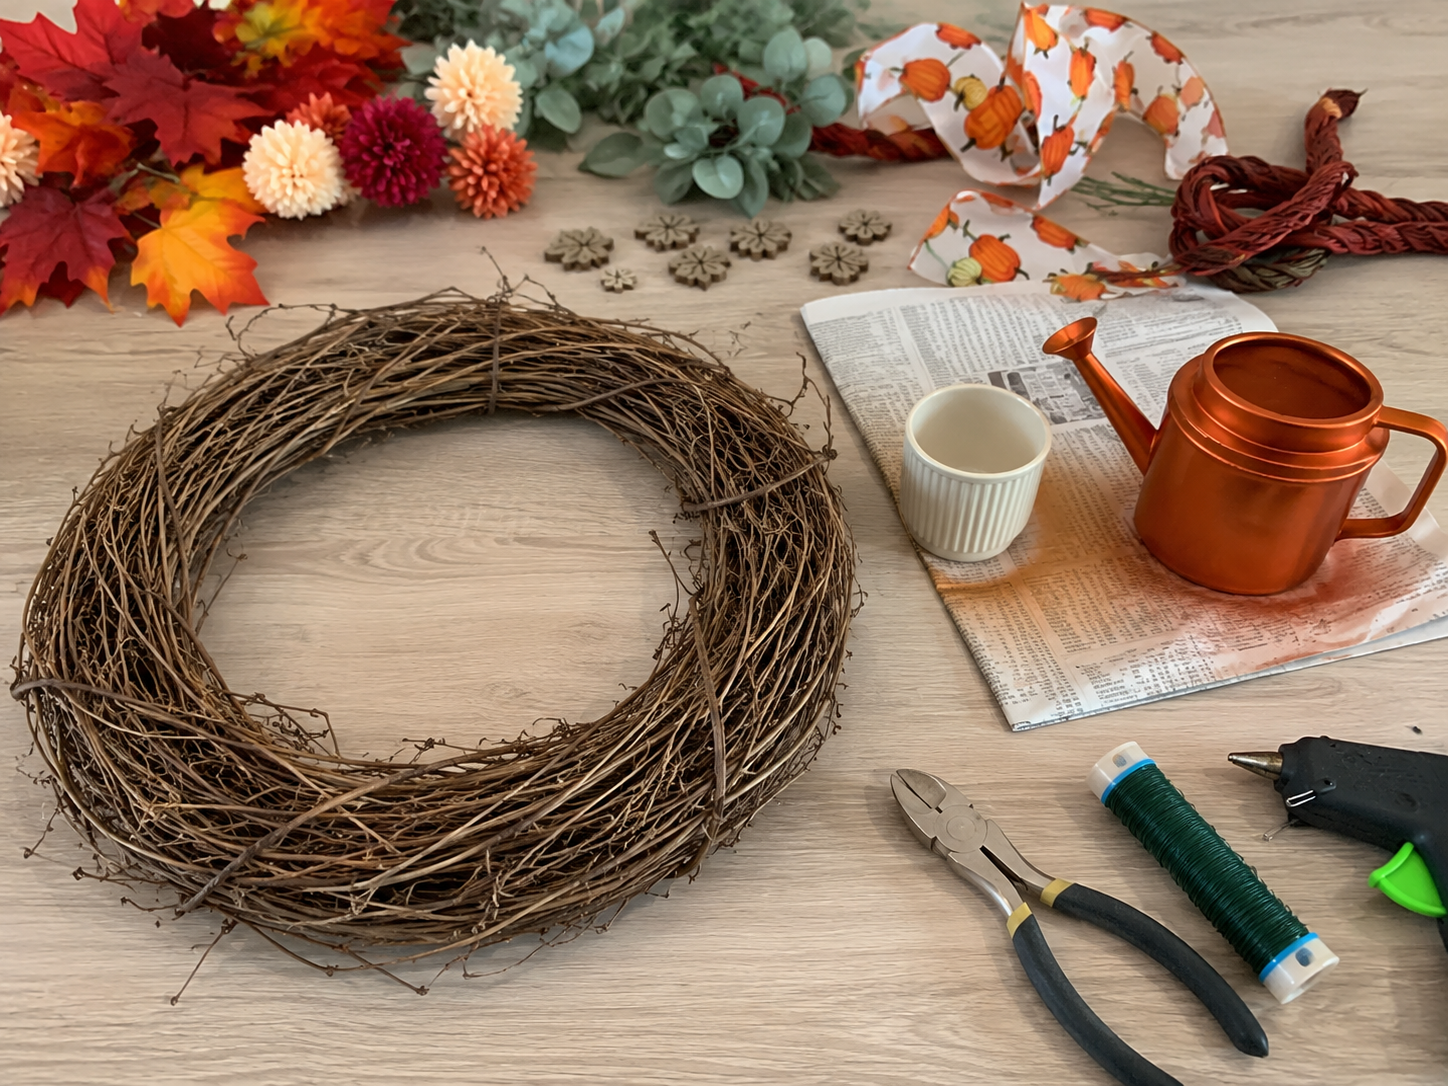
Materials Needed
- Wreath Form (Grapevine or Wire)
- Faux Fall Leaf Garlands & Eucalyptus Picks
- Assorted Faux Fall Flowers (Mums, Pom-poms)
- Mini Wooden Leaf Cutouts
- Pumpkin-Patterned Ribbon
- Small Lightweight Plastic Watering Can
- Small Plastic Mini Flower Pot
- Acrylic Craft Paint (Copper/Orange, Cream)
- Twisted Jute Rope or Flexible Craft Branch/Vine
- Basic Craft Tools (Wire cutters, scissors, floral wire, hot glue gun & glue sticks)
Why This Craft Works
This Harvest Haven Wreath is just the thing to bring cozy vibes into your home for Fall & Autumn. I picture it hanging on a farmhouse kitchen door, welcoming guests on your front porch, or even dressing up a blank wall in your living room. It’s truly a versatile piece of Holiday & Seasonal decor.
The best part? This whole project, using mostly Dollar Tree supplies, ran me about $12-15 total. You really can’t beat that for a beautiful, custom piece that looks way more expensive than it actually is! It’s proof that you don’t need a big budget for big style.
You don’t need to be a crafting pro to make this, it’s totally easy! From start to finish, the Harvest Haven Wreath took me about 40-60 minutes. It’s perfect for beginners, a fun afternoon project with older kids, or when you need a quick, thoughtful last-minute gift.
Step-by-Step Instructions for Harvest Haven Wreath: A Dollar Tree-Style Fall Statement
Alright, crafters, are you ready to get your hands a little gluey? Making this Harvest Haven Wreath is seriously so much fun and super simple. You’ll be amazed at how quickly this Holiday & Seasonal decor comes together, and it’s a fantastic project for anyone, even if you’re just starting out with DIY. Let’s grab our Dollar Tree goodies and make some beautiful Fall & Autumn magic!
Step 1: Prepare Wreath Base & Props
Begin by selecting your wreath form; a grapevine form offers a natural look, while a wire form might need a light wrapping of burlap ribbon or raffia for added volume. Next, prepare your decorative elements: paint the lightweight plastic watering can with copper or orange acrylic craft paint, ensuring full coverage and an even finish. Paint the small plastic mini flower pot with cream acrylic paint. Allow both pieces to dry completely before proceeding.
Step 2: Attach Fall Leaves Foundation
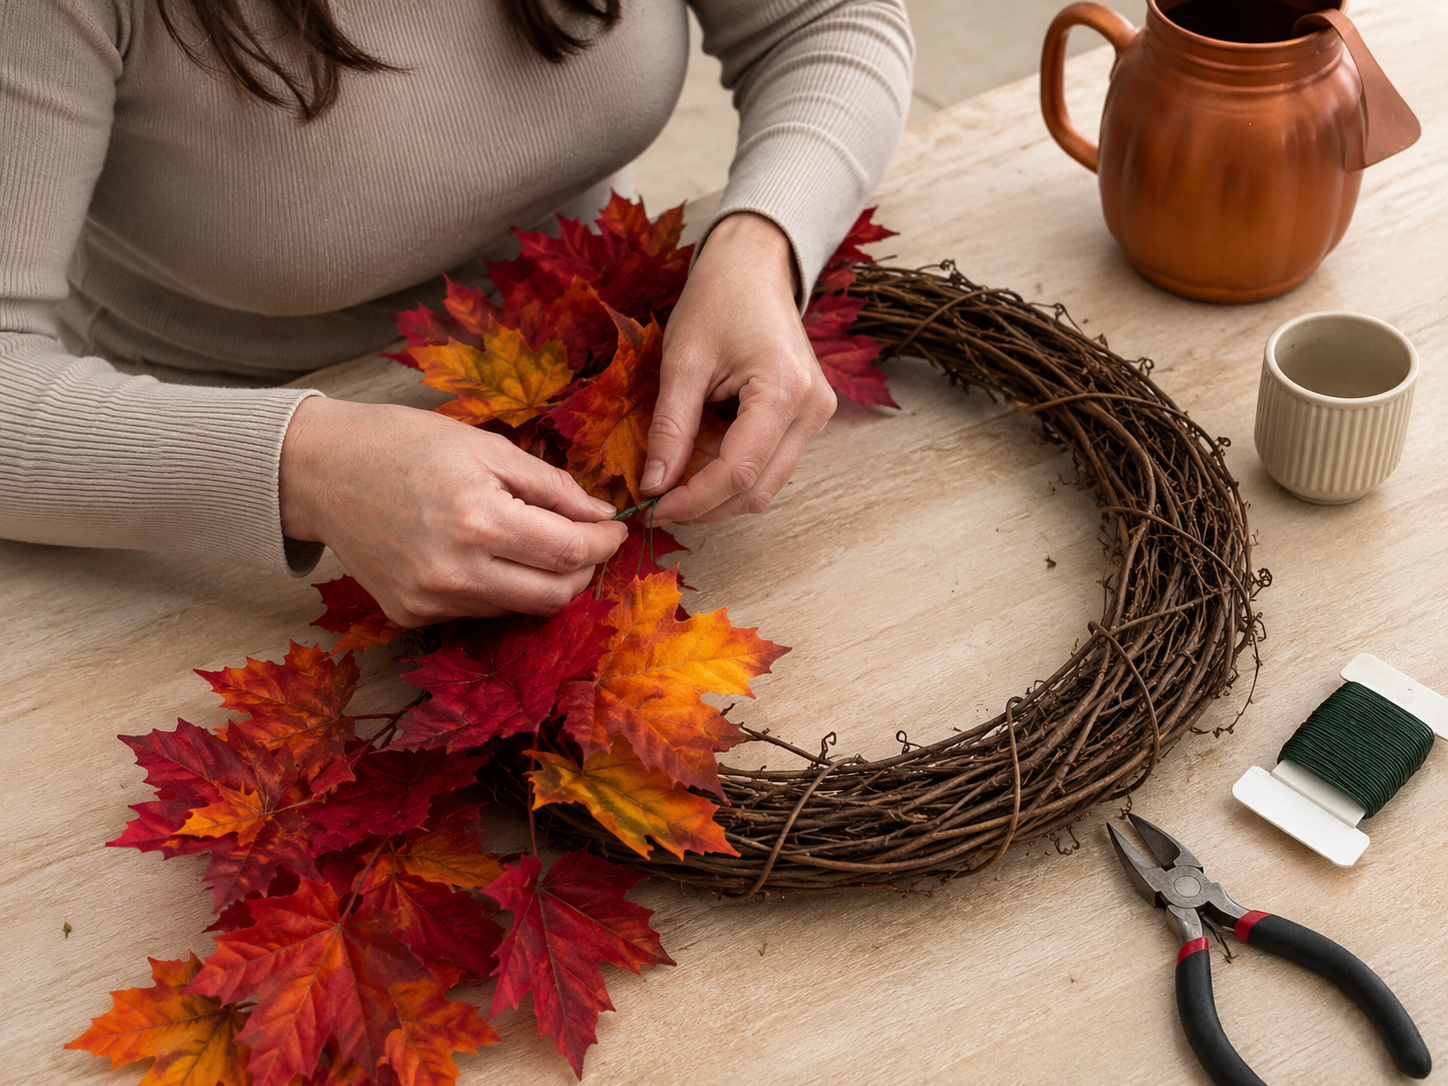
Unfurl your faux fall leaf garlands. Starting at one point, begin attaching sections of the garland to your wreath form using floral wire. Overlap the leaf clusters generously, winding the garland around the wreath and securing it tightly every few inches. Ensure the vibrant orange, red, and yellow maple leaves are facing outwards and cover the wreath form evenly, maintaining a clearly round and balanced shape. Aim for a dense, full base layer.
Step 3: Layer in Muted Eucalyptus
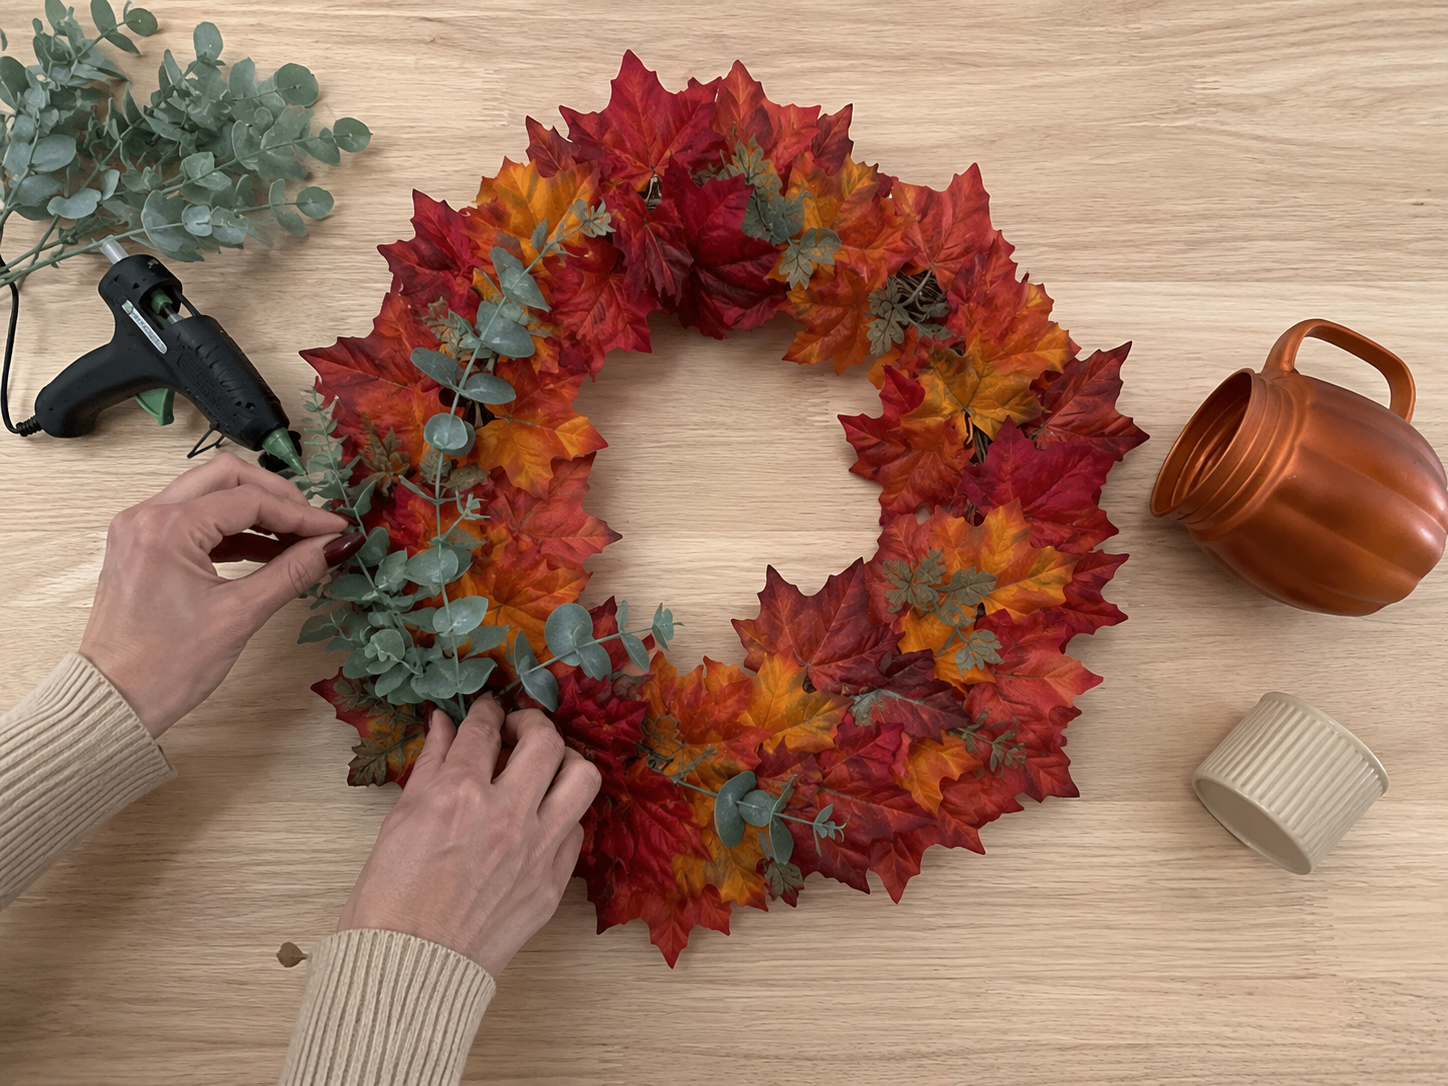
Once your base layer of fall leaves is complete, it’s time to add depth and textural contrast with eucalyptus. Take your faux eucalyptus picks or trim sections from a garland. Intersperse these muted green leaves among the brighter fall foliage. Use small pieces of floral wire or dabs of hot glue to secure them, ensuring they are evenly distributed but not overwhelming the fall leaves. The goal is to provide a soft, contrasting backdrop that peeks through the autumn colors.
Step 4: Incorporate Fall Mums & Flowers
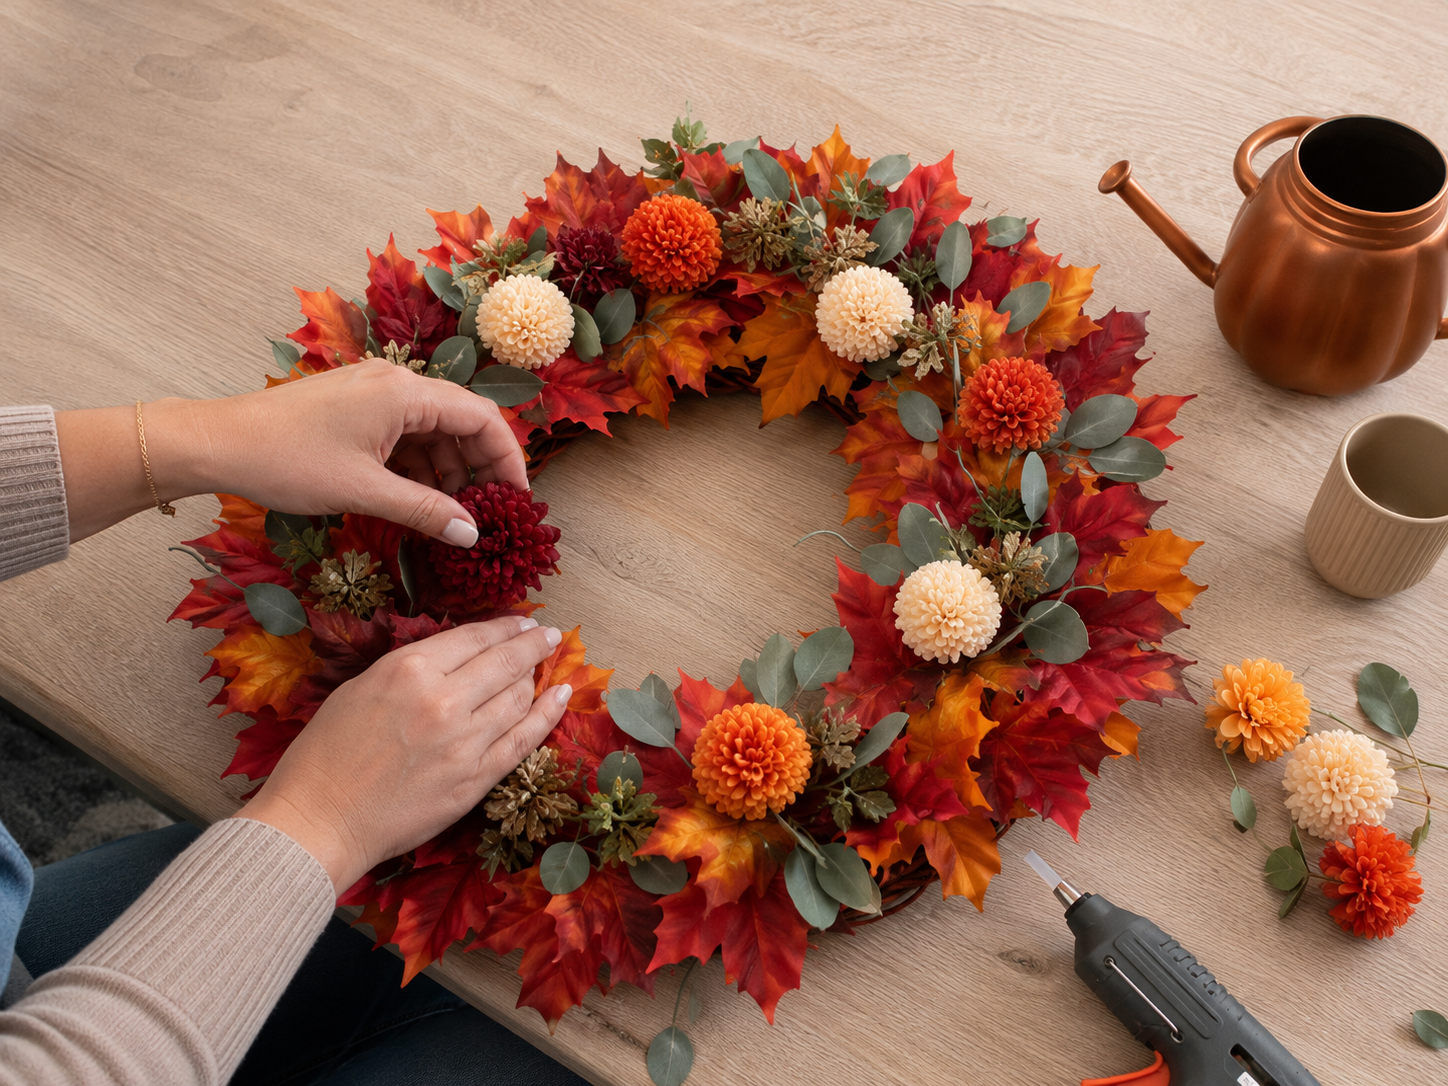
Now, it’s time to add your focal flowers. Strategically place your faux fall mums and pom-pom flowers around the wreath. For visual interest, vary their sizes and colors, incorporating shades like deep red, rust orange, and cream. Before gluing, arrange them loosely to find a pleasing, balanced layout. Once satisfied, secure them firmly with hot glue, pushing them gently into the existing leaf and eucalyptus layers to make them look cohesive and deeply rooted in the wreath.
Step 5: Place Mini Wooden Leaf Accents
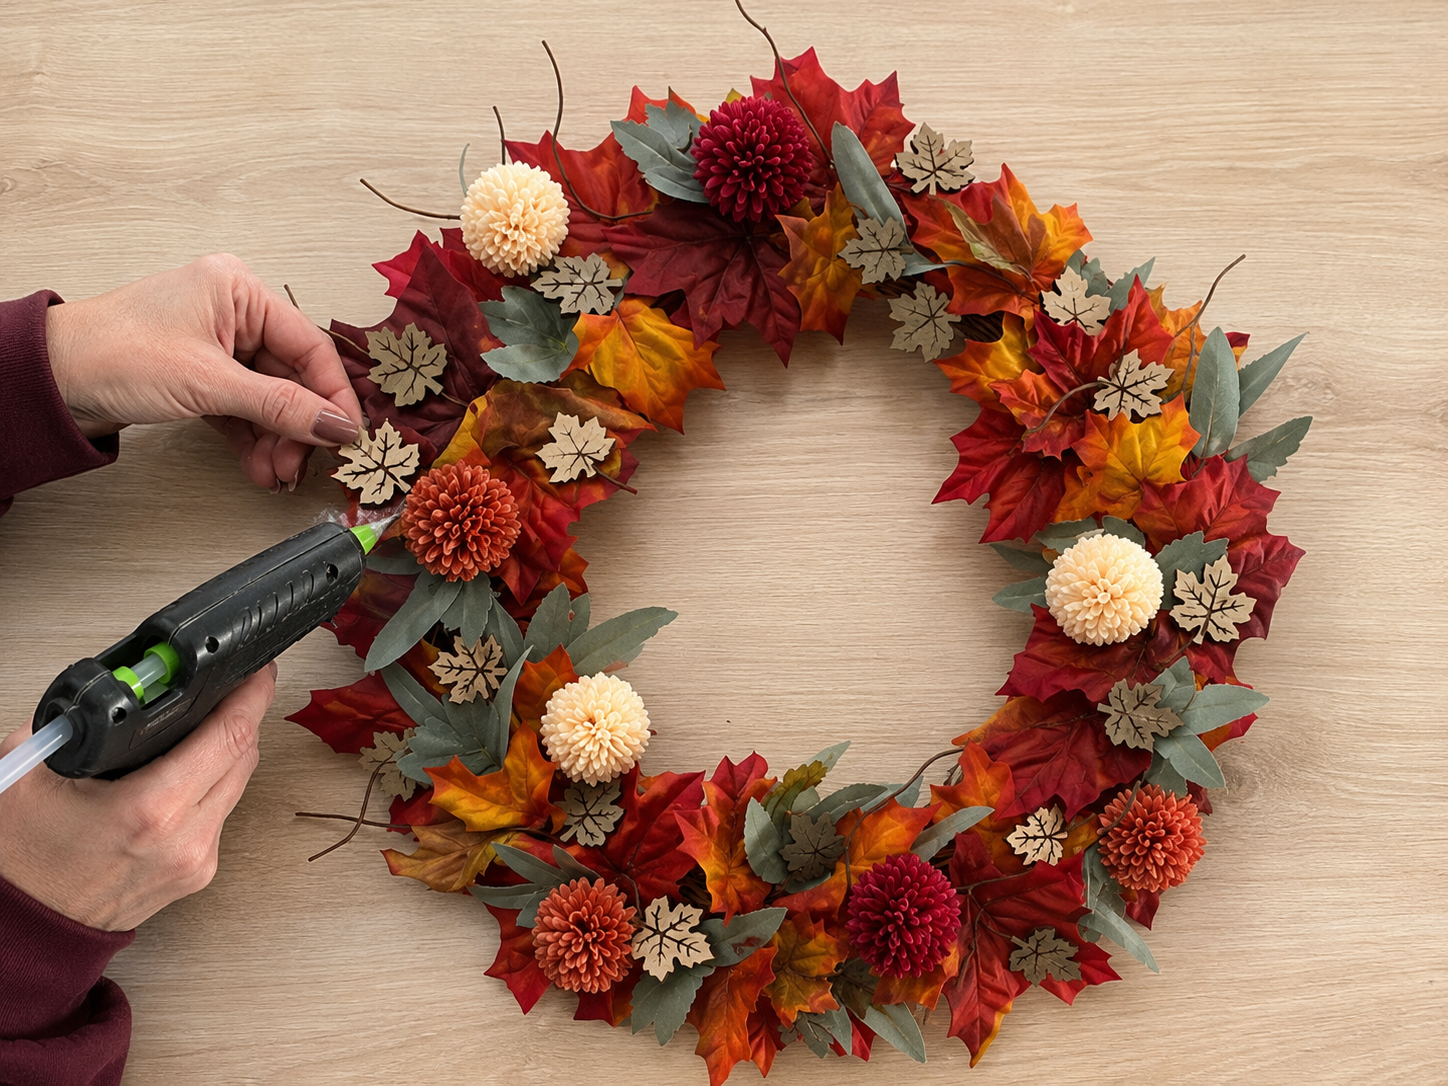
With the main foliage and flowers in place, add charming detail with your small wooden leaf cutouts. These provide a lovely rustic texture. Apply a small dab of hot glue to the back of each wooden leaf and attach them sparsely but intentionally onto the wreath. Place them strategically, peeking out from behind a flower, nestled within a cluster of leaves, or gently accenting an open area. The idea is to add subtle points of interest.
📱 Craftino App
Make more crafts like this
1,000+ Fall & Autumn ideas with photo guides & Pro Tips
✓ Step-by-step photo tutorials, nothing left out
✓ Pro Tips for every step
✓ Save crafts & browse fully offline
✓ New ideas added every week


Step 6: Create & Attach Pumpkin Bow
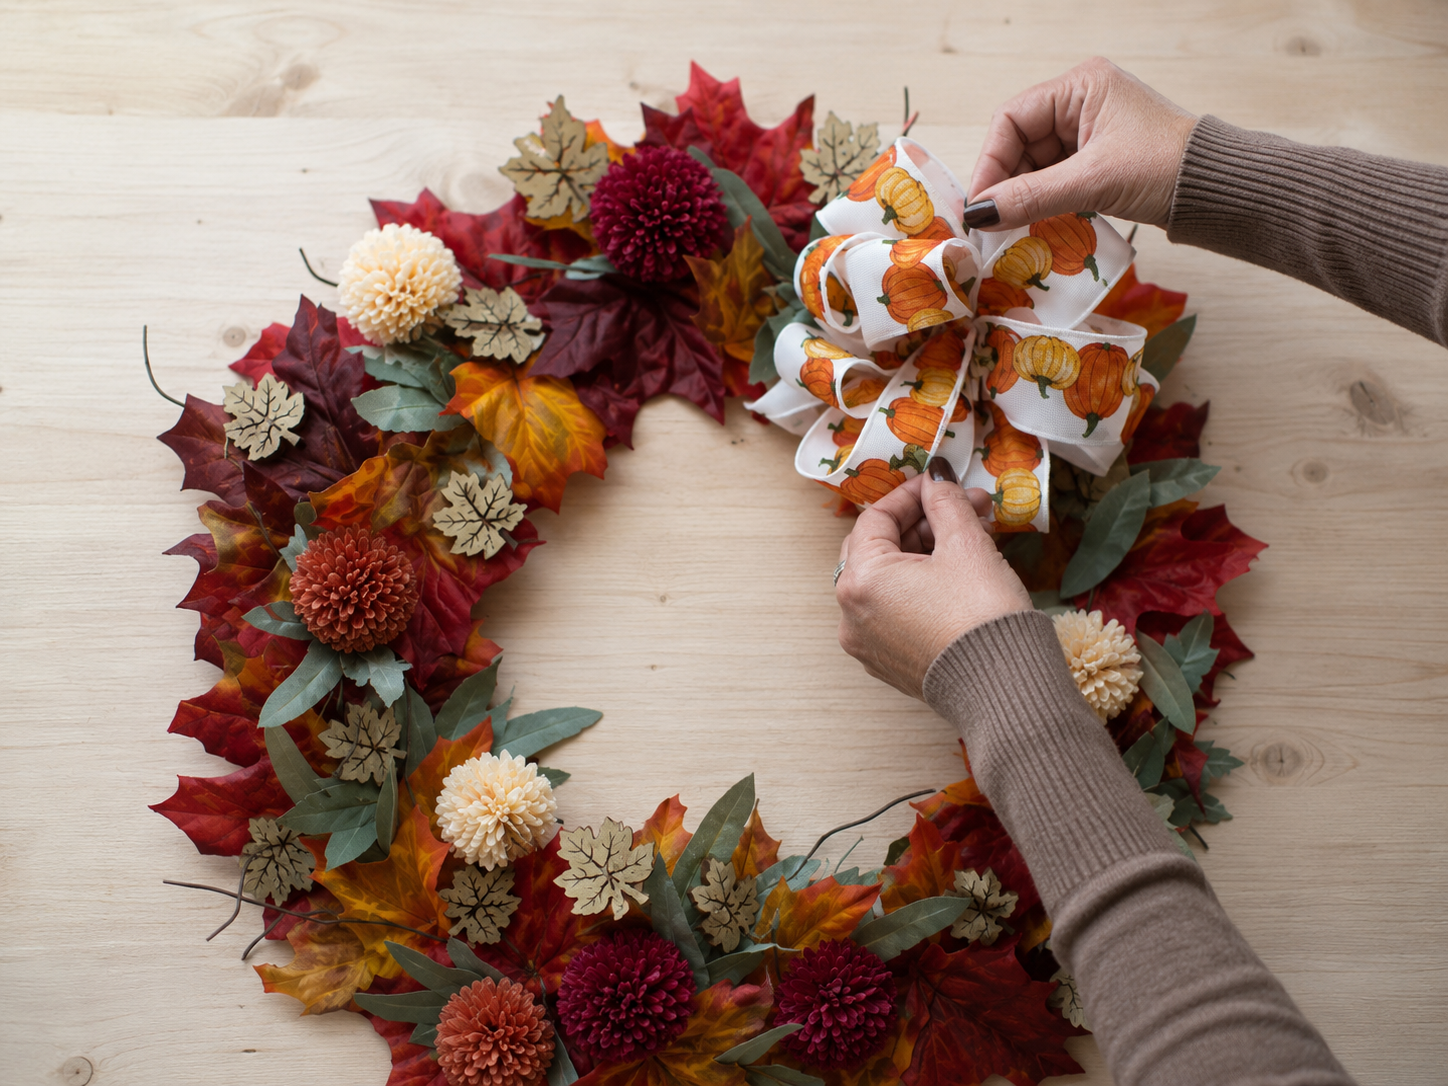
Now, create a focal point with your pumpkin-patterned ribbon. Fashion a large, full bow by making several loops and gathering them tightly in the center. Secure the center with a piece of floral wire, twisting it tightly at the back. Once formed, position this generous bow near the upper-right section of the wreath. Thread the floral wire through the wreath form and twist it securely at the back to attach the bow firmly. Finally, fluff the ribbon loops for maximum volume and visual impact.
Step 7: Attach Tilted Watering Can
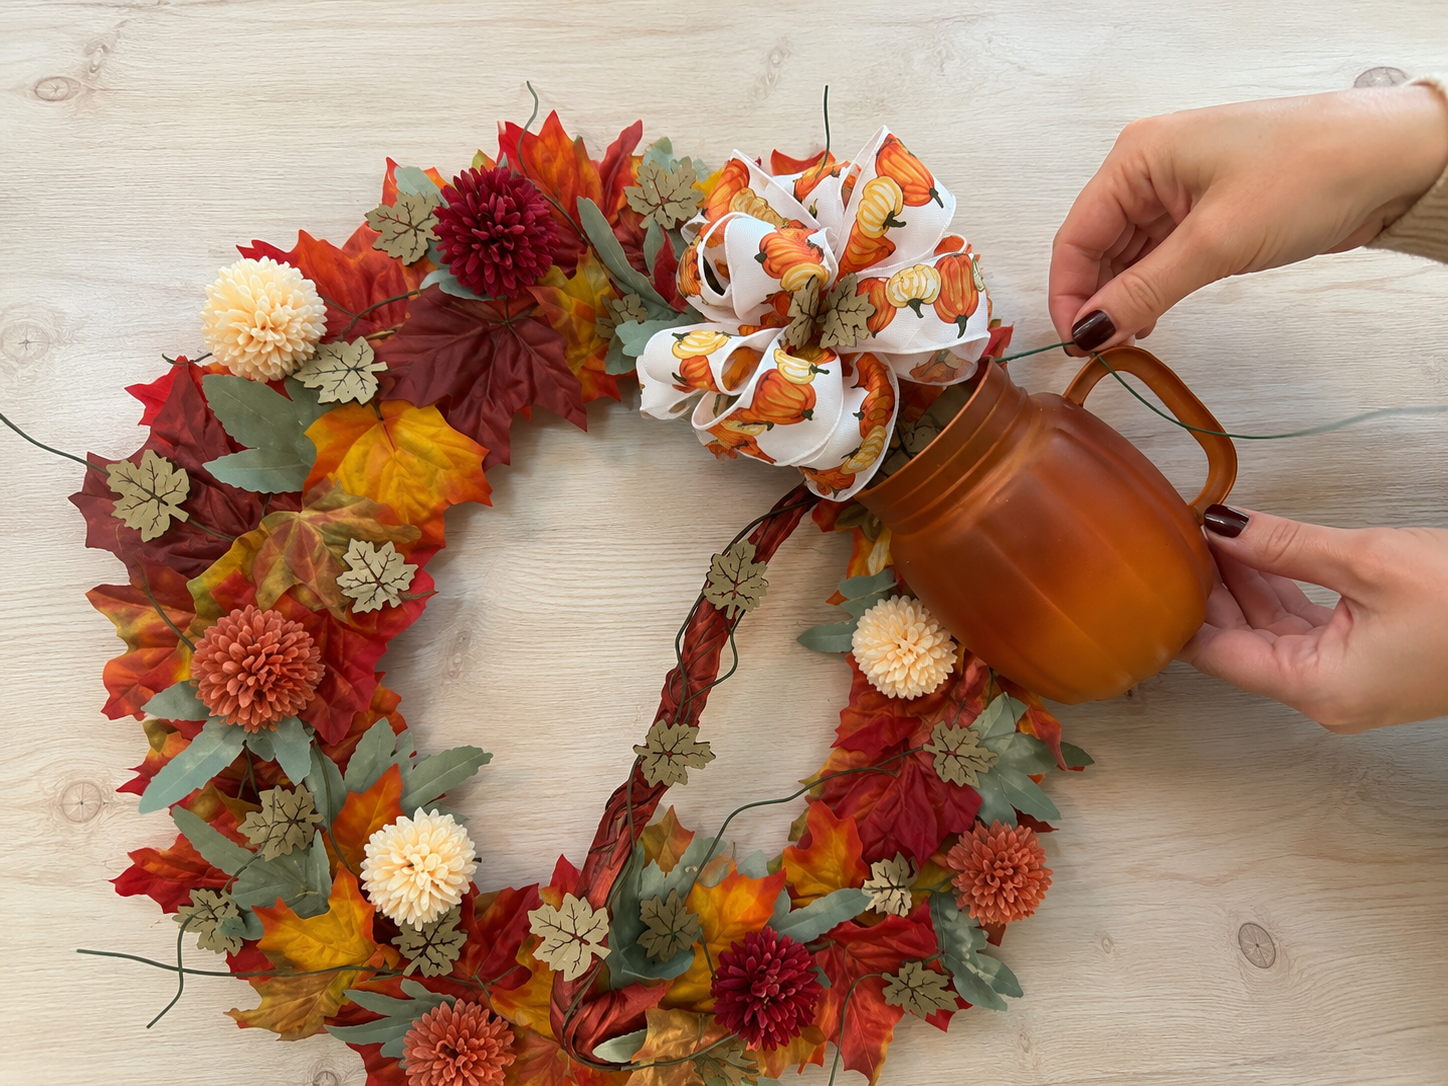
Carefully position your painted copper/orange watering can on the right side of the wreath, just below and slightly to the right of the bow. Angle it downwards, as if it is pouring into the wreath. Use sturdy floral wire to thread through the handle and possibly through small, carefully drilled holes in the back of the can (use a hot skewer to melt holes in plastic if needed). Secure the can tightly to the wreath form, ensuring it is stable and maintains its tilted angle.
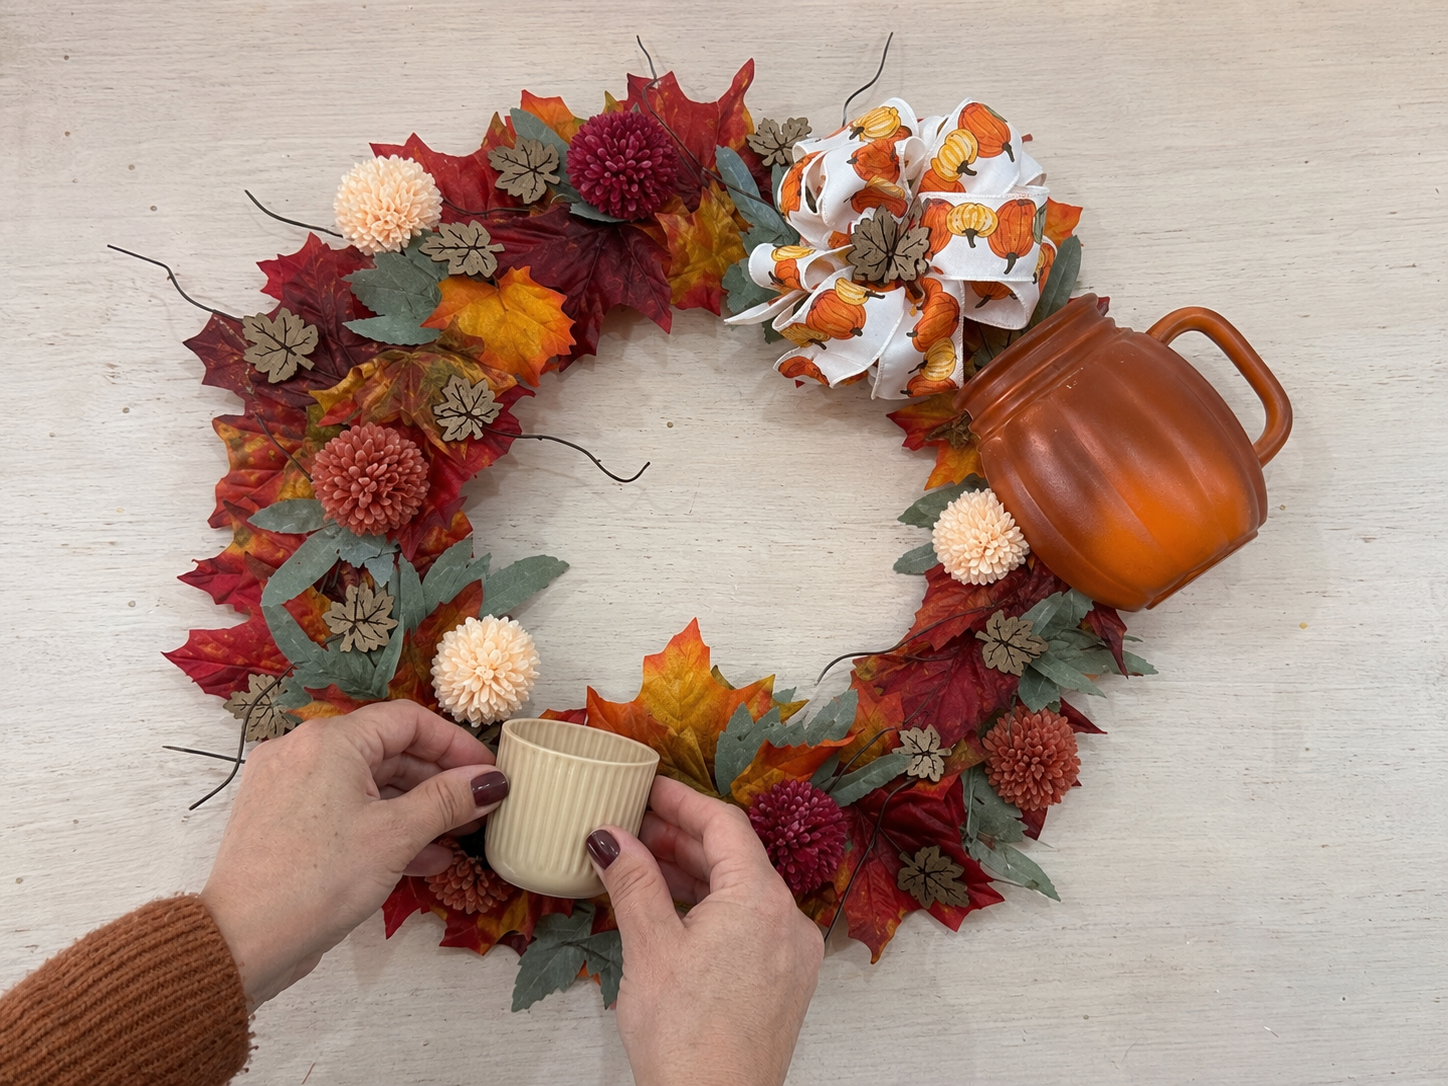
Step 8: Secure Cream Flower Pot
Now, turn your attention to the bottom of the wreath. Attach the painted cream mini flower pot near the bottom, slightly to the left of the wreath’s center. Use strong floral wire, threading it through the pot’s drainage holes (or carefully drilled holes) and around the wreath form to secure it firmly. Alternatively, use a generous amount of hot glue for a more permanent bond. Ensure the pot is upright and stable, providing a clear base for the ‘pouring’ element that will connect to the watering can.
Step 9: Create Pouring Stem Detail
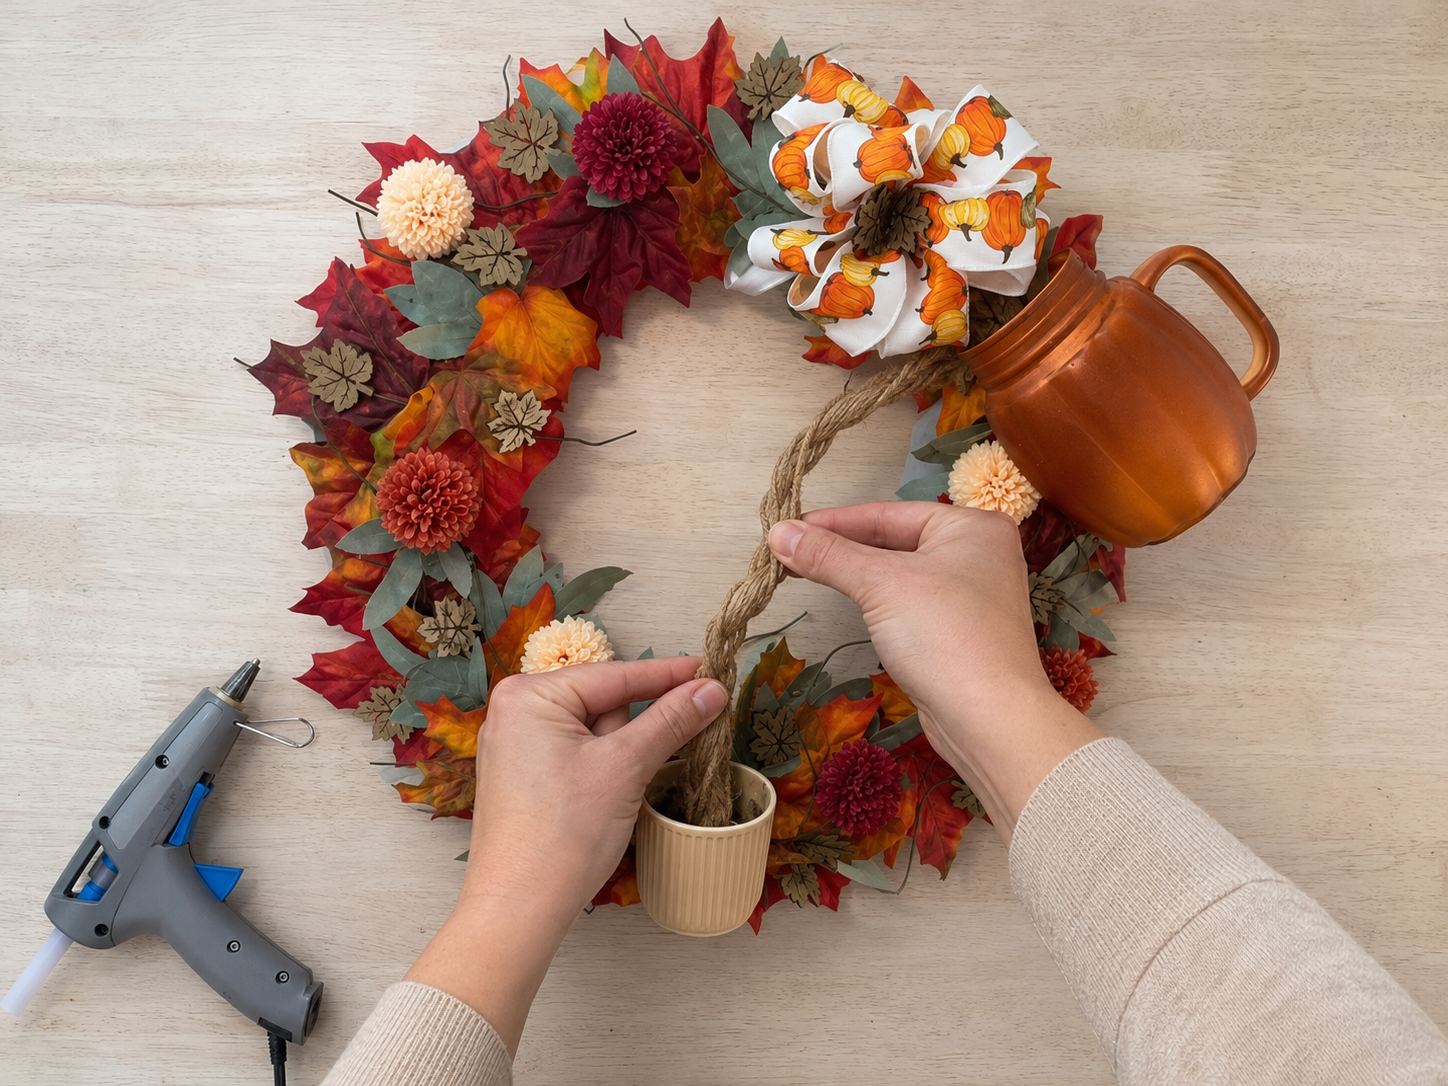
This step brings the narrative of your wreath to life! Take your twisted jute rope or flexible craft branch/vine. Starting from inside the cream flower pot, secure one end of the rope/vine with hot glue. Gently curve and guide the rope upwards and to the right, creating a natural arc that appears to ‘pour’ from the pot towards the spout area of the watering can or into the bottom loops of the bow. Secure the rope along its path and at its end point using small dabs of hot glue or hidden pieces of floral wire nestled within the leaves.
Step 10: Final Styling & Display
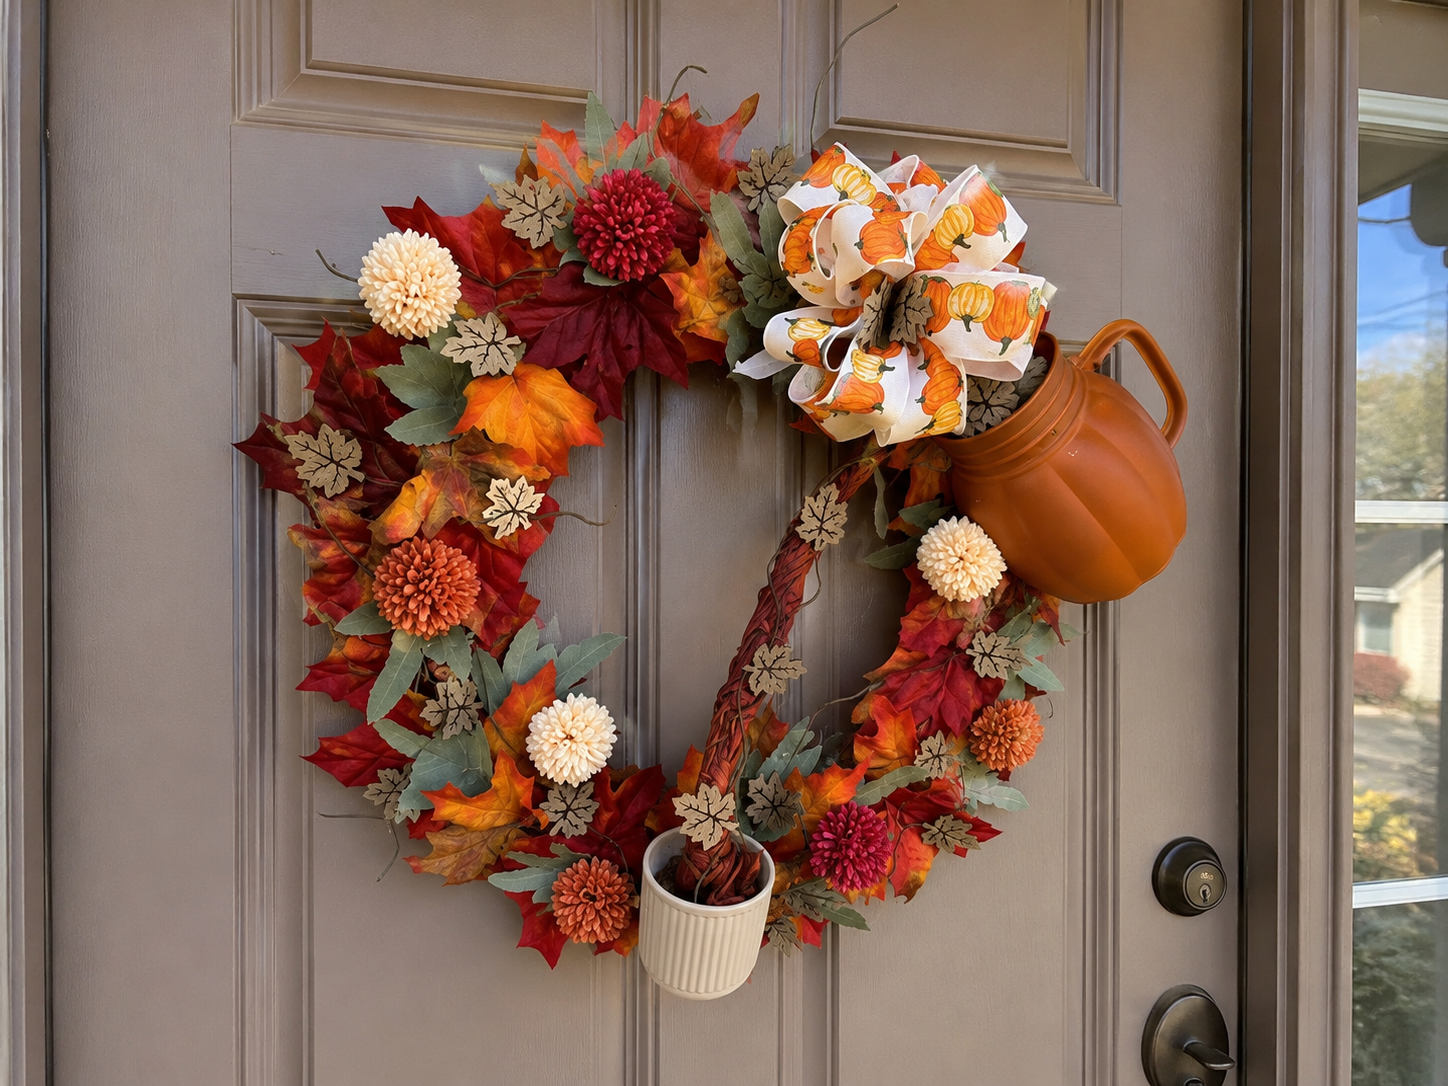
Step back and admire your handiwork! Take a moment to inspect your entire wreath. Fluff any leaves, flowers, or ribbon loops that may have become compressed during the crafting process. Ensure all elements—especially the watering can, pot, and stem—are securely attached and stable. Once you’re satisfied with the overall balance and appearance, hang your beautiful Harvest Haven Wreath on your front door to welcome the cozy fall season!
See also: 25 Easy Dollar Tree Fall Halloween Crafts To Cozy Up Your Home
📋 Love staying organized while crafting? Check out our printable planners & craft designs at CraftersDT on Etsy and use code CRAFT20 for 20% off your entire order!
Show Off Your Fall Harvest Haven Wreath!
Look at that! Your beautiful Harvest Haven Wreath is all done and ready to shine. Hang it on your front door, above your mantel, or gift it to a friend who loves Fall & Autumn decor as much as you do. Don’t forget to share your version with me, I’d love to see how you styled yours!
📱 Craftino App
Make more crafts like this
1,000+ Fall & Autumn ideas with photo guides & Pro Tips
✓ Step-by-step photo tutorials, nothing left out
✓ Pro Tips for every step
✓ Save crafts & browse fully offline
✓ New ideas added every week
Frequently Asked Questions
What is the total cost to make the Harvest Haven Wreath: A Dollar Tree-Style Fall Statement?
The total cost to create the Harvest Haven Wreath: A Dollar Tree-Style Fall Statement is typically $12-15. This budget-friendly craft utilizes most of its supplies from Dollar Tree, making it an affordable Fall & Autumn DIY project.
How long does it take to complete the DIY Harvest Haven Wreath for Fall & Autumn?
It takes approximately 40-60 minutes to complete the DIY Harvest Haven Wreath for Fall & Autumn. This quick crafting project is perfect for an afternoon activity or when you need a fast Holiday & Seasonal decoration.
Is the Harvest Haven Wreath: A Dollar Tree-Style Fall Statement project suitable for beginners?
Yes, the Harvest Haven Wreath: A Dollar Tree-Style Fall Statement project is very easy and perfect for beginners. The steps are straightforward, requiring basic crafting skills like cutting and gluing, making it an accessible Fall & Autumn craft for all skill levels.
Where can I buy the supplies for the Harvest Haven Wreath: A Dollar Tree-Style Fall Statement?
You can primarily buy supplies for the Harvest Haven Wreath: A Dollar Tree-Style Fall Statement at Dollar Tree. Items like the wreath form, faux leaves, small pumpkins, and ribbon are readily available there for $1.25 each.
Can the DIY Harvest Haven Wreath be given as a Fall & Autumn gift?
Absolutely, the DIY Harvest Haven Wreath makes a wonderful and thoughtful Fall & Autumn gift. Its handmade charm is perfect for showing appreciation to teachers, neighbors, or friends during the Holiday & Seasonal period.
How can I customize my Harvest Haven Wreath: A Dollar Tree-Style Fall Statement?
You can easily customize your Harvest Haven Wreath by swapping out colors and embellishments. For example, use white pumpkins instead of orange, or add sunflowers for a different Fall & Autumn look, making each wreath unique.
Is the Harvest Haven Wreath durable for outdoor display during Fall & Autumn?
The Harvest Haven Wreath is best suited for indoor or covered outdoor display during Fall & Autumn. While it holds up well indoors, direct exposure to harsh weather like heavy rain or strong sun might cause the Dollar Tree faux materials to fade or deteriorate over time.
What is a common mistake to avoid when making a Dollar Tree Harvest Haven Wreath?
A common mistake to avoid when making a Dollar Tree Harvest Haven Wreath is using too much hot glue, which can show through your materials. Apply small dots of hot glue to secure items firmly without creating visible excess, ensuring a neat finish for your Fall & Autumn decor.
Browse fall & autumn crafting supplies at Dollar Tree.

Leave a Reply