
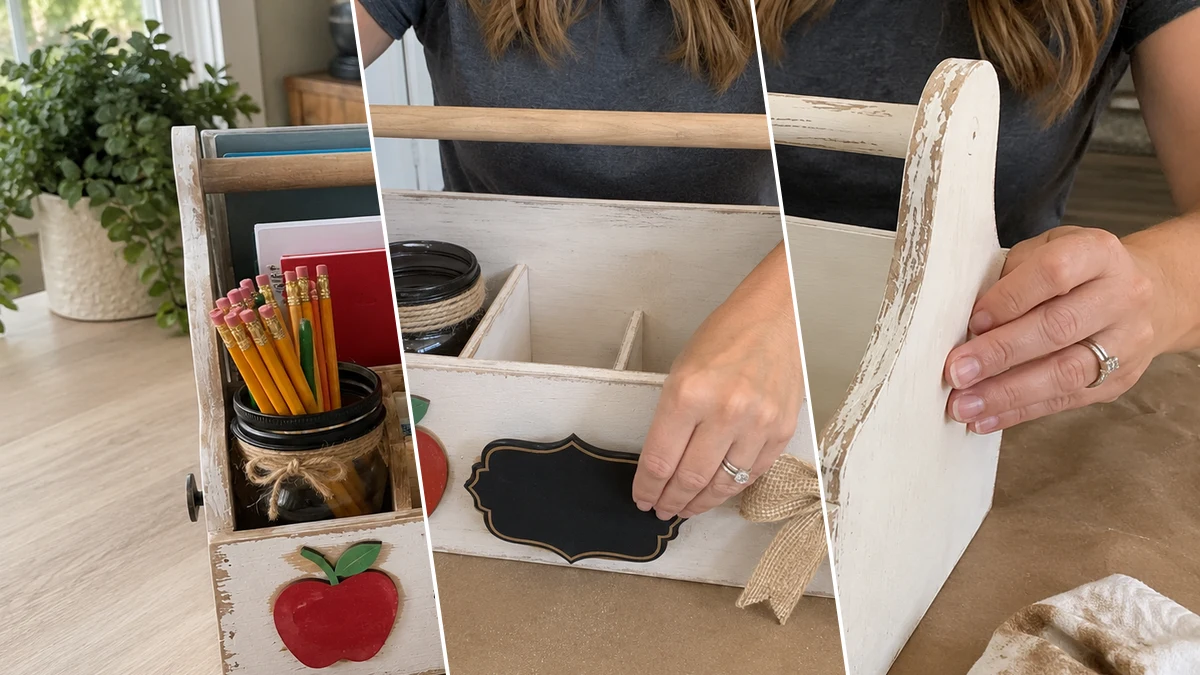
OK so I finally got around to making this Rustic Farmhouse Back-to-School Homework Caddy and honestly? I’m obsessed with how it turned out. If you’re into organizing & storage projects, you’re gonna love this one.
Theme: Farmhouse / Rustic
Materials Needed
- Unfinished Wooden Caddy (with handle, or similar wooden box/crate elements for assembly)
- Thin Wood Craft Boards (for internal dividers, if not pre-divided)
- Two Standard Mason Jars
- White or Cream Chalk Paint
- Dark Wax or Brown/Black Acrylic Paint
- Wood Craft Embellishments (e.g., apple cutout, chalkboard-style plaque)
- Burlap Ribbon
- Jute Twine
- Strong Craft Adhesive (Wood glue, Hot glue sticks)
- Basic Craft Supplies (Sandpaper, paintbrushes, clean rags)
Why This Craft Works
This Rustic Farmhouse Back-to-School Homework Caddy is perfect for farmhouse / rustic decor and honestly one of my favorite Dollar Tree finds turned into something really special. Whether you’re dressing up a shelf, a mantel, or a tabletop, this fits right in.
The best part? The whole project ran me about $12-15 total, mostly Dollar Tree supplies plus a couple of extras. Super budget-friendly for what you get.
Difficulty-wise this is a solid beginner project. It took me 20-35 minutes start to finish, including drying time. If you’ve never done a craft like this before, don’t worry at all. You’ll be fine.
Step-by-Step Instructions for Rustic Farmhouse Back-to-School Homework Caddy
This is seriously one of those projects that looks way harder than it actually is. I knocked it out in about 20-35 minutes and the result is so cute. You don’t need any fancy tools or skills for this one, just some basic supplies and a little bit of time. Grab your supplies and let’s do this together, I’ll walk you through every single step.
Step 1: Assemble & Prepare Caddy Structure
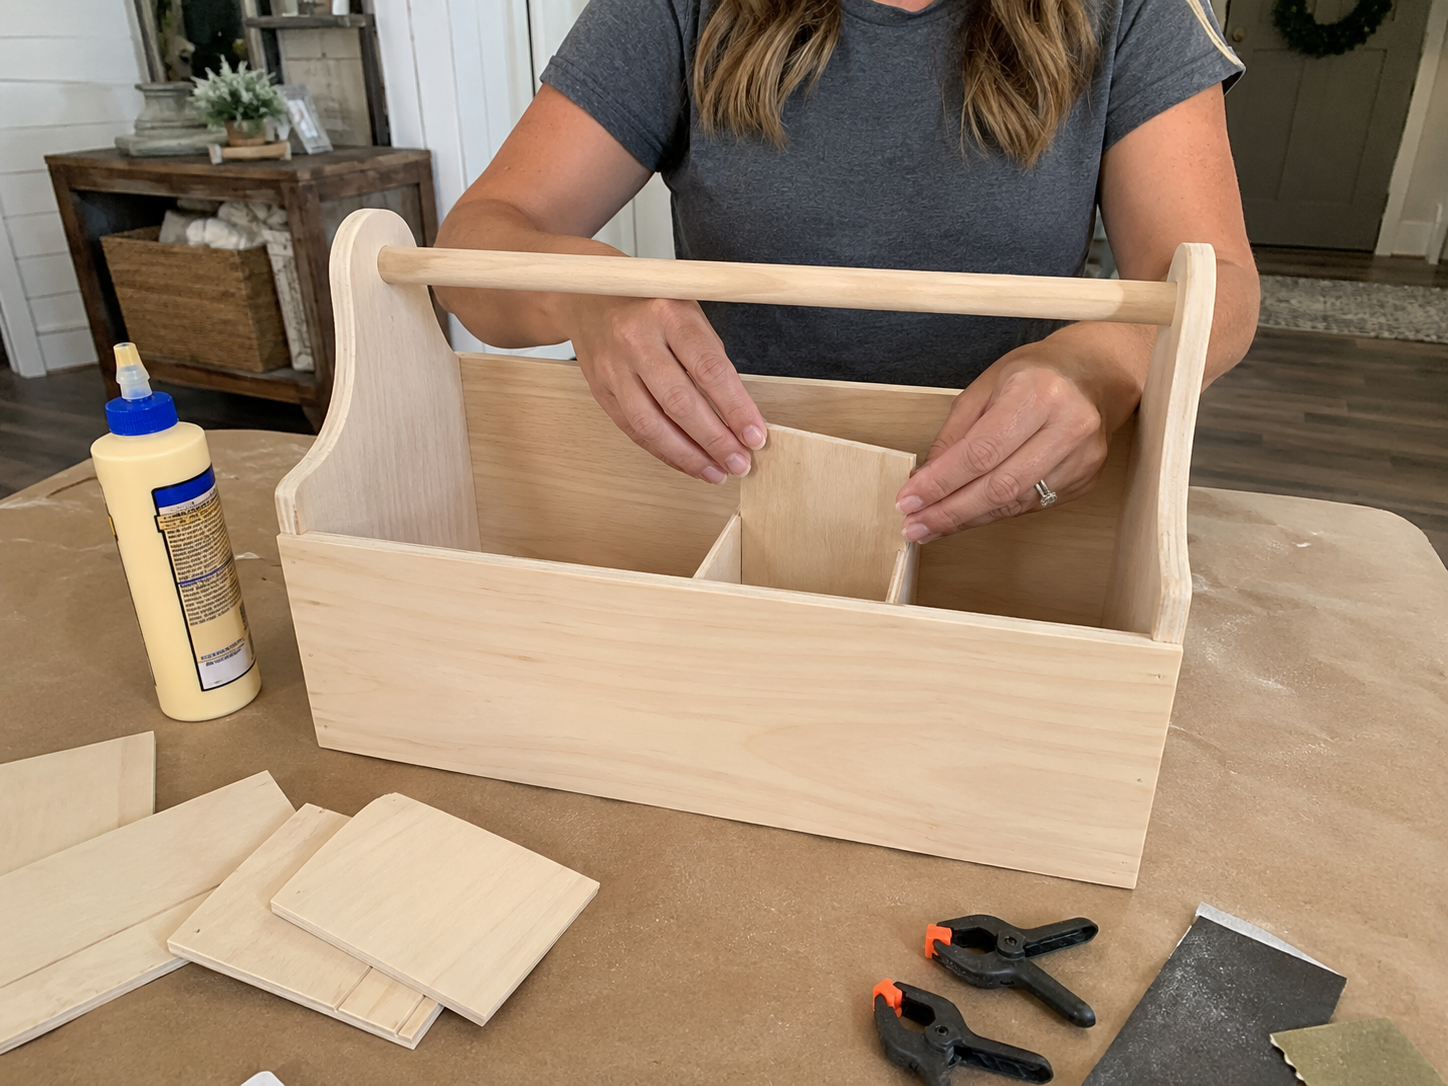
Begin by gathering your unfinished wooden caddy components. If your caddy comes unassembled or needs internal compartments added, use strong wood glue and, if desired, small brad nails or screws for extra reinforcement, to assemble the main structure and internal dividers. Ensure all pieces are securely joined and allow the glue to dry completely according to manufacturer instructions. Once dry, lightly sand any rough edges or surfaces with fine-grit sandpaper (120-220 grit) to create a smooth base for painting.
Step 2: Apply Base Paint Coat
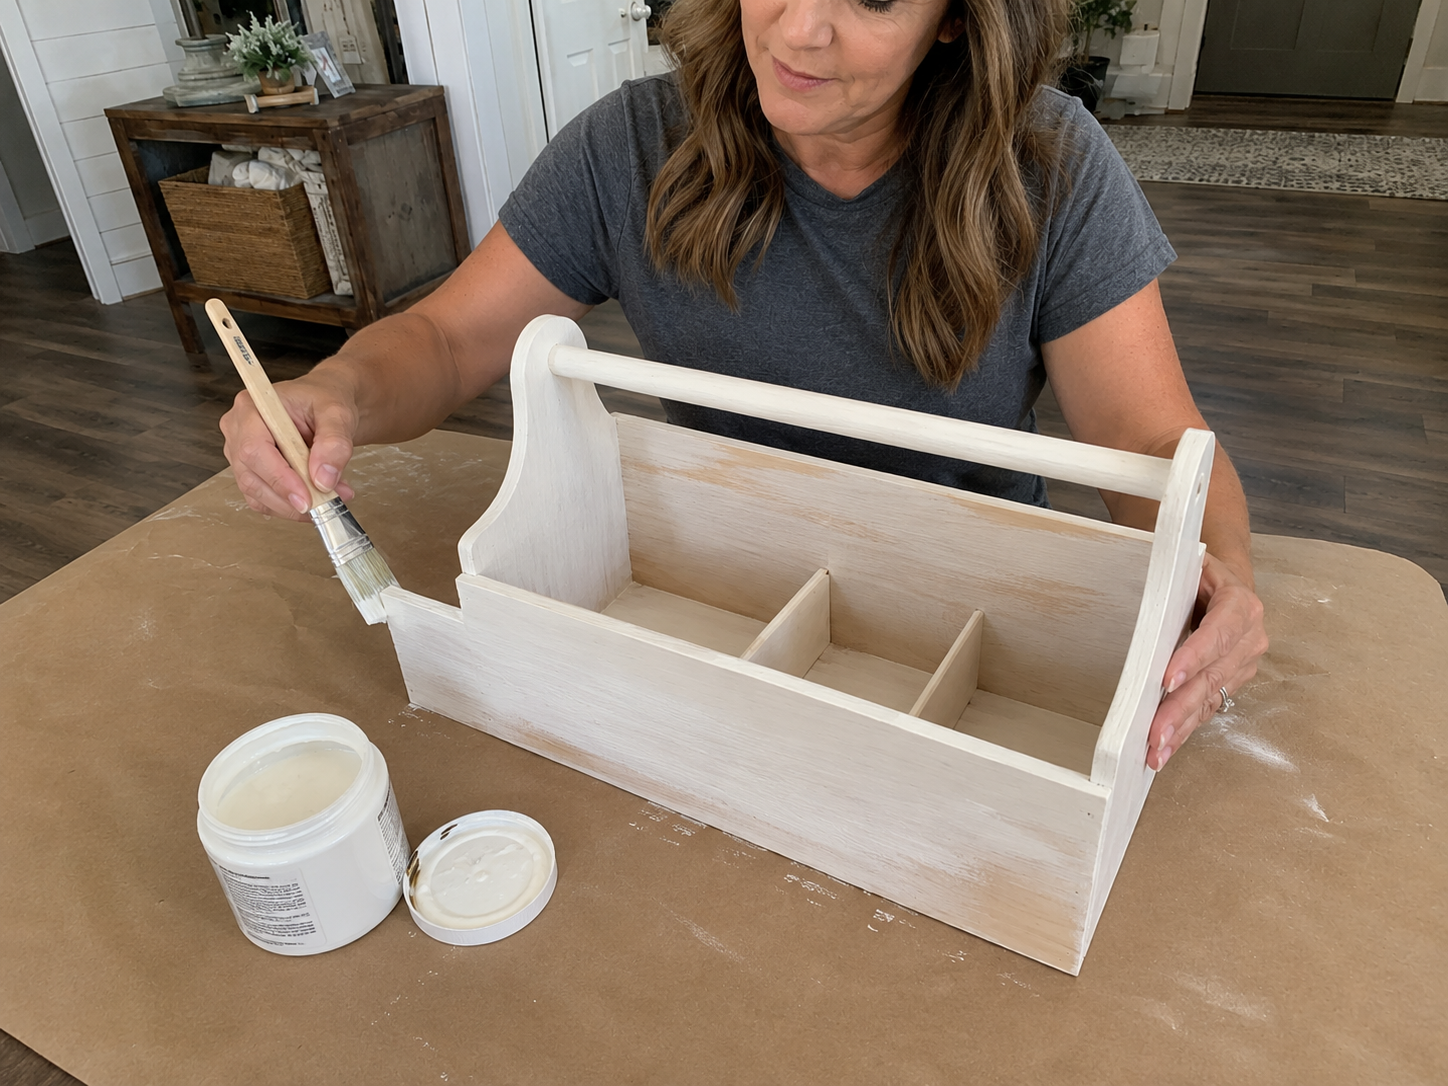
Once your caddy structure is fully assembled, dry, and sanded smooth, apply one to two even coats of white or cream chalk paint to the entire exterior and interior surfaces. Chalk paint is chosen for its excellent adhesion and ease of distressing. For a rustic, imperfect look, full, opaque coverage isn’t strictly necessary; slight variations or thin spots will contribute to the aged charm. Allow each coat to dry completely before applying the next.
Step 3: Create Distressed Finish
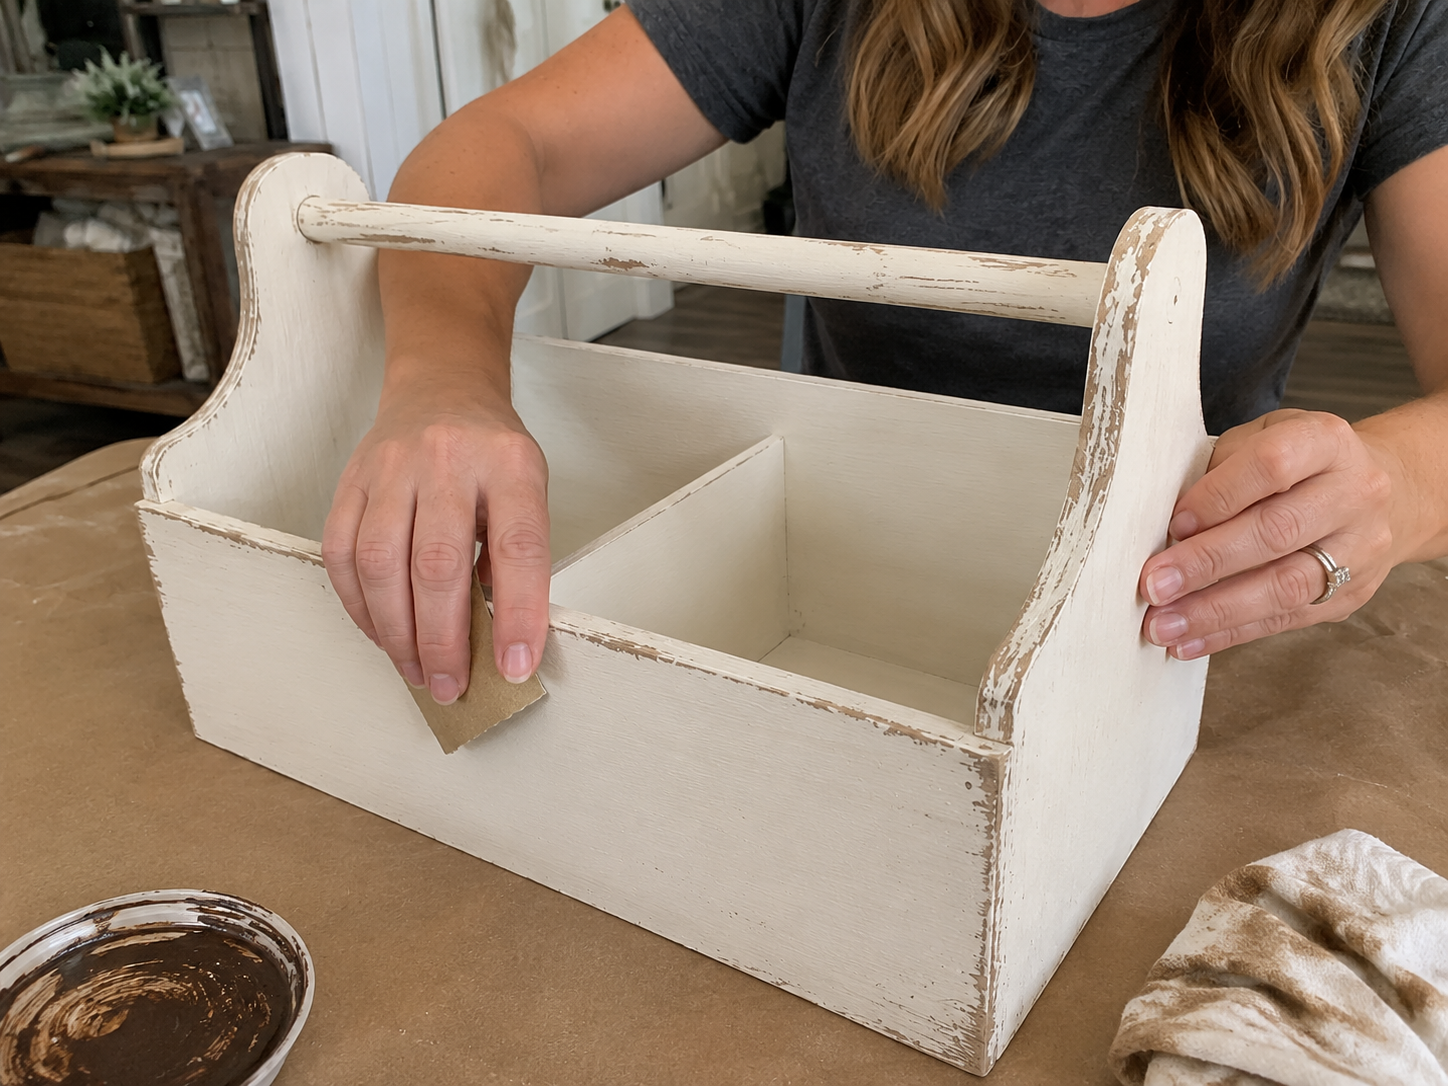
Now, it’s time to create the signature farmhouse distressed look. Using fine-grit sandpaper (around 120-220 grit), gently sand down the edges, corners, and any raised areas of the caddy where natural wear would occur. You want to subtly expose the wood underneath the paint. For an additional layer of aged character, lightly dab dark wax or watered-down brown/black acrylic paint onto the distressed areas with a clean rag or brush, then immediately wipe back excess. This allows the pigment to settle into the sanded areas and crevices, enhancing the antique effect.
Step 4: Prepare & Adorn Mason Jars
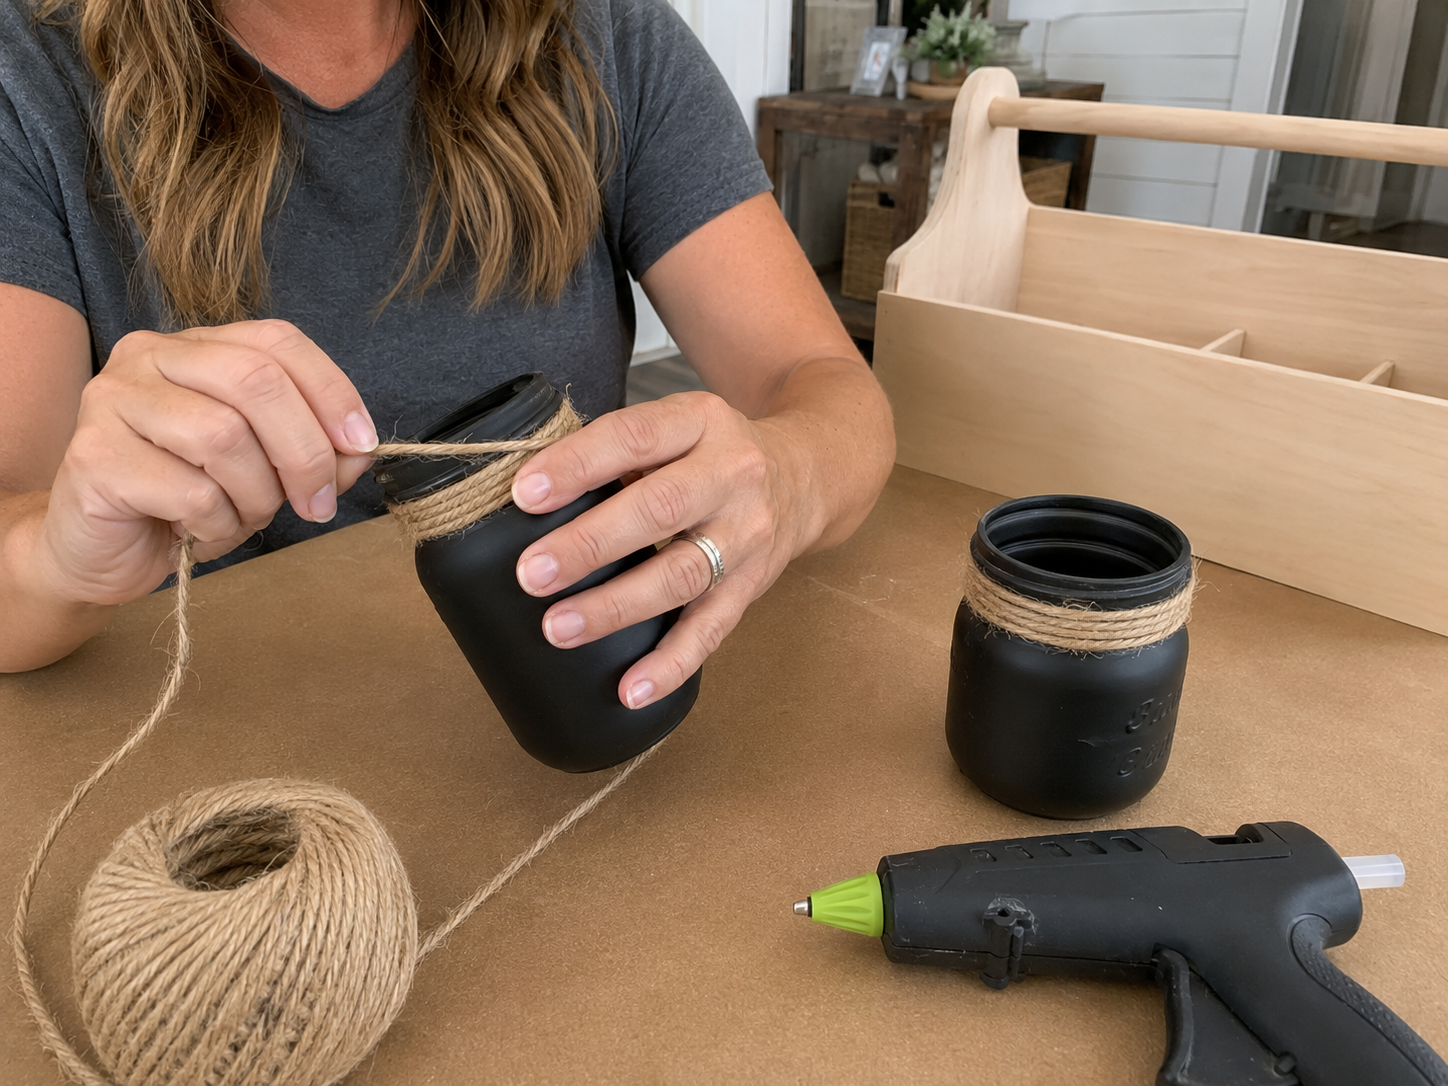
Take your two mason jars and ensure they are clean and dry. Apply two coats of dark brown or black acrylic paint to the outside of the jars. This opaque finish will contrast beautifully with the distressed caddy. Once the paint is completely dry, wrap jute twine several times around the neck of each jar, securing the starting and ending ends with a small dab of hot glue. This adds a charming, tactile, rustic detail.
Step 5: Attach Jars & Embellishments
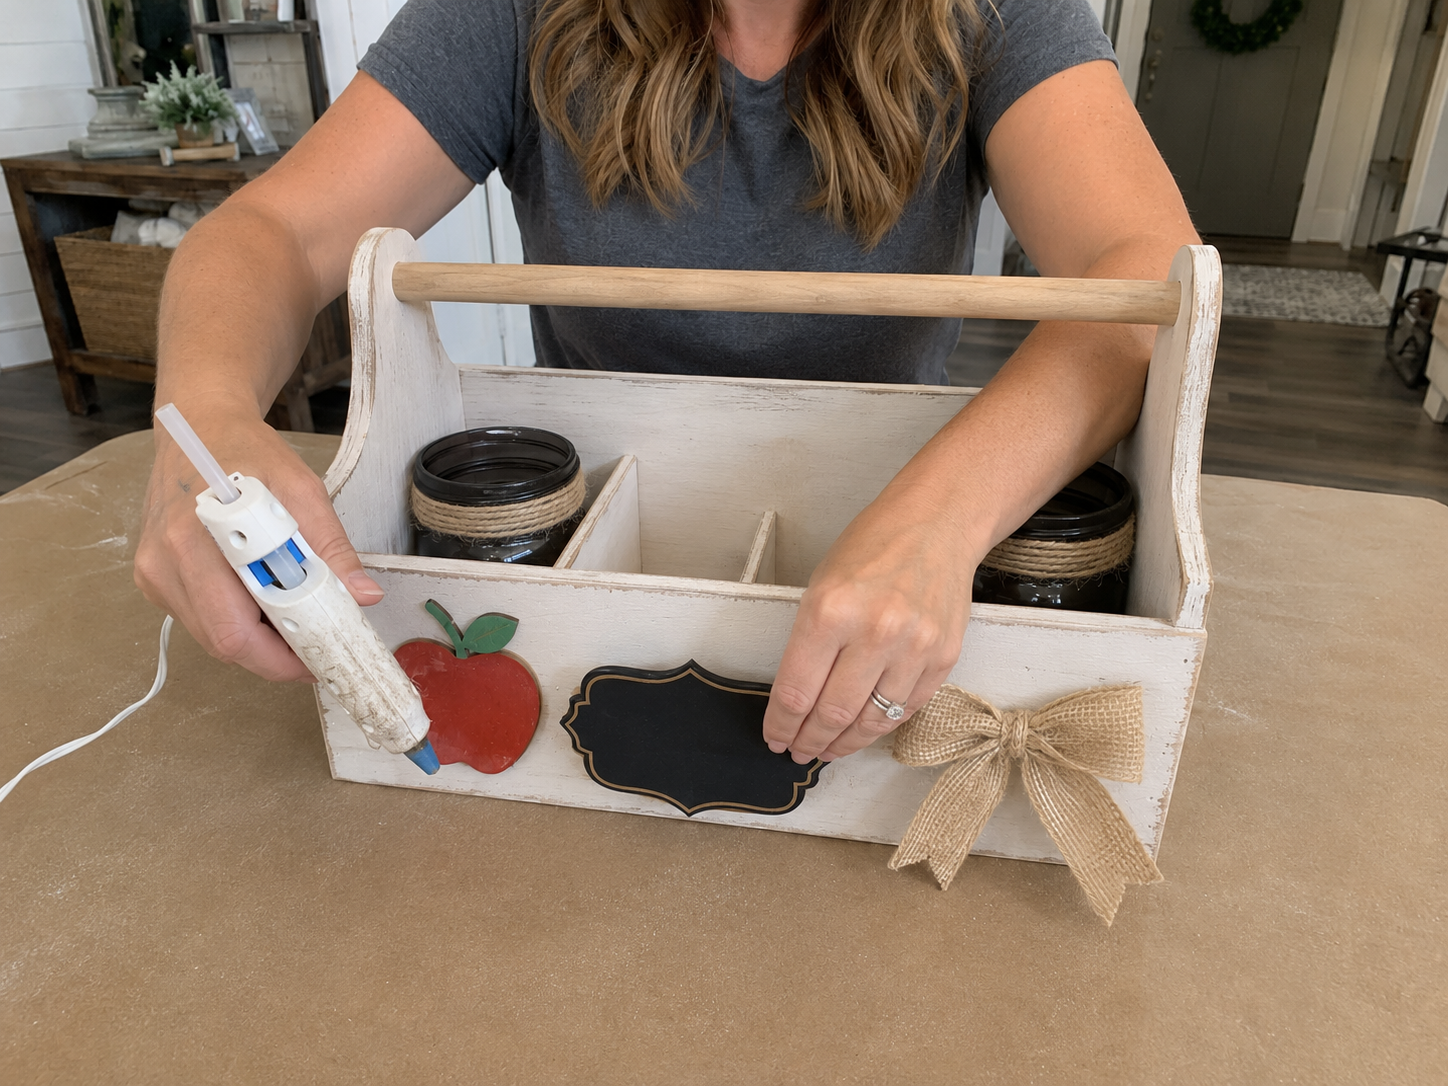
Now, bring your caddy to life with the decorative elements. Use a strong craft adhesive (like E6000 or a heavy-duty hot glue) to securely attach the prepared mason jars into their designated front side compartments or to the outside front edges of the caddy. Next, position and adhere your wood craft embellishments: glue the apple plaque to one side of the caddy’s front and the chalkboard-style label plaque to the center. Finally, tie a simple yet charming burlap bow and hot glue it onto the caddy, perhaps near the chalkboard label, to complete the look.
📱 Craftino App
Make more crafts like this
1,000+ Farmhouse / Rustic ideas with photo guides & Pro Tips
✓ Step-by-step photo tutorials, nothing left out
✓ Pro Tips for every step
✓ Save crafts & browse fully offline
✓ New ideas added every week


Step 6: Seal for Protection & Finish
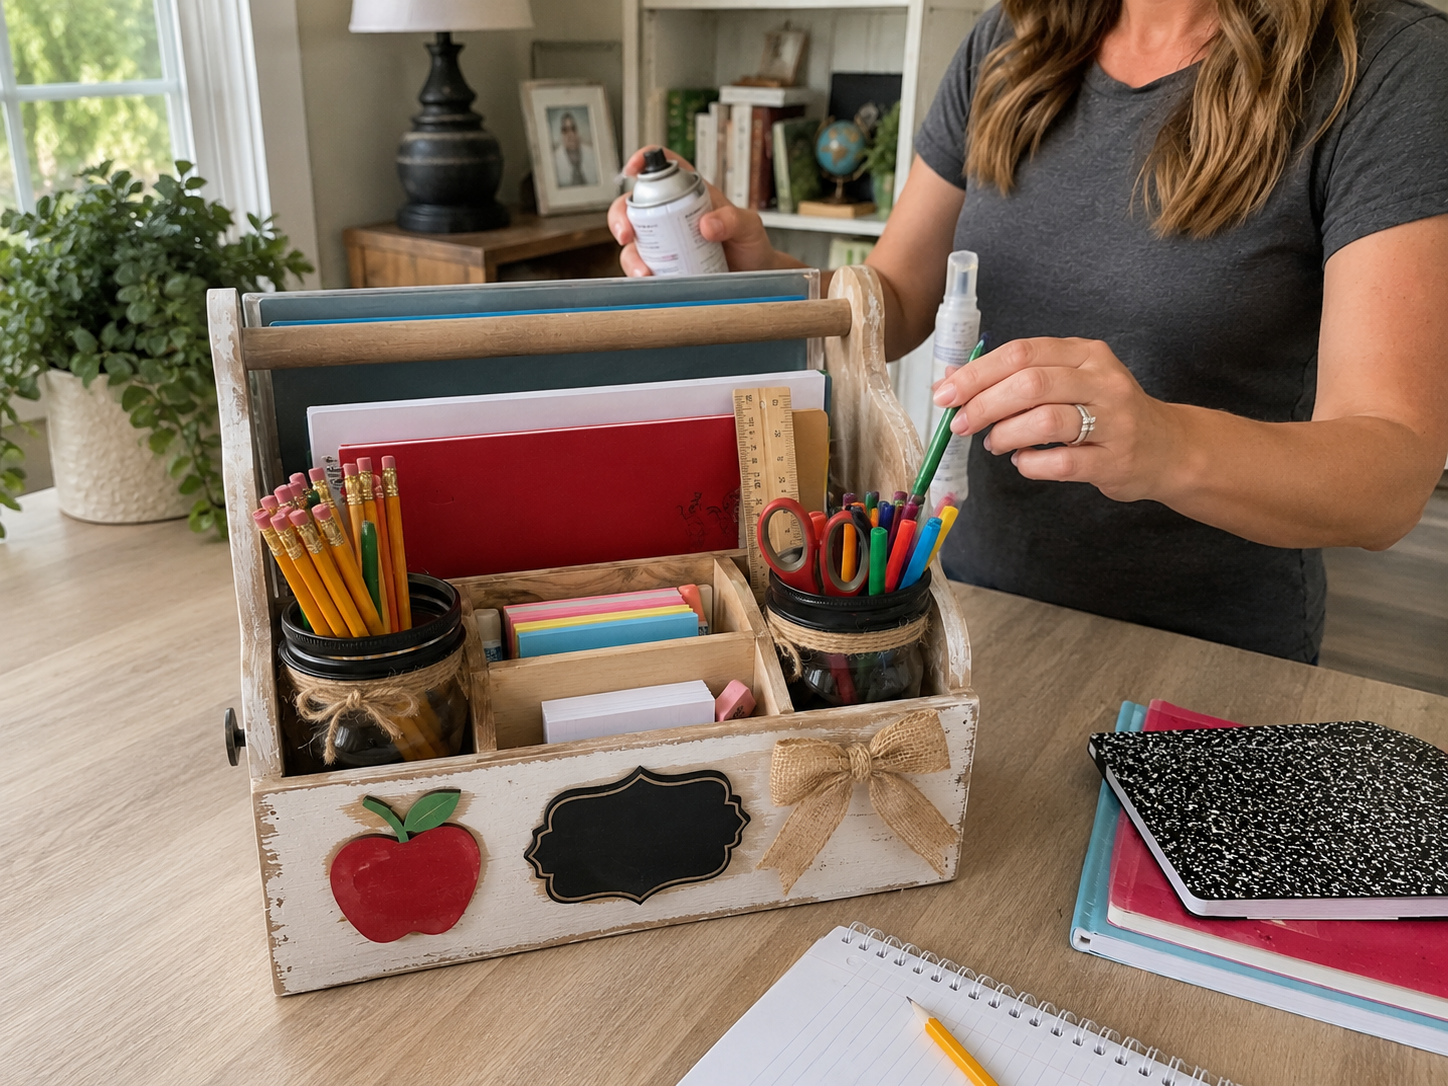
To protect your beautiful homework caddy from everyday wear, spills, and to make it easier to clean, apply a protective coat of clear matte or satin sealant. A spray-on sealant is quick and provides an even finish; alternatively, you can use a brush-on polycrylic. Ensure you work in a well-ventilated area. Apply thin, even coats and allow the sealant to dry completely between layers and cure fully (typically 24-72 hours, depending on product) before filling your caddy with school supplies and putting it to use.
See also: Dreamy Dollar Tree Floral Chandelier An Elegant Diy Hanging Decor
📋 Love staying organized while crafting? Check out our printable planners & craft designs at CraftersDT on Etsy and use code CRAFT20 for 20% off your entire order!
Your Rustic Farmhouse Back-to-School Homework Caddy Is Complete!
And that’s it! Your Rustic Farmhouse Back-to-School Homework Caddy is done and honestly it looks so good. Pop it on a shelf, give it as a gift, or just admire your handiwork. If you try this one, I’d love to see how yours turns out!
📱 Craftino App
Make more crafts like this
1,000+ Farmhouse / Rustic ideas with photo guides & Pro Tips
✓ Step-by-step photo tutorials, nothing left out
✓ Pro Tips for every step
✓ Save crafts & browse fully offline
✓ New ideas added every week
Frequently Asked Questions
How long does it take to make a Rustic Farmhouse Back-to-School Homework Caddy?
Around 20-35 minutes from start to finish. Add a little extra if you’re waiting on glue or paint to fully dry between steps.
How much does a DIY Rustic Farmhouse Back-to-School Homework Caddy cost with Dollar Tree supplies?
Around $12-15 total. Most supplies come from Dollar Tree at $1.25 each, plus one or two extras you may already have at home.
Is this organizing & storage project beginner friendly?
Yes. No special tools or skills required. A basic hot glue gun and the ability to follow numbered steps is enough.
Where can I buy the materials for this Rustic Farmhouse Back-to-School Homework Caddy?
Dollar Tree carries most of the supplies, especially in the seasonal and floral aisles. Walmart and Hobby Lobby are backup options if Dollar Tree is out of stock.
Can I make this Rustic Farmhouse Back-to-School Homework Caddy as a handmade gift?
Yes. It makes a great handmade gift for around $12-15. Wrap it in tissue paper and a small box and it photographs like a boutique buy.
How long will this Rustic Farmhouse Back-to-School Homework Caddy last once it’s made?
Indoors, expect 1-2 years of life with normal handling. Avoid direct sunlight on painted finishes to prevent fading.
Can I customize the colors or theme of this Rustic Farmhouse Back-to-School Homework Caddy?
Yes. Swap the paint shade or ribbon color to match your decor. The base steps and supply list stay the same; only the finish color changes.
What’s the most common mistake to avoid with this craft?
Rushing the glue dry time. Most hot glue sets in 60 seconds but a craft this size needs 5-10 minutes of resting before moving on, or pieces shift.
Browse farmhouse / rustic crafting supplies at Dollar Tree.

Leave a Reply