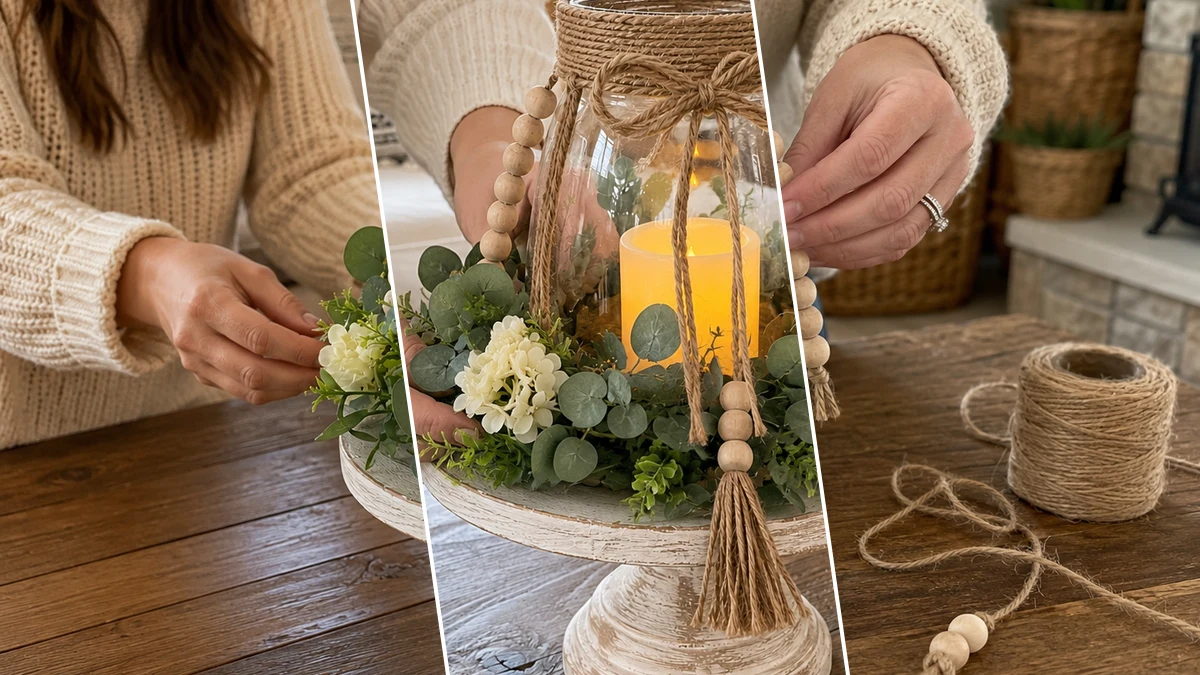
OK so I finally got around to making this Rustic Farmhouse Beaded Candle Pedestal Centerpiece and honestly? I’m obsessed with how it turned out. If you’re into home decor projects, you’re gonna love this one.
Theme: Farmhouse / Rustic
Materials Needed
- Wooden Candle Pedestal Base (round plaque & riser)
- Large Clear Glass Jar or Vase
- Jute Twine & Natural Wood Beads
- Faux Greenery & Small Cream Flowers
- Battery-Operated LED Pillar Candle
- Hot Glue Gun & Glue Sticks
- Cream Chalk Paint & Sandpaper
Why This Craft Works
This Rustic Farmhouse Beaded Candle Pedestal Centerpiece is perfect for farmhouse / rustic decor and honestly one of my favorite Dollar Tree finds turned into something really special. Whether you’re dressing up a shelf, a mantel, or a tabletop, this fits right in.
The best part? The whole project ran me about $10-13 total, mostly Dollar Tree supplies plus a couple of extras. Super budget-friendly for what you get.
Difficulty-wise this is a solid beginner project. It took me 30-45 minutes start to finish, including drying time. If you’ve never done a craft like this before, don’t worry at all. You’ll be fine.
Step-by-Step Instructions for Rustic Farmhouse Beaded Candle Pedestal Centerpiece
This is seriously one of those projects that looks way harder than it actually is. I knocked it out in about 30-45 minutes and the result is so cute. You don’t need any fancy tools or skills for this one, just some basic supplies and a little bit of time. Grab your supplies and let’s do this together, I’ll walk you through every single step.
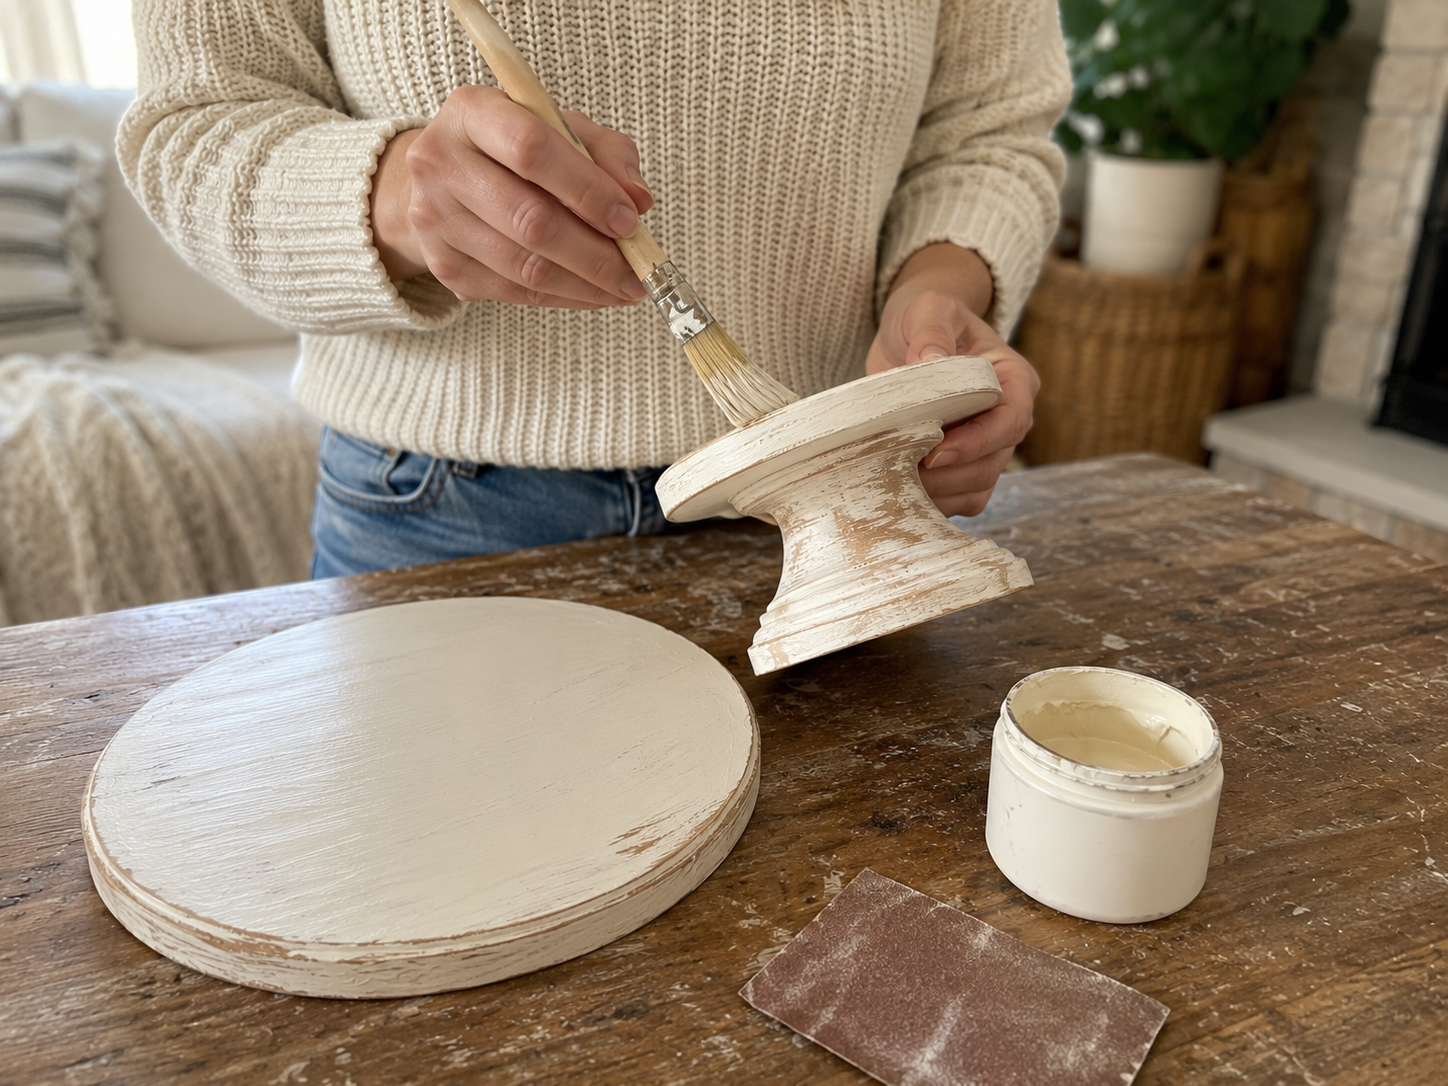
Step 1: Prep & Paint Wooden Base
Begin by applying an even coat of cream chalk paint to both the round wooden plaque and the short wooden candlestick/riser piece. Chalk paint adheres well without extensive priming. Once dry, use sandpaper to lightly distress the edges and raised areas of both pieces. This technique removes some paint, revealing the natural wood underneath and creating a beautifully aged, rustic aesthetic that feels handmade.
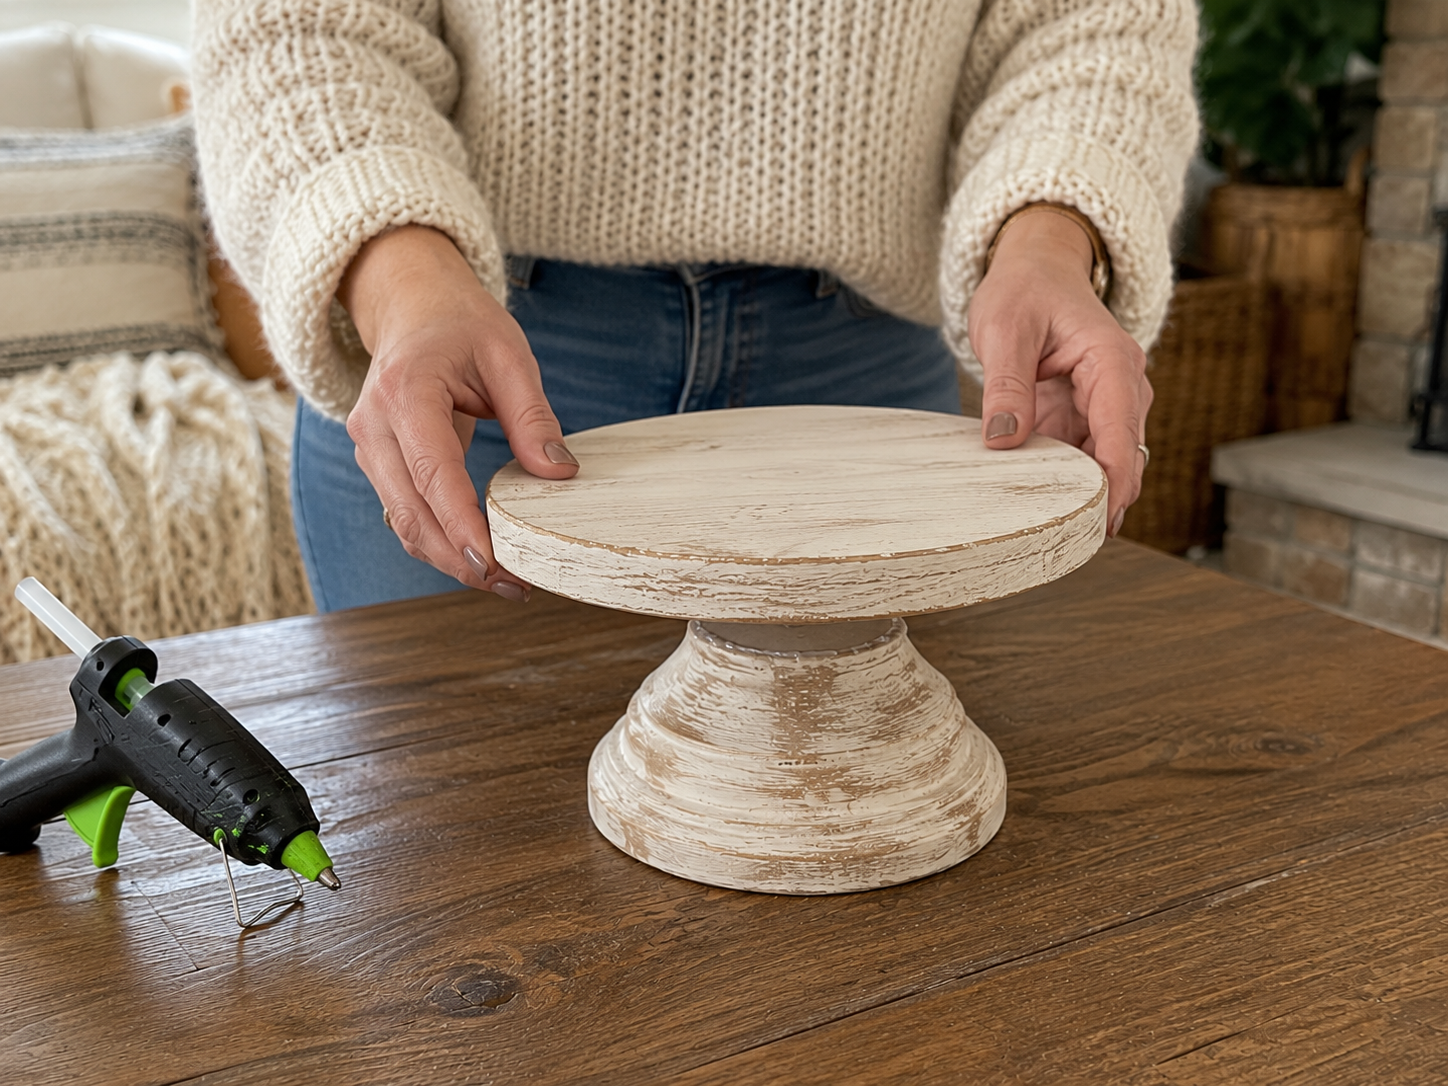
Step 2: Assemble Pedestal Base
Carefully apply a generous amount of hot glue to the top, narrow end of the painted wooden pedestal piece. Center this pedestal directly underneath the round wooden plaque. Press firmly to ensure a strong bond and hold in place for a few seconds until the glue sets. This creates your raised candle tray.
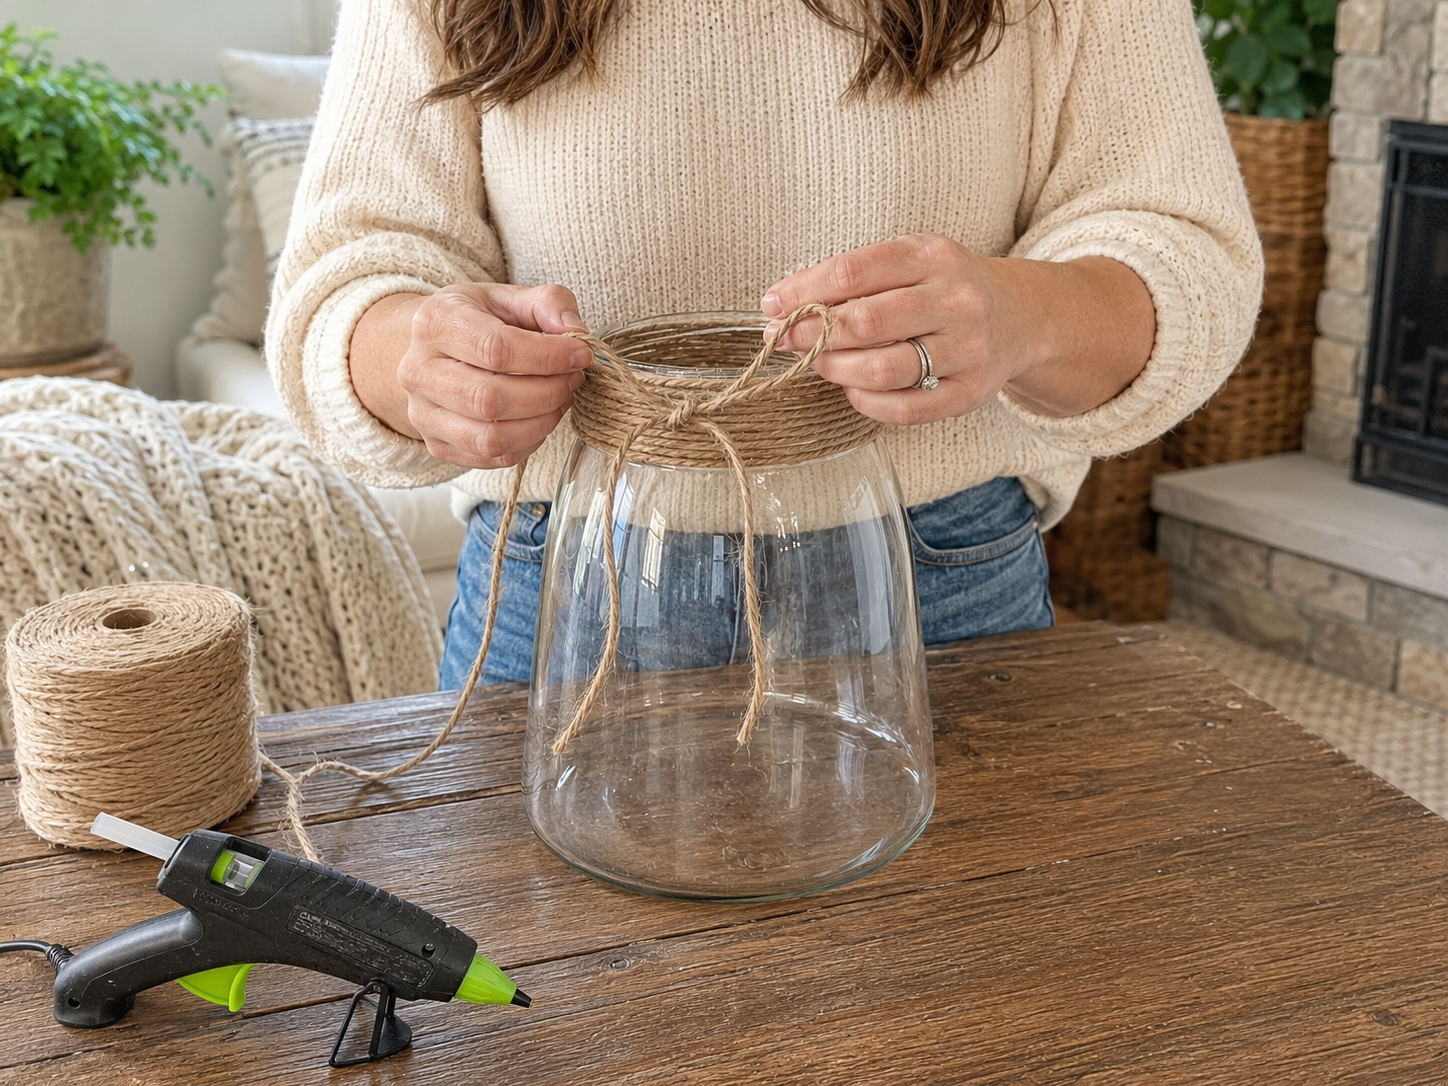
Step 3: Adorn Jar with Jute & Bow
Take your clear glass jar and begin wrapping thick jute twine neatly around its rim or upper neck area. Start by securing the end of the twine with a small dab of hot glue. Continue wrapping tightly and evenly, applying small dots of glue intermittently on the inside of the jar’s neck to hold the twine firmly in place. Once wrapped to your desired thickness (typically 3-5 rows), cut the twine and secure the end with another small dot of glue. Finally, cut a separate piece of jute twine and tie a simple, neat bow at the front of the wrapped section.
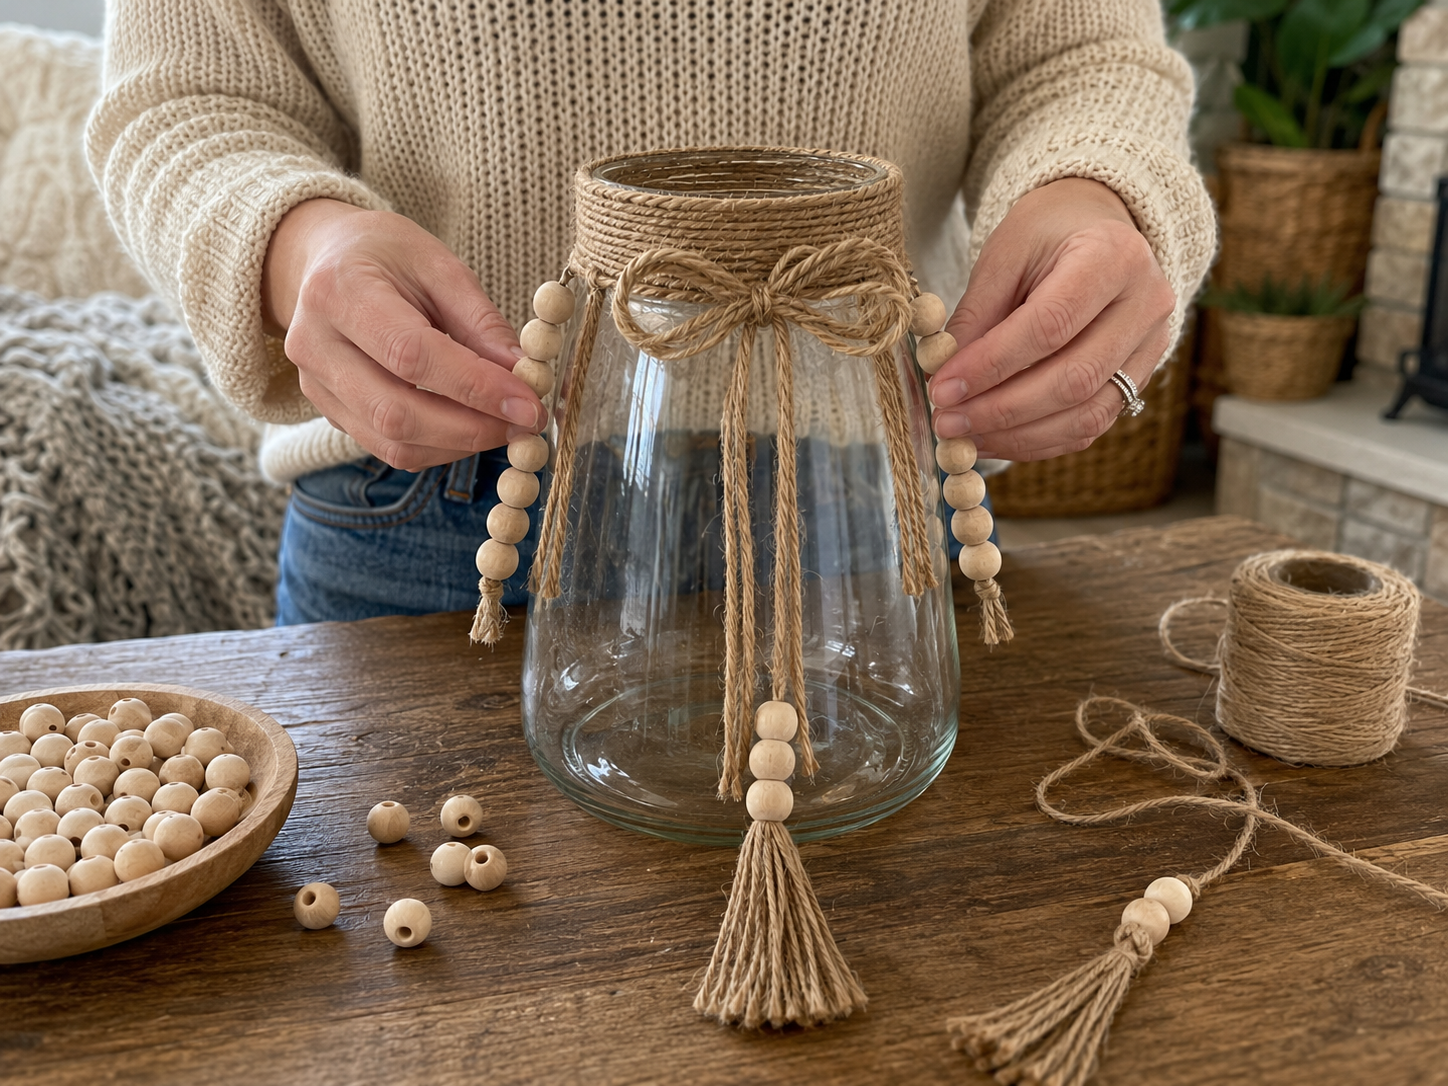
Step 4: Add Beaded Accents
Now, create your beaded accents. For the two hanging ‘handles,’ thread natural wood beads onto separate short lengths of jute twine (about 12-15 beads per strand, depending on bead size and desired length). Tie a secure knot at the end of each strand to hold the beads. Attach one end of each beaded strand to either side of the jar’s neck, just under the jute wrap, using hot glue or by tucking and gluing the twine under the existing wrap. For the longer bead tassel accent, create a small tassel from jute twine, thread a few beads onto the top of it, and then glue this entire piece centrally under the front jute bow, allowing it to hang down as a focal point.
Step 5: Place Candle & Jar
Carefully place your battery-operated LED pillar candle inside the adorned glass jar, ensuring it sits upright and is centered. Next, position the entire glass jar (with the candle inside) centrally on your assembled, distressed wooden pedestal tray. The base of the jar should sit flat on the wooden plaque, ready for the greenery.

📱 Craftino App
Make more crafts like this
1,000+ Farmhouse / Rustic ideas with photo guides & Pro Tips
✓ Step-by-step photo tutorials, nothing left out
✓ Pro Tips for every step
✓ Save crafts & browse fully offline
✓ New ideas added every week

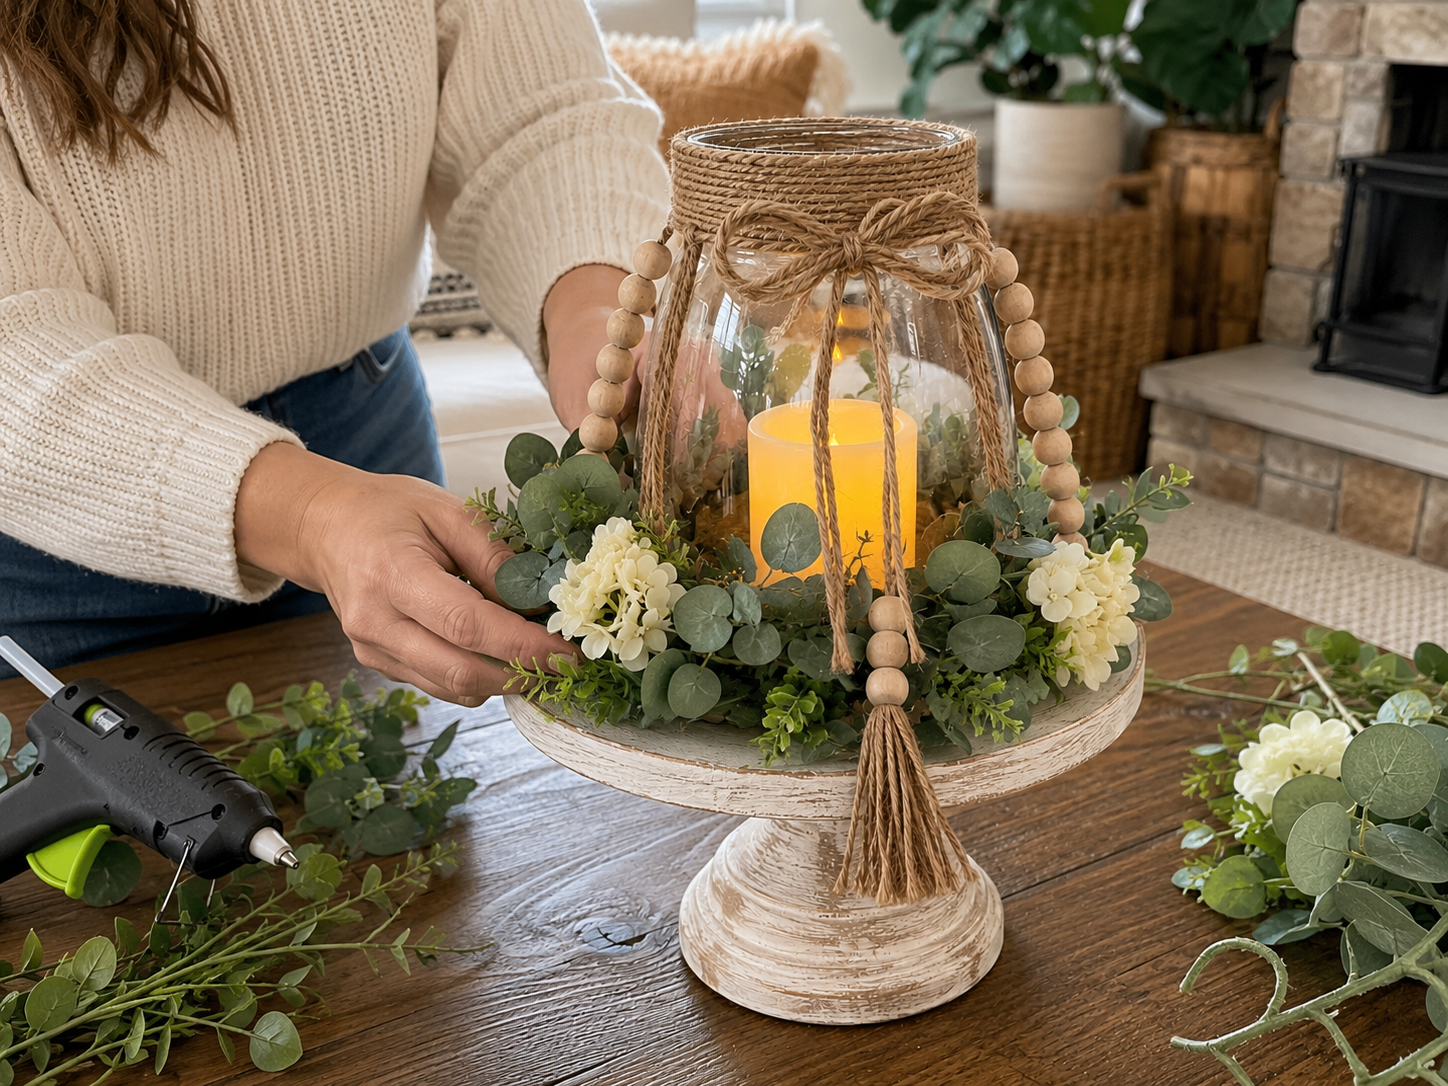
Step 6: Arrange Greenery & Flowers
Around the base of the glass jar, begin arranging faux eucalyptus stems and small cream flowers. Start with the eucalyptus, creating a loose wreath shape that encircles the jar. Overlap stems and fluff the leaves to create fullness and a natural look. Once you’re happy with the placement, use small dabs of hot glue to secure the greenery stems to the wooden tray. Then, tuck in the small cream flowers amongst the eucalyptus, gluing them in place for pops of color and texture. An optional floral foam ring or cardboard ring can be used around the jar’s base to help anchor the greenery before gluing.
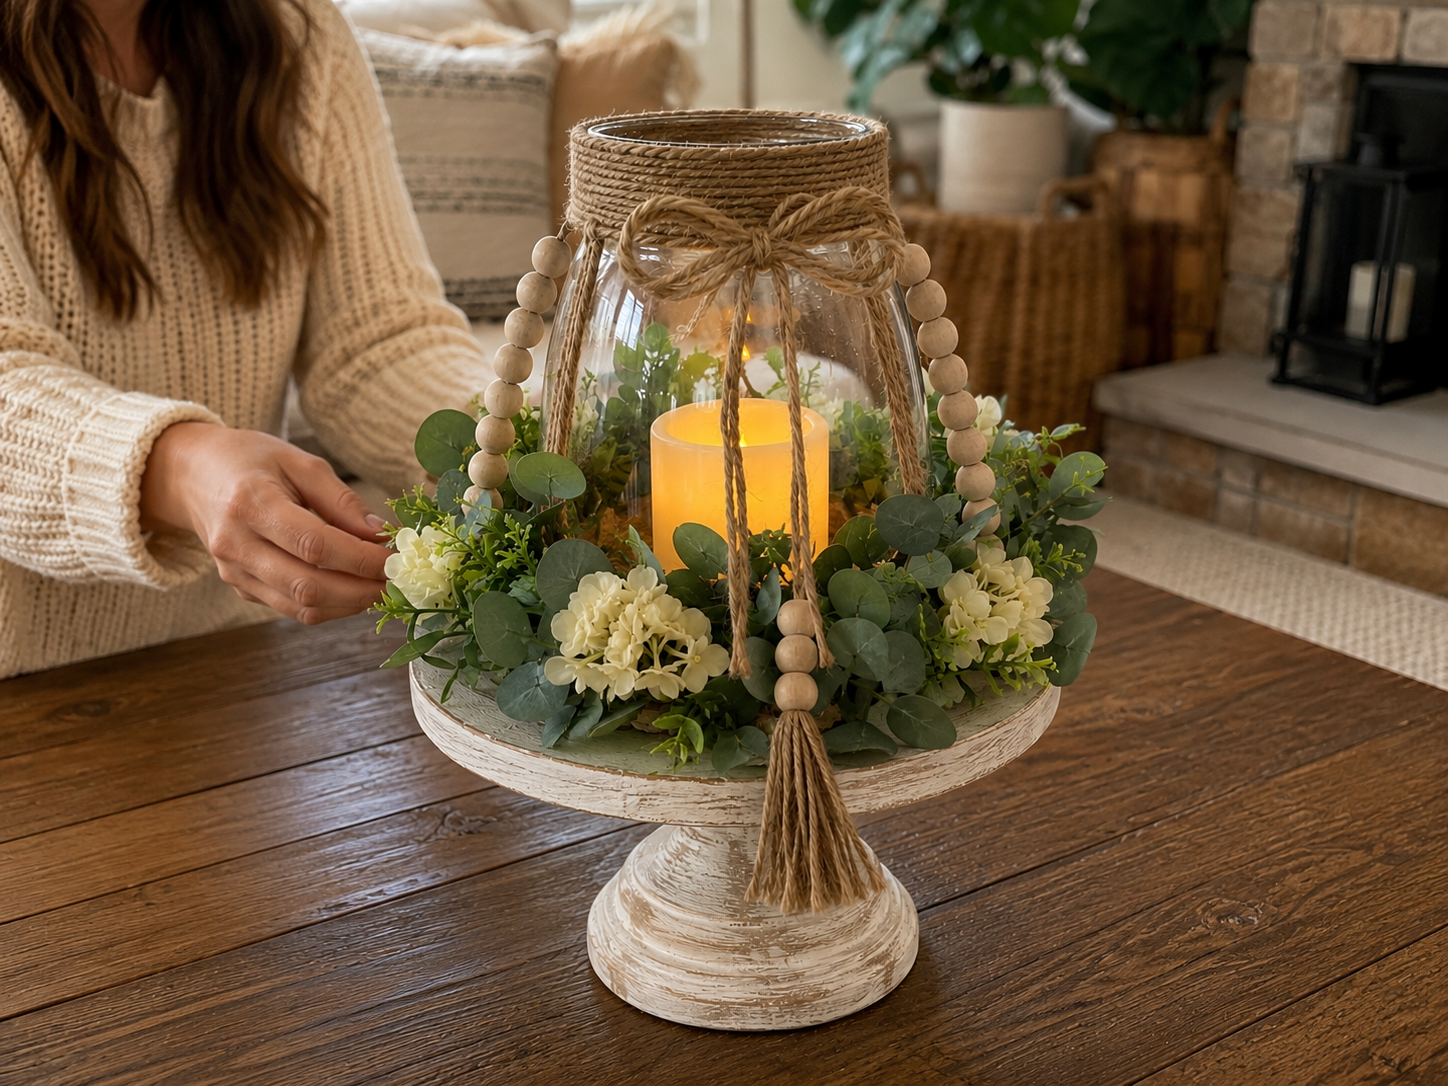
Step 7: Final Touches & Display
Step back and admire your creation! Make any final adjustments to the greenery and flowers, fluffing them as needed to achieve a full, pleasing look. Trim any visible excess twine or glue strands. Ensure the LED candle is visible and emits a warm glow through the glass. Your rustic beaded candle pedestal centerpiece is now complete and ready to bring a cozy farmhouse charm to your home. Place it on a coffee table, console, or kitchen island.
See also: Affiliate Disclosure Statement And Credits
📋 Love staying organized while crafting? Check out our printable planners & craft designs at CraftersDT on Etsy and use code CRAFT20 for 20% off your entire order!
Your Rustic Farmhouse Beaded Candle Pedestal Centerpiece Is Complete!
And that’s it! Your Rustic Farmhouse Beaded Candle Pedestal Centerpiece is done and honestly it looks so good. Pop it on a shelf, give it as a gift, or just admire your handiwork. If you try this one, I’d love to see how yours turns out!
📱 Craftino App
Make more crafts like this
1,000+ Farmhouse / Rustic ideas with photo guides & Pro Tips
✓ Step-by-step photo tutorials, nothing left out
✓ Pro Tips for every step
✓ Save crafts & browse fully offline
✓ New ideas added every week
Frequently Asked Questions
How long does it take to make a Rustic Farmhouse Beaded Candle Pedestal Centerpiece?
Around 30-45 minutes from start to finish. Add a little extra if you’re waiting on glue or paint to fully dry between steps.
How much does a DIY Rustic Farmhouse Beaded Candle Pedestal Centerpiece cost with Dollar Tree supplies?
Around $10-13 total. Most supplies come from Dollar Tree at $1.25 each, plus one or two extras you may already have at home.
Is this home decor project beginner friendly?
Yes. No special tools or skills required. A basic hot glue gun and the ability to follow numbered steps is enough.
Where can I buy the materials for this Rustic Farmhouse Beaded Candle Pedestal Centerpiece?
Dollar Tree carries most of the supplies, especially in the seasonal and floral aisles. Walmart and Hobby Lobby are backup options if Dollar Tree is out of stock.
Can I make this Rustic Farmhouse Beaded Candle Pedestal Centerpiece as a handmade gift?
Yes. It makes a great handmade gift for around $10-13. Wrap it in tissue paper and a small box and it photographs like a boutique buy.
How long will this Rustic Farmhouse Beaded Candle Pedestal Centerpiece last once it’s made?
Indoors, expect 1-2 years of life with normal handling. Avoid direct sunlight on painted finishes to prevent fading.
Can I customize the colors or theme of this Rustic Farmhouse Beaded Candle Pedestal Centerpiece?
Yes. Swap the paint shade or ribbon color to match your decor. The base steps and supply list stay the same; only the finish color changes.
What’s the most common mistake to avoid with this craft?
Rushing the glue dry time. Most hot glue sets in 60 seconds but a craft this size needs 5-10 minutes of resting before moving on, or pieces shift.
Find more farmhouse / rustic craft ideas & supplies at Dollar Tree.
Leave a Reply