
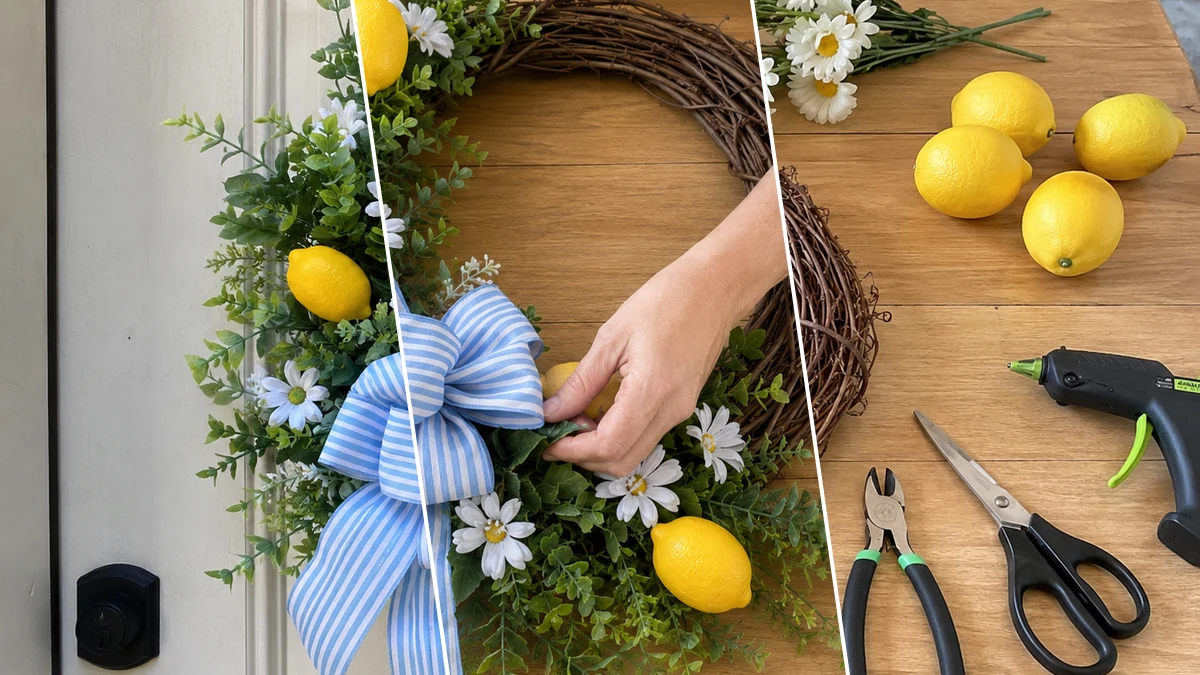
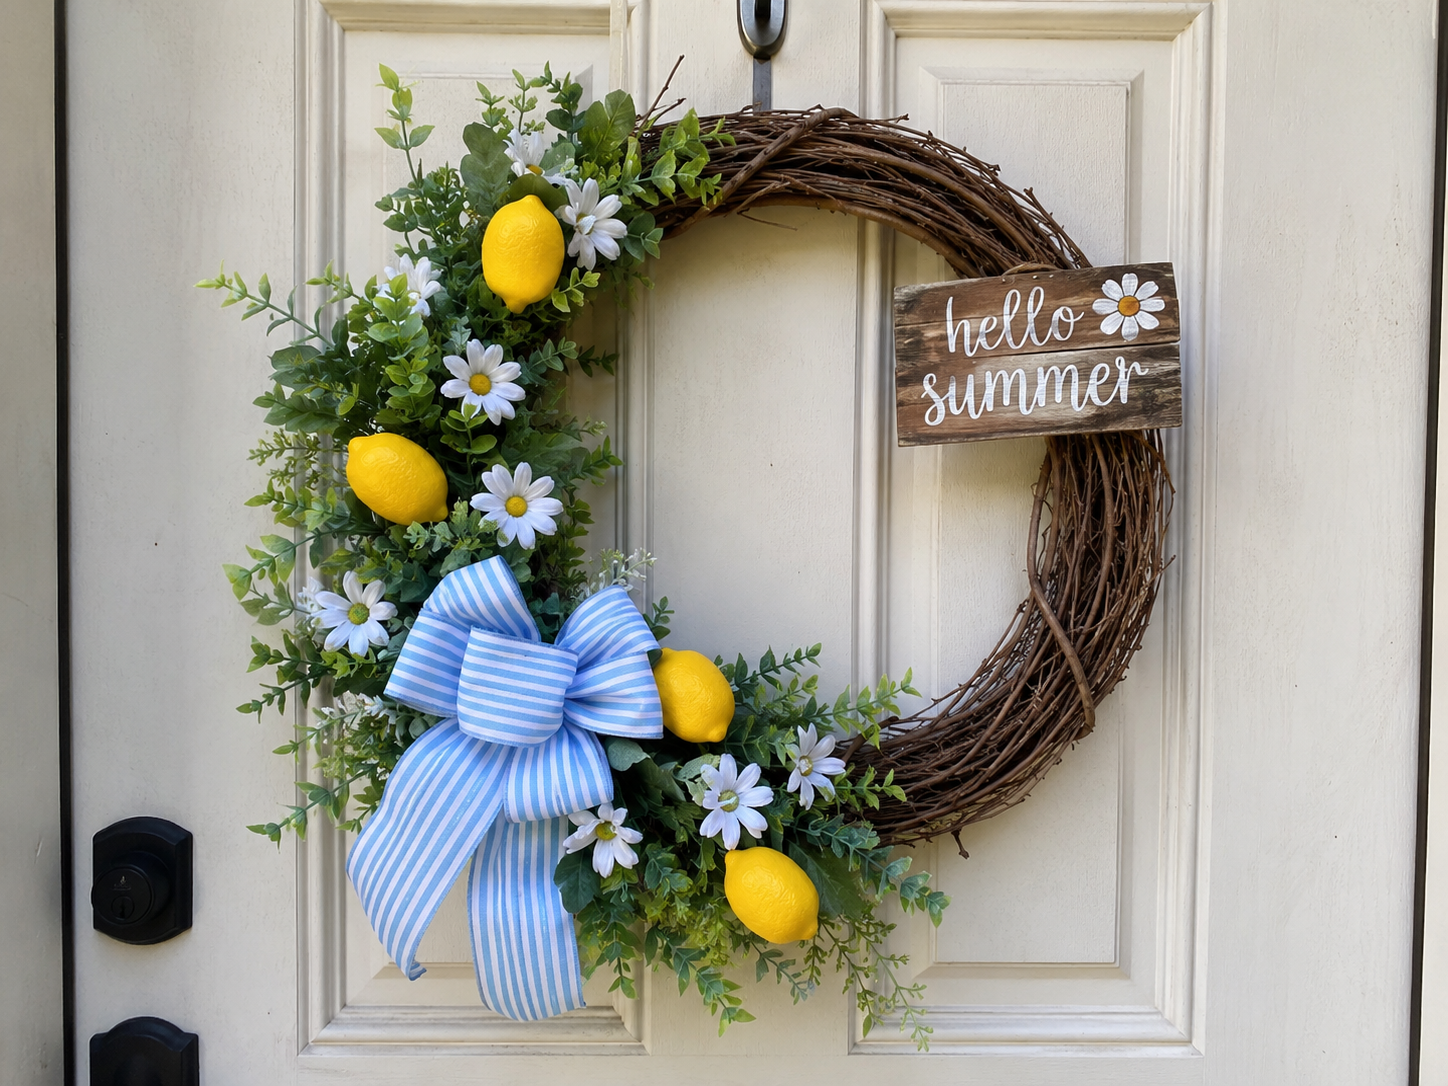
Okay, so my porch was looking a little sad after spring, and I really needed something bright and happy to welcome summer. That’s when I had this idea for a ‘Sunshine & Stripes: Easy Dollar Tree Summer Wreath’! Honestly, it turned out even cuter than I imagined, and it brings such a fun, beachy vibe right to my front door.
Theme: Summer & Beach
Materials Needed
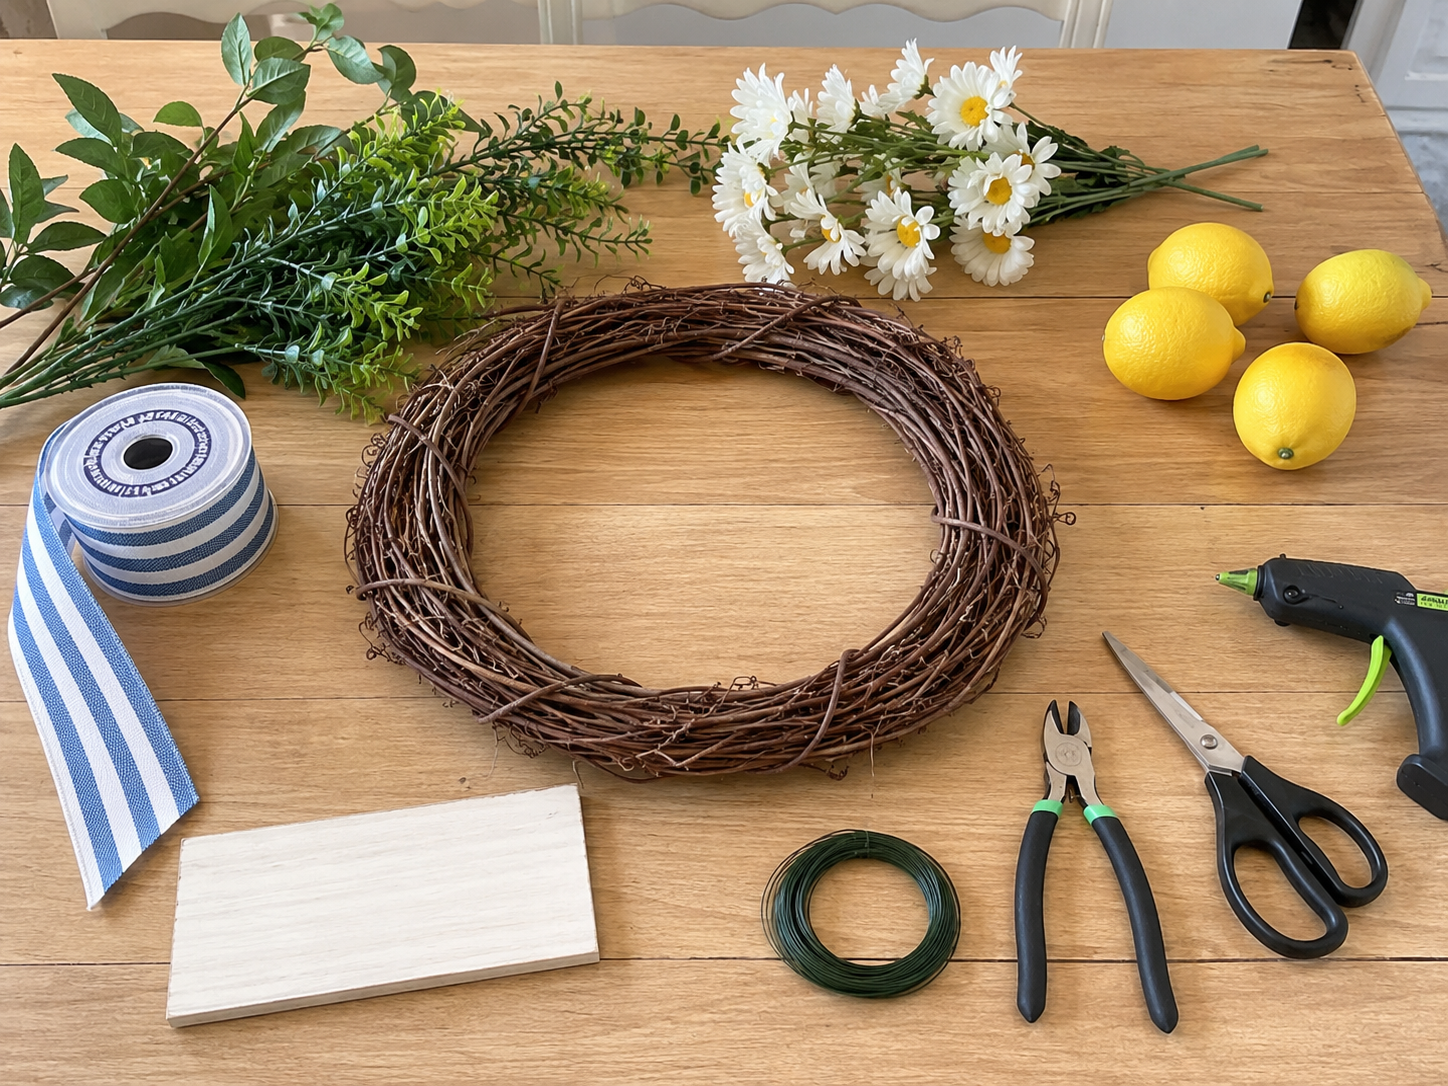
- Grapevine Wreath Form (approx. 18-20 inch)
- Faux Greenery Stems (e.g., eucalyptus, mixed leafy picks)
- Faux White Daisy Stems (approx. 3-4 stems, with multiple blooms)
- Faux Lemons (approx. 4-5)
- Wired Blue & White Striped Ribbon (2.5 inch wide, 3-4 yards)
- Small Rectangular Wood Sign Plaque
- White Paint Marker or ‘Hello Summer’ Vinyl Decal
- Hot Glue Gun & Glue Sticks
- Floral Wire & Wire Cutters
- Scissors
Why This Craft Works
This ‘Sunshine & Stripes: Easy Dollar Tree Summer Wreath’ is just perfect for so many spots! Imagine it hanging on your front door to greet friends and family, or brightening up a blank wall in your sunroom. It’s also super cute for a Summer & Beach themed party, or even as cheerful decor in a guest bathroom.
And let’s talk budget, because that’s my favorite part! You won’t believe it, but this entire craft, using all those amazing Dollar Tree supplies, ran me about $12-15 total. Seriously, for that price, you can make a couple of them without breaking the bank!
This project is definitely ‘Easy’ on the difficulty scale, so don’t be shy if you’re new to crafting. It took me about 30-45 minutes from start to finish, which makes it perfect for a quick afternoon craft session, or even a last-minute gift for a friend. Anyone can do this!
Step-by-Step Instructions for Sunshine & Stripes: Easy Dollar Tree Summer Wreath
Alright, crafters, get ready to grab your hot glue gun because we’re about to make some summer magic! This ‘Sunshine & Stripes: Easy Dollar Tree Summer Wreath’ is so much fun and super easy, you’ll be done before you know it. It’s perfect for beginners, or if you just need a quick, happy project to brighten your day. Let’s get started!
Step 1: Prepare the Grapevine Base
Start by examining your natural grapevine wreath form. Gently remove any loose twigs, stray pieces, or excess debris that might interfere with attaching your decorations. Ensure the wreath is clean and ready for embellishment. No need to paint the base, as its natural brown color provides a beautiful rustic foundation.
Step 2: Trim & Lay Out Greenery
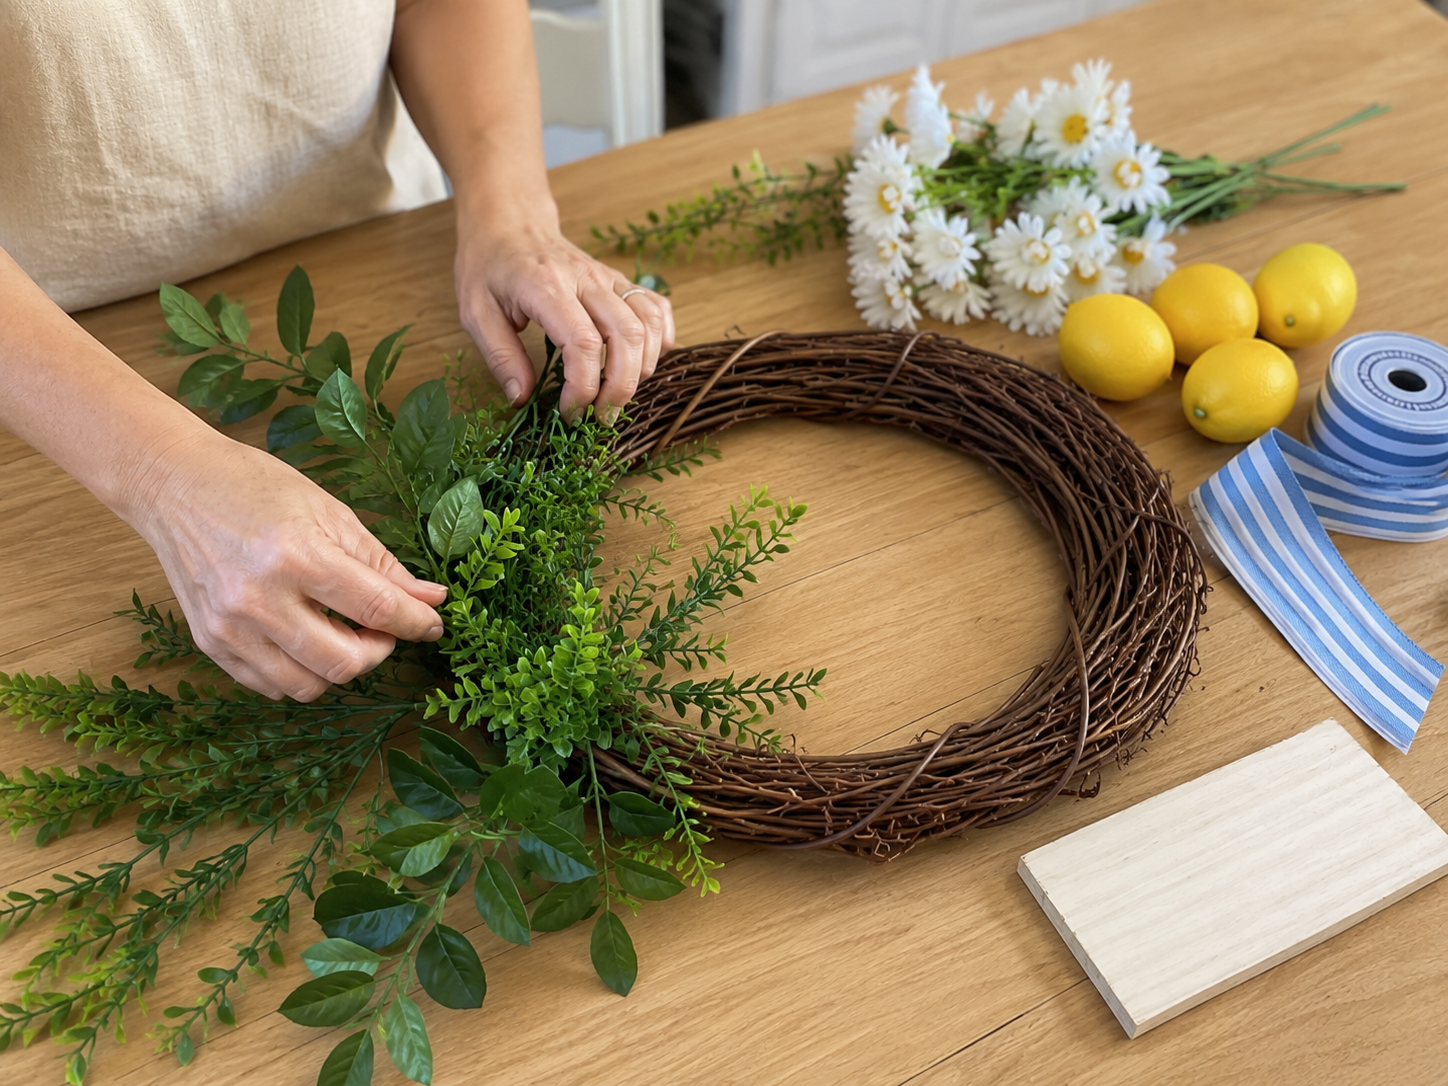
Using wire cutters, trim your faux greenery stems into smaller, manageable pieces, typically 6-10 inches long. Begin to lay these pieces onto the left and lower-left sections of your grapevine wreath. Experiment with their placement, overlapping them slightly and varying the direction of the leaves to create a full, organic base. Do not attach them yet; simply arrange them to visualize the design.
Step 3: Secure Greenery in Place
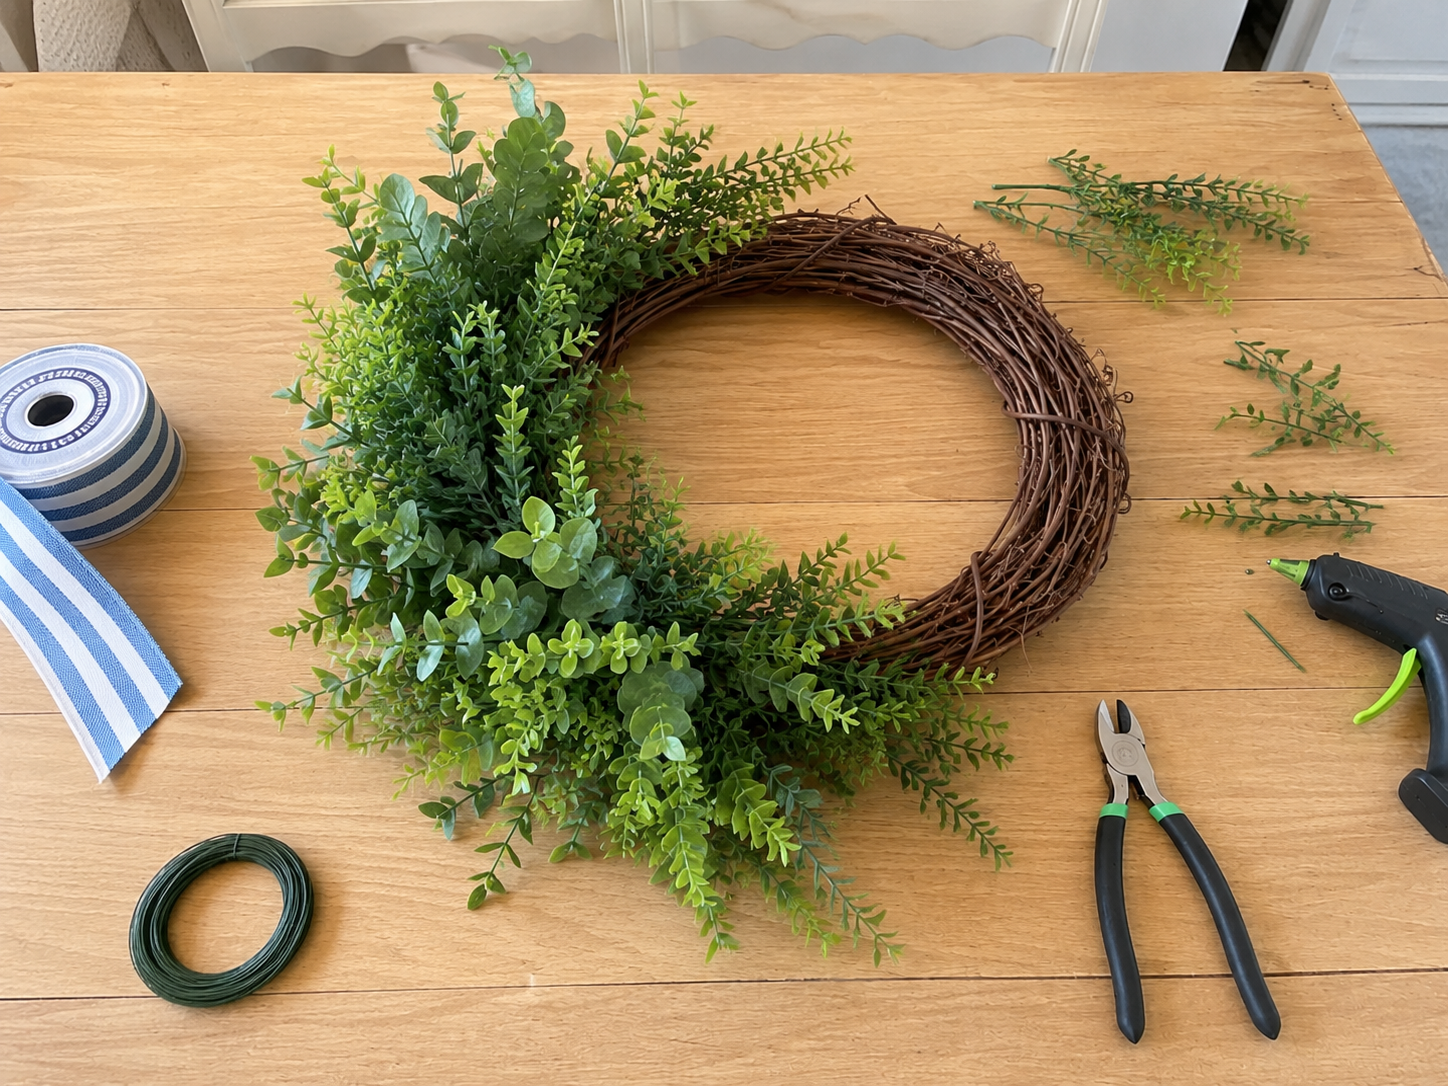
Once you’re happy with the greenery arrangement, start securing it. Apply dabs of hot glue to the ends of the greenery stems and tuck them firmly into the grapevine base. For extra security, especially for heavier or longer pieces, use floral wire to wrap around the stem and a section of the grapevine, twisting it tightly at the back. Continue until all greenery is securely attached.
Step 4: Add Fresh Daisy Flowers
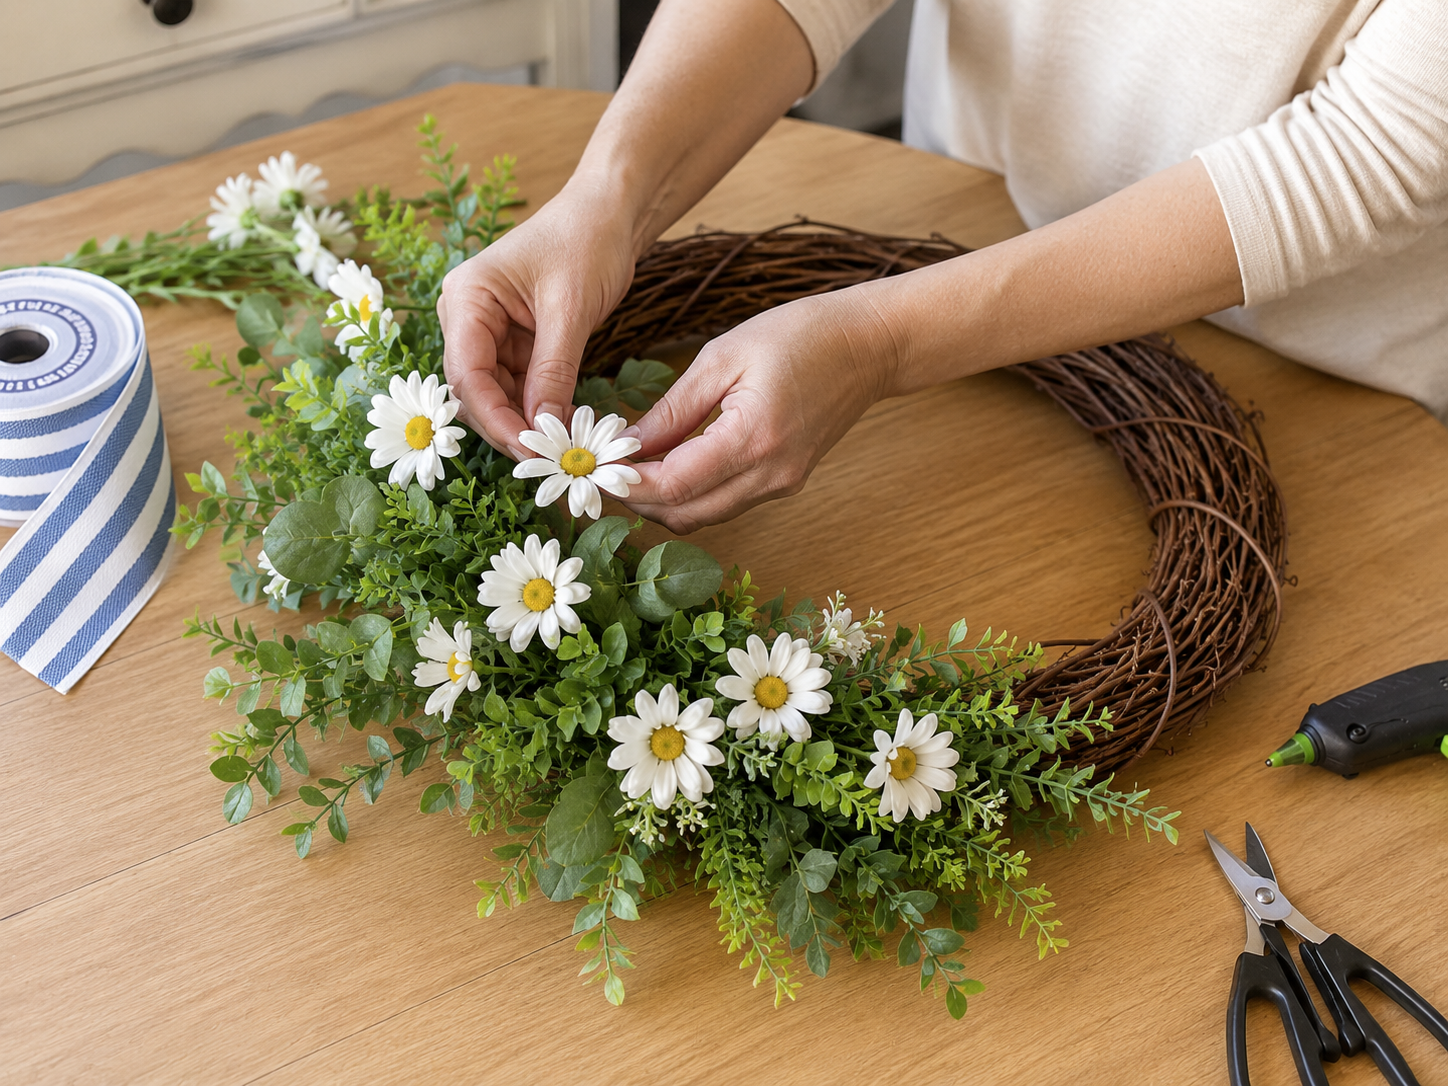
Now it’s time to add your white daisy stems. Trim the stems to appropriate lengths (usually 3-5 inches). Begin tucking and gluing individual daisy blooms or small clusters of daisies into the greenery arrangement. Distribute them naturally, aiming for a fresh, ‘just picked’ look. Use hot glue to secure them firmly within the greenery.
Step 5: Incorporate Faux Lemons
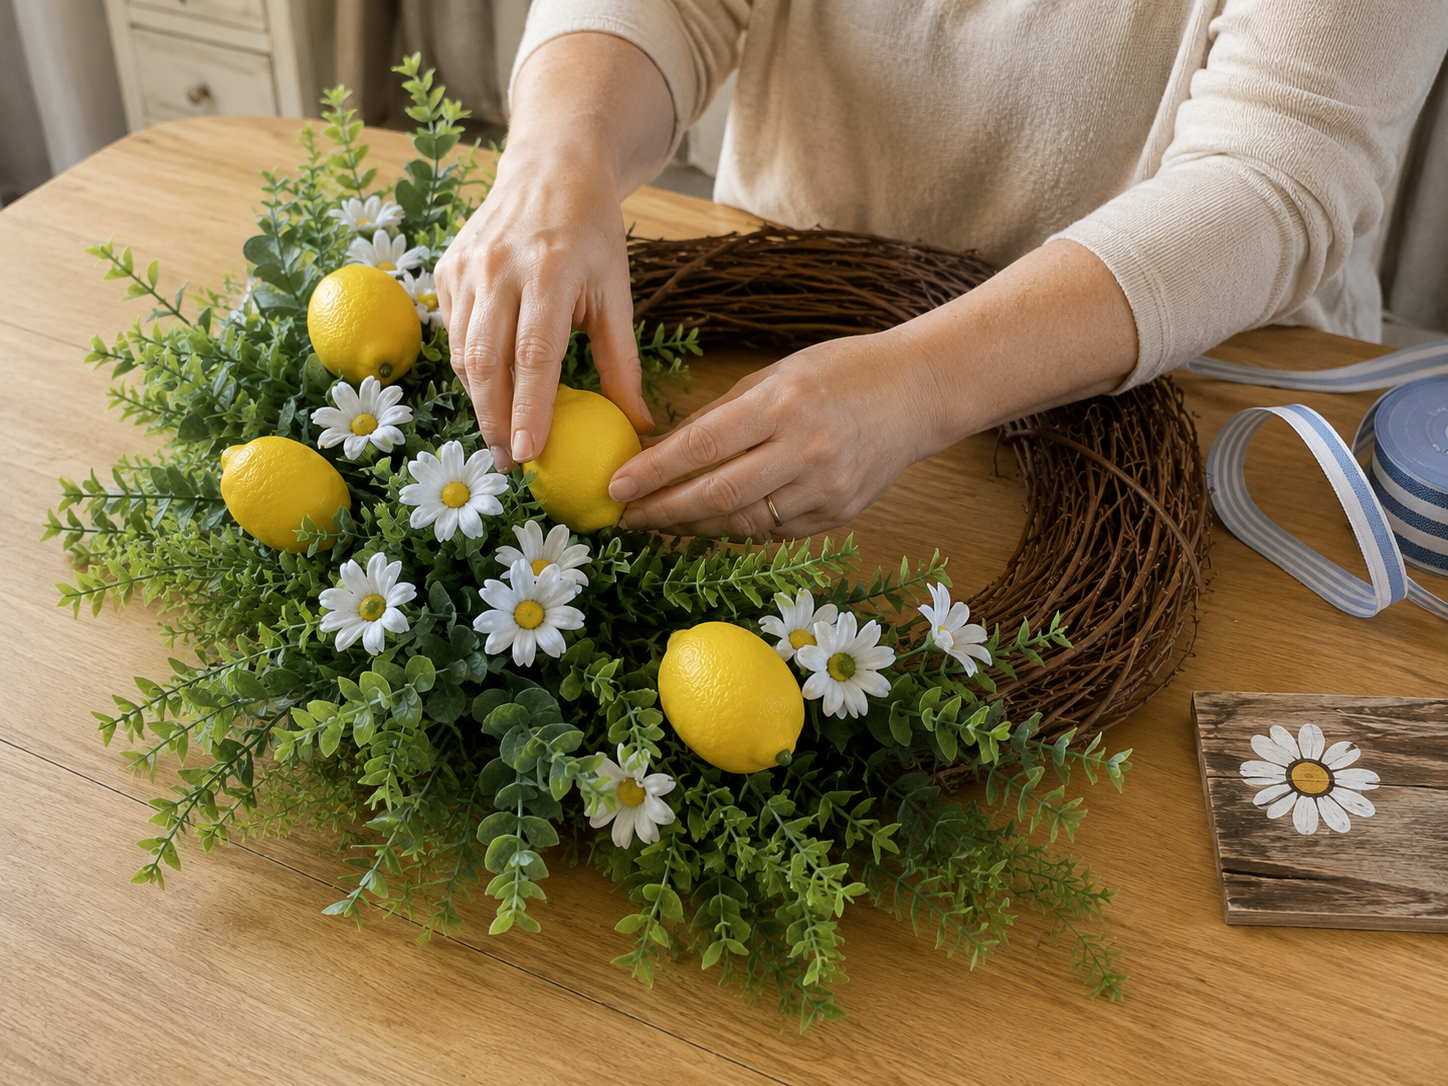
Introduce the bright, sunny faux lemons into your wreath design. Position the lemons strategically among the greenery and daisies, ensuring they are evenly distributed across the decorated sections. Use generous amounts of hot glue to securely attach each lemon to the grapevine base or a sturdy part of the greenery, pressing firmly until the glue cools.
📱 Craftino App
Make more crafts like this
1,000+ Summer & Beach ideas with photo guides & Pro Tips
✓ Step-by-step photo tutorials, nothing left out
✓ Pro Tips for every step
✓ Save crafts & browse fully offline
✓ New ideas added every week


Step 6: Make & Attach Striped Bow
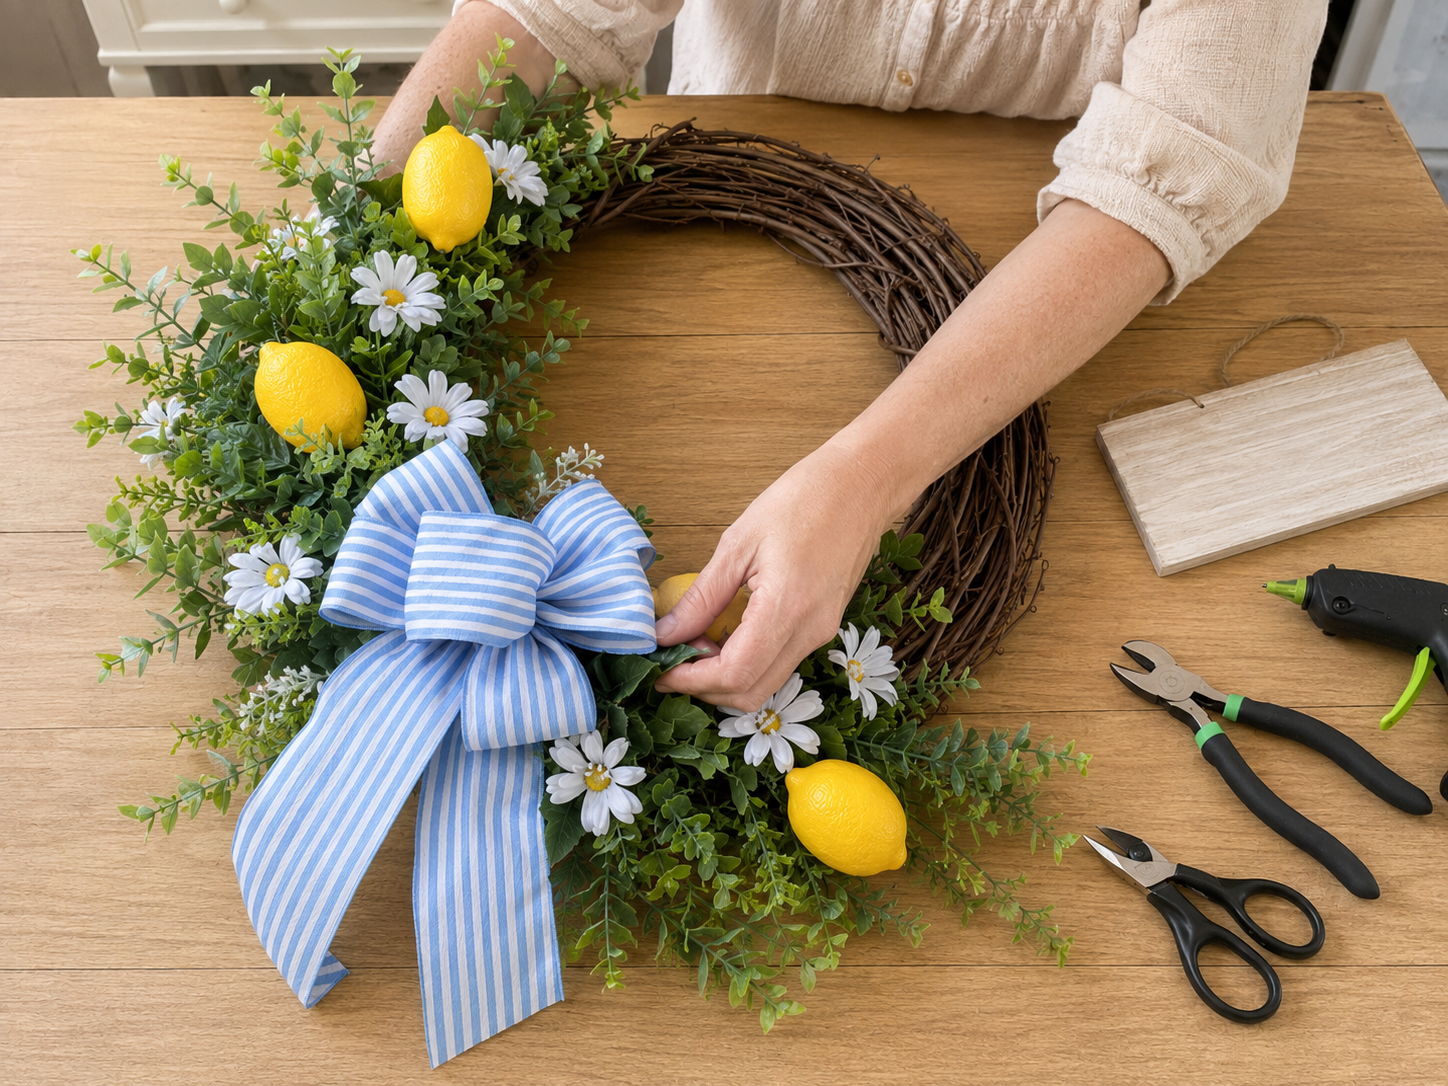
Create a beautiful multi-loop bow using your wired blue and white striped ribbon. You can use a bow maker or tie it by hand. Aim for a full, fluffy bow with two long tails. Once your bow is formed, attach it securely to the lower-left section of the wreath, slightly overlapping the greenery and daisies. Use floral wire threaded through the back of the bow and twisted around a sturdy part of the grapevine to hold it firmly in place, then trim the tails to your desired length.
Step 7: Create & Attach ‘Hello Summer’ Sign
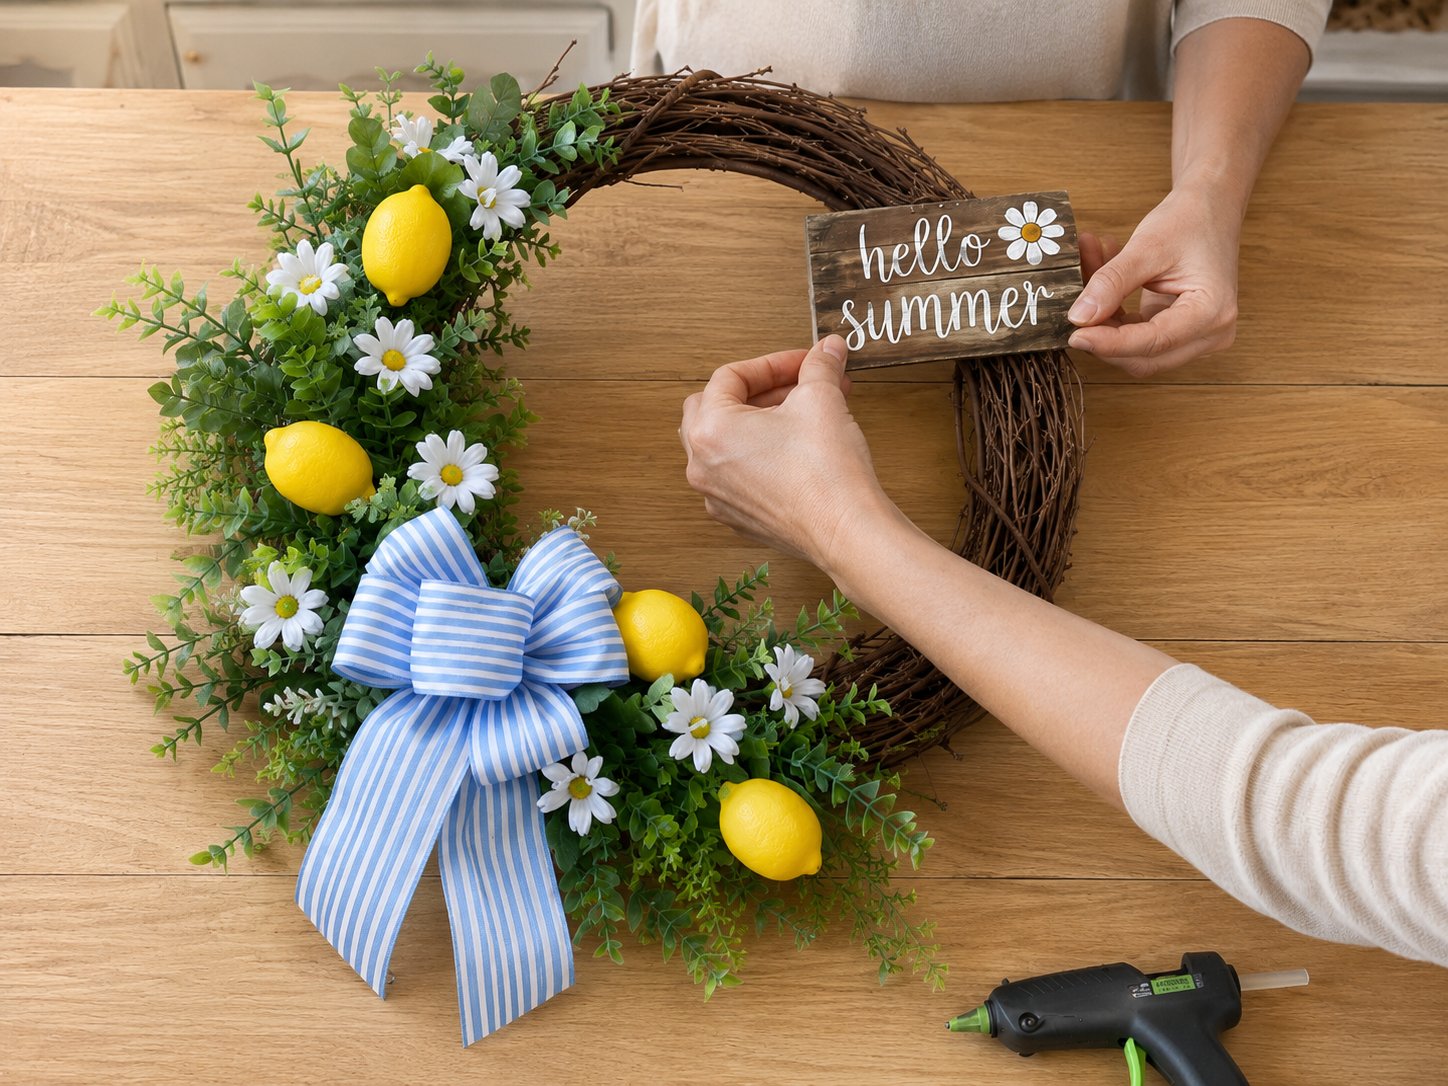
Take your small rectangular wood plaque. If using a paint marker, carefully write ‘hello summer’ in a clear, cheerful script, adding a small daisy detail if desired. Alternatively, apply a vinyl decal. Once the sign is ready, attach it to the upper-right side of the wreath. You can use hot glue if the sign is lightweight or small pieces of floral wire threaded through any existing holes in the sign and wrapped around the grapevine for a more secure hold.
Step 8: Final Styling & Display
Step back and admire your creation! Gently fluff the greenery and bow, ensuring all elements are facing forward and look cohesive. Adjust any flowers or lemons if needed. Your Dollar Tree-inspired summer wreath is now complete and ready to bring a touch of sunshine to your front door! Hang it using a wreath hanger or a strong command hook.
See also: Sunny Meadow Summer Wreath A Budget Friendly Floral Delight
📋 Love staying organized while crafting? Check out our printable planners & craft designs at CraftersDT on Etsy and use code CRAFT20 for 20% off your entire order!
Your Sunny Summer Wreath is Ready!
Woohoo, you did it! Your ‘Sunshine & Stripes: Easy Dollar Tree Summer Wreath’ is complete and looking absolutely adorable. Hang it on your front door, bring that Summer & Beach vibe to a kitchen wall, or gift it to someone special. Don’t forget to share a pic of your version, I’d love to see it!
📱 Craftino App
Make more crafts like this
1,000+ Summer & Beach ideas with photo guides & Pro Tips
✓ Step-by-step photo tutorials, nothing left out
✓ Pro Tips for every step
✓ Save crafts & browse fully offline
✓ New ideas added every week
Frequently Asked Questions
What is the total cost for the ‘Sunshine & Stripes: Easy Dollar Tree Summer Wreath’?
The total cost for the ‘Sunshine & Stripes: Easy Dollar Tree Summer Wreath’ is approximately $12-15. This budget-friendly project primarily uses supplies found at Dollar Tree, making it an affordable DIY option for Summer & Beach decor.
How long does it take to make the ‘Sunshine & Stripes: Easy Dollar Tree Summer Wreath’?
Making the ‘Sunshine & Stripes: Easy Dollar Tree Summer Wreath’ takes approximately 30-45 minutes from start to finish. This quick crafting time makes it an ideal project for a fun afternoon activity or a last-minute gift.
Is the ‘Sunshine & Stripes: Easy Dollar Tree Summer Wreath’ suitable for beginners?
Yes, the ‘Sunshine & Stripes: Easy Dollar Tree Summer Wreath’ is perfect for beginners. The steps are straightforward, and the materials are easy to work with, requiring minimal crafting experience to achieve a beautiful result.
Where can I buy supplies for the ‘Sunshine & Stripes: Easy Dollar Tree Summer Wreath’?
All the primary supplies for the ‘Sunshine & Stripes: Easy Dollar Tree Summer Wreath’ can be readily purchased at Dollar Tree. This includes the wreath form, ribbons, and small embellishments, keeping the project super affordable.
Can I give the ‘Sunshine & Stripes: Easy Dollar Tree Summer Wreath’ as a gift?
Absolutely, the ‘Sunshine & Stripes: Easy Dollar Tree Summer Wreath’ makes a thoughtful and budget-friendly Summer & Beach themed gift. It’s a handmade present that shows care without a high cost, perfect for a hostess gift or a friend’s birthday.
Is the ‘Sunshine & Stripes: Easy Dollar Tree Summer Wreath’ durable for outdoor display?
The ‘Sunshine & Stripes: Easy Dollar Tree Summer Wreath’ is best suited for indoor display or in a covered outdoor area, such as a porch or patio, to protect it from direct weather exposure. This helps maintain the vibrant colors and integrity of the Dollar Tree materials.
How can I customize my ‘Sunshine & Stripes: Easy Dollar Tree Summer Wreath’?
You can easily customize your ‘Sunshine & Stripes: Easy Dollar Tree Summer Wreath’ by swapping out ribbon colors to match your decor, or by adding different small beach-themed embellishments like mini seashells or starfish, all available at Dollar Tree.
What is the best type of glue to use for this DIY Dollar Tree wreath?
Hot glue is the best adhesive to use for this DIY Dollar Tree wreath because it dries quickly and provides a strong bond on the plastic wreath form and various embellishments. A low-temperature hot glue gun works well for most crafters.
How many rolls of ribbon do I need for the ‘Sunshine & Stripes: Easy Dollar Tree Summer Wreath’?
You will typically need two to three rolls of wired ribbon for the ‘Sunshine & Stripes: Easy Dollar Tree Summer Wreath’, depending on how full you want your bow and accent loops to be. Dollar Tree offers a variety of wired ribbon colors perfect for this project.
What size wreath form is used in the ‘Sunshine & Stripes: Easy Dollar Tree Summer Wreath’ project?
The ‘Sunshine & Stripes: Easy Dollar Tree Summer Wreath’ project usually utilizes a 14-inch wire or foam wreath form. These standard size forms are readily available at Dollar Tree and provide a good base for the design.
Find more summer & beach craft ideas & supplies at Dollar Tree.

Leave a Reply