
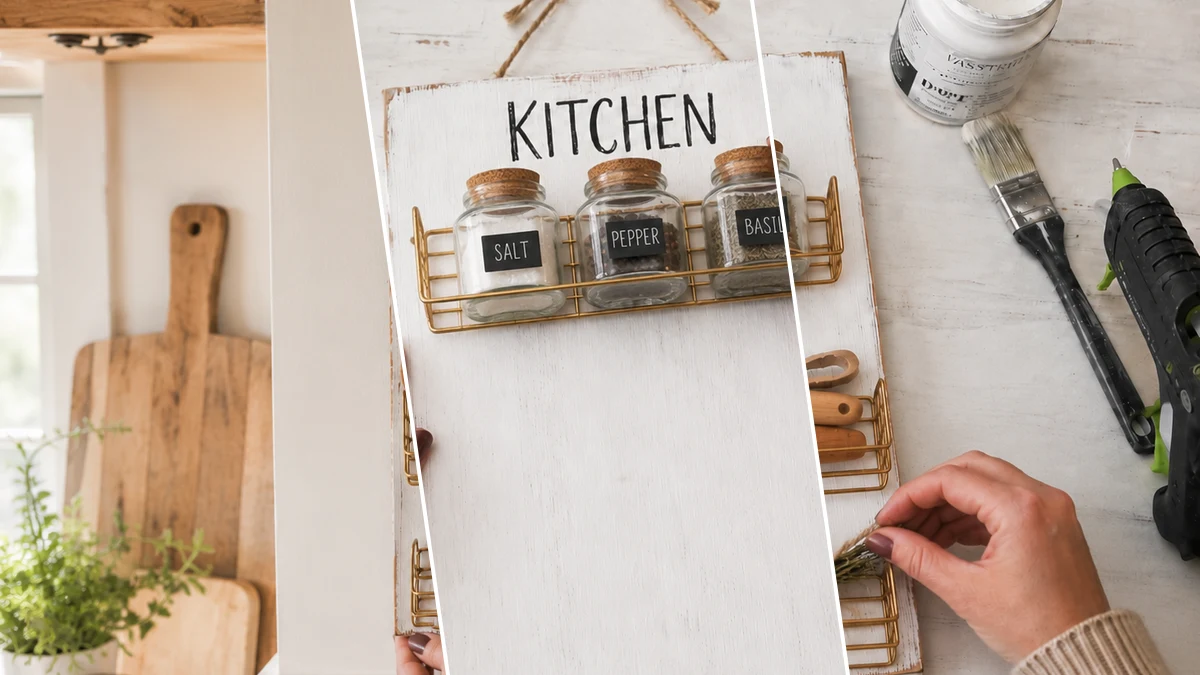
Ever walk into Dollar Tree just for a few things and end up with a whole basket full of possibilities? Me too, friend! That’s exactly how this super cute Rustic Farmhouse Kitchen Wall Organizer (Dollar Tree DIY) came to life. I saw these little crates and my mind just started buzzing with ideas for organizing my kitchen clutter, farmhouse style.
Theme: Farmhouse / Rustic
Materials Needed
- Rectangular Wooden Board (approx. 12×16 in)
- Small Gold Wire Baskets (3)
- Mini Glass Jars with Cork Lids (3)
- White Acrylic Paint
- Jute Twine
- “Kitchen” Wooden Letters or Stickers
- Adhesive Kit (Wood Glue, Hot Glue Gun & Sticks)
- Mini Chalkboard Labels
- Assorted Kitchen Decor (e.g., wooden utensils, dried herbs)
- Sandpaper
Why This Craft Works
This little organizer is just perfect for adding a touch of cozy Farmhouse / Rustic charm to your kitchen. I made mine to hold things like my spice jars, recipe cards, or even some small succulents right next to my stove. It’s great for keeping everyday essentials handy and looking cute at the same time.
And guess what? Creating this adorable Rustic Farmhouse Kitchen Wall Organizer (Dollar Tree DIY) won’t break the bank at all. Thanks to all the amazing Dollar Tree supplies, this whole project ran me about $12-15 in total. You really can’t beat that for custom Organizing & Storage that looks this good!
You’ll be so surprised how easy this DIY is, making it absolutely perfect for beginners or even a fun craft afternoon with older kids. From start to finish, this Rustic Farmhouse Kitchen Wall Organizer (Dollar Tree DIY) took me around 20-35 minutes. It’s a quick win for adding some style and organization to your home!
Step-by-Step Instructions for Rustic Farmhouse Kitchen Wall Organizer (Dollar Tree DIY)
Alright, are you ready to get your craft on? You’re going to love how quickly this Rustic Farmhouse Kitchen Wall Organizer (Dollar Tree DIY) comes together. It’s super satisfying to turn simple Dollar Tree finds into something so charming and useful. Grab your supplies, because we’re about to make some magic happen, even if you’re a beginner crafter!
Step 1: Prepare & Paint Wooden Base
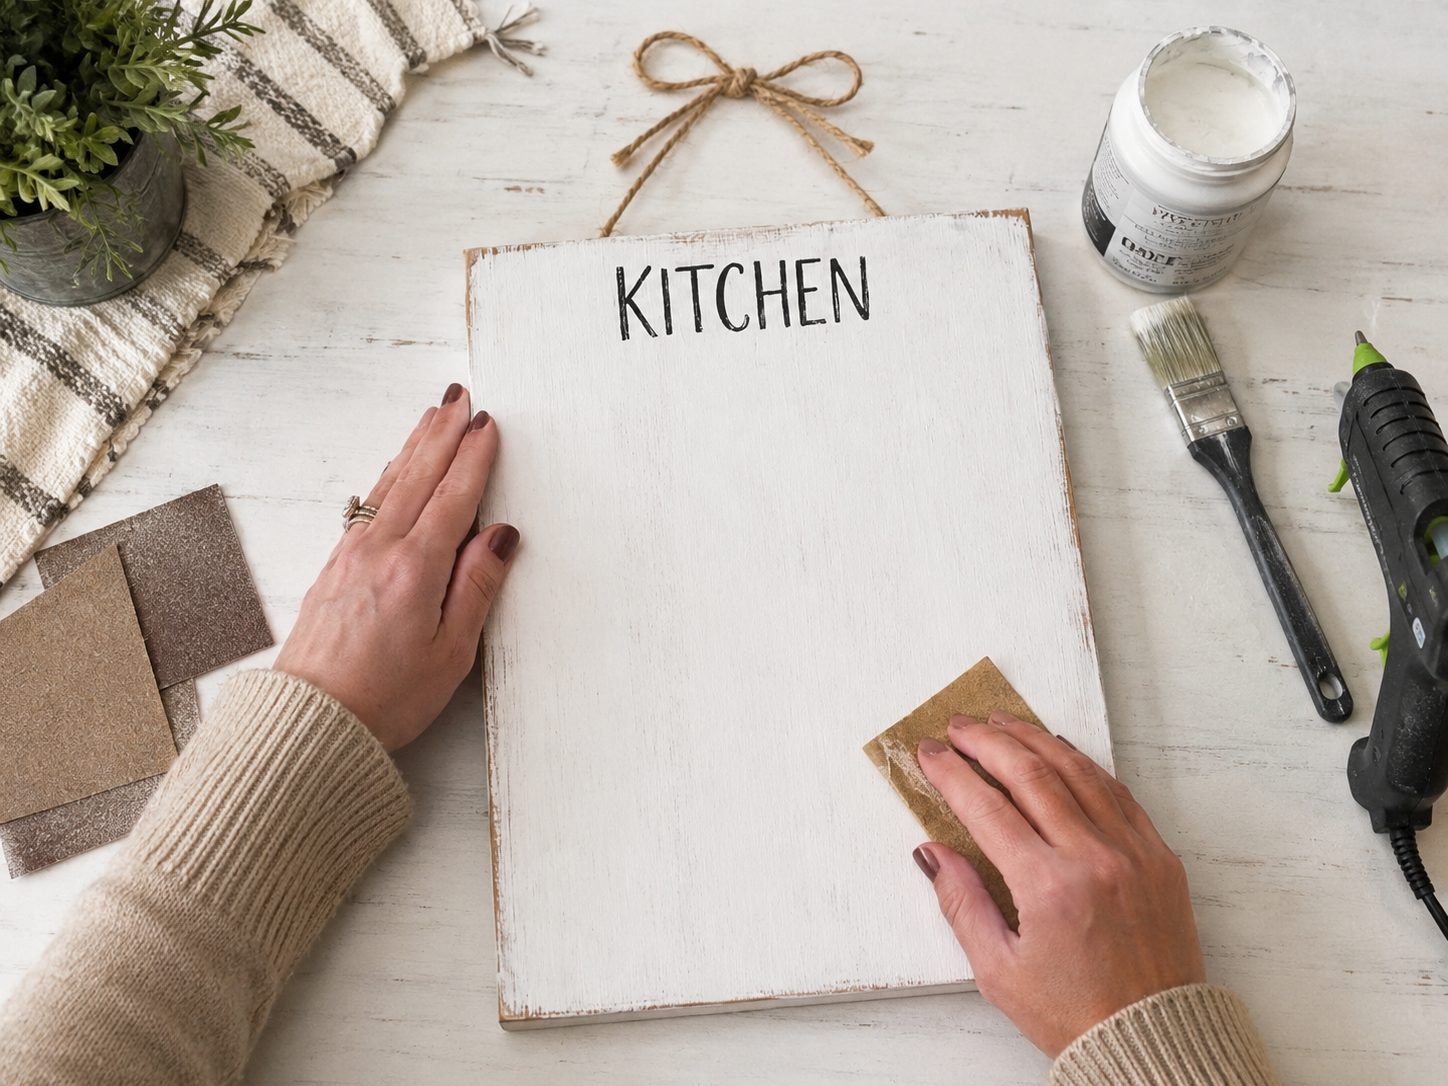
Begin by lightly sanding the entire surface and edges of your rectangular wooden board to ensure it’s smooth and ready for paint. Wipe away any dust. Apply 1-2 coats of white acrylic paint, allowing it to dry completely between coats, aiming for a slightly distressed, rustic look. Once dry, attach a loop of jute twine to the top back for hanging, and affix your ‘Kitchen’ text (wooden letters or sticker) to the upper front of the board, centered beneath where the twine will emerge.
Step 2: Mount Top Spice Basket
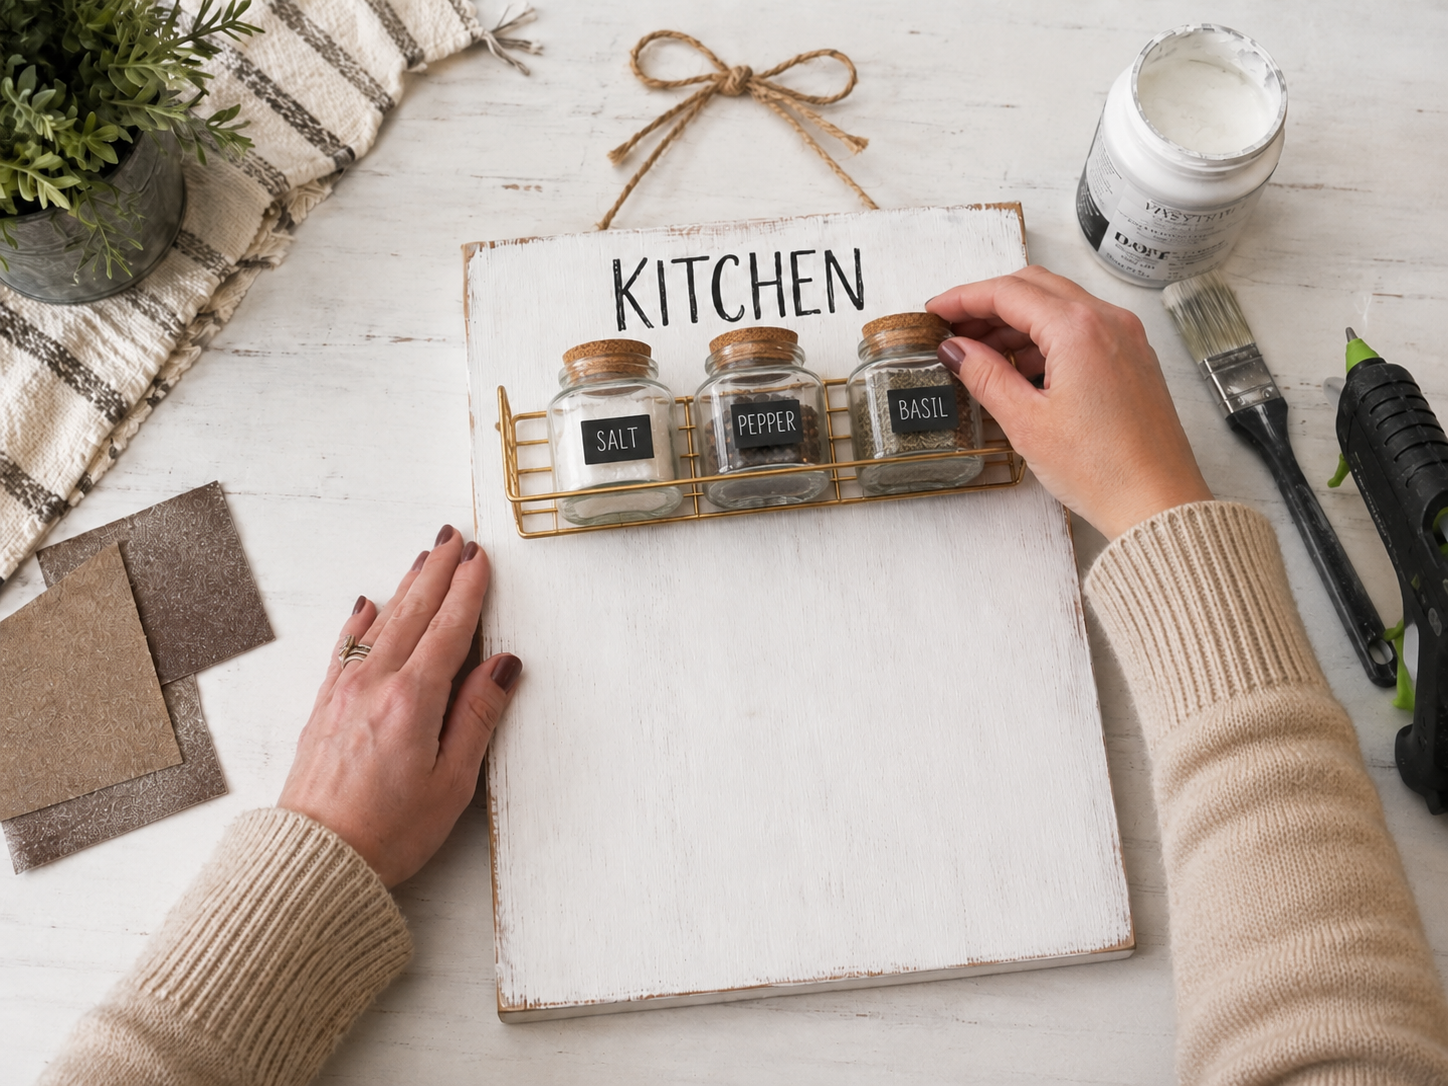
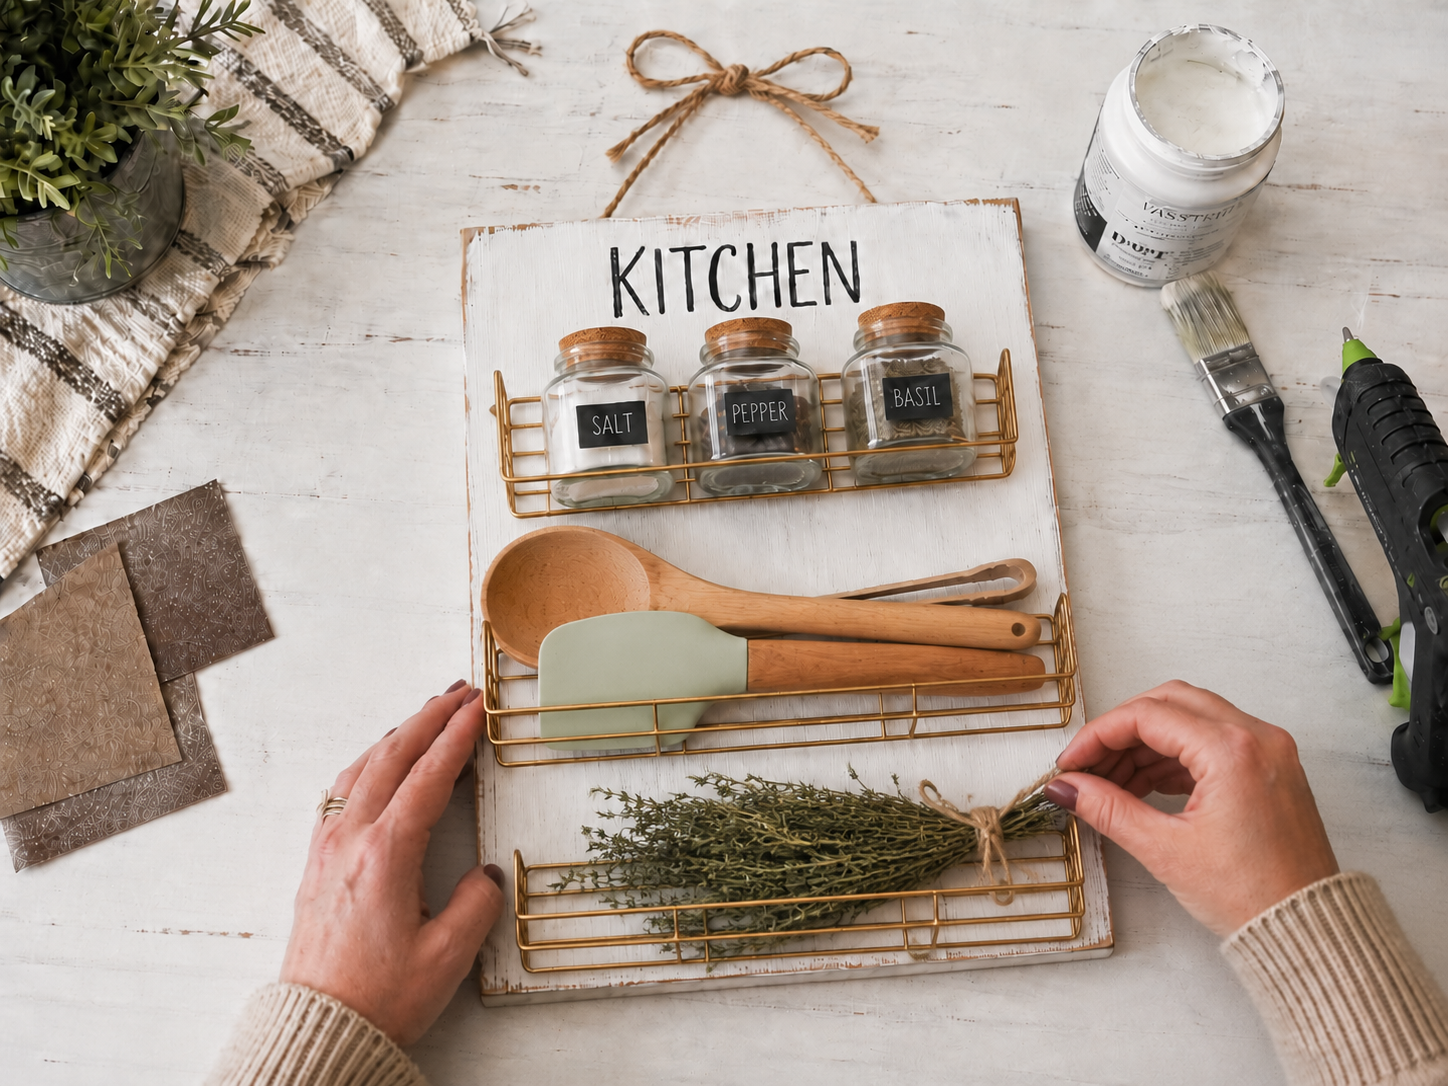
Carefully measure and mark the position for your first (top) gold wire basket, ensuring it’s centered and level, leaving adequate space below the ‘Kitchen’ text. Apply a strong wood glue to the back of the basket where it will meet the board. For an immediate hold while the wood glue cures, add a few dots of hot glue to the basket’s contact points before pressing it firmly onto the board. While the basket dries, prepare your mini glass jars by filling them with your desired spices and attaching the mini chalkboard labels, writing ‘SALT,’ ‘PEPPER,’ and ‘BASIL’ (or your preferred spices). Once the basket is stable, arrange the labeled jars neatly inside.
Step 3: Add Middle Utensil Basket
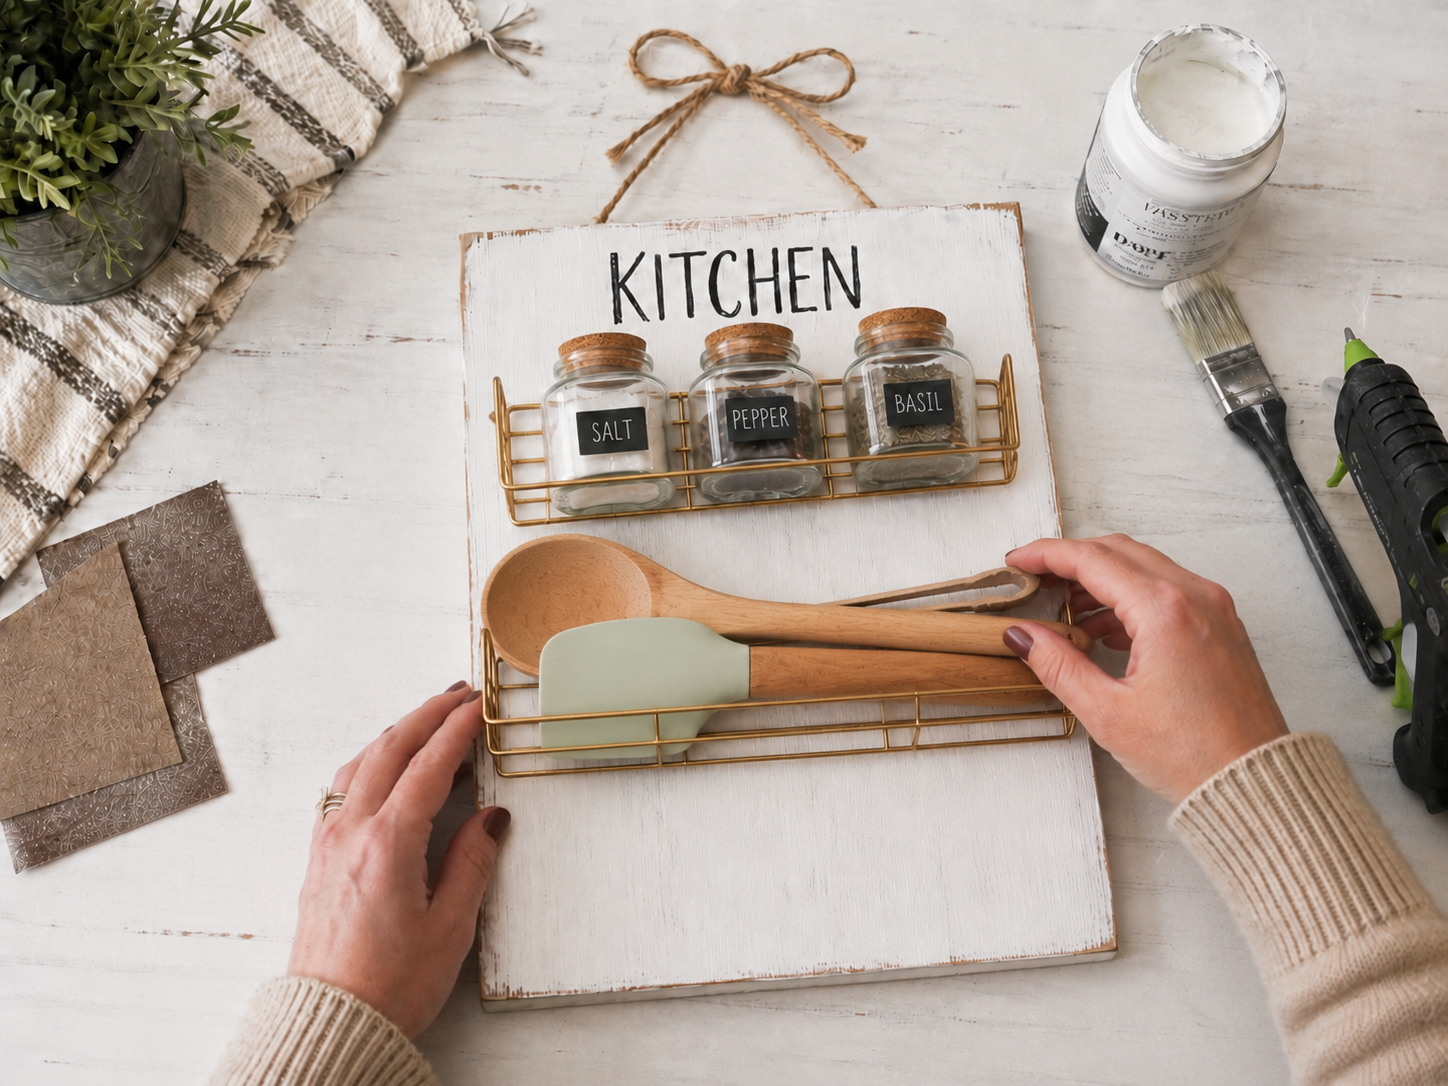
Measure the appropriate distance below the top basket to ensure even spacing for the middle gold wire basket. Repeat the gluing process: apply a strong wood glue to the back of the basket, position it carefully using your measurements, and use hot glue for immediate hold while the wood glue sets. Press firmly and hold until the hot glue cools. Allow the glues to cure for the recommended time. Once securely attached, select your chosen wooden kitchen utensils (such as a wooden spoon, spatula, or tongs) and artfully arrange them inside the middle basket.
Step 4: Secure Bottom Decor Basket
Position your third (bottom) gold wire basket, ensuring it is evenly spaced below the middle basket and leaves adequate clearance from the bottom edge of the board. Follow the same gluing procedure as before: apply wood glue, use hot glue for initial hold, and firmly press into place. Allow ample drying time for the glues to bond completely. Once the basket is secure, add a decorative bundle of dried herbs (like rosemary or thyme, tied with jute twine) or any other appropriate decor, into the bottom basket. This adds a natural, aromatic touch to your organizer.
Step 5: Reinforce & Final Checks
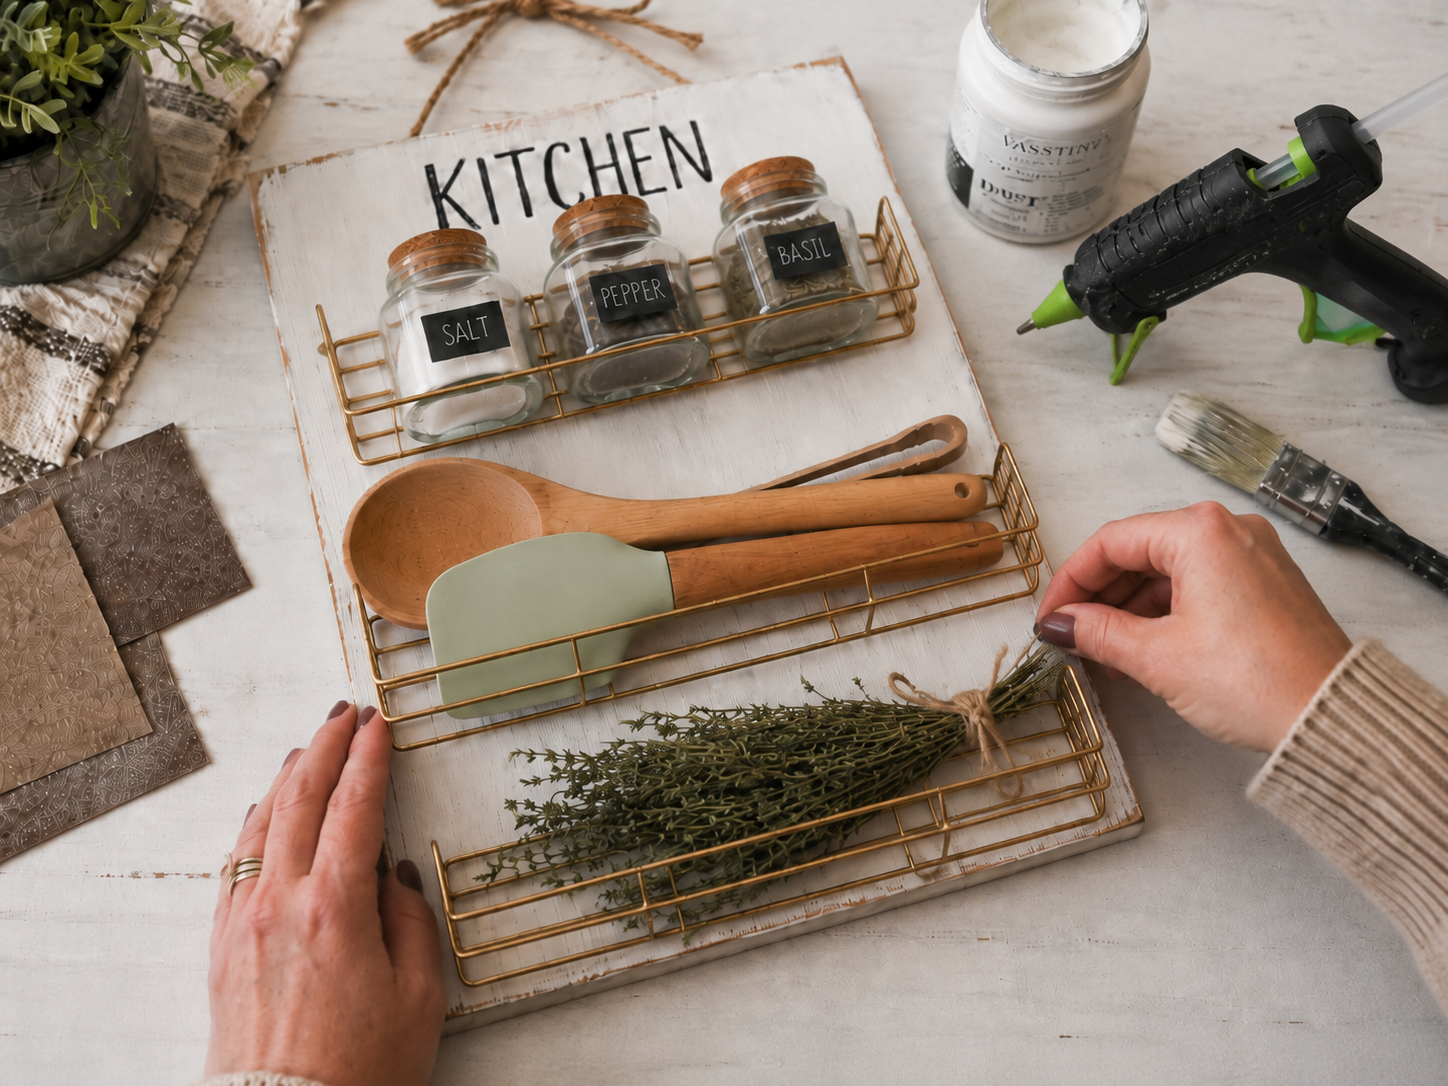
Once all baskets are attached and the wood glue has had sufficient time to cure (check manufacturer’s instructions, typically 24 hours for full strength), go back and apply additional hot glue or a small bead of strong craft adhesive (like E6000) along the contact points between the basket frames and the wooden board. This reinforces the attachment points, especially crucial for baskets that will hold heavier items or be frequently accessed. Gently test each basket by applying slight pressure to ensure it is firmly attached and won’t wobble or detach over time.
📱 Craftino App
Make more crafts like this
1,000+ Farmhouse / Rustic ideas with photo guides & Pro Tips
✓ Step-by-step photo tutorials, nothing left out
✓ Pro Tips for every step
✓ Save crafts & browse fully offline
✓ New ideas added every week


Step 6: Hang & Enjoy Your Organizer
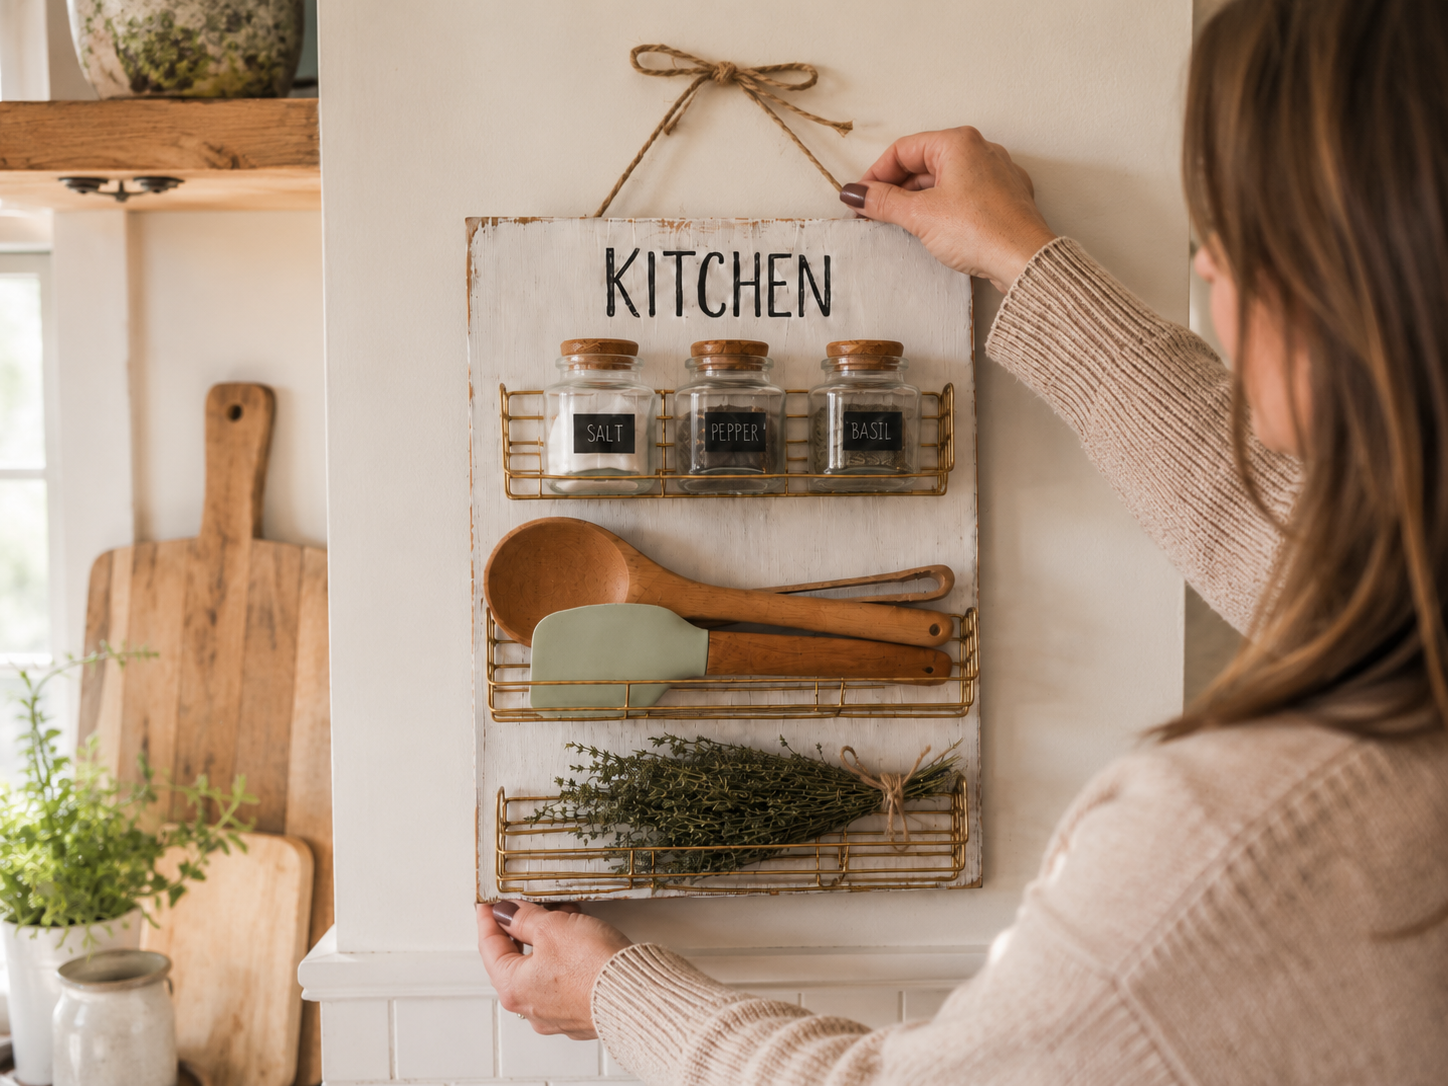
With all components securely in place and adhesives fully cured, your Dollar Tree Rustic Kitchen Wall Organizer is ready to be proudly displayed! Choose a prominent and practical spot in your kitchen, such as an empty wall space near your cooking area or dining nook, where it can be both decorative and highly functional. Hang it using the jute twine loop on a sturdy picture hook or nail. Step back and admire your newly organized, charming, and personalized kitchen space!
See also: Rustic Farmhouse Kitchen Utensil Board Decor
📋 Love staying organized while crafting? Check out our printable planners & craft designs at CraftersDT on Etsy and use code CRAFT20 for 20% off your entire order!
DIY Farmhouse Kitchen Organizer Complete!
And there you have it, friend! Your brand new Rustic Farmhouse Kitchen Wall Organizer (Dollar Tree DIY) is all done and ready to bring some cute Organizing & Storage to your home. Hang it up in your kitchen, pantry, or even use it in your craft room. I can’t wait to see how you make it your own, so don’t forget to share your pictures!
📱 Craftino App
Make more crafts like this
1,000+ Farmhouse / Rustic ideas with photo guides & Pro Tips
✓ Step-by-step photo tutorials, nothing left out
✓ Pro Tips for every step
✓ Save crafts & browse fully offline
✓ New ideas added every week
Frequently Asked Questions
What is the total cost for this Rustic Farmhouse Kitchen Wall Organizer (Dollar Tree DIY)?
The total cost for making the Rustic Farmhouse Kitchen Wall Organizer (Dollar Tree DIY) is typically $12-15. This budget-friendly project uses mostly Dollar Tree supplies, making it very affordable for custom Organizing & Storage.
How long does it take to create this Dollar Tree Farmhouse / Rustic organizer?
This Dollar Tree Farmhouse / Rustic organizer can be completed in about 20-35 minutes. It’s a quick DIY project perfect for adding Organizing & Storage to your kitchen without spending hours.
Is this Rustic Farmhouse Kitchen Wall Organizer (Dollar Tree DIY) difficult for beginners?
No, this Rustic Farmhouse Kitchen Wall Organizer (Dollar Tree DIY) is very easy for beginners. The steps are straightforward, and it doesn’t require any advanced crafting skills or special tools.
Where can I find all the supplies for this Farmhouse Kitchen Wall Organizer?
You can find almost all the supplies for this Farmhouse Kitchen Wall Organizer at Dollar Tree, including the small crates, paint, and decorative elements. For specific items like wood glue, you might check Walmart or a craft store.
Can I customize the look of my Dollar Tree Rustic Farmhouse Kitchen Wall Organizer?
Yes, you can easily customize your Dollar Tree Rustic Farmhouse Kitchen Wall Organizer by changing the paint colors, adding different embellishments like faux flowers or stencils, or even choosing different sized crates for varied Organizing & Storage.
Is the Rustic Farmhouse Kitchen Wall Organizer a good DIY gift idea?
Yes, the Rustic Farmhouse Kitchen Wall Organizer makes an excellent DIY gift for housewarmings, Mother’s Day, or birthdays. It’s a thoughtful and practical gift, especially for someone who loves Farmhouse / Rustic decor.
What type of glue should I use for the Dollar Tree DIY Farmhouse organizer?
For the Dollar Tree DIY Farmhouse organizer, a strong wood glue or E6000 adhesive is recommended for securely attaching the wooden crates together. Allow at least 24 hours for the glue to fully cure for maximum durability.
How durable is this DIY Rustic Farmhouse Kitchen Wall Organizer for daily use?
This DIY Rustic Farmhouse Kitchen Wall Organizer is quite durable for indoor daily use when assembled correctly. Using strong wood glue and allowing proper drying time ensures it can hold items like spice jars and small plants effectively.
Browse farmhouse / rustic crafting supplies at Dollar Tree.

Leave a Reply