
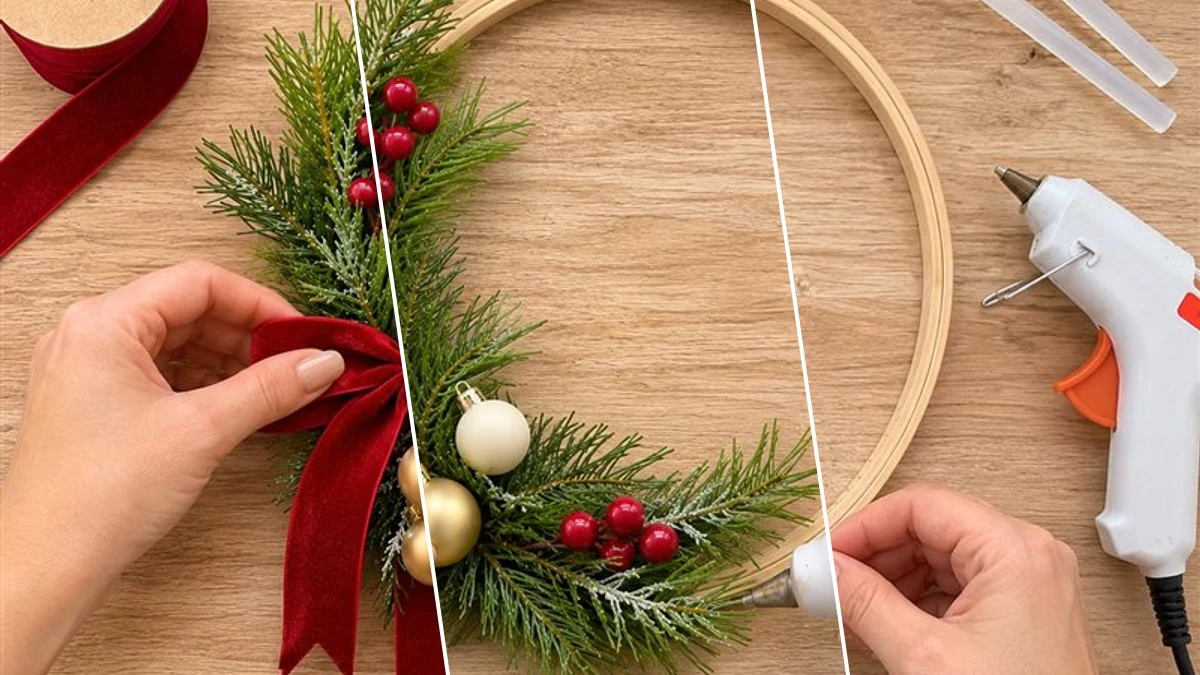
Add a touch of modern festive charm to your home with an asymmetrical Christmas embroidery hoop wreath. This project combines natural elements with classic holiday accents to create a unique piece of decor. Its simple construction makes it an accessible craft for any skill level, resulting in a beautiful display for the holiday season.
Project at a Glance
- Difficulty: Easy
- Estimated active time: 15 minutes to 25 minutes (drying and curing waits not included)
- Estimated component cost: low-cost, mostly Dollar Tree supplies
- Main material: Wood
- Suggested placement: Wall
Designing Your Asymmetrical Christmas Hoop Wreath
The asymmetrical design of this Christmas hoop wreath offers a contemporary take on traditional holiday decor. By intentionally leaving a portion of the natural wood embroidery hoop exposed, the craft achieves a balanced yet visually interesting aesthetic. This approach allows the warmth of the wood to complement the festive greenery and embellishments.
The combination of faux pine greenery, vibrant red berries, and subtle gold and cream mini ornaments creates a classic Christmas palette. Red velvet ribbon adds a luxurious texture and provides a final touch of elegance. The materials are selected to be easily assembled with hot glue, making the crafting process straightforward and enjoyable.
This style of wreath is versatile, suitable for hanging on a front door, as an accent on an interior wall, or even leaning on a mantelpiece. Its estimated active assembly time is 15 to 25 minutes, making it a quick project to enhance your holiday home decor.
Materials for DIY Asymmetrical Christmas Embroidery Hoop Wreath for Festive Door or Wall Decor
- Natural Wood Embroidery Hoop (approx. 10-inch)
- Faux Pine Greenery Stems
- Red Berry Picks
- Mini Christmas Ornaments (Gold & Cream)
- Red Velvet Ribbon (wired for bows is ideal)
- Hot Glue Gun & Glue Sticks
- Wire Cutters
Need another material? Browse current craft supplies and deals.
Assembling Your Asymmetrical Christmas Hoop Wreath
Creating this elegant Christmas hoop wreath involves a few simple steps, primarily focused on arranging and securing the decorative elements. Careful placement of the greenery and ornaments will ensure the asymmetrical design stands out. Follow these instructions to bring your festive vision to life.
Step 1: Gather All Your Craft Supplies
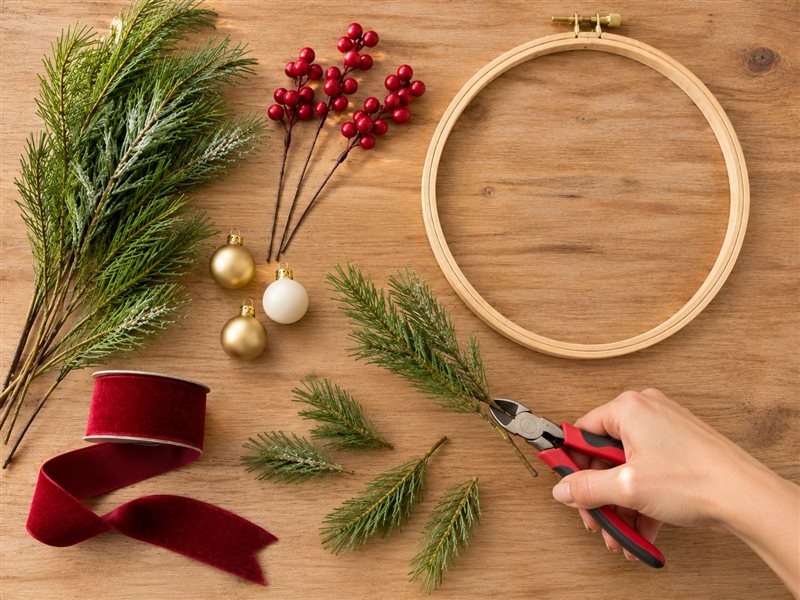
Prepare your workspace by laying out all the necessary materials and tools. This includes your embroidery hoop, faux greenery stems, berry picks, mini ornaments, red velvet ribbon, hot glue gun, glue sticks, and wire cutters. Organizing everything at the start ensures a smooth and efficient crafting process, allowing you to easily access each item as needed.

Step 2: Prepare Greenery Sprigs
Take your faux pine greenery stems and, using wire cutters, carefully snip them into smaller, individual sprigs. Aim for various lengths to create visual interest and dimension in your wreath. These shorter, more manageable pieces will be easier to position and layer on the hoop, allowing for a fuller and more organic look. Discard any excess wire or plastic from the base of the sprigs.
Step 3: Attach Pine Greenery to Hoop
Begin hot gluing the prepared pine sprigs to the lower-left section of your embroidery hoop. Start by securing larger pieces as a base, then layer smaller sprigs on top, slightly overlapping them to build fullness. Work around the lower curve, ensuring the greenery covers approximately one-third to one-half of the hoop. The key is to leave the upper-right section bare to maintain the elegant asymmetrical design. Apply hot glue directly to the back of each stem and press firmly onto the wood.



Step 4: Embellish with Berries and Ornaments
Once your pine greenery is securely in place, it's time to add the decorative elements. Hot glue the red berry picks strategically amongst the pine sprigs, distributing them evenly to add vibrant pops of color and texture. Next, use small dabs of hot glue to secure the mini gold and cream ornaments. You can glue them directly to the greenery or to the hoop behind the greenery, allowing them to hang naturally. Arrange them in a small, appealing cluster, typically near the center of your greenery arrangement, to draw the eye.

Step 5: Add Velvet Bow and Hanging Loop
Cut a generous length of your red velvet ribbon and tie a festive bow. If your ribbon is wired, shape the loops and tails for a full, elegant look. Hot glue the completed bow securely over the center of your greenery and ornament cluster, concealing any glue points. Finally, cut another piece of velvet ribbon, approximately 12-18 inches long. Fold it in half to form a loop and thread it through the metal clasp at the top of the embroidery hoop. Tie or hot glue the ends together to create a sturdy and decorative hanging loop. Your beautiful asymmetrical Christmas hoop wreath is now ready to display!

Displaying Your Finished Christmas Hoop Wreath
With all components securely in place, your asymmetrical Christmas embroidery hoop wreath is ready to adorn your home. Hang it on a door, entryway wall, or use it to bring a festive touch to any indoor space. This handmade piece offers a personalized accent for your holiday decor.
Related project collection: DIY Faux Greenery Christmas Kissing Ball with Velvet Ribbon for Doors
Practical Questions About This Project
What size embroidery hoop is recommended for this wreath?
An approximately 10-inch natural wood embroidery hoop is used as the base for this asymmetrical Christmas wreath.
Can different colors of ornaments or ribbon be used?
Yes, the design can be customized. While the example uses gold and cream mini ornaments and red velvet ribbon, alternative colors could be chosen to match specific decor themes.
What type of ribbon is best for the bow and hanging loop?
Red velvet ribbon is recommended, and wired velvet ribbon is ideal for creating a full, shapely bow and a sturdy hanging loop.
Is this wreath suitable for outdoor display?
The materials and construction of this wreath are intended for indoor display. Exposure to outdoor elements like rain, wind, or direct sunlight may affect its durability and appearance.
How long does it take to make this wreath?
The estimated active assembly time for this project is 15 to 25 minutes. This estimate excludes any unattended drying or curing time for the hot glue.
Search Dollar Tree for wood supplies.

Leave a Reply