
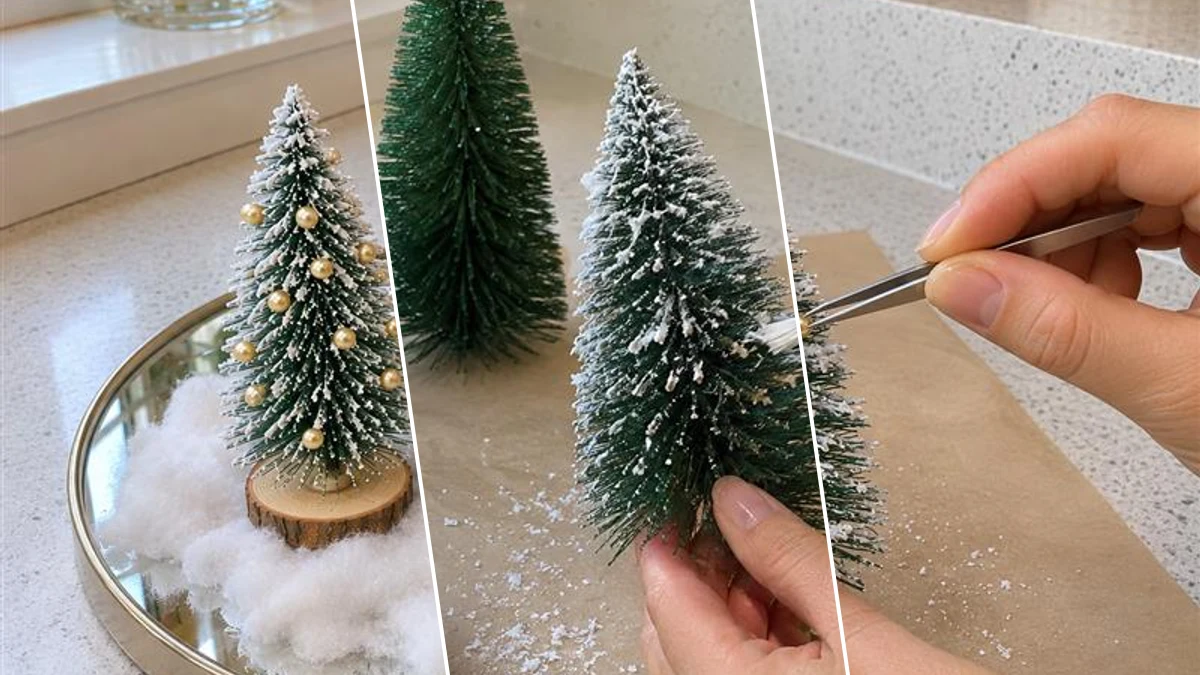
Create a festive frosted bottle brush tree winter village centerpiece to bring a touch of holiday magic to your home. This charming tabletop display features miniature bottle brush trees, delicately frosted and adorned with tiny gold beads. Each tree is secured to a natural wood slice, then arranged on a reflective mirror tray with soft cotton batting to simulate snow. It is an ideal project for seasonal decor.
Project at a Glance
- Difficulty: Easy
- Estimated active time: 25 minutes to 45 minutes (drying and curing waits not included)
- Main material: Faux Florals
- Suggested placement: Tabletop
Crafting a Frosted Bottle Brush Tree Winter Village
This craft transforms simple bottle brush trees, like those often found at Dollar Tree, into a charming miniature winter forest scene. The combination of frosted branches, tiny gold 'ornaments', and natural wood bases creates a rustic yet elegant aesthetic. Arranged on a mirror tray with soft cotton batting, the display evokes a serene snowy landscape, perfect for holiday gatherings.
The reflective surface of the mirror tray enhances the visual depth, making the 'snow' and trees appear more expansive. It is a versatile centerpiece that can adorn a dining table, coffee table, or mantelpiece, adding a cozy and festive touch to any room throughout the winter season.
Materials for DIY Frosted Bottle Brush Tree Winter Village Centerpiece on a Mirror Tray
- Bottle Brush Trees (various sizes)
- White Acrylic Craft Paint
- Faux Snow or Epsom Salt
- Small Gold Pearl Beads
- Natural Wood Slices
- Craft Adhesive (tacky glue or hot glue)
- Round Mirror Tray
- Cotton Batting
Need another material? Browse current craft supplies and deals.
Assembling Your Frosted Winter Village Centerpiece
Creating this frosted bottle brush tree winter village centerpiece involves a few straightforward steps. Begin by transforming plain bottle brush trees into snowy miniatures, then add delicate details and arrange them into a charming display. The estimated active time for this project is 25 to 45 minutes, excluding unattended drying and curing.
Step 1: Frosting the Bottle Brush Trees
Begin by gently dabbing white acrylic craft paint onto the branches of each bottle brush tree. Focus on the tips and outer edges to mimic freshly fallen snow. While the paint is still wet, immediately sprinkle faux snow or Epsom salt over the painted areas, ensuring good coverage. Allow the paint and snow to dry completely, following paint product instructions. Repeat if a thicker frosted look is desired.

Step 2: Adorning with Gold Pearl Beads
Once the frosted trees are dry, carefully apply small dots of tacky glue or hot glue onto various branches. Using tweezers or a toothpick, press the small gold pearl beads onto the glue dots, distributing them evenly around each tree to resemble tiny ornaments. Work in small sections to prevent the glue from drying before you can attach the beads. Allow the glue to set completely.

Step 3: Mounting Trees to Wood Slices
For each decorated bottle brush tree, select a natural wood slice base that is appropriately sized for stability. Apply a generous amount of tacky glue or hot glue to the center of the wood slice. Carefully press the base of a frosted and beaded tree onto the glue, holding it firmly in place until the adhesive begins to set. Ensure each tree stands upright and is securely attached to its wood base. Allow all glue to fully cure before moving the trees.



Step 4: Assembling the Winter Forest Display
Place the round mirror tray on your desired surface. Begin by arranging the cotton batting onto the tray, pulling it apart gently to create soft, uneven drifts of 'snow'. Once the snow base is ready, strategically place your finished frosted and beaded trees with their wood slice bases onto the cotton batting. Vary their heights and positions to create a natural-looking miniature forest or village scene. The mirror tray will reflect the trees, enhancing the magical winter effect.
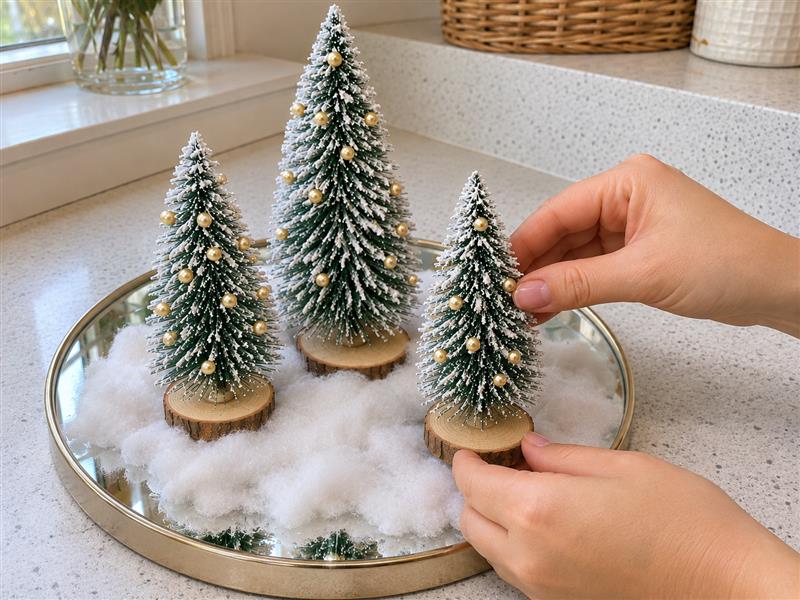
Enjoying Your Winter Village Centerpiece
With these steps, a delightful frosted bottle brush tree winter village centerpiece is complete. This festive display adds a serene and magical touch to your holiday decor, perfect for welcoming guests or simply enjoying the seasonal atmosphere. Place it where the reflective mirror can best capture the light and enhance its snowy charm.
Related project collection: DIY Honeycomb Paper Christmas Trees for Elegant Holiday Tabletop Decor
Practical Questions About This Project
What materials can be used for the frosted snow effect on the trees?
Faux snow or Epsom salt can be used to create the frosted effect on the bottle brush trees. Both options are sprinkled over wet white acrylic craft paint.
What type of adhesive is recommended for this project?
Tacky glue or hot glue is suitable for this project. These adhesives are used for attaching the gold pearl beads to the trees and securing the trees to their wood slice bases.
Why is a mirror tray used for the display?
A round mirror tray is used to reflect the trees and cotton batting, enhancing the magical winter effect of the miniature forest. It creates depth and visual interest for the centerpiece.
How can the bottle brush trees be arranged to look like a natural forest or village?
To create a natural-looking miniature forest or village scene, vary the heights and positions of the finished trees on the cotton batting. Strategically place them on the mirror tray.
What kind of bottle brush trees are suitable for this craft?
Plain green bottle brush trees in various sizes are suitable for this craft. The source mentions using trees from Dollar Tree, which are then frosted and decorated.
Search Dollar Tree for faux florals supplies.

Leave a Reply