
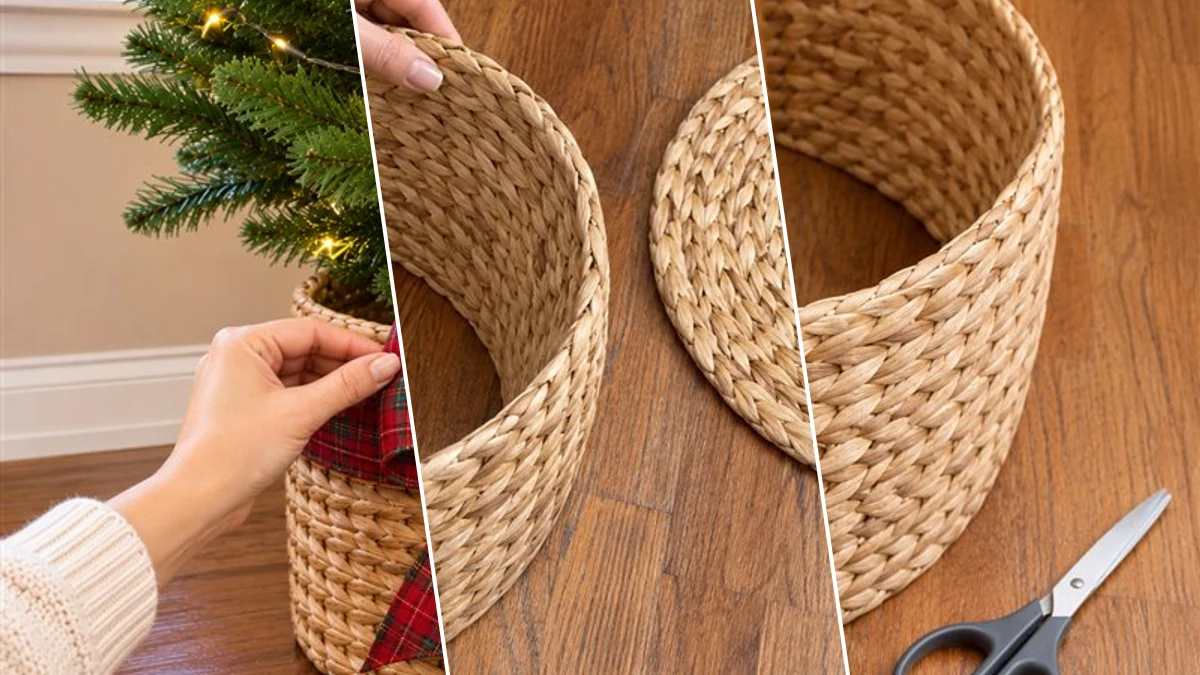
Conceal an unsightly Christmas tree stand with a charming DIY collar made from natural woven placemats. This easy project offers a rustic alternative to traditional tree skirts. With just a few materials and simple steps, you can create a cohesive and festive base for your holiday tree. Add a wide wired plaid ribbon for a classic touch.
Project at a Glance
- Difficulty: Easy
- Estimated active time: 10 minutes to 15 minutes (drying and curing waits not included)
- Estimated component cost: a few dollars (reusable tools and general supplies excluded)
Why a Woven Placemat Tree Collar Works
A Christmas tree stand can often detract from the festive appearance of your holiday decor. This DIY woven placemat collar provides an attractive solution, offering a rustic and farmhouse-inspired aesthetic that beautifully complements various decorating styles. It effectively conceals the stand, creating a polished and inviting base for your tree.
Crafting this tree collar is designed to be a straightforward process, requiring minimal time and effort. Using readily available natural woven placemats and a wide wired ribbon, this project transforms simple items into a cohesive holiday accent. The assembled collar is a durable and stylish alternative to fabric tree skirts.
Materials for DIY Rattan Placemat Christmas Tree Collar to Hide the Stand
- Natural Woven Placemats (2)
- Wide Wired Plaid Ribbon
- Clear Zip Ties or Twine
- Scissors
Need another material? Browse current craft supplies and deals.
Crafting Your Woven Placemat Tree Collar
Transform two natural woven placemats into a charming Christmas tree collar with these clear steps. The process involves gently curving the placemats, securing them with zip ties, and adding a festive ribbon. Follow along to create a rustic base for your holiday tree.
Step 1: Gently Curve Placemats
Lay the two natural woven placemats flat on your work surface. One at a time, gently flex and curve each placemat to begin shaping it into a half-circle. The natural woven material should allow for some flexibility without breaking, preparing them to form the circular collar.
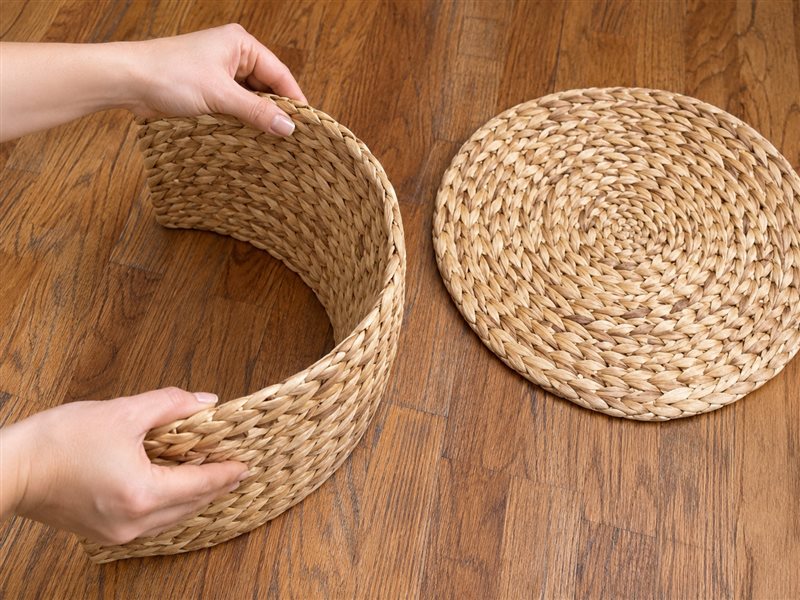
Step 2: Connect Placemat Ends
Take the two curved placemats. Overlap their straight, shorter ends by about 1-2 inches, aligning the woven patterns as best as possible. Use clear zip ties or pre-cut sections of twine to tightly secure these overlapping sections together, forming a strong bond. Only join one side at this point, leaving the collar partially open.
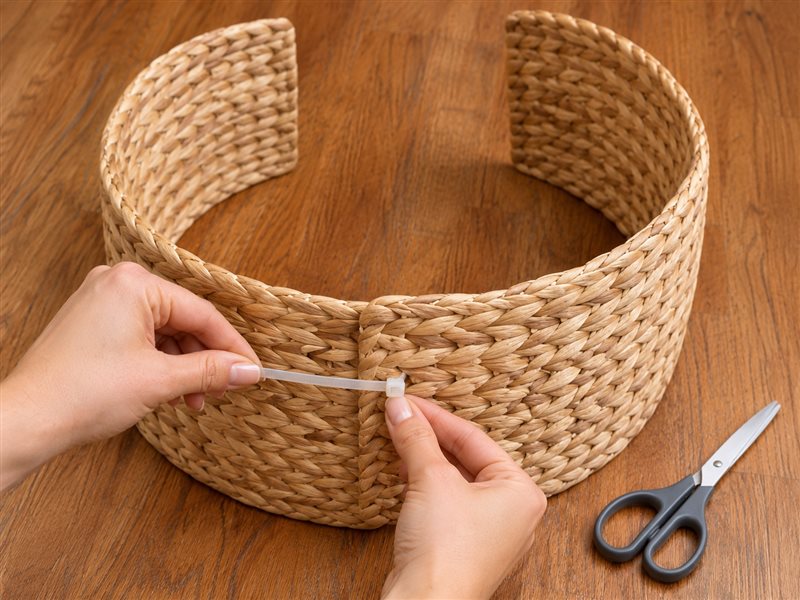
Step 3: Form Circular Collar
Continue by joining the remaining two ends of the placemats in the same manner as the previous step, overlapping and securing them with additional zip ties or twine. Once the full circular collar is formed, use scissors to carefully trim any excess length from all zip ties or twine, ensuring a smooth, snag-free finish both inside and out.
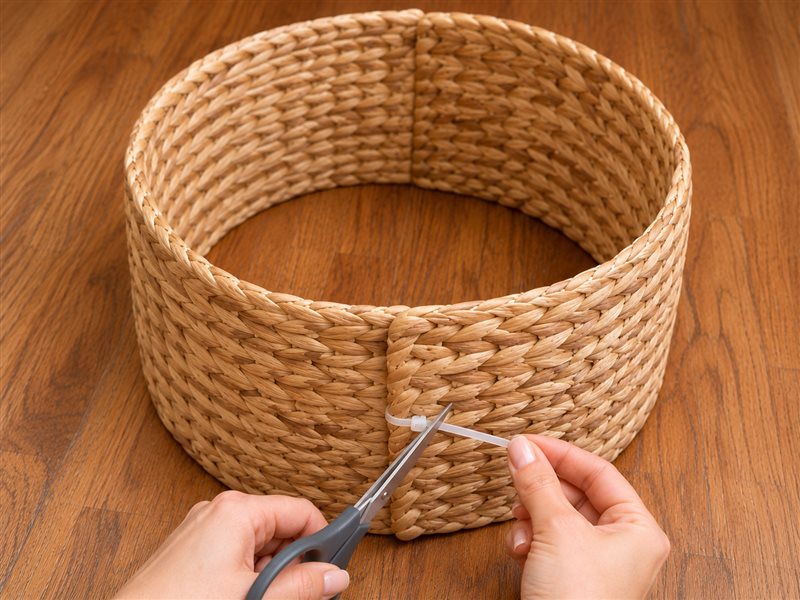


Step 4: Place Collar Around Tree
Carefully lift the completed woven collar and position it around the base of your Christmas tree. Guide it gently over the tree stand, ensuring it fully conceals the stand and sits stably on the floor. Adjust its placement to be centered and even, providing a clean base for your tree.
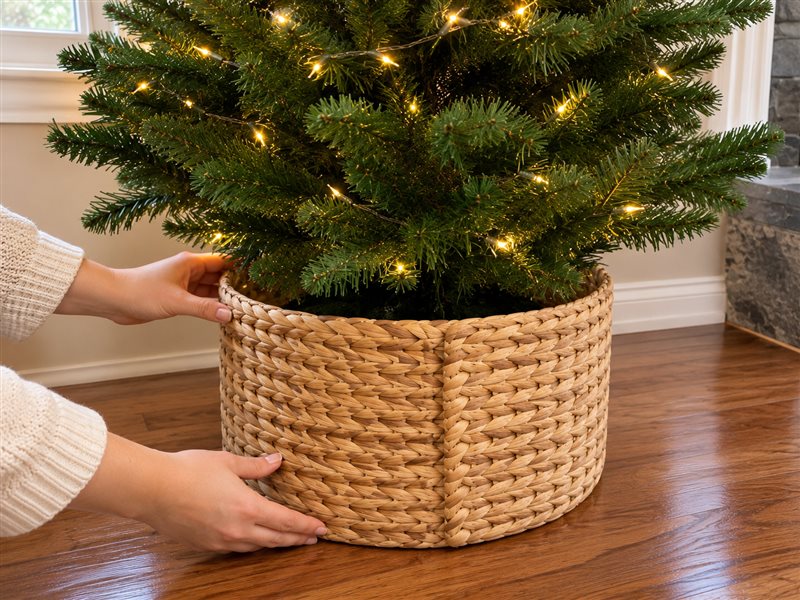
Step 5: Wrap with Plaid Ribbon
Take your wide wired plaid ribbon and begin wrapping it horizontally around the top portion of the woven collar. Start at the back or side, wrapping once around, ensuring the ribbon covers the secured seams (zip ties/twine). Overlap the ribbon ends at the front where the bow will be tied, securing them temporarily if needed.
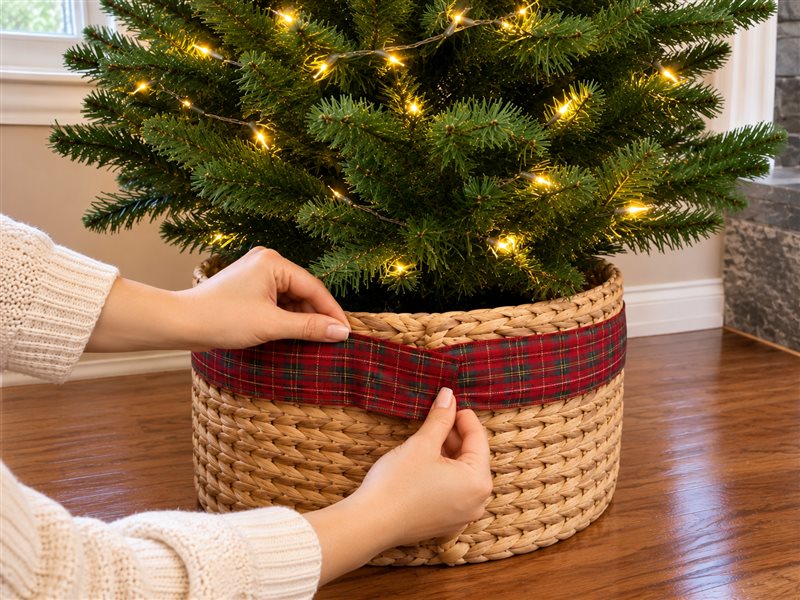
Step 6: Tie Festive Bow
At the front of the collar, where the ribbon ends meet, tie a large, decorative bow. Use the wired nature of the ribbon to fluff out the loops, giving the bow volume and an attractive shape. Adjust the tails of the bow to hang gracefully, completing your festive Christmas tree collar.
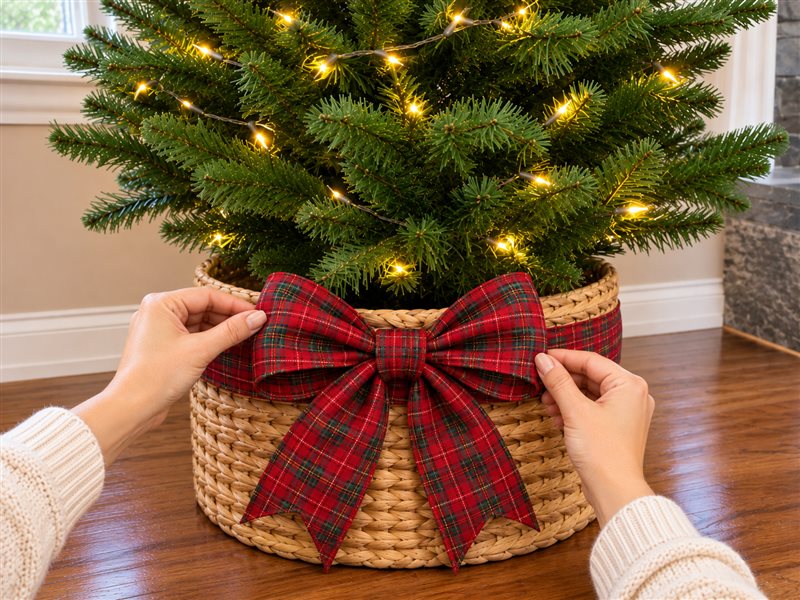
Enjoy Your Rustic Placemat Tree Collar
With the woven placemat collar in place, your Christmas tree now features a beautifully finished base. This simple craft enhances your holiday decor with a rustic charm that is both practical and visually appealing. Enjoy the cohesive and festive look it brings to your home.
Related project collection: DIY Tabletop Christmas Tree with Cascading Velvet and Plaid Ribbons: Christmas Tree Ribbon Ideas
Practical Questions About This Project
What kind of placemats work best for this project?
Natural woven placemats are used for this project, as their flexibility allows for gentle curving to form the collar.
Can I use twine instead of zip ties to connect the placemats?
Yes, clear zip ties or twine can be used to secure the overlapping ends of the placemats.
What type of ribbon is recommended for this collar?
A wide wired plaid ribbon is suggested for wrapping around the collar and tying a decorative bow, as its wired edges help hold the bow's shape.
Will this collar fit any size Christmas tree?
This collar is designed for a small artificial Christmas tree, effectively concealing its stand. The size will depend on the dimensions of the placemats used.
Is this Christmas tree collar suitable for outdoor use?
This placemat Christmas tree collar is intended for indoor use.
Browse christmas supplies at Dollar Tree.

Leave a Reply