
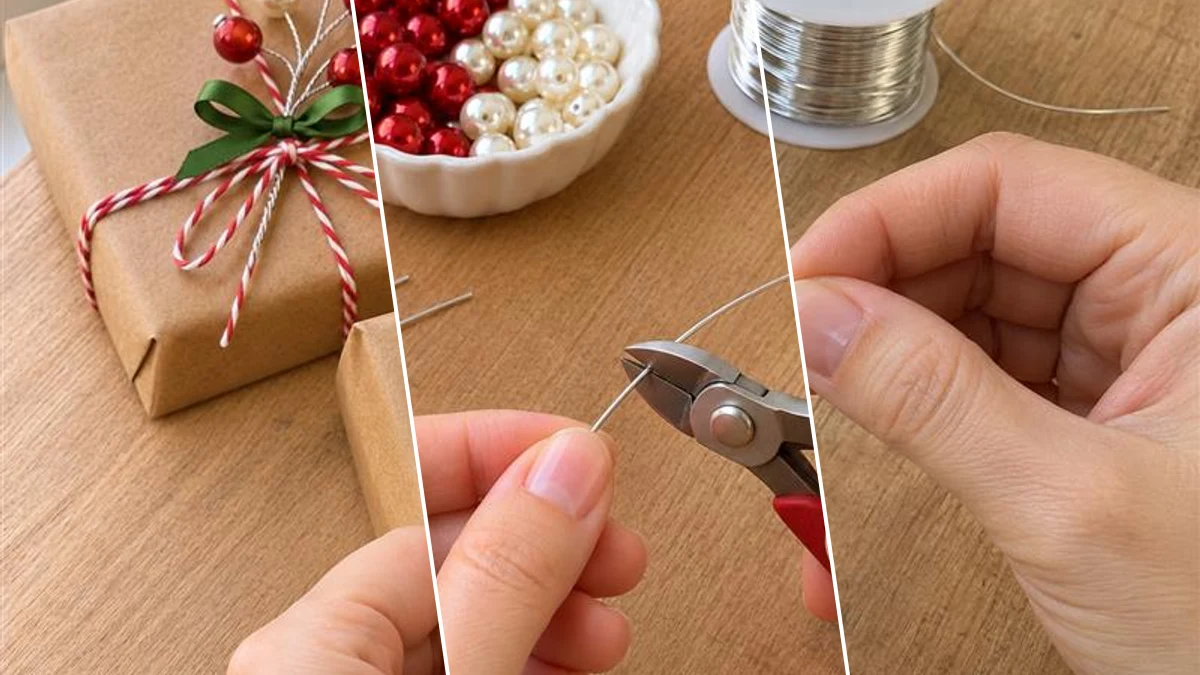
Transform ordinary holiday packages into memorable presents with handmade beaded berry gift topper picks. Using simple silver craft wire, red and pearl-white beads, and a tiny green ribbon bow, you can shape five custom sprigs in under 30 minutes. These festive accents tuck easily into twine and bows for a polished, personal holiday presentation.
Project at a Glance
- Difficulty: Easy
- Estimated active time: 15 minutes to 30 minutes (drying and curing waits not included)
- Estimated component cost: $3 to $7 (reusable tools and general supplies excluded)
- Main material: Wire
Elevate Holiday Gift Wrapping with Handmade Wire Sprigs
Standard gift wrap and ribbon are lovely, but adding a textural handmade element turns any present into something special. These beaded berry sprigs bring a classic rustic charm to kraft paper packages and traditional bows without requiring advanced craft skills or expensive specialty supplies.
Making a small batch of five picks takes roughly 15 to 30 minutes and costs between 3 and 7 dollars depending on what you already have in your stash. Because they are lightweight and made on sturdy wire stems, they hold their shape well indoors during the winter season and can be saved and reused for multiple holiday gifting occasions.
Materials for DIY Beaded Berry Gift Topper Picks for Christmas Packages
- Silver Craft Wire
- Red and Pearl-White Beads
- Green Ribbon
- Kraft Wrapping Paper and Twine
- Wire Cutters
Need another material? Browse current craft supplies and deals.
How to Make Beaded Berry Gift Topper Picks
Gather your wire cutters, beads, and ribbon on a clean flat surface. Follow these five straightforward steps to snip, thread, twist, and tie your custom Christmas package toppers.
Step 1: Cut and Prepare the Wire Stems
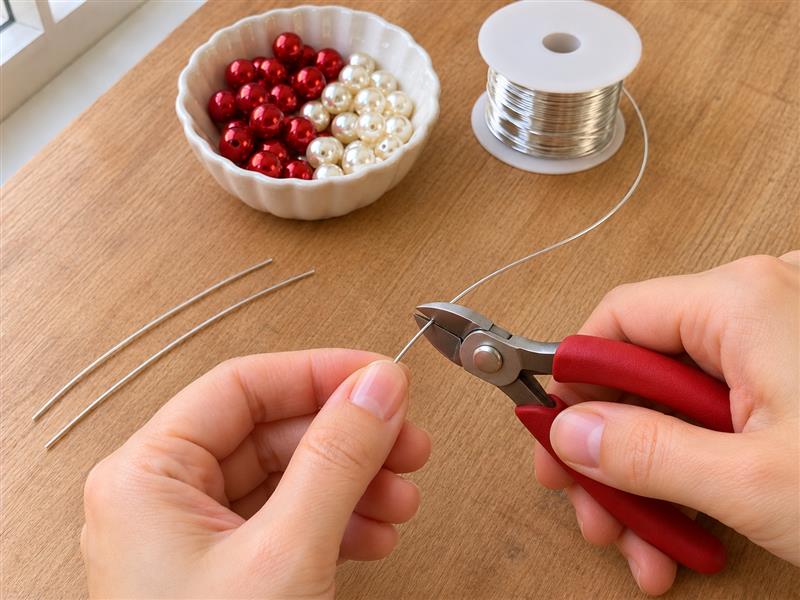
Using your wire cutters, snip multiple lengths of silver craft wire measuring about 5 to 6 inches long. Set out your red and pearl-white beads in a small bowl for easy access.
Step 2: Thread Beads Onto Wire Ends
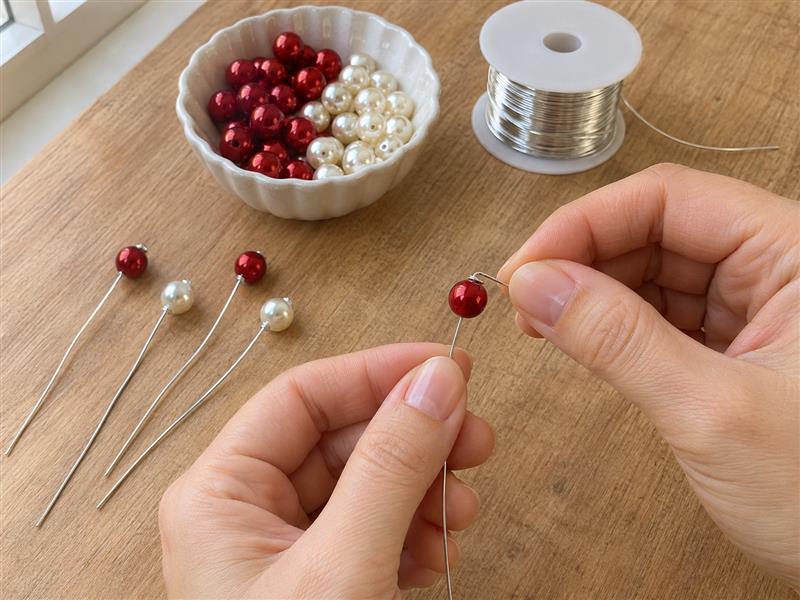
Take a short piece of wire and slide a bead onto the end. Bend the very tip of the wire over the bead to secure it in place, then repeat this process along the upper branches of the wire.
Step 3: Twist Wires into Sprigs
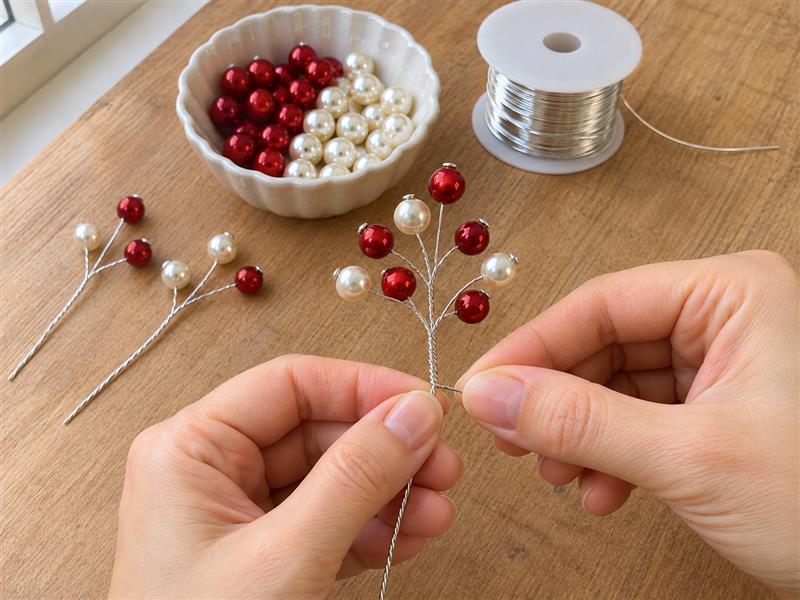
Gather several individual beaded wire branches together and twist their lower stems around each other. Shape and fan out the top berry clusters so they look full and organic.


Step 4: Add Green Ribbon Bows
Tie a small, neat bow using your green ribbon. Attach the bow tightly around the lower stem of each berry pick, trimming any excess ribbon tails to a clean length.
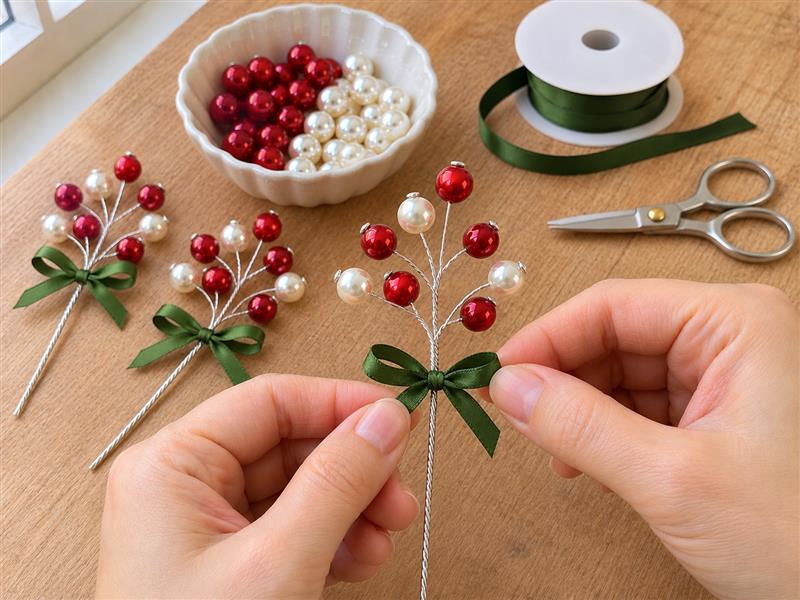
Step 5: Tuck Picks Into Gift Wrapping
Wrap your gift boxes in kraft paper and tie them with festive twine. Slide the finished beaded berry picks directly underneath the twine and bows to complete your custom presentation.
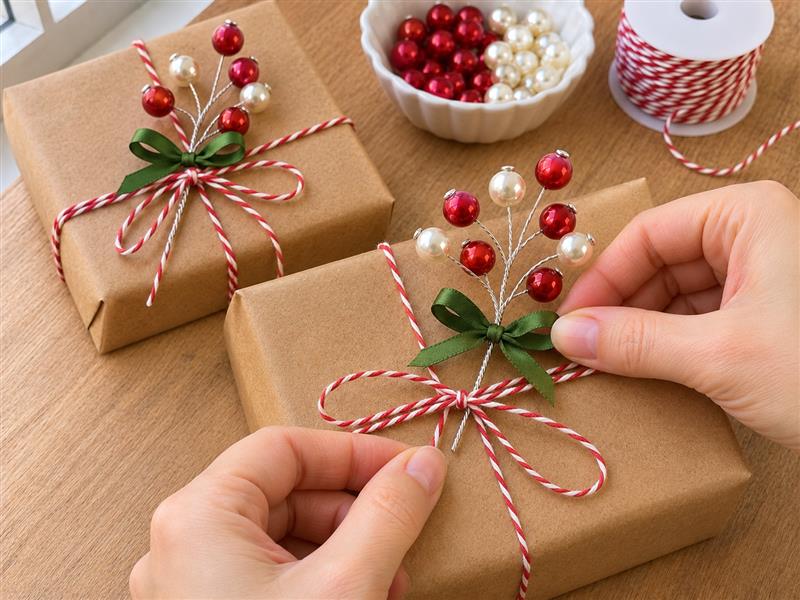
Create Custom Packages This Holiday Season
These charming beaded berry picks add a thoughtful, artisanal finish to every gift under the tree. Whip up a small batch today and enjoy giving presents that look just as wonderful on the outside as they are on the inside.
Related project collection: DIY Beaded Cone Christmas Trees for Elegant Holiday Tabletop Decor
Practical Questions About This Project
How long does it take to make these beaded berry picks?
You can easily complete a batch of five berry picks in about 15 to 30 minutes, making this a fast holiday craft.
What supplies do I need for this project?
You will need silver craft wire, red and pearl-white beads, green ribbon, kraft wrapping paper and twine, and a pair of wire cutters.
How much does it cost to make a batch of picks?
The estimated project cost ranges from 3 to 7 dollars, excluding basic tools like wire cutters.
How do I attach the finished berry picks to my gifts?
Once your boxes are wrapped in kraft paper and tied with twine, simply slide the wire stems of the finished berry picks directly underneath the twine and bows.
Can these picks be used for outdoor holiday displays?
These handmade berry picks are designed for indoor holiday gift giving and display.
Search Dollar Tree for wire supplies.

Leave a Reply