
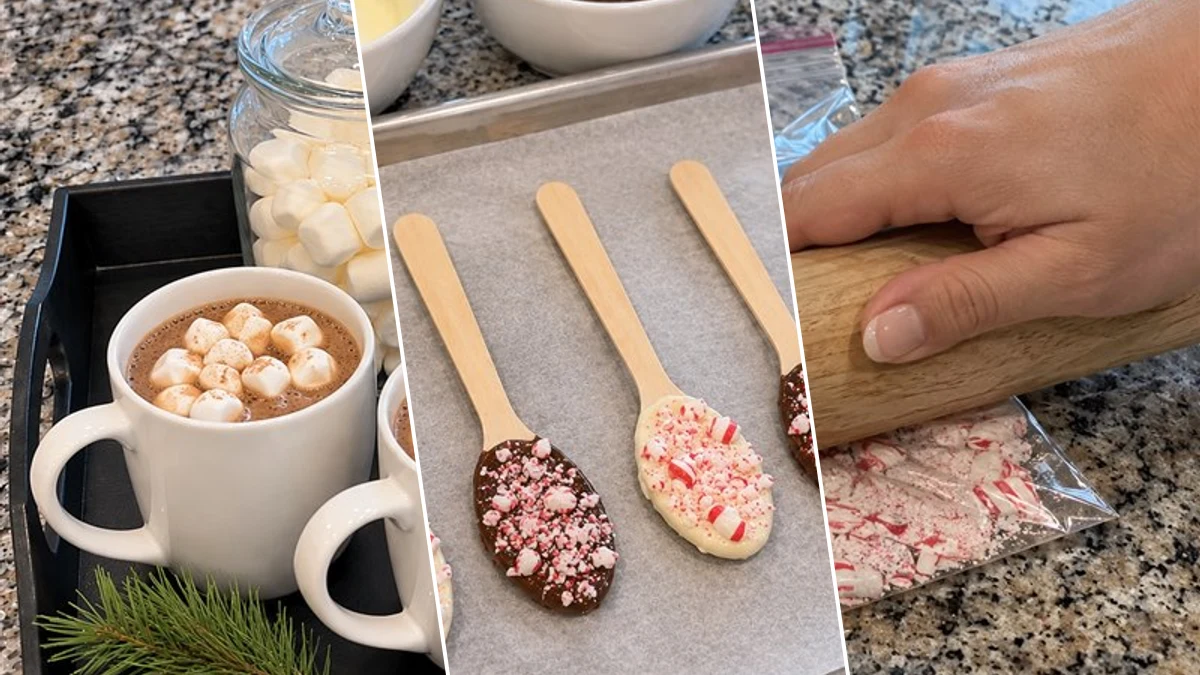
Get ready to serve up some serious holiday cheer with your very own Christmas hot chocolate bar! This delightful display features charming peppermint chocolate stir spoons and a cozy setup perfect for festive gatherings. It's an easy and budget-friendly way to add a touch of magic to your winter entertaining.
Project at a Glance
- Difficulty: Easy
- Estimated active time: 20 minutes to 40 minutes (drying and curing waits not included)
- Estimated component cost: $15 to $30 (reusable tools and general supplies excluded)
- Suggested placement: Kitchen Counter
Why a Hot Chocolate Bar is Perfect for Holiday Entertaining
Holiday gatherings are all about warmth, comfort, and delicious treats. A DIY hot chocolate bar provides all three, inviting guests to customize their cozy drinks. It's a fantastic focal point for any party, from a casual family get-together to a festive open house. Plus, the interactive element makes it a memorable experience for everyone.
This particular hot chocolate bar uses a simple black serving tray, which you can often find affordably, making it incredibly budget-friendly. The star of the show, our homemade peppermint chocolate stir spoons, adds a gourmet touch without any baking or complicated techniques. You can easily assemble this entire display in about 30-40 minutes, not including the brief chilling time for the spoons.
Materials for DIY Christmas Hot Chocolate Bar Tray with Peppermint Stir Spoons
- Black Serving Tray
- Wooden Stir Spoons
- Melting Chocolate Wafers (Dark & White)
- Peppermint Candies
- Parchment Paper
- Glass Apothecary Jars (2)
- Hot Chocolate Bar Accents (Mugs, Mini Marshmallows, Hot Cocoa Mix, Cookies, Pine Sprig, Tall Glass)
Need another material? Browse current craft supplies and deals.
Assembling Your Festive Hot Chocolate Bar
Crafting this delightful hot chocolate bar is simpler than you might think, making it an ideal project for even beginner crafters. Follow these steps to create a beautiful and inviting display that will be the highlight of your holiday celebrations.
Step 1: Crush Peppermint Candies
Unwrap approximately 10-15 peppermint candies and place them inside a sturdy zip-top bag. Seal the bag, removing as much air as possible. Use a rolling pin or the bottom of a heavy glass to crush the candies into a mix of fine crumbs and small, chunky pieces. This variety in texture adds visual interest to your spoons.

Step 2: Melt the Chocolates
Place dark melting chocolate wafers in one microwave-safe bowl and white melting chocolate wafers in another. Melt each bowl separately in the microwave on medium power for 30-second intervals, stirring thoroughly after each interval, until the chocolate is smooth and fully melted. Alternatively, use a double boiler method for a more controlled melt.

Step 3: Dip and Decorate Stir Spoons
Hold a wooden stir spoon by its handle. Dip the bowl of the spoon into the melted chocolate, coating about half of its length. Gently tap the spoon against the side of the bowl to remove any excess chocolate. Immediately, while the chocolate is still wet, roll the chocolate-coated end in the crushed peppermint candies until it is evenly coated. Repeat with remaining spoons, alternating between dark and white chocolate for variety.



Step 4: Chill to Set Chocolate
Carefully place each decorated stir spoon onto a sheet of parchment paper. Ensure there is enough space between spoons so they do not touch. Transfer the parchment paper with the spoons to a flat surface like a baking sheet and refrigerate for at least 15-20 minutes, or until the chocolate is completely firm and set. This step prevents the chocolate from melting or smudging when handled.

Step 5: Fill Jars and Arrange Tray Base
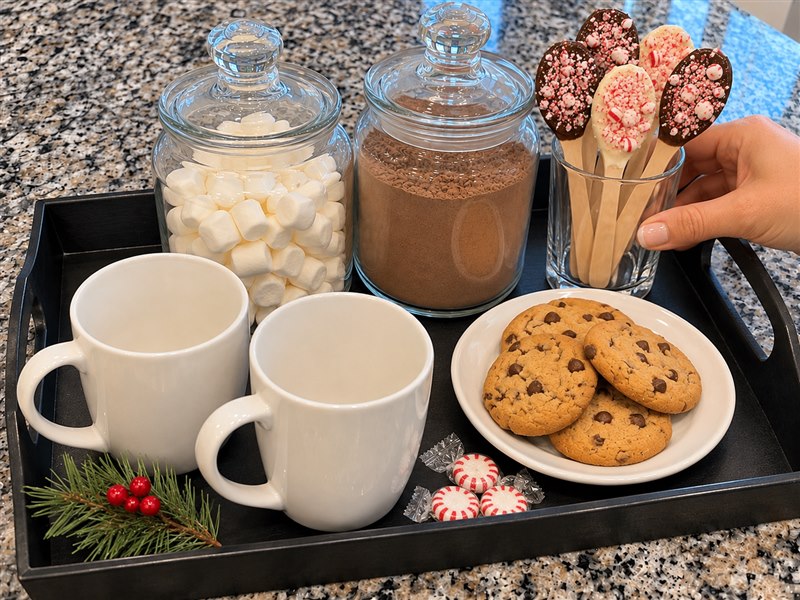
Fill one glass apothecary jar with mini marshmallows and the other with your favorite hot cocoa mix. Place these two filled jars towards the back of your black serving tray. Then, arrange two empty white ceramic mugs and a small white plate with chocolate chip cookies on the tray, leaving space for the spoons and other accents.

Step 6: Style the Hot Chocolate Bar
Once the chocolate on your stir spoons is fully set, gather them and place them upright in a tall, clear glass or container. Position this glass prominently on the serving tray. Add a few individually wrapped peppermint candies and a small, fresh pine sprig to fill any gaps and enhance the festive, cozy aesthetic of your hot chocolate bar.
Step 7: Serve and Enjoy
Your Christmas Hot Chocolate Bar Tray is now complete and ready to serve! Pour warm hot chocolate into the mugs, adding extra mini marshmallows if desired. Encourage guests to use the festive peppermint chocolate stir spoons to enhance their drink with a hint of peppermint flavor as the chocolate slowly melts.

Enjoy Your Cozy Christmas Hot Chocolate Bar
Once assembled, your festive hot chocolate bar is ready to delight friends and family. It's a charming and interactive way to enjoy warm drinks throughout the holiday season. Gather around, sip, and savor the sweet, peppermint-infused moments.
Related project collection: DIY Peppermint Candy Christmas Wreath for Festive Holiday Door Decor
Practical Questions About This Project
How much does this Christmas hot chocolate bar cost to create?
The estimated cost for the components of this project, excluding reusable tools and general supplies, ranges from $15 to $30. Many items, including the serving tray, can often be found affordably at dollar stores.
Can I prepare the chocolate spoons ahead of time?
Yes, the peppermint chocolate stir spoons can be prepared up to a week in advance. Once fully set, store them in an airtight container at room temperature or in the refrigerator, especially if your home is warm, to prevent melting.
What kind of serving tray is best for this project?
A sturdy black serving tray, around 12×18 inches, works wonderfully as a base, providing a clean contrast for the festive items. You can use any tray you have on hand, but a flat, stable surface is ideal for arranging the jars, mugs, and treats.
What if I don't have glass apothecary jars?
Any clear, lidded containers will work perfectly in place of apothecary jars. Mason jars, clear plastic containers, or even small bowls with spoons can hold your mini marshmallows and hot cocoa mix just as effectively.
Explore tray craft supplies at Dollar Tree.

Leave a Reply