
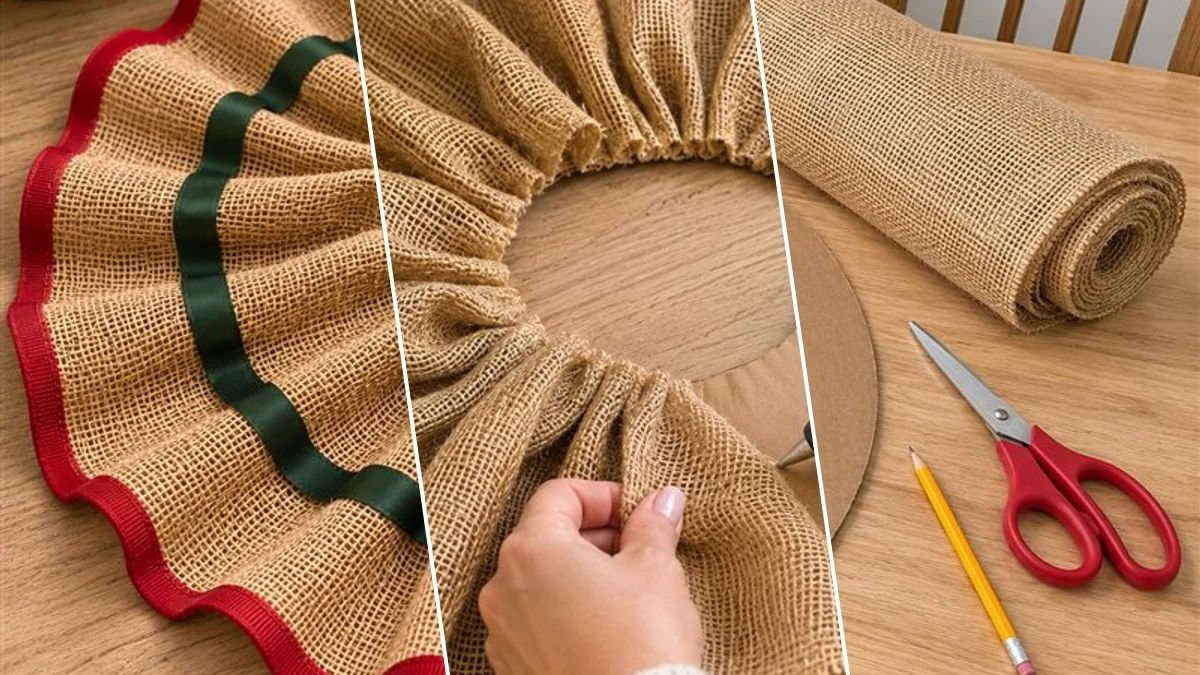
Looking for a charming, rustic touch for your small Christmas tree this holiday season? This easy no-sew burlap ruffle tree skirt is the perfect DIY project to add handmade warmth to your tabletop decor. With just a few simple materials and a hot glue gun, you can create a beautiful base for your festive display in about an hour. It's an ideal way to personalize your holiday setup without needing a sewing machine.
Project at a Glance
- Difficulty: Easy
- Estimated active time: 45 minutes to 90 minutes (drying and curing waits not included)
- Estimated component cost: $3 to $8 (reusable tools and general supplies excluded)
- Main material: Burlap
- Suggested placement: Tabletop
Why a No-Sew Burlap Tree Skirt is a Holiday Must-Have
This no-sew burlap ruffle tree skirt offers a unique blend of rustic charm and effortless crafting, making it an ideal addition to your holiday decorations. Designed specifically for tabletop or smaller artificial Christmas trees, its compact size, typically 18 to 24 inches in diameter, perfectly cradles your tree stand and provides a lovely backdrop for wrapped gifts. The natural texture of burlap, combined with festive red and green ribbons, creates a cozy, farmhouse-inspired look that feels both traditional and inviting.
Beyond its aesthetic appeal, this project is incredibly practical. You can expect to complete it in about 45 to 90 minutes of active crafting time, and the materials typically cost between $3 and $8, making it a truly budget-friendly option. When properly stored, your handmade burlap tree skirt will hold up beautifully indoors for many holiday seasons to come, becoming a cherished part of your annual decorating tradition.
Materials for DIY No-Sew Burlap Ruffle Tree Skirt for Tabletop Christmas Trees
- Burlap Fabric (Roll or Ribbon)
- Cardboard or Foam Ring (Base)
- Red Ribbon
- Green Ribbon
- Hot Glue Gun & Glue Sticks
- Scissors
- Measuring Tape
Need another material? Browse current craft supplies and deals.
How to Craft Your No-Sew Burlap Ruffle Tree Skirt
Ready to add a charming, handmade touch to your holiday tree? This project is surprisingly simple, relying on hot glue to transform basic materials into a beautiful, rustic tree skirt. Just gather your supplies and follow these clear, step-by-step instructions to create your own festive decor.
Step 1: Create the Circular Base
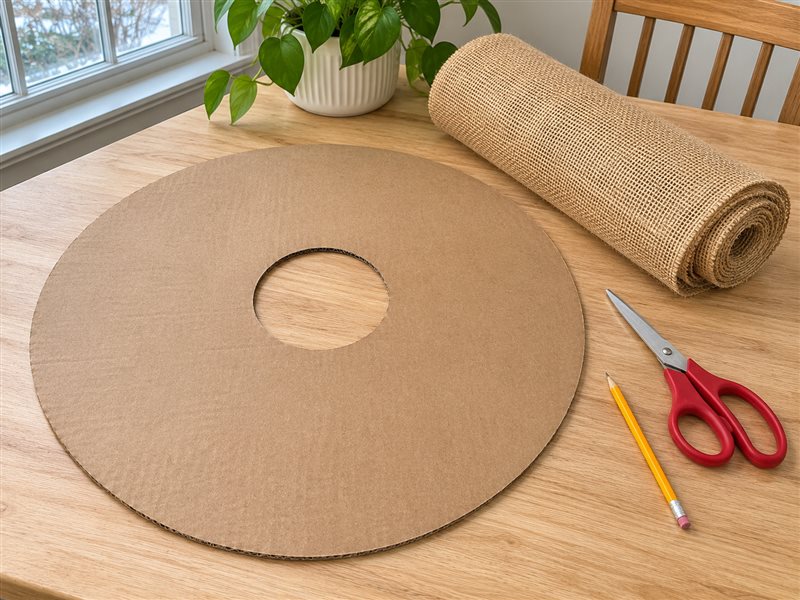
Begin by cutting your chosen base material (cardboard or foam board) into a large circle for the skirt's outer diameter. Then, cut a smaller concentric circle in the center for the tree trunk opening. A good size for a tabletop tree might be 18-24 inches for the outer circle and 2-3 inches for the inner. Ensure the inner hole is large enough for your tree stand but small enough to be concealed by the skirt's ruffles. A large plate, pot lid, or compass can help you draw perfect circles before cutting.
Step 2: Cut Burlap for Ruffles
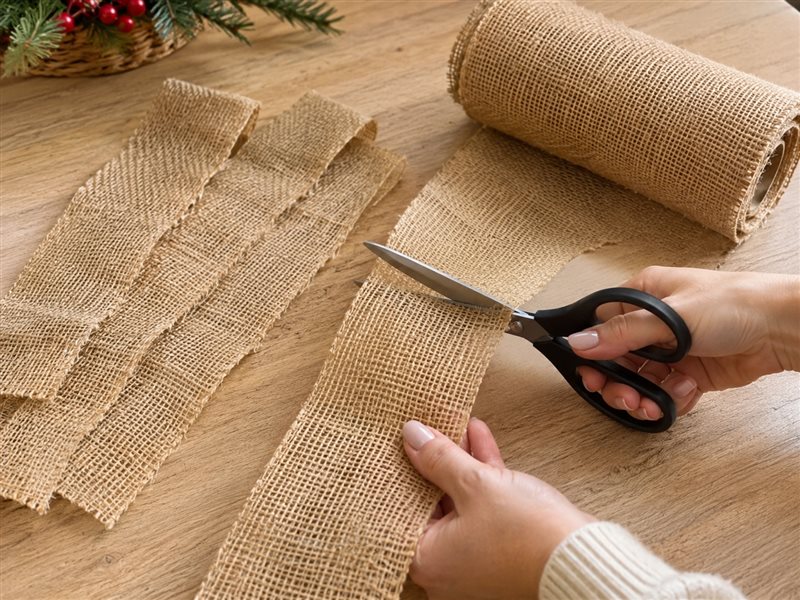
Unroll your burlap fabric or ribbon. Using scissors and a measuring tape, cut multiple long strips, each about 3 to 4 inches wide. The total length of burlap needed will depend on the circumference of your base and how full you want your ruffles to be. As a general guide, you'll need strips that are 2-3 times the length of the section you plan to cover. Burlap naturally frays, so handle gently. If using pre-cut burlap ribbon, you may not need to cut strips if the width is suitable.
Step 3: Form and Secure Burlap Ruffles
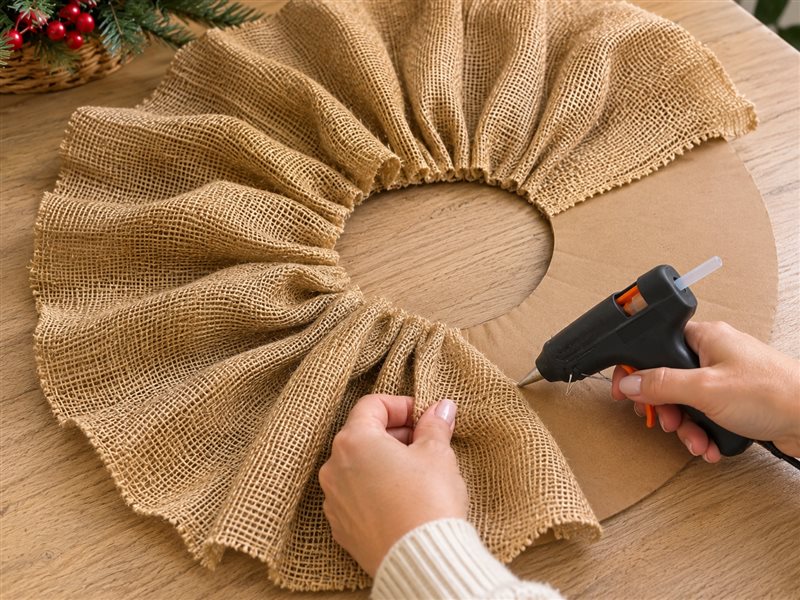
Starting from the outermost edge of your base ring, begin creating ruffles with your burlap strips. You can do this by hand-pleating the burlap or by running a loose gathering stitch along one long edge (no need to secure permanently, just to gather). Apply a line of hot glue to a small section of the base ring and press the gathered burlap firmly onto it. Continue adding ruffled strips in concentric circles, overlapping each layer slightly to create a full, layered look. Work your way inward towards the center opening, ensuring each layer of ruffles conceals the glued edge of the previous one.


Step 4: Edge with Red Ribbon
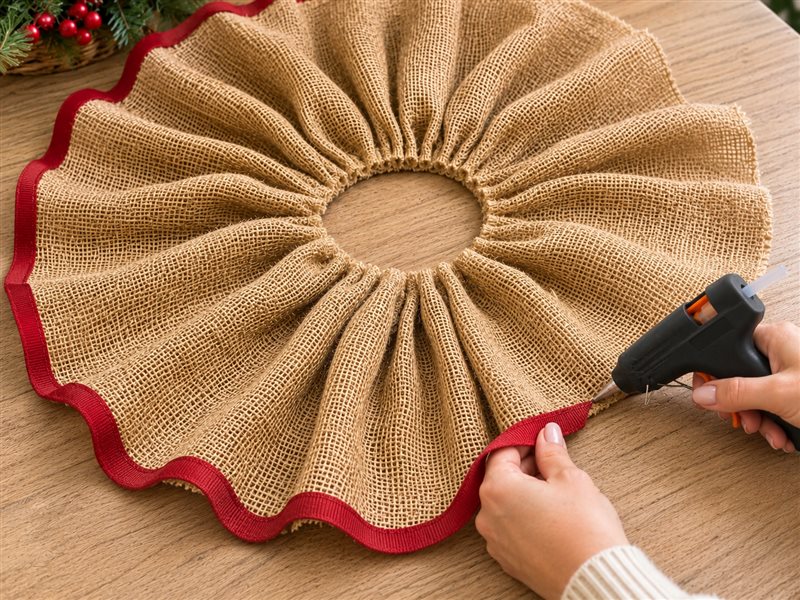
Once all your burlap ruffles are attached to the base and the glue has set, it's time to add the decorative edge. Take your red ribbon and apply a thin, even line of hot glue along the outermost edge of the burlap skirt. Carefully press the red ribbon onto the edge, ensuring it covers any raw burlap edges and creates a clean, finished look. Overlap the ends slightly where they meet for a seamless finish, or trim neatly and glue flush.
Step 5: Embellish with Green Ribbon
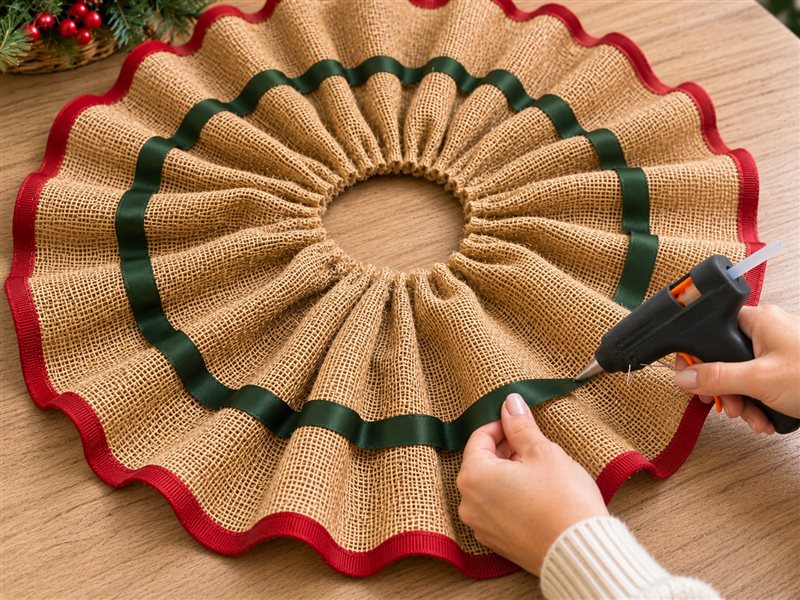
For the final decorative touch, take your green ribbon and determine where you'd like your decorative band to sit on the ruffled skirt. A good placement is usually in the middle or slightly below the middle of the skirt's height, running horizontally. Apply small dots or a thin line of hot glue along the back of the green ribbon and carefully press it onto the burlap ruffles. Go around the entire skirt, making sure the ribbon lies flat and straight. Trim any excess ribbon and secure the ends neatly with glue for a polished finish.
Display Your Rustic No-Sew Tree Skirt
With your no-sew burlap ruffle tree skirt complete, you've added a beautiful, personalized element to your holiday display. This charming piece is perfect for showcasing your tabletop Christmas tree and provides a lovely base for all your wrapped gifts. Enjoy the cozy, rustic ambiance it brings to your home throughout the festive season!
Related project collection: DIY Cardboard Gingerbread House Luminary for Christmas Tabletop Decor
Practical Questions About This Project
Can I use different colors of ribbon for this project?
Yes, absolutely! While red and green offer a classic Christmas look, you can easily customize the ribbon colors to match your existing holiday decor. Gold, silver, white, or even plaid ribbons would create a beautiful alternative.
How long does this no-sew tree skirt project take to make?
You can typically complete this no-sew tree skirt in about 45 to 90 minutes of active crafting time. This estimate excludes any unattended drying or curing time, though hot glue sets very quickly.
How should I store the burlap tree skirt after the holidays?
To ensure your burlap tree skirt lasts for many seasons, gently fold it and store it flat in a breathable container or box. Keep it in a dry, cool place away from direct sunlight to prevent dust accumulation and preserve the fabric and colors.
Is it possible to make a larger version of this skirt for a full-sized tree?
While this tutorial is designed for smaller trees, you could adapt the concept for a larger tree by using a bigger base ring and significantly more burlap. However, managing the ruffles and securing a much larger piece with hot glue might become more challenging and time-consuming. It may also require more robust materials to prevent sagging.
Browse burlap supplies at Dollar Tree.

Leave a Reply