
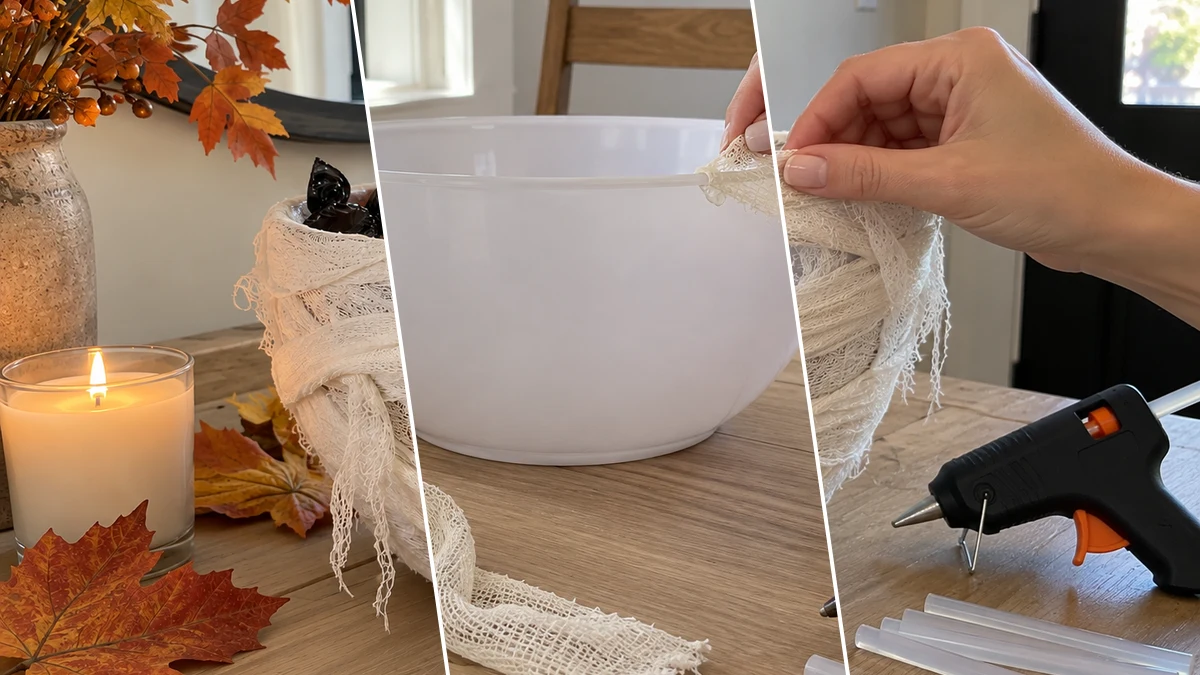
Prepare for Halloween with a playful DIY mummy candy bowl, perfect for holding treats or adding a festive touch to your decor. This easy project transforms a simple plastic bowl into a whimsical, spooky accent. It is suitable for displaying on an entryway console, kitchen island, or party table. The quick assembly makes it an ideal craft for the autumn season.
Project at a Glance
- Difficulty: Easy
- Estimated active time: 30 minutes to 40 minutes (drying and curing waits not included)
- Estimated component cost: $2.5 to $3.5 (reusable tools and general supplies excluded)
- Suggested placement: Entryway
Why This Mummy Candy Bowl is Perfect for Halloween
This mummy candy bowl offers a straightforward way to add personalized Halloween decor to your home. Using common craft materials like gauze and googly eyes, it creates a recognizable spooky character that is more cute than scary. The project is designed for ease, making it accessible for beginners or as a supervised activity for families with children.
The finished bowl serves as both a decorative piece and a functional container for wrapped Halloween candies. Its budget-friendly nature, relying on supplies often found at dollar stores, allows for festive decorating without significant expense. The slightly loose, textured wrap of the gauze contributes to an authentic mummy aesthetic, ensuring a charming display for trick-or-treaters and guests.
Materials for DIY Mummy Candy Bowl for Halloween Entryway or Party Decor
- Plastic Bowl
- Gauze or Cheesecloth Strips
- Googly Eyes (2)
- Hot Glue Gun
- Hot Glue Sticks
Need another material? Browse current craft supplies and deals.
How to Make Your Halloween Mummy Candy Bowl
Creating your own mummy candy bowl is a simple process involving wrapping and gluing. Follow these steps to transform an ordinary plastic bowl into a festive Halloween decoration. Adult supervision is recommended when using a hot glue gun.
Step 1: Prepare the Bowl and Gauze
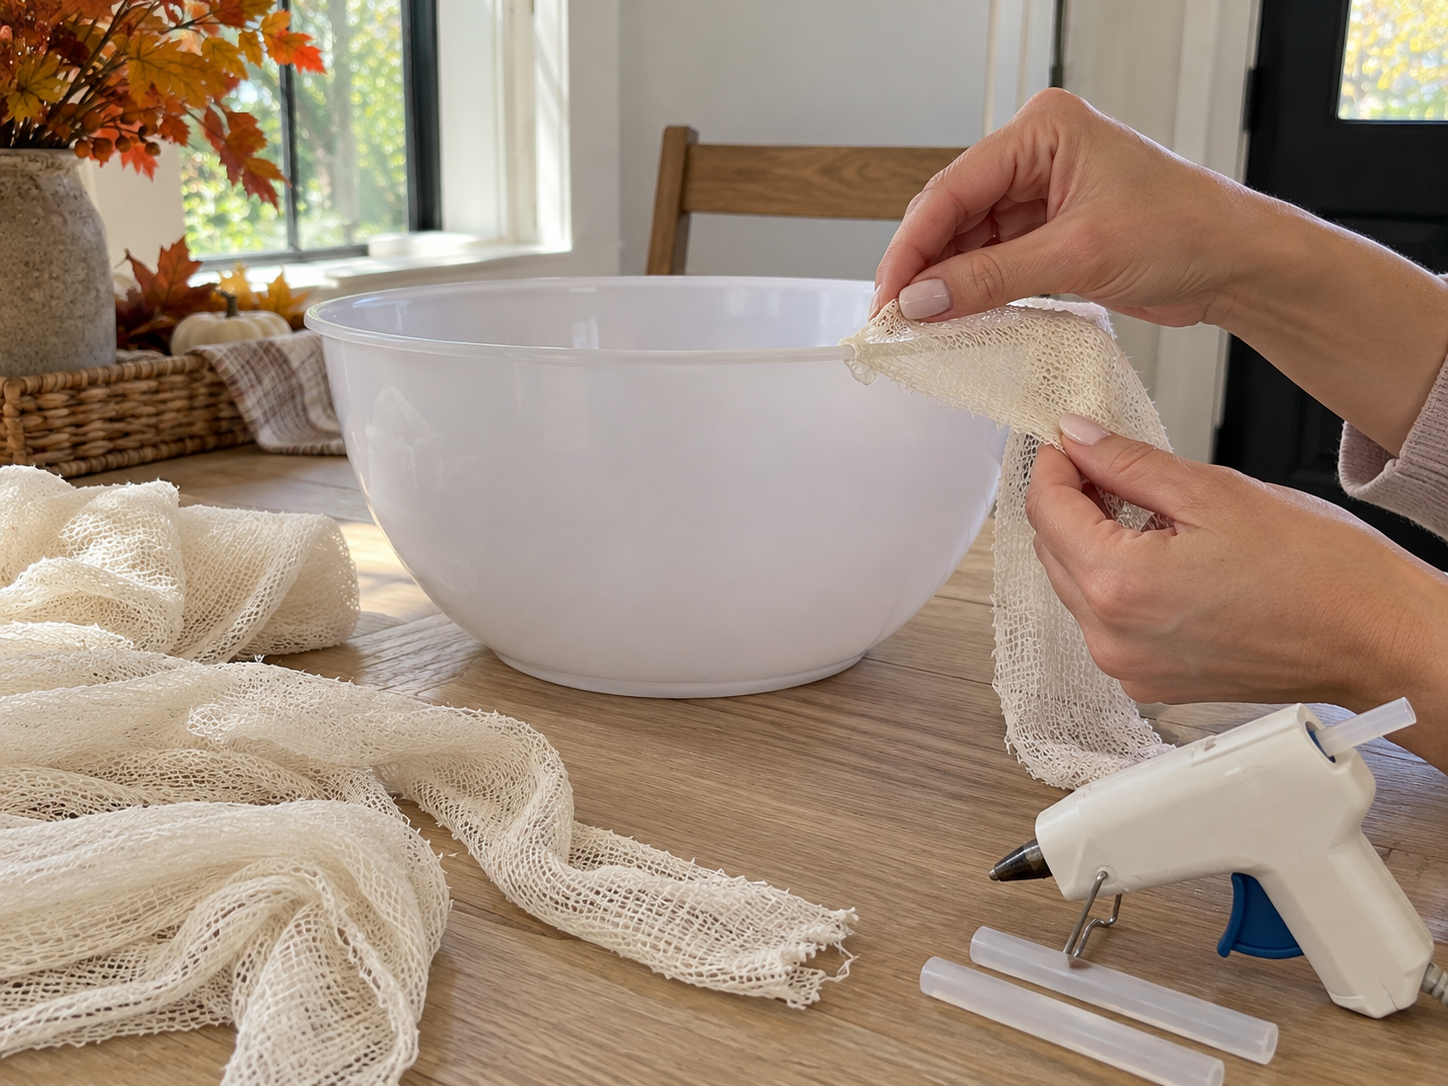
Before you begin, ensure your plastic bowl is clean and dry. Unroll your gauze or cheesecloth and cut it into long strips, roughly 1.5 to 2 inches wide. The length doesn't need to be exact; you can connect strips as you go. Take the end of your first gauze strip and secure it to the top rim of the plastic bowl using a small dab of hot glue. Hold it in place for a few seconds until the glue sets.
Step 2: Begin Wrapping the Bowl
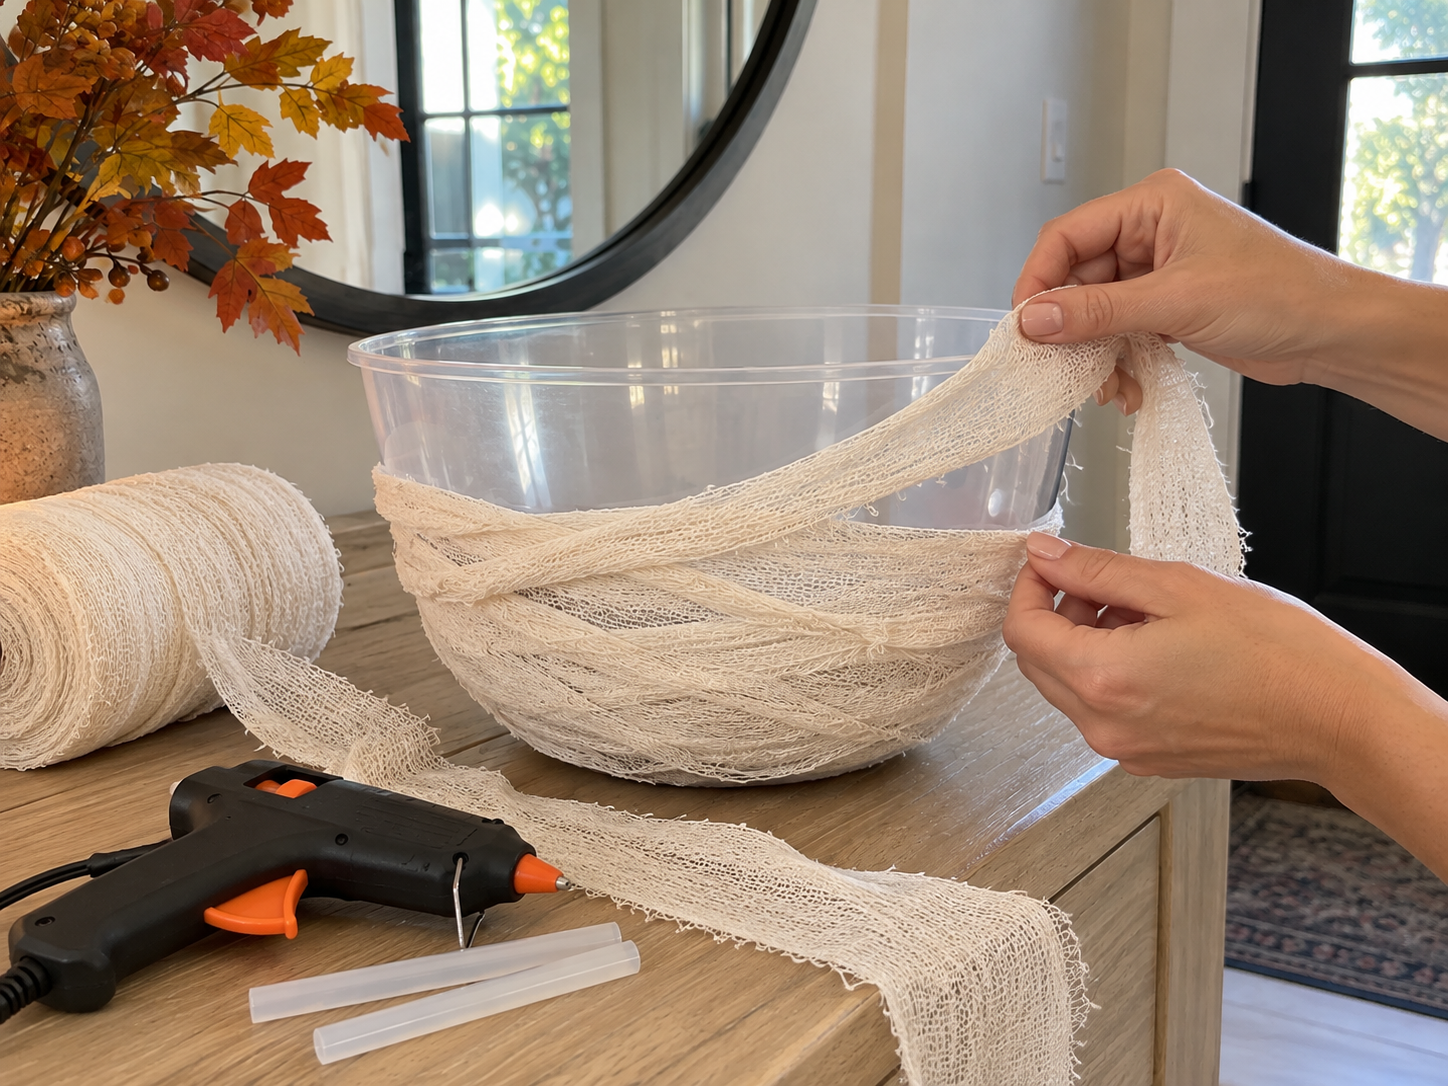
Once the first strip is securely attached, begin wrapping the gauze around the bowl. Work your way down and around, overlapping the strips slightly as you go. The goal is to cover the bowl completely, creating a textured, mummy-like appearance. Apply small dabs of hot glue periodically (every few wraps) on the back or inside of the bowl to hold the gauze in place, ensuring it adheres snugly to the bowl's surface. Don't worry about perfect neatness; a slightly uneven or loose wrap contributes to the mummy aesthetic.
Step 3: Continue and Create Eye Gap
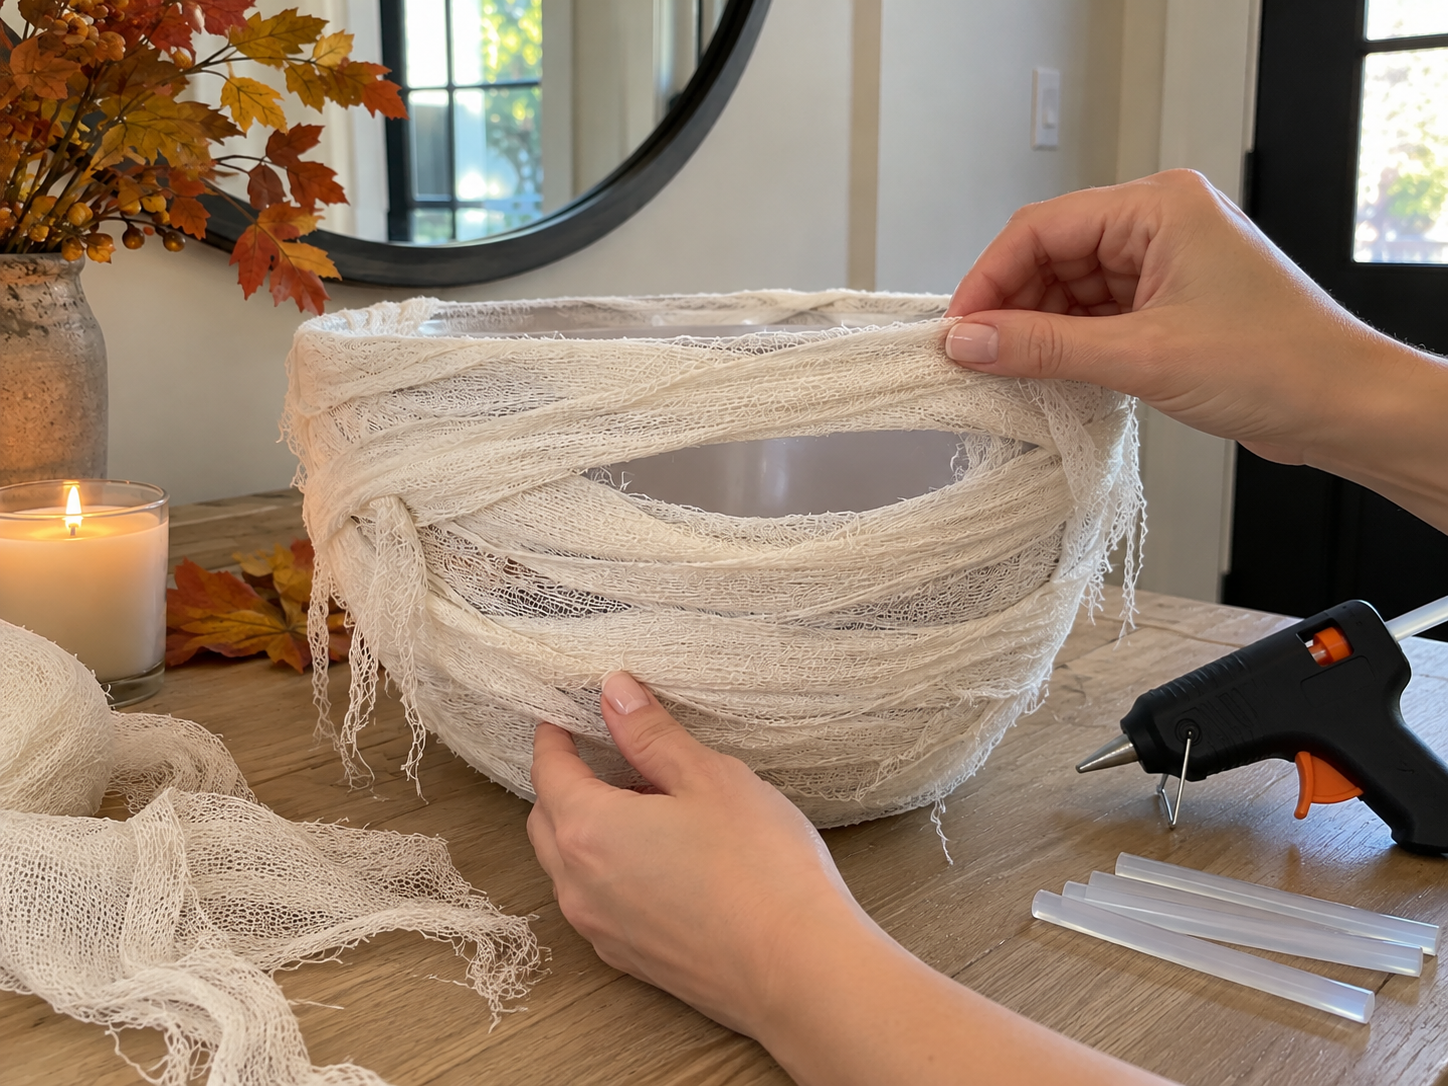
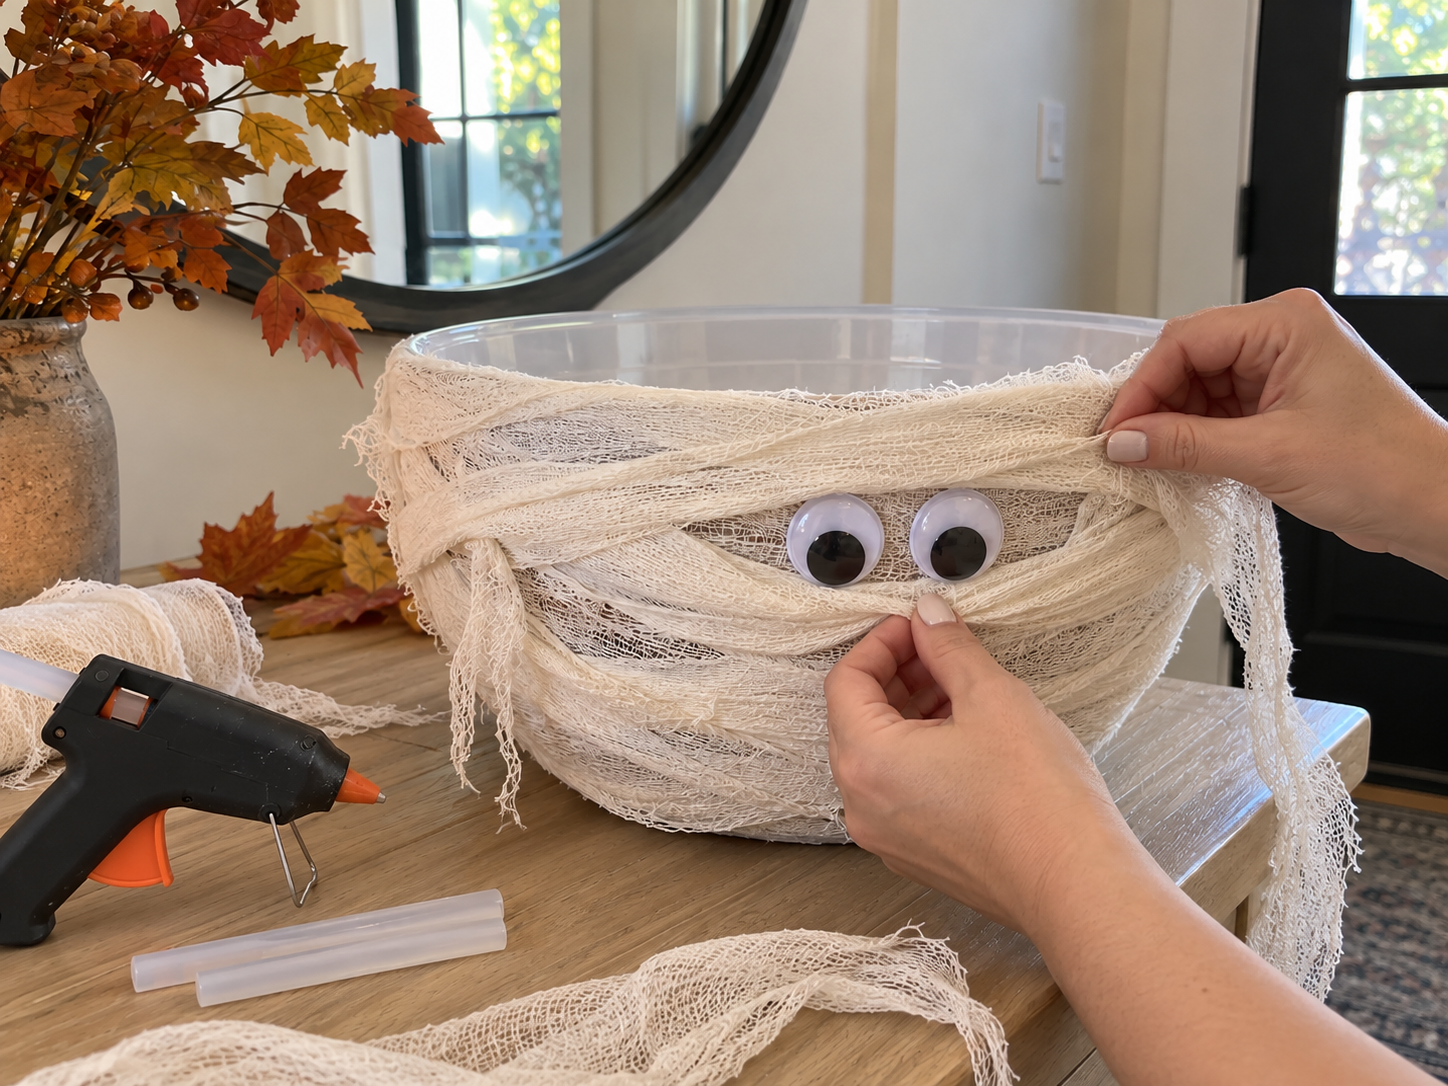
Continue wrapping the gauze around the bowl, ensuring full coverage while leaving a small, horizontal gap on one side of the bowl. This gap will be where your mummy's eyes peek out. As you wrap, continue to secure the gauze strips with hot glue as needed, especially at the end of each strip or when starting a new one. Maintain the slightly loose, natural drape to enhance the mummy's aged look. Allow some stray threads and short ends to hang free for added character.


Step 4: Attach Googly Eyes
Once the wrapping is complete and the eye gap is defined, select two googly eyes of an appropriate size for your bowl. Apply a small dot of hot glue to the back of each googly eye. Carefully position and press them into the center of the unwrapped gap. Hold them in place for a few seconds until the glue is dry and they are firmly attached. Adjust any surrounding gauze strips slightly if needed to frame the eyes better, enhancing the peeking mummy effect.
Step 5: Fill and Display
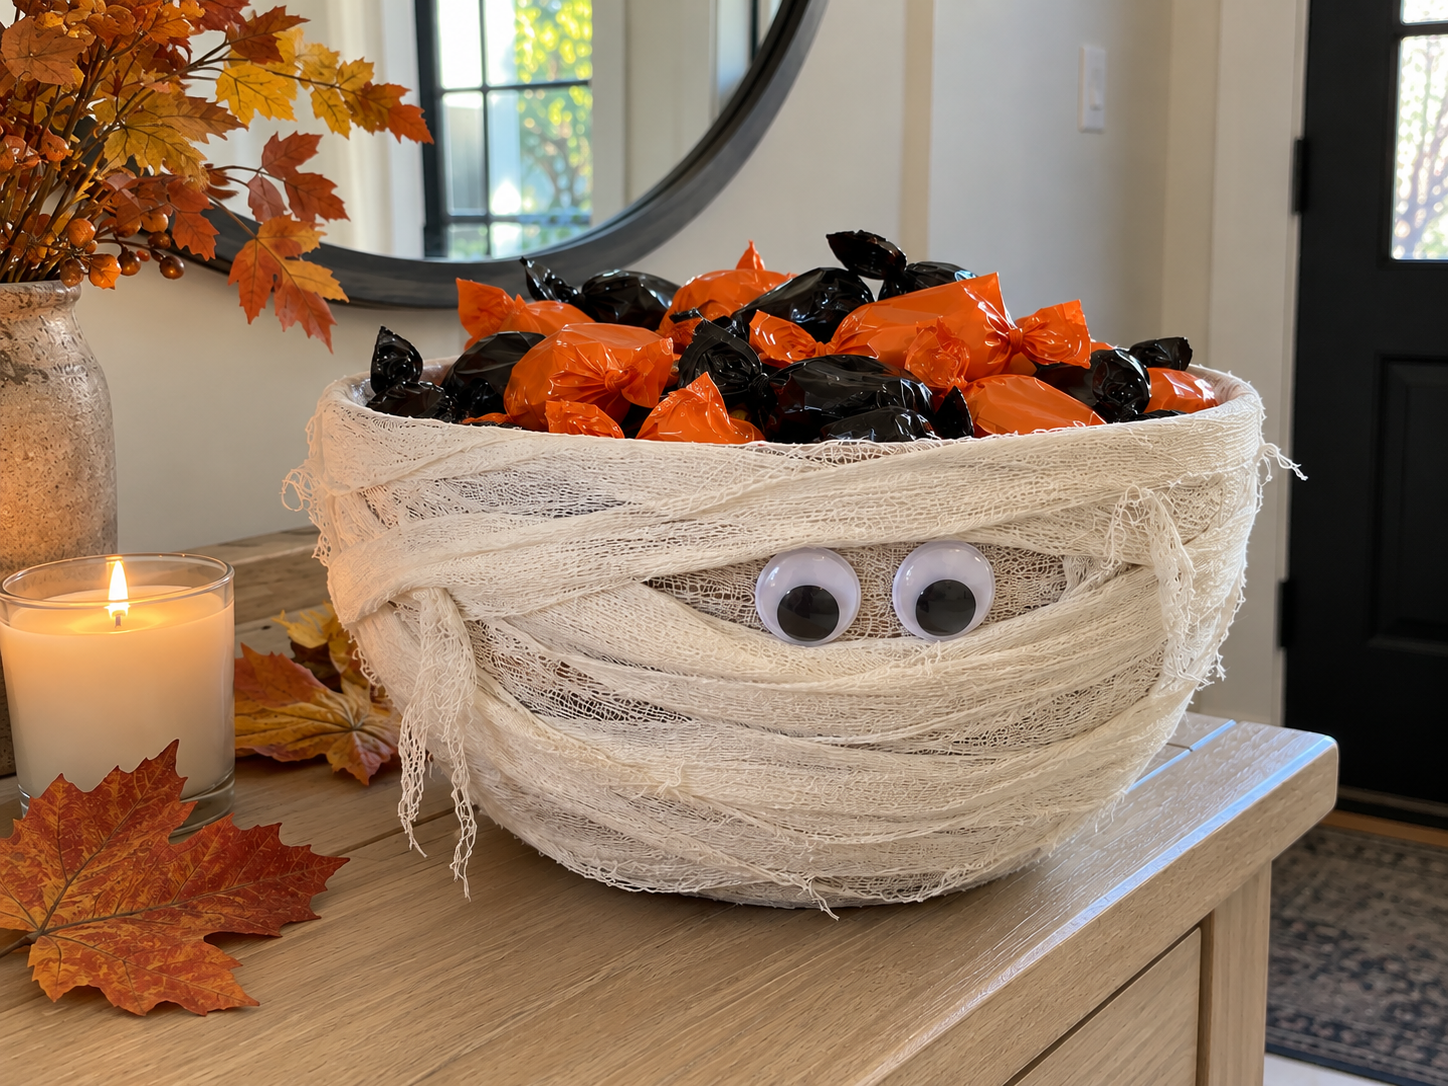
Your Halloween mummy candy bowl is now complete! Allow any hot glue to fully cool and cure. To prepare it for display, fill the bowl to the brim with your favorite wrapped Halloween candies, such as those in orange and black wrappers to complement the spooky theme. Place your new candy bowl on an entryway console, kitchen island, or party table to delight trick-or-treaters and guests.
Enjoy Your Spooky Halloween Display
With your mummy candy bowl complete, you have a delightful and functional piece ready for the Halloween season. Fill it with your favorite wrapped candies and place it where it can best greet trick-or-treaters or enhance your party atmosphere. This charming craft adds a handmade touch to any festive autumn setting.
Related project collection: DIY Farmhouse Glowing Ghost Jar Halloween Centerpiece for a Rustic Tray
Practical Questions About This Project
Can children help with this craft?
Yes, this craft is considered kid-friendly, but adult supervision is necessary, especially for handling the hot glue gun during assembly.
Where is the best place to display this Halloween candy bowl?
The finished mummy candy bowl is suitable for display on an entryway console table, a kitchen island, or as a centerpiece on a party table.
How long does it take to make this mummy candy bowl?
The estimated active time for this project is between 30 to 40 minutes, which excludes unattended drying and curing time for the glue.
What kind of candy is recommended for filling the bowl?
It is recommended to fill the bowl with your favorite wrapped Halloween candies, particularly those in orange and black wrappers, to complement the spooky theme.
Browse centerpiece supplies at Dollar Tree.

Leave a Reply