My kiddos saw these adorable beaded eggs on TikTok and begged me to try making some for our Easter decorations this year. And you know me, I’m always up for a fun, budget-friendly project! That’s how we ended up creating this super cute Dollar Tree Easter Bead Craft – Simple Egg Decor DIY. It was honestly way easier than I thought it would be!
See also: Bead Crafts Ideas Tips
Theme: Easter
Materials Needed
- Wooden beads (pastel colors)
- Floral wire or thin craft wire
- Hot glue gun & glue sticks
- Jute twine
- Scissors
- Small wood base or tray (optional)
- Faux moss (optional)
📋 Love staying organized while crafting? Check out our printable planners & craft designs at CraftersDT on Etsy and use code CRAFT20 for 20% off your entire order!
Step-by-Step Instructions for Dollar Tree Easter Bead Craft – Simple Egg Decor DIY
Get ready to dive into some serious crafting fun because this project is a total breeze! You’ll be amazed at how quickly these come together, seriously, you can whip up a whole basket of these beaded eggs in under an hour. It’s perfect for beginners, a fun afternoon activity with the kids, or even just a relaxing solo craft session. This simple egg decor DIY is going to bring so much charm to your Easter festivities, I promise!
📱 Free to Download
Craftino, The #1 Craft App
✓ Save crafts & browse fully offline
✓ Download printable PDF guides for every project
✓ Step-by-step photo tutorials, nothing left out
✓ 1,000+ craft projects with new ones added every week
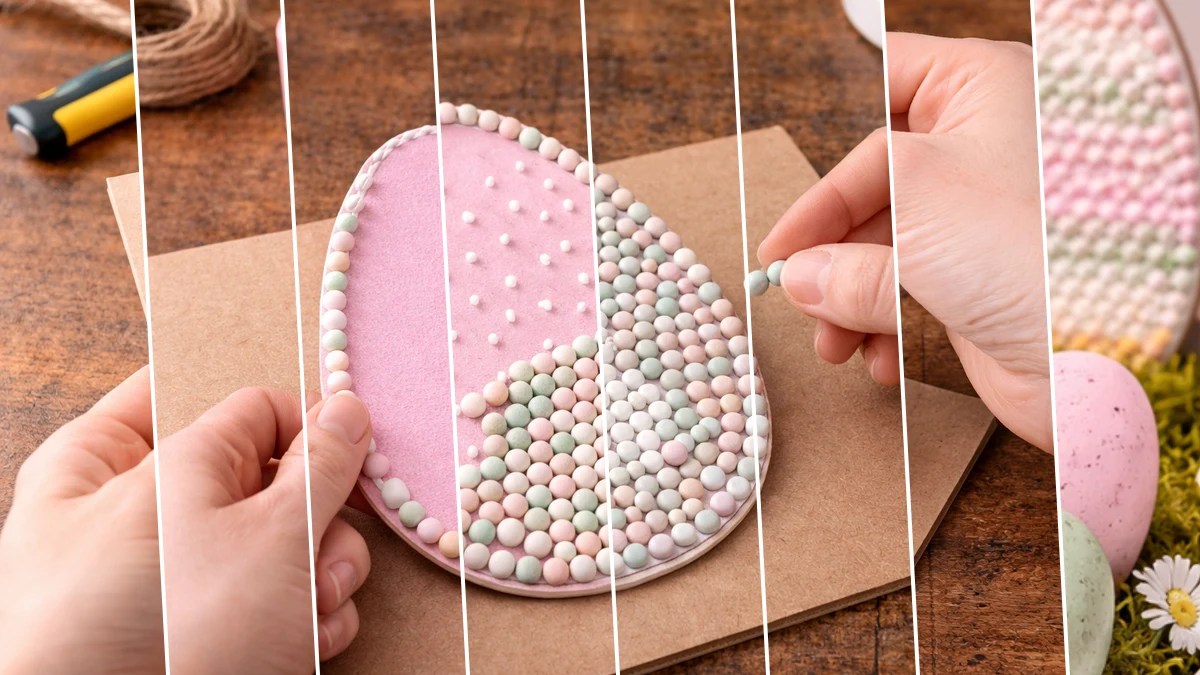
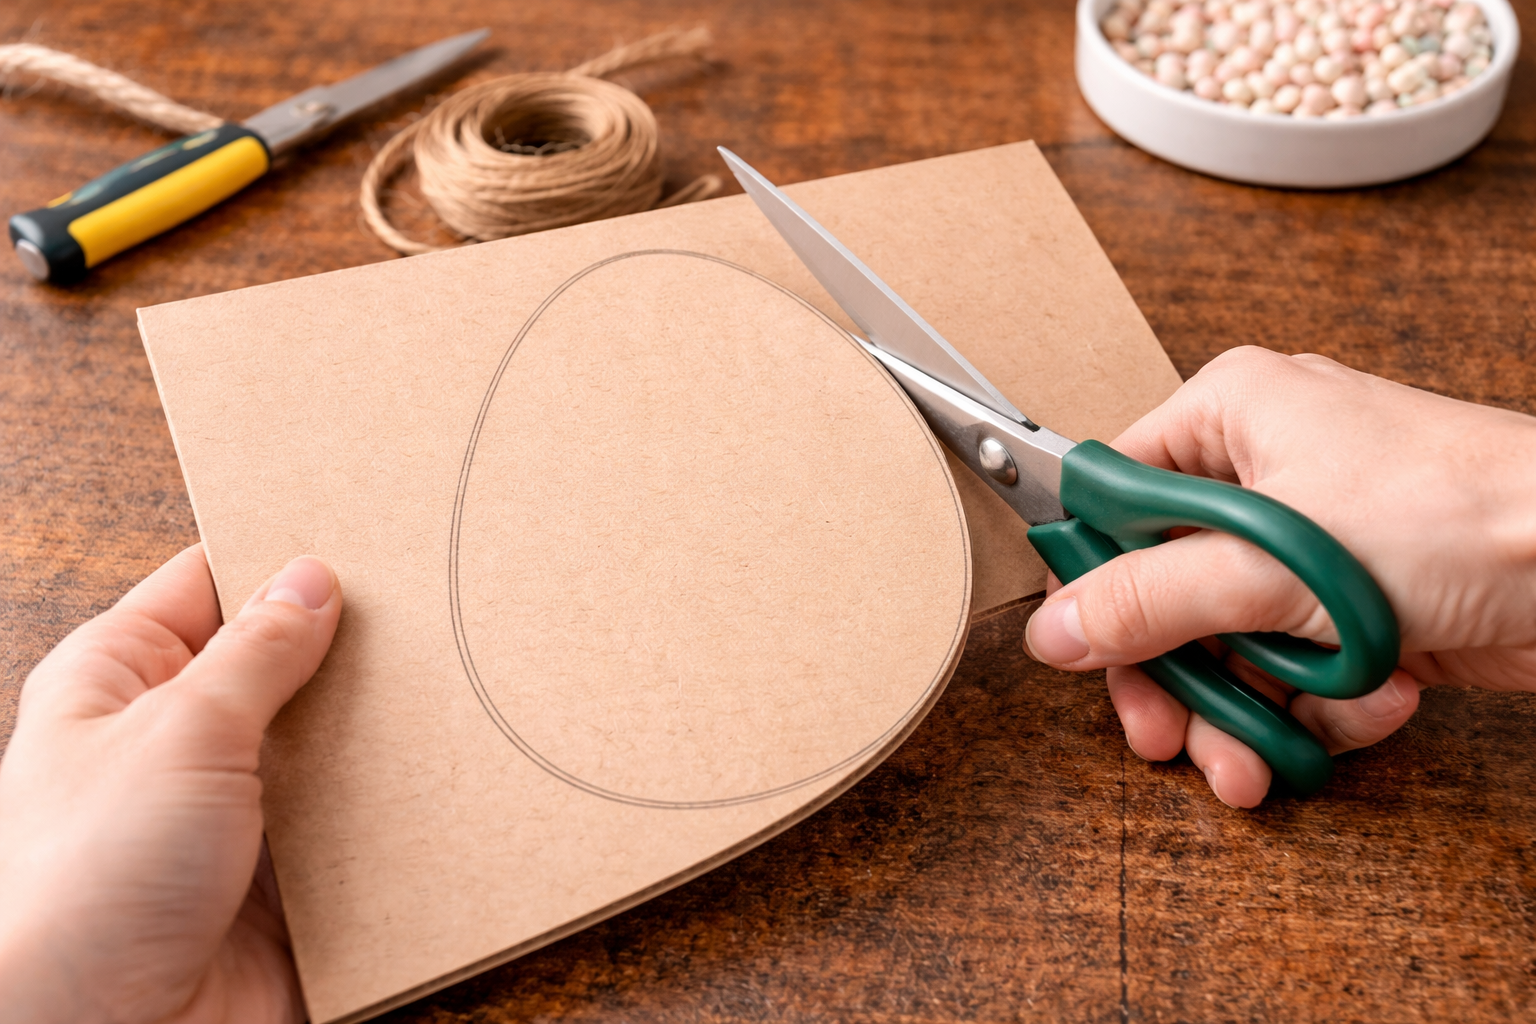
Step 1: Draw the Egg Shape
Use a pencil to draw a smooth egg shape on thick cardboard or thin MDF. Make the bottom part slightly wider and the top a bit narrower to create a natural egg look. Keep the lines clean and balanced so the final piece looks even from all sides.
💡 Pro Tip: If needed, sketch lightly first and adjust the shape before finalizing.
Step 2: Cut the Base
Carefully cut along the outline using scissors or a craft knife. Follow the curve slowly so the edges stay smooth and rounded. Make sure there are no sharp corners or uneven cuts, as this will affect how the beads sit later.
💡 Pro Tip: Turning the base while cutting helps keep your lines more controlled.
🗓️ Keep all your craft projects on track! Explore our printable planners & templates at CraftersDT on Etsy and use code CRAFT20 for 20% off!
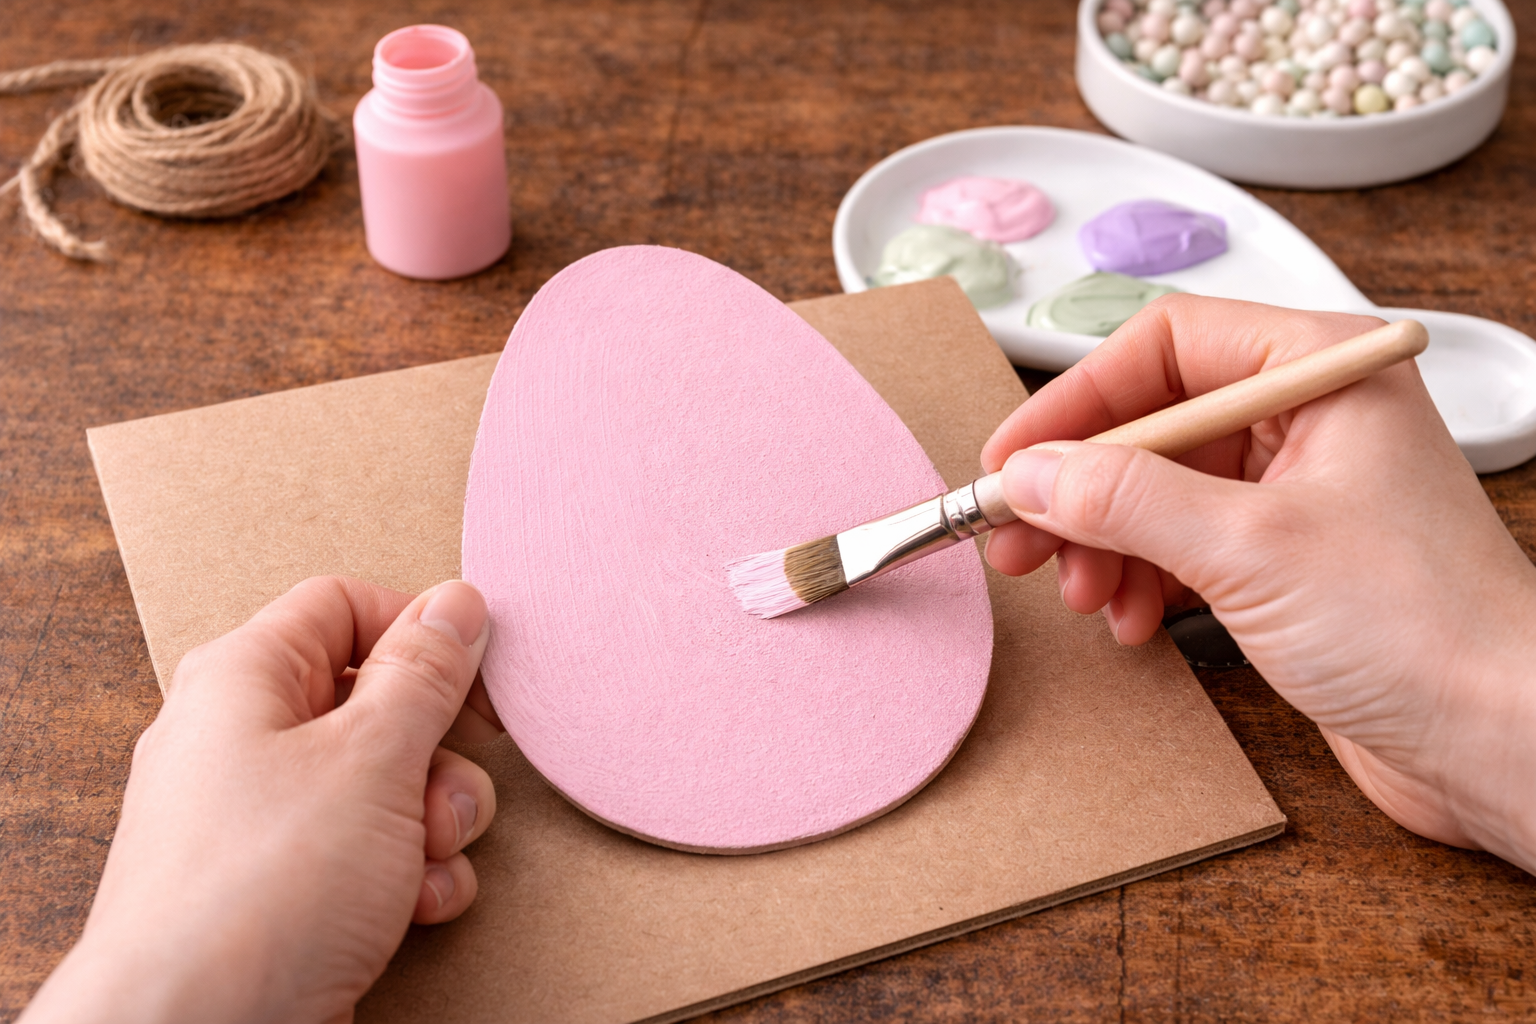
Step 3: Paint the Base
Apply a layer of pastel acrylic paint across the entire surface of the base. Spread the paint evenly so no raw cardboard is visible. Let it dry completely before moving on to avoid smudging or lifting the beads later.
💡 Pro Tip: Soft colors like pink, lavender, or mint work best for a cozy look.
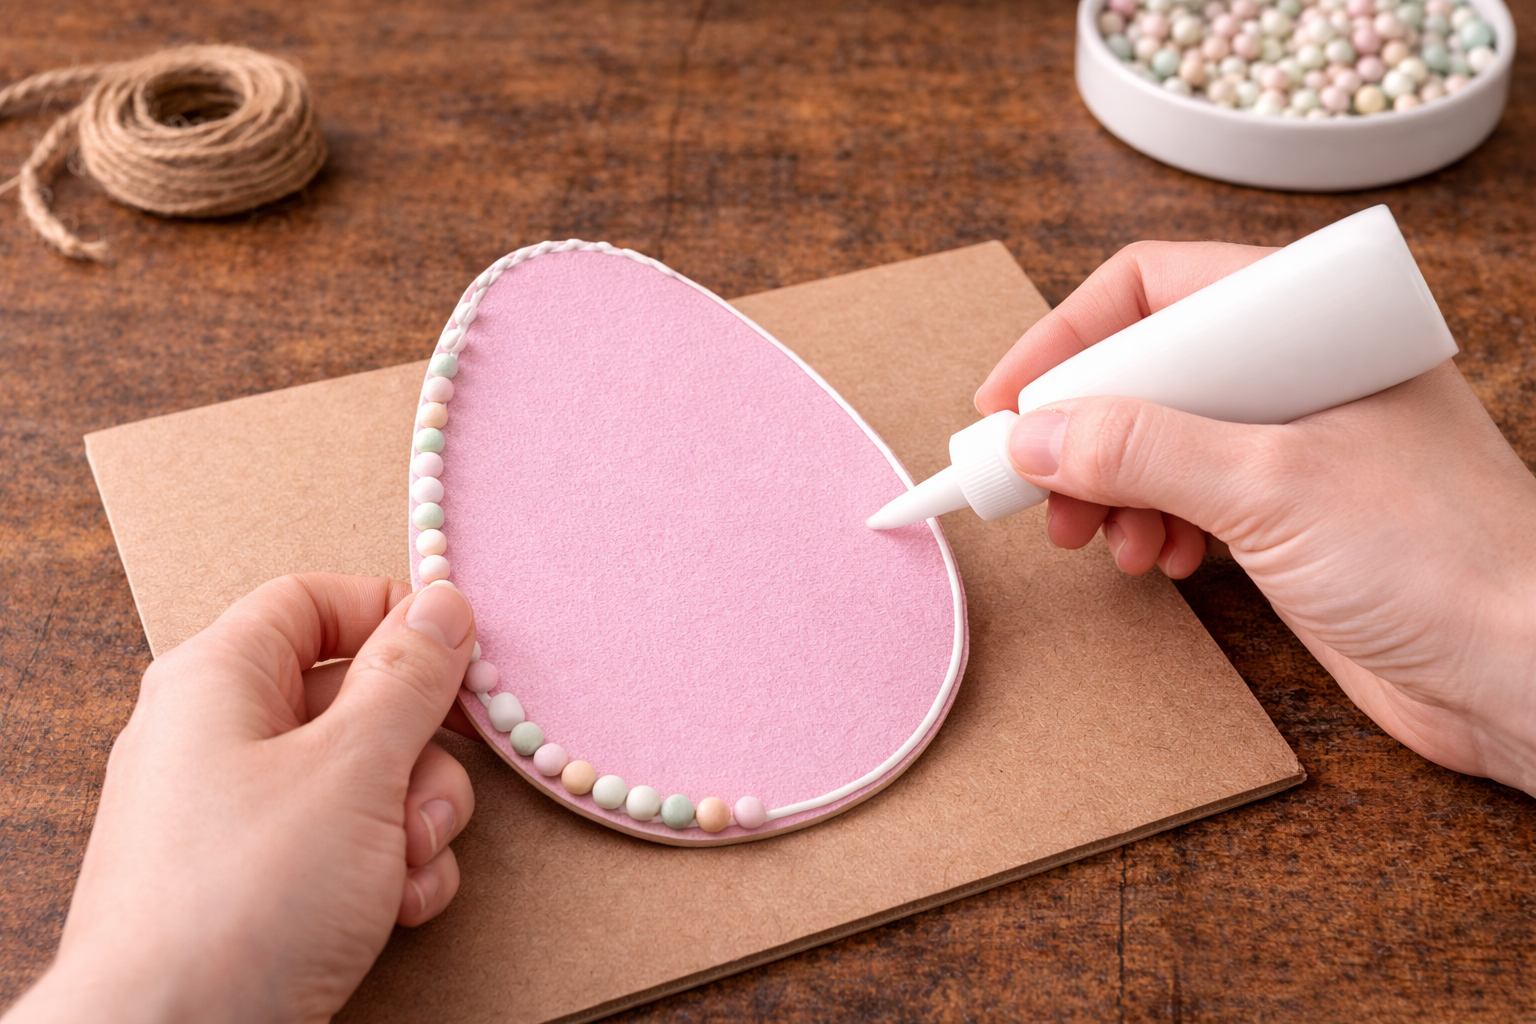
Step 4: Create the Bead Outline
Apply a thin, continuous line of strong craft glue along the outer edge of the egg. Place each bead one by one directly onto the glue, following the shape closely to form a clean border. Press each bead gently so it stays in place and aligns with the curve.
💡 Pro Tip: Start from the bottom center and work your way up both sides evenly.
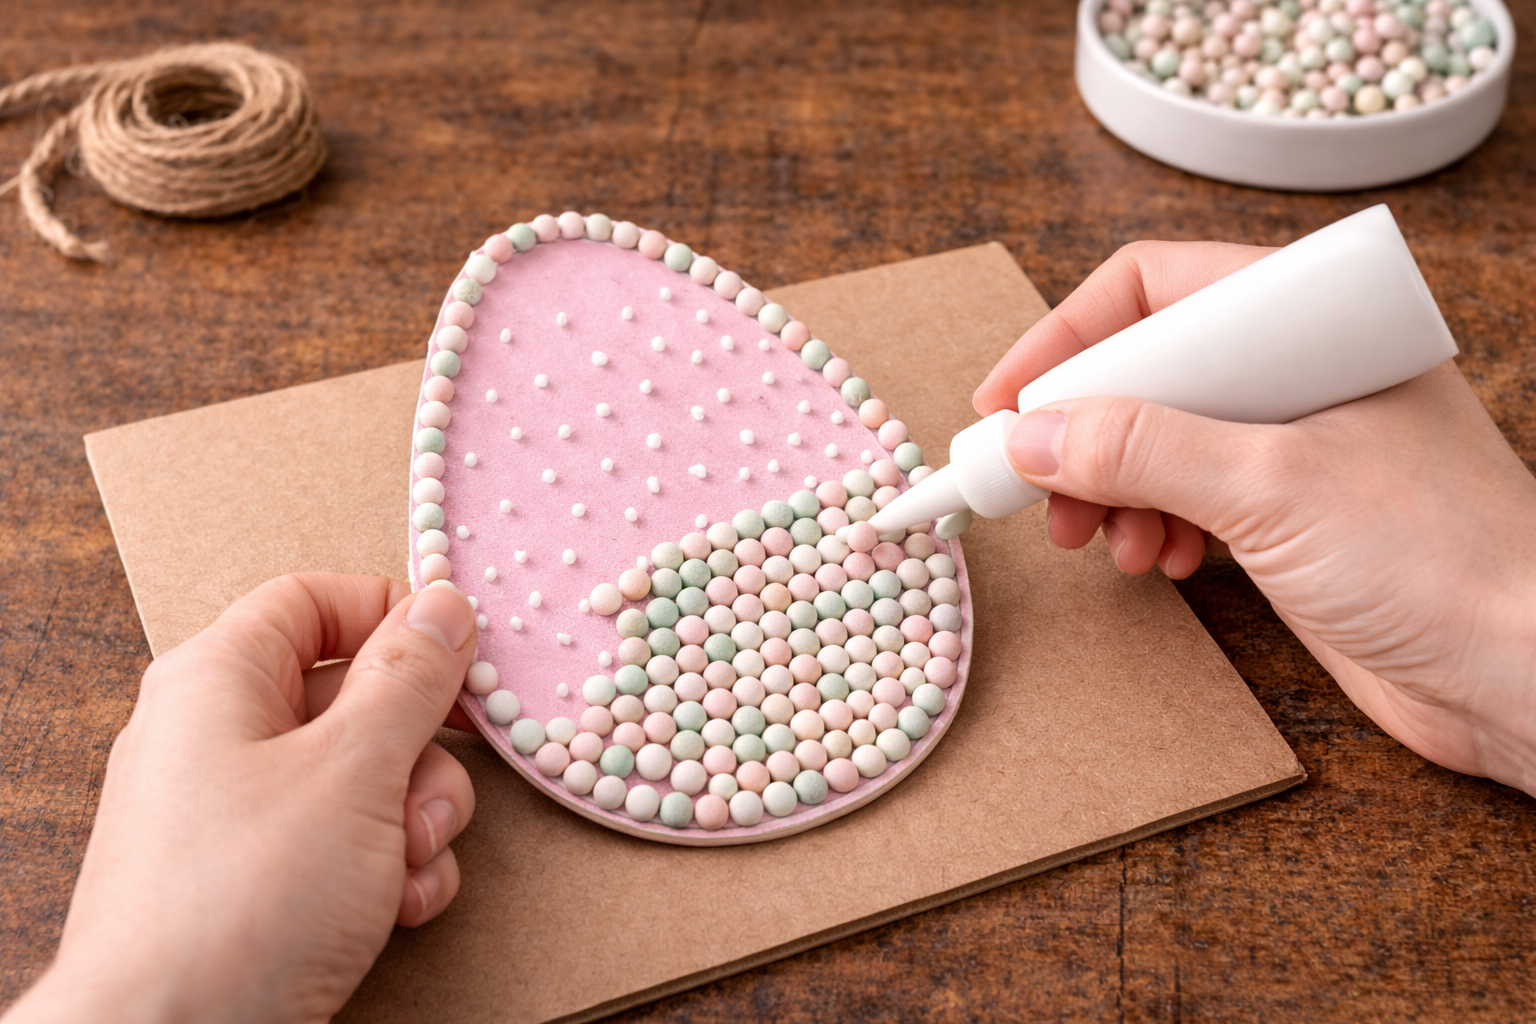
Step 5: Fill the Inside
Add small dots of glue inside the outlined area and begin placing beads next to each other in tight rows. Continue filling the shape gradually from bottom to top, making sure there are no visible gaps between the beads. Keep the spacing consistent so the surface looks full and smooth.

💡 Pro Tip: Work in small sections so the glue stays tacky while placing beads.
Step 6: Add the Design
Use beads in different colors to create a simple design like a bunny, flower, or horizontal stripes. Place each bead carefully according to your pattern, building the design step by step so it stays clear and centered within the egg shape.
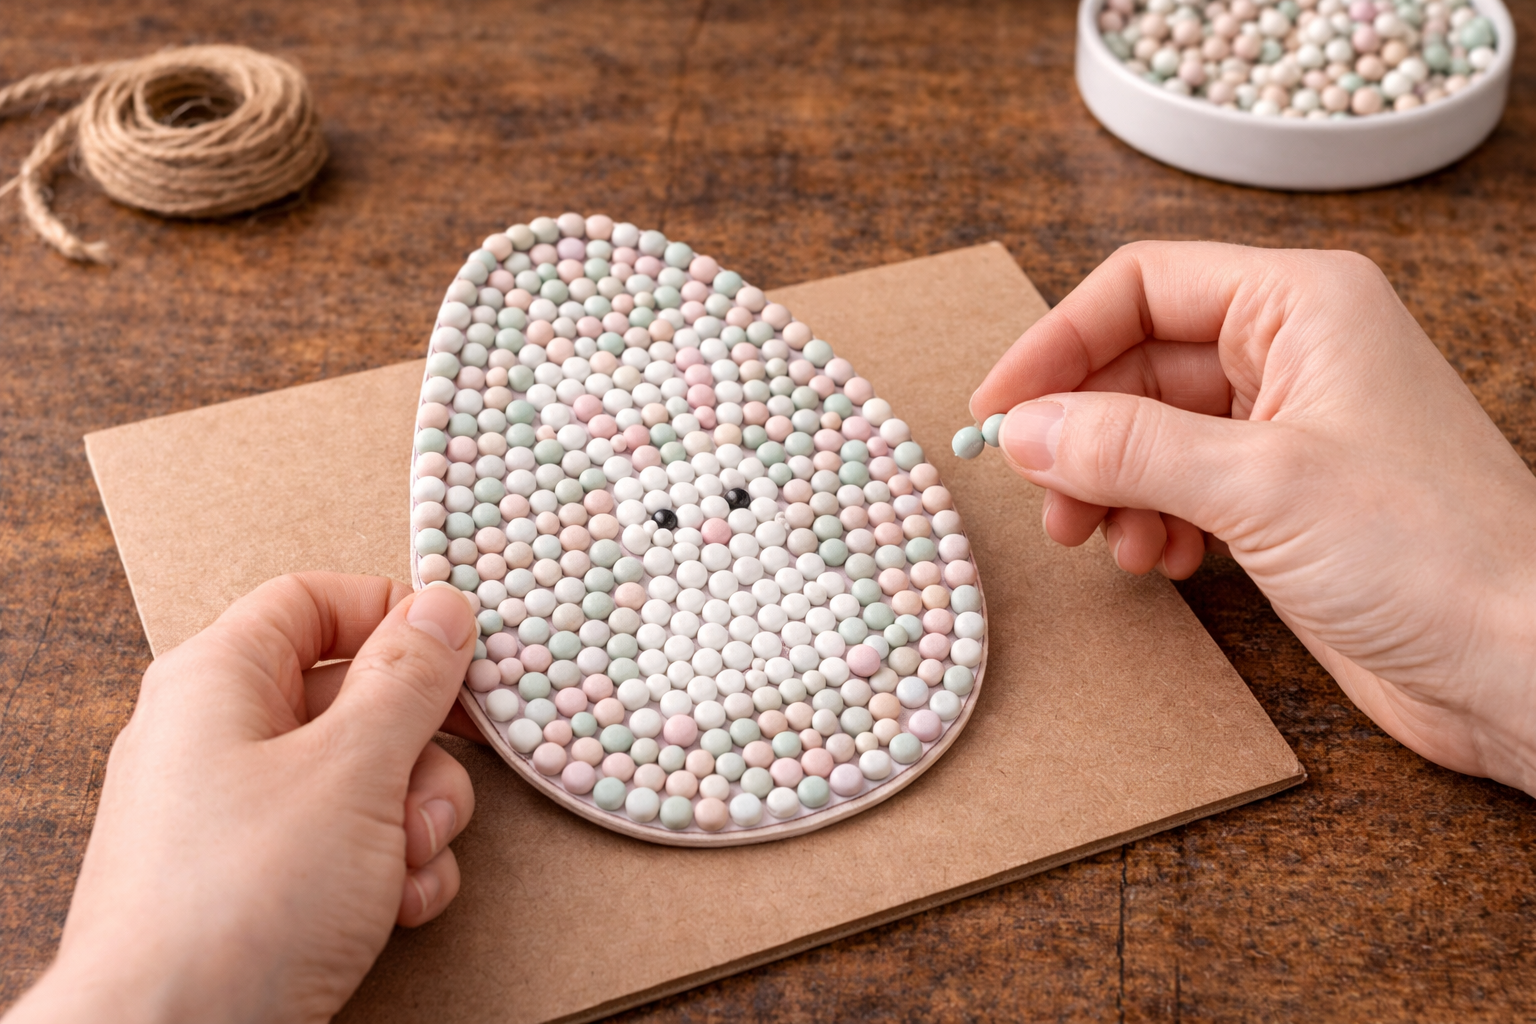
💡 Pro Tip: Lightly plan the design with your eyes before placing beads.
Step 7: Attach the Twine
Create a small hole at the top center of the egg base and thread a piece of jute twine through it. Tie the ends into a small loop or bow, making sure it sits neatly at the top and stays centered.
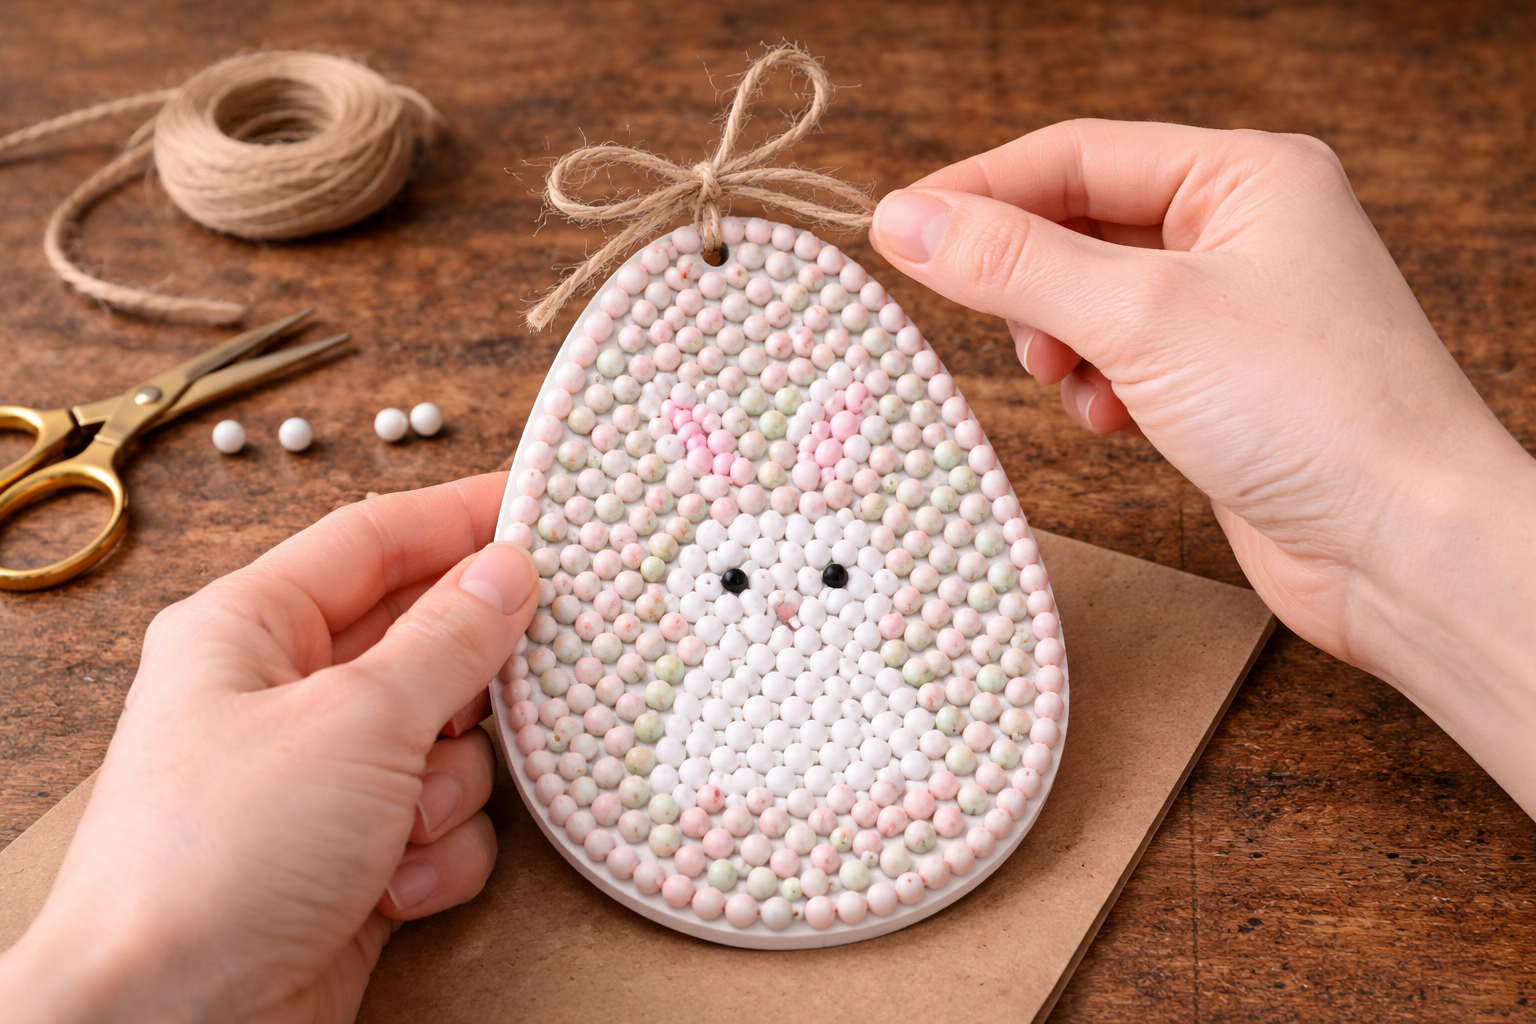
💡 Pro Tip: Adjust the knot before tightening so the egg hangs straight.
Step 8: Style the Display
Place the finished bead egg upright inside a small tray filled with decorative moss. Position it so the front design is clearly visible, and add one or two more eggs nearby to create a cozy, balanced display.
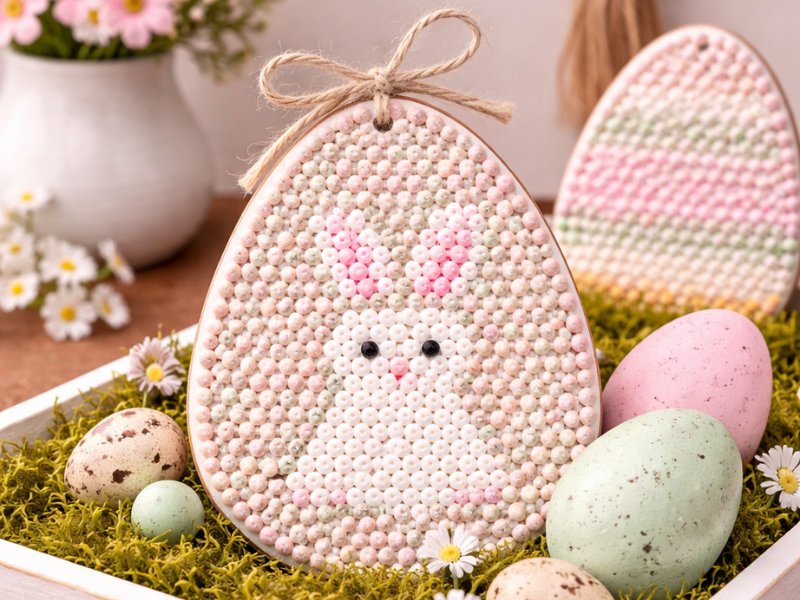
💡 Pro Tip: Grouping multiple eggs makes the decor feel fuller and more styled.
Hooray! Your Dollar Tree Easter Beads!
Look at your beautiful beaded eggs! They’re so versatile and add such a sweet, handmade touch to any Easter basket, centerpiece, or mantel display. Don’t forget to show me how yours turned out on Instagram, or even try mixing up the bead colors next time for a totally different look!
📱 Free to Download
Craftino, The #1 Craft App
✓ Save crafts & browse fully offline
✓ Download printable PDF guides for every project
✓ Step-by-step photo tutorials, nothing left out
✓ 1,000+ craft projects with new ones added every week
Frequently Asked Questions
How long does it take to make a Dollar Tree Easter Bead Craft – Simple Egg Decor DIY?
You can usually make one beaded egg in about 5-10 minutes, so a whole basket of these goes pretty quick! It’s a great speedy Easter project.
Is this Dollar Tree Easter Bead Craft suitable for kids?
Absolutely! It’s a fantastic Holiday & Seasonal craft for older kids and teens, especially with adult supervision for the hot glue gun part. Younger kids can help with bead selection.
What kind of beads should I use for this simple egg decor DIY?
We used wooden beads from Dollar Tree, but you can use plastic beads, pearl beads, or even small pom-poms for a different texture. Just make sure they’re small enough!
Can I make variations of this Easter bead craft?
Yes! Try painting your beads first, using different sized eggs, or adding a ribbon loop to hang them. You can also use various color themes for the Holiday & Seasonal vibe.
Check out the official Dollar Tree store for more holiday crafts & supplies here.
Leave a Reply