OK so I finally got around to making this Garden Bloom Solar Jar Lantern and honestly? I’m obsessed with how it turned out. If you’re into home decor projects, you’re gonna love this one.
See also: Whimsical Speckled Easter Egg Topiaries Craft
Theme: Spring & Garden
Materials Needed
- Clear Mason Jar (standard size)
- Solar Mason Jar Lid Light
- Acrylic Craft Paints (assorted floral colors like green, white, yellow, pink, purple/blue)
- Small Detail Paintbrushes
- Jute Twine
- Faux Daisy Flower with Leaves (small)
- Clear Sealer Spray (outdoor-safe, e.g., acrylic sealant)
- Hot Glue Gun & Glue Sticks
📋 Love staying organized while crafting? Check out our printable planners & craft designs at CraftersDT on Etsy and use code CRAFT20 for 20% off your entire order!
Why This Craft Works
This Garden Bloom Solar Jar Lantern is perfect for spring & garden decor and honestly one of my favorite Dollar Tree finds turned into something really special. Whether you’re dressing up a shelf, a mantel, or a tabletop, this fits right in.
📱 Free to Download
Join 50,000+ crafters already using Craftino
Browse 87+ Spring & Garden ideas and thousands more in the app
✓ Save crafts & browse fully offline
✓ Download printable PDF guides for every project
✓ Step-by-step photo tutorials, nothing left out
✓ 1,000+ craft projects with new ones added every week

The best part? The whole project costs under $5 if you grab your supplies at Dollar Tree. I used items I found right in the seasonal aisle and spent maybe $3-4 total. Super budget-friendly.
Difficulty-wise this is a solid beginner project. It took me about 30-45 minutes start to finish, including drying time. If you’ve never done a craft like this before, don’t worry at all. You’ll be fine.
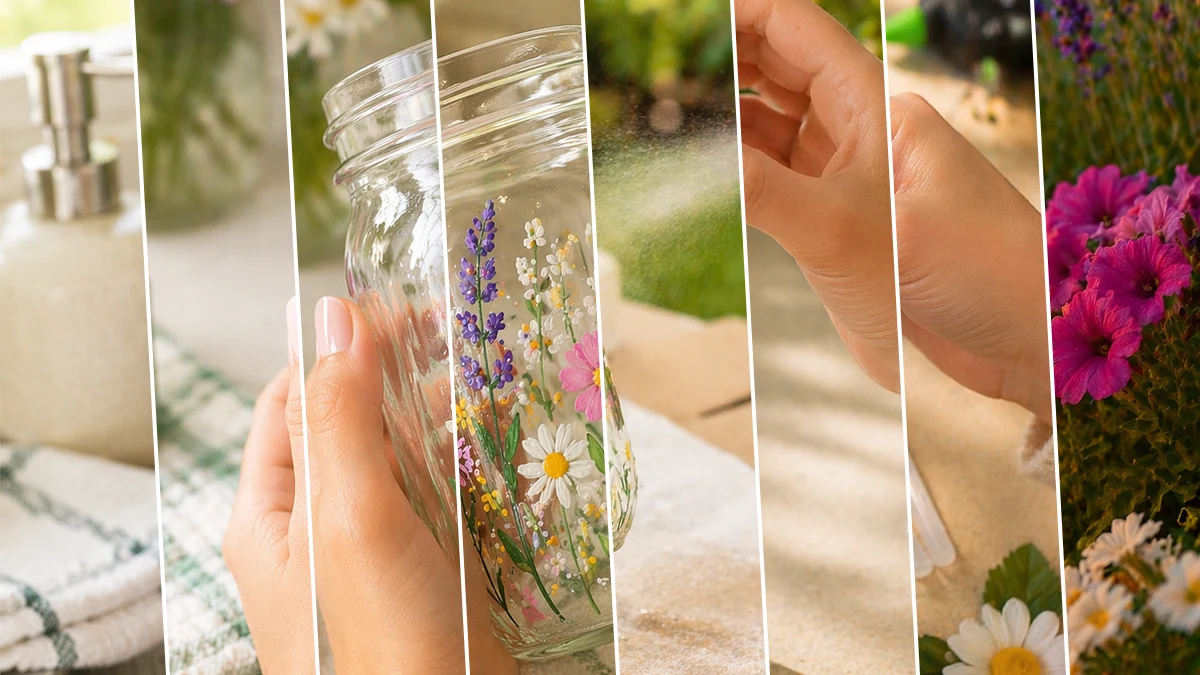
Step-by-Step Instructions for Garden Bloom Solar Jar Lantern
This is seriously one of those projects that looks way harder than it actually is. I knocked it out in about an hour and the result is so cute. You don’t need any fancy tools or skills for this one, just some basic supplies and a little bit of time. Grab your supplies and let’s do this together, I’ll walk you through every single step.
Step 1: Prepare Your Mason Jar Canvas
Begin by thoroughly cleaning your mason jar. Wash it with warm soapy water, rinse well, and dry completely with a lint-free cloth. For the best adhesion of paint, wipe the exterior glass surface with rubbing alcohol or white vinegar to remove any oils, fingerprints, or residues. This creates a clean surface for your paint.
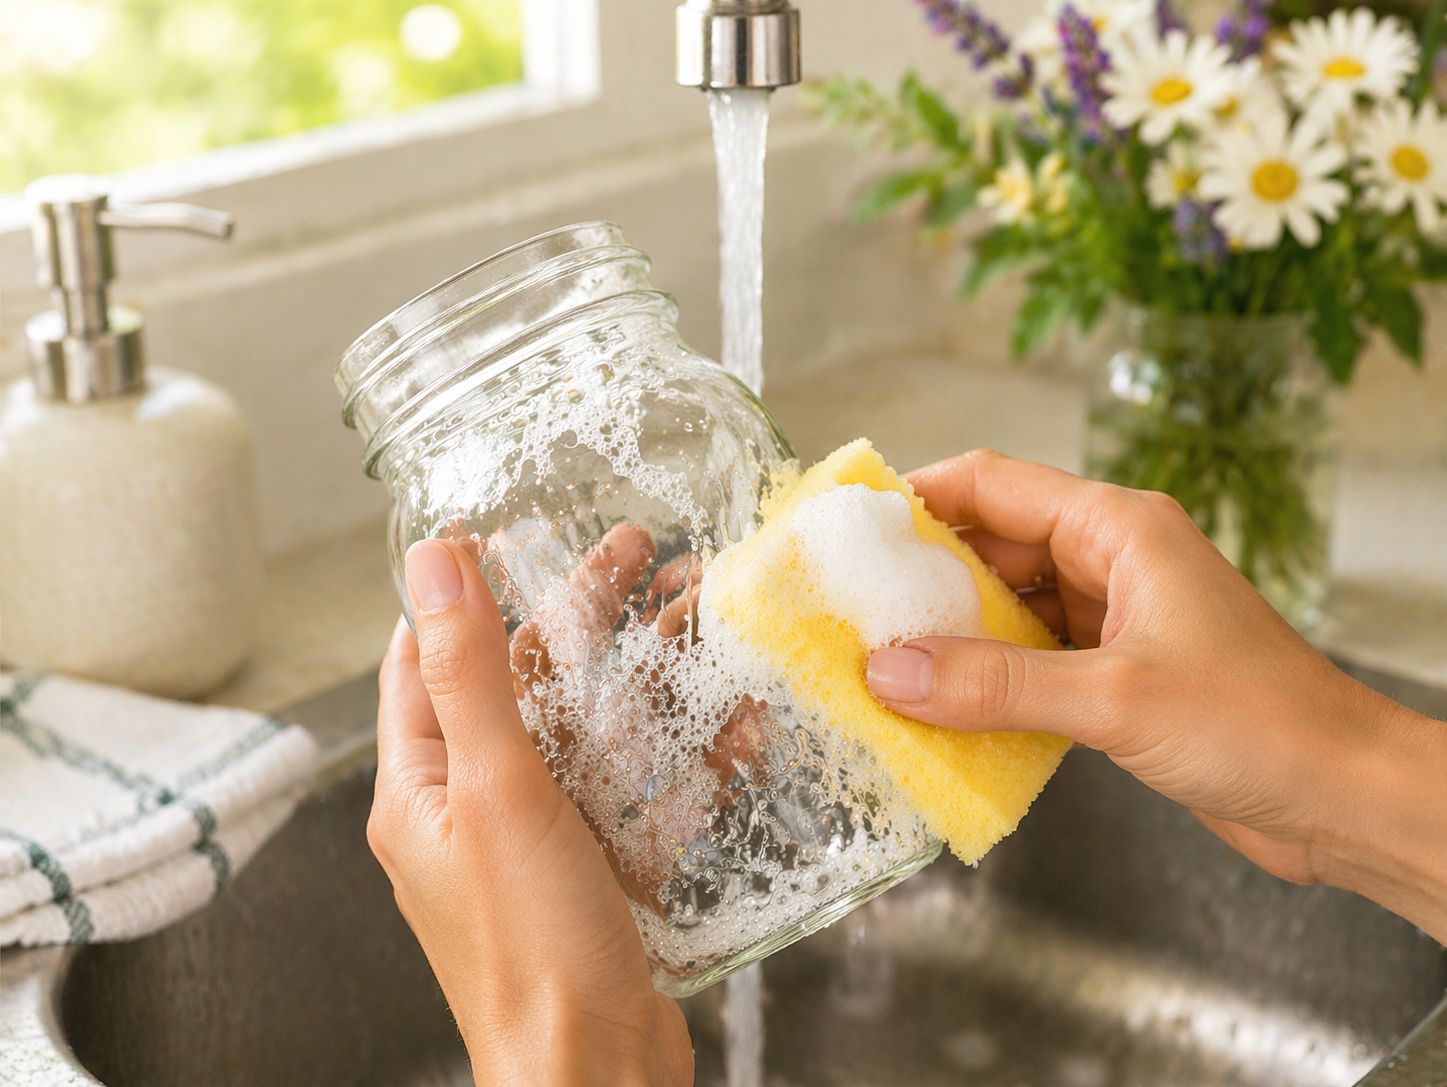
💡 Pro Tip: Ensure the jar is bone-dry before painting. Any residual moisture can prevent paint from sticking properly or cause bubbling. A quick wipe-down with rubbing alcohol will also help your paint cure more effectively.
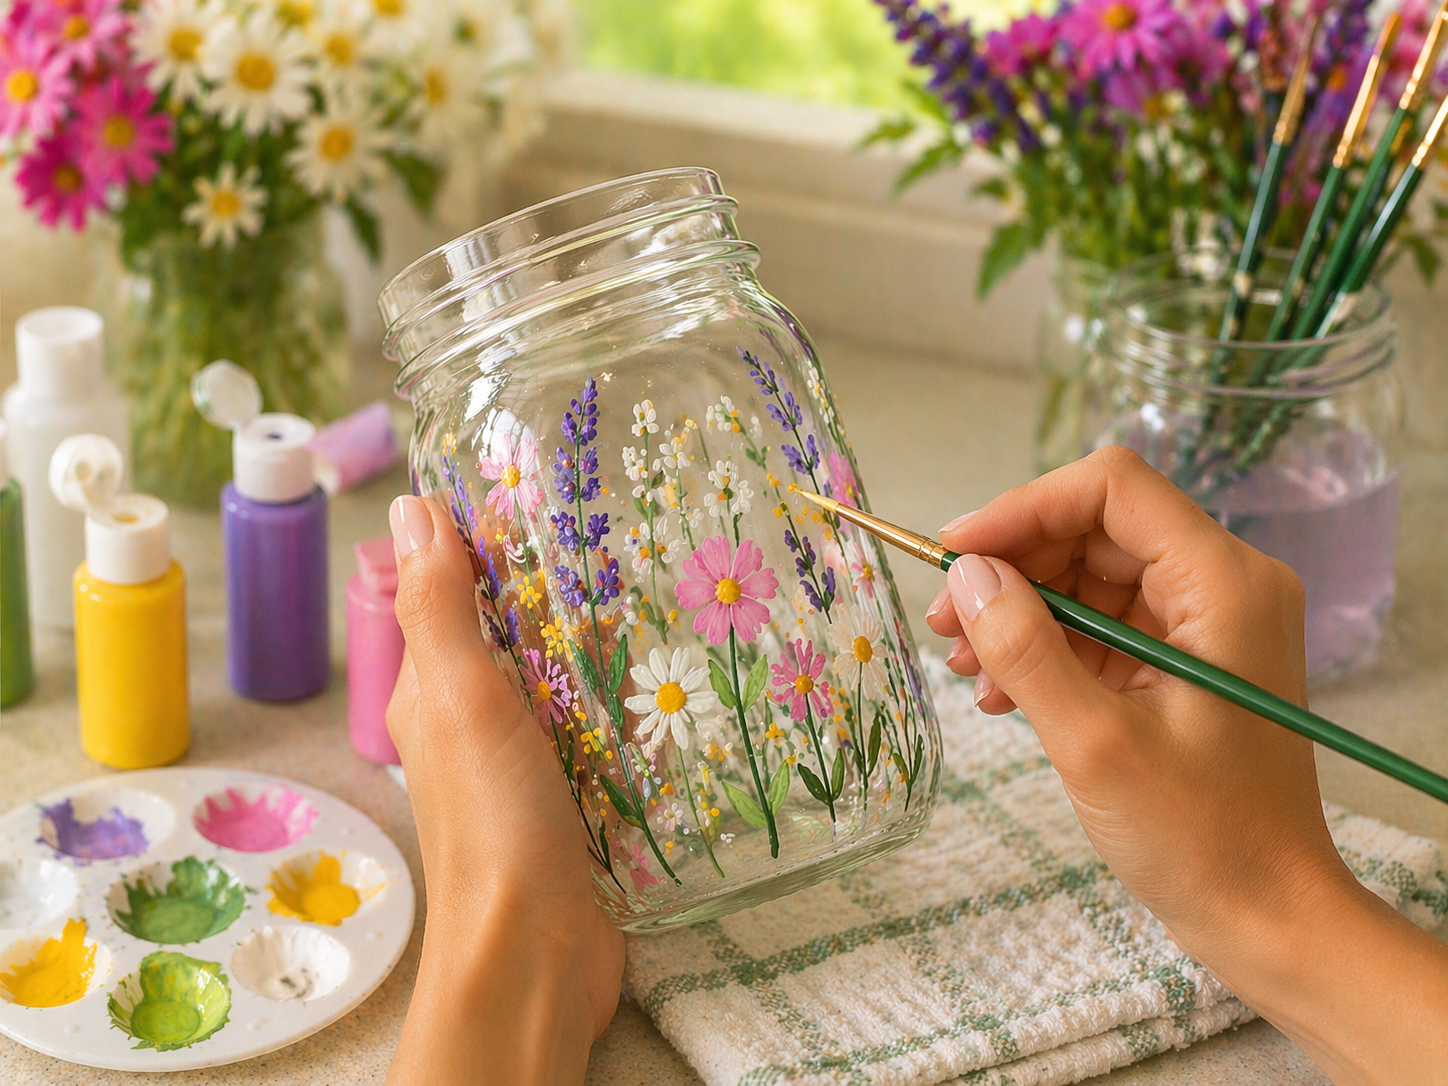
Step 2: Paint the Garden Bloom Stems
Using a fine detail paintbrush and green acrylic paint, begin painting vertical stems and small leaves directly onto the outside of the mason jar. Vary the heights and widths of your stems to create a natural, meadow-like effect. Don’t worry about perfect straight lines; a slightly whimsical, freehand style adds to the charm.
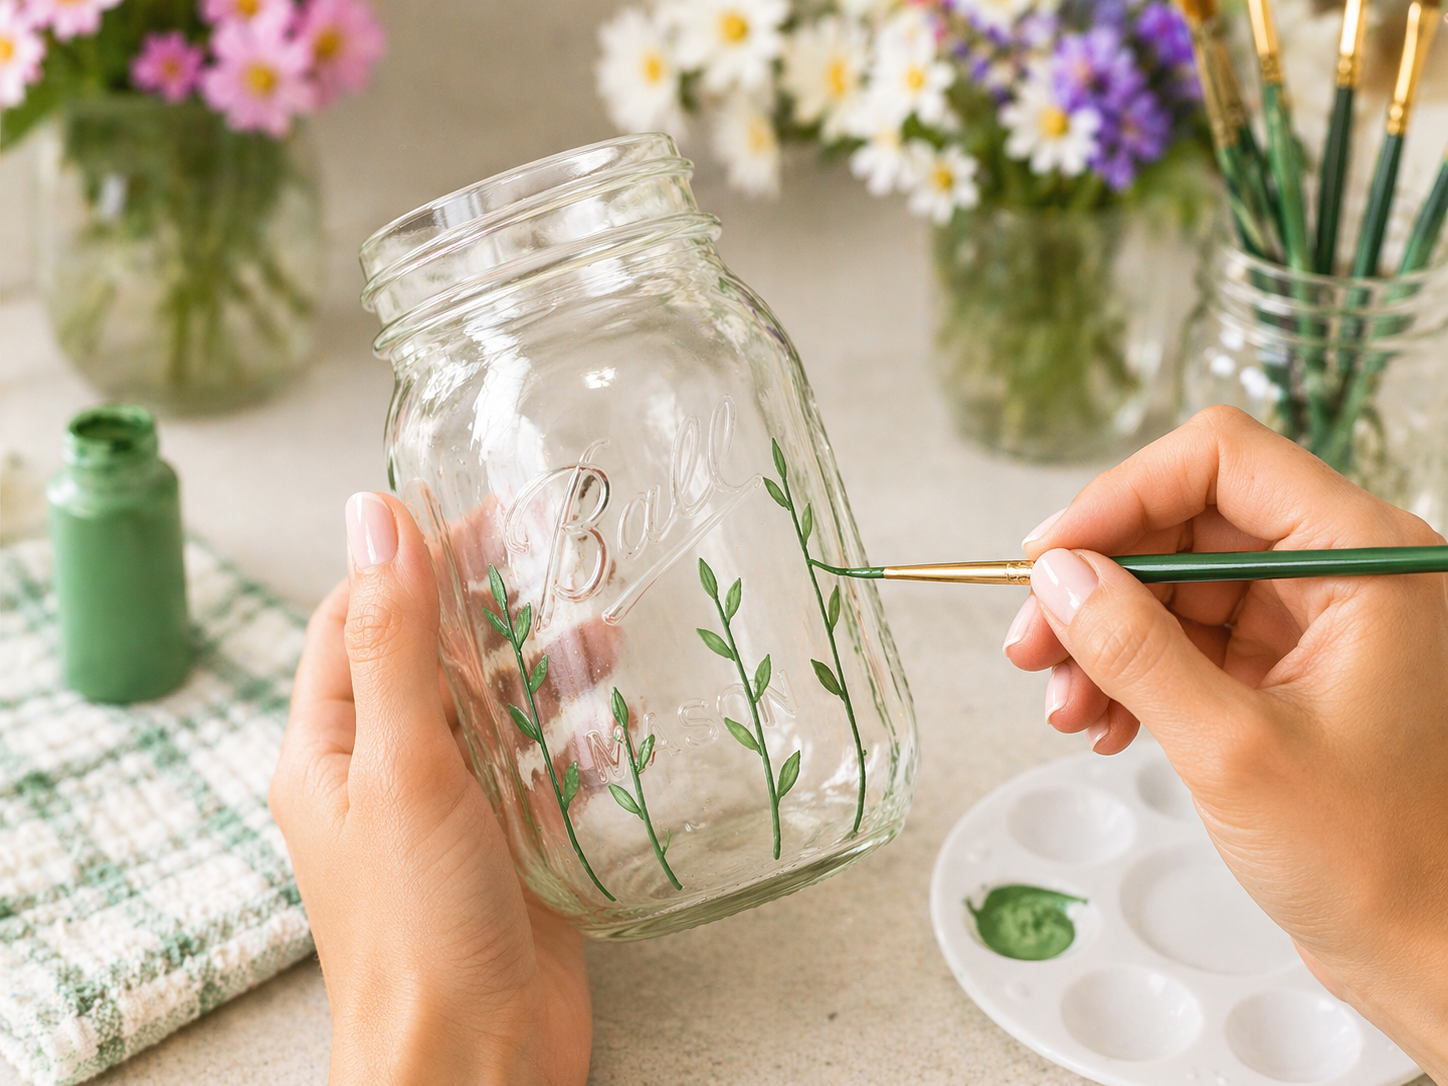
💡 Pro Tip: Load your brush with just enough paint to make a clean stroke, but not so much that it’s globby. Practice a few strokes on a scrap piece of paper or another glass surface first to get a feel for painting on glass.
🗓️ Keep all your craft projects on track! Explore our printable planners & templates at CraftersDT on Etsy and use code CRAFT20 for 20% off!
Step 3: Add Delicate Floral Details
Now, it’s time to add your colorful flowers! Using various acrylic craft paints and your detail brushes, paint small white daisies, purple sprigs (resembling lavender), and pink accent flowers at the tops of your green stems and sporadically throughout. Use a light hand and build up the colors. For tiny details like flower centers, you can use the back of a paintbrush handle or a toothpick to dab small dots of contrasting color (e.g., yellow for daisy centers).
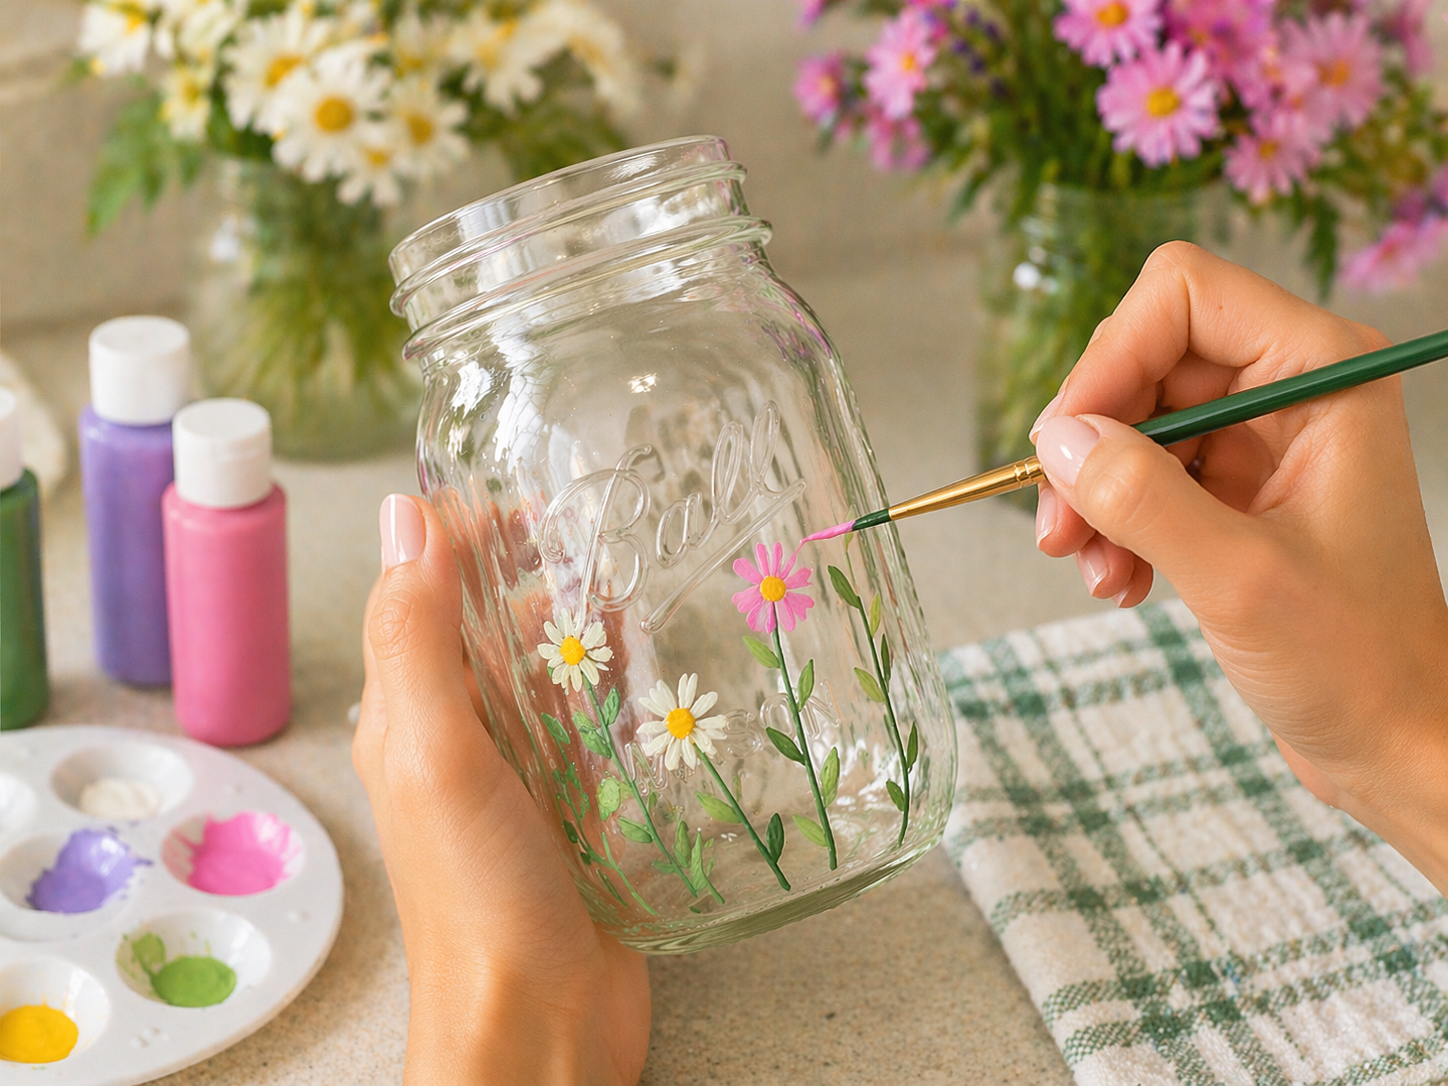
💡 Pro Tip: Allow each color layer to dry slightly before adding the next to prevent colors from bleeding together, especially when layering different hues. For simple flowers, start with a central dot and then add petals radiating outwards.
Step 4: Complete Floral Design & Dry
Continue adding more flowers, filling in gaps, and adding tiny yellow or white dots for additional accents or small buds. Vary the size, shape, and height of your flowers to create a truly organic and vibrant garden scene around the entire jar. Once all painting is complete, allow the paint to air dry completely for at least 2-4 hours, or refer to your paint’s specific drying instructions for optimal curing.
💡 Pro Tip: To ensure your paint is fully cured and ready for sealing, always err on the side of longer drying times, especially in humid conditions. You can gently test a discreet area with your fingertip to check for tackiness.
Step 5: Seal for Outdoor Durability
To protect your beautiful painted design from the elements (rain, sun) and ensure its longevity, apply a clear outdoor-safe sealer. If using a clear acrylic sealant spray, work in a well-ventilated area and apply several light, even coats, allowing sufficient drying time between each coat according to the product instructions. If using a brush-on decoupage glue (like Mod Podge Outdoor), apply 2-3 thin, even coats.

💡 Pro Tip: When using spray sealer, hold the can about 8-10 inches away from the jar and use a continuous sweeping motion to avoid drips or uneven patches. Always test a small, inconspicuous area first if you’re unsure how the sealer will react with your specific paints.
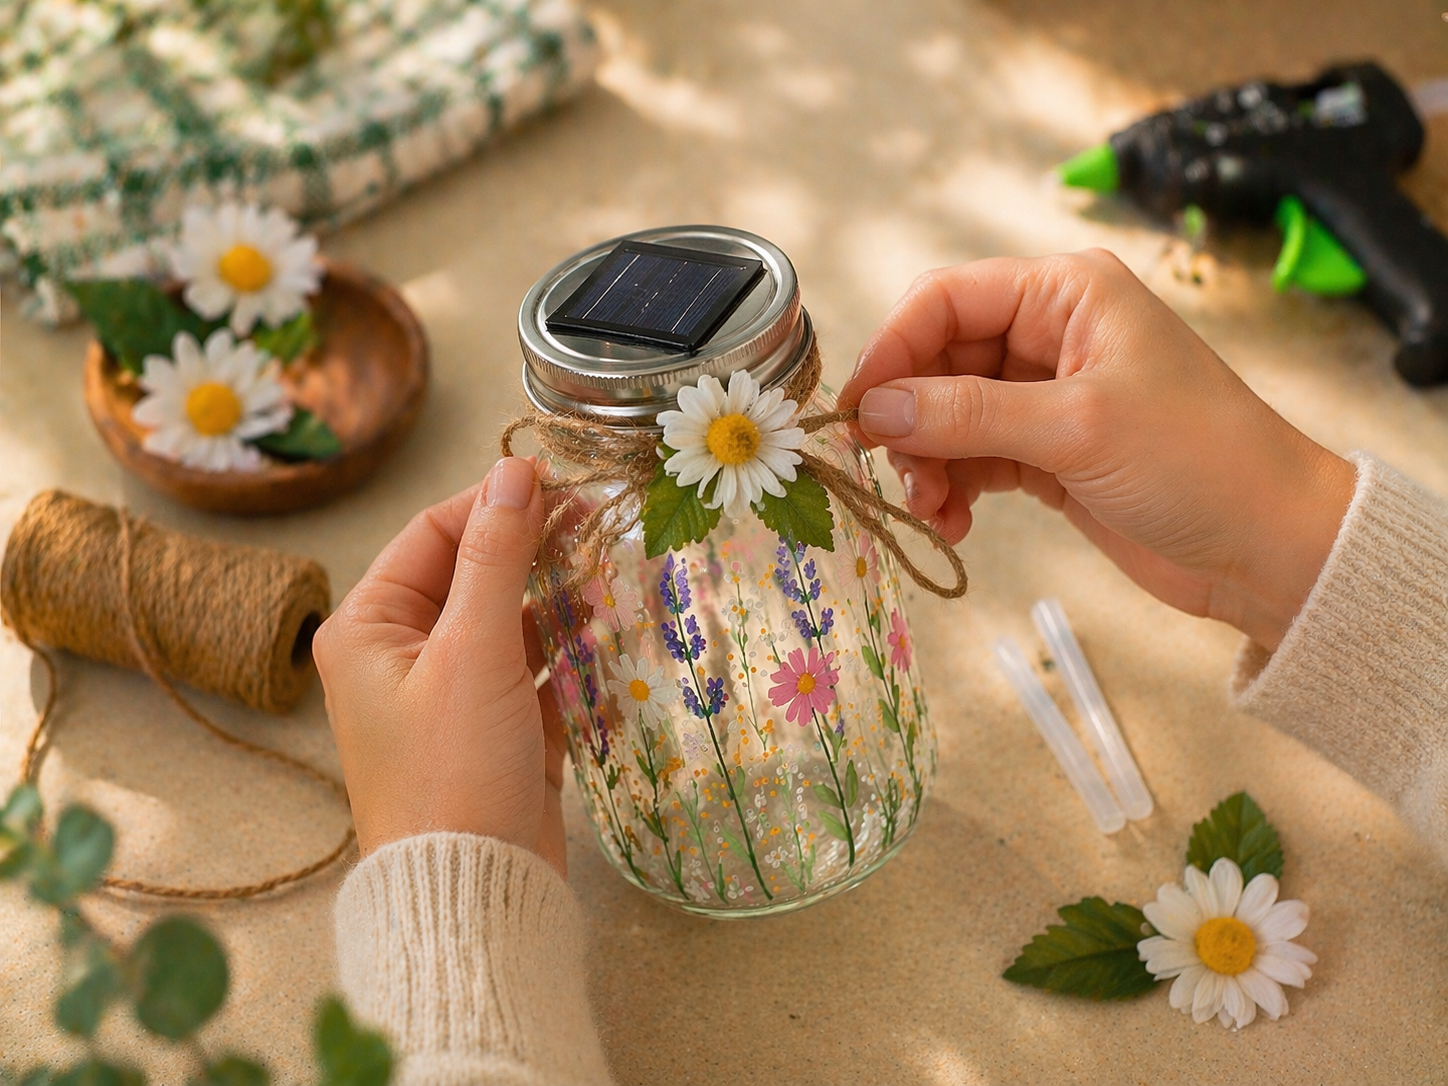
Step 6: Attach the Solar Lid
Once the sealer is completely dry, carefully remove the original metal lid from your mason jar. Take your solar mason jar lid light and twist it securely onto the top of the jar. Most solar lids have a small on/off switch; ensure it is in the “on” position so the solar panel can charge during the day and illuminate the jar at dusk.

💡 Pro Tip: Before placing the lid, make sure the solar panel is clean and free of smudges or debris to maximize its charging efficiency. If there’s a protective film on the solar panel, remove it.
Step 7: Embellish with Twine & Flower
Cut a length of jute twine long enough to wrap around the neck of the jar two or three times and tie a decorative bow. Secure the twine in place with a small dot of hot glue if needed to prevent slipping. Then, use your hot glue gun to attach the faux daisy flower (with its leaves) to the center of the twine bow or directly onto the tied knot, creating a charming focal point.
💡 Pro Tip: For a neat and even bow, form the loops and adjust their size before making the final knot. You can trim any excess twine tails for a tidy finish that complements your floral design.
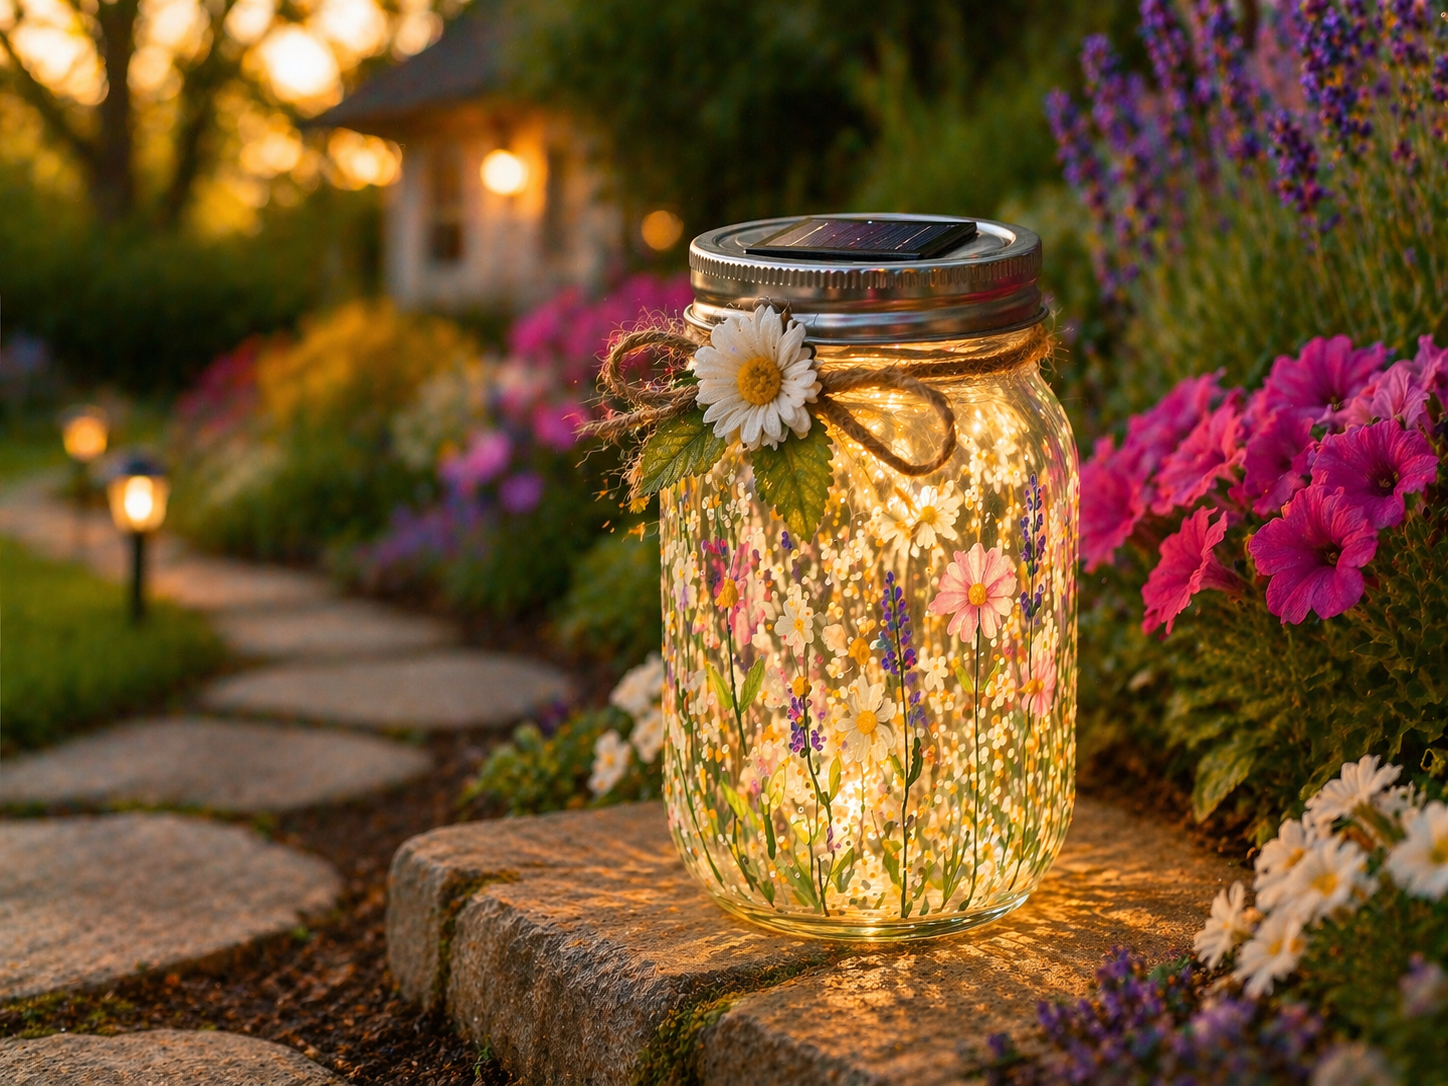
Step 8: Style in Your Garden Oasis
Your beautiful Garden Bloom Solar Jar Lantern is now complete! Place it in a sunny spot in your garden, a flower bed, or along a pathway where it can soak up the sun’s rays during the day and glow enchantingly at dusk. This handmade lantern will add a touch of personalized charm and gentle illumination to your outdoor space.
💡 Pro Tip: For optimal lighting, position the lantern where its solar panel will receive direct sunlight for at least 6-8 hours daily. Avoid placing it under dense foliage or near other bright night lights, as these can interfere with its light sensor and prevent it from turning on.
Your Garden Bloom Solar Jar Lantern Is Complete!
And that’s it! Your Garden Bloom Solar Jar Lantern is done and honestly it looks so good. Pop it on a shelf, give it as a gift, or just admire your handiwork. If you try this one, I’d love to see how yours turns out!
📱 Free to Download
Join 50,000+ crafters already using Craftino
Browse 87+ Spring & Garden ideas and thousands more in the app
✓ Save crafts & browse fully offline
✓ Download printable PDF guides for every project
✓ Step-by-step photo tutorials, nothing left out
✓ 1,000+ craft projects with new ones added every week
Frequently Asked Questions
How long does it take to make a Garden Bloom Solar Jar Lantern?
Most people finish this project in about 30-45 minutes. If you’re waiting for glue or paint to dry, budget a full hour to be safe.
How much does a DIY Garden Bloom Solar Jar Lantern cost with Dollar Tree supplies?
Usually under $5 total. Most of the supplies come from Dollar Tree at $1.25 each, so you’re looking at $3-5 for the whole project.
Is this home decor project good for beginners?
Absolutely. No special tools or skills needed. If you can use a hot glue gun and follow simple steps, you can totally make this.
Where can I find the materials for this Garden Bloom Solar Jar Lantern?
Dollar Tree carries most of what you need, especially in the seasonal aisle. Walmart and Hobby Lobby work too if your local Dollar Tree is out of stock.
Can I make this Garden Bloom Solar Jar Lantern as a gift?
Yes! It makes a great handmade gift. Package it in a small box or bag with tissue paper and it looks way more expensive than it actually is.
Check out the official Dollar Tree store for more holiday crafts & supplies here.
Leave a Reply