Oh my goodness, you guys! I was just strolling through Dollar Tree the other day, minding my own business, and grabbed a few wood pieces that just screamed “Patriotic!” Before I knew it, I had whipped up the cutest little decoration. I’m so excited to share my Rustic Freedom Flag Stand: DIY 4th of July Decor with you!
Theme: Patriotic / 4th of July
Materials Needed
- Wooden Base & Slats
- Patriotic Acrylic & Chalk Paints
- Wooden Star Cutouts
- Mini Alphabet Letters
- Mini American Flag
- Patriotic Ribbon
- Raffia or Excelsior Grass
- Hot Glue Gun & Sticks
- Craft Tools
- Decorative Brads or Thumbtacks
- Optional Wooden Bead/Dowel
Why This Craft Works
This little flag stand is just perfect for adding a touch of Americana to your home, especially for the 4th of July. I love putting mine on the mantel, as a centerpiece for our BBQ picnic table, or even by the front door to welcome guests. It’s that cozy, rustic touch for your Holiday & Seasonal decor.
And guess what? Making this craft won’t break the bank! Thanks to my trusty Dollar Tree finds, all the supplies for this Patriotic / 4th of July project ran me about $12-15 total. You really can’t beat that for custom, handmade decor.
You’ll be happy to know this is a super easy DIY craft, perfect even if you’re a beginner or just want a quick project. From start to finish, the Rustic Freedom Flag Stand took me about 40-60 minutes, including drying time. It’s a fantastic last-minute craft for those summer get-togethers.
Step-by-Step Instructions for Rustic Freedom Flag Stand: DIY 4th of July Decor
Alright, crafters, are you ready to get started on your own Rustic Freedom Flag Stand: DIY 4th of July Decor? This project is so much fun and goes together super quick, honestly. You’ll be amazed at what you can create in just a little bit of time, and it’s perfect for anyone, even the kids can help with some parts!
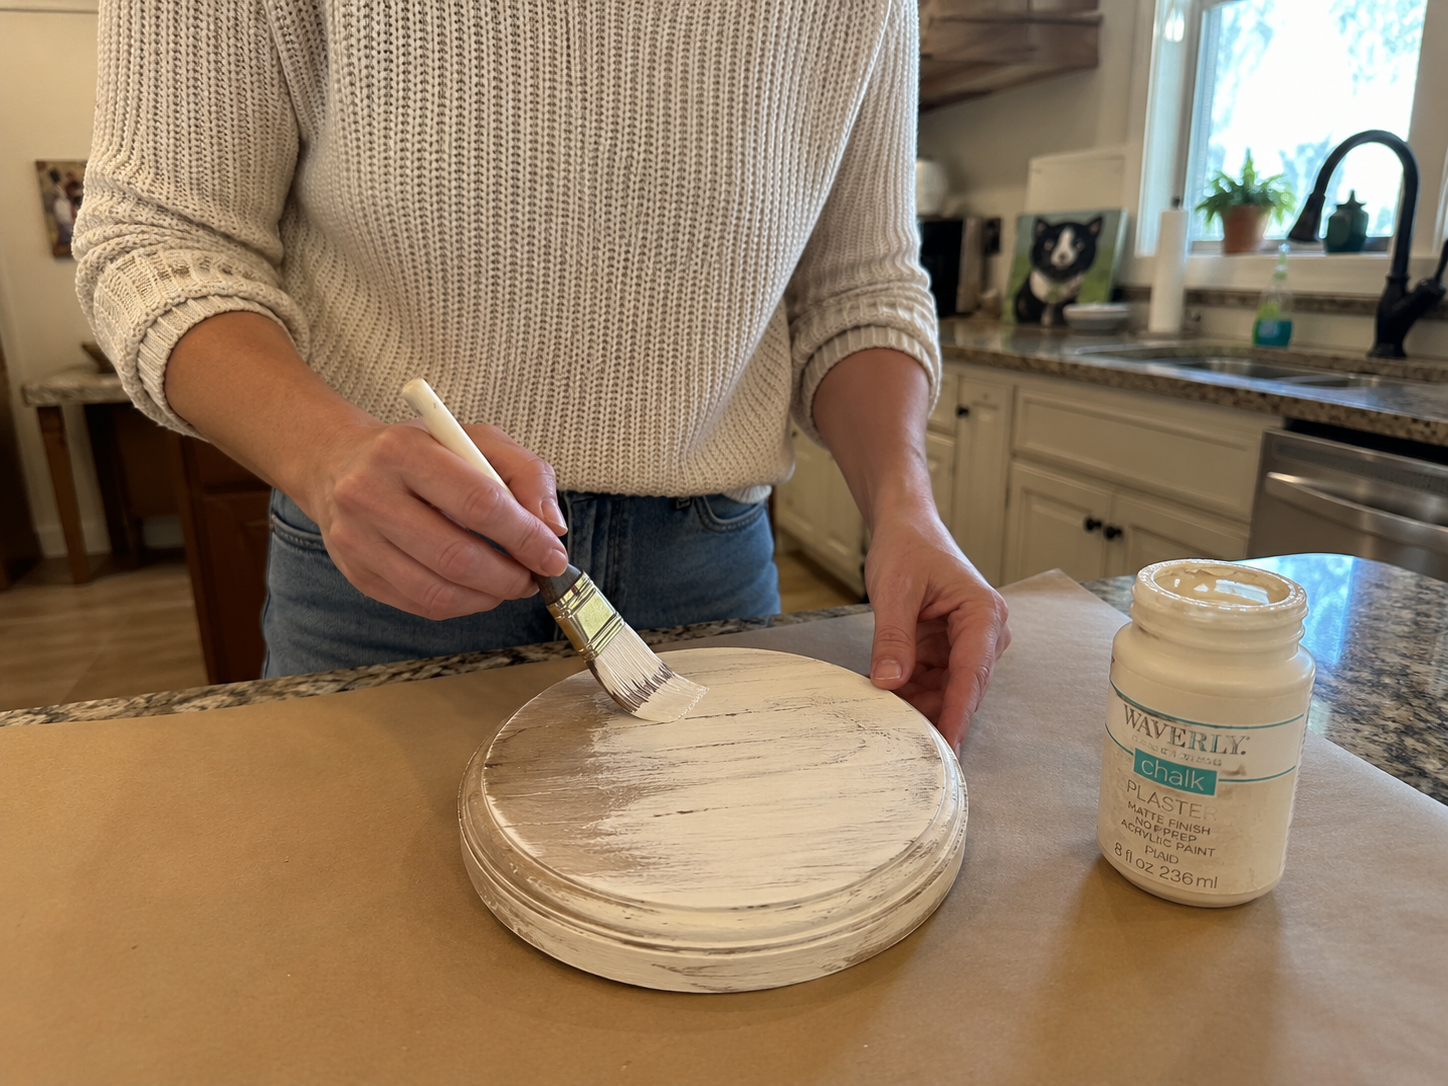
Step 1: Prepare & Paint the Base
Begin by painting your round wooden base with white or cream chalk paint. Apply a thin, even coat, allowing the wood grain to show through slightly for a rustic effect. Let it dry completely according to paint instructions.
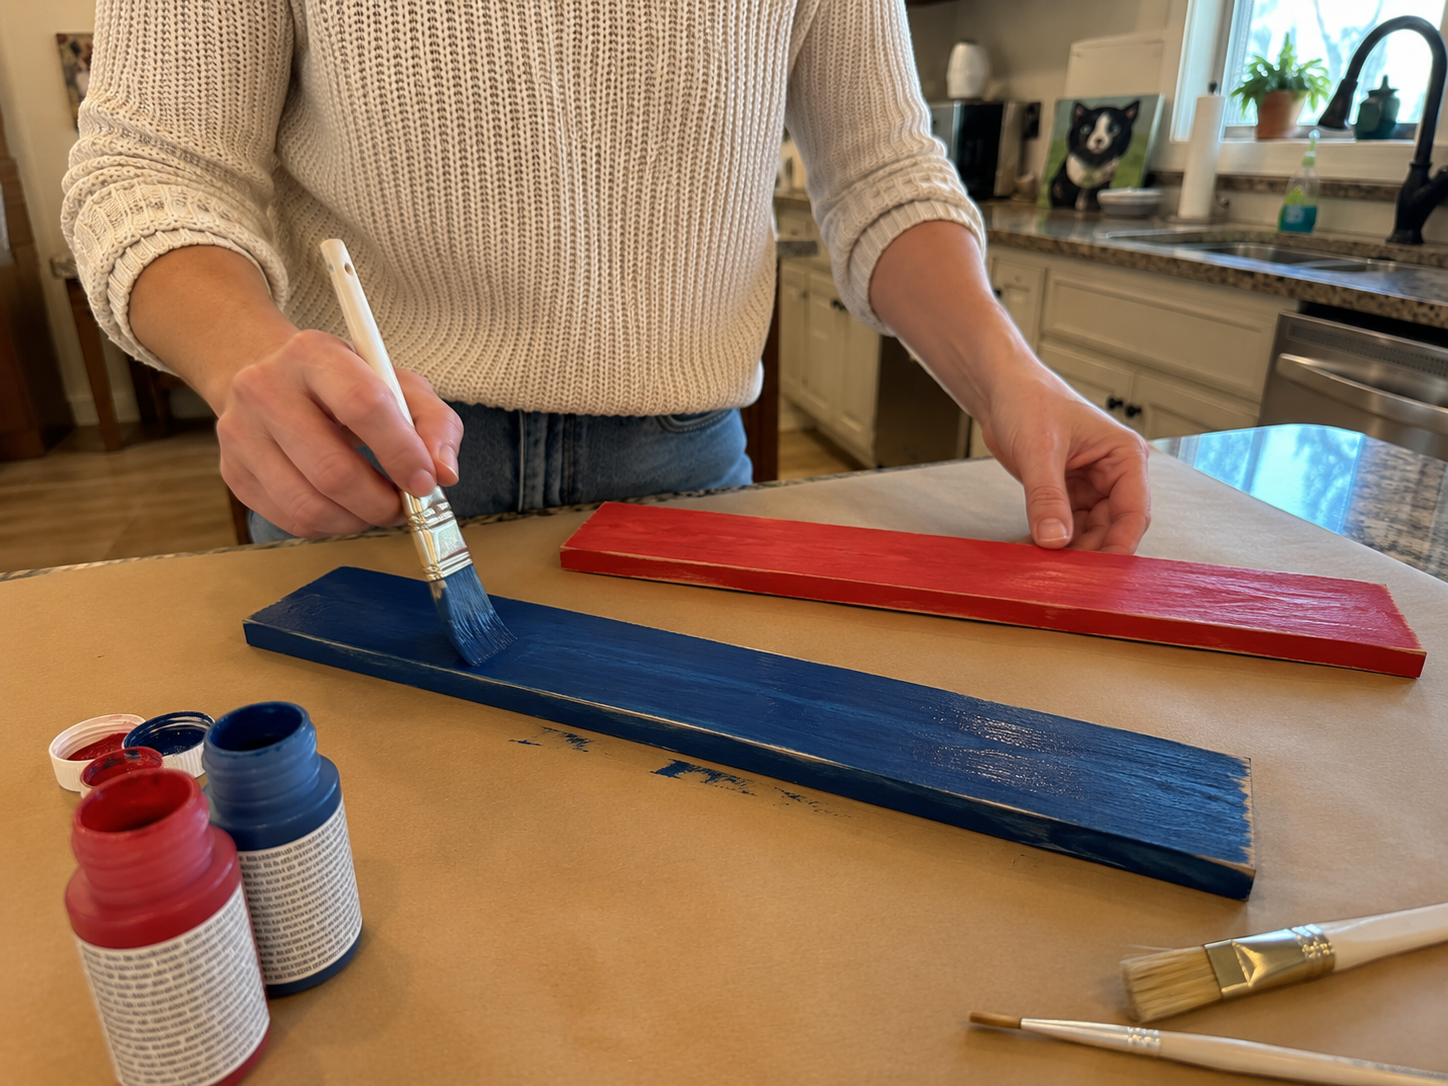
Step 2: Paint the Main Slats
Paint one jumbo craft stick or slat a solid navy blue. Paint a second jumbo stick rustic red, ensuring good, even coverage. Set them aside to dry thoroughly, ideally for at least 30-60 minutes between coats or until dry to the touch. These will form the main structure of your ‘4’.
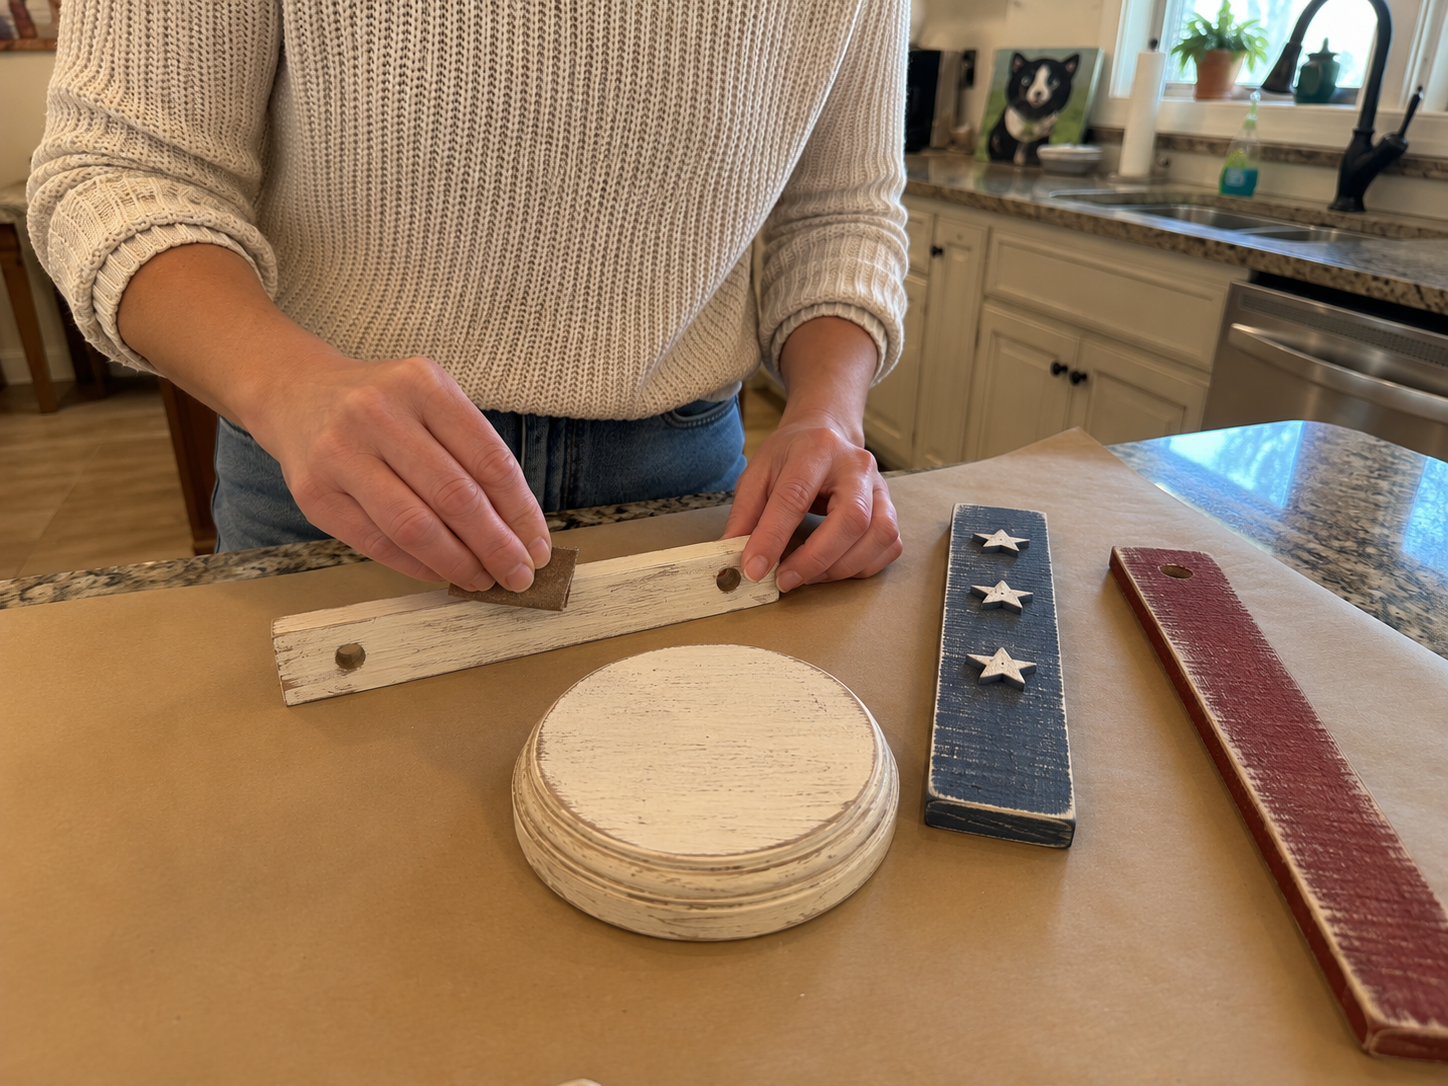
Step 3: Paint & Distress Sign Slat
Take the shorter wooden slat and paint it with white or cream chalk paint. Once completely dry, lightly distress all painted pieces (the base, red slat, blue slat, and sign slat) using sandpaper or a dry brush. Focus on edges and high spots to reveal hints of raw wood underneath, giving it that handmade, weathered appeal without looking too damaged.
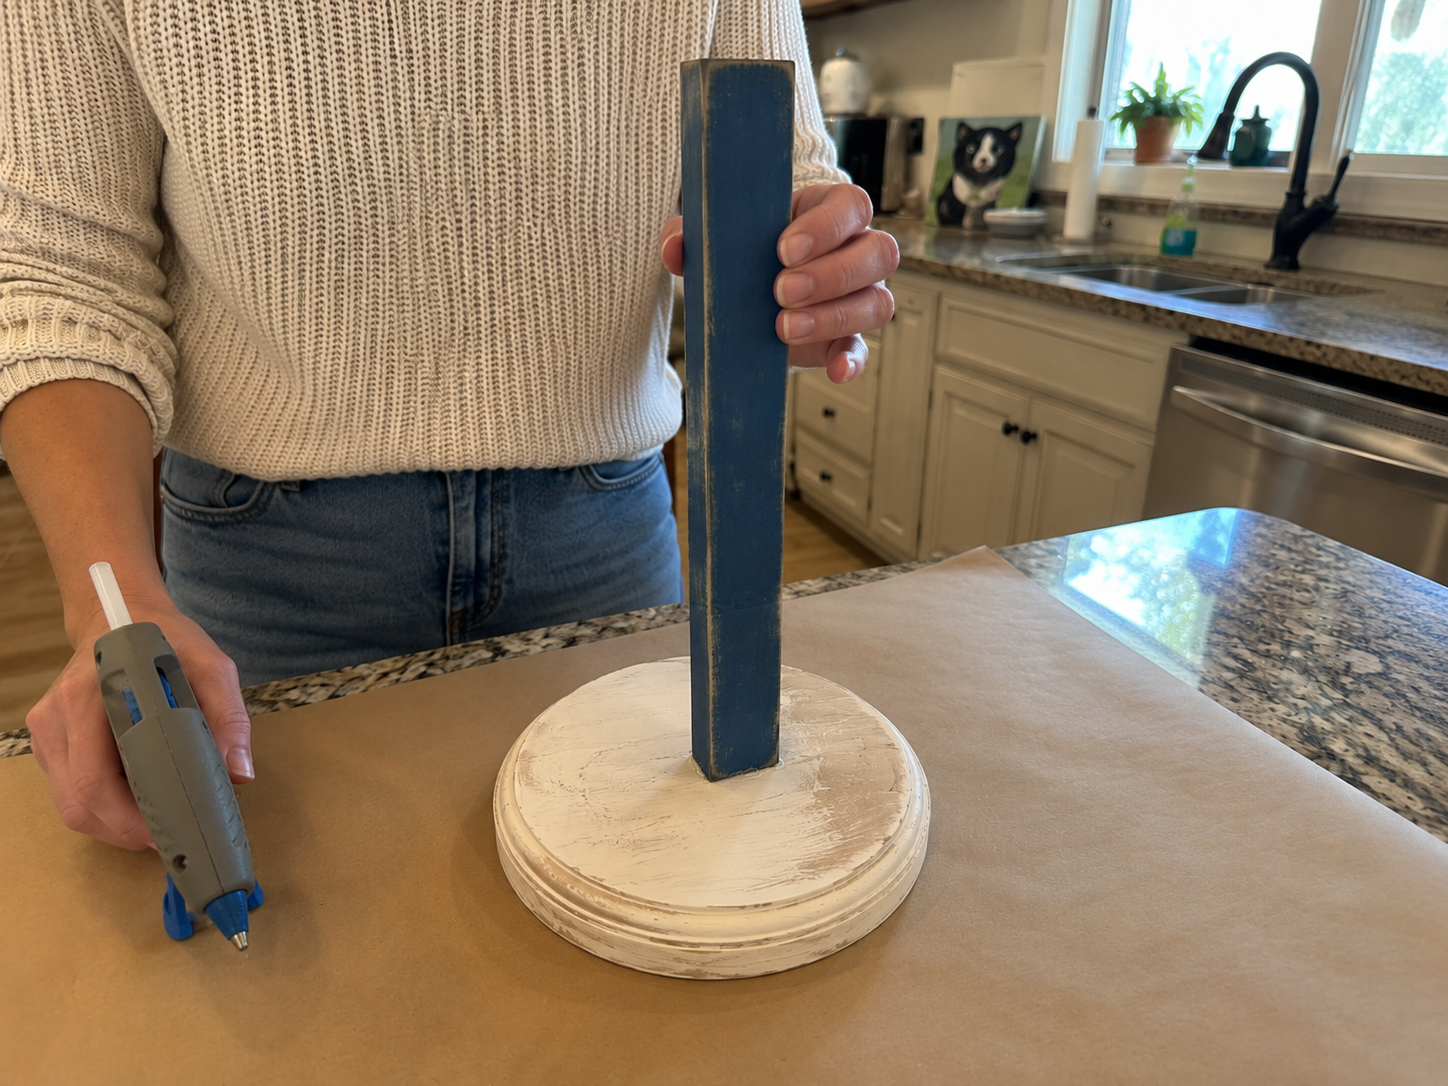
Step 4: Assemble the Vertical Support
Using your hot glue gun, apply a generous amount of hot glue to the bottom edge of the navy blue painted slat. Center it on the round wooden base and press firmly, ensuring it stands perfectly straight and secure. Hold in place for 15-20 seconds until the glue sets and cools.
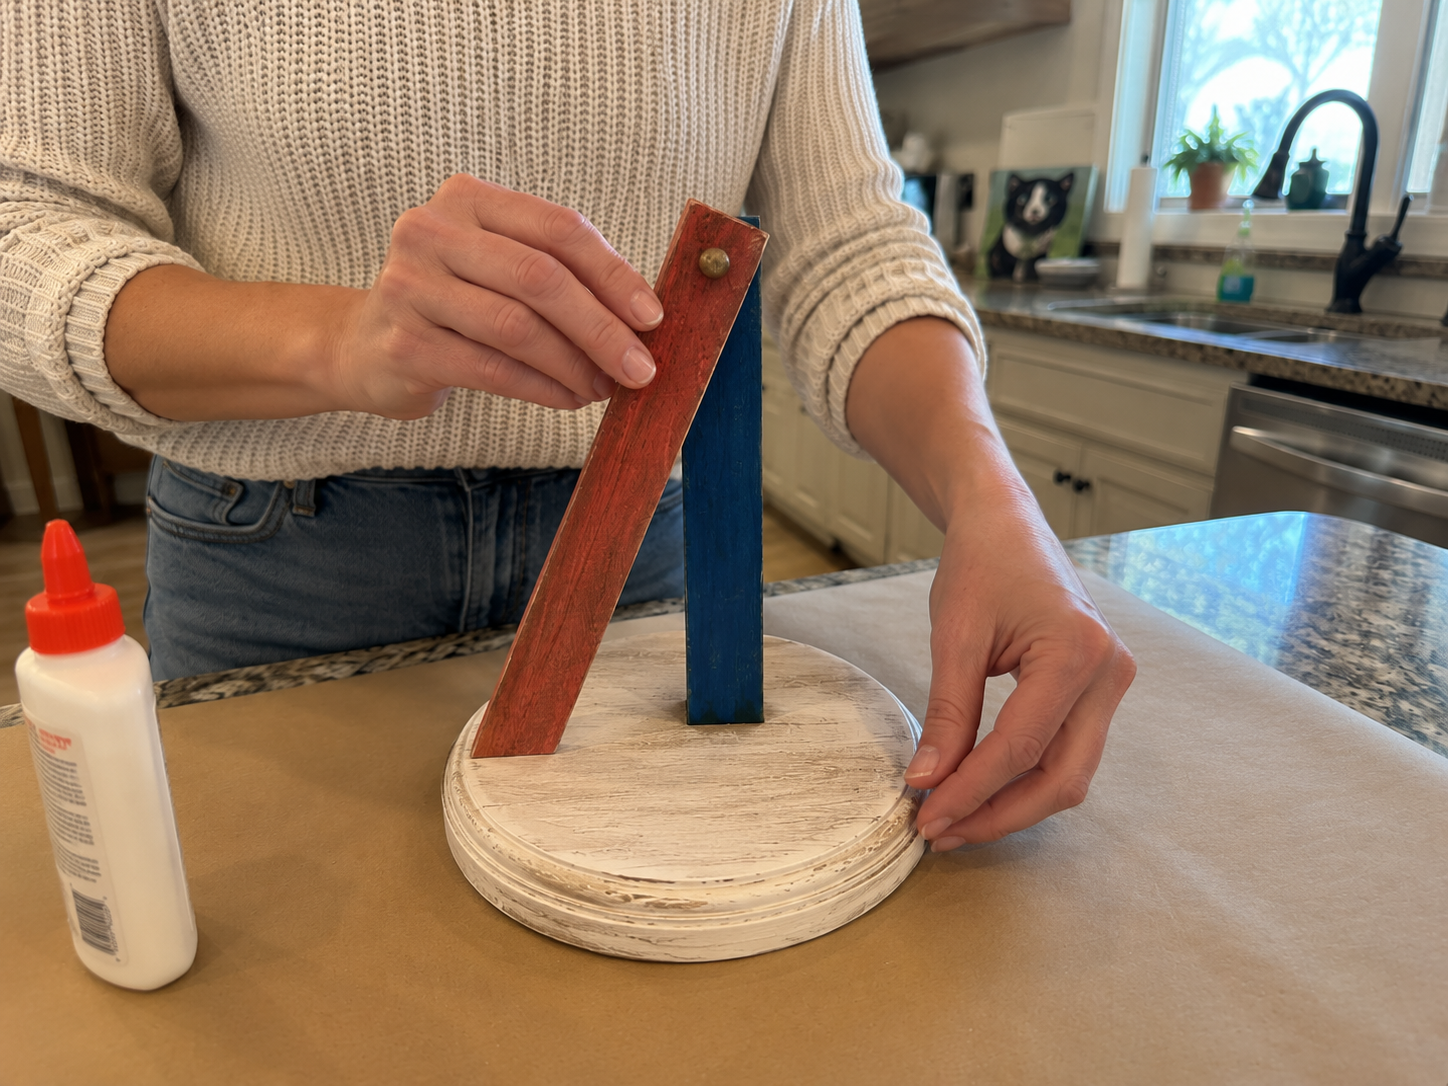
Step 5: Form the Angled ‘4’
Take the rustic red painted slat. Apply hot glue along one end and attach it to the top of the blue vertical slat, angling it downwards towards the front right side of the base. Apply more hot glue to the bottom end of the red slat and secure it firmly to the base, creating a simple stylized number ‘4’ with the two wooden pieces. If using, glue a small wooden bead where the red and blue slats connect at the top for an extra rustic detail.
📱 Craftino App
Make more crafts like this
1,000+ Patriotic / 4th of July ideas with photo guides & Pro Tips
✓ Step-by-step photo tutorials, nothing left out
✓ Pro Tips for every step
✓ Save crafts & browse fully offline
✓ New ideas added every week

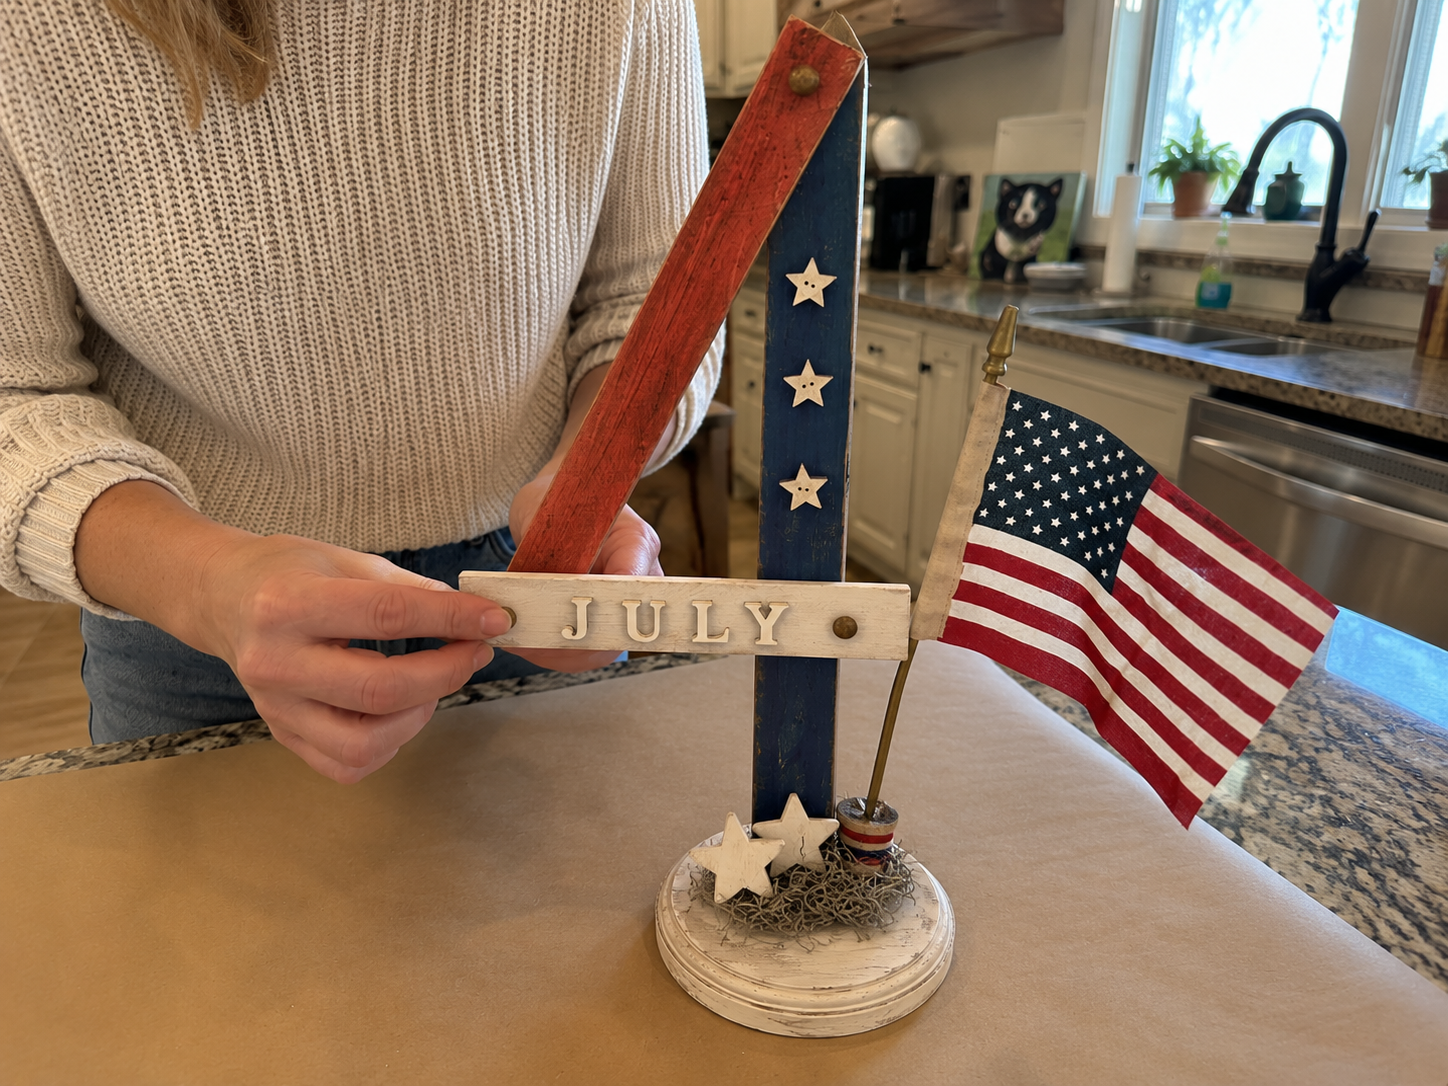
Step 6: Add the ‘JULY’ Sign
Position the short, distressed white or cream slat horizontally across the front of the blue vertical support, forming the crossbar of the ‘4’. Hot glue it securely in place. Then, carefully glue the mini alphabet letters to spell ‘JULY’ centered across this white sign slat.
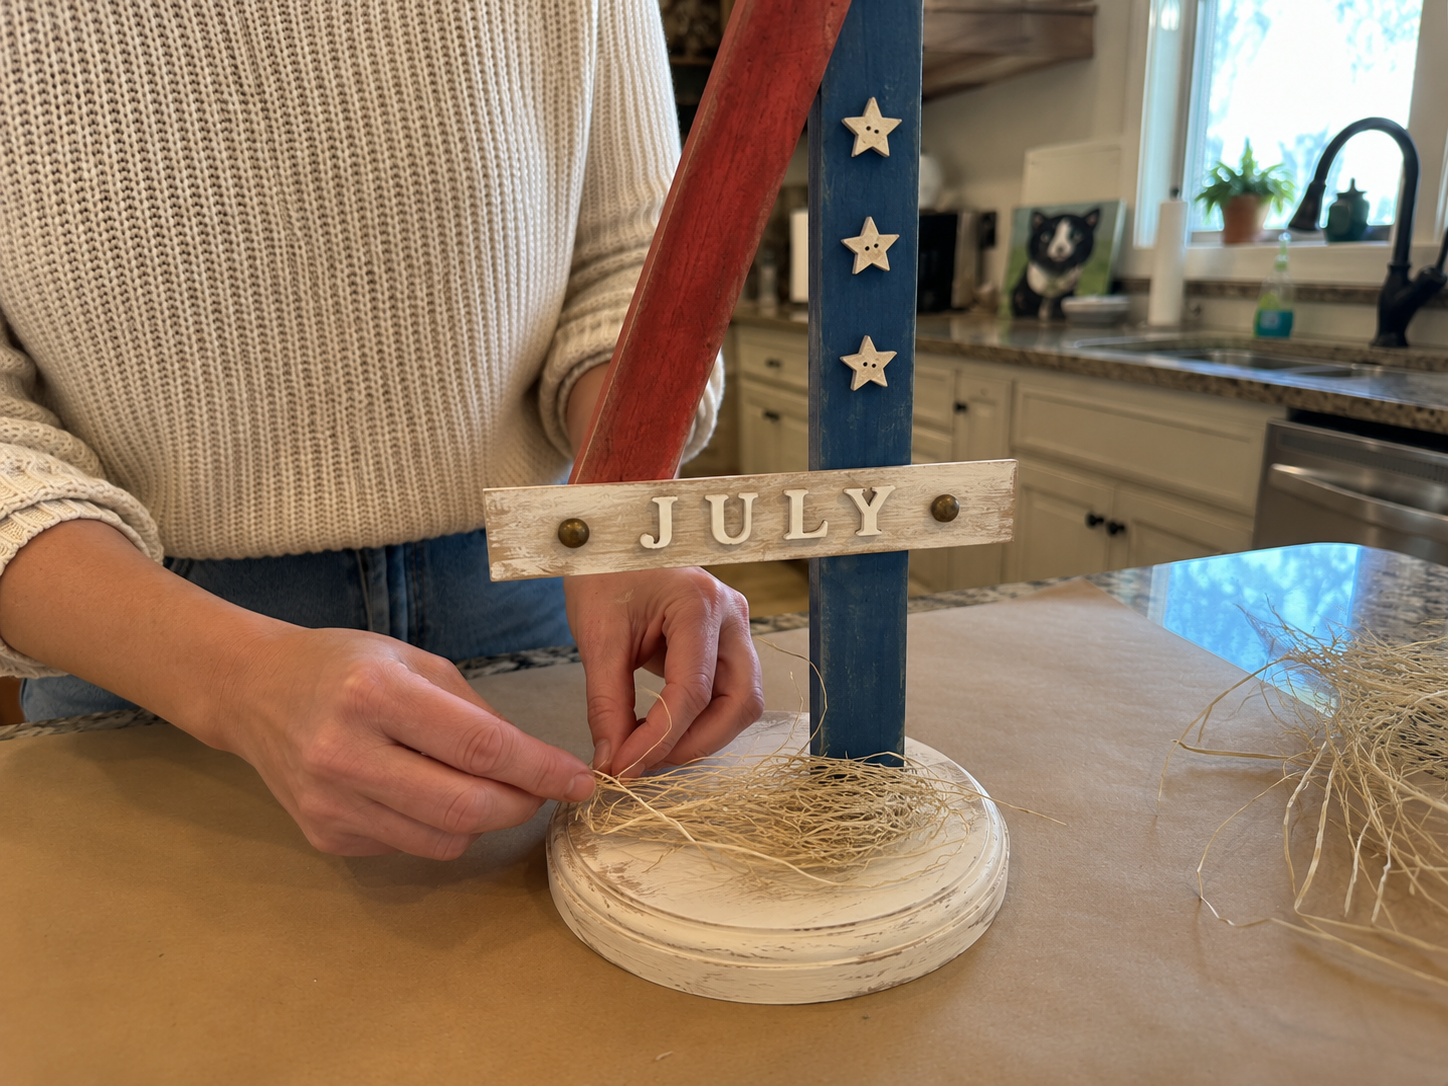
Step 7: Enhance with Rustic Details
Glue two small decorative brads or faux rusty thumbtacks, one on each side of the ‘JULY’ sign, towards the edges of the white slat, for an authentic handmade look. Then, glue three small wooden star cutouts vertically down the navy blue slat, spacing them evenly to create a cohesive design.

Step 8: Add Base Embellishments
Carefully hot glue a cluster of raffia or natural excelsior grass around the base of the stand. This helps to hide any visible glue lines from attaching the slats and creates a rustic, nest-like texture, adding warmth and a natural feel to your patriotic centerpiece.
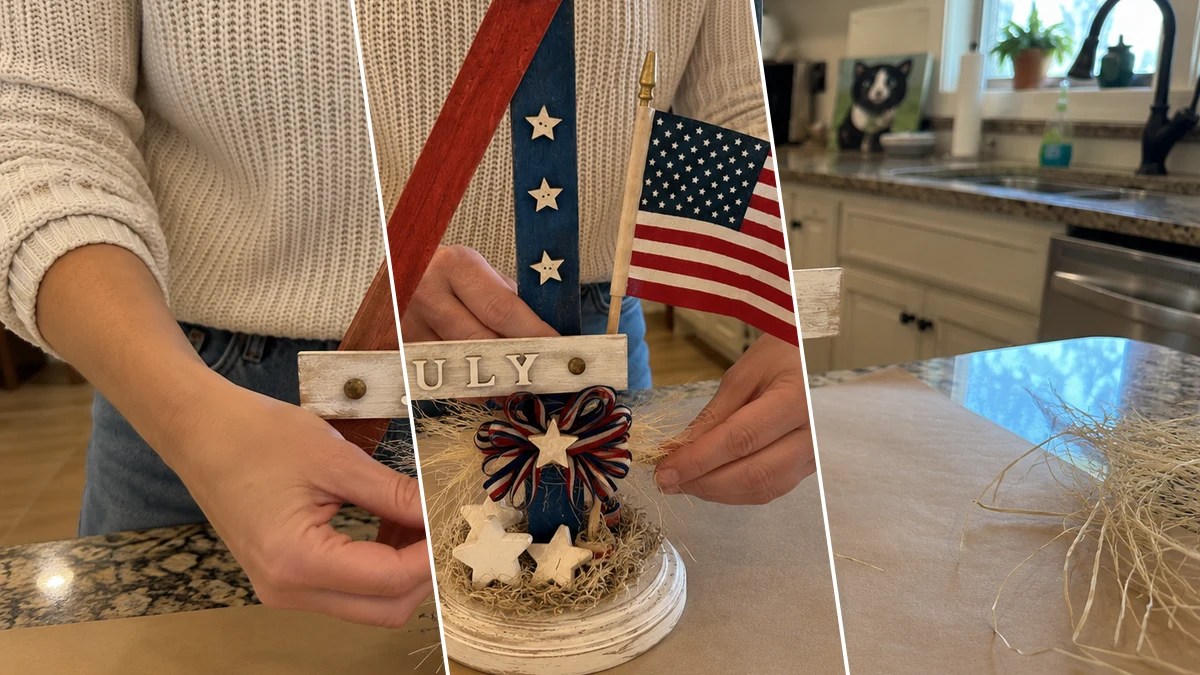
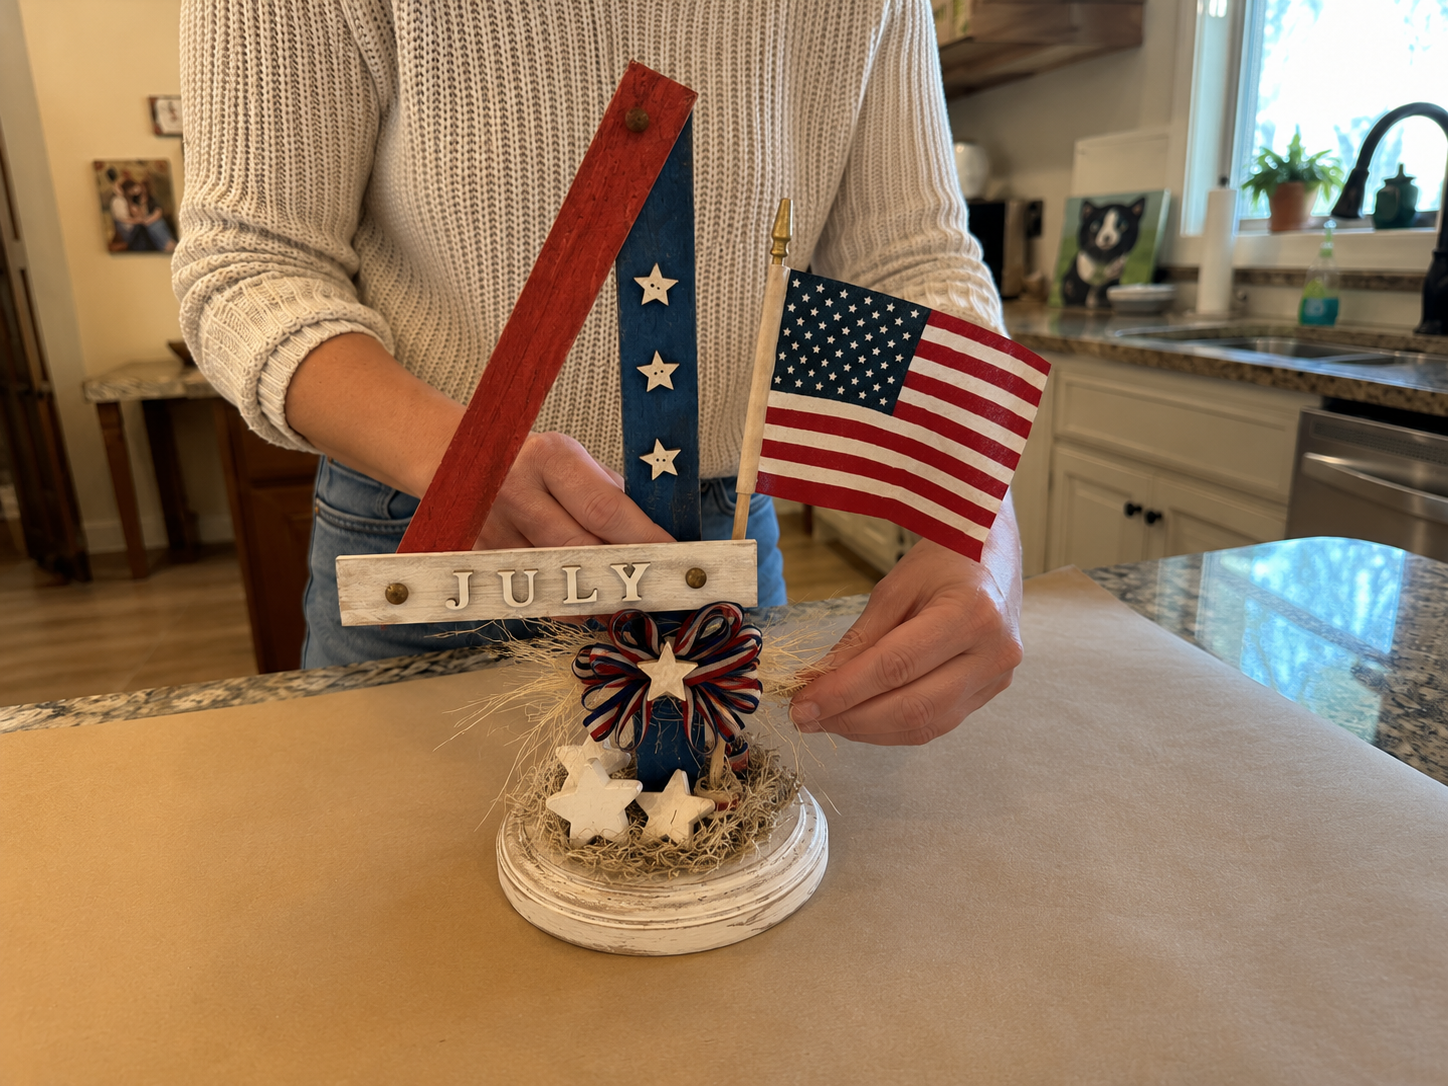
Step 9: Incorporate the Mini Flag
Attach the mini American flag on a stick to the right side of the base, slightly behind the ‘JULY’ sign. You may need to trim the stick or glue it securely so it stands upright and adds patriotic height to the display. Ensure it’s stable and won’t wobble.
Step 10: Final Embellishments & Balance
Create a small patriotic bow from your red-white-blue ribbon and hot glue it near the lower front center, just under the ‘JULY’ sign, nestled on top of the raffia. Glue a small wooden star in the middle of this bow. Finally, add one or two extra wooden stars near the base on top of the raffia, adjusting all elements for a balanced, finished look that feels complete and charming.

See also: Dollar Tree Patriotic Candle Centerpiece For 4th Of July
📋 Love staying organized while crafting? Check out our printable planners & craft designs at CraftersDT on Etsy and use code CRAFT20 for 20% off your entire order!
Your Rustic Freedom Flag Stand Shines!
There you have it, your very own Rustic Freedom Flag Stand is all done! Doesn’t it just look adorable sitting on the porch or brightening up your living room? I hope you love your new Patriotic / 4th of July decor as much as I do, and don’t forget to share pics if you make your own or try a fun variation!
📱 Craftino App
Make more crafts like this
1,000+ Patriotic / 4th of July ideas with photo guides & Pro Tips
✓ Step-by-step photo tutorials, nothing left out
✓ Pro Tips for every step
✓ Save crafts & browse fully offline
✓ New ideas added every week
Frequently Asked Questions
How much does it cost to make the Rustic Freedom Flag Stand: DIY 4th of July Decor?
The total cost to make the Rustic Freedom Flag Stand: DIY 4th of July Decor is typically around $12-15, especially if you get most of your supplies from Dollar Tree. This budget-friendly project uses inexpensive craft items for a big impact.
How long does it take to complete the Rustic Freedom Flag Stand DIY?
It takes about 40-60 minutes to complete the Rustic Freedom Flag Stand DIY from start to finish. This time frame includes steps like painting, gluing, and allowing for some drying time between coats.
Is the Rustic Freedom Flag Stand: DIY 4th of July Decor project suitable for beginners?
Yes, the Rustic Freedom Flag Stand: DIY 4th of July Decor project is very suitable for beginners. It involves simple techniques like painting and hot gluing, making it an easy and fun craft for all skill levels.
Where can I buy supplies for this Dollar Tree Patriotic / 4th of July craft?
You can find most of the supplies for this Dollar Tree Patriotic / 4th of July craft at Dollar Tree, including wood pieces, paint, and flags. Other craft stores like Hobby Lobby or Walmart also carry similar affordable materials if you can’t find everything at Dollar Tree.
Can I use the Rustic Freedom Flag Stand outdoors for Patriotic / 4th of July celebrations?
The Rustic Freedom Flag Stand is best suited for indoor use or covered outdoor areas to protect it from the elements. If you plan to use it fully outdoors, you should apply 2-3 coats of a clear outdoor sealant to protect the paint and wood from weather damage.
What kind of glue works best for assembling the Rustic Freedom Flag Stand?
A hot glue gun works best for quickly assembling the Rustic Freedom Flag Stand, providing a strong, fast bond for the wooden pieces. For extra durability, especially if you’re worried about heat or moisture, you can also use E6000 craft adhesive, allowing 24-72 hours for a full cure.
How many small flags do I need for the Rustic Freedom Flag Stand?
You will typically need 2-3 small American flags for the Rustic Freedom Flag Stand to create a full and festive look. Dollar Tree often sells packs of mini flags, making it easy to grab the quantity you need.
Can I customize the colors of my Rustic Freedom Flag Stand: DIY 4th of July Decor?
Absolutely, you can customize the colors of your Rustic Freedom Flag Stand: DIY 4th of July Decor! While traditional red, white, and blue are popular, you could try a distressed white, light blue, and tan for a more farmhouse look, or even add glitter for extra sparkle.
What are some common mistakes to avoid when making this DIY 4th of July Flag Stand?
One common mistake to avoid when making this DIY 4th of July Flag Stand is rushing the drying process; ensure paint layers dry completely for 10-15 minutes before adding another coat to prevent smudging. Also, apply glue in controlled amounts to avoid messy overflows that can be hard to hide.
Is the Rustic Freedom Flag Stand a good gift for a Patriotic / 4th of July celebration?
Yes, the Rustic Freedom Flag Stand makes an excellent and thoughtful gift for a Patriotic / 4th of July celebration. It’s a handmade, budget-friendly item perfect for hosts, neighbors, or anyone who loves festive Holiday & Seasonal decor.
Browse patriotic / 4th of july crafting supplies at Dollar Tree.
Inspiration / Credit: Wanda
Leave a Reply