
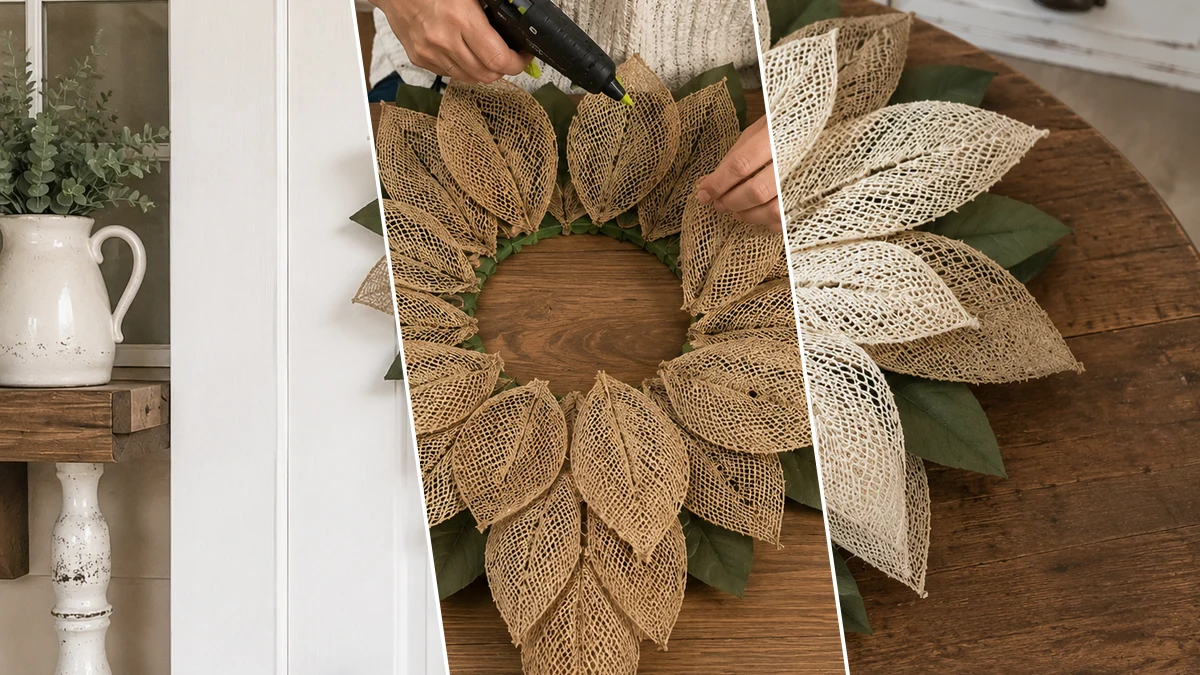
Ever walk into Dollar Tree for one thing and end up with a cart full of craft supplies you just *knew* you needed? Same, girl, same! That’s how I ended up with all the goodies to make this super cute Rustic Layered Flower Door Hanger: Farmhouse Charm on a Budget! It’s one of those projects that just makes your heart happy.
Theme: Farmhouse / Rustic
Materials Needed
- Wreath Base (Wire wreath form or sturdy cardboard circle)
- Ribbons & Mesh (Natural burlap ribbon, tan decorative mesh, open-weave natural/cream ribbon)
- Faux Greenery (Dark green faux leaf stems, faux eucalyptus greenery stems)
- Jute Twine
- Small Wood Button or Wood Slice
- Craft Essentials (Hot glue gun & glue sticks, floral wire, sharp scissors)
Why This Craft Works
This sweet door hanger is perfect for adding a touch of cozy Farmhouse / Rustic style anywhere in your home. I love hanging mine on our pantry door in the kitchen, but it would look just as darling on a bedroom door, in an entryway, or even as part of a gallery wall. It’s got that warm, inviting vibe that makes any space feel more like home.
And can we talk about the price tag? You know I’m all about that budget-friendly DIY life! This whole project, using mostly Dollar Tree supplies, ran me about $10-13 total. Seriously, you get so much Farmhouse charm without breaking the bank. It’s my kind of crafting!
Don’t even worry if you’re a crafting newbie, because this one is super easy peasy! It took me about 40-60 minutes from start to finish, which is perfect for a quick afternoon project. So if you need a last-minute gift or just want to add some quick Home Decor flair, this Rustic Layered Flower Door Hanger is perfect for anyone, even kids with a little help.
Step-by-Step Instructions for Rustic Layered Flower Door Hanger: Farmhouse Charm on a Budget!
Okay, enough chatting, let’s get those craft hands ready! You are going to have so much fun putting together this Rustic Layered Flower Door Hanger. It’s honestly one of the most satisfying projects because you see it come together so quickly, usually in about 40-60 minutes. Grab your supplies, put on some tunes, and let’s make some Farmhouse charm!
Step 1: Prepare Base & Cut Materials
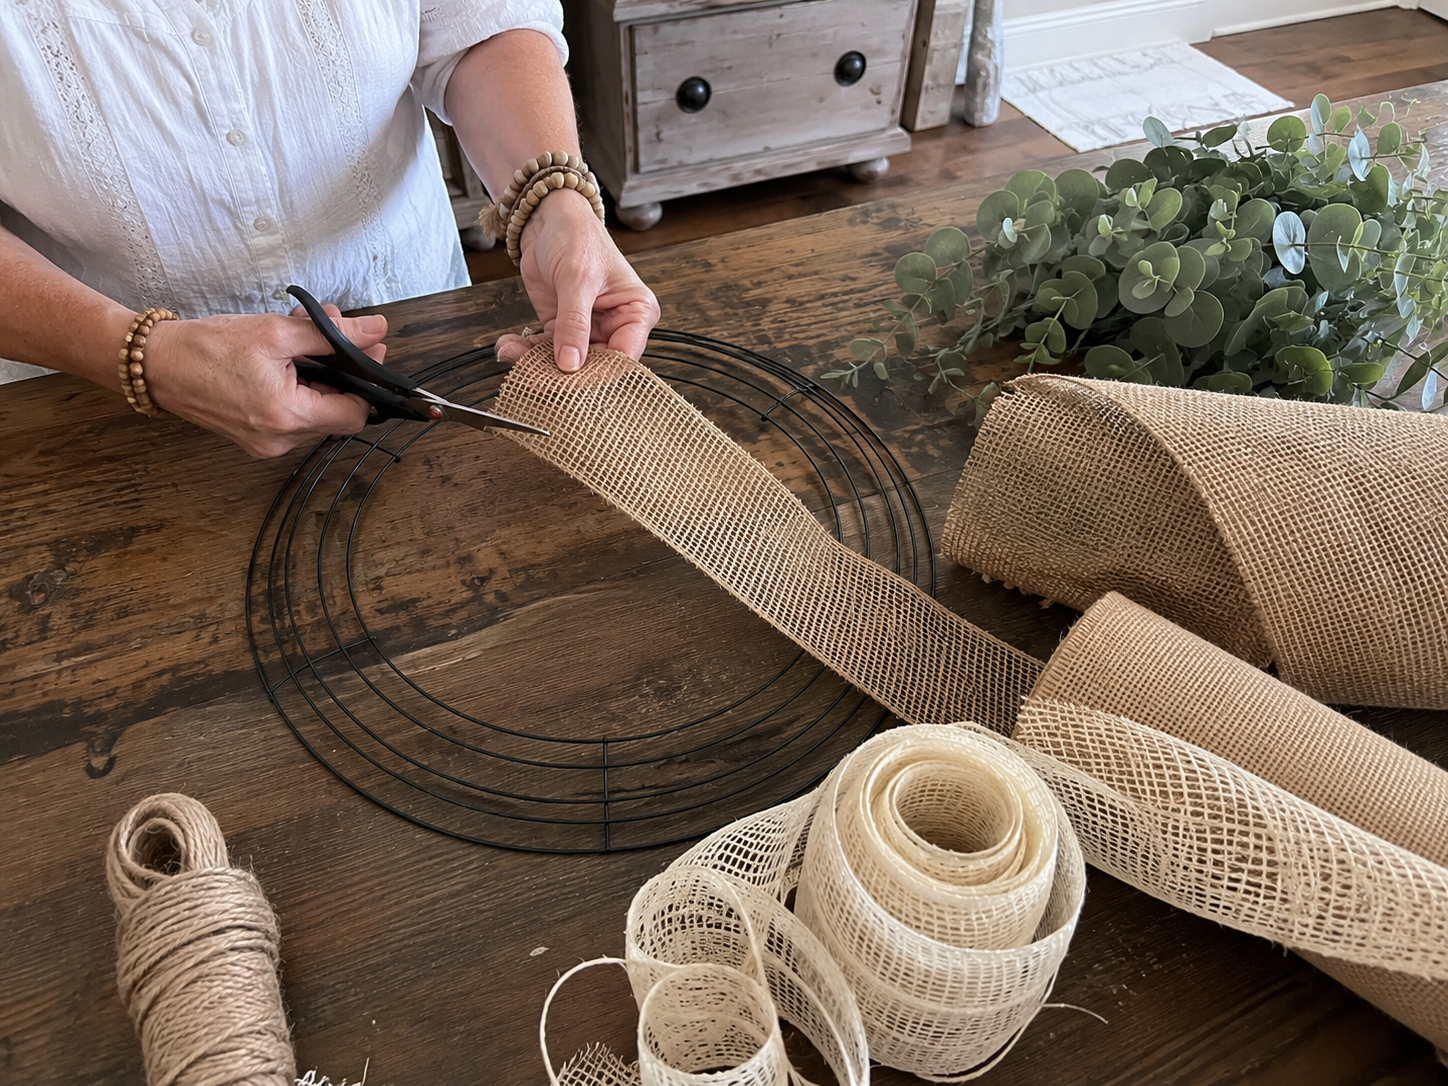
Begin by selecting your wreath base; a wire wreath form or a sturdy cardboard circle works perfectly. Gather all your ribbons, mesh, and faux greenery. Using sharp scissors, cut the dark green faux leaves from their stems if necessary. For the petals, cut various lengths and widths of burlap, tan mesh, and open-weave cream ribbon, anticipating different sizes for each layer. The outer burlap petals will be the largest, tapering to smaller open-weave inner petals. Aim for pieces approximately 8-12 inches long for the main petals, and 5-7 inches for inner ones, adjusting for your desired flower size.
Step 2: Attach Back Green Leaves
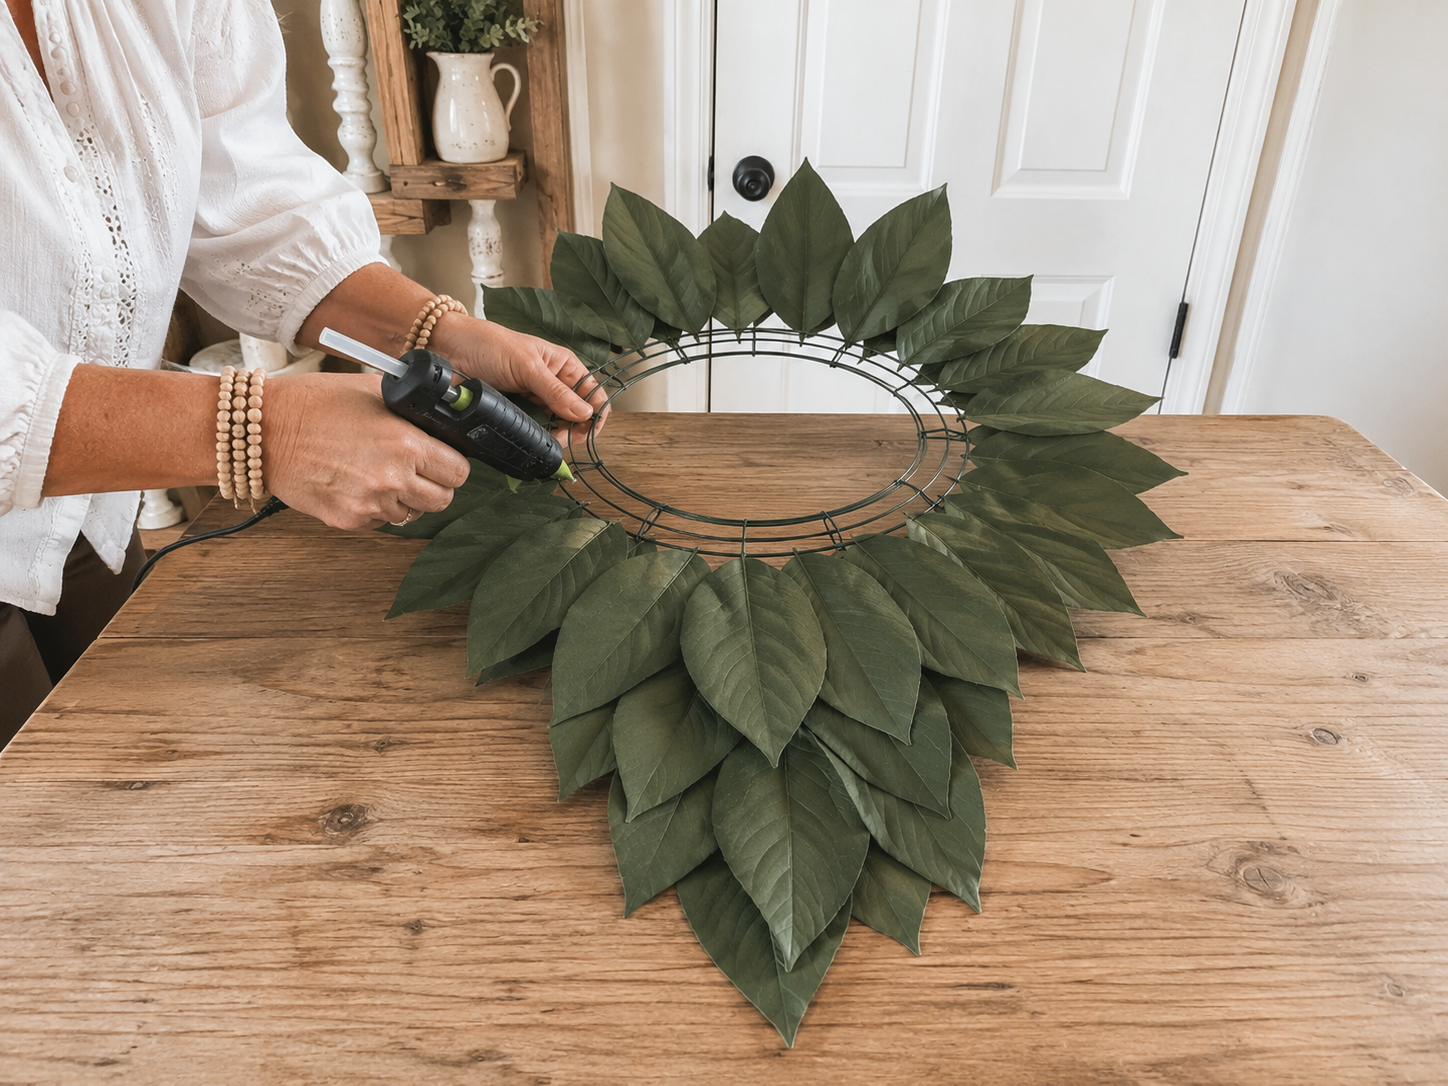
Take your broad dark green faux leaves. Arrange them around the outer edge of your wreath form, ensuring they extend slightly beyond the form to create a lush, natural backdrop for your petals. Use floral wire to secure the stems to the wire wreath form, or hot glue them firmly if using a cardboard base. Overlap them slightly to create a full, continuous green layer.
Step 3: Add Outer Burlap Petals
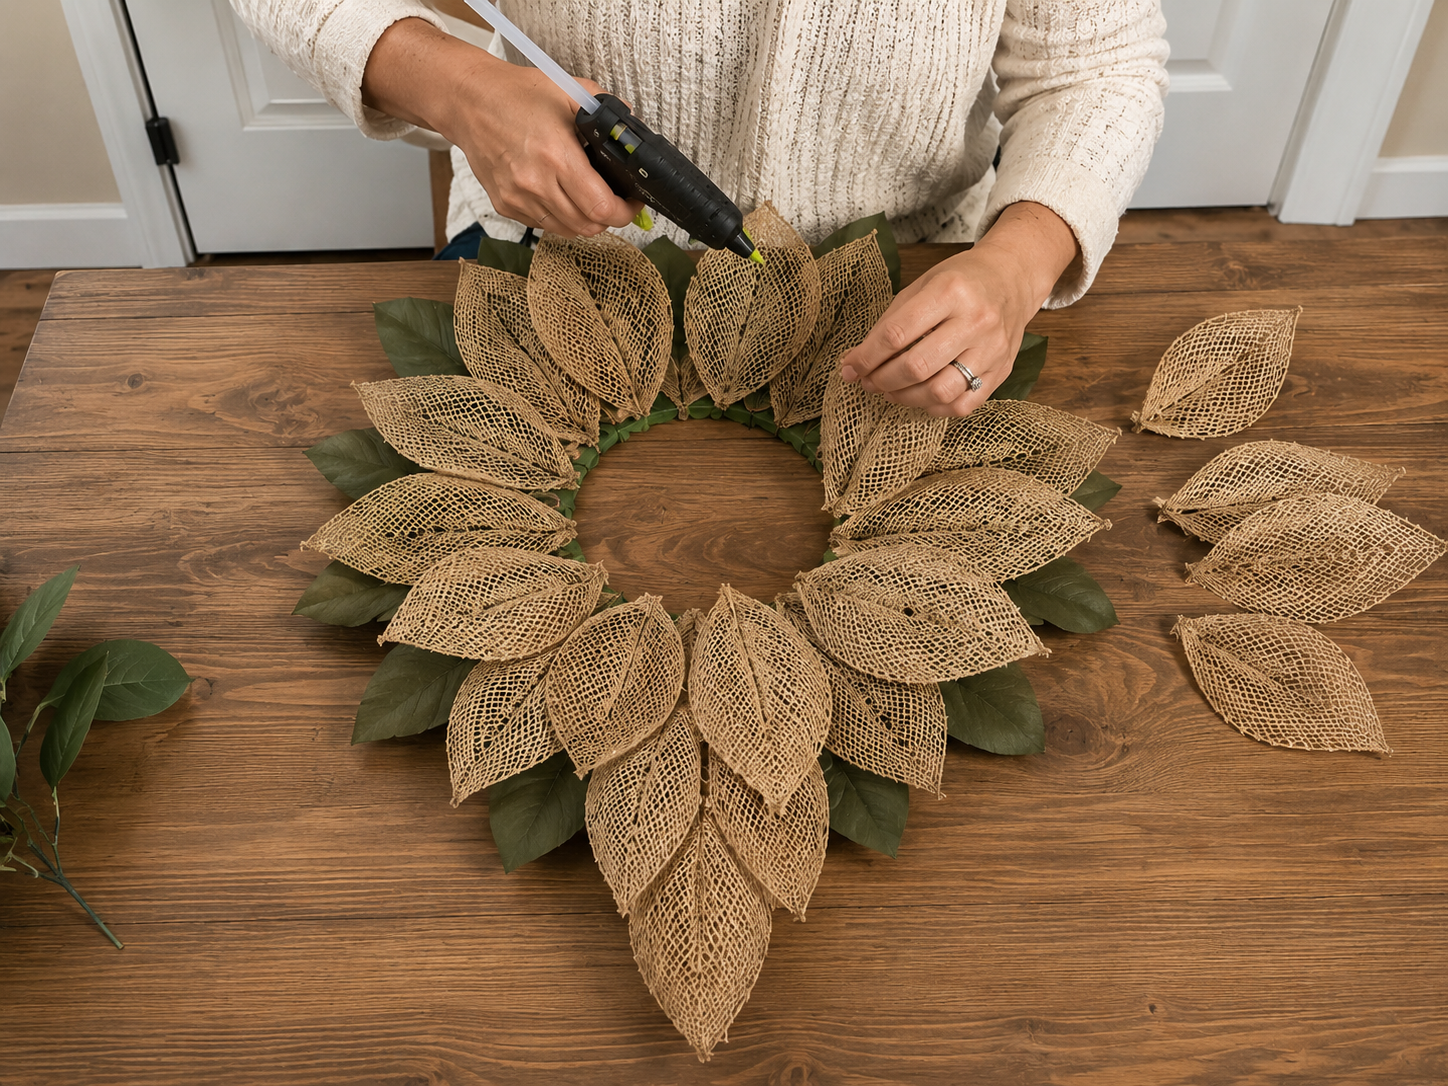
Now, it’s time for your first layer of petals. Take your cut pieces of tan burlap ribbon or decorative mesh. To form a petal, fold a piece in half lengthwise, then bring the two outer edges towards the center back, creating a pointed top and a gathered base. Apply hot glue to the gathered base and press it firmly onto the wreath form, just inside and slightly overlapping the green leaves. Continue this process, placing the petals evenly around the form, ensuring they are consistent in size and shape.
Step 4: Layer Main Open-Weave Petals
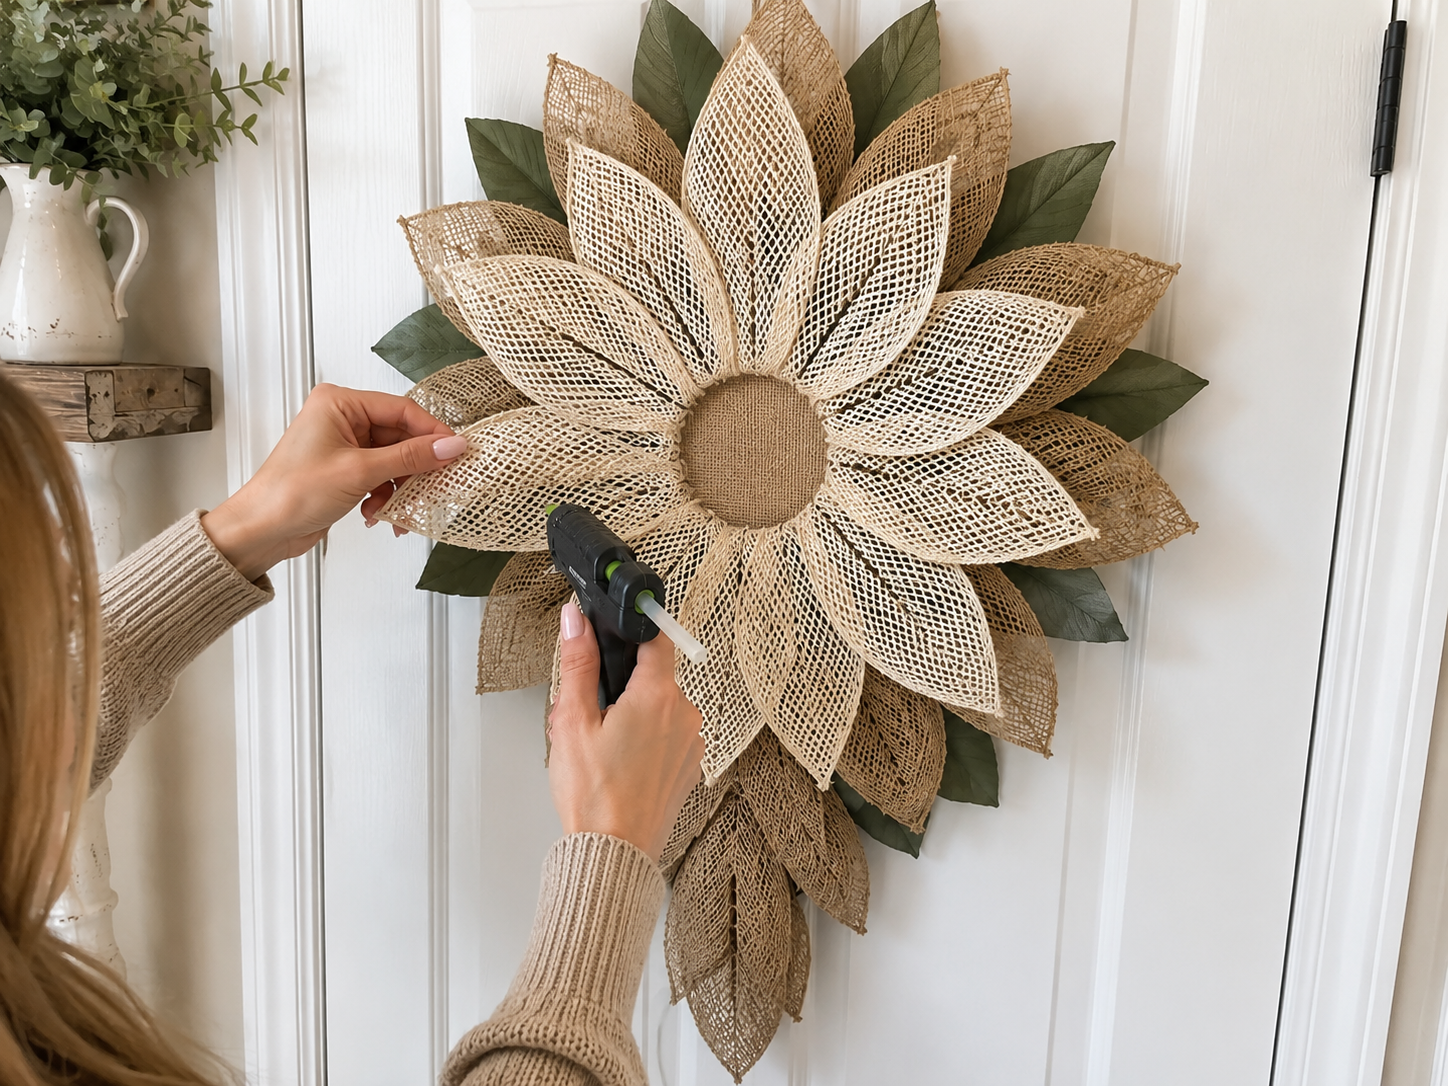
Next, create the main visible layer with your cream lace/open-weave ribbon. These petals should be slightly smaller than the burlap ones but still substantial. Fold each piece in the same way – lengthwise, then bring outer edges to the center back to form a pointed petal. Hot glue these petals onto the wreath form, just inside and slightly overlapping the tan burlap layer. Stagger them between the burlap petals for a fuller, more dynamic look.
Step 5: Form Inner Petal Layer
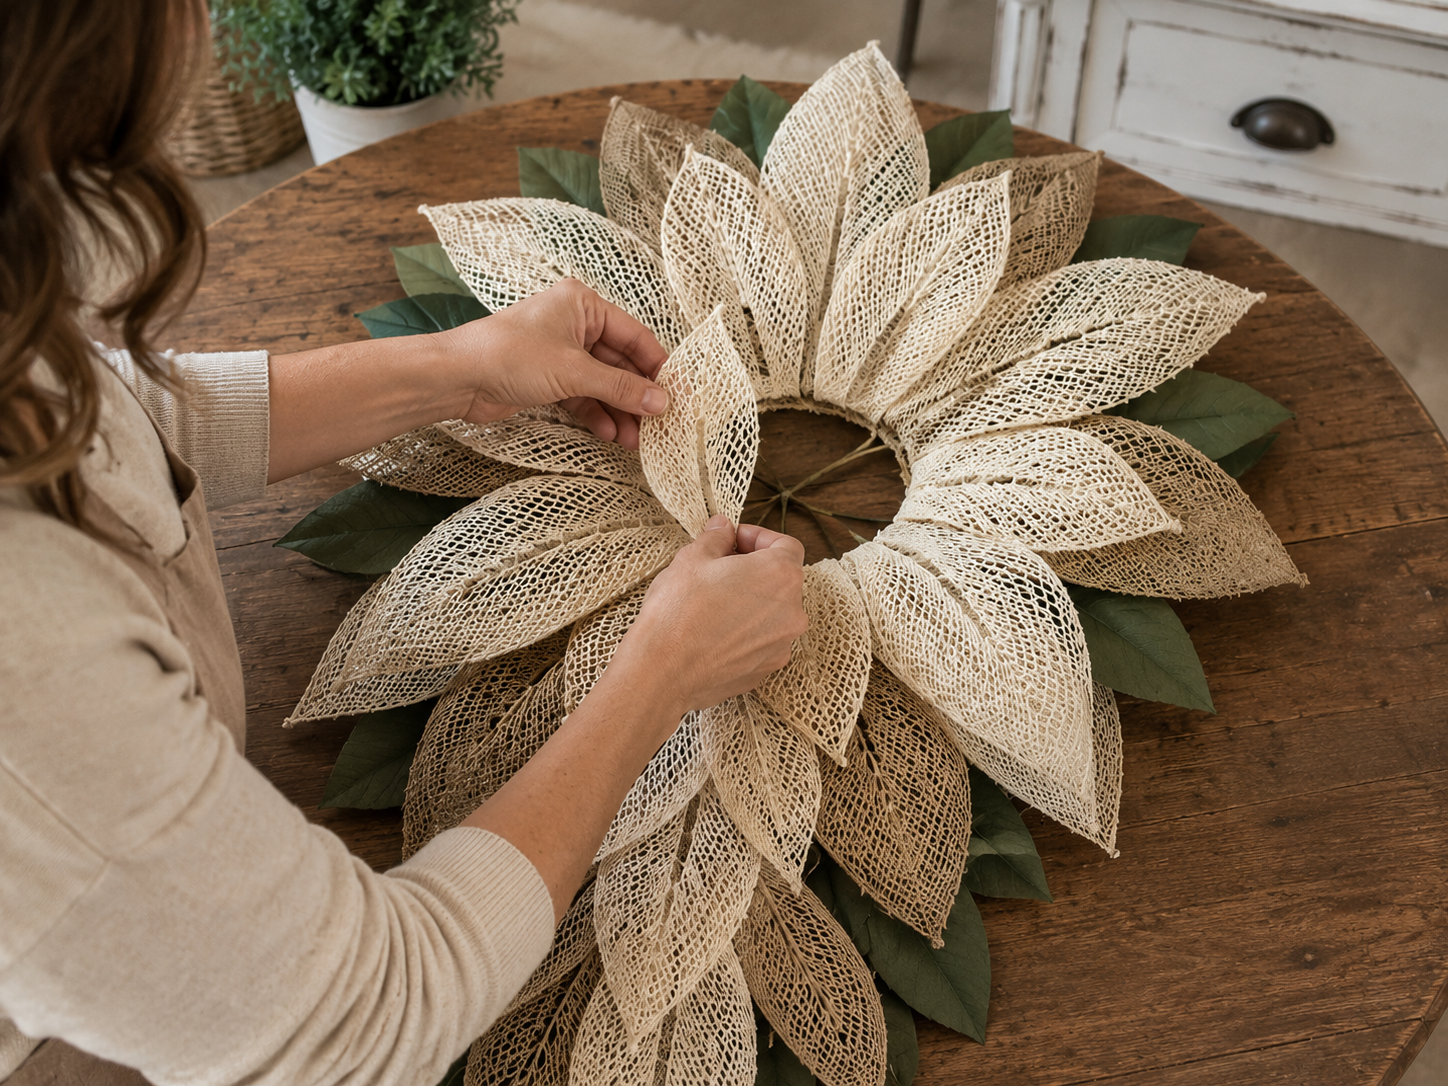
To add depth and transition to the center, create a smaller, tighter layer of petals using the same open-weave natural/cream ribbon. These petals will be shorter and narrower than the previous open-weave layer. Fold them into the petal shape and glue them in a tighter circle towards the center of the wreath form, ensuring they blend seamlessly with the larger open-weave petals.
📱 Craftino App
Make more crafts like this
1,000+ Farmhouse / Rustic ideas with photo guides & Pro Tips
✓ Step-by-step photo tutorials, nothing left out
✓ Pro Tips for every step
✓ Save crafts & browse fully offline
✓ New ideas added every week


Step 6: Craft the Burlap Center
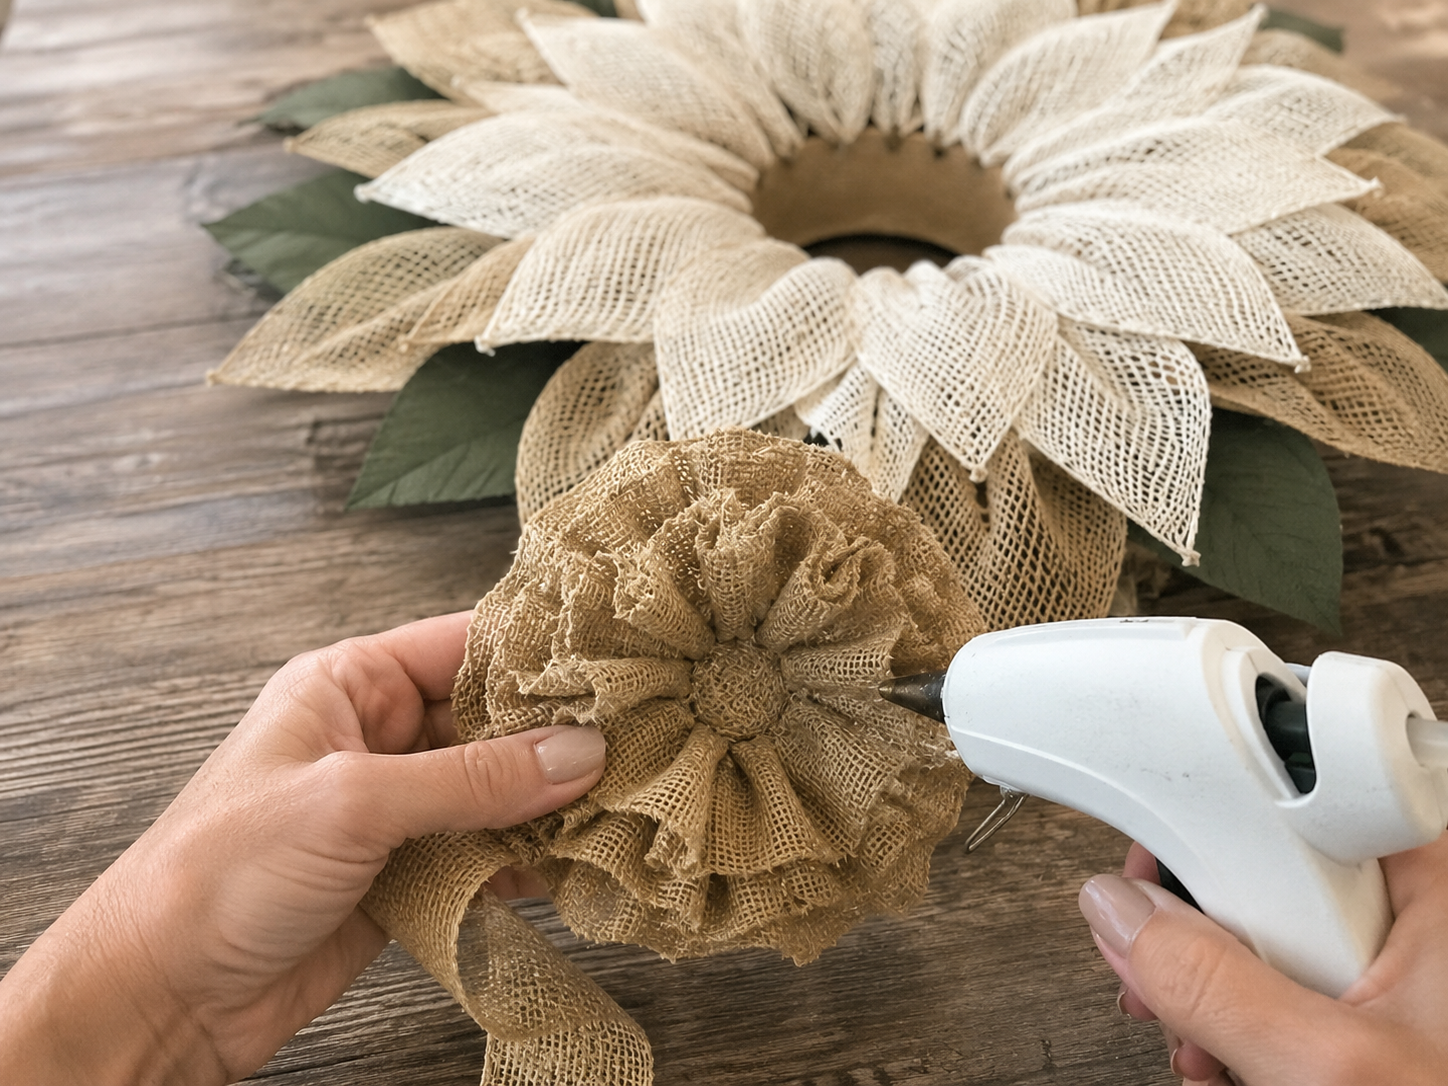
Take a longer piece of your natural burlap ribbon (the denser kind). Apply a line of hot glue along one long edge and carefully fold it over itself to create a clean, doubled edge. Then, apply a continuous line of hot glue along this folded edge and begin to roll and gather the burlap tightly into a spiral, scrunching it as you go to create a ruffled, textured flower center. Keep adding glue as you roll to secure each fold.
Step 7: Attach Center & Button
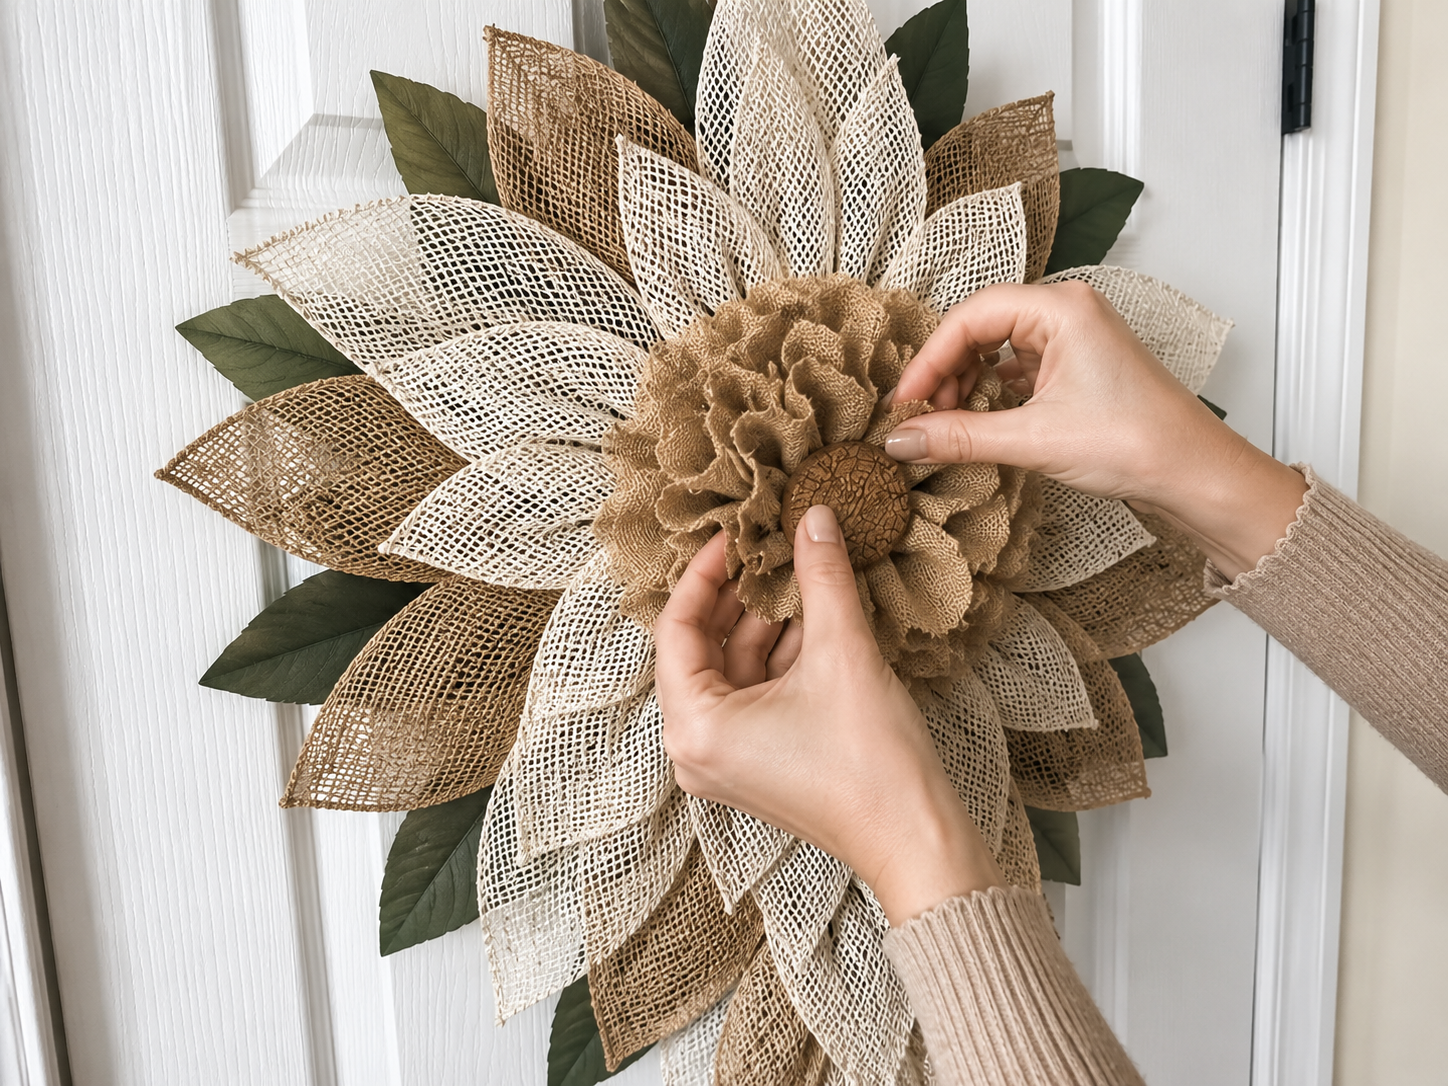
Once your burlap center is complete, apply a generous amount of hot glue to its entire underside. Carefully press it firmly into the very middle of your layered flower, holding it in place until the glue sets. Then, select your small round wood button or wood slice. Apply hot glue to its back and secure it precisely in the center of your gathered burlap piece. This adds a charming, finished touch.
Step 8: Secure Trailing Eucalyptus
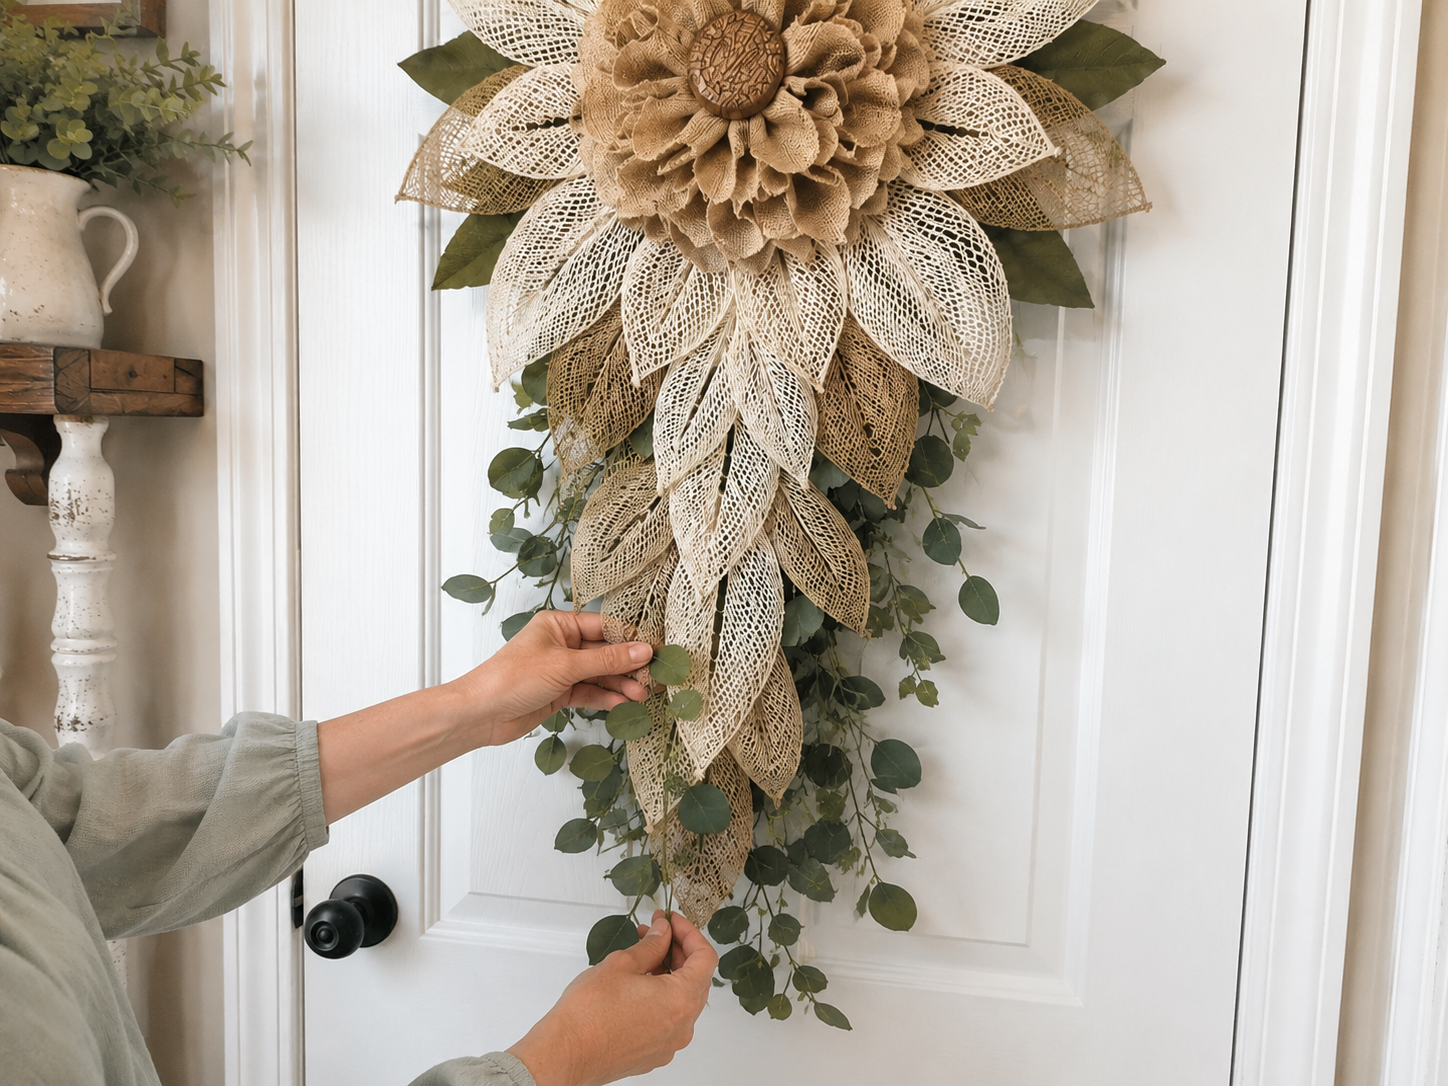
To add a graceful, cascading effect, take your faux eucalyptus greenery stems. Trim them to varying lengths, creating a natural look. Arrange them at the bottom of your layered flower, letting them trail slightly downwards. Use floral wire to secure the main stem portions to the wreath form, or hot glue them firmly to the base behind the lowest petals. Fan them out to create a full, organic drape.
Step 9: Create Hanging Loop
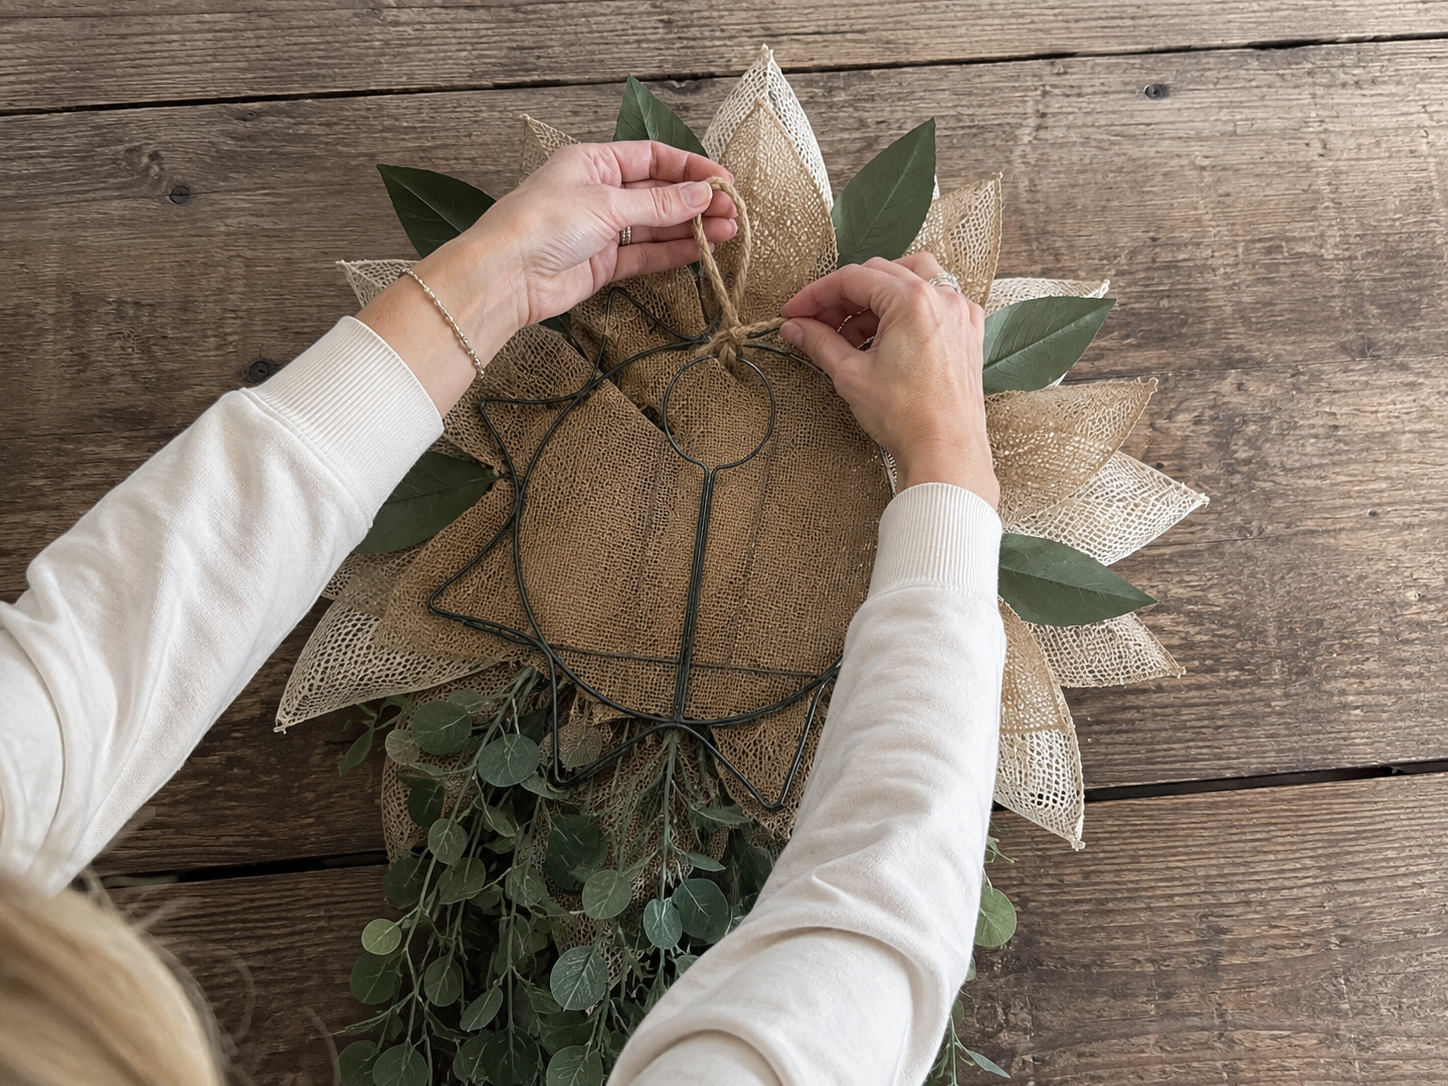
For easy display, create a sturdy hanging loop. Cut a piece of jute twine approximately 12-18 inches long, depending on your desired hanging length. Fold it in half to create a loop. Secure the two ends of the twine firmly to the top back of your wreath form using hot glue, or by tying them around the wire frame and securing with floral wire. Ensure the knot or glued points are strong enough to hold the weight of your hanger.
Step 10: Display Your Door Hanger
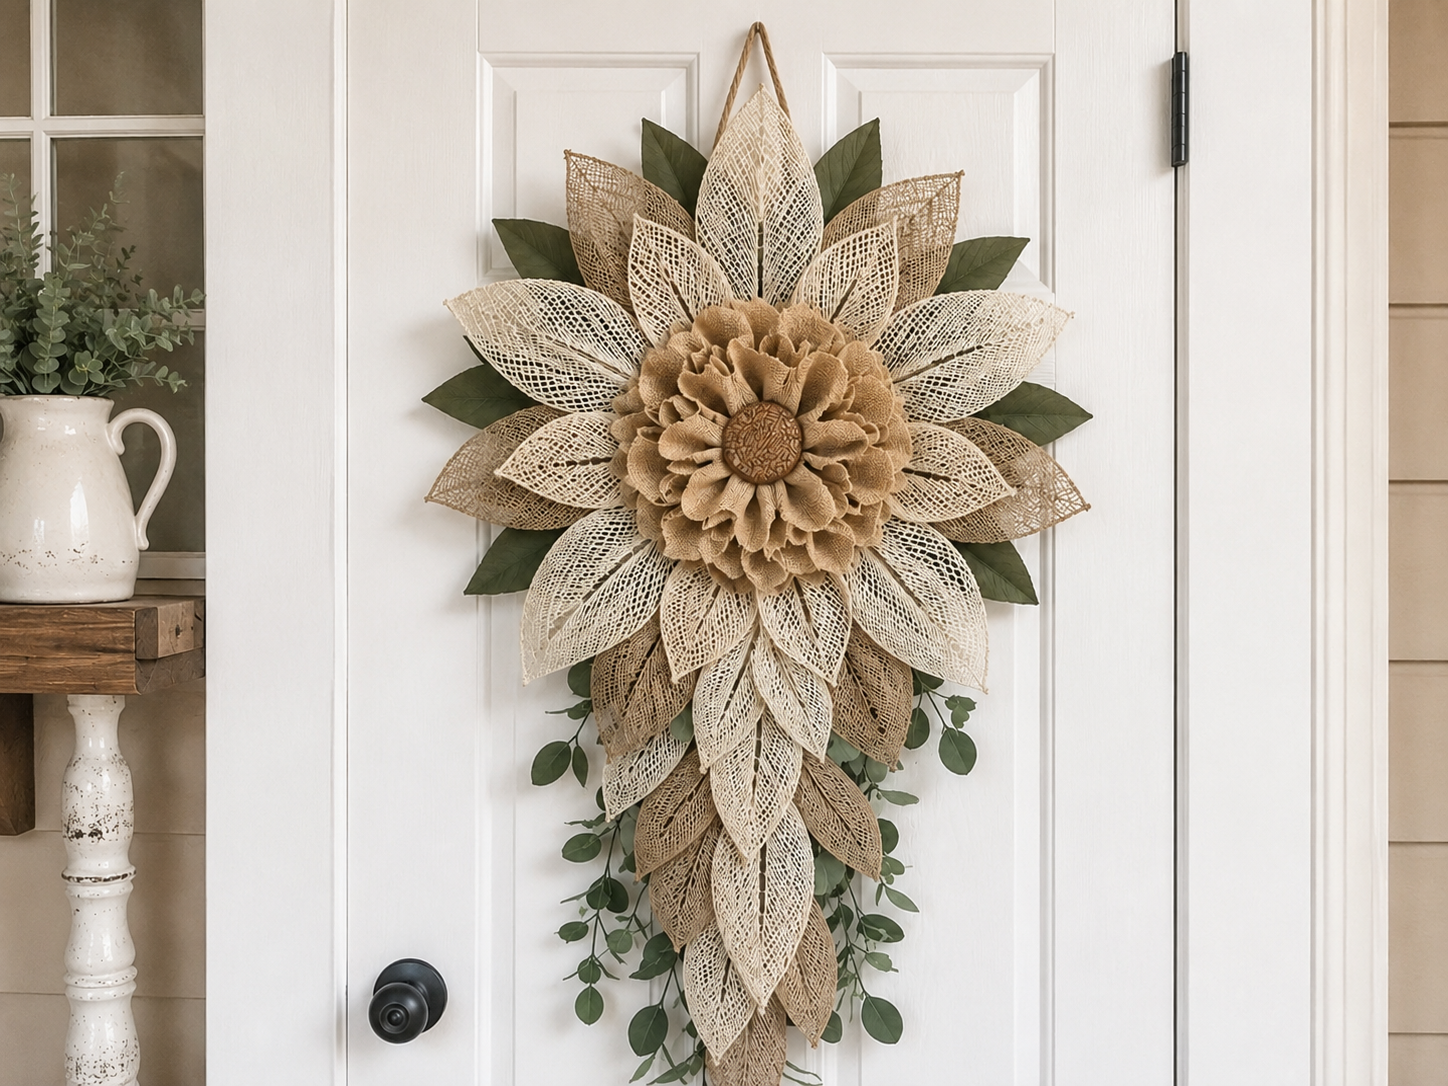
Congratulations! Your rustic layered flower door hanger is now complete. Choose a prominent spot on your front door, an interior wall, or even above a mantelpiece to showcase your handmade creation. The simple farmhouse charm will instantly elevate your decor, adding a welcoming touch to any space. Step back and admire your beautiful, budget-friendly work of art!
See also: Elegant Farmhouse Grapevine Wreath Diy Door Decor
📋 Love staying organized while crafting? Check out our printable planners & craft designs at CraftersDT on Etsy and use code CRAFT20 for 20% off your entire order!
Your Farmhouse Layered Flower Charm is Ready!
Woohoo, you did it, crafter! Your gorgeous Rustic Layered Flower Door Hanger: Farmhouse Charm on a Budget! is all done and ready to make your home extra special. Hang it up right away, or wrap it up for a sweet gift. Don’t forget to share your version, I’d love to see how you made it your own!
📱 Craftino App
Make more crafts like this
1,000+ Farmhouse / Rustic ideas with photo guides & Pro Tips
✓ Step-by-step photo tutorials, nothing left out
✓ Pro Tips for every step
✓ Save crafts & browse fully offline
✓ New ideas added every week
Frequently Asked Questions
What is the total cost for making this Dollar Tree Rustic Layered Flower Door Hanger?
The total cost for this Rustic Layered Flower Door Hanger: Farmhouse Charm on a Budget! is approximately $10-13. This budget-friendly project primarily uses supplies from Dollar Tree for maximum savings.
How long does it take to complete this DIY Farmhouse / Rustic door hanger project?
Crafting this Farmhouse / Rustic door hanger takes about 40-60 minutes from start to finish. It’s a quick project perfect for an afternoon or evening craft session.
Is the Rustic Layered Flower Door Hanger suitable for beginner crafters?
Yes, this Rustic Layered Flower Door Hanger is definitely beginner-friendly. The steps are simple and don’t require any advanced crafting skills, making it a great first Home Decor DIY.
What type of glue should I use for assembling my Rustic Layered Flower Door Hanger?
A hot glue gun with all-purpose hot glue sticks is ideal for assembling your Rustic Layered Flower Door Door Hanger. It provides a strong, fast-drying bond crucial for layered elements.
Where can I buy the supplies for this budget-friendly Farmhouse / Rustic craft?
Most of the supplies for this Farmhouse / Rustic door hanger can be found at Dollar Tree. You can also check craft stores like Hobby Lobby or Walmart for similar items if your Dollar Tree stock is low.
How many layered flowers do I need to make for this door hanger design?
You’ll typically need to create 3-5 layered flowers of varying sizes for a full and charming Rustic Layered Flower Door Hanger. This quantity ensures a beautiful, balanced look for your Home Decor.
Can I customize the colors for my DIY Rustic Layered Flower Door Hanger?
Absolutely, you can easily customize the colors for your Rustic Layered Flower Door Hanger to match any Farmhouse / Rustic decor or seasonal theme. Just pick your favorite colors of craft paper or paint.
Is this Rustic Layered Flower Door Hanger a good DIY gift idea for an occasion?
Yes, this Rustic Layered Flower Door Hanger makes a wonderful and thoughtful DIY gift for occasions like Mother’s Day, housewarmings, or even a birthday. It shows you put in personal effort and adds Farmhouse charm.
What’s a common mistake to avoid when making a layered flower door hanger?
A common mistake to avoid is using too much glue, which can make the layered flowers stiff and less natural-looking. Use small dots of hot glue at the center of each layer to keep them flexible and dimensional.
Find more farmhouse / rustic craft ideas & supplies at Dollar Tree.
Inspiration / Credit: Roselyn Barela

Leave a Reply