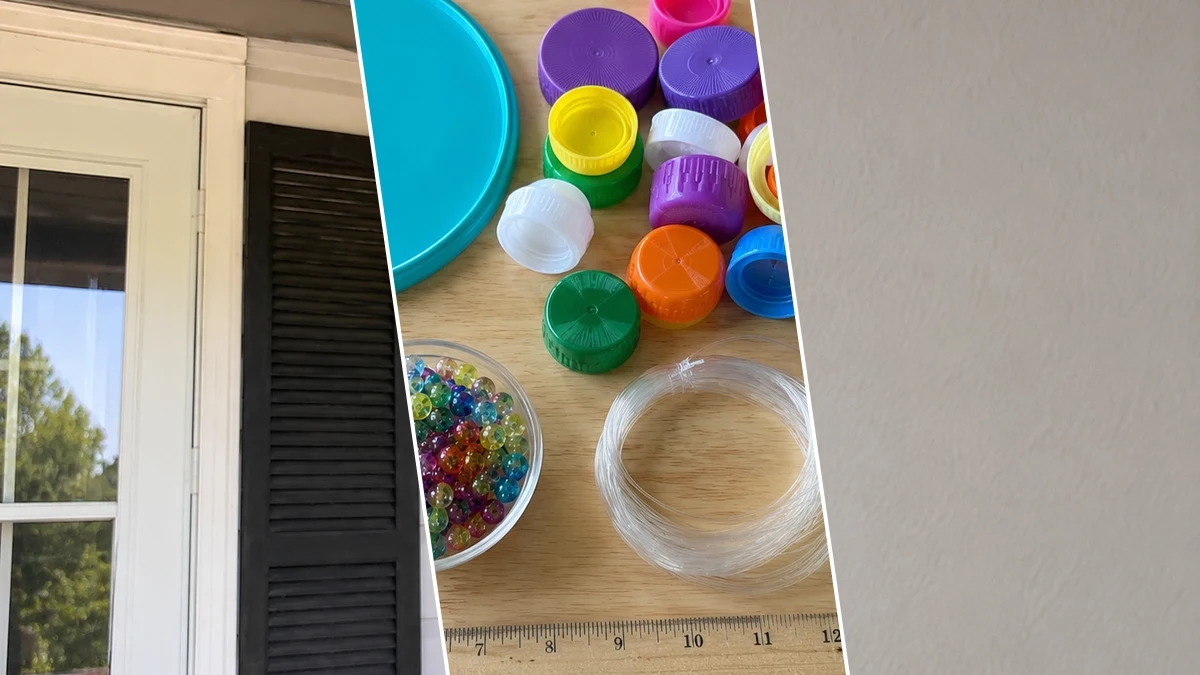
You know how sometimes you just collect stuff without a plan? That was me with a pile of bottle caps! I saw them sitting there and thought, ‘There has to be a way to make something cute for my Spring & Garden decor.’ That’s how this Cheerful Upcycled Bottle Cap Wind Chime idea totally blossomed in my head.
Theme: Spring & Garden
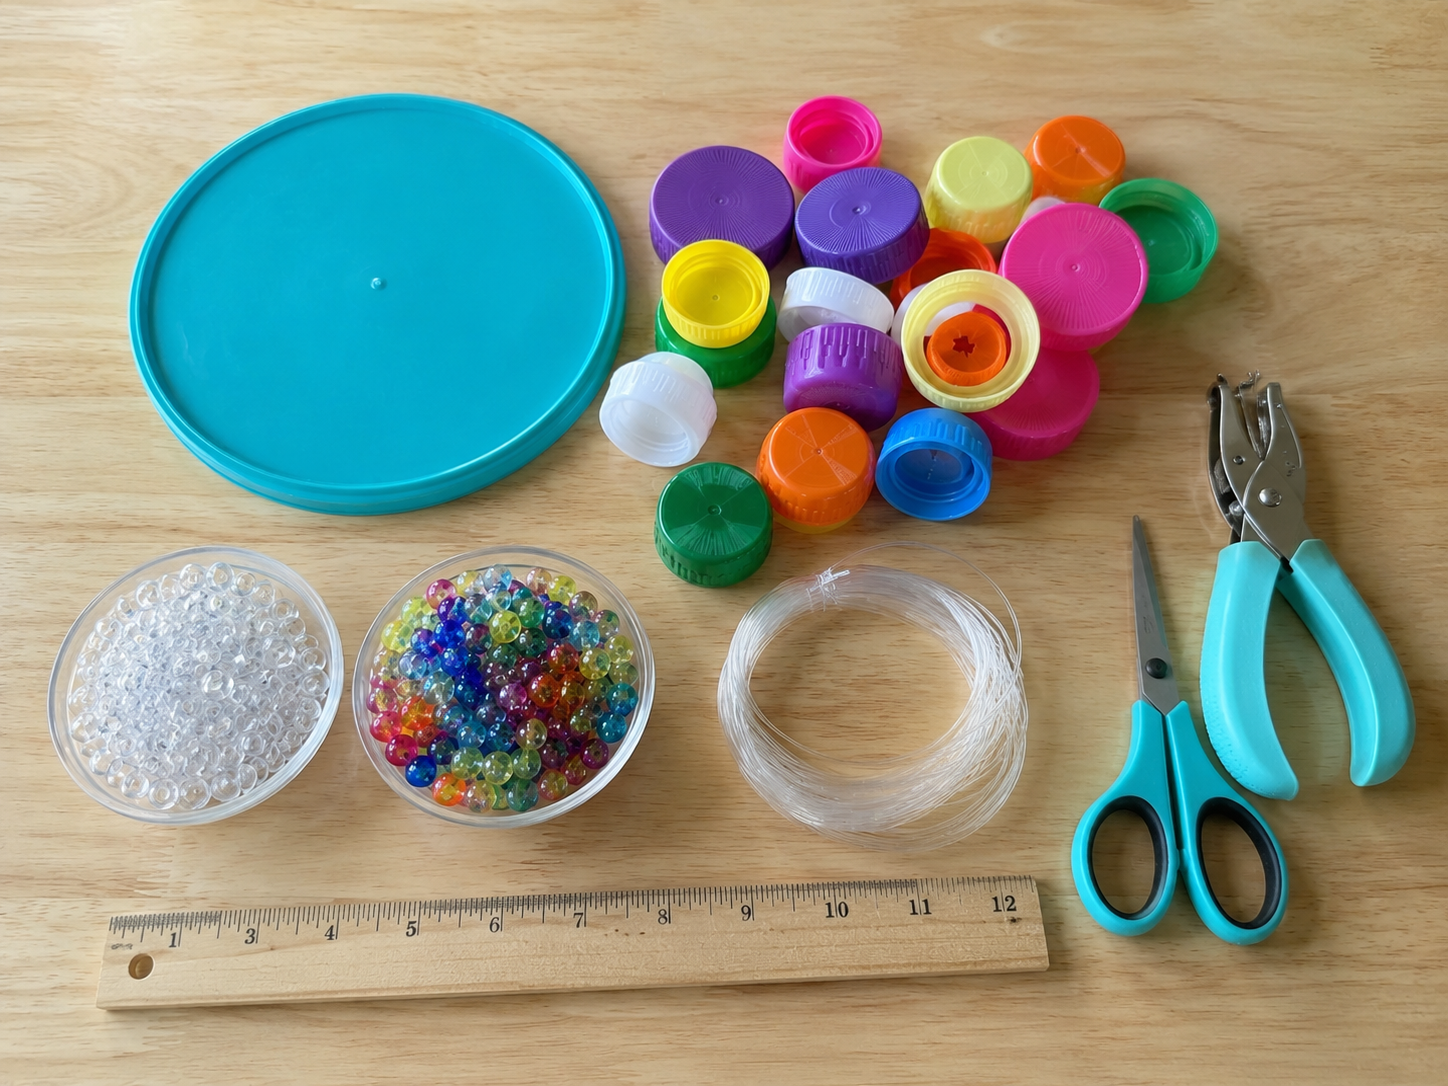
Materials Needed
- Assorted Plastic Bottle Caps
- Plastic Lid or Round Plate (for top base)
- Clear Fishing Line or Strong Cord
- Assorted Plastic Beads (pony beads, acrylic beads)
- Small Hole Punch or Heated Metal Skewer
- Scissors and Ruler
- Optional Small Charms, Bells, or Large Beads
- Strong Hanging Cord
Why This Craft Works
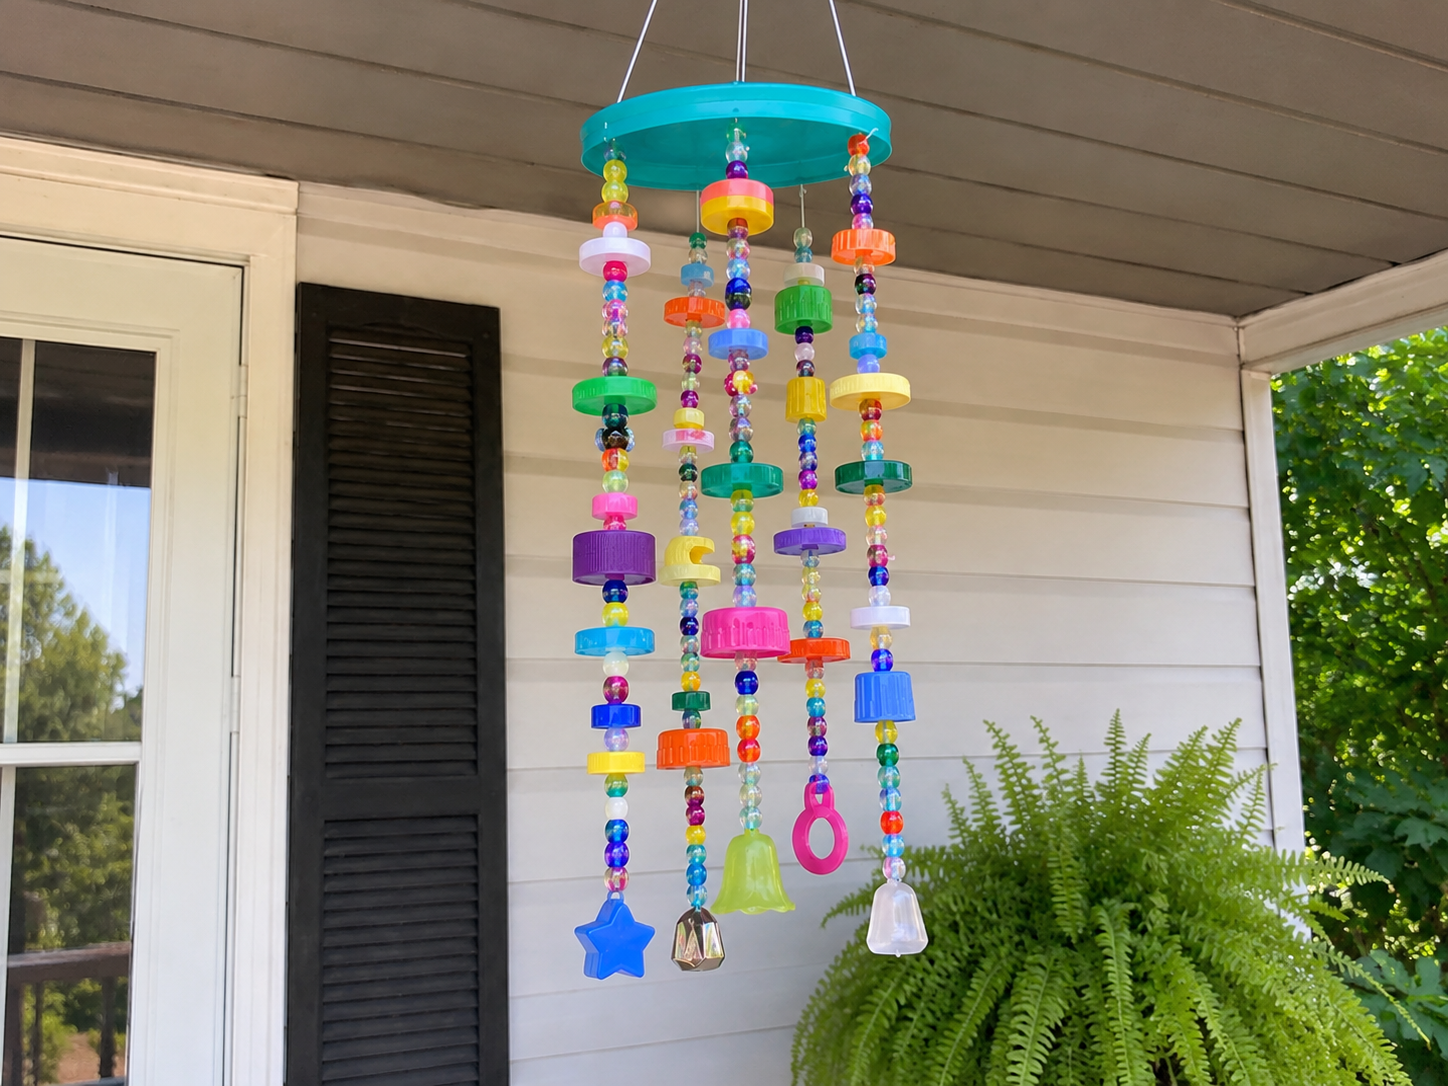
This little wind chime is just perfect for bringing a bit of sunshine and whimsy to your outdoor spaces. I hung mine right by the back door leading to the garden, and it makes me smile every time I hear it chime. It’s such a sweet touch for your porch, patio, or even hanging from a tree branch to welcome Spring & Garden vibes.
And guess what? You can whip up this whole Cheerful Upcycled Bottle Cap Wind Chime project without breaking the bank! Most of my supplies came right from my favorite spot, Dollar Tree. All in all, this fun craft ran me about $11-14 total, which is a steal for something so charming.
Don’t you just love a quick and easy craft? This one is definitely ‘Easy’ on the difficulty scale, making it perfect for beginners, kids, or anyone who needs a last-minute gift. From start to finish, it only took me about 40-60 minutes to put together. You’ll be enjoying your new wind chime in no time!
Step-by-Step Instructions for Cheerful Upcycled Bottle Cap Wind Chime
Alright, friends, are you ready to get your craft on? This Cheerful Upcycled Bottle Cap Wind Chime project is so much fun and super simple, you won’t believe it! You’re going to love how quickly this comes together, probably in just about an hour. It’s truly a fantastic Upcycling & Repurposing project for anyone, even if you’re just starting out.
Step 1: Gather and Prepare Materials
Begin by thoroughly cleaning and drying all your collected plastic bottle caps to remove any residue or dirt. Select a sturdy plastic lid or a small round plastic plate to serve as the main base for your wind chime. Ensure all other materials, like beads, cord, and tools, are within easy reach.
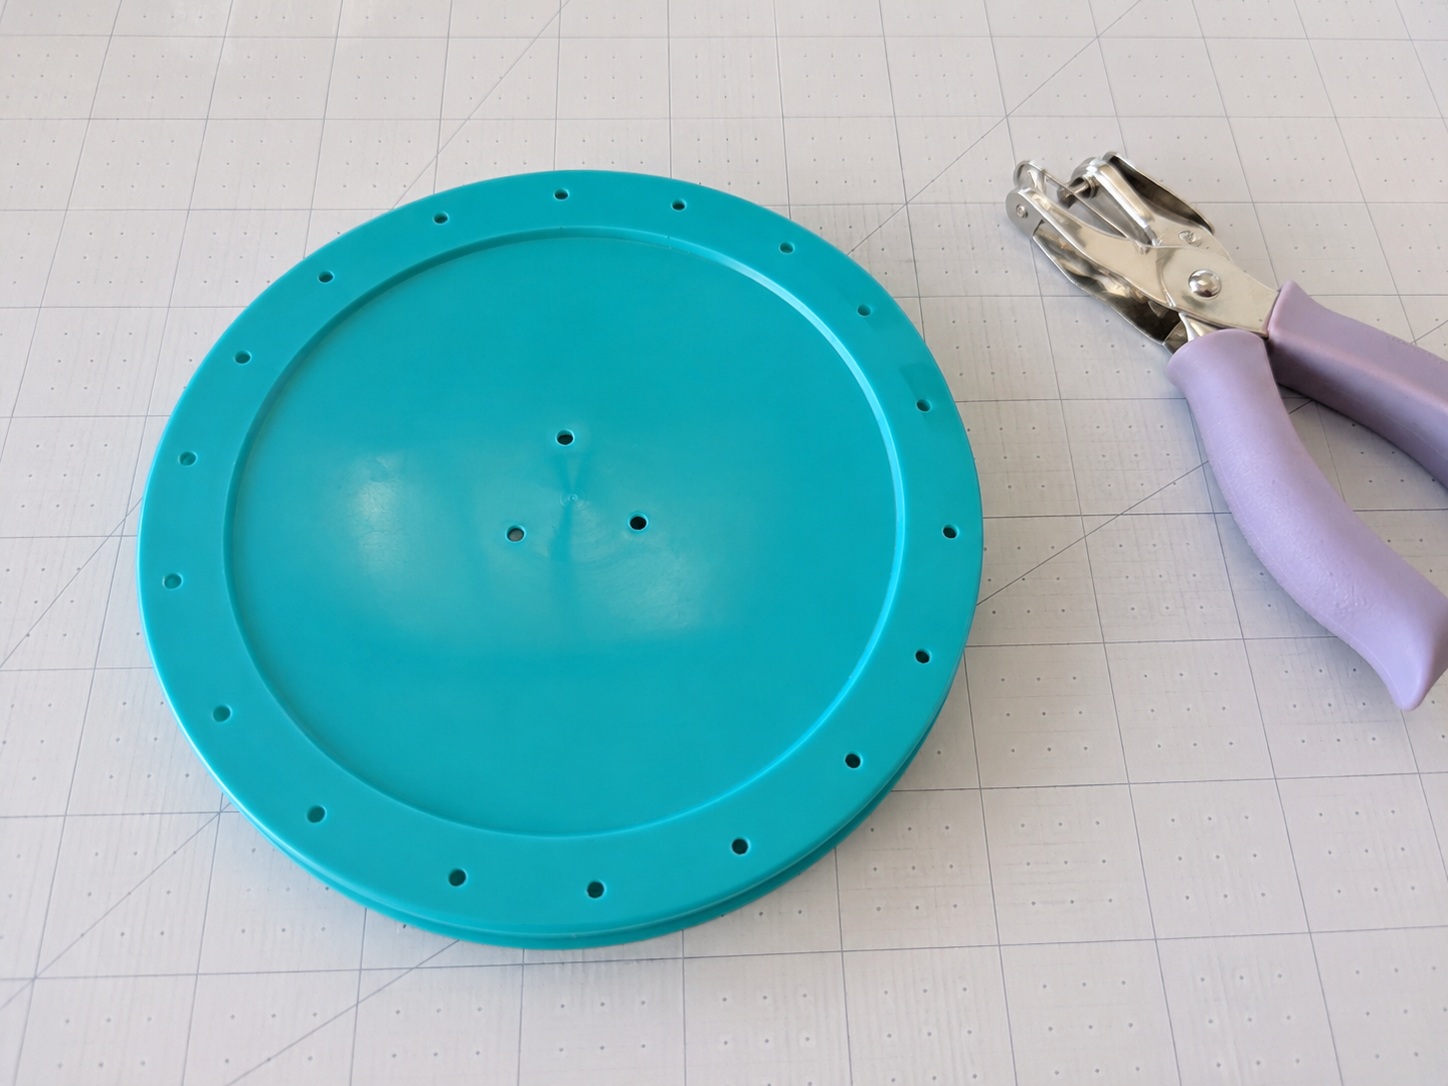
Step 2: Prepare the Top Base
Take your chosen plastic lid or plate (the top base). Use a small hole punch or a heated metal skewer to create evenly spaced holes around the outer edge where your hanging strands will attach. Depending on the size of your base, 6-10 holes are ideal. Additionally, make three small holes closer to the center of the base, forming a triangle, which will be used for the main hanging cords.
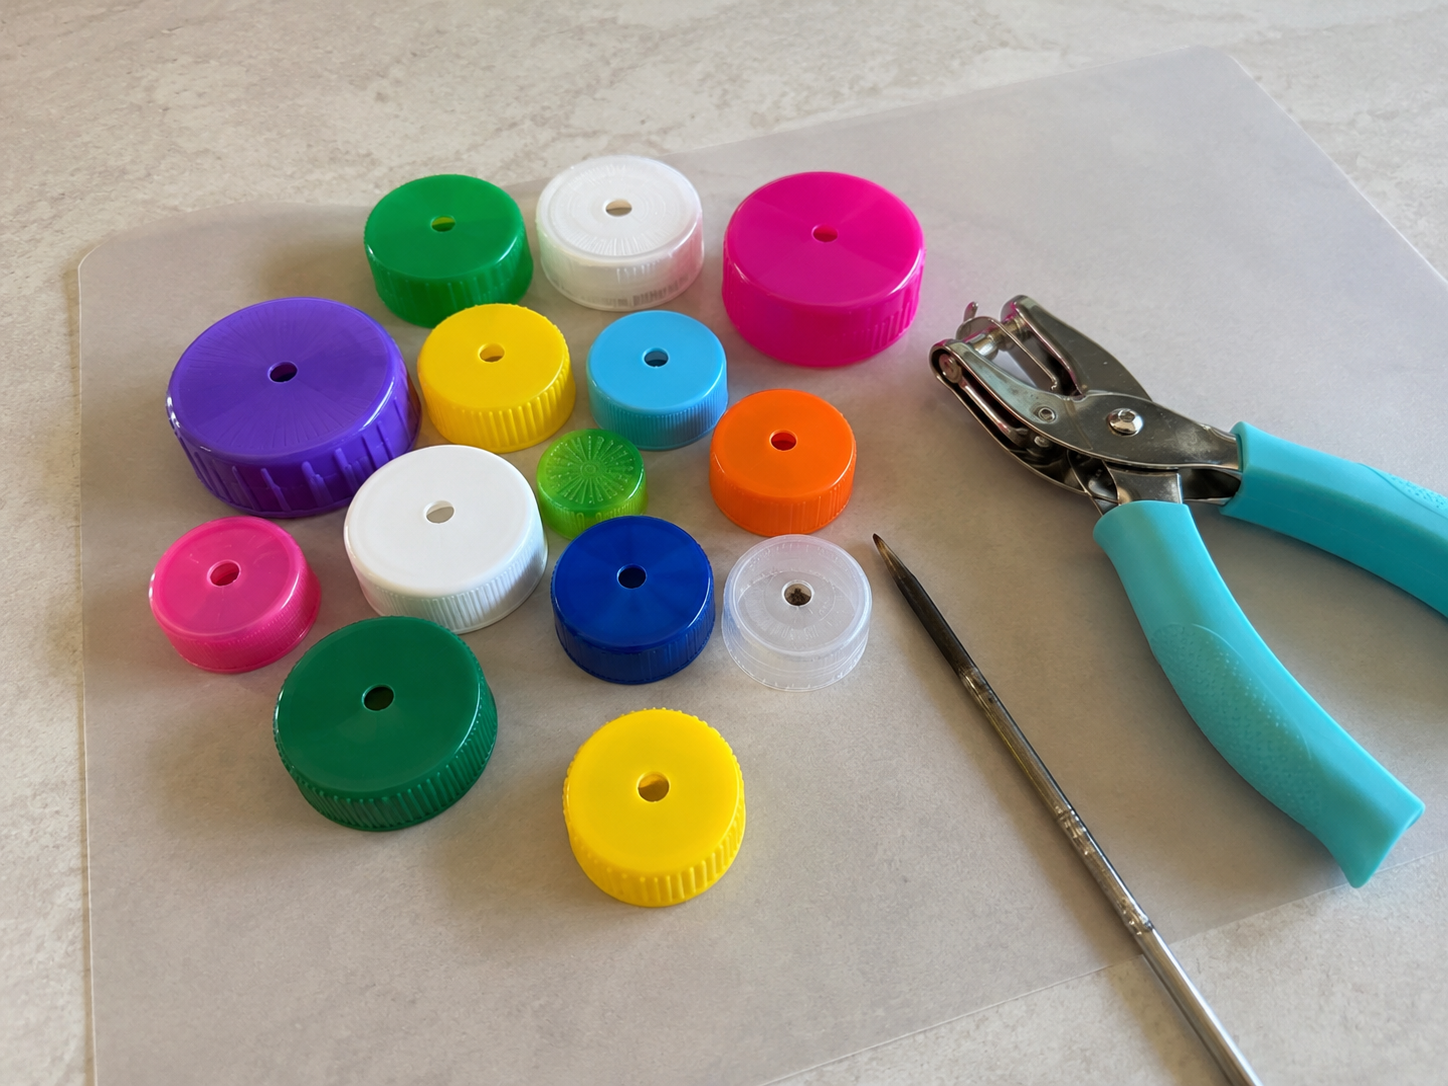
Step 3: Prepare the Bottle Caps
For each plastic bottle cap you plan to use, carefully create one small hole directly through its center. This hole will allow the caps to be strung vertically along your fishing line. Ensure the hole is large enough for your chosen cord to pass through but not so large that the cap easily slips. A small hole punch or a heated metal skewer works best for this step.
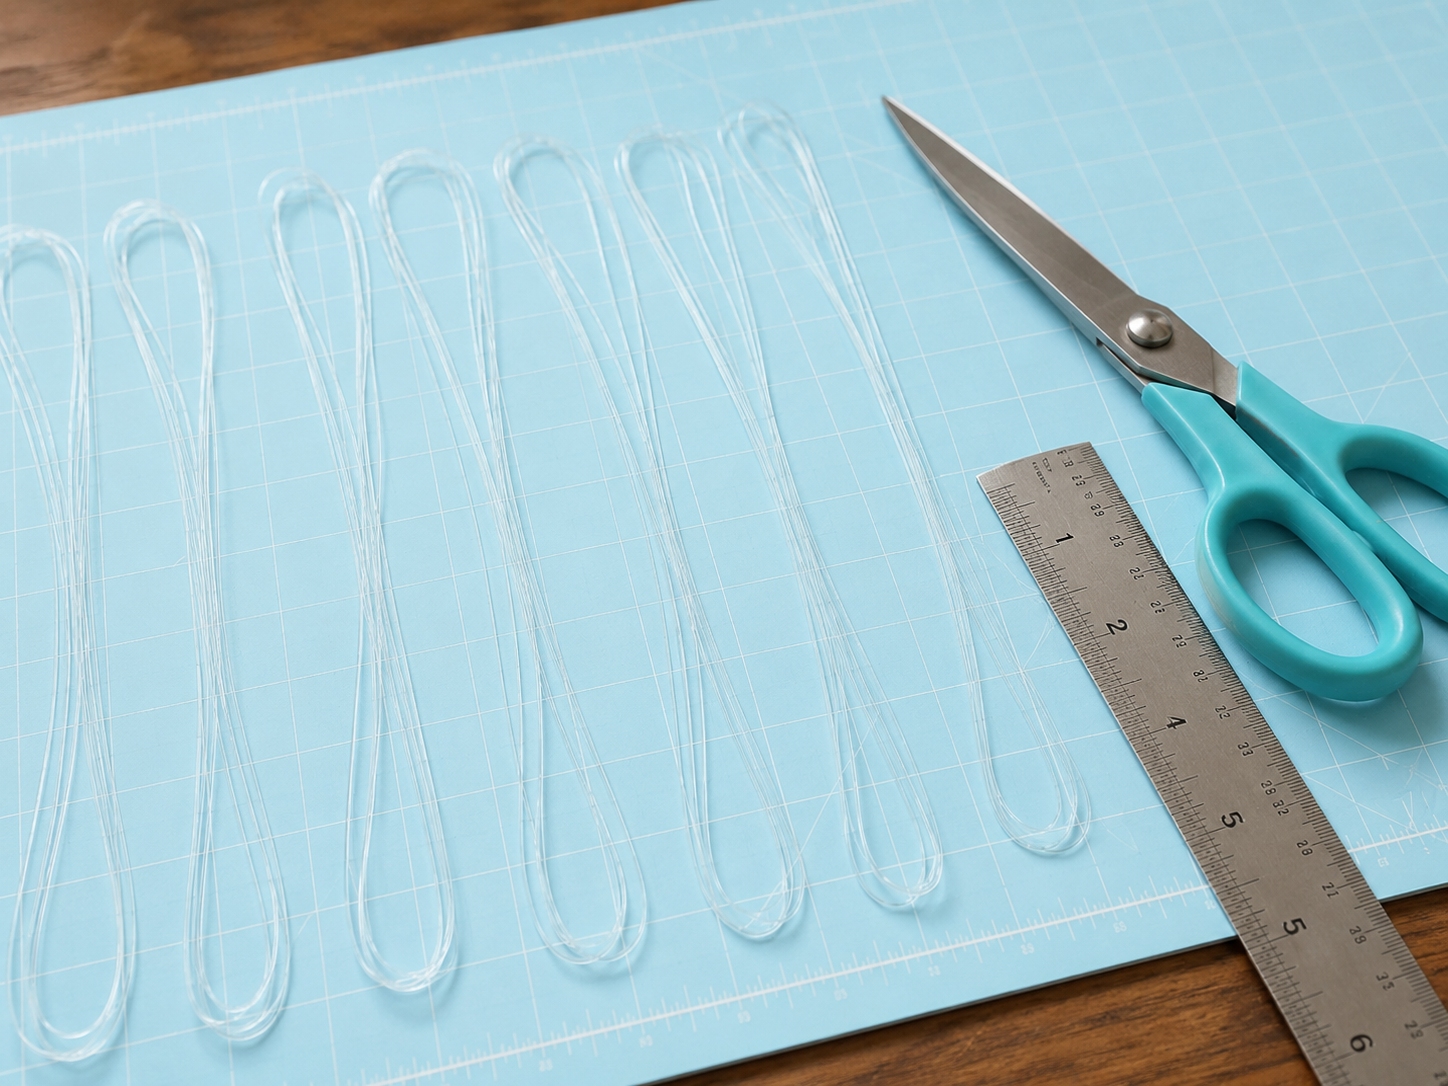
Step 4: Cut and Prepare Strands
Unroll your fishing line or strong clear cord. Using a ruler, cut several lengths of cord, varying from approximately 12 to 24 inches (30-60 cm) long. The varying lengths will create visual interest and allow the chimes to hang at different heights. Prepare enough individual strands for each hole you made around the edge of your top base.
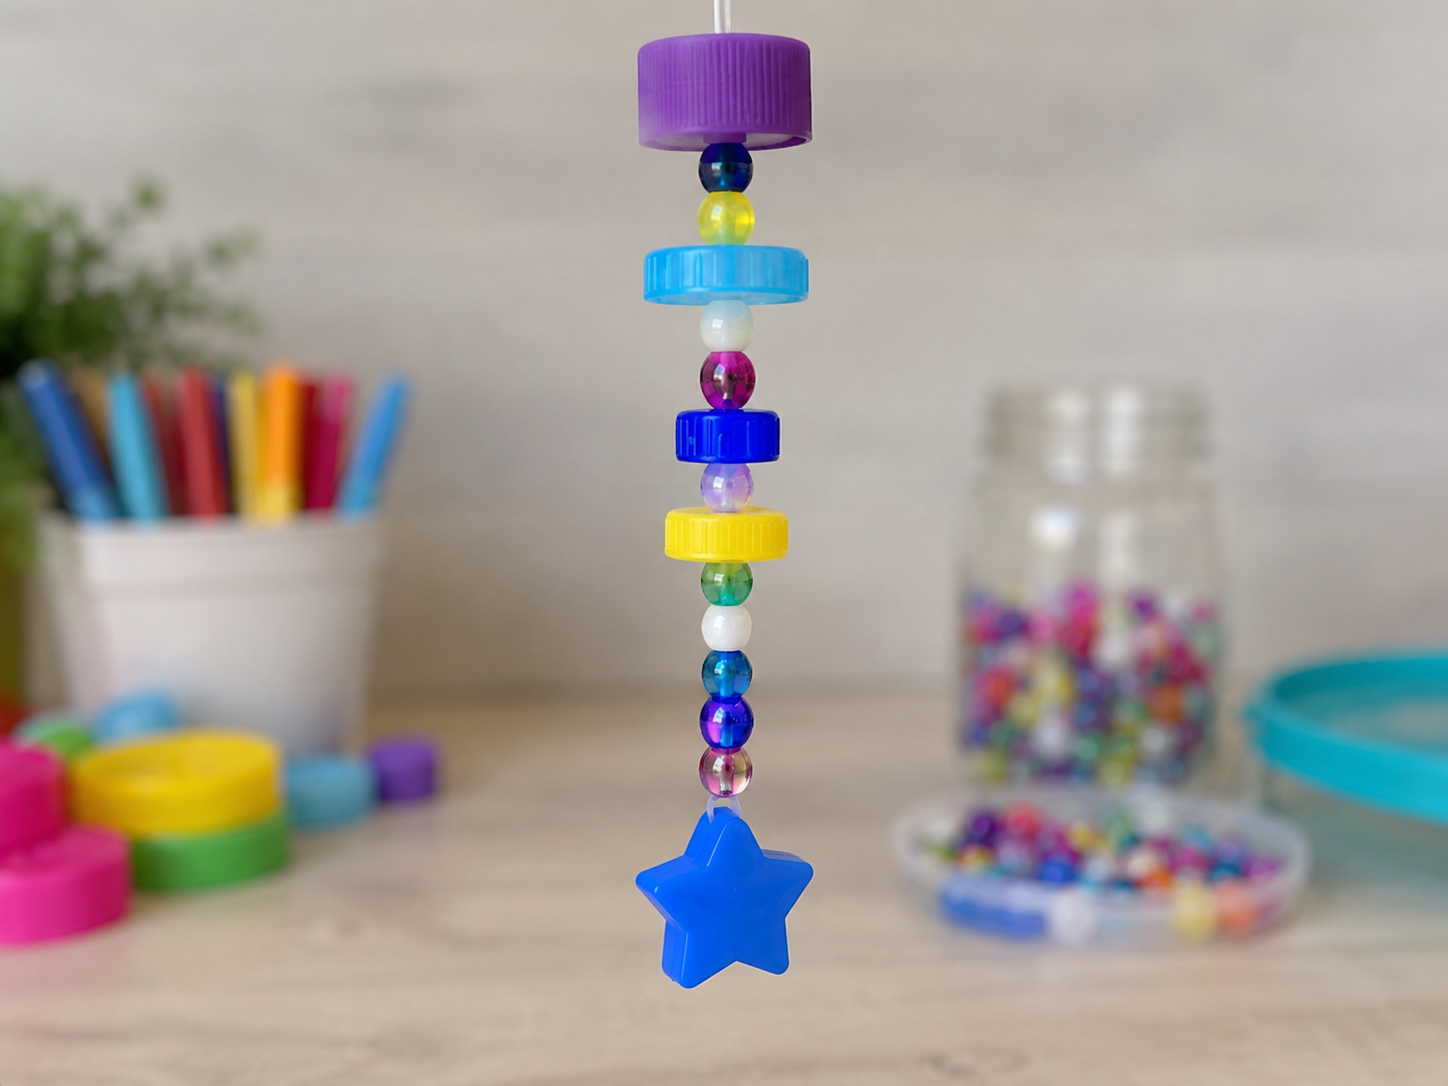
Step 5: Assemble Hanging Strands
Now, it’s time to get creative! Begin building each hanging strand by threading clear pony beads, colorful acrylic beads, and your prepared bottle caps onto the fishing line. Alternate sizes, colors, and types of beads and caps. Experiment with different patterns to make each strand unique and visually appealing. Remember to vary the sequence to create a playful, upcycled aesthetic.

📱 Craftino App
Make more crafts like this
1,000+ Spring & Garden ideas with photo guides & Pro Tips
✓ Step-by-step photo tutorials, nothing left out
✓ Pro Tips for every step
✓ Save crafts & browse fully offline
✓ New ideas added every week

Step 6: Add Weighted Bottoms
Once you are satisfied with the design of each hanging strand, tie a larger bead, a small bell, or a plastic charm at the very bottom of each strand. This ‘weight’ will help the strands hang straight, catch the breeze, and create a pleasing sound if using bells. Secure it with a strong double knot to ensure it doesn’t slip off.
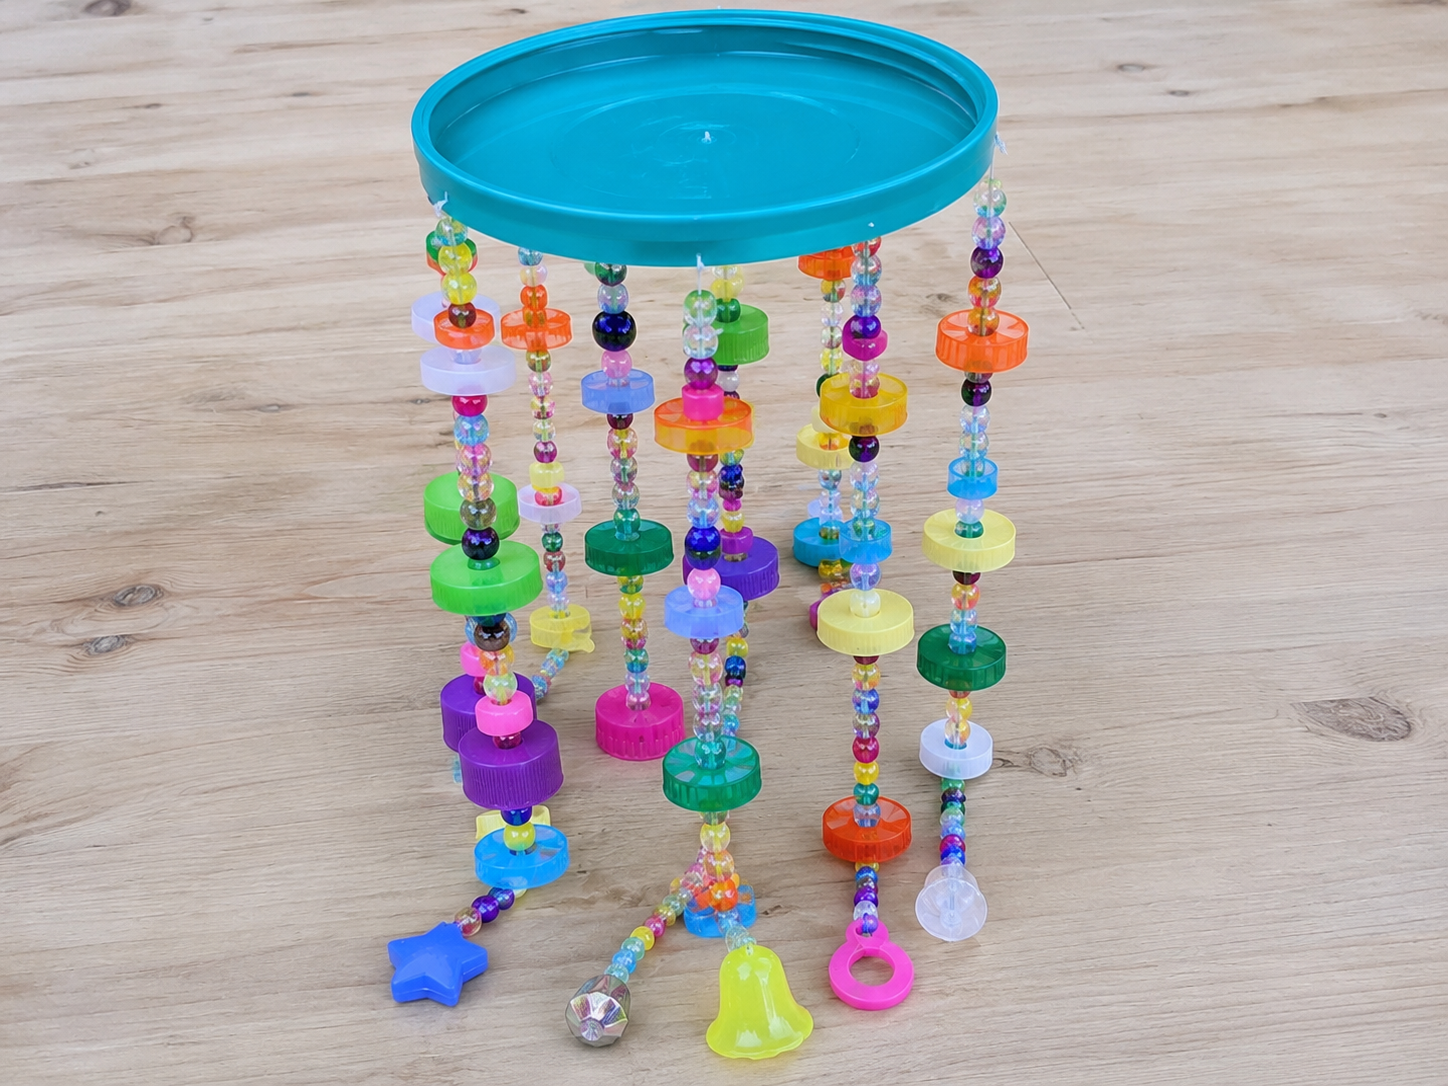
Step 7: Attach Strands to Base
Take your fully assembled hanging strands and attach each one to the holes you created around the edge of the plastic top base. Thread the top end of each fishing line through a hole from the top side, then loop it around and tie it securely with a double knot on the underside of the base. Ensure the knots are tight and the strands are evenly spaced but hang at slightly different lengths for dynamic movement.
Step 8: Create the Main Hanger
Cut three equal lengths of strong hanging cord, each approximately 18-24 inches (45-60 cm) long. Thread one end of each cord through one of the three center holes you made in the top base. Tie each cord securely to the underside of the base. Once all three cords are attached, gather them together directly above the wind chime and tie them into a single sturdy knot or loop. This creates the main hanger for your wind chime.
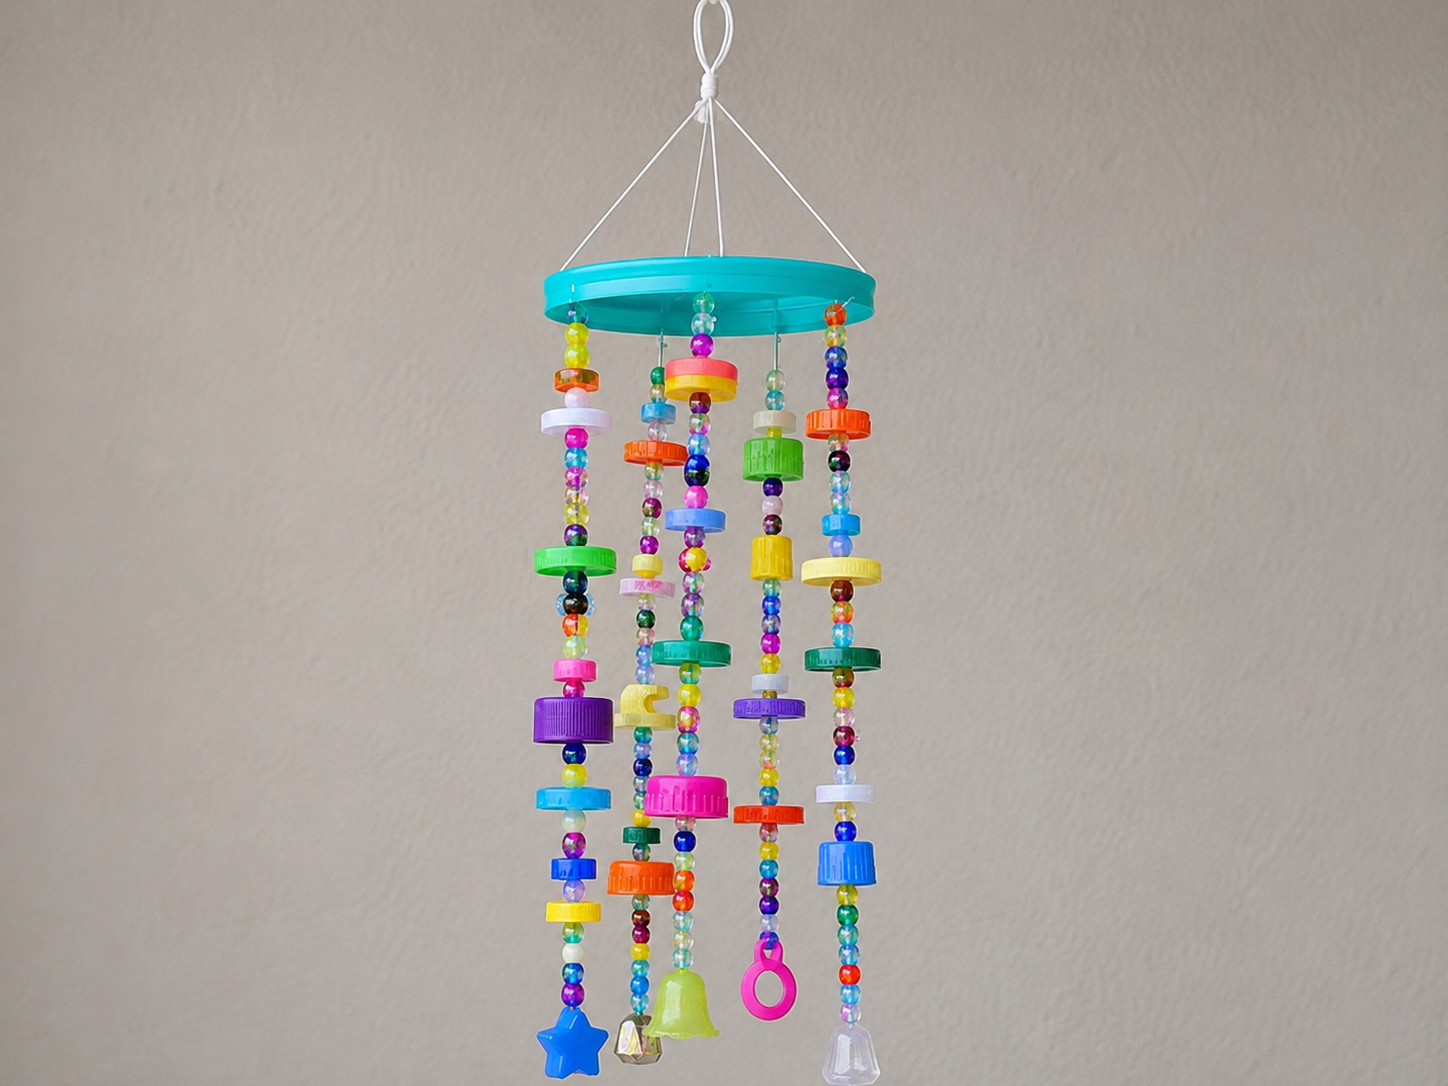
Step 9: Display Your Wind Chime
Your cheerful Upcycled Bottle Cap Wind Chime is now complete! Find a perfect spot to hang it, whether it’s on a porch, patio, in a garden corner, or a kids’ craft area. Allow the gentle breeze to move the colorful caps and beads, creating a delightful visual and subtle soundscape. Enjoy your handmade creation!
See also: Whimsical Garden Terracotta Pot Wind Chime
📋 Love staying organized while crafting? Check out our printable planners & craft designs at CraftersDT on Etsy and use code CRAFT20 for 20% off your entire order!
Your Cheerful Chime Awaits!
Isn’t it just the cutest? I just love how my Cheerful Upcycled Bottle Cap Wind Chime brightens up my porch! Now it’s your turn to make one, and don’t forget to share your amazing Spring & Garden creation with me. Happy crafting, y’all!
📱 Craftino App
Make more crafts like this
1,000+ Spring & Garden ideas with photo guides & Pro Tips
✓ Step-by-step photo tutorials, nothing left out
✓ Pro Tips for every step
✓ Save crafts & browse fully offline
✓ New ideas added every week
Frequently Asked Questions
What is the total cost to make a Cheerful Upcycled Bottle Cap Wind Chime?
The total cost to create a Cheerful Upcycled Bottle Cap Wind Chime is typically around $11-14. This budget-friendly DIY project largely uses supplies found at Dollar Tree, making it an affordable addition to your Spring & Garden decor.
How long does it take to assemble a DIY Bottle Cap Wind Chime for my garden?
Assembling a DIY Bottle Cap Wind Chime for your garden takes approximately 40-60 minutes from start to finish. This quick craft is perfect for an afternoon project, providing a cheerful Upcycling & Repurposing addition to your outdoor space.
Is the Cheerful Upcycled Bottle Cap Wind Chime an easy craft for beginners?
Yes, the Cheerful Upcycled Bottle Cap Wind Chime is an easy craft, making it perfect for beginners and children. The steps involve simple cutting, gluing, and stringing, requiring no advanced crafting skills.
How many bottle caps are needed for one Upcycled Bottle Cap Wind Chime?
You will need approximately 15-20 clean bottle caps to create one full-sized Upcycled Bottle Cap Wind Chime. This allows for 3-4 strands, each with 5 bottle caps, plus one for the top hanger, adding a cheerful touch to your Spring & Garden area.
What kind of glue works best for a Dollar Tree Bottle Cap Wind Chime?
For a Dollar Tree Bottle Cap Wind Chime, a strong, clear-drying craft adhesive like E6000 or Gorilla Glue Clear Grip works best. These glues provide a durable bond for the bottle caps and beads, ensuring your cheerful chime withstands outdoor elements.
Where can I buy affordable supplies for a Spring & Garden Bottle Cap Wind Chime?
You can find most of the affordable supplies for a Spring & Garden Bottle Cap Wind Chime at Dollar Tree. Items like twine, beads, and small embellishments are readily available there, with bottle caps being easily upcycled from soda or beer bottles.
Is the Cheerful Upcycled Bottle Cap Wind Chime a good DIY gift?
Yes, the Cheerful Upcycled Bottle Cap Wind Chime makes an excellent DIY gift for various occasions, especially for Mother’s Day, birthdays, or as a housewarming present. Its handmade charm and cheerful sounds are perfect for anyone who loves unique Spring & Garden decor.
Will a DIY Upcycled Bottle Cap Wind Chime last outdoors in a garden?
A DIY Upcycled Bottle Cap Wind Chime can last well outdoors, especially if sealed with a clear, waterproof spray sealant before hanging. Using weather-resistant twine and strong outdoor-grade glue will further enhance its durability against Spring & Garden elements.
How can I customize my Cheerful Upcycled Bottle Cap Wind Chime?
You can easily customize your Cheerful Upcycled Bottle Cap Wind Chime by painting the bottle caps in various colors or patterns to match your Spring & Garden theme. You can also vary the bead types, add small charms, or use different lengths of string for unique chime sounds.
What common mistakes should I avoid when making a Dollar Tree Bottle Cap Wind Chime?
A common mistake to avoid when making a Dollar Tree Bottle Cap Wind Chime is not allowing enough drying time for the glue between steps. Rushing the process can lead to caps detaching; ensure at least 20-30 minutes of dry time for each glued section before moving on.
Leave a Reply