
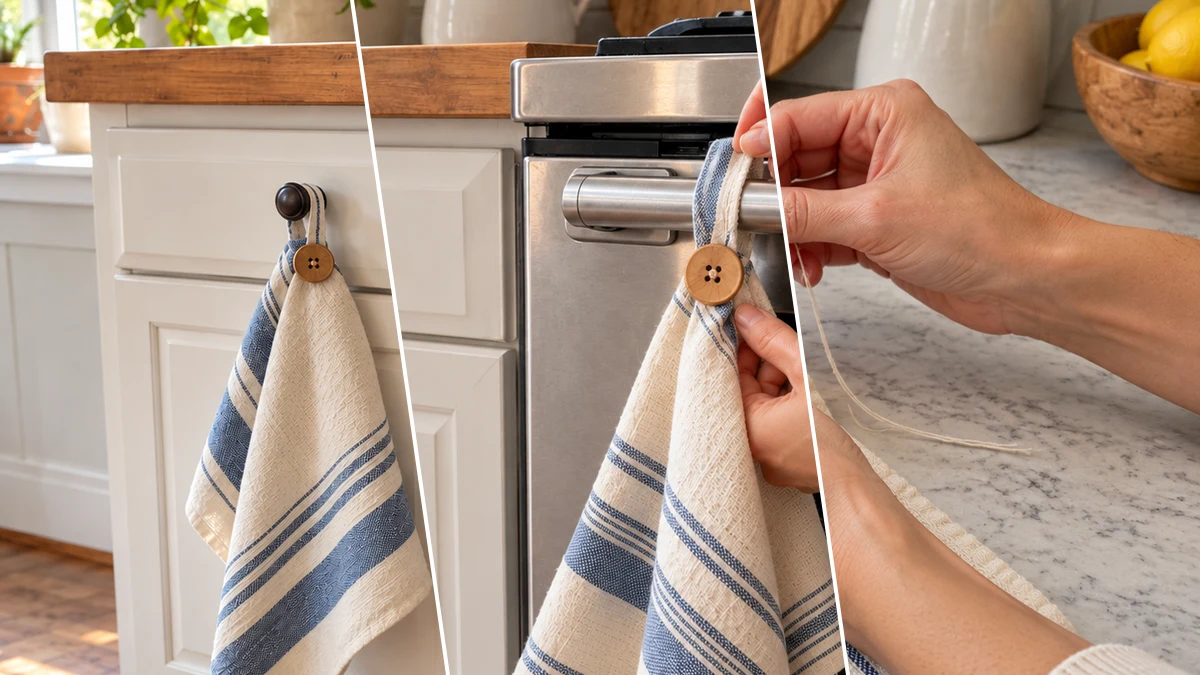
Keep kitchen towels securely in place with a set of DIY button-loop towels. This easy project transforms plain dish towels into functional and decorative accents for your kitchen. Designed to hang neatly from oven handles or cabinet knobs, these towels add a touch of farmhouse style. Create a coordinated look that is both practical and charming.
Project at a Glance
- Difficulty: Easy
- Estimated active time: 30 minutes to 45 minutes (drying and curing waits not included)
- Estimated component cost: $4 to $6 (reusable tools and general supplies excluded)
- Main material: Fabric
Why Button-Loop Kitchen Towels are a Smart Choice
Kitchen towels often slip off oven handles or cabinet knobs, leading to misplaced towels and a less tidy appearance. This simple craft addresses that common frustration by adding a secure button and loop closure to a plain dish towel. The design ensures your towels stay exactly where you hang them, providing both convenience and a neat kitchen.
Beyond their practical function, these button-loop towels contribute to your kitchen's overall aesthetic. With a choice of coordinating fabric strips or ribbon and large wooden buttons, you can easily match your existing decor. They are particularly well-suited for farmhouse or rustic kitchen styles, enhancing the warm and inviting atmosphere.
Materials for DIY Button Loop Kitchen Towels for Oven Handles and Farmhouse Kitchens
- Plain Kitchen Towels (3-pack)
- Large Wooden Buttons (3)
- Coordinating Fabric Strips or Ribbon
- Sewing Needle
- All-Purpose Thread (matching towel color)
- Scissors
Need another material? Browse current craft supplies and deals.
Crafting Your Button-Loop Kitchen Towels
Transform ordinary kitchen towels into a functional and stylish set with these straightforward steps. This easy sewing project involves creating a fabric loop and securely attaching a large wooden button. Follow along to create a coordinated collection of towels that stay put and enhance your kitchen decor.
Step 1: Prepare Fabric Loops and Towel Corner
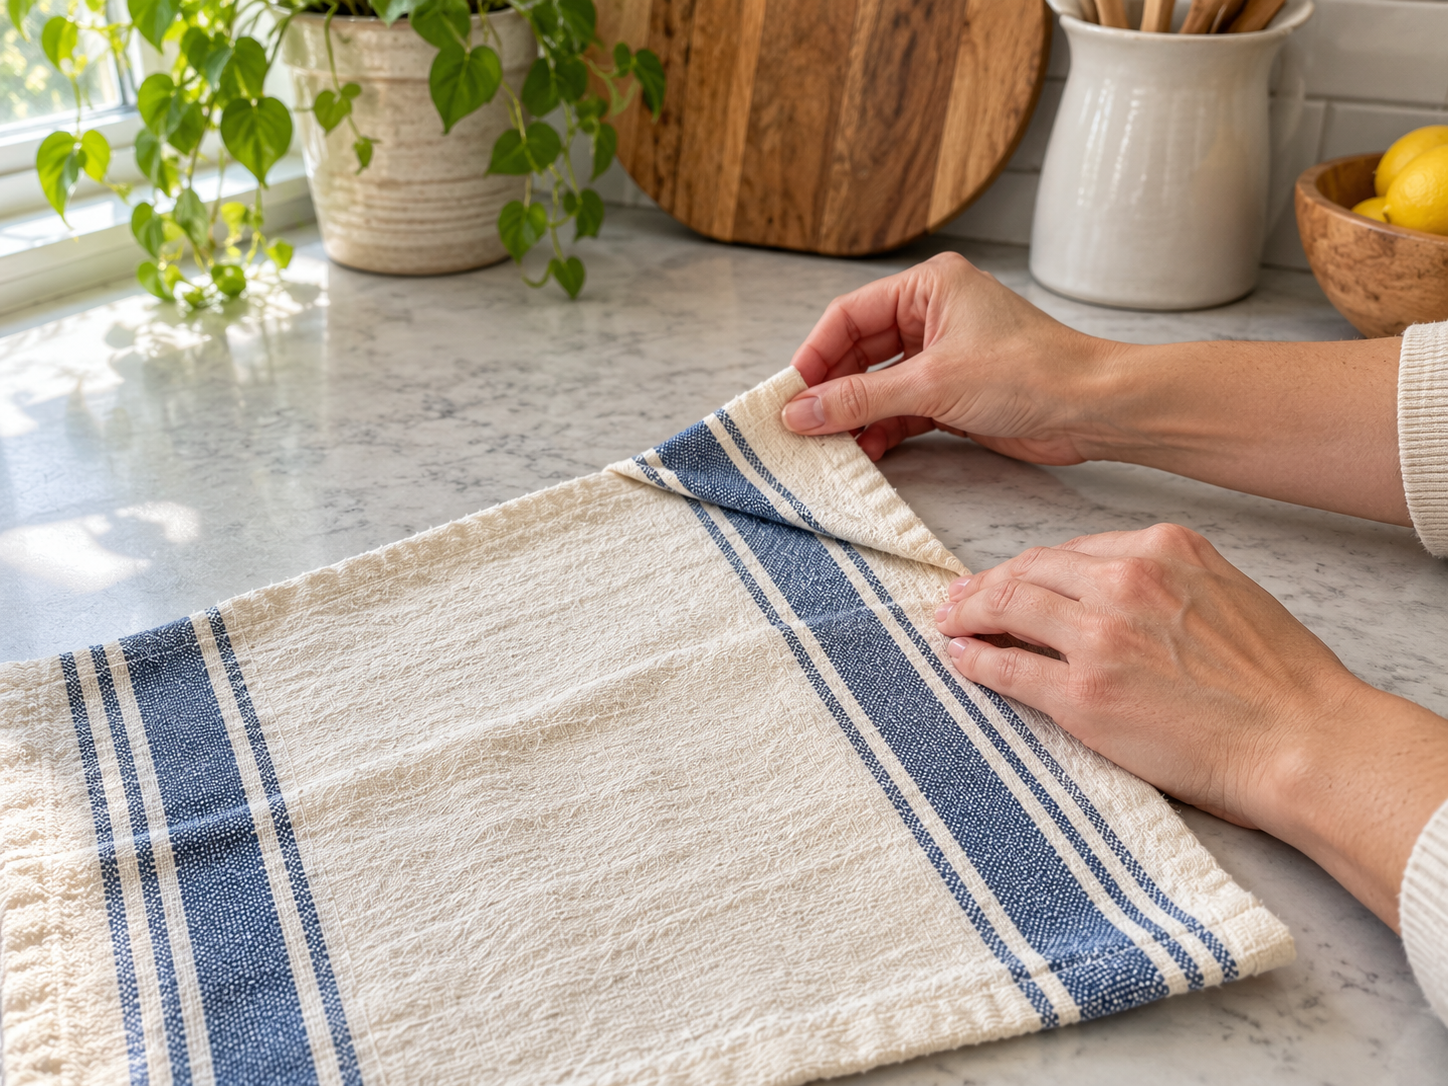
Begin by selecting your kitchen towels and any coordinating fabric or ribbon for the loops. Cut three pieces of fabric strip or ribbon, each approximately 6-8 inches long, depending on your desired loop size. Lay one kitchen towel flat on your work surface. Choose one corner and fold it diagonally, bringing the tip of the corner towards the body of the towel by about 1-2 inches. This creates a reinforced area for the button and loop.
Step 2: Position and Pin the Loop
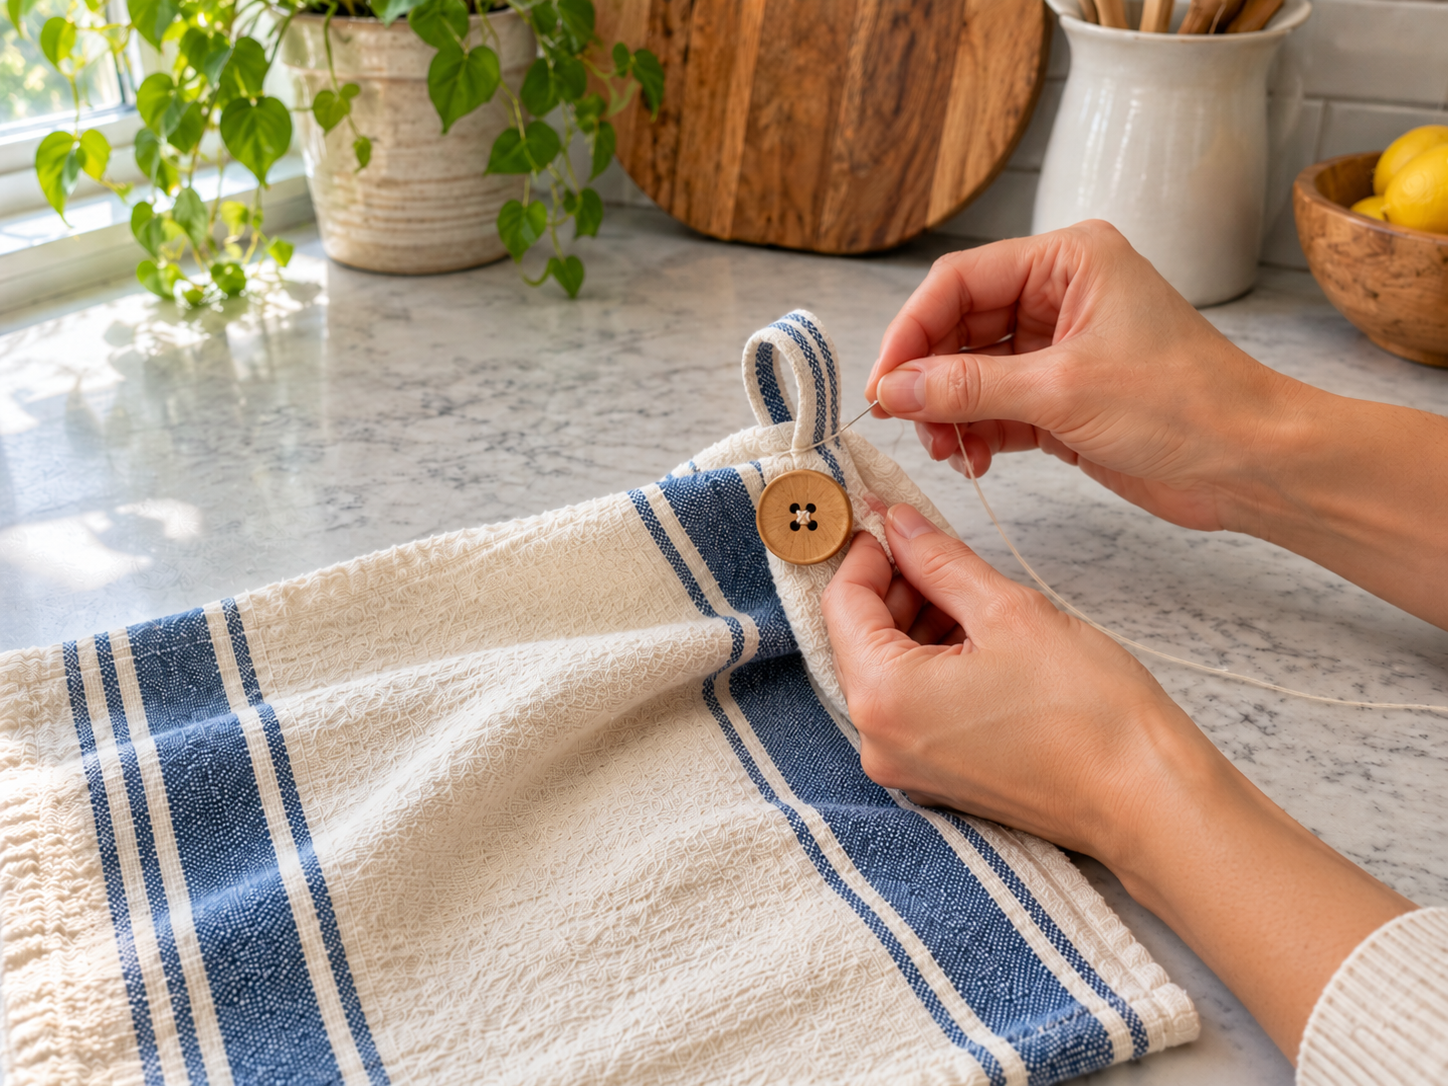
Take one of your cut fabric strips or ribbons. Fold it in half to form a loop. Position the raw ends of the loop onto the folded corner of the towel, ensuring they align neatly with the towel's edge. The loop should extend outwards from the corner. Use a sewing pin to firmly secure the loop in place, piercing through the raw ends of the loop and the folded towel fabric beneath.
Step 3: Attach the Wooden Button
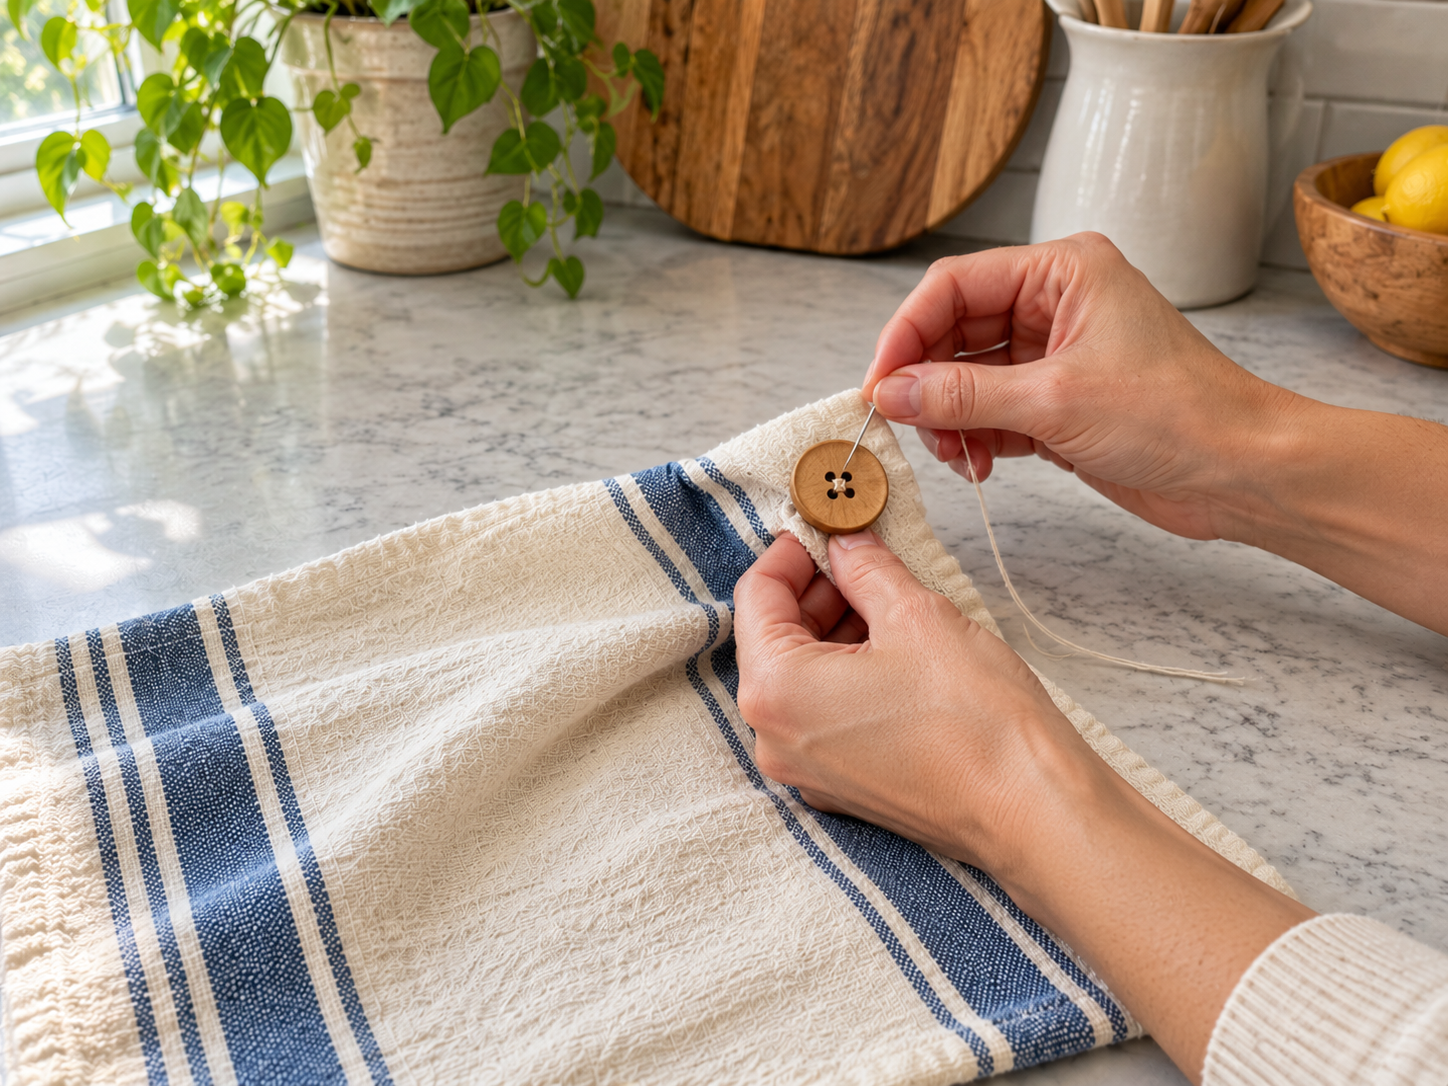
Select one large wooden button. Position the button directly over the base of the fabric loop, ensuring it covers the raw ends of the loop where they meet the towel. Thread your needle with a double strand of all-purpose thread that matches your towel color. Begin sewing the button onto the corner, passing the needle through the buttonholes, the fabric loop's ends, and the towel corner fabric. Make sure to catch all layers securely with each stitch.


Step 4: Secure and Finish All Towels
Once the button is firmly attached, tie off your thread with a secure knot on the back of the towel, ensuring it won't unravel with use. Trim any excess thread close to the knot. Carefully remove the sewing pin. Inspect your finished button loop to ensure it's sturdy. Repeat steps 1 through 3 for each of your remaining kitchen towels, creating a matching set.
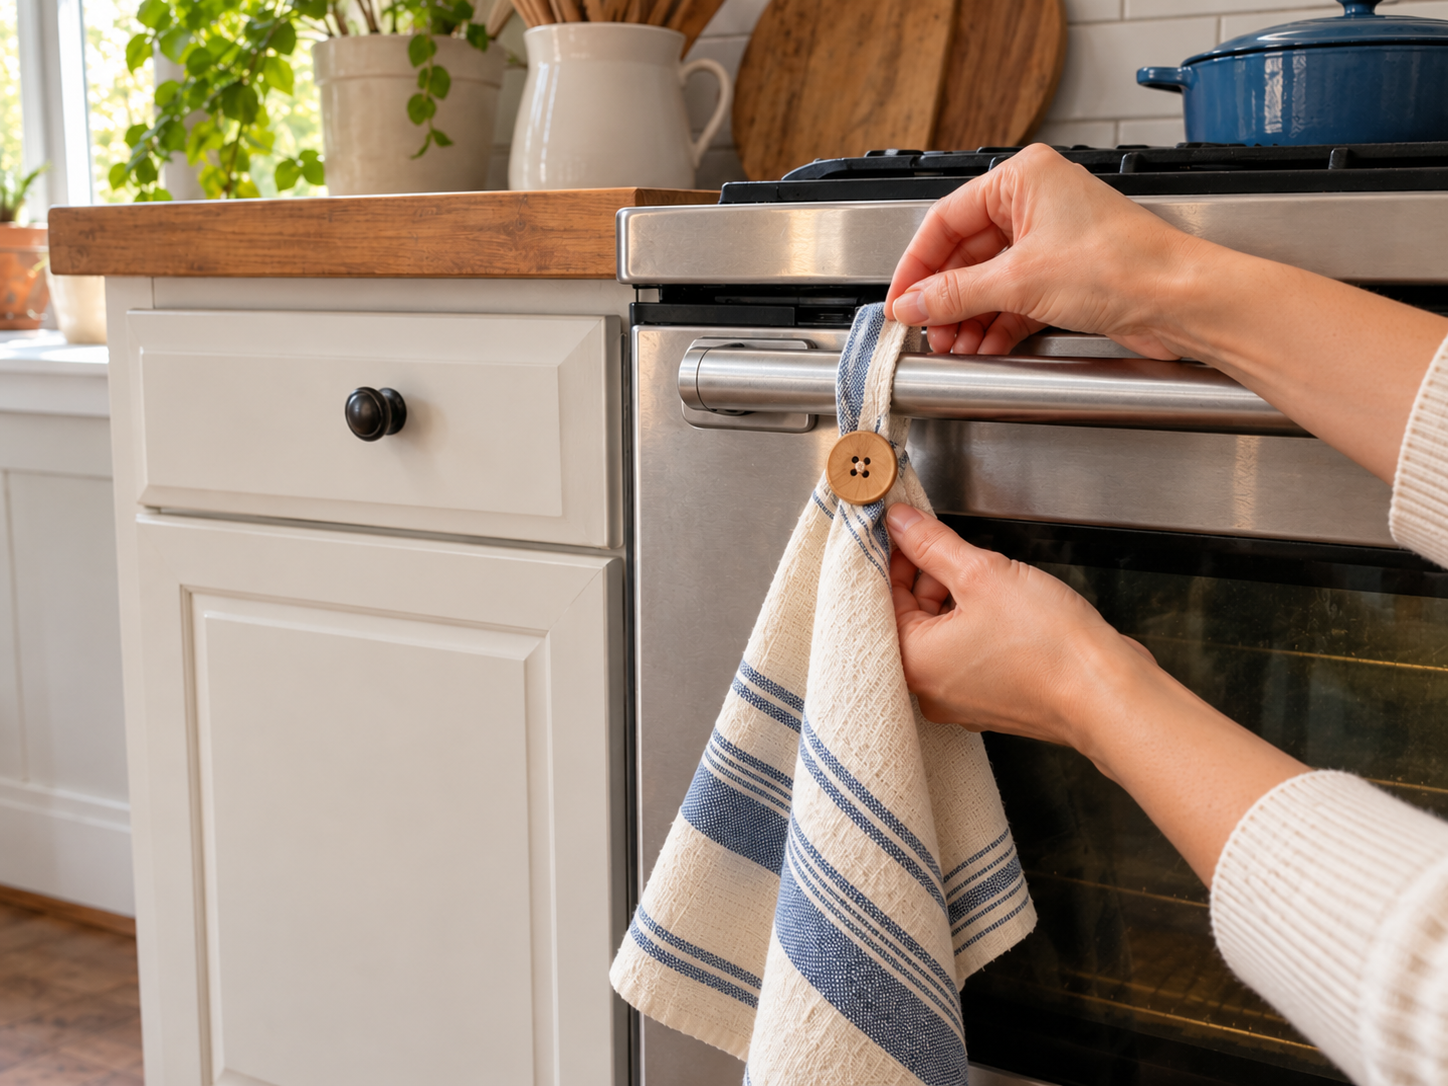
Step 5: Display Your Button-Loop Towels
With your set of button-loop kitchen towels complete, it's time to put them to use! Hang them from your oven door handle, refrigerator handle, kitchen cabinet knobs, or any other suitable hook or rod in your kitchen. Arrange them artfully to add a touch of farmhouse charm and ensure your towels are always within reach and securely hung.
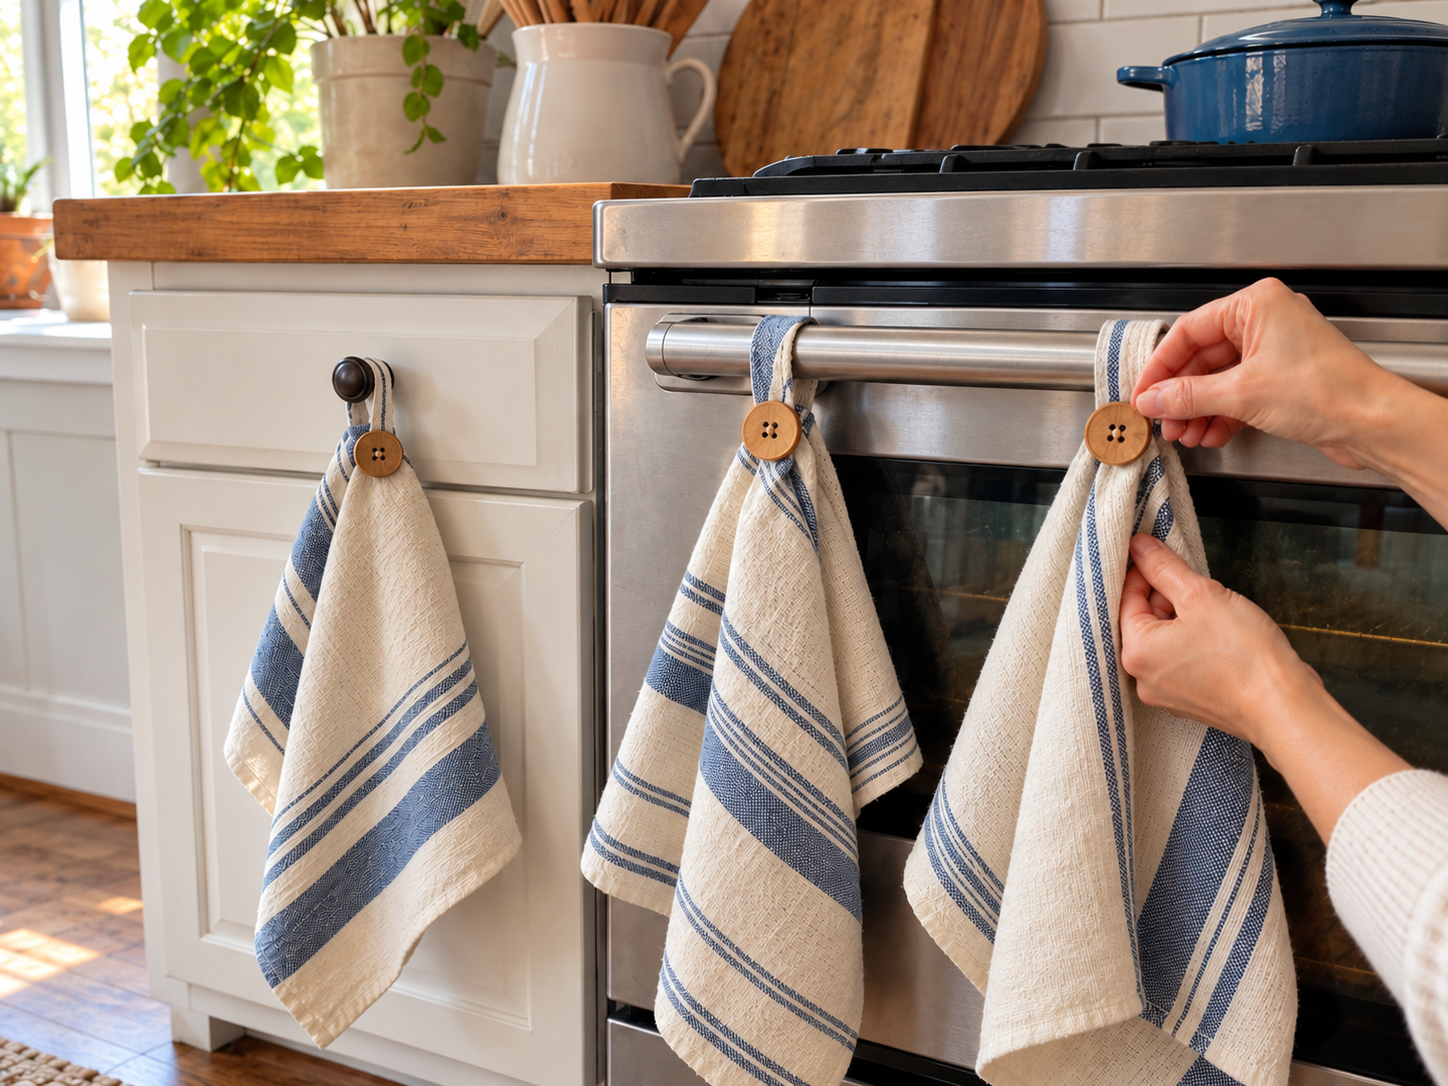
Enjoy Your Custom Button-Loop Kitchen Towels
With your new set of button-loop kitchen towels complete, you now have a practical and charming addition to your home. Display them on oven handles or cabinet knobs to keep them organized and within reach. This simple project adds a personalized touch and enhances your kitchen's farmhouse style.
Related project collection: DIY Farmhouse Kitchen Canister: Upcycling Your Old Jars
Practical Questions About This Project
What type of towels are suitable for this project?
Plain kitchen towels are ideal for this project, allowing the button and loop detail to stand out.
Can other materials be used for the loop besides ribbon?
Yes, coordinating fabric strips can be used in place of ribbon to create the loops for your towels.
What kind of buttons are recommended?
Large wooden buttons are used in this project, contributing to the farmhouse or rustic aesthetic.
Where can these button-loop towels be displayed in the kitchen?
These towels are designed to hang securely from oven door handles, refrigerator handles, or kitchen cabinet knobs.
Is this sewing project suitable for beginners?
Yes, this project is classified as easy and involves straightforward hand sewing steps.
Search Dollar Tree for fabric supplies.

Leave a Reply